If you’ve ever used the Periodical Source Index (PERSI), you know what a genealogy gem it is. PERSI is a master index to thousands of genealogical and historical periodicals, published by the Allen County Public Library’s Genealogy Center (ACPL). According to the Journal Gazette, PERSI contains about 2.5 million citation and adds another 100,000 a year. This is where you go to see if someone’s written about your family or ancestral hometown in state, regional, ethnic, local and other journals and newsletters.
You can currently search PERSI through the HeritageQuest Online databases at your local library and with your Ancestry.com membership. But the trick is accessing those articles once you find them. The best way right now is to order them directly from ACPL (click on Article Fulfillment Form). It costs $7.50 USD to order up to 6 articles at a time, plus $.20 per page and you get the articles in the mail.
Now findmypast.com has big plans to make PERSI easier to use. Findmypast.com is becoming the new online host of PERSI, and they plan to link digital images of as many articles as possible to the index. “PERSI unearths hidden gems for genealogy researchers,” says D. Joshua Taylor, lead genealogist for findmypast.com. “We look forward to working with various societies and publications to get permission to digitize their articles.”
That sounds like an enormous undertaking, but certainly one that’s long overdue and will pay off for family history researchers. I’ll keep you posted on their progress!
Welcome to this step-by-step series for beginning genealogists—and more experienced ones who want to brush up or learn something new. I first ran this series in 2008-09. So many people have asked about it, I’m bringing it back in weekly segments.
Episode 44: Family Secrets in Genealogy Records
Today’s episode is unlike any other I’ve done on the podcast. Today we are going to tackle some difficult subject matter: family secrets in genealogy. You know, none of us have a perfect family tree. In fact, I would venture to guess that at some point each one of us who are delving into our family’s past will come across some sad and painful stories. An ancestor abandoned at an asylum, incarcerated for acts of violence, or perhaps who committed suicide.
For Crystal Bell, my guest on today’s show, that sad and painful story was very close to her branch of the tree. In fact, the troubles lay at her parents’ door, and she bore the brunt of the chaos that was created. And yet there is tremendous hope that comes from Crystal’s story. She is a wonderful example of the freedom that can come from facing your fears and breaking down the mystery of a troubled past. It’s what I call the redemptive gifts of family history.
Crystal also shares some of the research strategies that her co-workers at Ancestry.com gave her for taking the next steps in finding her mother, who passed away under an assumed name.
Thoughts from Crystal on responding to the family secrets in your own tree:
“Hatred and resentment only make you look older. They have a great toll on your health. As far as I’m concerned, I can’t hate my mother and father because I don’t know their circumstances were. I can only try to determine their ancestors. I want to know who were my ancestors. Where did they come from?
I feel badly when people…just don’t want to know. I don’t want to die with that sense of abandonment. I want to move on, I want to get past the grief. I want to know who my people were. I just, for the first time in my life, want to experience a feeling of joy and happiness that I feel like I deserve.”
Ancestry.com “Shaky Leaf” Hints Technology
Crystal made connections on her Ancestry.com family tree by reviewing the automated hints provided on the site, known popularly as “shaky leaves.” Learn more about using these in this video.
MyCanvas Update
The MyCanvas service mentioned by Crystal is no longer offered by Ancestry.com. But it is still around! Learn more in my blog post about it.
Here’s a final family history thought for today:
We are not just defined by one relative, or the product of a dysfunctional family or parental relationship. We come from all of our ancestors….
The ones who did amazing things,
The ones who did everyday things,
And the ones who did wrong.
You deserve to know them all, and as the saying goes, the truth will set you free.
VIDEO & SHOW NOTES: Video #2 of our 25 Websites for Genealogy Playlist. In this video, my guest presenter Gena Philibert-Ortega covers top genealogy finding aids and society websites that are must-have for family history research. Even though some sound specific to a certain area, don’t be fooled. They have resources available for all genealogists.
Websites 5 through 12 of our 25 Websites for Genealogy
I’m Gina Philibert Ortega, and welcome to 25 Websites for Genealogy, What I’d like to do is talk to you about websites that are must-haves for your genealogical research.
Some of these websites will be new to you, and others are going to be very familiar to you. In talking about the familiar websites, I want to get you thinking about them differently, explain a little bit more about what you can do at these websites, and how to get the most out of them.
In this series of 25 Websites for Genealogy, we’re going to be looking at websites in different categories. Our second category is the Finding Aids & Society Websites (#5 through 12).
Linkpendium provides links to free and subscription websites that can help you with your genealogical research. The directory includes 10,000,000+ links to information about families around the world as well as helpful information about U.S. states and counties. The site emphasizes free resources provided by libraries, government agencies, genealogical and historical societies, and individuals.
ConferenceKeeper.org is the most complete genealogy calendar of events anywhere! Here you will find thousands of genealogy webinars, seminars, conferences, workshops, podcasts and more, from genealogy societies, libraries, and other organizations all around the world.
Website #8: New England Historic Genealogical Society (American Ancestors)
AmericanAncestors.org databases include 1.4+ billion records for the United States, the British Isles, and continental Europe. And according to the website it also features:
one of the most extensive online collections of early American genealogical records,
the largest searchable collection of published genealogical research journals and magazines,
and the only online source for records from Boston’s Catholic Archdiocese.
Founded in 1869, the New York Genealogical and Biographical Society provides access to genealogical records, journals, periodicals, special collections, digital books and other free resources. In addition, they host educational events.
The Foundation for East European Family History Studies is an international organization that provides education and resources to support Eastern and Central European genealogical research.
Elevenses with Lisa is our little slice of heaven where friends get together for tea and talk about the thing that never fails to put a smile on our face: Genealogy!
Are you ready for a year of successful genealogy? Learn how to develop an effective research plan, and preserve and protect your genealogy. Keep reading for the show notes that accompany this video.
10 Questions to Rate Your Readiness for Genealogy Success
1. Have you selected a place to start?
I started learning how to play the guitar in 2020. I began with an online course to learn the basics, and I picked one song that I really wanted to learn how to play.
For three months I worked my way through the course and played that song over and over every day. This resulted in two things: I learned how to play the song, and my husband took a blow torch to my guitar! (Just kidding.)
At the end of those three months I had several weeks where I just didn’t feel I was making any progress at all. I practiced every day, but I wasn’t getting anywhere.
It turns out that I had reached my initial goals – I knew the most popular chords, had memorized the Pentatonic Scale and could play the song Crazy On You for a captive audience in my home. However, I had not stopped to identify my next set of goals. Therefore, stagnation set in.
In an effort to restart my learning and success trajectory, I spent an evening looking through my record collection and I made a list of 6 of my favorite songs. Then I put them in the order I wanted to learn to play them. Most importantly, I identified which one was my top priority to learn. Once I did that, I knew exactly how I was going to spend my practice time.
It sounds simple, but finding and deciding on the place to start (or restart) is really easy to miss. When it comes to genealogy there’s always a bright shiny object online ready to gobble up a few precious minutes, or hours, or days! Having a predetermined project goal in mind will help you get down to business faster and keep you from wandering aimlessly.
2. Have you developed a project research question?
Once you know what your project will be, it is time to formulate the general question. In other words, what is the question you are trying to answer?
In this episode I shared the family story that had been handed down the McClelland family about their ancestor Washington McClelland. The story went like this: “He immigrated to the U.S. from England. He was working on the railroad when he met a girl in Idaho. She became pregnant. They married. He converted to the LDS church. They raised a family together.”
The general research question was “is this story true?” That’s a big question, and one that we’ll break down further in question #3.
Genealogy Gems Premium Members can learn more about formulating research questions by watching the segment HowAlice the Genealogist Avoids the Rabbit Hole Part 1 in Elevenses with Lisa Episode 2. It’s available in the Premium Videos area of the Genealogy Gems website. Don’t miss the downloadable handout! You’ll find the link under the video. (Learn more about becoming a Premium Member here.)
3. Do you have a Research Plan for your genealogy project?
The general project question can usually be broken down into several bite-sized actionable questions. In the example of “Is the story about Washington McClelland true?” we can break that question down into several questions:
Where exactly was Washington from in England?
When did he come to the United States?
Why/how did he end up out West?
Did he work on the railroad?
When and where did he marry?
When was their oldest child born?
Did he join the LDS church?
And many of these questions can likely be broken down further. These more focused question help provide the framework for the project’s research plan. They can then be re-sorted so that they follow a logical progression of answers.
The next step will then be to identify and prioritize the sources (records) that are likely to provide the necessary relevant evidence. Then determine the order in which you will locate each identified record. Finally, add where you think you can find the records to the plan.
4. Do you have the research forms you need?
There are many different types of genealogy research forms: research logs, blank record forms, checklists, just to name a few.
Research logs are great for keeping track of your research plan progress. Blank record forms (such a blank 1900 U.S. Federal Census form) are very handy for transcribing the pertinent information for analysis. And checklists (such as a list of all types of death records) help ensure that you don’t miss and records, and you don’t look for the same record twice!
Free Genealogy Forms at Family Tree Magazine
Family Tree Magazine offers a plethora of free genealogy forms. You’ll need to register for a free website account to download the forms.
Having an organizational system in place takes the guesswork out of where things should be filed, making it much more likely they will actually get filed. It also ensures that you’ll be able to put your hands on your records whenever you need them.
Here’s a secret: There is no one perfect filing system. The most important thing is that it makes sense to you and that you are consistent in how you use it.
In Elevenses with LisaEpisode 6 (available to Premium Members) I cover step-by-step the system I developed and have used for over 15 years. I’m happy to report I’ve never lost an item. (Whew, what a relief!)
As you work on your genealogy research you’ll find there are two important tasks you will be doing often:
Storing items that you have not had a chance to work on yet (I refer to these pending items as “to be processed.”)
Storing items that need to be filed. (Let’s face it, we rarely want to stop in the middle of an exciting search to file a document.)
Not having a way to store these two types of items leads to clutter and piles on your desk. Here’s my simple solution:
Place a “to be filed” basket next to your desk.
Create a “Pending” tab in each surname 3-ring notebook (if you use my system.) The beauty of the surname notebook Pending section is you have a place to put documents (out of sight) that are associated with a specific family. When you’re ready to work on that family line, grab the notebook and jump to the Pending section to start processing and analyzing the previously found records.
7. Do you have the supplies you need on hand?
Make sure that you have a small quantity of all of the supplies you need for the filing and organization system you are using.
Here’s what my shopping list looks like:
3” 3-Ring View Binders
(allow you to customize covers & spines)
1” 3-Ring View Binder
1 box of Acid-Free Sheet Protectors
3-Ring Binder Tab Dividers
8. Have you settled on a file naming scheme?
How to name digital genealogy files is something we all struggle with. Good intentions don’t make the job any easier. Take a few moments to nail down the basic naming scheme you will commit to follow. I say basic, because there will be times when you’ll need to modify it to suit the file. That’s OK. But always start with the basic format.
Here’s what my basic file naming format looks like:
Year (will force chronological order)
First Name (filed in surname folder)
Location
Example: 1920_robert_m_springfield_oh
Notice in my format I don’t usually include the surname. That’s because I file in surname folders. Notice that I said “usually.” That’s because we are always free to add on additional information like a surname if we think it will prove helpful. For example, if I anticipate that I will have a need to share individual files with other researchers or family members (rather than the entire folder) then I will add the surname so that the person receiving the file has the pertinent information.
8. Are you prepared to make copies?
Protecting and preserving our genealogy for generations to come is a top priority for most genealogists. All of us at some time have worried about what would happen if a website that we upload our content to goes out of business or sells out to another company. Now there is a new reason to take a few extra steps to ensure you don’t lose access to your genealogy data.
Recently, According to Buzz Feed, on Jan. 9 the largest cloud-hosting service notified a large social media network with millions of users that it would be cutting it off from its cloud hosting service. According to the Wall Street Journal, “other tech partners also acted, crippling operators.”
Now we must add to the list of concerns the possibility that a genealogy website we use might be cut off from web hosting. How might this type of action impact our personal family history that we share on websites? Many companies that provide access to millions of historical records and likely house a copy of your family tree and your DNA test results use the same cloud hosting service. In fact, it’s hard to find a company out there that isn’t tethered to it in some way.
My research showed that both Ancestry and FamilySearch have been featured on their website in case studies and blog articles:
The bottom line is that our family history is our responsibility to preserve and protect. While we can benefit from sharing copies of it online, putting all our genealogy eggs in only the online basket puts it at risk because we don’t have control.
While I love the idea of going paperless and I’ve been striving to do that in recent years, I’m changing my tune on this. For several years I’ve been strongly recommending that you get your own genealogy software on your own computer and use it as your master database. All online family trees are simply copies. Many people, particularly those who rely solely on FamilySearch often wondered why I was so concerned. The events of this week make my point and put an exclamation point on the end of it.
Making digital and paper copies of your data is a simple strategy you can put in place today. This means regular print outs of your tree, family group sheets, and the most important genealogical documents. I keep mine in a portable fireproof safe.
We can also make digital copies as well. For example, last year I had all my old home movies transferred to digital and they are stored on my computer. I went the extra step to get copies on DVD and I also copied the digital files onto a terabyte hard drive that is in the fireproof safe.
Remember, your computer is connected to the Internet. If you’ve ever woken up to a Windows update, then you know that tech companies can make changes to your computer. Having your own paper and digital copies are just extra insurance that certainly can’t hurt.
Here’s a checklist of things you can put in place today:
a good printer
extra ink
a stock of paper
a portable terabyte hard drive
Ideas for saving paper and ink:
Print only the most important documents that might be more difficult to replace.
Focus your printing on direct ancestors.
Print in draft mode (depending on the document) and / or black and white to save ink.
Make double-sided copies.
When possible, add two documents to each side of the paper so that one piece of paper holds 4 documents.
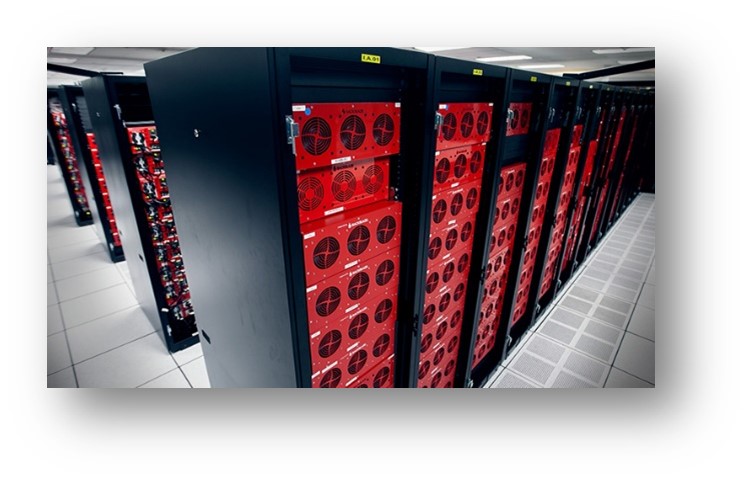
9. Is your computer backed up to the Cloud?
I use and recommend Backblazefor computer cloud backup. They have their own storage facility. Here’s what their storage pods look like:
Image courtesy of Backblaze.
I am also an affiliate of Backblaze so I appreciate when you use my link if you decided to make a purchase. I will be compensated at no additional cost to you, and that supports this free show. https://www.backblaze.com/landing/podcast-lisa.html
Learn more: Premium Members can watch the Premium video Your Guide to Cloud Backup and download the PDF handout. You’ll get answers to questions like:
What is cloud backup?
Why should I use cloud backup?
How does cloud backup work?
Is cloud backup safe?
What should I look for when selecting a cloud backup service?
My personal cloud backup choice
10. Have you scheduled ongoing education time?
Pick one area you want to improve your genealogy skills and knowledge and make time each week to learn something new about it.
Thank you for making Elevenses with Lisaand Genealogy Gems one of your places for genealogy learning, laughing and getting refilled!
Use a free service like Blogtrottr.com to receive email notification reminders. Simply paste the Genealogy Gems channel URL into the first field, https://www.youtube.com/GenealogyGems enter your email address and select from the drop-down menu how often you would like to receive notifications. Then click the orange “Feed Me” button. When I post a new video or schedule an Elevenses with Lisa episode you’ll receive an email notification.
Recap:10 Questions to Rate Your Readiness for Genealogy Success
Have you selected a place to start?
Have you developed a project research question?
Do you have a Research Plan for your genealogy project?
Do you have the research forms you need?
Have you established Your Filing System?
Do you have the supplies you need on hand?
Have you settled on a file naming scheme?
Are you prepared to make copies?
Is your computer backed up to the Cloud?
Have you scheduled ongoing education time?
Elevenses with Lisa Archive
Premium Member have exclusive access to all of the archived episodes and downloadable handouts. Visit theElevenses with Lisa Archive.
Let us know if you found this video and article helpful. I’d also like to hear from you about the topics you would like to learn more about in future episodes. Thanks!