Does using cloud storage for genealogy (like Dropbox) replace having a computer backup service like Backblaze?
Recently I heard from Jim in Midland, Texas, USA, who is a little perplexed:
“Hi Lisa, I’ve heard all your podcasts, some more than once, and I appreciate your tutelege of five years. I’m nearly 80 and some of the techie stuff is frustrating, but I’m still working at it.
You recommend Backblaze for cloud storage now. Does this mean that Backblaze is a replacement for Dropbox or do they serve different functions? I haven’t used either, but I am looking for a means of storing my information in a safe and retrievable place.”
Jim asks a great question! Dropbox and Backblaze are indeed different animals.
Dropbox is a temporary place to put active files you want to access from a variety of computing devices (such as a smartphone, iPad, your spouse’s computer, etc.) I think of it as Grand Central station for the files I’m actively working with.
You can install Dropbox on multiple computers and download the app to your various mobile devices so that any file stored there is accessible and synchronized. Many apps and devices build connection to Dropbox right in to their own service or device, making it super easy to access files.
Cloud storage for genealogy research makes it easier to collaborate, research while traveling and access your files from different devices or locations. However, I don’t know anyone who only uses Dropbox for ALL of their files. Typically we also save files to our computer’s hard drive, particularly more archival types of files. So while you would be able to retrieve files stored on Dropbox if your computer crashed, and files that are on that computer would be lost. Dropbox also makes it easy to share folders and files with others. Again, think Grand Central Station for active files. Dropbox does have limitations regarding the amount of storage and sharing.
Backblaze is a cloud-based backup service for your entire computer. Once you activate Backblaze, you can just forget about it. It constantly is backing up EVERY file on that computer. If that computer crashed all of your files would be retrievable from Backblaze. You have the added convenience of being able to also access your files from Backblaze.com or the Backblaze app, and in that way it overlaps Dropbox. But that’s not usually how you would access your files. Usually, you would just turn on the backup, and forget about it. There is no limit to how many of your computer files you can back up with a cloud-based backup service like Backblaze.
My Bottom Line: Dropbox is short term storage for active projects, and Backblaze is long term, automatic, secure storage.
Files I’m currently working on (like projects, articles, etc.) I store in Dropbox, making it easy to work on the file from different computing devices and making it easy to share with others. While they are in Dropbox they are “on the Cloud” on the Dropbox servers. Once the project or item is done, I move the file(s) to my main computer. This keeps me from going over my Dropbox limits, and ensures the files are still accessible AND fully backed up and secure in case something happens to my computer. I can full restore my files to a new computer in one swoop if need be.
I have chosen Backblaze as the official cloud backup for Genealogy Gems. Backblaze is also a sponsor of the free Genealogy Gems podcast. For only $4.99 a month Backblaze can back up your computer files, too. Why not check them out and see if their service is right for you? Click here to learn more about Backblaze.
English parish records top this week’s list of new online genealogy records. More new or updated family history collections: British newspapers, pensions and India records; records for Brazil, Germany, The Netherlands, Peru, and Poland; UK images and deaths; US...
We have five strategies for researching disasters for family history. They come in response to a listener email about her own “disaster-prone family.” Use these tips to learn about natural or man-made disasters, epidemics, travel accidents, and more that affected your ancestors, and very possibly more about your ancestors role in these events.
View of Eastland taken from Fire Tug in river, showing the hull resting on it’s side on the river bottom. Wikimedia Commons image; click to view with full citation.
It might seem a little sad to search out disasters, epidemics, and accidents in the lives of your ancestors, but it certainly helps us see things in a different light. Genealogy Gems Editor Sunny Morton has shared recently how enthralling it has been for her to dig deeper into her ancestor’s experience of living through the Johnstown Flood. She used many of the tools I write about extensively in my book The Genealogist’s Google Toolbox (Google Books, Google Earth Pro, and even YouTube) to add an amazing amount of meat to the bones of the story.
I also recently received an inspiring letter from Natalie, a Genealogy Gems Premium Member about how researching disasters in her family history turned her into a passionate genealogist. Here’s what she said:
“Dear Lisa and Company,
I just subscribed to your Premium podcast and must say that listening to Premium Podcast episode 143 affirmed that I made an excellent decision!
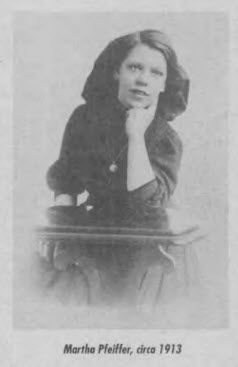
I also had family members who were in the Johnstown Flood, since that’s where my family initially immigrated. My parents and I were born there and [I] have heard of stories of the Great Flood of 1889 since I can remember. There was a long-standing family story about my 2nd great-aunt, Julia Pfeiffer Rohr, being pulled out of the floodwaters by her hair.
Ironically or not, my ancestors relocated to Chicago a few years after the Johnstown Flood, only to have my maternal grandmother’s sister (who was a few months away from her 19th birthday) killed while aboard the Eastland [steamship in 1915]. Not sure why some families are ‘disaster prone’ through the generations, but ours seems to be one of those.
I learned about the Eastland Disaster as an adult when my mother’s half-sister in Chicago wrote and shared a family history with me. As a Twin Cities journalist, I published an article (click here and go to page 5) in one of the community newspapers about the disaster.
Still, at the time, I found next to nothing on the Eastland, which was both frustrating and puzzling. [Since then,] I’ve done a ton of research on the event and have written larger pieces, including a to-be published book. I didn’t intend to become an expert on a shipping disaster, but that’s what happened. Also, this marked my entrance into the amazing world of family history.”
5 Tips for Researching Disasters in Family History
Learn more about the disasters your own family experienced with these 5 tips that I shared with Natalie in the Genealogy Gems Premium Podcast episode 145. Although these tips are for researching the Eastland disaster specifically, you can absolutely put them to work for you!
1. Start with Google.The world’s leading search engine, Google.com can lead to rich resources you may never find in a local library or archive. In the case of the Eastland disaster, a Google search immediately brought up a website dedicated to the event. The casualty list had everyone’s name, age, gender, marital status, ethnicity, and the cemetery in which they were buried.
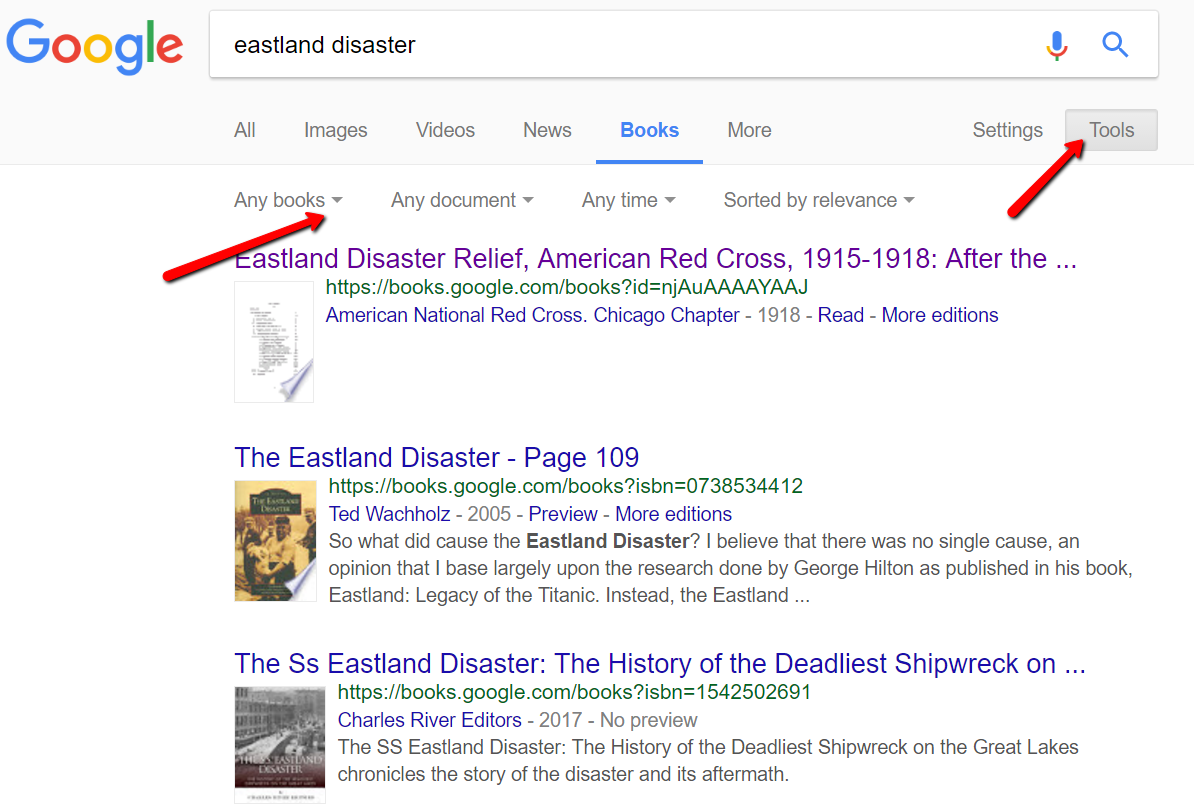
2.Next, we go to Google Books, where Google takes you deeper and more specifically into historical books. Using the Eastland disaster as our criteria, the first result was a published final report by the American Red Cross’ disaster relief committee on what happened, and how the affected families were helped. Several published histories of the disaster were also listed there. These can be purchased, or you can find copies of them through inter-library loan at your local library. If you just want to see which books in the search results can be read for free, click the Tools button under the search box, and a new menu bar will pop up. Click Any books, then choose Free Google eBooks, like so:
Watch my free video tutorial on finding free e-books on Google. This video is one in a series of tech tip videos available for free at my YouTube channel. Click the Subscribe button while you’re there and you will be notified each time a new genealogy video is published.
3. Keep checking back! New things come online every moment of every day. In 2015, historical video footage about the Eastland disaster was discovered and identified in an online archive (see my blog post about that). But of course it’s impossible to rerun the same searches every day looking for new and updated material. The answer: set up a Google Alert for your search query. That way Google will do the searching for you, and you will receive an email only when Google finds new and updated items that match your search terms. Read my article on How to Set-up Google Alerts for step by step instructions on how to set up your own Google Alerts. Then read How to get the Most out of your Google Alerts for Genealogy.
4. Search YouTube separately. YouTube has several video clips of the Eastland disaster. The Chicago Tribune has wrapped that historical video clip into a short video documentary that includes additional photos their researchers discovered. You’ll also find an animation from the Eastland Disaster Historical Society that recreates what happened and how. Read chapter 14 in my book The Genealogist’s Google Toolbox, Second Edition which is devoted to using YouTube for your genealogy research.
5. Explore Gendisasters.com.This site compiles information on all kinds of tragedies from the past: tornadoes, fires, floods, and buggy-related disasters are just a small sampling of what they cover. You can search by type of disaster, but if you’re not quite sure how it might be filed (like was it a drowning or a ship disaster?), then search by year or place. I looked for Eastland disaster first under ship disasters, and I saw that events are listed alphabetically by place, specifically by city in most cases. There isn’t a way to jump easily to “Chicago,” so I had to scroll through several pages, but I did find it under Chicago, IL Steamer Eastland Disaster, July 1915. Since I already knew the city and date, I could have gotten to it faster by searching under those tabs, but I sure saw just how many events are cataloged at Gendisasters.com. It’s amazing!
Avoid Disaster with the Right Tools
Lastly, some of the disasters you are researching may have a website dedicated to it. The Eastland disaster webpage has several interesting pictures of the ship and the disaster itself. There’s a nice long narrative about the tragedy and some transcribed newspaper articles, as well.
Researching disasters for family history can be exciting and enjoyable. The world wide web is truly like a time machine. See what other ways you can use Google for genealogy in my book, The Genealogist’s Google Toolbox.Effective Google searches, Google Earth, Google Alerts, and Google Translate are just the tip of the iceberg! You will become a Google guru in no time.
A ton of genealogy and family history research can be done for free. In this episode I’ll share 15 fabulous free websites and what I love about them. These are essential for everyone serious about saving money while climbing their family tree.
(Get your ad-free Show Notes Cheat Sheet at the bottom of this page in the Resources section.)
LISA’S SHOW NOTES: Get your ad-free downloadable handout in the Resources section at the bottom of this page.
Tip: Use the Tools button on the results page to reveal the filter menu. Filter your results down to just full digitized and searchable books by selecting Full View.
Snagit Clipping Tool: Here’s our link for purchasing your copy of Snagit (screen clipping tool) Thank you for using our link. Use coupon code GENEALOGY15to get 15% off. (We will be compensated at no additional cost to you, which makes the free Elevenses with Lisa show and notes possible.)
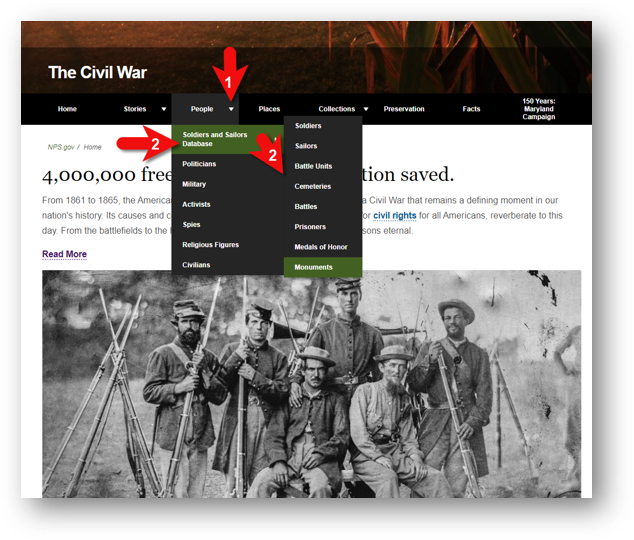
“Cooperative effort between the National Park Service and several public and private partners whose goal is to increase Americans’ understanding of this decisive era in American history by making information about it widely accessible.
11. Soldiers and Sailors Database
Features:
Men who served in the Union and Confederate armies during the Civil War.
Histories of Union and Confederate regiments.
Links to descriptions of significant battles.
Selected lists of prisoner-of-war records and cemetery records.
 Does using cloud storage for genealogy (like Dropbox) replace having a computer backup service like Backblaze?
 Dropbox is a temporary place to put active files you want to access from a variety of computing devices (such as a smartphone, iPad, your spouse’s computer, etc.) I think of it as Grand Central station for the files I’m actively working with.
 Backblaze is a cloud-based backup service for your entire computer. Once you activate Backblaze, you can just forget about it. It constantly is backing up EVERY file on that computer. If that computer crashed all of your files would be retrievable from Backblaze. You have the added convenience of being able to also access your files from Backblaze.com or the Backblaze app, and in that way it overlaps Dropbox. But that’s not usually how you would access your files. Usually, you would just turn on the backup, and forget about it. There is no limit to how many of your computer files you can back up with a cloud-based backup service like Backblaze.
 I have chosen Backblaze as the official cloud backup for Genealogy Gems. Backblaze is also a sponsor of the free Genealogy Gems podcast. For only $4.99 a month Backblaze can back up your computer files, too. Why not check them out and see if their service is right for you? Click here to learn more about Backblaze.
 I just subscribed to your Premium podcast and must say that listening to