by Lisa Cooke | Dec 10, 2014 | 01 What's New, Book Club
 Looking for something fun to read this holiday season? Whether you need reading material for holiday travels or just want to curl up under a blanket at home, here are two great titles I love. I shared these with Lisa in the December episode of the Genealogy Gems podcast–click here to hear our discussion and excerpts!
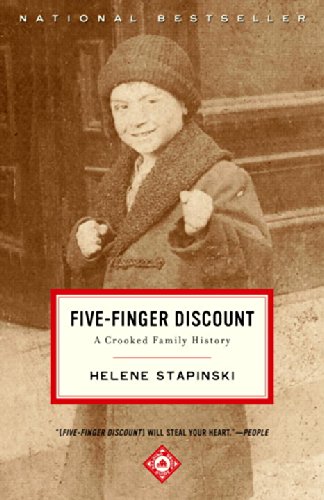
Five-Finger Discount: A Crooked Family History
by Helene Stapinski is one of my favorite published family histories. The author recounts her family’s upbringing in the context of the notoriously corrupt culture of Jersey City, New Jersey, U.S.A. It’s a page-turner, from the jaw-dropping opening sentence to the author’s final musings about how her own life reflects hand-me-down criminal tendencies. Some of the stories are snickeringly funny and some are sad, and the author keeps just the right distance from the drama. She’s close enough to sympathize with people who are trying to make their way within a culture that rewards dishonesty, greed and violence, yet can laugh at ironies like trying to learn about her grandfather’s petty thefts–when he’s stolen the very newspaper pages about his misdeeds from the library.

Homemade Biography: How to Collect, Record, and Tell the Life Story of Someone You Love
This is more than “just” a how-to book for family historians—it’s a story of its own. I re-read it every time I want to be freshly inspired to pursue the stories of my family. New York Times best-selling author and journalist Tom Zoellner weaves stories of his own into fabulous, hard-won advice on interviewing people. He shares insider tips on how to get the best stories out of those we talk to. There’s even a helpful chapter on how to work with the memories of those who have Alzheimer’s!
Tune in next month to learn our next featured book for the first quarter of 2015. Learn more about other books we’ve recommended at the Genealogy Gems Book Club page.
by Lisa Cooke | Jul 3, 2015 | 01 What's New, Australian, British, Canadian, Census, Digital Archives, FamilySearch, Findmypast, images, Immigration, Memory Lane, Military, Photographs, Records & databases, United States

Every Friday, we blog about new genealogy records online. Do any of the collections below relate to your family history? Look below for early Australian settlers, Canadian military and vital records, the 1925 Iowa State Census and a fascinating collection of old New York City photographs.
AUSTRALIAN CONVICT RECORDS. Now Findmypast subscribers can access several collections on early settlers. Among them over 188,000 Australia Convict ships 1786-1849 records, which date to “the ships of First Fleet and include the details of some of the earliest convict settlers in New South Wales.” You’ll also find “nearly 27,000 records, the Australia Convict Conditional and Absolute Pardons 1791-1867 list the details of convicts pardoned by the governor of New South Wales and date back to the earliest days of the colony” and New South Wales Registers of Convicts’ Applications to Marry 1825-1851, with over 26,000 records.
CANADIAN WWI MILITARY RECORDS. As of June 15, 162,570 of 640,000 files are available online via the Soldiers of the First World War: 1914–1918 database on the Library and Archives Canada website. This is the first installment of an ongoing effort to digitize and place online records of the Canadian Expeditionary Force service files.
IOWA STATE CENSUS. About 5.5 million newly-added records from the 1925 state census of Iowa are now free to search at FamilySearch,org. Name, residence, gender, age and marital status are indexed. The linked images may also reveal parents’ birthplaces, owners of a home or farm and name of head of household.
NEW YORK CITY PHOTOGRAPHS. About 16,000 photos of old New York City from the New York Historical Society are free to view on Digital Culture of Metropolitan New York. According to the site, “The extensive photograph collections at the New-York Historical Society are particularly strong in portraits and documentary images of New York-area buildings and street scenes from 1839 to 1945, although contemporary photography continues to be collected.”
ONTARIO, CANADA VITAL RECORDS. Nearly a half million birth record images (1869-1912), nearly a million death record images (1939-1947) and over a million marriage record images (1869-1927) have been added to online, indexed collections at FamilySearch.
 Today’s list of new records has a LOT of Canadian material! If you’re researching Canadian roots, here’s a FREE video for you to watch on our YouTube channel: Lisa Louise Cooke’s interview with Canadian research expert Dave Obee, who shares 10 tips in his effort to help one RootsTech attendee break through her brick wall. This post and tip and brought to you by The Genealogist’s Google Toolbox by Lisa Louise Cooke, newly-revised and completely updated for 2015 with everything you need to find your ancestors with Google’s powerful, free online tools.
by Lisa Cooke | Aug 16, 2011 |
The Genealogy Gems Podcast Episodes
2011 Season Six
Episode 101 Listen & Show Notes
Tons of great gems in the news, and learn all about becoming a certified genealogist from Alvie Davidson.
Episode 102 Listen & Show Notes
Genealogy Gems News, Updating your Podcast iGoogle Gadget, Research Strategies and an interview with Kendall Wilcox, Executive Producer of The Generations Project about the new Season 2.
Episode 103 Listen & Show Notes
Genealogy Gems News, “Cemetery Justice,” the New Google Books, the New Google Earth Version 6.0 for Genealogy.
Episode 104 Listen & Show Notes
Genealogy and Technology Converge. Interview with professional genealogist Kory Meyerink on the 50 most popular family history websites. Geo-Tagging photos with Chris Bair.
Episode 105 Listen & Show Notes
Interview with Josh Taylor of the New England Historic Genealogical Society on RootsTech. Tips for getting the most out of a conference, NARA videos, and free RootsMagic webinars.
Episode 106 Listen & Show Notes
Lisa shares her experience at the Who Do You Think You Are? Live show held recently in London, as well as some her own Cooke ancestry sleuthing. Interview with New Zealand genealogist Jan Gow on how to create your own family history resource library.
Episode 107 Listen & Show Notes
Free Webinars, the 1911 Scotland Census, Fraternal Organizations, and Dick Eastman joins Lisa to talk about Cloud Computing and Computer Security.
Episode 108 Listen & Show Notes
Census Tips and Tricks with Jason Harrison of FamilySearch. Also how to cite sources from Wikipedia, Lisa finds a newspaper article for a listener, and where to start in looking for Germany records.
Episode 109 Listen & Show Notes
The Civil War 150th Anniversary with Mike Litterst of the National Parks Service. Also, the new Jamboree apps, free upcoming webinars, and a tale of a military heros bible finding its way home again.
Episode 110 Listen & Show Notes
Divorce Research: Little White Lies at the Turn of the Century, free webinar, and special guest Maureen Taylor The Photo Detective from the Who Do You Think You Are? Live event in London.
Episode 111 Listen & Show Notes
Military Records: How to find Invalid and Pension files, New Mexican records, and special guest Roger Kershaw of the National Archives UK gives the back ground on the British Home Children from his book New Lives For Old.
Episode 112 Listen & Show Notes
Helping kids embrace family history at the Genealogy Jamboree.
Episode 113 Listen & Show Notes
Family History Writing with author John Paul Godges.
Episode 114 Listen & Show Notes
Online Security, Records Roundup, Genealogy Blogging with Becky Jamison.
Episode 115 Listen & Show Notes
How to Travel to Your Ancestor’s Homeland.
Episode 116 Listen & Show Notes
The Genealogy Gems Podcast recorded live at the Southern California Genealogical Society Jamboree. Special guests: Allison Stacy, Publisher of Family Tree Magazine, and Certified Graphologist Paula Sassi.
Episode 117 Listen & Show Notes
Find out if you should be using “Flourish” in your genealogy research with my guest DearMYRTLE.
Episode 118 Listen & Show Notes
PERSI, Grandmas and Grandpas and Free Transcription Software.
Episode 119 Listen & Show Notes
Prepare for Family History Christmas Gifts, Listener’s Grandparent Terms of Endearment, and 1000Memories.
Episode 120 Listen & Show Notes
Part 1 of Lisa interview with Washington Post editor Steve Luxenberg, author of the riveting true-story book Annie’s Ghost.
by Lisa Cooke | Oct 16, 2016 | 01 What's New
We know you want to keep up-to-date with where Lisa will be giving her lectures and presentations. This fall, we have three upcoming events. Here all the details:
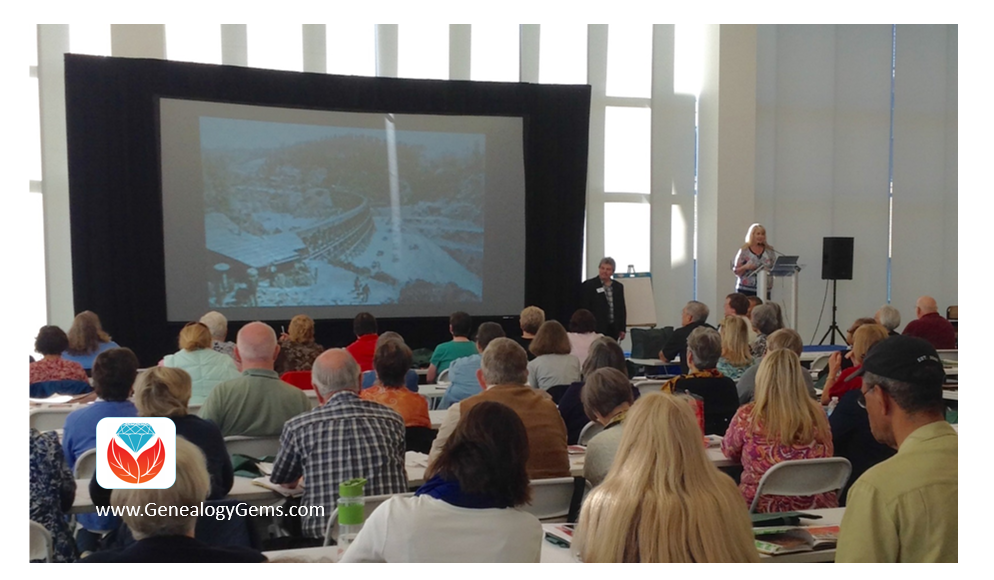
Lisa Louise Cooke speaking at the Columbus Ohio Metropolitan Library
Upcoming Events: Kansas
The Johnson County Genealogical Society will be holding an all day seminar on the 22nd of October. Lisa’s topics include:
- How to Reopen and Work a Genealogical Cold Case
- The Great Google Earth Game Show
- Tap Into Your Inner Private Eye: Nine Strategies for Finding Living Relatives
- Ways to Enhance Your Genealogy Research with Old Maps
What: Johnson County Genealogical Society 2016 Annual Seminar
When: Saturday, Oct. 22, 2016
Where: The Ritz Charles Event Center, 9000 West 137th Street, Overland Park, KS 66221
The event will take place at the Ritz Charles Event Center, 9000 West 137th St., Overland Park, Kansas. Registration is now open. To register online, click here.
Upcoming Event: Texas
Next on the list is the four day conference hosted by the Texas State Genealogical Society. This conference will take place in Dallas on October 27th through the 30th, and includes 35 speakers and an exhibit hall. Lisa will be giving two lectures:
- Beginning Evernote for Genealogists
- Using Google Earth for Genealogy
What: Texas State Genealogical Society Conference
When: Oct. 27 – 30, 2016
Where: Crowne Plaza Dallas Downtown
Online registration and payment is available through October 21st, but after that date you will need to register and pay in-person at the event, if space is still available.
Upcoming Events: Florida
Lisa’s final in-person speaking engagement for 2016 will be presenting as the Keynote Speaker for the 20th Annual Central Florida Family History Conference.
What: 20th Annual Central Florida Family History Conference
When: Saturday, November 12, 2016
Where: Olympia High School at 4301 S. Apopka Vineland Rd., Orlando, Florida.
You can register for the all-day conference online here. If you have a young person who is interested in genealogy, you’ll want to be aware that all students under the age of 18 are admitted free! Learn more details by visiting the Central Florida Family History Conference homepage.
Can’t Make it to an Upcoming Event?
 A Premium Membership to Genealogy Gems will give you access to over 30 of Lisa Louise Cooke’s video classes. From Evernote to DNA, Cloud computing and advanced research techniques, you will find this a great resource for your learning and inspiration. For more information on becoming a Premium Member, click here.