Click the video player below to watch 10 Top Tips for Beginning German Genealogy now.
Episode 52 Show Notes
Researching ancestors in another country can be a little daunting. Challenges include foreign languages, moving boundaries, and spelling variations. This is certainly true for German genealogy.
If you’re new to German genealogy or your research has stalled, this episode of Elevenses with Lisa is for you. In fact, even if you don’t have German ancestors I think you will still find the principles and ideas covered very helpful.
Translator, author and German handwriting expert Katherine Schober shares her 10 Top Tips for Beginning Germany Genealogy.These tips are packed with tools and resources that you can start using right away.
Katherine Schober is a German / English translator, specializing in the old German handwriting. She is the author of “The Magic of German Church Records” and “Tips and Tricks of Deciphering German Handwriting”, as well as the creator of the online course “Reading the Old German Handwriting.” And this year she will be one of the featured speakers at this year’s virtual International German Genealogy Conference.
Click the video below to watch the show. Then scroll down below to get all of the show notes. Premium Members will find the downloadable ad-free show notes cheat sheet PDF in the Resources section at the bottom of the page.
Mentioned in this video:
International German Genealogy Conference July 17-24, 2021. Use special code EARLY until April 30 to get $50 off the package of your choice. Registration here
Reading the Old German Handwriting Course online with Katherine Schober Register for the course here
Use Coupon Code GEMS for 10% off the course.
1. Start with What You Know about Your German Ancestor
Resist the temptation to start searching online immediately. Take the time to talk to your relatives, starting with the oldest. Review family documents, photo albums and other materials around your home. You may be surprised how much you already have, and the light that other relatives can shed on the family tree. Every step of the way its critically important to document everything!
2. Look for Resources in America Before Jumping Over to Germany
Photos
Family Bibles (Watch Elevenses with Lisaepisode 29)
Census Records
Local church records
Passenger Lists (Watch Elevenses with Lisaepisode 34)
Records in Germany are kept at the local level. Make sure you have the right town in the right state.
Meyers Gazetteer About the Meyers Gazetteer from the website: Meyers Orts- und Verkehrs-lexikon des deutschen Reichs “is the most important of all German gazetteers. The goal of the Meyer’s compilers was to list every place name in the German Empire (1871-1918). It gives the location, i.e. the state and other jurisdictions, where the civil registry office was and parishes if that town had them. It also gives lots of other information about each place. The only drawback to Meyer’s is that if a town did not have a parish, it does not tell where the parish was, making reference to other works necessary.”
The Historic Gazetteerat The Genealogical Gazetteer provides “The precise identification of places is essential in genealogy. Unfortunately, too few researchers care in identifying places. The project “GOV” was initiated to help historians and genealogists with the management of place references and to provide high quality data for anyone.”
4. Identify Available Records for the Town in Germany
Matricula – find church registers (mostly books of birth, marriage and death) from various European countries (currently Austria, Germany, Poland, Serbia and Slovenia).
8. Search for Vital Records
Vital records began nationwide in 1876, though it may be possible to find earlier records in certain locales.
Some pairs of letters can find themselves interchanged in German words. Understanding which ones were commonly swapped can save you a lot of frustration as you attempt to interpret documents. Examples of commonly switch letters include B and P, and K and G.
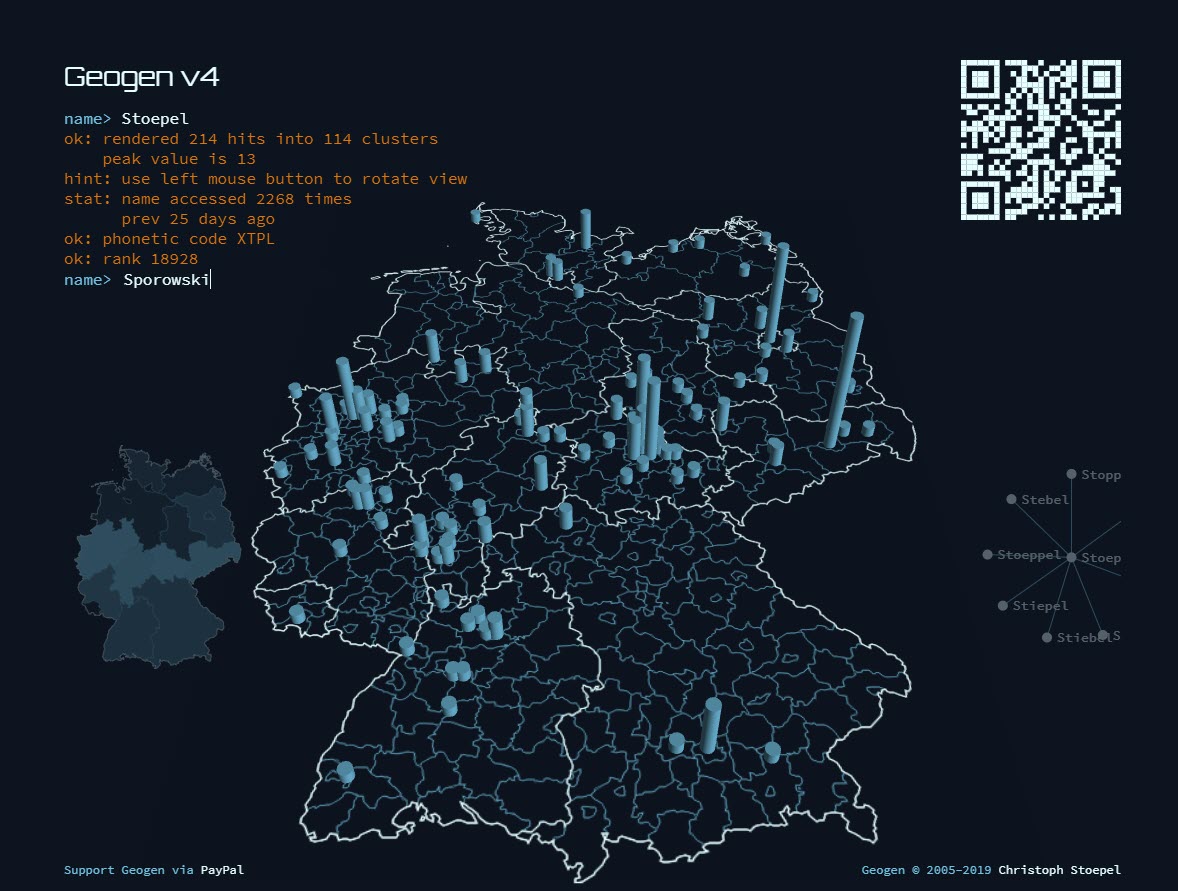
Geogen v4 offers genealogists a way to discover the areas of Germany where a surname appears most frequently. Type in your ancestor’s German surname and press Enter on your keyboard. Try variations that you have come across in records to compare the results.
Geogen v4 offers genealogists a way to discover the areas of Germany where a surname appears most frequently.
10. Use the Genealogy FAN CLUB
If you get stuck, use the FAN CLUB principle by looking at Friends, Associates, and Neighbors. These are the people who interacted with your ancestors in important ways. They will come in particularly handy when you run out of records for your German ancestor. By reviewing the records of those closest to your ancestor you may find new clues that can move your search forward and lead back to your family tree.
Katherine Schober is a German-English genealogy speaker, author, and translator, specializing in the old German handwriting. She is the author of “The Magic of German Church Records” and “Tips and Tricks of Deciphering German Handwriting”, as well as the creator of the online course “Reading the Old German Handwriting.” Katherine lives in St. Louis with her Austrian husband, and can be reached via e-mail at language@sktranslations.com or via her website, www.sktranslations.com.
Lisa Louise Cooke uses and recommends RootsMagic family history software. From within RootsMagic, you can search historical records on FamilySearch.org, Findmypast.com and MyHeritage.com. In the works: soon RootsMagic will be fully integrated with Ancestry.com, too: you’ll be able to sync your RootsMagic trees with your Ancestry.com trees and search records on the site.
Keep your family history research, photos, tree software files, videos and all other computer files safely backed up with Backblaze, the official cloud-based computer backup system for Lisa Louise Cooke’s Genealogy Gems. Learn more at http://www.backblaze.com/.
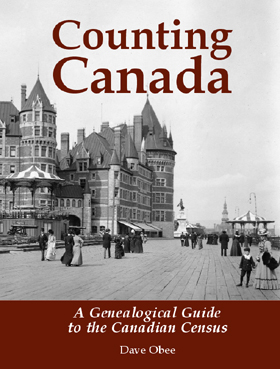
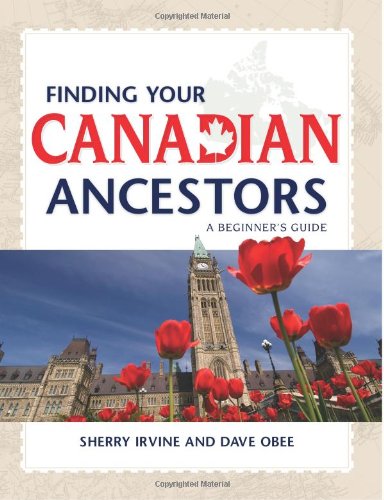
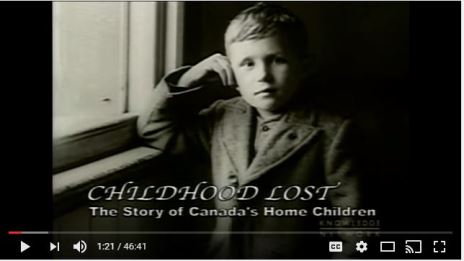
INTERVIEW: DAVE OBEE
Continuing our celebration of Canada’s 150th birthday!
Dave Obee is an internationally-renowned Canadian journalist, historian and genealogist. Dave is a columnist for Internet Genealogy and Your Genealogy Today (formerly Family Chronicle). Dave has also written about family history for Canada’s History and Your Family Tree in the United Kingdom.
Read a companion blog post on English parish records, with several image examples and links to the resources Kate Eakman recommends.
Legacy Tree Genealogists provides expert genealogy research service that works with your research goals, budget and schedule. The Legacy Tree Discovery package offers 3.5 hours of preliminary analysis and research recommendations: a great choice if you’ve hit a brick wall in your research and could use some expert guidance.
Start creating fabulous, irresistible videos about your family history with Animoto.com. You don’t need special video-editing skills: just drag and drop your photos and videos, pick a layout and music, add a little text and voila! You’ve got an awesome video! Try this out for yourself at Animoto.com.
You will find the complete show notes for the topic discussed in this episode at the Elevenses with Lisa show notes page here.
Google Books is a free online catalog of over 25 million books, 10 million of which are digitized and searchable. While you would expect to find books at Google Books, you may be surprised to discover there it also includes many other types of published materials. In this episode I’ll explain how to find 10 of my favorite surprising items at Google Books.
Click below to listen:
Learn More About Google Books for Genealogy
My book includes everything you need to know about improving your Google searches in Google Books:
Genealogy Gems Premium Members Exclusive Download:
This audio from this episode comes from Elevenses with Lisa episode 30. Log into your membership and then click here to download the handy PDF show notes that compliment this podcast episode.
Don’t miss the Bonus audio for this episode. In the app, tap the gift box icon just under the media player. Get the app here.
Get the Free Genealogy Gems Newsletter
The Genealogy Gems email newsletter is the best way to stay informed about what’s available with your Premium eLearning Membership. Sign up today here.
Get Unlimited Photo Enhancement and Colorization at MyHeritage
Get genealogy records and unlimited Enhanced and Colorized photos as a MyHeritage PremiumPlus or Complete Plan Subscriber. Click here to start a free trial.
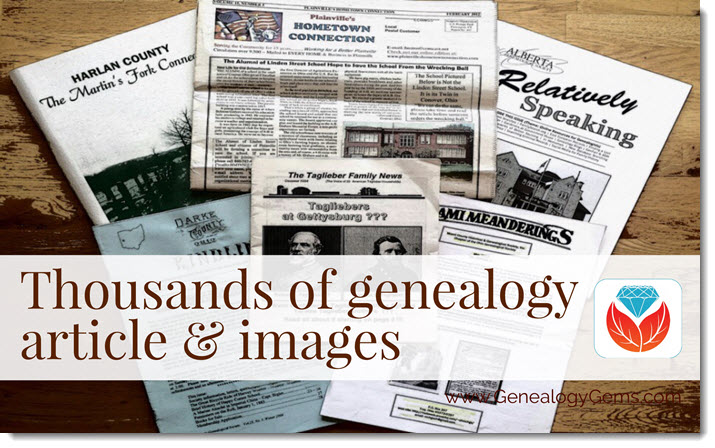
New genealogy records online recently include thousands of articles and images in PERSI, the Periodical Source Index. Also: new and updated Australian vital and parish records, German civil registers, an enormous Japanese newspaper archive, and a variety of newspaper and other resources for US states: AZ, AR, IA, KS, MD, NJ, PA, & TX.
PERSI Update: Thousands of new genealogy articles and images
Findmypast.com updated the Periodical Source Index (PERSI) this week, adding 14,865 new articles, and uploaded 13,039 new images to seven different publications. PERSI is one of those vastly under-utilized genealogy gems: a master subject index of every known genealogical and historical magazine, journal or newsletter ever published! Click here to explore PERSI.
The seven publications to which they’ve added images are as follows:
Click here to read an article about using PERSI for genealogy research.
More New Genealogy Records Online Around the World
Australia
Parish registers in Sydney. A new Ancestry.com database has been published: Sydney, Australia, Anglican Parish Registers, 1818-2011. “This database contains baptism, burial, confirmation, marriage, and composite registers from the Anglican Church Diocese of Sydney,” says the collection description. Baptismal records may include name, birth date, gender, name and occupation of mother and father, address, and date and parish of baptism. Confirmation records may include name, age, birth date, address, and the date and parish of confirmation. Marriage records may include the names of bride and groom as well as their age at marriage, parents’ names and the date and parish of the event. Burial records may include the name, gender, address, death date, and date and parish of burial.
Victoria BMD indexes. MyHeritage.com now hosts the following vital records indexes for Victoria, Australia: births (1837-1920), marriages (1837-1942), and deaths (1836-1985). These new databases supplement MyHeritage’s other Victoria collections, including annual and police gazettes. (Note: comparable collections of Victoria vital records are also available to search for free at the Victoria state government website.)
Germany
Just over 858,000 records appear in Ancestry.com’s new database, Halle (Saale), Germany, Deaths, 1874-1957. “This collection contains death records from Halle (Saale) covering the years 1874 up to and including 1957,” states the collection description. “Halle, also known as “Halle on the Saale,” was already a major city by 1890. These records come from the local registry offices, which began keeping vital records in the former Prussian provinces in October 1874. “The collected records are arranged chronologically and usually in bound yearbook form, which are collectively referred to as ‘civil registers.’ For most of the communities included in the collection, corresponding alphabetical directories of names were also created. While churches continued to keep traditional records, the State also mandated that the personal or marital status of the entire population be recorded. (Note: These records are in German. For best results, you should search using German words and location spellings.)”
Japan
A large Japanese newspaper archive has been made available online, as reported by The Japan News. The report states: “The Yomiuri Shimbun has launched a new online archive called Yomiuri Kiji-Kensaku (Yomiuri article search), enabling people to access more than 13 million articles dating back to the newspaper’s first issue in 1874. The archive also includes articles from The Japan News (previously The Daily Yomiuri) dating back to 1989. This content will be useful for people seeking English-language information on Japan…Using the service requires registration. There is a minimum monthly charge of ¥300 plus tax, with any other charges based on how much content is accessed.” Tip: read the use instructions at the article above, before clicking through in the link given in that article.
New Genealogy Records Online for the United States: By State
Arizona. Newspapers.com has added the Arizona Daily Star, with issues from 1879 to 2017. The Arizona Daily Star is a daily morning paper that began publishing in Tucson on January 12, 1879, more than 30 years before Arizona became a state. The Daily Star’s first editor was L.C. Hughes, who would later go on to become governor of the Arizona Territory.
Arkansas. The University of Arkansas Libraries has digitized over 34,000 pages of content for its latest digital collection, the Arkansas Extension Circulars. A recent news article reports that: “The Arkansas Agricultural Extension Service began publishing the Arkansas Extension Circulars in the 1880s. These popular publications covered myriad agriculture-related topics: sewing, gardening and caring for livestock among them. Now, users worldwide can access these guides online.” These practical use articles give insight into the lives of rural and farming families in Arkansas, and feature local clubs and community efforts.
Iowa. The Cedar Rapids Public Library has partnered with The Gazette to make millions of pages of the newspaper available online. The Gazette dates back to 1883, and the new database is keyword searchable. A recent article reports that 2 million pages are currently available online in this searchable archive, with plans to digitize another 1 million pages over the next 18 months.
Kansas. From a recent article: “Complete issues of Fort Hays State University’s Reveille yearbooks – from the first in 1914 to the last in 2003 – are now online, freely available to the public in clean, crisp, fast-loading and searchable digital versions in Forsyth Library’s FHSU Scholars Repository.” Click here to go directly to the yearbook archive and start exploring.
Maryland. New at Ancestry.com: Maryland, Catholic Families, 1753-1851 (a small collection of 13.5k records, but an important point of origin for many US families). “Judging from the 12,000-name index at the back of the volume, for sheer coverage this must be the starting point for Western Maryland Catholic genealogy,” states the description for this collection of birth, baptismal, marriage, and death records for the parishes of St. Ignatius in Mt. Savage, and St. Mary’s in Cumberland, Maryland. Find a brief history of Catholicism in western Maryland with lists of priests and a summary of congregational growth. Then find lists of marriages, baptisms, deaths, and burials, and even lists of those “who appeared at Easter Confession, confirmation, communion, or who pledged financial support for the parish priest.”
New Jersey. Findmypast.com subscribers may now access small but historically and genealogically important collections of baptismal records (1746-1795) and additional church records (1747-1794) for Hannover, Morris County, New Jersey. States the first collection description, “Despite being small in population, the township is rich in history. It was the first settlement established in northwest New Jersey, dating back to 1685, and is situated by the Whippany River.” The second group of records “pertains to an active time in Hanover, with the resurgence of religious revivals kicking off around 1740. The most populous denominations in the latter half of the 1700s were Presbyterian, Society of Friends (Quaker), Dutch Reformed, Baptist, and Episcopal.”
Pennsylvania. The Carlisle Indian Industrial School, located in Carlisle, PA, was a federally-funded boarding school for Native American children from 1879 through 1918. The Carlisle Indian School Digital Resource Center is a project that is building an online searchable database of resources to preserve the history of the school and the students who attended there.
They recently announced a new resource titled Cemetery Information. According to the site, this collection provides “easy access to a wide range of primary source documents about the cemetery and the Carlisle Indian School students interred there.” Available materials include an individual page for every person interred there with their basic information, downloadable primary source materials about their death, an interactive aerial map of the cemetery, and more.
Texas. The Texas State Library and Archives Commission has digitized a series of collections featuring archival holdings from the First World War through the Texas Digital Archive. These collections are:
The Frank S. Tillman Collection: “The bulk of the collection focuses on the Thirty-Sixth Division and also features items from the Ninetieth Division, the Adjutant General of Texas, and other Texas soldiers.”
General John A. Hulen Papers:”Highlights include correspondence, photographs, and scrapbooks, dating 1887-1960.”
36th Division Association Papers: “The papers include correspondence, reports, military records, and scrapbooks, dating 1857-1954. Records relate to Texans’ experience during World War I, railroads in Texas, and the San Jacinto Monument.”
What genealogy websites are you using? Which additional ones should you also be using?
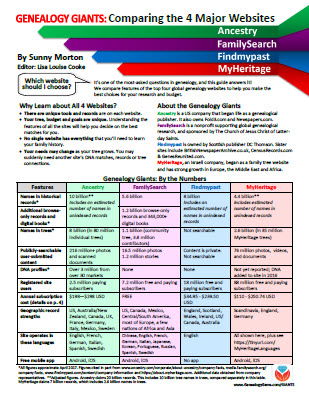
Learn more about the giant genealogy websites mentioned in this post–and how they stack up to the other big sites–in our unique, must-have quick reference guide, Genealogy Giants, Comparing the 4 Major Websites, by Genealogy Gems editor Sunny Morton. You’ll learn how knowing the relative strengths and weaknesses of Ancestry.com, FamilySearch.org, Findmypast.com and MyHeritage.com can help your research. There’s more than one site out there–and you should be using as many of them as possible. The guide does share information about how to access library editions of these websites for free. This inexpensive guide is worth every penny–and may very well help you save money.
Disclosure: This post contains affiliate links and Genealogy Gems will be compensated if you make a purchase after clicking on these links (at no additional cost to you). Thank you for supporting Genealogy Gems!