by Diahan Southard | May 27, 2017 | 01 What's New, Genealogy Giants Websites, MyHeritage
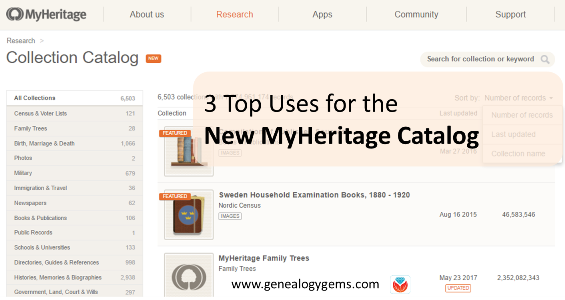
 The new MyHeritage Collection Catalog is making the site even easier to use. Read our 3 favorite uses for the new MyHeritage Collection Catalog, and a description of how MyHeritage counts its records.
The new MyHeritage Collection Catalog has just been released, and is dedicated to searching records collections on the site. It’s a public catalog, available whether you are a subscriber or not, so now you can easily see whether MyHeritage may have the historical records you need.
It’s a public catalog, available whether you are a subscriber or not!
“The new Collection Catalog provides a useful listing of the collections on SuperSearch and is a gateway to the vast historical treasure trove of 7.8 billion records currently offered by MyHeritage,” says a MyHeritage press release. “The catalog lists our 6,503 main collections and excludes tiny collections that have fewer than 500 records each.” (Those may be added to the catalog later on.)
Here are 3 top uses we see for the new MyHeritage Collection Catalog:
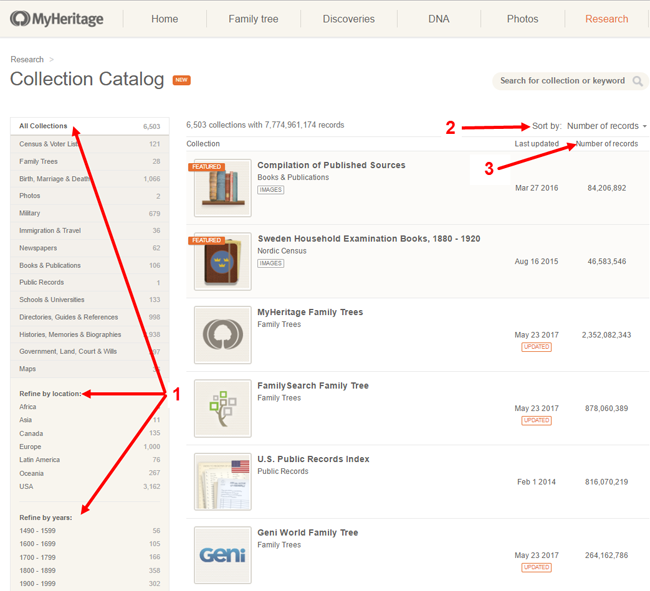
1. Look for specific record types for a particular place and time period. Use the left side menu to select record types, locations and time periods. Within many of those, you’ll be able to choose more specific subcategories. You can also do keyword searches if you’re generally looking for particular kinds of records (“newspaper” or “church”).
2. See what’s new on the site, or what collections have been recently updated. To see what’s been added or updated lately, roll over Sort by and select “Last updated.” You’ll also see a little tag on any collections that are new or have been recently updated. This helps you to know whether you’re seeing the most recent data available, particularly in collections they index from other websites, such as the FamilySearch Tree or Geni World Family Tree.
3. See how many records are in a collection. This may help you determine how comprehensive a particular database might be, and compare how many records for a particular place are on their site.
Speaking of record counts, MyHeritage also shared a description of how they count records. I’m really encouraged to see a major records site do this and I hope this trend continues! In our newest quick reference guide, Genealogy Giants: Comparing the 4 Major Websites, we talk about how difficult it is to compare record content on different genealogy websites because there’s no uniform standard for counting them, and they don’t all define their counting methods alongside their site statistics. Here’s MyHeritage’s description of how they count records:
“In structured collections, such as census records, birth, and marriage records, each individual name is counted as one record. For example, a marriage document naming both the bride and groom is counted as two records. Nicknames or aliases are not counted as additional records. In family trees, each tree profile is counted as one record, even when it is available in more than one language. Each photo is counted as one record. In unstructured collections, such as newspapers or yearbooks, each page is counted as one record even though it may include hundreds of names. We count each page as a single record because we don’t want to inflate the record count by guessing.” (MyHeritage previously published this information in a 2014 blog post.)
Getting the Most from MyHeritage
Here at Genealogy Gems we strive to help you get the most out of the genealogy websites you choose to use in your research. In the case of MyHeritage, we’ve got two jam-packed quick reference guides like no others on the market:
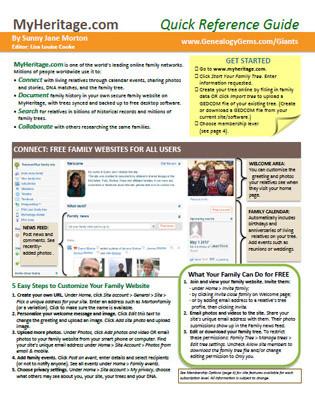 MyHeritage Quick Reference Guide: Newly Updated in 2017!
This guide shows you how to:
- create a family website on MyHeritage (and help your relatives use it for free),
- build your family tree,
- research records and others’ trees,
- get the most from the built-in search tools,
- test or upload your DNA and work with DNA matches,
- quickly navigate the website, and choose the best membership plan (free or paid) for your needs.
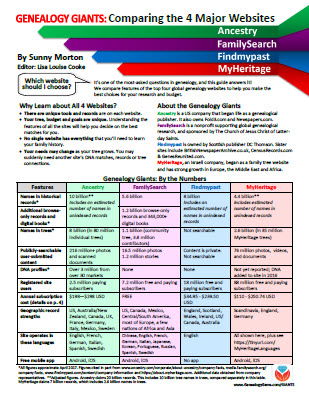
Genealogy Giants: Comparing the 4 Major Websites: NEW in 2017
This comprehensive guide helps you answer the question, “Which genealogy records websites should I use?” You’ll learn:
 How knowing about all four websites can improve your family history research
- How the sites stack up numerically for historical records, names in trees, DNA profiles, site users, site languages and subscription costs
- Unique strengths of each website and cautions for using each
- What to keep in mind as you evaluate record content between sites
- Geographic record strengths: A unique table has an at-a-glance comparison for 30+ countries
- How to see what kinds of records are on each site without subscribing
- How family trees are structured differently at these websites—and why it matters
- Privacy, collaboration, and security options at each site
- How DNA testing features differ at the two websites that offer it
- What you can do with free guest accounts at each website
- Subscription and free access options
Thanks for sharing this post with others who will want to know about the new MyHeritage Catalog! You are a Gem!
by Lisa Cooke | Aug 28, 2017 | 01 What's New, Google, Google Earth, Listeners & Readers, Maps, Memory Lane |
Ever thought of visiting your childhood home? Here’s a story about people who are actually buying theirs back. For the rest of us, here’s how to use Google and Google Earth to revisit your childhood home and relive some memories–without spending a dime.
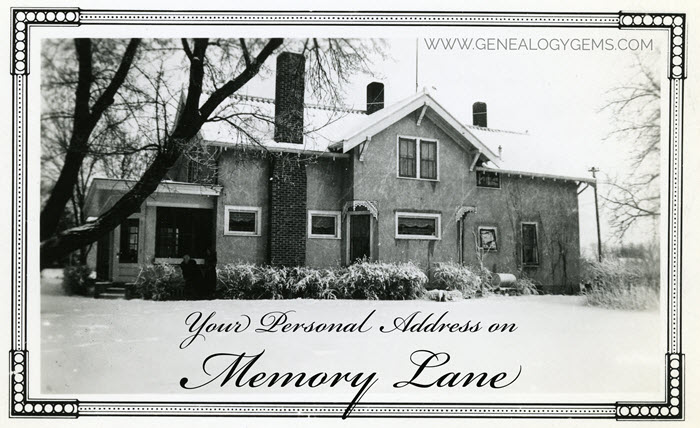
Your childhood home–or perhaps another beloved family home–is your own personal address on Memory Lane. Who wouldn’t love to stroll up to its doors and recapture some memories?
The image above is of my husband’s great grandfather’s home in Winthrop, Minnesota. It’s a home that I have many photos of, have researched, and have come to feel personally connected to although I’ve never seen it in person. It’s one of many ancestral homes that I yearn to visit one day. So as you can imagine, I really enjoyed this report from The Wall Street Journal about a few lucky folks who are living the dream of not only visiting, but owning and restoring, their childhood home.
Even if you’re not interested in buying back an old family home, many of us are curious about the houses we used to love. Are those houses still there? What do they look like now? What else can we learn about them?
Let’s explore three ideas to help you stroll down memory lane. Then, I’ll share a discovery from a Genealogy Gems Premium podcast listener who recently dropped me a line.
1. Find the address for your childhood home
If you don’t recall the street address of your favorite family home, ask a relative or look it up. For U.S. addresses since 1940, you might start with the U.S. Public Records Index, searchable in part or full at Ancestry.com (volumes 1 and 2 for 1950-1993), FamilySearch.org or MyHeritage.com (click here to learn more about that database). Look also in records such as:
For U.S. addresses from 1880-1940, look to U.S. census records, which include street names and house numbers. In the example below from the 1930 census, you can see “Cedar Street” written vertically by the red arrow, and the house number written for each household entry, as shown in blue.

From the 1930 US census, Ancestry.com.
If you can’t find an address on an old record, but you think you could navigate yourself there on a map, it’s time to go to Google Earth and fly yourself there!
2. Use Google Earth to view your childhood home now
Google Earth is your on-ramp to your own personal Memory Lane. Go to the site, enter an address, and watch yourself “fly” to that address. If you don’t know an exact address but you know where to look, enter a street name or even a city. Then zoom in to the neighborhood and street section of interest. Activate Street View, if it’s available. Not sure how to do that? Watch my free Google Earth for Genealogy Video Class to get started.
Once you’ve found the location, take a close look. Is the house still there? What does it look like now? How has the landscape changed? The neighborhood?
You can use Google Earth to revisit your own childhood home or another family landmark, such as an ancestor’s homestead or burial place. (Click here to read about one genealogist’s virtual trip to an ancestor’s business using Google Earth’s Street View, and click here to see how another genealogist used historical map overlays in Google Earth to identify an old home’s location.)
3. Google the address of your childhood home
Googling the address of your family home may produce unexpected and interesting results like these:
a) Sale listings. If your house has been on the market in recent years, you may be able to find a listing with great details, and even pictures of the inside today. Top Google search results from specific addresses often bring up real estate websites with varying degrees of information, such as square footage, current estimated value, year built, most recent sale date and price, and more. Weed through these entries to see whether Zillow or another similar site shows a current or past listing for sale or rent. These may contain more details and may even have interior and exterior pictures of the house as it is now.
Watch closely—Google may bring up houses nearby, not the one you’re looking for. But even a neighborhood listing for a house built on a similar floor plan may jog your memories of the home and may give you a sense of what the area is like now.
b) Historical information. A Google search result may bring up historical news coverage or obituaries from digitized newspaper websites like Newspapers.com (a subscription may be required to view these in full). Or you may find something really fascinating, like a discovery made by Genealogy Gems Premium member Heather. After listening to me talk about this subject in Premium Podcast episode 141 (click here to subscribe), Heather wrote me this email:
 “I love listening to the podcasts while driving to and from work, often sharing my own thoughts with you. This happened yesterday while listening to the latest Premium Podcast episode on family homes. I decided that I had to write and share what I managed to find! Since I have deep family roots in Connecticut back to 1650s, I managed to find a few family homes, but I started searching with the more recent generations and addresses that I knew. The two homes where my great-grandparents (Inez Hart and John Milton Burrall) and my great-grand aunts (Mary and Lucy Burrall) lived were written up in an application for the National Register of Historic Places!
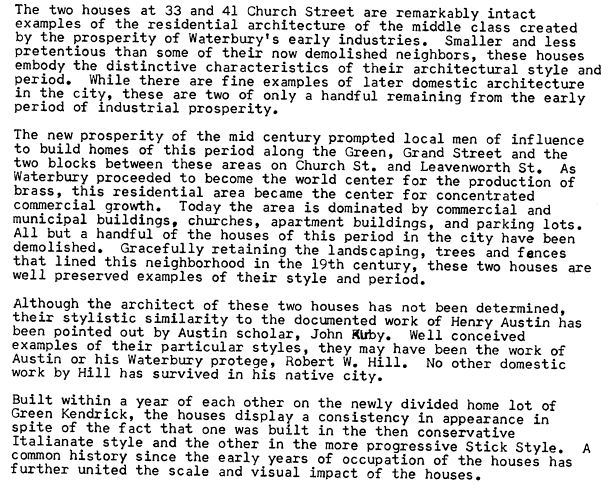
The National Park Service is working on digitizing these applications. I found the application with a narrative description of the home and pictures of the interior and exterior. I have found other applications that have also included some genealogy of the family who lived in the home. Here is the website for the National Park Service and the database search page.”
Thanks for sending these in, Heather! And for sending along copies of the applications she found. The multi-page applications (more than 10 pages each!) include historical background on the buildings and former owners, as well as photos and site maps. Above is a photo–and below is an excerpt–from these applications.
When you’re ready for a full-fledged Google education, take a look at my top-selling book, The Genealogist’s Google Toolbox, and my companion video tutorial series, Google Earth for Genealogy.
Disclosure: This post contains affiliate links and Genealogy Gems will be compensated if you make a purchase (at no additional cost to you) after clicking on these links. Thank you for supporting Genealogy Gems!
by Lisa Cooke | Dec 6, 2015 | 01 What's New, Craft & Displays, Holidays, Memory Lane
Are you looking for a fun, easy and downright delicious way to share some family history this Christmas? What better way to entice your family to have an interest in the family tree than wrapping that history around a luscious chocolate bar?

DIY: Stuff Their Heritage in Their Stocking
I firmly believe that family history should not sit on a shelf, but should be seen, touched, felt and even tasted!
Sometimes when a passionate genealogist shares the family history discoveries they have made, their relatives are less than enthusiastic to hear about it. (Sound familiar? I know I’ve experience this phenomenon.) This lack of interest may be more about the delivery of the information rather than the information itself. The trick is to serve up the family tree in an appealing and fun way.
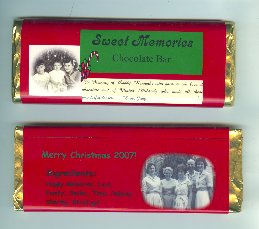
That’s why a few years ago I designed these customized candy bars which I call Sweet Memories. They’re basically your favorite chocolate bar wrapped in a custom label with your own sweet family history memory on it. What could be better than that?!
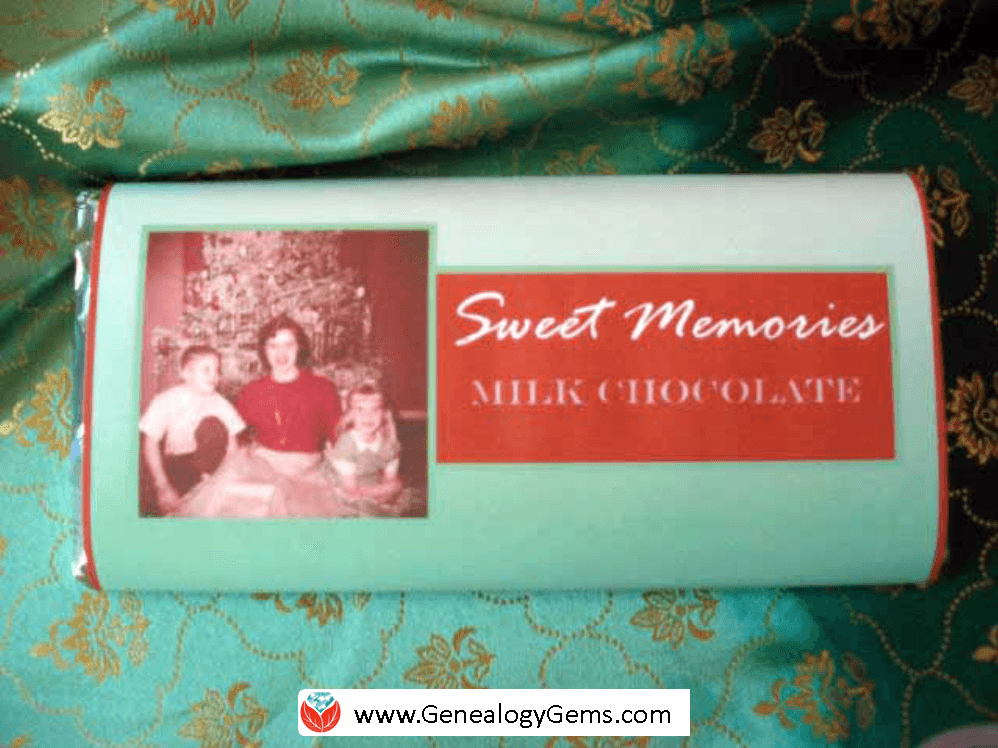
Here’s the first Sweet Memories stocking stuffer candy bar I made for Christmas.
They are really simple to make. The candy bars themselves are store bought. All you need is a computer, printer and some paper and you can whip some up in an hour or so.
What I especially love about these customized delectable delights is the conversation they stimulate. I loved seeing the surprises on the faces of my family, and then the reminiscing that soon followed. They loved seeing the old photos and the clever list of “ingredients” that provided insight into the character of their ancestors.
Don’t feel like you have to do exactly what I did on mine. Instead of a list of ingredients you could include a short funny story, favorite family quotes, or little-known fun facts about the ancestors in the photo. Use your imagination and have fun!
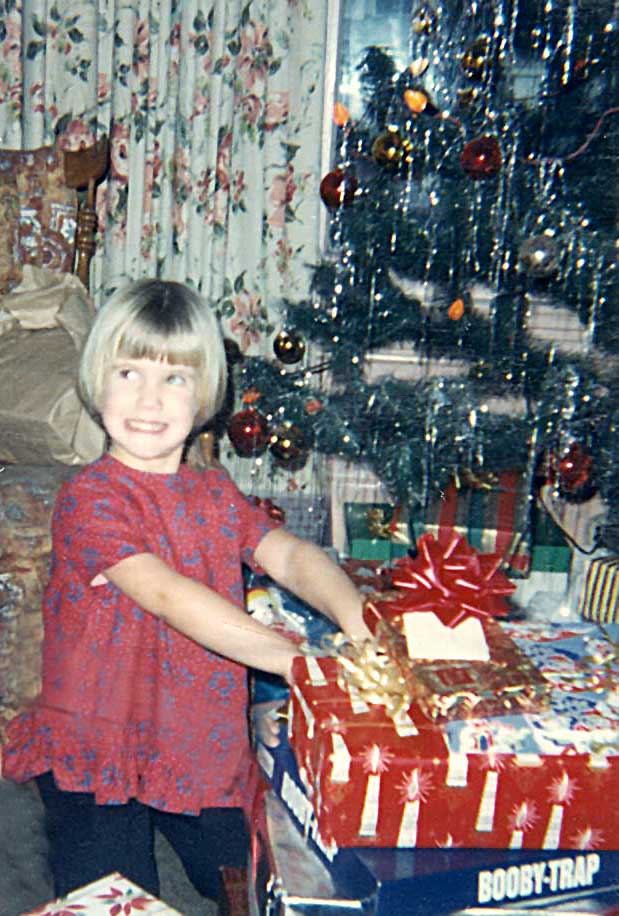
Me having fun at Christmas in 1966. Did you have the Booby-Trap game too? (Leave a comment)
Keep reading because after the step-by-step instructions below, I’ll share some more design ideas.
How to Make “Sweet Memories” DIY Stocking Stuffer Candy Bars
Here’s how to make your own custom labels and turn plain chocolate bars into wonderful holiday gifts for your loved ones.
Start by gathering up the following supplies:
- A 3.67 oz approximately sized Chocolate Bar wrapped in foil with a paper wrapper. (Dove and Cadbury are some of my favorites. Hmmmm!)
- Bright white printer paper
- Computer and printer
- A software publishing program that you can create your label in, like Microsoft Publisher. (Or try using a word processing programming using the text box feature.)
- Double sided tape (I use Scotch Brand Double Sided Photo Safe tape available here.)
- Scissors
- Scanned family photos, especially old holiday photos
These instructions are for creating the labels in Microsoft Publisher, but you could also do it in PowerPoint or any other design type software or app.
1. Create a Rectangle
On the blank page, create a 7 ¾” high and 5 ¾” wide rectangle using the Shape tool. This just gives you a nice outline to work in.
2. Add a Background
An easy way to add an interesting background is to scan a piece of scrapbook paper that you like. The scrapbook paper could be textured or have a repeating design. But you could also choose a favorite digital image.
Use the INSERT IMAGE function to get the image onto your page. Next, resize it to fit just over the rectangle that you created.
Another other option for the background is to select the rectangle and use the FORMAT FILL COLOR function to color the box with the color of your choice. I used green and then chose a gradient that went from light to dark for added interest.
3. Add an Old Photo(s)
You can add any digitized photo that you like. Dig through your old family photo albums to find Christmas photos from the past, or simply feature an ancestor or family. You can use the same photo for all your stocking stuffers, or surprise each member of your family with a candy bar featuring a different ancestor.
Use INSERT IMAGE to add your photos and resize them to fit.
For the front side image, I measured down approximately two inches from the top of the label, and that is where the top of the photo was placed. I set it ¼” from the left edge. Both photos are about 2” x 2”.
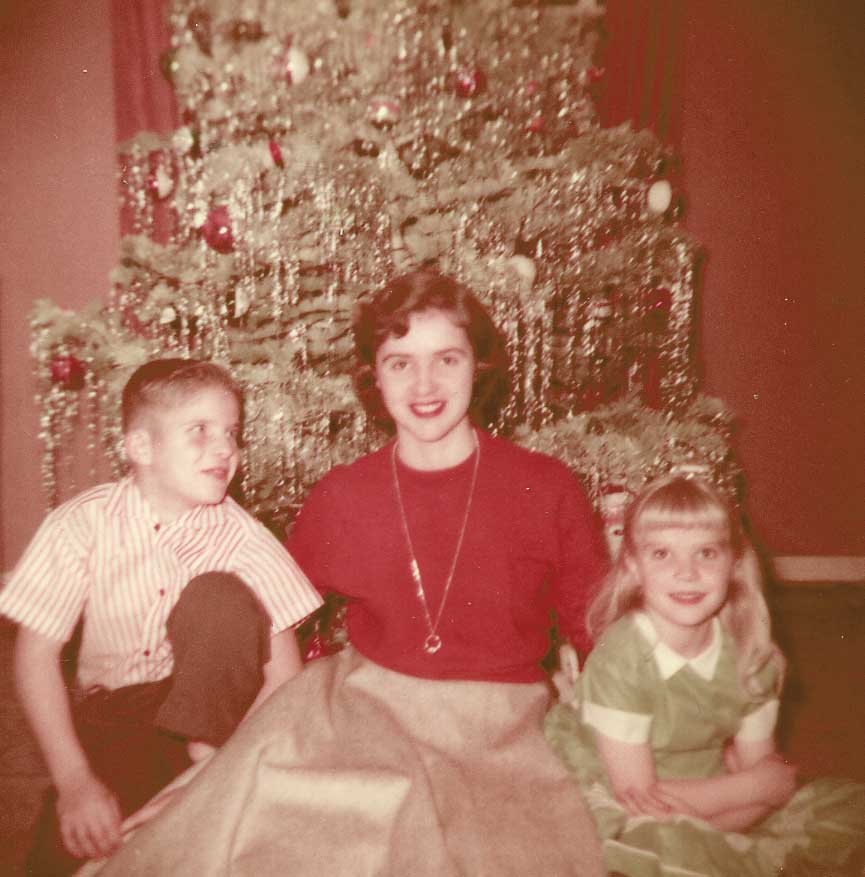
My uncle, mom and aunt in 1956. I used this photo for the front side of my stocking stuffer candy bar label.
4. Adding Photos to the Back of the Label
The backside photo begins 5” from the top of the label and is set ¼” from the left edge.
You may also want to include a small text box that states the date and location of the photos and the names of the people.
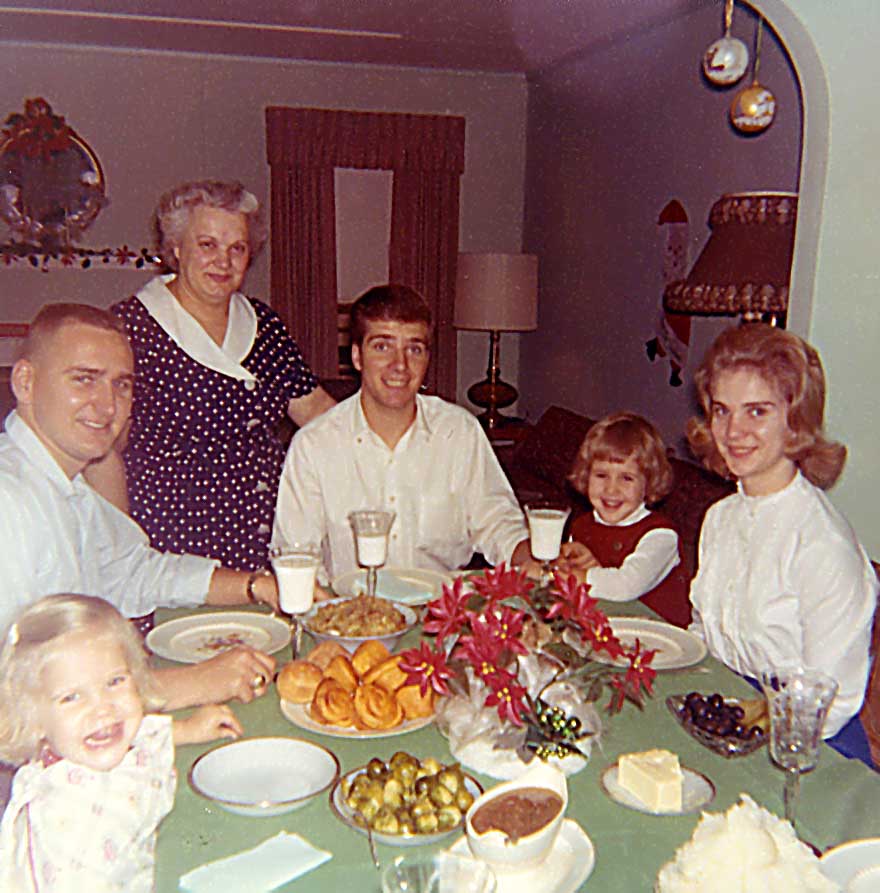
Christmas Dinner at Grandma’s House (I’m in the bottom left corner, mouth wide open as usual.) I featured this photo on the backside of my label.
5. Add Descriptive Text
The last step is to insert the text boxes.
Both the “Sweet Memories” text box and the “Ingredients” text box that I included are about 3” wide and 1 1/4” high. You can format them with the borders and colors that you want.
In my example, you’ll see that I took the color cues from the colors in the photos – the crimson red and soft green. Many apps have a color picker feature that will allow you to get an exact match.
 6. Add the Ingredients List
Every food item has an ingredients label on it, and this bar is no exception. I had some fun with the ingredients list and played up the family theme. I thought about my memories of my Grandmother and the values and elements she poured into each holiday. So my ingredients list reads:
- Love,
- Family,
- Attention,
- Politeness,
- Grandma’s Cooking,
- Smiles,
- Caring
- and Time.
Feel free to reflect your own family values in the list.
7. Print Your Label
Once you’ve got everything laid out on the screen the way you want it, it’s time to print.
From the menu, click FILE then PRINT and then click the PROPERTIES button. From this window be sure to select “high resolution paper” or “high brightness” as the media type, and select HIGH for the print quality to make sure you get the best, most professional looking label.
Print the label, then carefully cut it out.
8. Fold the Label to Fit
Follow the folding guidelines shown above, but keep in mind that your candy bar is going to dictate your actual fold lines.
The first fold line for my standard size Cadbury chocolate bar (which you can buy in bulk here) was 1 ½” from the top of the label and the second fold line is 4 ¼” from the top of the label.
(Disclosure: Genealogy Gems is a participant in the Amazon Services LLC Associates Program, an affiliate advertising program designed to provide a means for sites to earn advertising fees by advertising and linking to Amazon.com. Thank you for supporting articles like these by using our links.)
9. Tape the Label Closed
Remove the original wrapper of the chocolate bar, being sure to keep the foil wrapper in place and undisturbed. Use a small piece of double sided tape to stick the label to itself on the backside snugly.
And there you have it, your own custom family history themed chocolate bar! It’s ready to tuck into a Christmas stocking, use at your next family reunion, or at any other time you want to tickle someone’s sweet tooth and share memories.
More DIY Stocking Stuffer Design ideas
I promised you more examples of these Sweet Memories candy bars. Here are some from my Genealogy Gems Podcast listeners.
I love the vignette styling Judy gave her family history photos.
Genealogy Gems Podcast listener Judy shared her version of the Sweet Memories stocking stuffer candy bar.
And this listener took this DIY idea and used it to create candy bar treats for her family reunion. What makes these SO unique is that she used a family heirloom crocheted blanket for her background image. (How clever is that?!) She spread the blanket over the bed of a scanner to make a digital image of that she could use on the label.

Click here for more family reunion ideas.
Get more DIY project here at Genealogy Gems. You’ll also find great heritage crafting ideas–including photo displays and heritage quilts–on my Pinterest boards. If you enjoyed this idea I’ll hope you’ll share via Pinterest or Facebook. Did you like this idea and do you have other suggestions for a new spin on it or a favorite DIY family history project? I’d love to hear it so please leave a comment below.
by Lisa Cooke | Sep 19, 2015 | 01 What's New, Apps, Genealogy TV, Google, images, Smartphones, Technology, YouTube
 Here at Genealogy Gems we love using Google for genealogy. Today we have another exciting Google resource that can transform how you share your genealogy with your family – because ultimately, genealogy is all about sharing your family’s story!
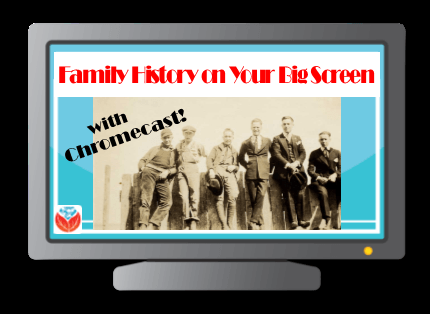
While the mobile device era has made communication and sharing easy and instant, sometimes it’s hard to really see the ‘big picture’ on our tiny screens. And crowding around the computer monitor isn’t much better. Chromecast by Google is a tool that allows you to stream content from your mobile devices and computers directly onto your TV!

 You can share slideshows, photos, videos, and more while everyone is seated comfortably in the living room. If you are looking for an easy and inviting way for your family to enjoy all the hard work you put into constructing the family tree, Chromecast is for you. The Google Chromecast HDMI Streaming Media Player currently sells for $35 and takes a mere 5 to 10 minutes to set up.
Even though I’m Lisa’s daughter, I am not a techie person at all, so if I can do it in just a few minutes without help, you can too!
How to Use Chromecast
After you’ve completed the initial set up, simply open the app you want to stream (YouTube, for example) and tap the Chromecast icon. Streaming is now enabled. (Chromecast primarily works over wifi, but Google recently announced that Ethernet cables are now available as an alternative.)
While streaming, you control the app functions on your mobile device or computer. For example, if you’re streaming a movie from the Netflix app on your iPad, you would play, pause, and make your selections directly on your iPad. If you want to switch back to viewing on your mobile device (or simply stop streaming), tap the Chromecast icon again.
Dozens of photo and video apps are compatible with Chromecast and all are listed on their website. Here are a few that I think genealogists will really enjoy, and they’re all available on both The App Store and Google Play:
 Photo Cast for Chromecast
Free
Premium Upgrades – $2.99 and up
 When you open the app, you can view all the photos and videos (including TV shows or movies you may have purchased) on your device. You can also create slideshows by picking individual photos or entire albums and adding songs from your music library. Then tap the Chromecast icon to instantly stream to your TV. It has four viewing modes available. Photo streaming has very little lag, but video streaming could take a little longer to load, depending on your wifi speeds. Multiple devices can stream to the same TV, and slideshows can continue to play on the TV while you use your mobile device for other tasks.
 Google Slides
Free
Google Slides is an ideal tool for Chromecast because it is linked directly to your Google account. I recommend using Google Slides from your laptop or desktop because you can pull pictures from your hard drive (or anywhere – you’re not limited only to the pictures on your mobile device). And personally I find I can work much more efficiently with a full mouse and keyboard for this kind of project. You can create a wonderfully detailed and multi-media slide show or presentation. Then, download the app to your mobile device and your presentations will be accessible there as well. I find streaming from your tablet works a little better than streaming from your computer, but you can still stream from a computer as long as it’s connected to wifi and is close enough to the TV to detect Chromecast.
 YouTube
Free
 Chromecast offers you an easy and convenient way to watch videos from our Genealogy Gems YouTube channel and other favorites on your TV! Open the YouTube app and tap the Chromecast icon. Browse videos as usual. When you select one to watch, it will stream to your TV with no loss of video or audio quality. You can also create a TV queue, specifically for videos you want to watch on the big screen. Tap on a video and a pop-up will ask to either play it or add it to your TV queue. The best part? YouTube will continue to play your video on your TV even if you minimize the app on your device to do other tasks. Before you finish your viewing session, be sure to tap the Subscribe button at the Genealogy Gems YouTube channel so you’ll have easy access to all current and new videos.
Desktop Streaming
Streaming from your desktop browser is another great feature. Anything you are viewing on your browser (videos, audio, website content, etc.) can be projected to your TV. You will need the current version of the Chrome web browser, as well as the Chromecast extension installed. In my personal experience I found streaming video from my browser to be a bit slow and choppy, but results may vary based on browser settings and wifi speeds. It’s worth a try, and I wouldn’t be surprised if this technology continues to evolve and improve.
TIP: How to Update Chrome
Normally, Chrome updates automatically in the background when you open and close your browser. But here’s how to check if you have the most current version of Chrome:
- Open Google Chrome.
- In the top right, click the Chrome menu
- Click About Google Chrome.
- The current version number is the series of numbers beneath the “Google Chrome” heading. Chrome will check for updates when you’re on this page.
- Click Relaunch to apply any available update.
Another cool thing about Chromecast:
Once you have Chromecast set up, your devices will detect any Chromecast that is nearby, whether it’s yours or someone else’s. So if you’re at a family member’s home and they have Chromecast, you can stream from your device to their TV as well! Can you say “time to share the latest version of the family tree?”
Again, as a non-techie I found Chromecast to be very user-friendly, and a huge value for the price. There are loads of fun apps to explore (music, podcasts, interactive games, and even a karaoke app!). Happy streaming!
 P.S. If you decide to purchase Chromecast, will you please use this link? Purchasing through our site supports the free Genealogy Gems podcast and all the free content on our website.
by Lisa Cooke | Aug 14, 2017 | 01 What's New, Court Records, Records & databases
Lydia thinks her great-grandfather was murdered–perhaps even by her grandfather! Here’s some advice for her and everyone researching “cold cases” for criminal ancestors on your family tree.

I heard recently from Lydia with these intriguing questions:
My great great grandpa William John Gabriel Nelson disappeared one day, never coming home from work. It was family lore that he had been “shanghai’d.” But even as a child the story didn’t add up. [Through a] few other mentions of the account throughout the years, and recently reconnecting with cousins through Ancestry.com/DNA and your advice to just email DNA matches, I have a growing reason to believe my great-grandfather was murdered. An even bigger fear is that my grandfather may have been the one to do it.
All parties involved with this are now dead, so follow-up is impossible with them. But I’m wondering about contacting the Los Angeles Police Department (LAPD) or the library to determine if indeed there was a cold case, missing persons report or John Doe. Since this happened in the mid 1940’s, would I contact the LAPD or is this now a job for a historian?
As a citizen, Lydia can certainly contact the LAPD here. It might take a bit of persistence to get to the right person or resource. I would start by asking for how you can find out the status of a cold case from the year in question.
Here are 4 ways to follow up on your own criminal ancestors’ cold cases:
1. Look for cold case files online.
As I often say, all good searches start online because they will help you prepare to go offline. In other words, not everything is online, but searching online first will give you a lay of the land, revealing what is available, who to contact, and where to go in person. Start with a Google search such as LAPD cold cases. The search results include several good leads:
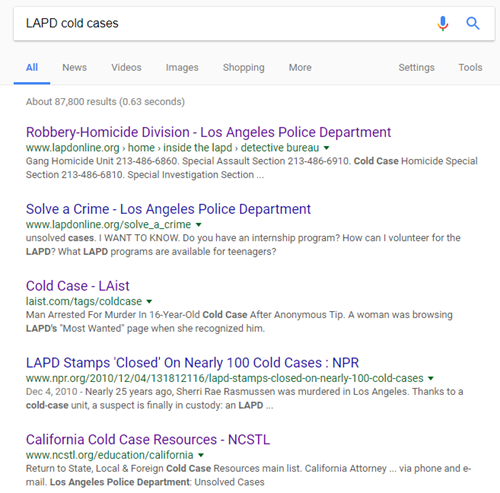
With a case like Lydia’s that is over 70 years old, I wouldn’t expect to pull it up in an online database (though you never know!) But I do see several sites here that provide phone numbers to gain access to those who can lead you in the right direction.
2. Search Google for clues.
 Use Google’s powerful search technology to look for online mentions of the names, places, and dates of your particular case.
In Lydia’s case, she might begin with keywords relating to her great-grandfather’s disappearance, with his name, year, and the place he was last seen. Including descriptive keywords such as disappear, mystery, vanished or murder might also yield helpful results.
Learn more about effective search techniques in my book, The Genealogist’s Google Toolbox, Second Edition.
3. Check old newspapers.
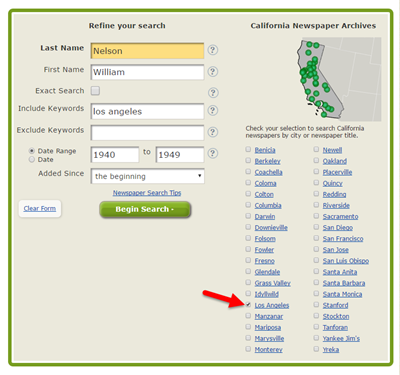
Newspapers in your ancestor’s hometown (or further afield) may have mentioned the incident. With a common name like William (or Bill) Nelson, you may need to weed out the overabundance of unwanted results you get. Let me show you how I did this in
GenealogyBank, a popular genealogical newspaper website:
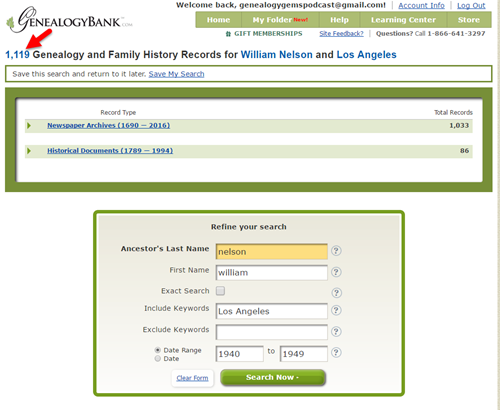
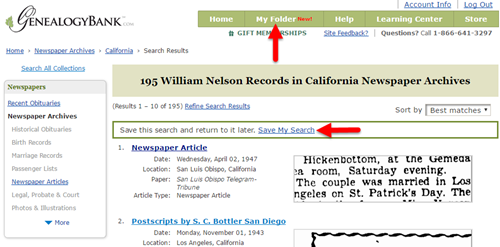
The initial results of searching GenealogyBank (above) for the terms William Nelson and Los Angeles brought up over 1,000 search results! (The red arrow points to the tally.) Since I don’t like wasting valuable research time on irrelevant results (who’s with me?!), I refined the search. I specified Nelson as a last name, William as a first name, Los Angeles as a keyword, and I added a date range: the decade during which he disappeared. Next, I limited my search to Los Angeles-area newspapers, shown below:
This search narrows results down to under 200: a robust number, but at least manageable to look through for relevant material.
I want to be able to use these same search parameters in the future, so I click
Save My Search. The search now appears in
My Folder for future reference.
4. Look for criminal records.
 If you knew (or suspected) that a relative was prosecuted for a crime, it’s time to start looking for records relating to the criminal case. There may be several kinds:
- In cases of suspicious death (where there was a body, unlike Lydia’s case), look for any surviving coroner’s records.
- If a trial may have occurred, research the jurisdiction to find out what court would have handled it, and then look for files relating to the case.
- If an ancestor may have served time, look for prison records. Genealogy Gems Premium podcast episode 29 is devoted to the topic of prison records.
Get inspired!
Read this article about a woman who was researching not one but two mysterious deaths on her family tree.
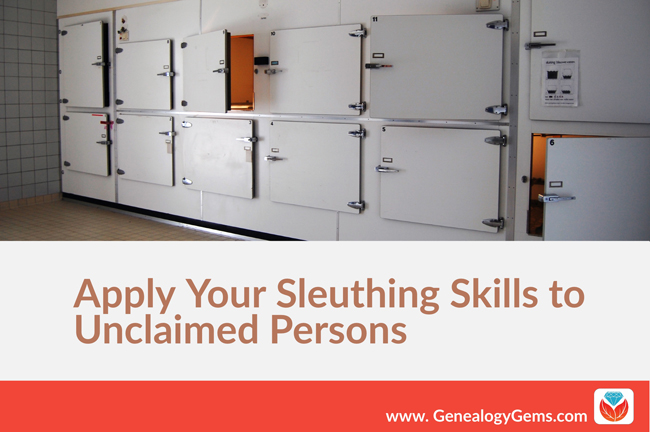
Want to help investigators lay to rest their own cold cases?
Click here to read about the Unclaimed Persons Project and how you can help.