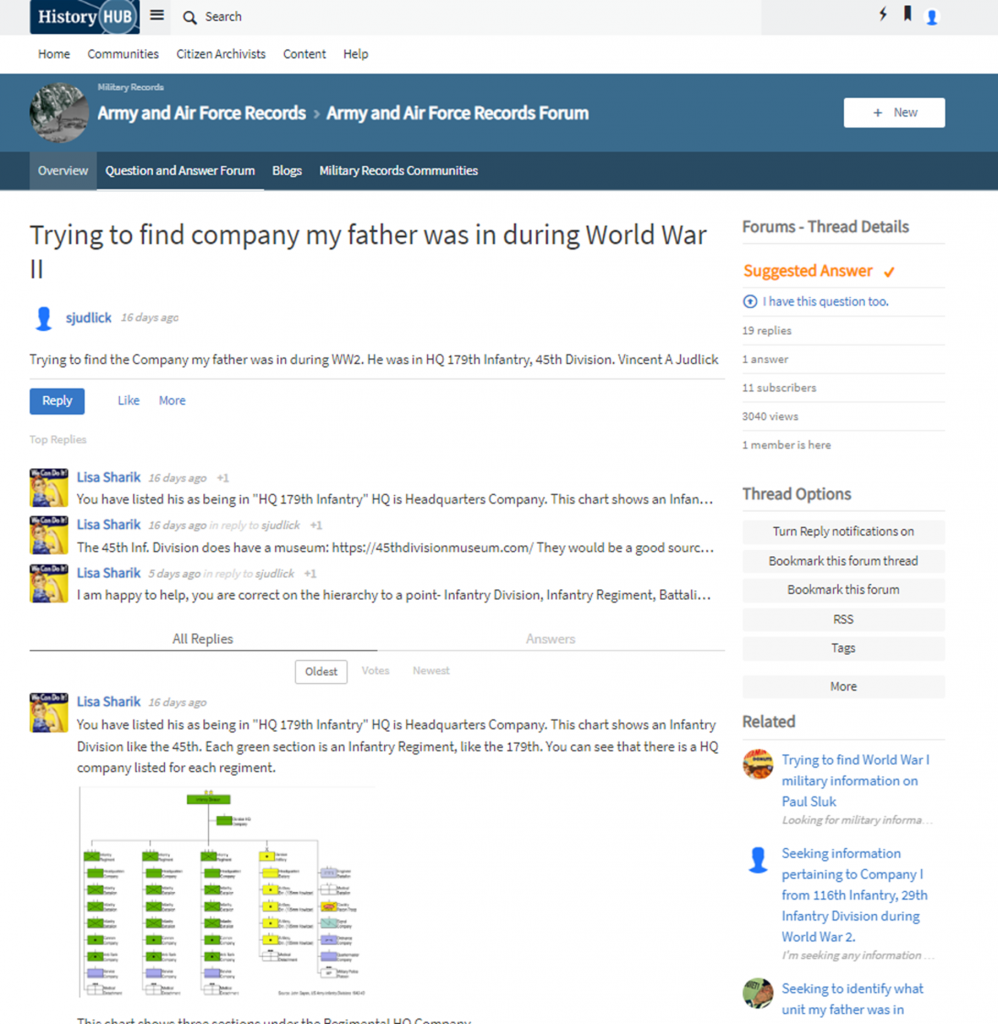
Show Notes: Are you trying to work on a genealogy brick wall, and you think the records you need might be at the National Archives? In this video, I’m going to show you a new way that you can get answers and hopefully get the records quickly.
The National Archives is a great place to do that, but as I’ve mentioned before in this video, their website can be a bit daunting. However, I’ve got some good news. They have updated the website, and tucked away in that update is a special area where you can ask questions and get answers from many different sources including the staff at the National Archives.
It’s called History Hub. This updated platform is a place where the staff will actually answer your questions. You’ll also get responses from other archivists, librarians, museum curators, genealogists, and history enthusiasts. We all have areas of expertise and a wide array of experience, and the new History Hub makes it easier to help each other.
Before you can ask a question or help answer a question, you’ll need to register for a free History Hub account. To do so, click the Create your History Hub account now link on the home page. Type in the account name you want, enter your email address and a password and click the box to agree to the terms of service.
If you are a returning History Hub user, you will need to reset your password and re-accept the community Terms of Use when you first log in.
Be aware that accounts that have not been used for over 1 year are automatically deactivated. So, you can email them at historyhub@nara.gov and they will reactivate your account.
Searching History Hub
Searching for answers at the History Hub is pretty simple and easy to do. You can enter your question in the “Ask” field on the History Hub homepage, or within a specific community. And we’ll talk about communities in just a second.
Let’s first ask a question. There’s a very good chance that someone else has already asked a very similar question to the one you have and there may already be a lot of contributions that will have the information you need.
Go to History.gov and type your question or some keywords into the Ask box. Don’t click the Ask button just yet. Give it a second to show you any potential answers that are already on History Hub. They will appear as a list below the Ask box.
Again, those answers will build up over time, so if when you ask your question you don’t see a similar answer, that’s OK. Go ahead and click the Ask button now and you’ll be taken to a page called Ask a Question in Researchers Help where you can write up your question. Include any relevant information you already know, such as names, dates, and places, and also mention specifically where you’ve already looked. That’s going to help them help you.
You can also add Tags to your question so that if someone searches for a tag, your request will also pop up. And be sure to check the box at the bottom so that you’ll be notified when someone replies to your post.
There are a couple of things to understand and keep in mind. First, all questions are public. So don’t post your phone number or other personal information about you or other living people.
Second, all questions are reviewed and moderated to make sure they comply with History Hub’s Terms and Conditions which again you can read when you sign up for your account. They only moderate and answer questions on weekdays during regular business hours, so patience is a virtue here.
In addition to the Ask a Question box, you’ll find a search bar at the top of the page. This search field searches the entire History Hub website. It’s very similar to the Ask a Question search bar in that once you enter your search terms, you’ll want to wait and let it populate possible answers that are already on the website. It will show you Forums, blogs and communities where your terms are being discussed.
You’ll also find a link to Advanced Search in the bottom right corner of that prepopulated list. This gives you a place to filter down in several creative ways which is very handy if you’re looking for information on a pretty broad topic or one that has had a lot of activity on History Hub.
History Hub search example
They even give you an RSS feed for your specific query. So, if you use an RSS reader to follow blogs and podcasts, you could add this link to it to sort of bookmark this search and keep up to date on the activity on this topic. If you don’t use a Feed Reader currently, but that sounds interesting to you, check out a feed reader like https://feedburner.google.com/ or just google Feed Reader.
Browsing History Hub
Even if you don’t have a specific question, History Hub is worth browsing. There are a couple of ways to do that.
Top Questions where you can look through the most popular questions and topics. This also includes threads from related forums. Use the filters underneath the title of this section to focus even more.
Activity Stream which features the most recent conversations.
Explore Communities. History Hub currently hosts 19 communities, including “Researchers Help,” Military Records, Genealogy, and more. To see them all, click on Communities at the top of any page on the History Hub website.
At History Hub you can not only ask questions, you can also answer them. Since all of us have expertise in our own areas of genealogy, History Hub encourages everyone to share their knowledge and experience with other users who are new to archival and genealogical research. So, you can help out a fellow genealogist by clicking Reply at the bottom of their post and sharing what you know about the topic.
Notifications, Updates, and Subscriptions
As I mentioned before, this site is building up content over time. So, you’re probably going to want to follow topics, and History Hub offers a couple of ways to do that.
Forum Updates & Notifications
If you’re interested in following a particular topic, such as Census Records, or Army and Air Force Records, you can get updates by email and on the platform for all new questions and answers in that specific forum. To do that, click on any community’s Question and Answer Forum tab, then click the Turn Forum notifications on link in the sidebar of that Forum’s homepage.
Subscribe to Community Updates
You can also receive daily or weekly email updates within a specific community, including new blog posts and questions. To do that on any Community Overview page, click “Email digest options” in the right column sidebar.
Getting Help with History Hub
History Hub Help Files: Getting Started. Again, this website is newly revamped, so they are still working out the bugs. You can report any problems or ask questions in theTechnical Help and Support Forum.
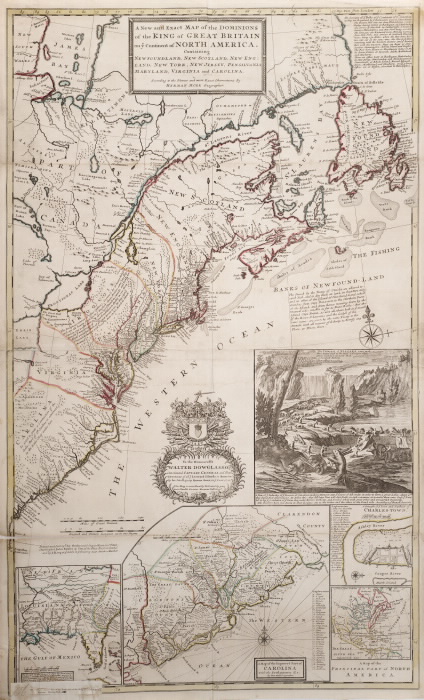
The Beaver Map, 1715. By Special Collections Toronto Public Library. Flickr, via Wikimedia Commons.
Recently I’ve seen two calls for volunteers to help “georeference” old maps. Basically, you’re tagging the maps in a way similar to tagging photos of people on social media sites. This makes finding old maps online easier and more accurate. It also allows sites to overlay the old and new maps. “Some places have changed significantly or disappeared completely, creating a puzzle that reveals an exciting contrast,” explains the British Library.
These two sites are asking for volunteers:
The British Library Online Gallery.The British Library is asking for volunteers to help georeference 50,000 maps it’s put online. Go right to the site and you’ll see the invitation to help on the home page. You’ll also see that you can click on a tab to search maps that are already georeferenced! The British Library tells its volunteers: “Your name will be credited, and your efforts will significantly improve public access to these collections. Contributors can see the results of their work, as well as the progress of the pilot and other participants, and the top contributor will be publicly announced.”
David Rumsey Historical Maps. This mega-maps site is also looking for volunteers to help add locations to its online map collections. On the home page, click on the left where it says Georeferencer: Help Add Location to Maps.
We blog about maps a lot here at Genealogy Gems. To learn more about using old maps online and for genealogy, go to our home page and search on the Maps category on the lower left side of the page. Additionally, Genealogy Gems Premium members have access to full-length video classes like these:
Here’s how to remove damage from photos, such as those commonly found on Polaroid Land pictures. It’s a simple digital photo restoration technique you can use to improve your old family photos. See how Lisa Louise Cooke cleaned up a precious family photo as a surprise for an guest she interviewed—and his touching response.
Last month, I asked esteemed film historian Sam Gill to send me some photos of himself that I could include on the “show notes” page for Genealogy Gems Podcast episode #215.The episode features our conversation on silent films, and the glimpse of early 20th century life that they provide.
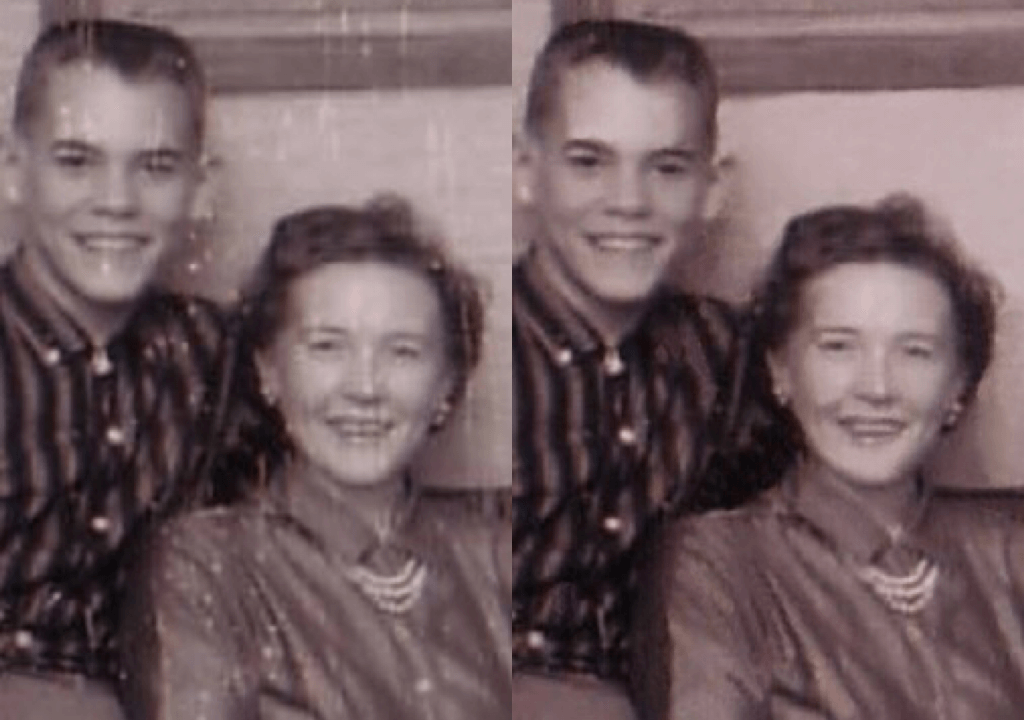
One of the images he shared captures him (when he was in high school) and his mom. Sam told me that it was taken at the time when he started helping her with their family’s genealogy.
“I seem to have only one photograph of my mother and me at that time, which was what they called a Polaroid Land Pictures photo,” he continued. “In the days before selfies and digital cameras, this was a way to have a photo miraculously developed in sixty seconds. That was considered a miracle of photography at the time.
“Although these photos tended to leave streak marks and other blemishes, it’s all I got! I am hoping you might get a kick out of seeing this young kid and his intelligent, forever-curious and talented mother, Florence Louise Jones Gill (aka Mom).”
After learning how much the memories behind that photo meant to Sam, I took the liberty of doing some quick touch up work on it. It’s not perfect, but it’s certainly cleaner:
A treasured old photo of Sam and his mom.
You can try the same techniques I used to remove damaged areas from photos you’ve digitized. It’s easy and free! So, follow along with me, and then keep reading for Sam’s response to receiving the cleaned-up photo.
How to remove damage from photos
(Update) In the past I have downloaded and used the free Adobe PhotoShop Fix app. However, the Adobe Photoshop Express app has now taken its place. You can download it onto your phone or other mobile device for free from the App Store or Google Play. You will find the Retouch feature as a Premium feature.
Then follow these steps:
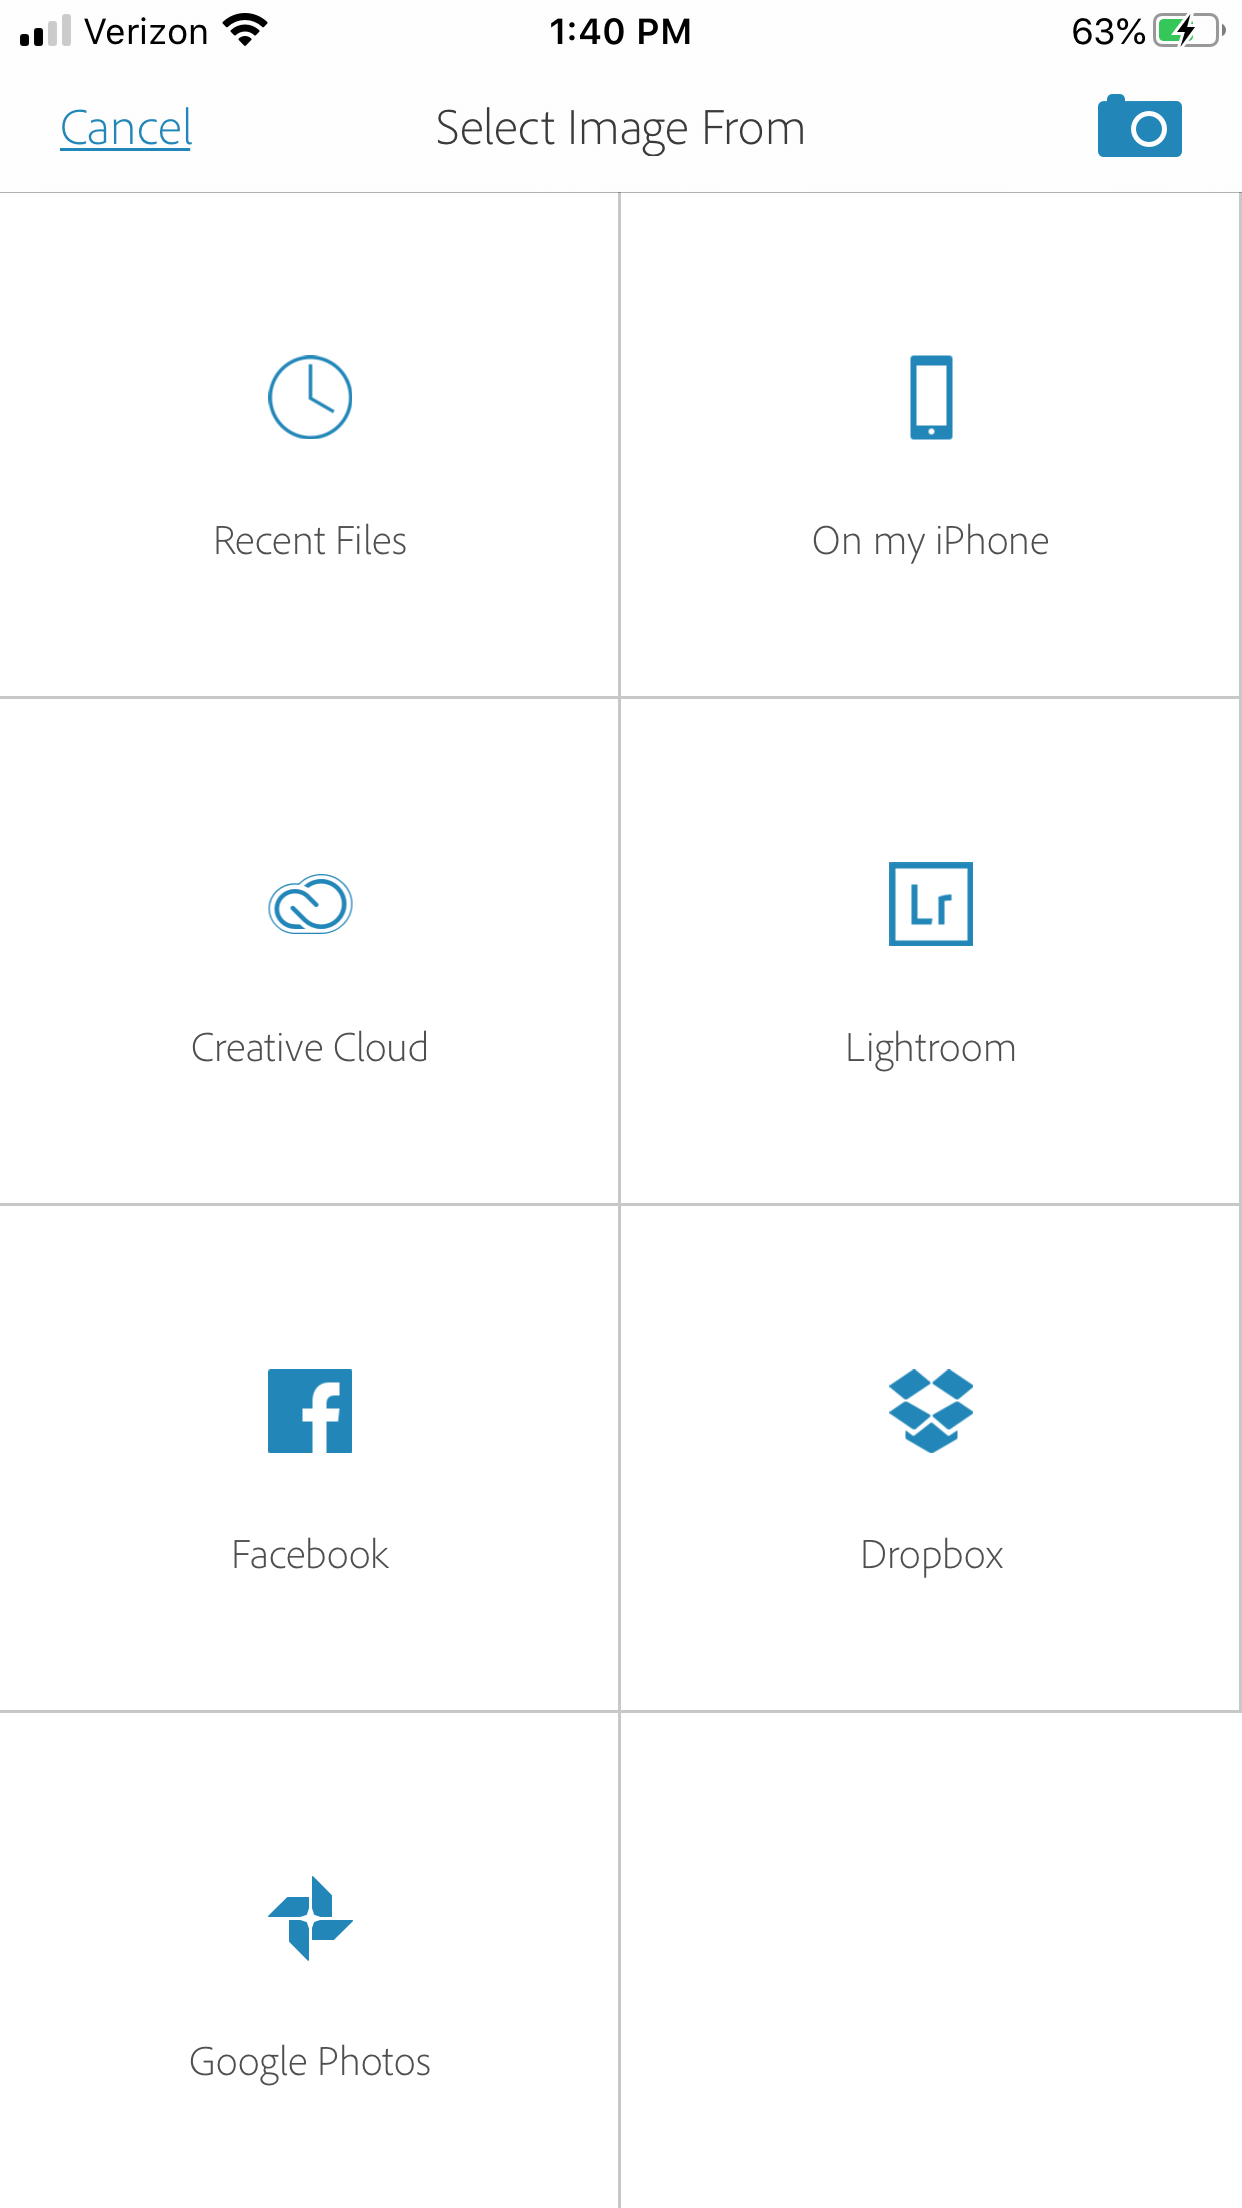
1. Add a Copy of the Digital Image
Open the app and tap the Plus sign to add your image. Don’t work with the original photo file. I save mine in Dropbox, but you can also pull your image copies from your phone, Adobe’s Creative Cloud, Facebook or Google Photos.
Tap the plus sign and select the location of your photo.
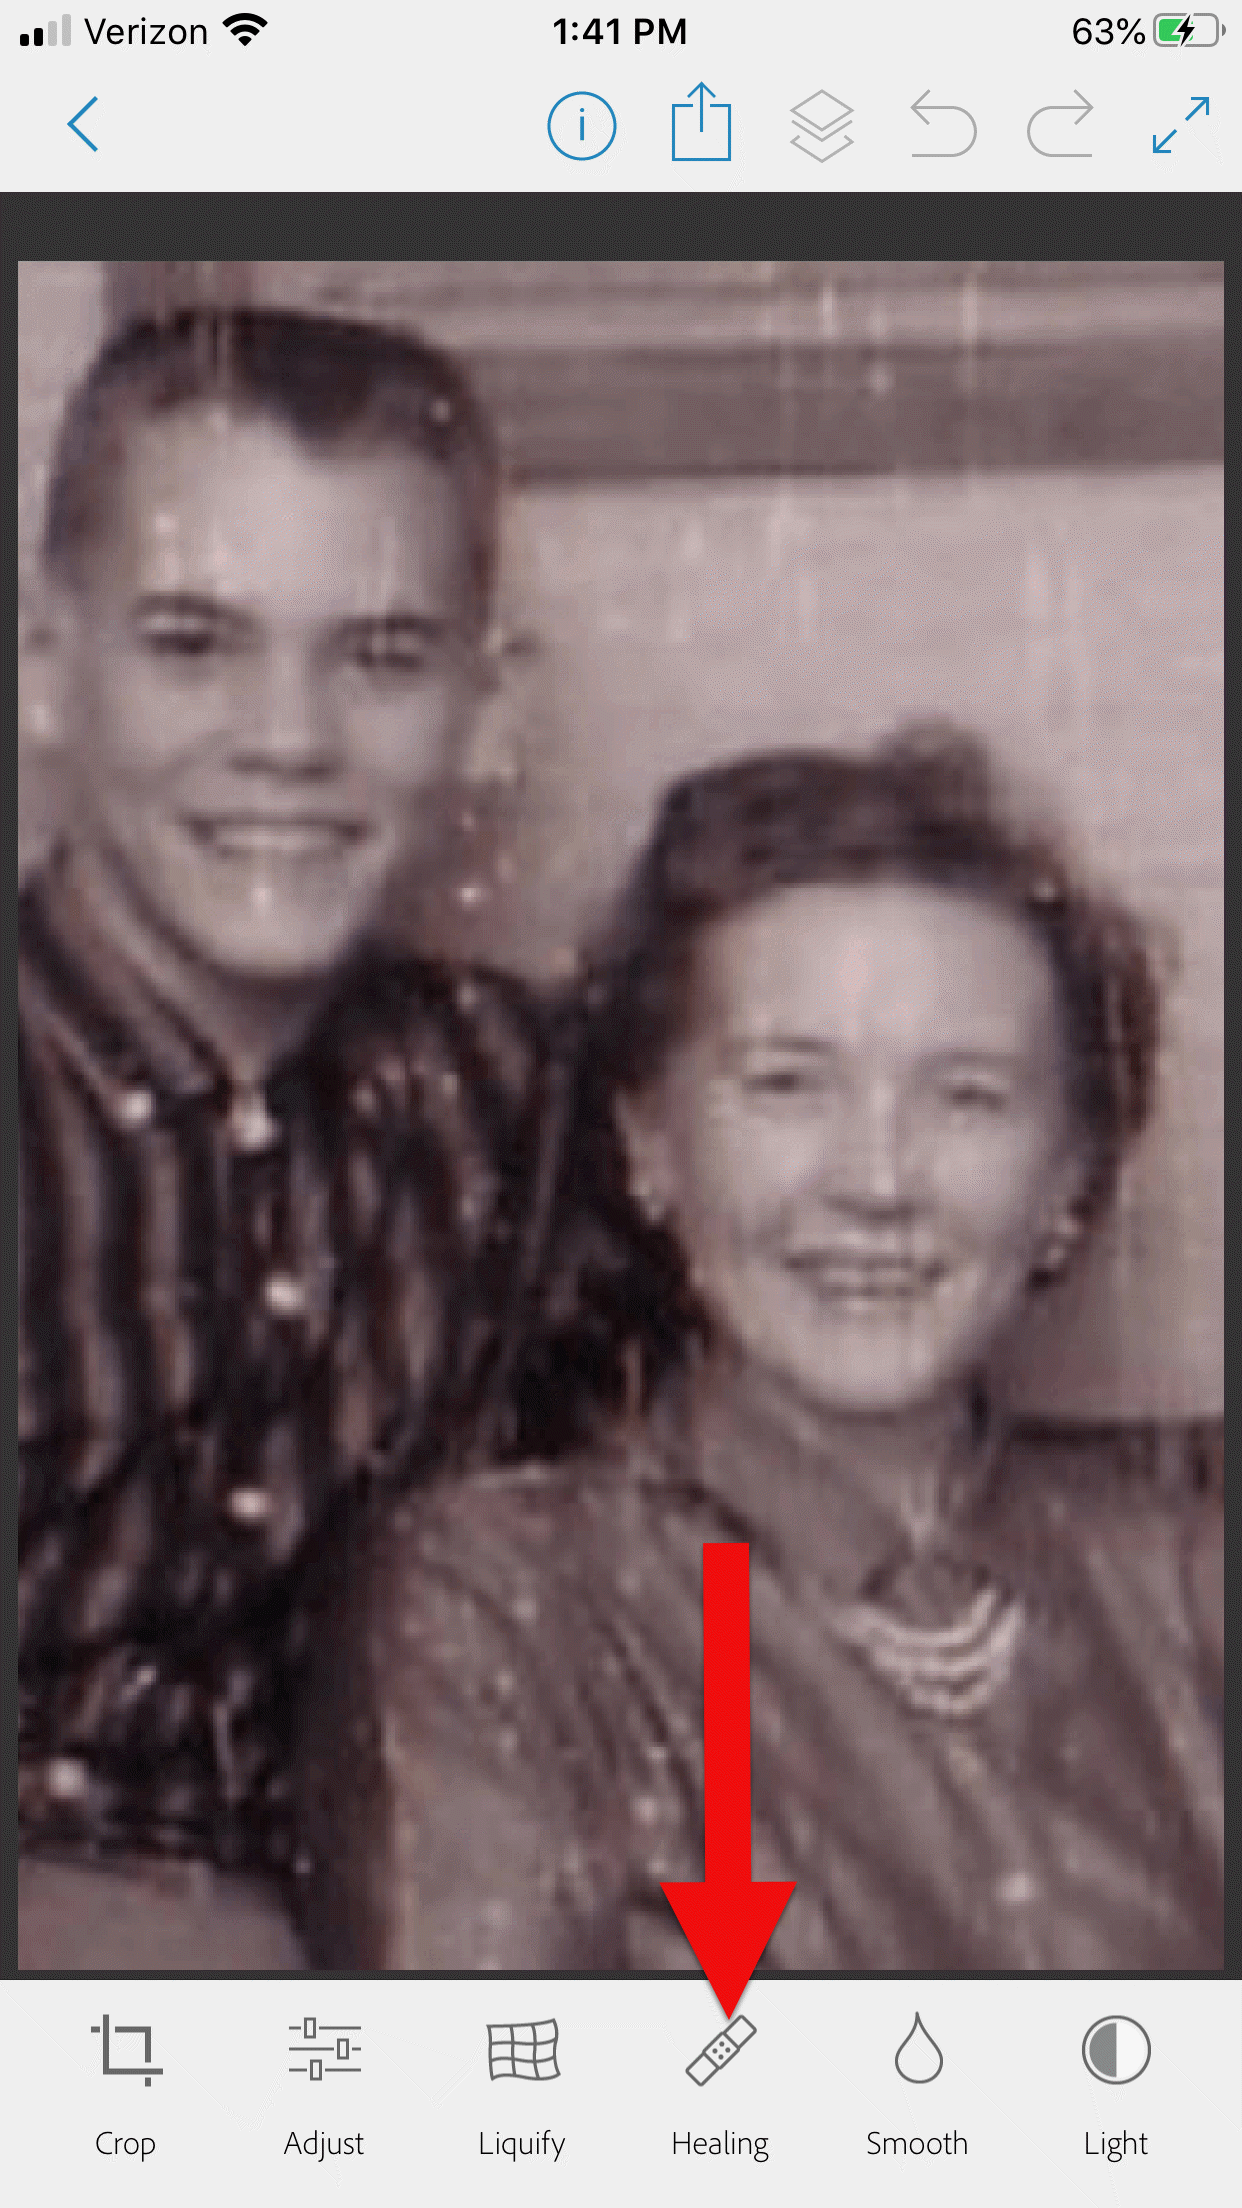
2. Tap Healing in the Menu
This will get you to the tools you will need to do the restoration.
3. Start with Minor Repairs
Start with the easy stuff (don’t go for the face right away,thought it’s tempting). Work on clothing and the backdrop first so you can get a feel for the repair work and refine your retouching movements.
4. Apply the Spot Heal Tool
Use Spot Heal first and see if it takes care of the problem area. Don’w worry about making mistakes. You can always tap the Undo at the top of the screen if you’re not happy with the results.
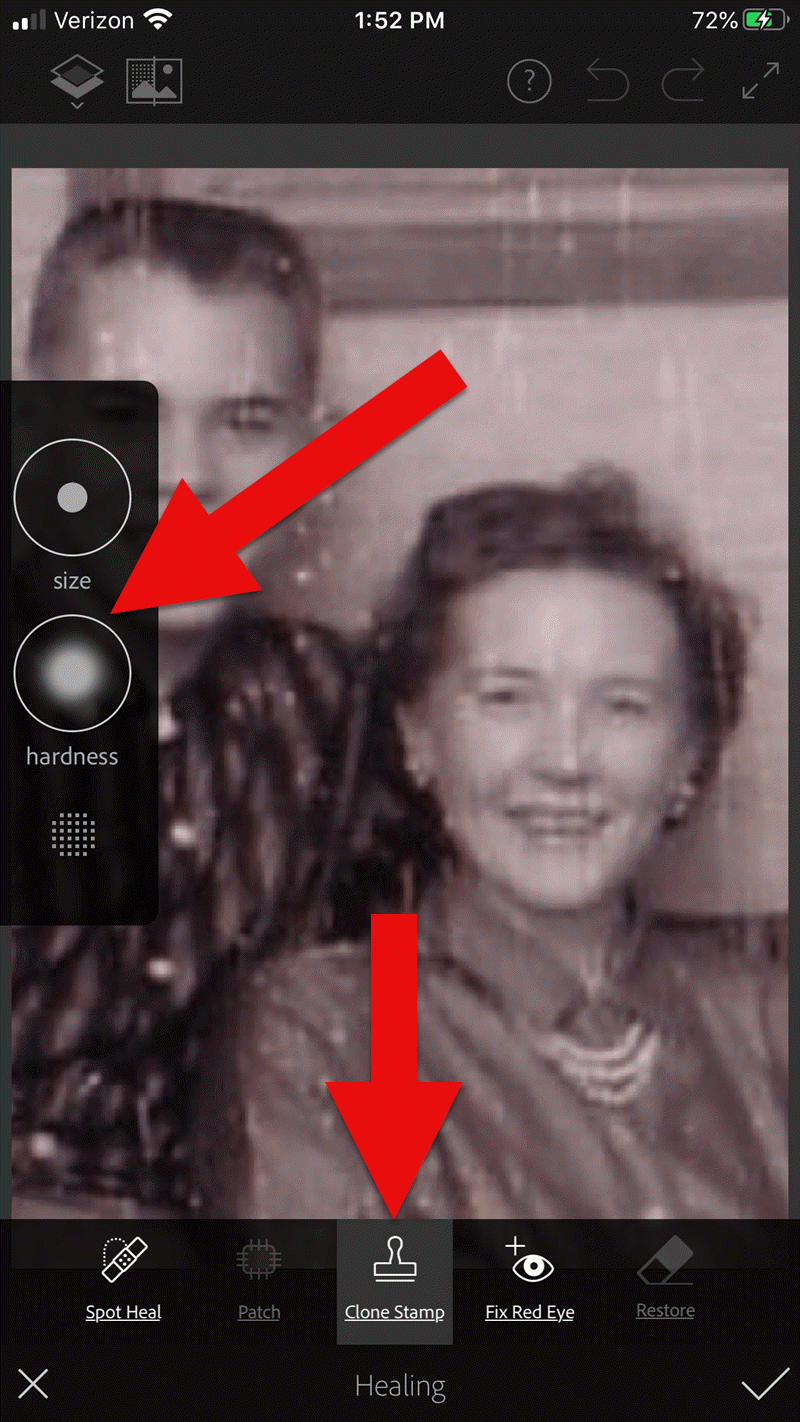
5. Apply Clone Stamp
Use the Clone Stamp tool to select an area on the existing photo that you want to duplicate to cover up a damaged area. For example you can select an unblemished area of the backdrop, duplicate it, and then “paste” it over a blemished area of the backdrop. Keep in mind that even in a single color backdrop, there can be shading, so move the clone stamp around to replicate it accurately.
Tap Clone Stamp in the menu, and use the tools on the left to adjust.
You can adjust the size of the clone stamp selection tool by tapping “Size” in the pop out menu on the left. Selecting “hardness” will give you the ability to cone with a sharp edge or a more feathered edge which is a bit more forgiving when covering another area.
6. Zoom for Greater Detail
Zoom in for better accuracy. To do this, put two fingers together and then them spread apart to enlarge the area.
While zooming in can give you greater control, if you get too close you may start seeing individual pixels (depending on the size and resolution of the original photo) and those can be much trickier to change accurately. Zoom back out often to “stand back” and inspect your work!
7. Adjust as Needed
If you’re going to zoom in, take the time to adjust the size of the tool you are using, whether it’s Spot Heal or Clone Stamp. You can adjust the size of the circle and the “hardness” by tapping the tab on the left side of the screen.
When you’ve completed your initial re
8. Saving
Be sure to save to your work along the way. That way you can always go back to a previous version if you get a little too overzealous. I like to save the image to my device’s Photos, but the app offers a variety of saving locations.
9. Apply Smoothing
In the main menu, use the Smooth tool to refine your work. Start by tapping Face. Chances are you’ll like the effect as it smooths the skin tone. And again, you can always undo if you don’t.
Then tap to spot-smooth areas, particularly backdrops. Beware of over-smoothing – it won’t look natural.
10. Make Final Adjustments
After you complete the repair work, play with other options to improve the image quality. In the main menu tap Adjust. Play with Contrast first, then move on to testing Warmth, Saturation, Shadows and Highlights.
When you’re done, save the finished image one last time to your device’s Photos.
Take Mobile Photo Restoration a Step Further
When I work on improving and restoring my old photos, I often do so in more than one app. It’s rare to find an app that does everything you want, and each has it’s special strengths. Adobe has several other excellent apps, and PhotoShop Mix is one I use quite often after I complete my initial restoration in Adobe PhotoShop Fix.
Import the restored image into the freeAdobe Photoshop Mix app. Here you’ll find even more tools for refining the image. Tap Adjust in the main menu. Experiment with these tools because you can always Undo!:
Auto Fix – I avoid this one!
Temperature
Exposure
Contrast
Highlights
Shadows
Clarity – definitely give this a whirl
Saturation
I was delighted how quickly I was able to significantly improve the photo. Sam and his mom’s faces just radiate happiness.
I sent it off and heard back from him almost immediately:
“I can’t tell you how much it means to me to see this extraordinary repair and restoration work you accomplished on that tiny Polaroid Land Picture of my mother and myself! This picture was taken at the exact same time I began to help my mother with her genealogical work.”
He then shared the story about that first research project with her. The two of them wanted to identify the relative who had rendered some beautiful old paintings hanging in his grandparents’ house. The trail led mother and teenage son to London, Ontario, Canada. As a budding genealogist, Sam was certainly thinking ahead!
“I convinced my mother to let me take along a tape recorder, as I was very interested in sound recordings, and so we recorded my mother’s interviews with family members still in London and related to the same…family.”
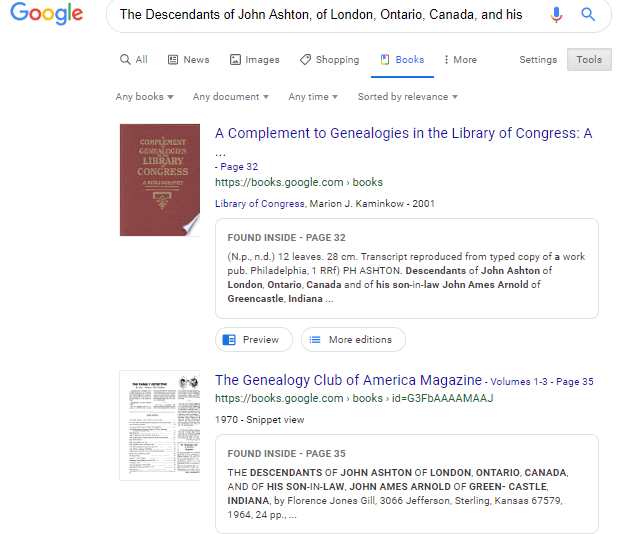
Sam and his mother identified the artistic ancestor who did those paintings: John Ashton. Their research culminated in a “delightful little family history, called The Descendants of John Ashton, of London, Ontario, Canada, and his Son-in-Law, John Ames Arnold, of Greencastle, Indiana (Lyons, Ks.: Lyons Publishing Co., 1964) compiled by my mother, Florence Jones Gill.”
Sam proudly mentions that her book was favorably reviewed. A quick check ofGoogle Booksreveals that there was indeed quite a bit of “buzz” when she published her book! It was referenced in several genealogical publications. Here are the search results in Google Books:
Sam wrapped up his reply with a little life lesson that he learned from his mom, that we can all take to heart.
“You might get a kick out of this,” Sam wrote, “but the only mistake that my mother ever found after the book was published, was the date of her marriage to my father! It should have been 1935, not 1934. One never to take herself TOO seriously, she had quite a laugh over that one.
It was fun helping my mother. Also, as I look back over my life, I must say that I have never known a more “can-do” person than my mother. If something came up that needed attention–no matter what it was–my mother’s usual response was , “WELL, WE’VE GOT TO DO SOMETHING ABOUT THAT !!!”
So my dear Gems, next time we see our family’s history hidden behind damage in an old photo, let us hear Mrs. Gill’s words in our ears “WE’VE GOT TO DO SOMETHING ABOUT THAT!!!”
My book Mobile Genealogy is chock full of more innovative ideas for using your smartphone and tablet for family history. It’s available here in the Genealogy Gems store.