We love the ease with which we can search online, but a genealogy research trip can offer exceptional and unique rewards. If you have been apprehensive about visiting a courthouse or archive, follow our 4 step plan for a successful genealogy research trip that could lead to your own amazing discovery!
By J. D. Cress [Public domain], via Wikimedia Commons
I am spoiled. Spoiled because I did not join the genealogy craze before the dawn of the internet and the power that using the Web brings to our family history research. I don’t know the pangs of writing 100+ letters to possible relatives and then waiting…waiting…and waiting to hear back from at least one!
In my genealogy world, if an answer can’t be found on one of my favorite genealogy website repositories (like FamilySearch, Ancestry, or Findmypast) then a quick Google search usually does the trick.
However, we new genealogists of the Internet era may be banking on the fact that “everything” we need is online. This is obviously not true. In fact, many local libraries and archives are under-staffed and under-funded making digitizing of their holdings difficult. This is why making a genealogy research trip is a really good idea.
The Unprepared Genealogy Research Trip
Several years ago, I made my first research trip. I was woefully unprepared. On a whim, I drove three hours on a weekday to “go to the courthouse.” I arrived at lunch time…and it was closed for an hour. Sigh. However, a nice receptionist suggested I go to the local public library just down the street.
When I arrived at the tiny corner building, I asked at the circulation desk for the history department. She seemed a little taken back, but said, “We have a little room in the basement with some local history and genealogy things.” Note to self: not all libraries are large enough for a “history department.”
In the basement room, no one was on duty, but a nicely printed instruction sheet of what was available and how to use their files laid on the table. “I guess I just dig in,” I thought, and off I went.
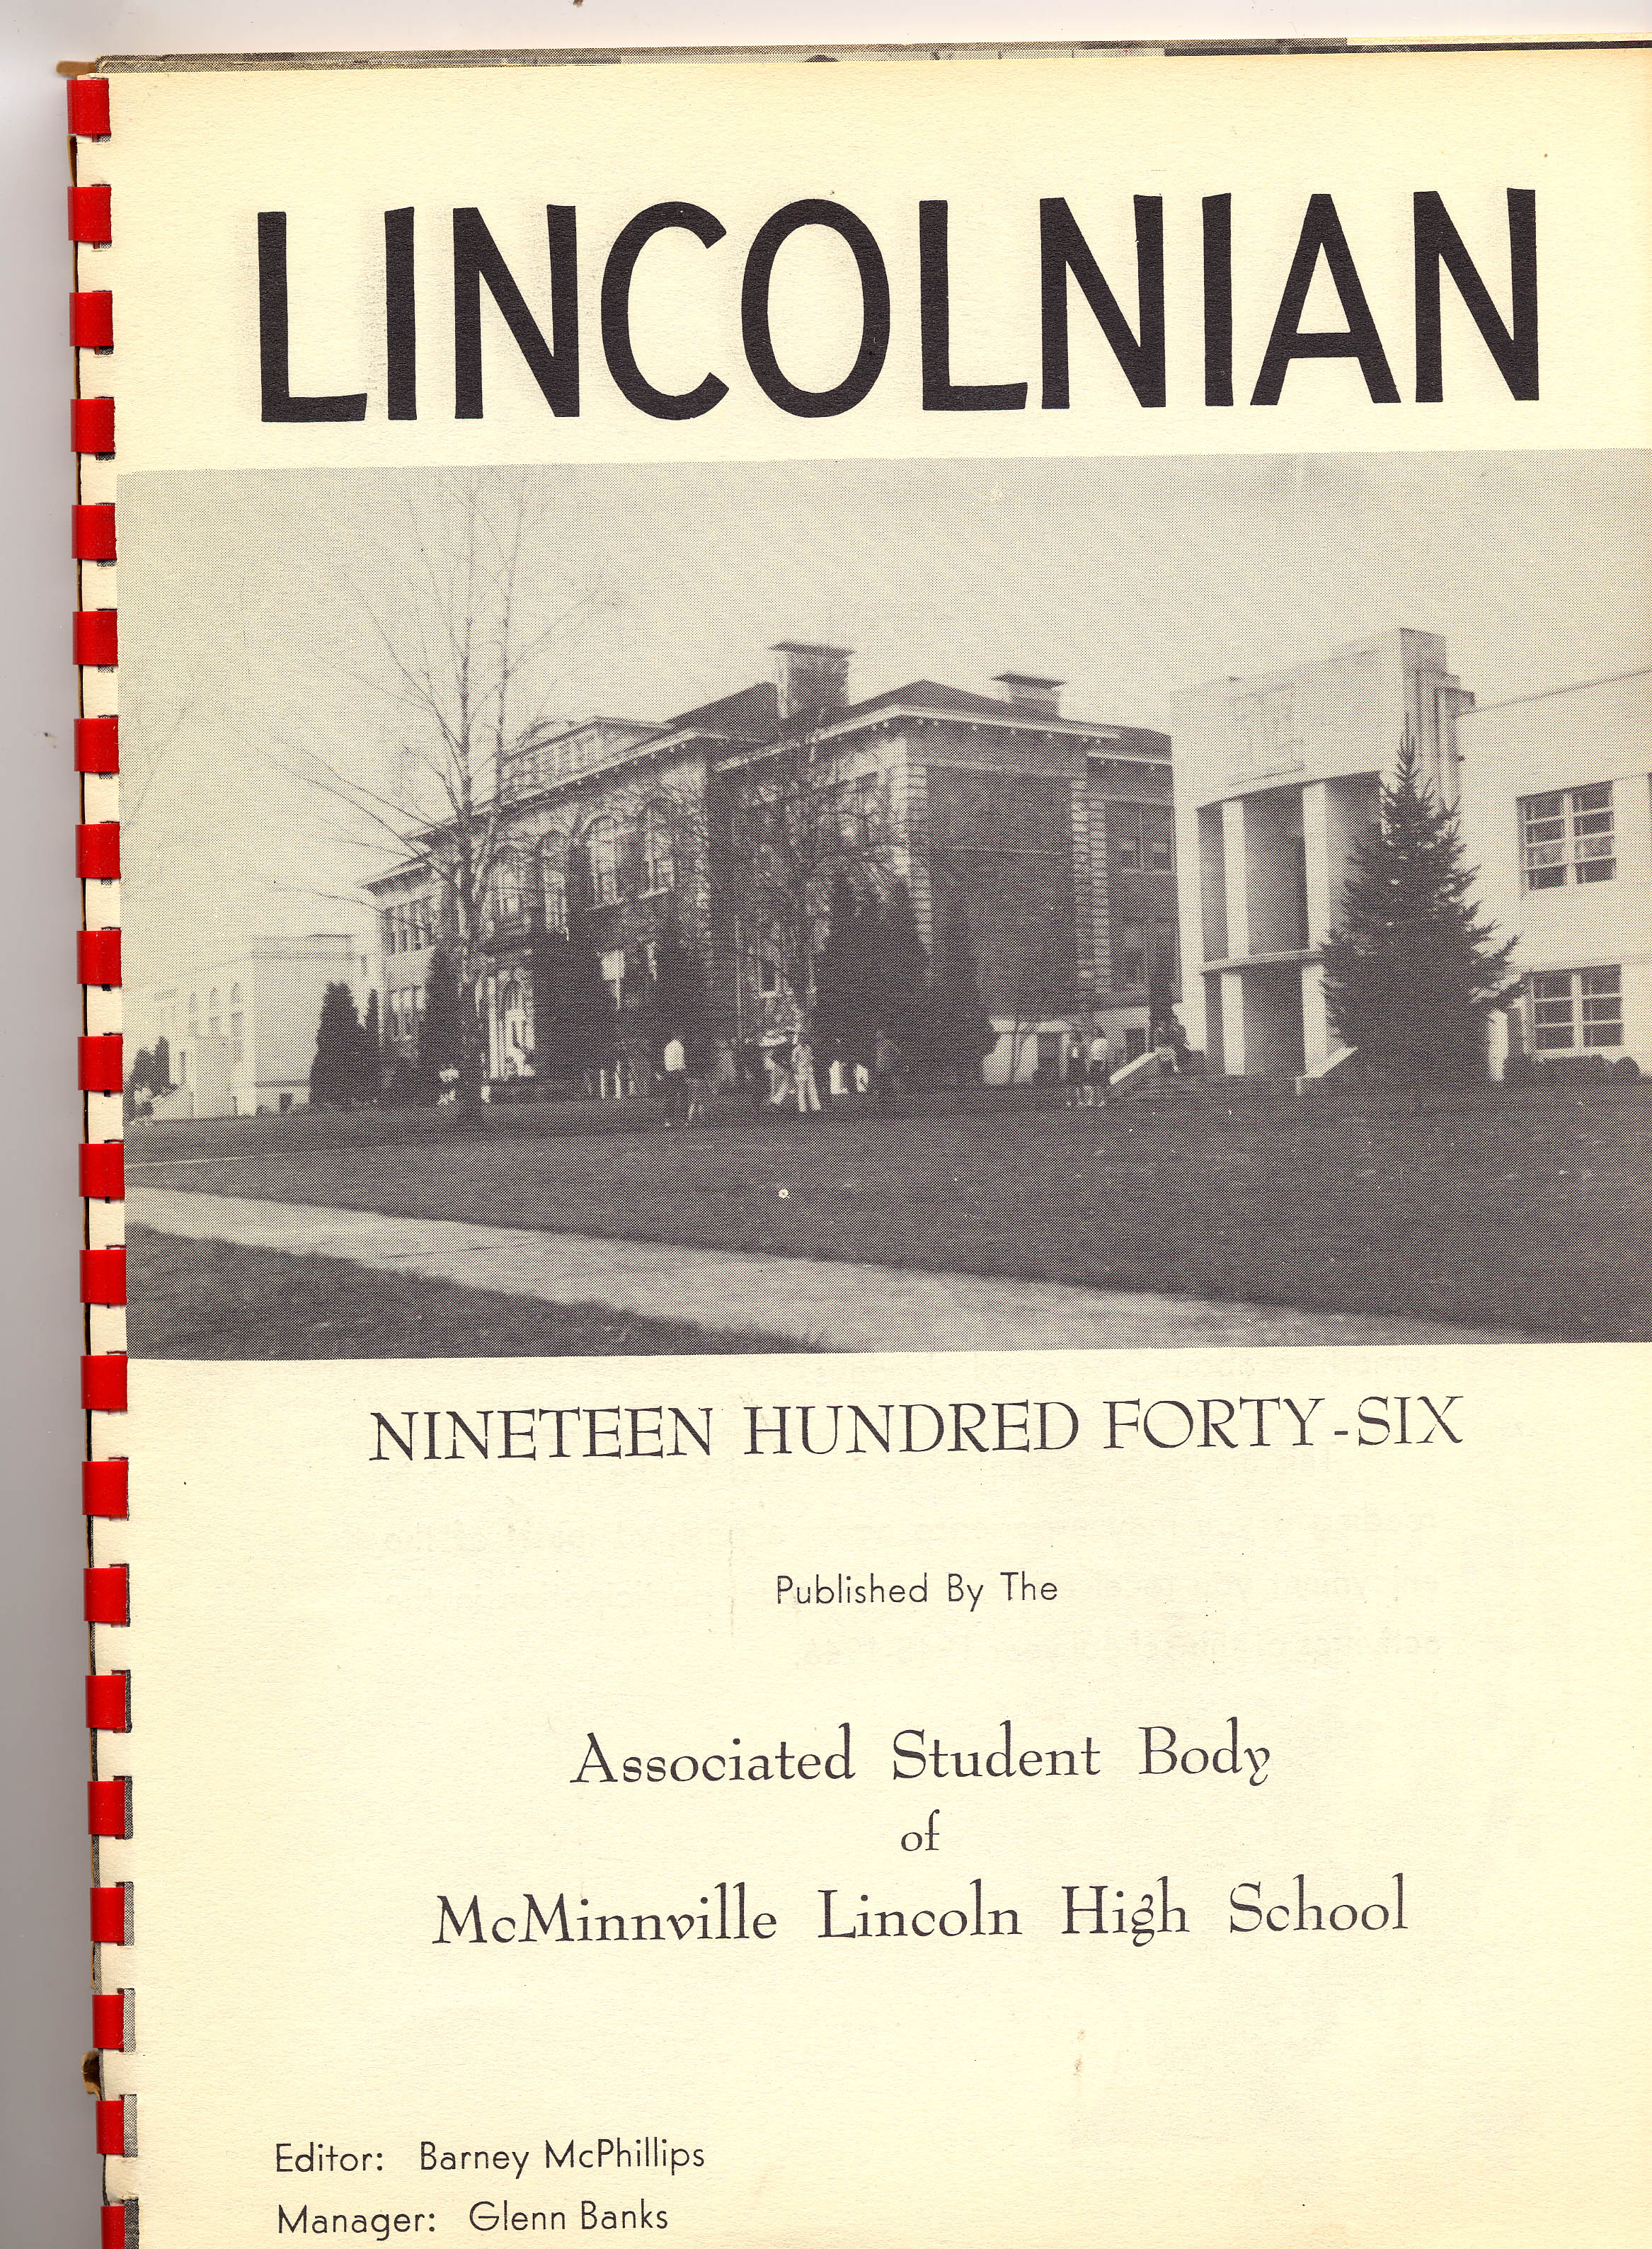
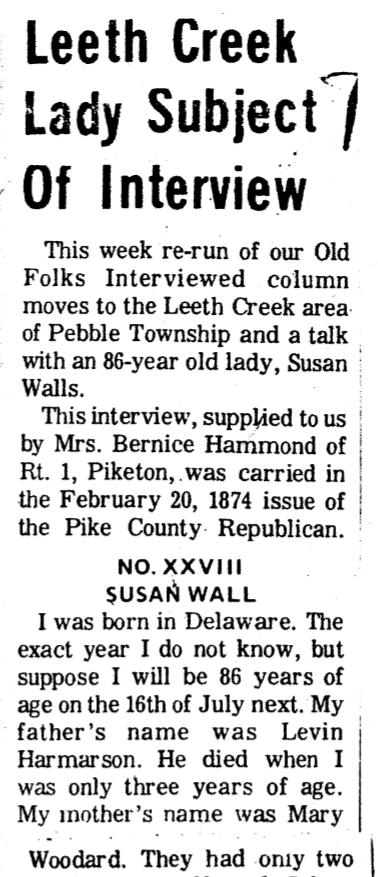
Though this was my first genealogy research trip, it proved to be very fruitful. In a scrapbook simply titled “Walls Family,” I found a Xerox
copy of an article from an 1874 newspaper. In this article, my fourth great-grandmother (Susannah Harmarson Walls) had been interviewed because she was the oldest living woman in the township. Her interview began, “I was born in Delaware. The exact year, I do not know, but I suppose I will be 86 years of age on the 16th of July next. My father’s name was Levin Harmarson. He died when I was only three years of age. My mother’s name was Mary Woodard.”
The interview included the story of her mother re-marrying, the family leaving Delaware for Wheeling, Virginia, and she marrying her step-brother there. Then, they traveled on into Scioto County, Ohio. She named each of her eleven children and their spouses.
The information in this one interview was particularly helpful. Before this, we had no idea when or where Susannah and Levi married, and finding the spouses of their children had proved difficult!
Though this was an amazing find, I wonder what other records, items, or photographs I might have dug up had I prepared ahead of time. Perhaps, I would have had time to dig more into their microfilm holdings, archived pictures, atlases, or even had time to go to the local cemetery.
The Prepared Genealogy Research Trip
Fast forward several years and I am making much more prepared genealogy research trips. Get the most from your next genealogy research trip by following these 4 important steps:
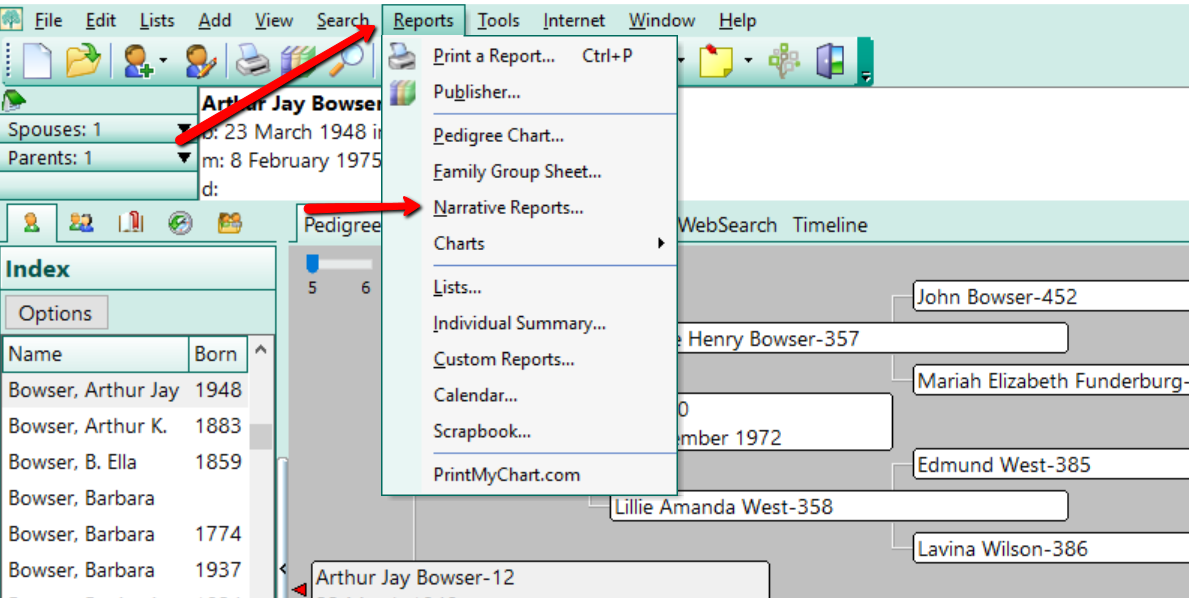
1. Run a Narrative Report. Start creating your genealogy research trip plan by printing out a narrative report of your targeted family line. This can be done with the reports feature found in genealogy database programs like RootsMagic.
2. Look for holes in your research. Carefully read through the report looking for holes in your research or where you may be missing a source. In this case, a “hole in your research,” may be the missing marriage date of a couple, or the missing birth date of a child. Circle these “holes” and make a list of what the needed piece of information is to correct it and where you can find it.
Example: Clark County, Ohio. Need a death date for Edmund West. County didn’t keep death records that early. Likely died between 1830-1840. Check probate record books, estate files, tax records, cemetery records, and tombstones at Wilson Cemetery.
Maybe you have a birth date, but no source. A source is the proof of a particular fact. For example, a good source for a birth date is a birth register or even a marriage record. If you are lacking sources for your genealogy facts or are not sure how to begin sourcing your genealogy, learn more about that here.
3. Decide what repositories you will need to visit. After creating your list, determine where these items are held by asking yourself important questions, such as: Will I need to visit the courthouse, a library, an archive, cemetery, or all the above?Which location will produce the most results? Should I visit the archives first, or the courthouse?
4. Contact each repository ahead of time. Finding out the days and times when each of these places is open before you go is a must! Try to pick a day when all, or most, of the places are open so that you can get a lot done. If this isn’t possible, consider making an extended stay overnight to accomplish your goals.
Keep in mind that not all websites are up-to-date. Just because the library says it is open from 10 to 5 every day but Sunday on the webpage doesn’t necessarily mean that is still the case. Always call each establishment to verify days and hours of operation.
Remember, there are newspapers, maps, documents, and pictures just waiting to be uncovered. By thinking about what you want to achieve while on your trip and what information you need to find and where, your genealogy research trip can be a successful one. Happy hunting!
More on Genealogy Research Trips
Still feeling unmotivated to get on the road, read or listen to these features for inspiring tips to make a courthouse records research trip in your near future!
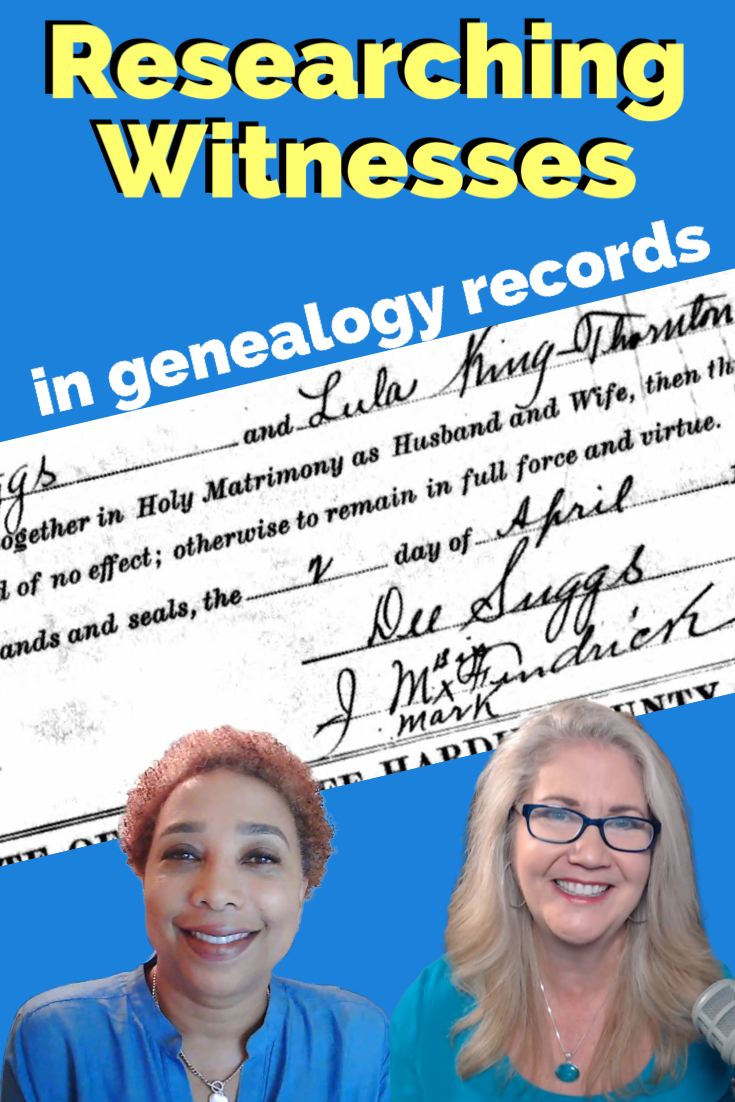
Show Notes: You may not have been around when your ancestors lived, but there were witnesses to the important events in their life. Genealogist Robyn Smith shares her 3 step process from her new Family Tree Magazine article called Witness Testimony.
Pin it on Pinterest! Free Genealogy Video
Get ready to find out how the witnesses named on your ancestors’ records can help you bust brick walls in your genealogy research!
Watch the Video Interview
Show Notes
(This interview has been minimally edited for clarity) Downloadable ad-free handout with time stamps and links. (Premium Membership required)
Why You Should be Researching Witnesses
Lisa: I learned a lot from your article in family tree magazine. And I wanted to chat with you a little bit about that, because I think researching our ancestors’ witnesses is fascinating, and it’s something that people don’t always think about. We may focus on the names we recognize and not so much on the ones that we don’t. I’d love to have you give your “elevator speech” if you will, as to why people should be taking the time to research witnesses.
Robyn: Most of us in the genealogy community eventually hear about this thing called “cluster research”. We hear this phrase, the FAN club that genealogist Elizabeth Shown Mills describes, where we take a look at the Friends, Associates and Neighbors of our ancestors. I would consider witnesses and bondsman in that FAN club, in that cluster.
Simply put, witnesses can help us find more family. That’s the benefit of researching these individuals and the records in which they find them. We can break through some brick walls. And this type of research can also tell us about the community ties and some of the customs in that time and place. So, witnesses and bondsman are always my secret research strategy.
What is a Bondsman?
Lisa: You mentioned bondsman, and that might be a new term for some folks. We might be used to seeing perhaps an immigration record or a birth record, and we see witness. What is a bondsman?
Robyn: This is one of those terms in genealogy that has a slightly different meaning historically than it does today. By bondsman we just mean someone who pledges a sum of money as a bond for another. Sometimes in these records, we might see that they’re called a Surety. You might see that term used. The difference between that and a witness is that there’s a financial obligation involved. I always try to tell people, it’s similar to cosigning a loan today. Most of us would probably not cosign a loan for people that we didn’t trust or that we didn’t know very well. And so, if you can keep that concept in your mind, that’s the value and the benefit of researching those witnesses and bondsman.
Lisa: Yes, when there’s a financial tie, there’s some kind of relationship there. And I guess if we can research them, that might lead us back to even more records about our own ancestor.
Genealogical Records that Include Witnesses
What kind of records will we find them in? In what type of records are we going to find witnesses and even more specifically, this term bondsman?
Robyn: The big one we think of, of course, is marriage bonds. We hear that phrase a lot. We may see them in marriage records, almost all deeds are going to have some sort of witness involved, and wills. Also, in probate records we will see executors and administrators often have to have bonds. If you’re going to serve as guardian to someone, typically, that person has to have a bond as well. And so those are sort of the big ones.
We can also think of court cases, civil court cases when you’re trying to secure someone’s appearance at a future court meeting. And I actually have seen the courts go after that bondsman if that person doesn’t show up. So, some of these records can get pretty juicy.
And of course, I think a lot of us are probably familiar with pension, military pension records and southern claims.
The only thing that I would caution people to watch out for is sometimes the witness is really just the county clerk, a local lawyer or local justice of the peace. So, it’s in researching that witness or that bondsman that you’ll find out the relationship if there is any, to the person of interest that you’re researching.
Lisa: That’s a really good point.
The Goal of Researching Witnesses in Records
Do you go after witnesses primarily because you’re wondering if they are related? Or is it also about that FAN principle where they may not be related, but researching them might actually lead me to more records about my own ancestor because of their will, depending on what the relationship was? Do both of those play into the way you approach them?
Robyn: I would say both. I’m actually really excited when I see a witness or bondsman because the curiosity serves you very well, in genealogical research, as we know. It’s a good thing to be a nosy genealogist. I want to know, why is that person there? That’s the question that I’m trying to answer. And more than a few times, it has led me to more family that I didn’t know about, particularly if that individual had a different surname.
Now, another gotcha is that sometimes they end up in the records with just their initials. So, we first have got to confirm who that person is before we’re ready to say that they’re related to our person of interest. So, there are some cautions that we may need to be aware of as we’re doing this research. But it’s another stone to overturn as you’re doing your research. And I love it when I see a person listed in a record. I’m excited!
Lisa: Me too! I feel like oh, my gosh, I finally have another avenue that I can pursue, particularly in a brick wall situation.
3 Step Process for Researching Witnesses
In the article, you provide a three-step research process. Will you walk us briefly through that process?
Step 1: Transcribe the Document
Robyn: The first thing that I do when I find a document concerning my ancestor that has a witness or bondsman, is to transcribe the document. I want to make sure that we all are comfortable with the practice of transcribing. Transcription ensures that you are actually reading every single word in that document. It’s going to help you notice all of the details that you might miss if you are just looking at it in its current format.
There are a lot of great free tools available to us for transcribing. There’s GenScriber, or there’s Trint. I would also recommend Family Tree Magazine’s cheat sheet on reading old handwriting. That becomes very handy when you’re doing this transcription.
Step 2: Do the Research
The second step is to then do the research. I always say you want to research in a variety of records. I actually research the person as if they were my ancestor already. That means I’m looking in census records and deed records and court records and everything else trying to establish who this person is. And the things that we learn along the way, are not just that this person is in this time and place, which is very important to us as genealogists, but it also gives us a hint as to how old the person was. It also gives us a hint about their literacy in terms of whether they sign with their mark or whether they sign with a signature. It is in this second step, doing the deep research, that you probably will uncover whether or not the person is related to your family.
Step 3: Research the Law
The third step is to research the laws because as we know, laws governed everything about the sources that we use a genealogy. They’re going to govern who can serve as a witness and a bondsman, how old that person has to be, and also how many were necessary.
We need to be aware that these laws are going to differ from state to state or colony or a locale and also throughout time. I look at the published date laws that I can find in databases like Internet Archive and Hathi Trust and Google Books but you and also visit your local library, law library, or archive. You may have to do some deep digging.
Those are the three steps that I recommend: transcribe the document, research the individuals you find, and make sure that you research the laws.
Lisa: Fantastic advice!
The Power of Transcribing Genealogy Records
I’d love to ask you a little bit more about transcription because I think that is a step that can be tempting to skip. People think, oh, well, I read it, I want to get going! I want to add people to my tree, and they are tempted to not take the time to transcribe. Will you tell us a little bit more about transcription? Why should we take that time? And what are we looking for, instead of just typing the words?
Robyn: Transcription to me is one of the basics of one of the basic genealogical skills I think we need to master in order to be successful, particularly once we start going back further in time and encountering those much more complicated problems. And it’s one of those basics that will remind you, if you don’t do it over and over again, that there’s a reason why it’s recommended in genealogy.
I can’t tell you how many phrases I’ve realized that I don’t fully understand as I’m transcribing. And Step one is to understand what that document is telling you. So, if there’s a phrase that I come across, I might email an archivist, or I might call one of my genealogy friends who’s got a little bit more experience in that particular time and place. Transcribing helps us to do that, and it helps us to understand.
When I transcribe, I also typically turn it into an abstract. I’m also making sure that I do a citation. So, to me, those are the building blocks of successful genealogical research.
I would also include keeping a research log and have a research plan. Those to me are very critical research building blocks to long-term success in genealogy.
I understand the impulse to want to skip transcribing. But I can tell you over and over again that I come across phrases that I thought I knew, but once I’m transcribing it, I really realized that I don’t. There are lots of wonderful webinars and classes that you can take on transcription that can teach you simple rules when you’re transcribing, and they’re easy to learn. They’re not complicated rules. And I think that once you start doing it, you’ll get more comfortable with the process. It will really become second nature.
I hope that I can encourage everyone with our conversation to do more of that transcribing. I did a lot of it earlier, not necessarily knowing or understanding all the rules, and now I’m going back and sort of revisiting those documents. It’s always amazing when things will jump out at you that you didn’t notice before, or it just didn’t resonate.
I always recommend having a genealogy buddy. You can say to them, hey, can you take a look at this and tell me what you see? You can have a fresh set of eyes look at it and ask you a question. I’m a genealogy junkie, so I find all of this really, really exciting to me. I kind of lean into it. We’ve all got other things to do in our lives. I try to do an hour here and there; it might be an hour this weekend. But I’m sort of just always working towards a goal. And that transcription, I tell you, that’s a key first step!
Witness Research Example
Lisa: I don’t mean to put you on the spot, but do you have a witness story or just something that you spotted that you just would love to share with us?
Robyn: I do! My mother’s family, my maternal family is from Tennessee. I was researching my second great-grandfather, Mike Fenricks in Tennessee, where he lived. Almost every source in his life asserts that he was born in Alabama. And so, this is a problem that a lot of genealogists have. I had no idea where in Alabama I’m even though I thoroughly went through all of the sources that were available in that time and place.
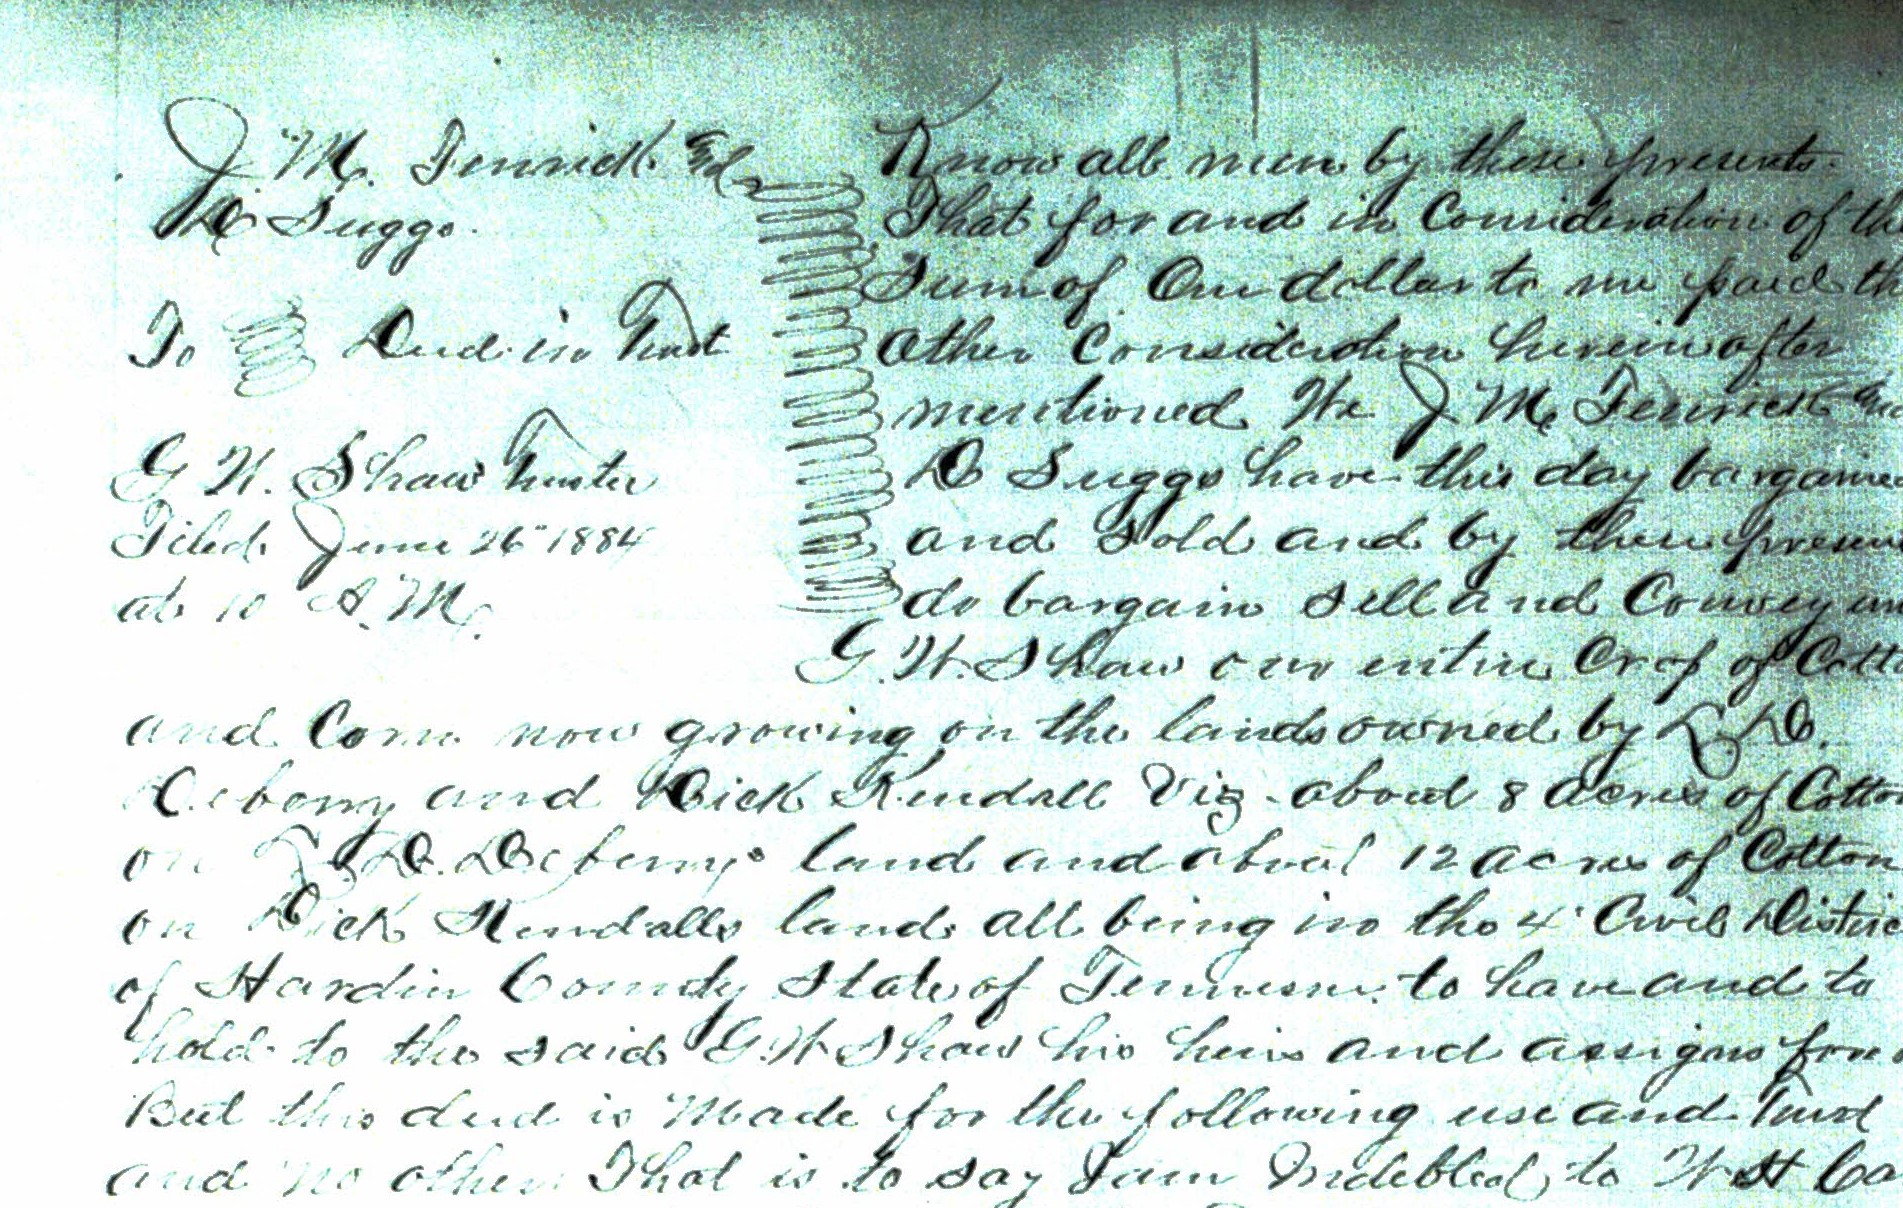
I noticed that he served as bondsman to a man named Dee Suggs. And then I noticed that he jointly took a couple of sharecropping deeds with this same man Dee Suggs.
Sharecropping Deed: JM Fenrick and Dee Suggs
I also found him living in Dee Suggs’ house in 1920. So, the wheels start turning! Why is he interacting with this man and Dee Suggs who was also born in Alabama?
The Dee Suggs household in the 1920 U.S. Federal Census
So, when the records ran out, for my ancestor, I started researching Dee Suggs. And where did this witness lead me? Dee Suggs led me back to Lawrence County, Alabama. And in that 1870 census household was a man named Mike. And that man ended up being his brother, it was his half-brother. And the same man is my second great, great grandfather. They had migrated to Tennessee together. They had been formerly enslaved, and I found a Freedmen’s Bureau contract that their mother signed where she calls all of them, her children. The 1870 census doesn’t provide relationships, so I had that critical labor contract that said, Sofrona and her four children. And so, it makes all the sense in the world why he’s associating with him and living with him, and jointly, promising bond for him. It is because they were half-brothers!
Lisa: I knew you’d have a great story!
Robyn: That story is the crux of my cluster genealogy lecture that I do. I go into more details, but following Dee is what led me to that community and his place of origin in northern Alabama. It was very exciting.
Learn more about Robyn Smith
Lisa: And I know you bring many stories to your readers at Reclaiming Kin. Please tell us the URL address and what they will find there at your website.
Robyn: Thank you so much. The URL is www.reclaimingkin.com. I call it a genealogy teaching blog, and what I mean by that is, I might start off with something from my family history, but every single post is meant to teach a skill. And so, every post there talks about a methodology, a strategy or resource. It’s not just about my family history, it’s about helping all genealogists to grow their skills, and also meet the special challenges of researching the enslaved. I’d be really happy if your listeners would come to the blog, take a look, sign up for my mailing list. And I’ll send you a free PDF, all my favorite research tips.
Lisa: Robyn, thank you so much. We’ll all look forward to your article Witness Testimony in the Family Tree Magazine Jan / Feb 2023 issue. And I look forward to hopefully talking to you again soon.
Robyn: Thank you so much for having me on today, Lisa.
Learn more about Transcription
There’s so much more to learn about doing transcriptions! Check out my full-length Premium video class called Transcribing and Analyzing Historical Documents. It’s part of Premium Membership, and it is going to tell you everything you need to know about how to do transcription, the tools that I recommend, and so much more. And along with that video class, you also get the downloadable handout. Becoming a premium member has a lot of perks. Learn more here.
The Genealogy Gems Podcast is the leading genealogy and family history show. Launched in 2007, the show is hosted by genealogy author, keynote presenter, and video producer Lisa Louise Cooke. The podcast can be found in all major podcasting directories, or download the exclusive Genealogy Gems Podcast app to listen to all the episodes and receive bonus content.
We are celebrating the 10th anniversary of the Genealogy Gems app. We blazed a new trail back in 2010 when we launched the app – apps were still really new back then. I loved the idea of having a way to deliver exclusive bonus content to you as well as the audio, the show notes and best of all an easy way for you to contact me and the show.
It’s more popular than ever, and as far as I know we are still the only genealogy podcast app available. If you haven’t already downloaded it just search for Genealogy Gems in Google Play or Apple’s App Store, or get the right app for your phone or tablet here.
In this episode I have two interviews for you on very different subjects. First up will be a follow up to last month’s episode where we focused specifically on the New York Public Library Photographers’ Identities Catalog.
Well, in this episode we’re going to talk to the genealogy reference librarian at the New York Public Library, Andy McCarthy. And as you’ll hear, there are a massive amount of resource available there for genealogists everywhere.
Then we’ll switch gears to Scandinavian genealogy with David Fryxell, author of the new book The Family Tree Scandinavian Genealogy Guide: How to Trace Your Ancestors in Denmark, Sweden and Norway.
GEM: The New York Public Library’s Milstein Division of United States
History, Local History & Genealogy with Reference Librarian Andy McCarthy.
The NYPL is one of the largest public genealogical collections in the country. They have a “wide-angle” approach to providing reference materials for local and US History.
The Top Resources at The New York Public Library
#1 The reference librarians.
Email them at history@nypl.org Ask questions, prepare for your visit.
#2 The online catalog:
Click here to visit the New York Public Library’s Online Catalog.
While they subscribe to many genealogy databases, they don’t host many. Use the catalog to determine what’s available, and what to ask for. See if what you’re looking for exists. Pay close attention to subject headings to identify resources.
#3 The Digital Collections
Click here to visit the Digital Collections at the New York Public Library.
City Directory Collection up to 1933.
Manhattan is the largest and is coming soon. This collection was only available previously on microfilm. It is a browse-only collection (not keyword searchable)
The 1940 Phone Directory is online.
Sanborn Fire Insurance Map collection is digitized and online.
The Map Wharper which is a crowd-sourcing project providing for historic map overlays, and super zooming in views.
Offline Materials:
They also have a massive collection available in house of books, pamphlets, newspapers, etc. There are research and photo copying services available.
#4 Research Guides online
Click here to view the New York Public Library’s research guides.
Before you go:
Definitely reach out before you go.
Provide them with specific questions and they can help you identify what to focus on while you’re there.
Visit the Milstein home page. They also have many public classes. Check to see what will be available during your visit.
One of Andy’s Favorites Collections
The Photographic Views of NYC Collection. Arranged by cross streets
David is an award-winning author, editor, speaker and publishing consultant. He founded Family Tree Magazine, the nation’s leading genealogy publication. As a writing expert, he wrote the Nonfiction column for Writer’s Digest magazine for more than a decade and served as director of the famous Maui Writer’s Retreat. He has authored countless articles for Family Tree Magazine, and is also the author of additional books including Good Old Days, My Ass and MicroHistory: Ideas and inventions that made the modern world.
Author David Fryxell
Here’s a brief outline of my Q&A with David Fryxell on his new book and Scandinavian genealogy research:
Question:
To understand the ties between the Scandinavian countries, and why countries like Finland and Iceland aren’t included, we have to learn about the cultures and languages, right?
Answer:
Scandinavian countries are really tied by language. And at one point all the countries were united. Borders change. The records reflect these various changes.
Question:
What’s the timeline of Scandinavian immigration?
Answer:
The First Wave, 1825–1860
The Second Wave, 1865–1880
The Third Wave, 1880–1924
Question:
What value do you think DNA testing provides, and what should we keep in mind if we do test?
Answer:
DNA results are most helpful to find other relatives who may be able to assist in your research.
Question:
Let’s say we know we’ve identified the ancestor who immigrated. What else do we need to know before we can jump the pond and start digging into Scandinavian records?
Answer:
In the case of Scandinavian ancestors, you may not have to find the U.S. passenger records. They have excellent passenger departure records.
Question:
Tell us about the census in Scandinavia. Is it consistent among all three countries?
Answer:
Norway and Denmark have good census records. You can find them at:
They are increasingly searchable, and much like our census records in the U.S.
Sweden doesn’t really have useful census records. But they have Household Inventory records in church books. They were recorded every year. Turn to websites such as ArchivDigital, and Ancestry.com.
Question:
Let’s dig into the records. Where do you recommend we start?
Answer:
Church records are key. (Vital Records, census, vaccination, etc.) Also Military, Land and Tax.
Question:
I love that chapter 16 is called What to do when you get stuck! Give us an example of a common area where researchers get stuck and one of your favorite strategies for unsticking them.
Answer:
Get familiar with and pay close attention to patronymic naming conventions where a man’s name is typically based on the given name of their father.
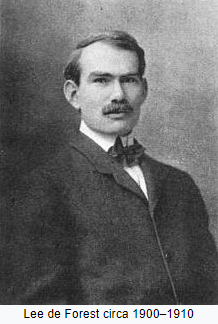
Monday, January 13th. Today is the anniversary of the first radio broadcast to the public. It took place 110 years ago in New York City, engineered by Lee deForest, a radio pioneer and inventor of the electron tube.
The 1910 broadcast wasn’t made from a purpose-built radio studio, but from the Metropolitan Opera house. DeForest broadcast the voices of Enrico Caruso and other opera singers. A small but impressed audience throughout the city gathered around special receivers to listen with headphones.
Today, 95 percent of American households have at least one radio.
One-hundred ten years after deForest’s lonely effort, some 5,400 radio stations employ about 92,000 people.
I’ll be speaking at this conference in Tel Aviv, Israel on October 25 & 26, 2020. Read more here.
RootsTech 2020
I’ll be presenting 4 sessions and look forward to visiting with you at the Genealogy Gems booth at the front of the exhibit hall. Get all the details here.
Stay Up to Date with the Genealogy Gems Newsletter
The Genealogy Gems email newsletter is the best way to stay informed about what’s available with your Premium eLearning Membership. Click here to sign up today.
Have you found all the school records there are to be had for your ancestors? Most of us haven’t, and the chances are very good that there are still some gems out there waiting to be found. Here are ten solid strategies that will help you track them down for your genealogy research.
Watch episode 82 below.
Because the movement for compulsory public education didn’t begin until the 1920s, many people assume that there few records to be had for genealogical purposes prior to that time. The reality couldn’t be further from the truth. Many children attended school much earlier.
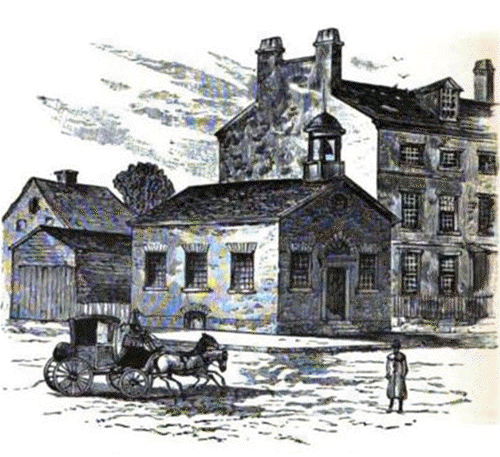
In fact, it may be surprising to learn that the first public school in what is now the United States opened in the 17th century. On April 23, 1635, the first public school was established in Boston, Massachusetts.
Illustration of the Boston Latin School by Ebenezer Thayer, courtesy of Wikimedia
It was a boys-only public secondary school called the Boston Latin School, and it was led by schoolmaster Philemon Pormont, a Puritan settler. The school was strictly for college preparation, and produced well-known graduates including John Hancock and Samuel Adams. It’s most famous dropout? Benjamin Franklin! The school is still in operation today, though in a different location.
Thousands of schools serving millions of students have been established in the U.S. since the inception of the Boston Latin School. (According to 2015-16 data from the National Center for Education Statistics (NCES) there are 132,853 K-12 schools in the U.S.) This means that the chances of there being school records for your ancestors is great indeed!
10 Solid Strategies for Finding School Records for Genealogy
Here are 10 proven ways to find your ancestors’ awkward yearbook photos, sports triumphs, and much, much more.
1. Establish a Timeline of your Ancestor’s Education
Check your genealogy software database to figure out when your ancestor would have attended high school or college. Keep in mind, as recently as the 1960s, children did not go to Kindergarten but may have started school at about 6 years old and beginning in First Grade.
To keep my search organized, I decided to create a simple worksheet form in a Word document. It allows me to identify the right time frames, locations, and other pertinent information for my search, and record my progress along the way.
2. Consult Family Papers and Books for School Records
Go through old family papers and books looking for things like:
school photos
senior calling cards,
high school autograph books,
journals and diaries,
fraternity or sorority memorabilia,
yearbooks and more.
When I dug through boxes and my grandmother’s cedar chest I found several records like…
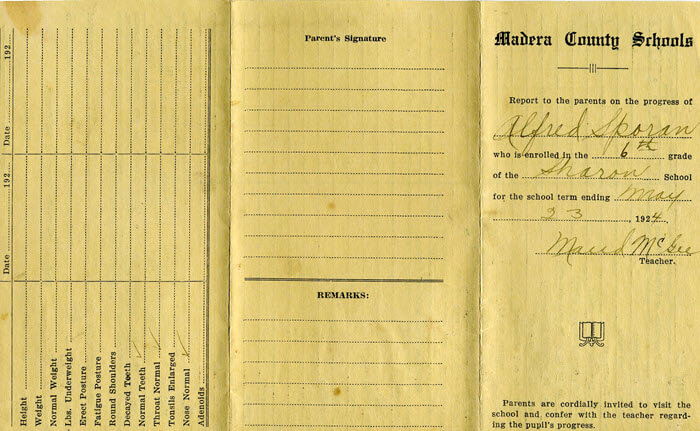
a Report Card:
My grandmother’s brother’s 6th grade report card found among family papers.
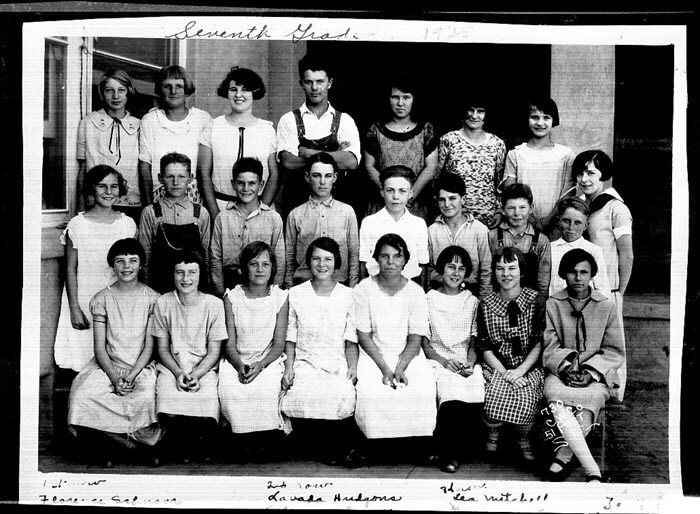
Grandma’s class picture from the 7th grade in 1925, Chowchilla, California. She is in the back row on the far right, and her brother is the boy in the center of the back row:
Grandma (back row, far right) with her 7th grade class.
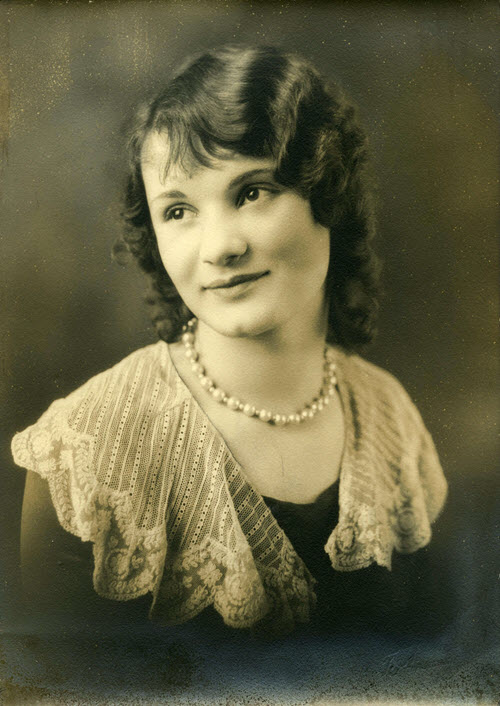
And Grandma’s senior portrait, 1930:
Grandma’s senior portrait from 1930
3. Google for Academic Family History
From the professional website of the state archives to the family history site cobbled together by a cousin you’ve never met, the potential for finding school records on the vast expanse of the internet is limitless! Google is the tool to help you locate websites that include school-related records with lightning speed.
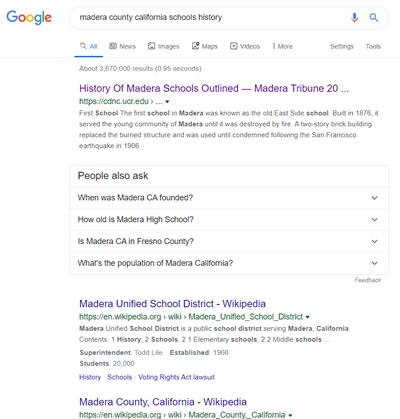
Since I’m not sure which school my grandmother attended, I started off my search for my grandmother’s school with a simple query for the history of schools in the county where she lived as a child:
Google search for the history of school’s in the county
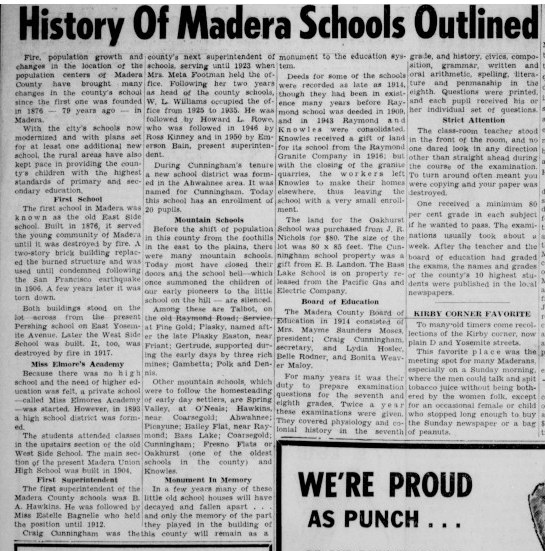
I was pleasantly surprised at the first search result. It’s a newspaper article from the Madera Tribune literally outlining the history of how the schools evolved in the county! It details such things as the driving forces behind where schools were located, when they were founded, and which ones at the time of the article were no longer in existence.
History of Madera Schools Outlined in the Madera Tribune, September 1955.
Next, I focused my attention on the grade school listed on Grandma’s brother’s 6th grade report card that I discovered during my search of family papers. I Googled the name of the school, county and state.
A search like this can literally deliver millions of results. In fact, this specific search brings up over 1 million search results.
You can typically reduce the unwanted search results by 90% by using search operators. These symbols and words give Google further instructions on what you want done with the words you are searching.
While I cover a large number of operators in my book The Genealogist’s Google Toolbox, I’m going to use just one of the most popular to dramatically improve my search for the Sharon school.
In the example below I put quotation marks around the name of the school. Doing this explains to Google that I want this phrase to appear exactly as I typed it in every single search result. You’ve probably noticed that when you search a phrase by itself, you’ll receive results that include only one of the words, or the words spelled differently, or in a different order. The quotation marks search operator prevents this from happening. It mandates that the phrase appear on every result exactly as you typed it.
Using Search Operators to Google the Grade School
Notice that I didn’t put quotation marks around the county name or the state. I recommend using search operators sparingly, at least in your initial search, to ensure that you don’t miss out on good results. If I were to put quotations marks around “Madera county” I would not receive any web pages that do mention Sharon School but just don’t happen to mention Madera County as a phrase.
Notice also that this search resulted in just over 11,000 results, a small fraction of what I would have received had I not used the quotation marks! Even more important is that the results on the first few pages of are all very good matches.
I could try a few more variations such as adding words like history, genealogy or records.
My googling led me to the Internet Archive where I found old silent color movies shot in the 1940s. There were several films and one featured the local school in the area where my relatives lived. Many, many people were filmed! Could one of those faces be one of my relatives?! Learn more about finding genealogical information includes school records by watching and reading 10 Awesome Genealogy Finds at the Internet Archive.
Click image to watch episode 43.
4. Search Newspapers
Historic newspaper are also a wonderful source of honor rolls, school sporting events and anything else having to do with school life.
While there are certainly more historic newspapers online than ever before, it’s still a fraction of what is available.
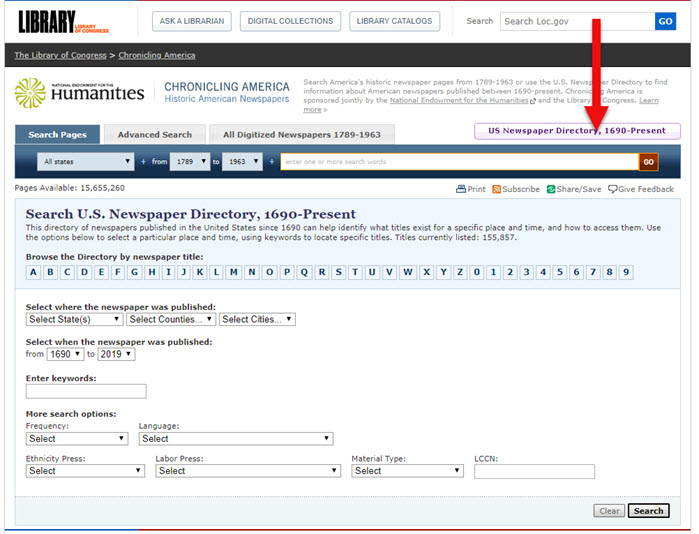
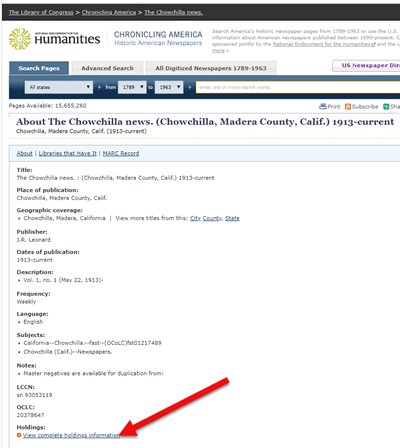
A visit to the Chronicling America website can help. At the home page click the U.S. Newspaper Directory button:
Click the U.S. Newspaper Directory button at Chronicling America
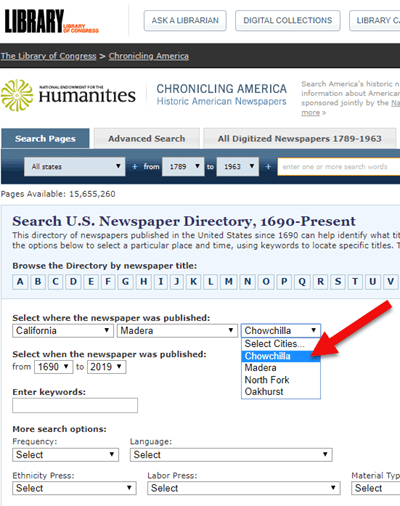
On the Directory search page, enter the state, county and town:
Search the U.S. Newspaper Director for the school location.
On the results page, click the “View complete holding information” link:
Click “View the holdings”
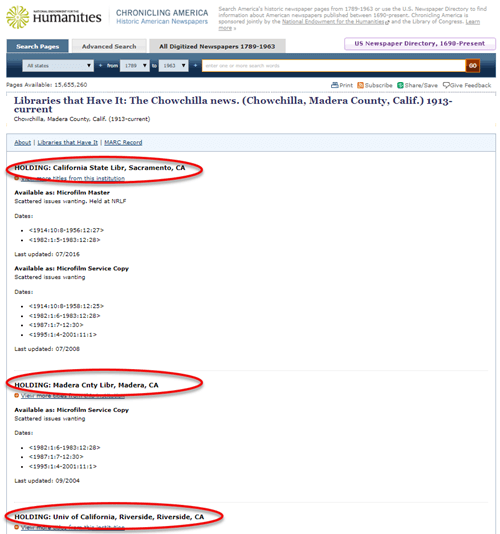
Now you can view all of the known available locations for this item:
The item I searched for has three known locations.
In my case, the Chowchilla newspaper of the early 20th century has not been digitized and is not available online. However, the California State Archives in Sacramento has an extensive collection of microfilm. I was able to make the trip in person, and was certainly glad I did! They not only had the newspaper I needed but also countless other resources that were helpful for my genealogical research.
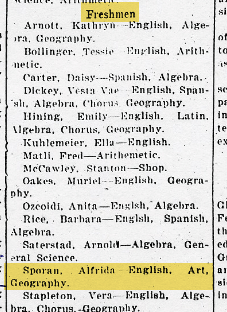
My Grandma listed by name in the newspaper for making the Freshman high school honor roll.
Here are additional resources to help you find newspapers for your school records research:
Local newspapers can also be found by searching for the public library website in the town where your ancestor attended school. Check the library’s online card catalog or contact them directly to see what newspapers they have and whether any can be loaned (on microfilm) through inter-library loan.
Click here to search Genealogy Bank – (This page includes a 7 day free trial option.) This popular subscription website has over 11,000 newspaper, 95% of which Genealogy Bank says are exclusive to their website.
5. Consult U.S. State Archives and Libraries
The public libraries and state archives across the country are a treasure trove of genealogical resources, and that includes school-related records.
While it’s easy to stop by your local library for a search, it may not be as easy to make your way to the public library in the town where your ancestors lived. Turn to the internet to do your homework regarding the repositories, their holdings, and the most convenient and economical way for you to access them.
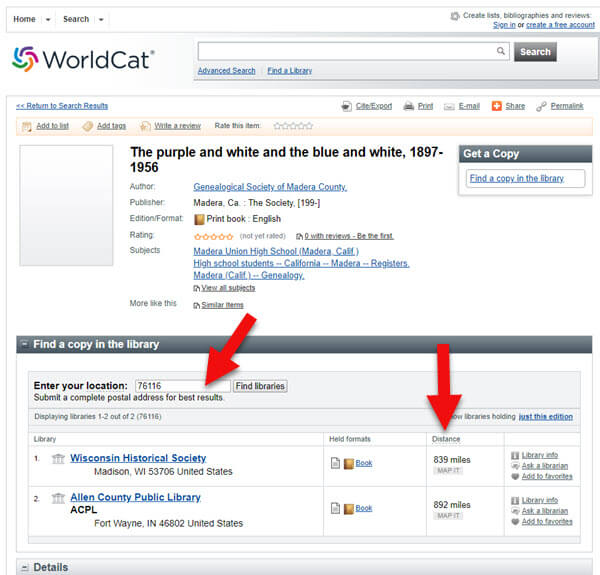
Start by conducting a search. Once you find an item of interest, enter your zip code under the “Find a Copy in the Library” section to identify where it’s available.
Enter your zip code to determine your proximity to the libraries and archives.
As you can see, the name of the libraries are hyperlinked so that you can click through to the item on their website. This makes requesting a look-up or photo copy very easy.
I can’t stress the value of State Libraries enough. Gere are three more excellent resources:
Click here to read Archivist Melissa Barker’s article called Using Vertical Files in Archives.
6. Contact State Historical and Genealogical Societies
In addition to newspapers, state historical and genealogical societies might have old yearbooks, school photograph collections or other records. For example, the Ohio Genealogical Society library has a large collection of Ohio school yearbooks.
Local historical and genealogical societies may also have school memorabilia in their small or archived collections.
To find contact information for a local historical or genealogical society, Google the name of the county and state and add the words genealogy, history and / or society at the end. For example: Darke County Ohio genealogy society.
7. Search for Online Yearbooks
One of the most exciting genealogical record collections to have come out in recent times is Ancestry.com’s U.S. School Yearbooks 1900-1999 collection. It is an indexed collection of middle school, junior high, high school, and college yearbooks from across the United States.
In June of 2019 Ancestry replaced old records with new updated records for most of the yearbooks found on the site. They also added new records from 150,000 yearbooks that previously only had images available. Later in August of 2019 they improved the collection even further by adding a staggering 3.8 million new records. This update also included 30,000 new image-only books.
Ancestry also has an extensive indexed collection of middle school, junior high, high school, and college yearbooks for Canada. Click here to search the Canadian collection.
MyHeritage has an international collection of yearbooks. In the menu under Research go to the Collection Catalog and search for Schools & Universities.
Additional websites featuring yearbooks include:
Old-Yearbooks.com – According to the website, “Old-Yearbooks.com is a free genealogy site, displaying old yearbooks, class rosters, alumni lists, school photos and related school items. All materials on this site are the property of the submitter. You may not use the images, text or materials elsewhere, whether in print or electronically, without written permission from the submitter or this site.”
Classmates.com – “Register for free to browse hundreds of thousands of yearbooks! You’ll find classic photos of friends, family, and even your favorite celebrities. Viewing the books is always free, and you can purchase a high-quality reprint.”
E-Yearbook.com – Their goal is to digitize all old high school, college & military yearbooks. The site has millions of yearbook pictures digitized, they say they are adding thousands of new pictures every week. “From our estimates, we offer the largest collection of old high school, college and military yearbooks on the Internet today.”
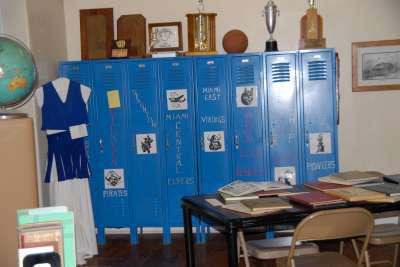
8. Check Township Archives
You might be thinking you didn’t read that right, but you did. Townships are small areas within the county. These small townships may have their own archives or one room museums. They are often the holders of some pretty one-of-a-kind finds.
The best way to determine what the township may have is to contact the township trustees. Google your township name, the county name, state name, and add the word trustee. You will likely need to give one of the trustees’ a phone call to ask what resources might be available.
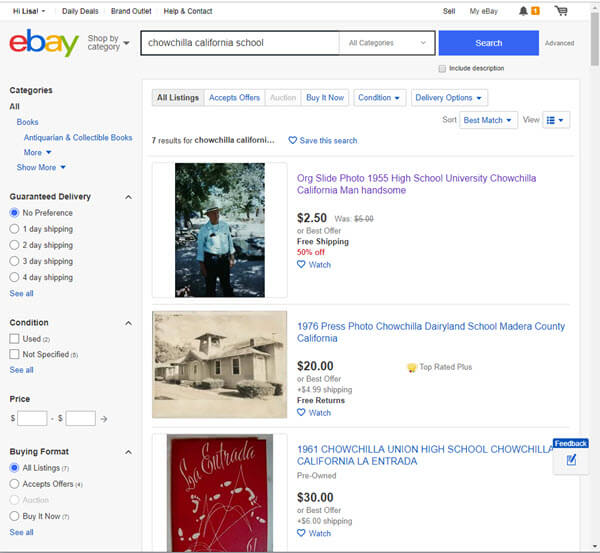
The auction website ebay is the perfect place to look for school record and memorabilia, particularly hard-to-find yearbooks.
Conduct a search on the school or town you are looking for to see if anyone is selling a yearbook that you want. (You’ll need a free ebay account to do this.) Also, search for old photographs or postcards of the school building that you can add to your family history.
Initial search for school items at ebay
When I searched for Chowchilla California School, several auctions for school-related items from Grandma’s high school came up. Unfortunately, these are auctions for yearbooks after she had already graduated. But no worries! This search is only for today. Tomorrow someone could put up an auction for exactly what I want. There’s only one problem: no one has enough time to search every single day!
A way to save time and ensure that you don’t miss new auction items is to save your search.
Click the Save this search button toward the top of the page:
Click the Save button to save the search you just ran.
By doing this, you will be sent an email any time a new auction comes up that meets your search criteria. You can learn more about setting up ebay saved searches for family history by listening to Genealogy Gems Podcastepisode #140.
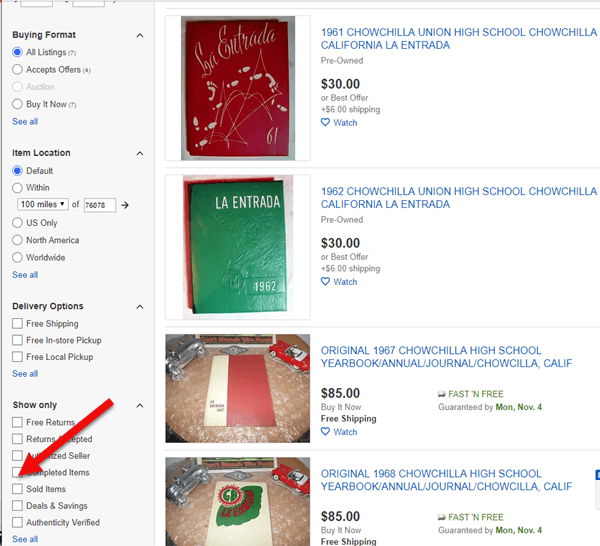
Here’s another one of my favorite strategies: After you run your initial search, check the box on the results page to include completed listings.
Click the Completed search box in the left hand column
In the revised “Completed” search results you may see some items that are of interest. If the item has a green price, it means the item was sold. If the price is black, it did not sell.
Each item will also have a link that says View Similar Active Items. Click that to see a list of items currently for sale that are very similar to one that you wanted.
You can also contact the seller of any item to inquire about the unsold item or to ask whether they have related items.
Bought on ebay: A yearbook from the school where my husband’s grandfather was a music teacher
I bought the yearbook above on ebay several years ago. It includes several photographs of my husband’s grandfather who was a music teacher at the high school back in the 1940s.
10. Call the School
If the school is still in operation, try calling the main office of the administration office. They may have old yearbooks and scrapbooks in their library or on display. If they don’t, they may very well be able to tell you where they can be found.
You can obtain contact information by Googling the name of the school and the location.
Good times to try calling a school are mid-morning after kids are settled into class, or between 3 and 4:00 pm local time, when many of the kids have gone home but the school office is still open.
Tell Us About the School Records You Find
Using these strategies you are bound to find more school records for your genealogical search. Please leave a comment below and share what you found, where you found it, and which strategy you used. It will inspire us all to keep looking! And if you have a favorite strategy that we didn’t mention here, please do share that too.
 ested I go to the local public library just down the street.