by Lisa Cooke | Feb 15, 2017 | 01 What's New, African-American |
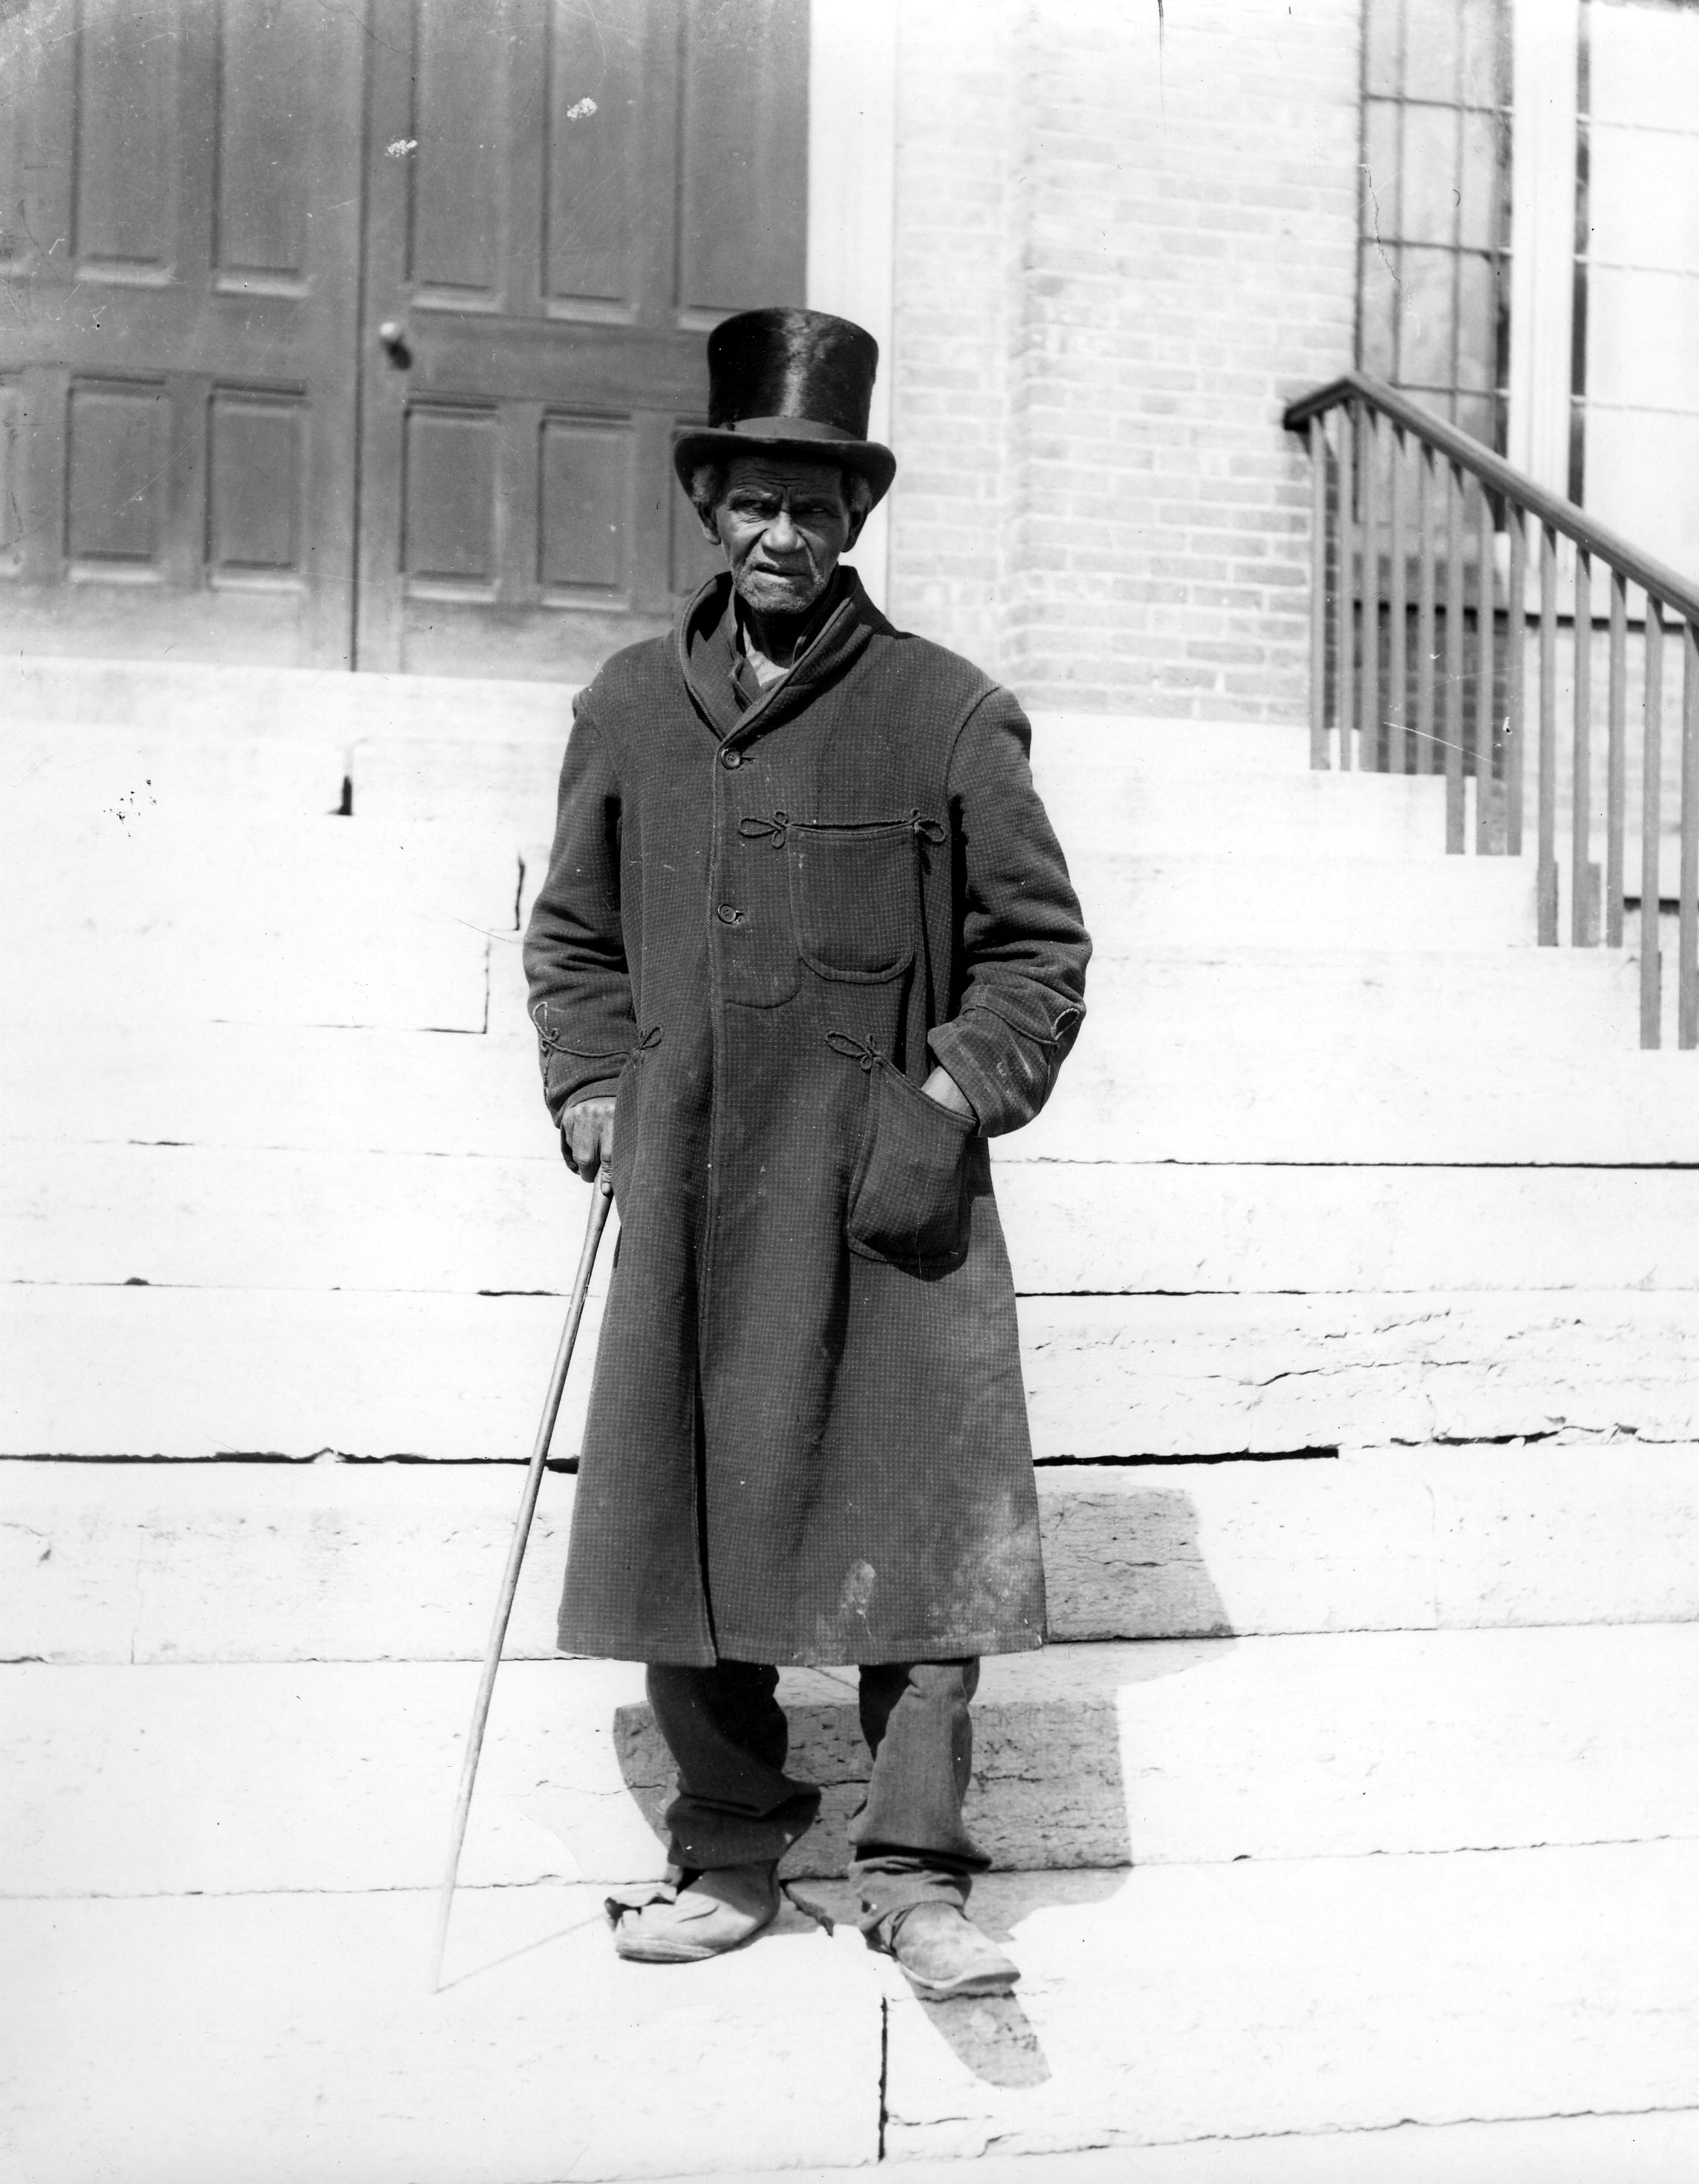
Not all people of color were enslaved prior to the emancipation. In fact, many were freed long before that. Researching free people of color can be quite complex. Tracing my own family line (who were free people of color) continues to be a real learning process for me. However, don’t let the challenges deter you from exploring this rich part of your heritage. In this “Getting Started” post, we discuss the manumission process, “negro registers,” and more for tracing your free people of color.
Who are Free People of Color?
[Note: Throughout our post, we will be using terminology that was used at the time the records were created.] A ‘free negro’ or ‘free black’ was a fairly recent status in the U.S. which differentiated between an African-American person who was free and those who were enslaved prior to emancipation. If a person was referred to as a ‘free negro’ or ‘free black’, that meant the person was not living in slavery. It is a fascinating and little know fact that, as Ancestry Wiki states, “one in ten African-Americans was already free when the first shots were fired on Fort Sumter.”
Step 1 for Tracing Free People of Color: Censuses
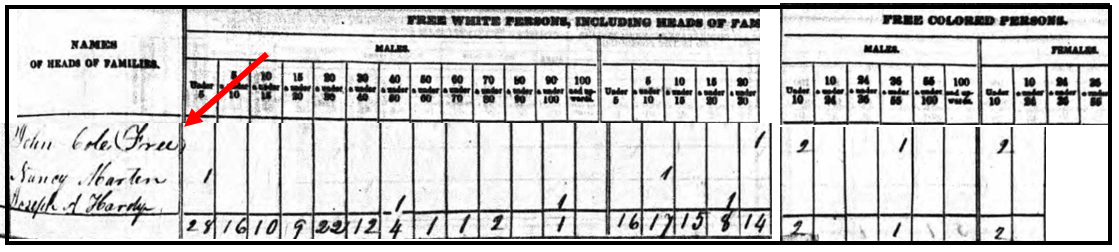
Sometimes, the story of your ancestors being free people of color was passed on through oral traditions. In my own family, our “line of color” was not talked about. Instead, my first clue was when I found my ancestor in the 1840 population census listed as free. I also found that one woman (presumably his wife) was marked in the column for “free white persons,” but John and the children were marked as “free colored persons” in this census. This was the first step to identifying my ancestor as a free person of color.
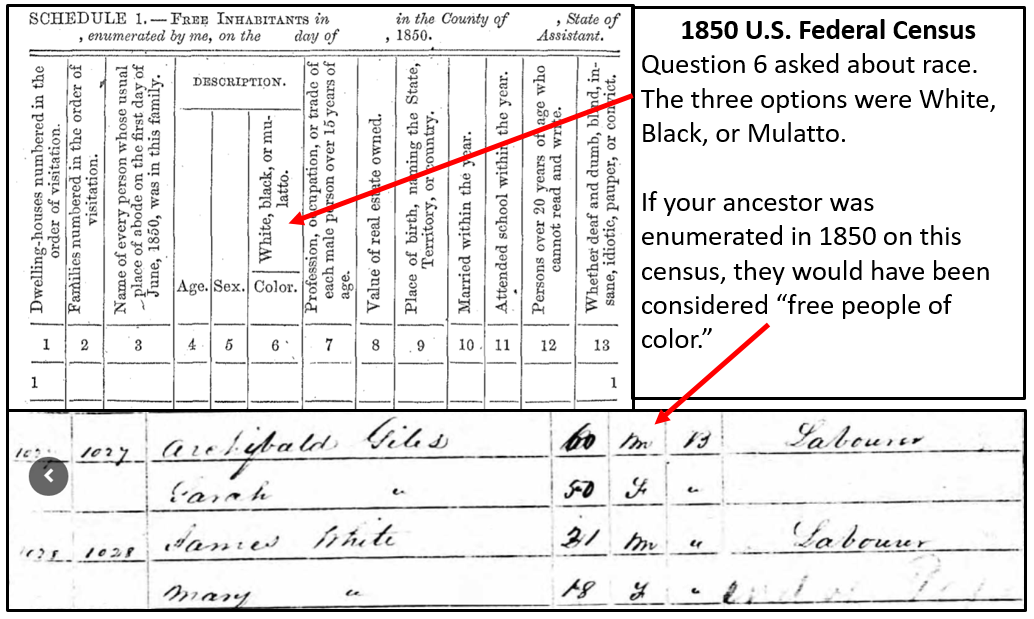
Let’s see another example. The 1850 and 1860 U.S. Federal Censuses included two population schedules. One enumerated free inhabitants, and the additional schedule, referred to as a Slave Schedule, was for making an enumeration of those persons who were enslaved. [We will discuss this further, below.]
If your ancestor appears on the 1850 U.S. Federal Census for free inhabitants, they are considered free, even if their race was listed as “Black.” An example of a Black man enumerated on the 1850 census is shown in the image below. Archibald Giles is recorded as “Black,” but appears on this census for “free inhabitants.” Therefore, he would be considered a free person of color.
If your targeted ancestor does not appear on either the 1850 or 1860 population schedule for free inhabitants, they might have been enumerated on the slave schedules of 1850 or 1860.
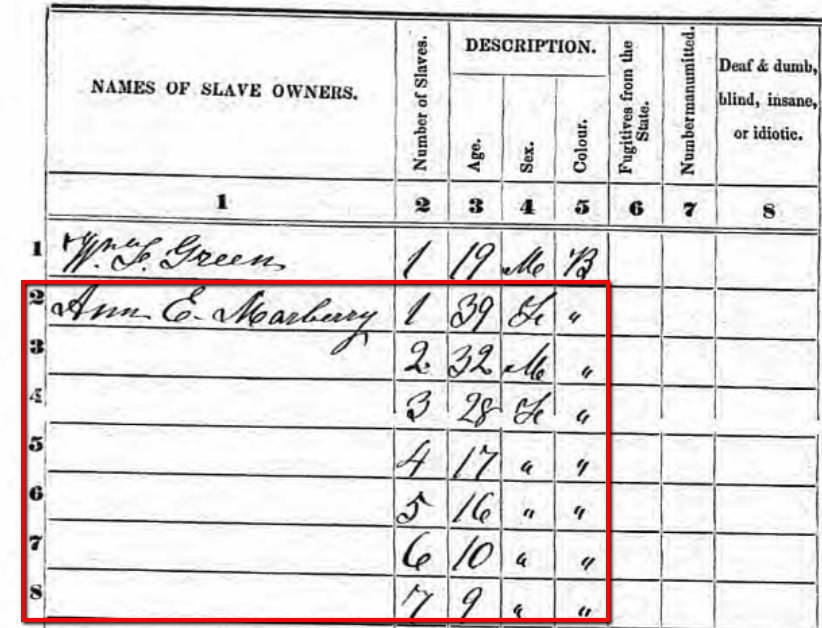
1850 Slave Schedule for Henry County, Tennessee. Snapshot via Ancestry.com.
You can check the 1850 Slave Schedule and the 1860 Slave Schedules at Ancestry.com. The 1850 census is also available at Findmypast, MyHeritage, and FamilySearch.
In this example to the left, you will see a portion of the Henry County, Tennessee Slave Schedule for 1850. Notice, only the heads of household or the “owners” were listed by name. Slaves were not named, but rather listed by age and sex under the names of their “owners.”
Step 2: The Manumission Process
Once you have identified that you have free people of color in your family tree, the next step is to determine how they became free. Many free people of color came from families that had been free for generations. This could have been due to a manumission of an ancestor or a relationship between an indentured white woman and a black slave. I make mention of this relationship between races because it is helpful to remember that the status (whether free or enslaved) of the child was based on the status of their mother. If the mother was free, then the child was free. If she was a slave, then the child was enslaved. [1]
Manumission was a formal way in which slaves were set free. There are many reasons why a slave owner may have released or freed his slaves. In some cases, slave owners would free their mistresses and children born to her. In one case, I found the following comment made by the slave owner, “I give my slaves their freedom, to which my conscience tells me they are justly entitled. It has a long time been a matter of the deepest regret to me…” And thirdly, it was possible for a slave to obtain their manumission through the act of “self-purchase.”
If the mother was free, then the child was free. If she was a slave, then the child was enslaved. [1]
Private manumission through probate. A private manumission decree could be made in a last will and testament. You can find these manumissions in wills, estate papers, or in probate packets. Many of these county level probate records have been microfilmed or digitized and are easily accessible online.
Sometimes, a manumission in a will would be contested. When this happened, a long paper trail of court documents may have been created. A thorough search of all of these proceedings may offer a wealth of genealogical data and clues.
Usually, manumission papers included the name of the slave owner, the name of the slave, and the reason for manumission. In the case of the slaves of John Randolph of Roanoke [Virginia,] his slaves were not named individually in his will written on 4 May 1819. Instead he stated, “I give my slaves their freedom, to which my conscience tells me they are justly entitled. It has a long time been a matter of the deepest regret to me, that the circumstances under which I inherited them, and the obstacles thrown in the way by the laws of the land, have prevented my manumitting them in my lifetime, which is my full intention to do, in case I can accomplish it.”[2]
John freed over five hundred slaves, and though each of them was not listed by name in his will, a codicil at the end of the will did name two of his slaves when he asked that Essex and his wife Hetty “be made quite comfortable.”[3]
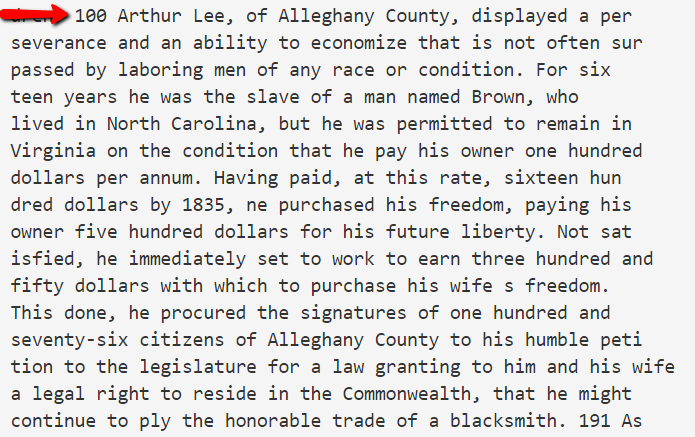
Record of Arthur Lee purchasing his freedom.
Manumission through self purchase. Self-purchase may seem impossible; however, many slaves were not required to work on Sundays for their masters.[4] On this day, men and women could hire themselves out to do work for others. With frugality, they could save their earnings to buy their freedom or the freedom of their loved ones, though this was very, very difficult.
As you can see in this example of Arthur Lee, he was able to pay for his freedom and the freedom of his wife, though it took many years. This type of record could be found in a published book, a record listed in notarial books of the county, civil minutes books, or other courthouse holdings. It is important to speak with a knowledgeable person in your targeted area about where you should look. A knowledgeable person may be those working with the local historical or genealogical society, or a head of the local history department of the public library.
Step 3: “Negro Registers”
If you do not find the manumission in a last will and testament, perhaps due to a courthouse fire or other loss, you may have luck searching the county records where your free people of color later settled. Free people of color were often required to register, using their freedom papers, when they relocated to a new area. These types of records are called ‘negro registers’ or ‘records of free negros.’
Newly freed people carried with them their freedom papers which were given to them when they were manumitted. Once they relocated, they would register with the county clerk. They would need to show the county clerk these freedom papers and a record was made in the register. The record may include the name of members of the family, ages, and most recent place of residence.
The book titled Registers of Blacks in the Miami Valley: A Name Abstract, 1804-1857 by Stephen Haller and Robert Smith, Jr. provides the following information about registers of freed people:
“From 1804 to 1857, black people in Ohio had to register their freedom papers with the clerk of courts of common pleas in the county where they desired residency or employment. State law required this registration, and clerks of court were to keep register books containing a transcript of each freedom certificate or other written proof of freedom (see Laws of Ohio 1804, page 63-66; 1833, page 22; 1857, page 186). Few of these registers have survived to the 20th century.”[2]
Though this author says that only a few of the registers have survived, I found some microfilmed registers listing the names of free people of color who had settled in Miami County, Ohio at the local historical society archives. Again, it is important to ask those people who would be most knowledgeable, and in this case, it was the historical society.
In conclusion, we understand that tracing both our enslaved and manumitted ancestors is often a difficult task. We also know there is much more to learn and share for the best techniques to researching these lines. We encourage you to review some of the additional sources below. Please let us know what other resources have been most helpful to you in researching your free people of color in the comments section below. We want to hear from you!
Source Citations
[1] Kenyatta D. Berry, “Researching Free People of Color,” article online, PBS, Genealogy Roadshow, accessed 1 Dec 2016.
[2] Lemuel Sawyer, A Biography of John Randolph with a Selection From His Speeches, New York: 1844, page 108, online book, Google Books, accessed 20 Dec 2015.
[3] Ibid.
[4] History Detectives Season 8, Episode 10, PBS, online video, originally aired 29 Aug 2010, accessed 1 Dec 2016.
Additional Reading
by Lisa Cooke | Jan 29, 2015
National Genealogical Society Family History Conference May 8-11, 2019 St. Charles, MO Genealogy Gems Booth #700 Schedule of Booth Activities Check this page again before you go for more specific information and schedule. Sign up to receive our free ebook Prize...
by Lisa Cooke | Sep 21, 2016 | 01 What's New, Cloud Backup |
Using your mobile device for genealogy is a great idea, but with that convenience takes some additional know-how. Back-up your mobile device images in a few simple steps and you’ll never say, “I lost my photos on my phone!”
“I lost my photos on my phone!!”
This is NOT what you want to hear from a dear friend who is also a genealogist. So my heart sank when Genealogy Gems Contributor Amie Tennant’s email dropped into my inbox.
Amie wrote:
“I spent 6 hours researching at a cemetery and archives in a far away location. You won’t believe this, but when I got home I realized my smartphone wasn’t working. I had taken all the tombstone images with it, all the document copies were made with it, all my notes were on it. And I hadn’t even had time to back it up.”
That’s the problem, unless you back up as you go, you can’t be sure that just an hour later it won’t all be gone. These days you’re more likely to snap photos of records with your phone than a camera. But with that convenience comes the need for a new game plan to keep those precious images safe.
Back-up Your Mobile Device Images: The Plan
I put together an immediate email to Amie with a restoration and preservation game plan. If, like Amie, you are using your smartphone and mobile devices more and more, you’ll want to put this plan into place too.
First, I advised Amie to visit her phone store (for example, The Apple Store if you have an iPhone) and see if they could retrieve the lost photos and data. You never know unless you ask!
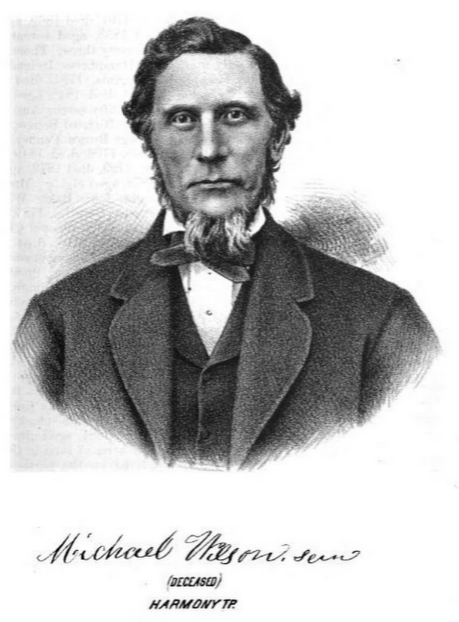
Image of Amie’s 4th great-grandfather she was able to retrieve.
Next, it’s important to consider automatic back-up options. Automatic back-ups are great, which is why I love BackBlaze. But BackBlaze is back up for your computer. The BackBlaze app on your phone only gives you access to those computer files, and doesn’t back up your phone.
One option is to back-up manually as you go. In other words, as soon as you snap that image of a record, save it to a Cloud storage service such as Google Drive or Dropbox. You could even activate Cloud back-up so that it happens automatically, though with the size of image files, you would likely need a paid subscription service to allow for adequate storage space. However, if you are going to continue to use your phone as a genealogy tool, it may be well worth the investment. Let’s look more closely at these two options:
Free Manual Option: If cost is an issue, you can save your photos to a free Dropbox account at the time you take the photo, and then move to more permanent storage on your computer at a later time.
1. Take the photograph
2. Tap the photo in my iPhone’s Photos app
3. Tap Edit and do a quick edit to clean it up (improve contrast, rotate so that it is right side up, crop to get as close-up as possible)
4. Tap Done to close the editor
5. Tap the Share icon and tap Save to Dropbox
6. Select the folder in Dropbox where I want to save the image and tap Save
However, it would definitely be faster and simpler to have your phone automatically backing up to the Cloud.
Low Cost Automatic Option: If your phone is going to be one of your genealogy tools, then automatic cloud back-up may be worth the low cost of around a dollar a month.
Personally, I am not a fan of iCloud even though I have an iPhone. I just don’t find it very user friendly to work with. Setting up your photos and videos to automatically back up to your Google Photos library via Google Drive is another option. Again, since photos and videos do take up a lot of space you’ll likely need to invest in a low cost monthly storage plan. Click here to learn more, or Google search Google Drive Plan Cost (or substitue the name of the service you are considering) for current plans.
Bottom line: There are several Cloud services available for our smartphones and mobile devices, so there’s sure to be one that’s right for you. Where ever your images find their final resting place, make sure it has Cloud back-up.
Amie’s Response to the Plan
I quickly sent the plan to Amie. She responded by saying:
“Thank you, Lisa! It was devastating. You were right, a nice man at the phone store was able to restore them! But, I don’t ever want to have this happen again. When I set up my new phone, a Samsung Android, I noticed a setting that said something like “automatic save to Google drive” and it would sync your images. So I clicked it “on” but now I can’t find where I did that! Any ideas?”
Troubleshooting Backing-up Your Mobile Device
When people shoot me a question, my usual response is “Just Google it!” I Googled Automatic backup of android phone and got several great hits on the results list.
One article on Android Fact.com was particularly helpful. (Read the full article here.) Remember, it can get pretty expensive to be instantly uploading images with your cell phone carrier. I suggest clicking Wi-Fi Only to ensure that uploading only takes place when you are connected to Wi-Fi.
I regularly emphasize backing up important documents that live on your computer. But let’s face it: If you have a smartphone, it would be oh, so sad to have to say “I lost my photos on my phone!” So don’t wait—back up your smartphone or mobile device today.
Another Tip for Using Smartphones for Genealogy
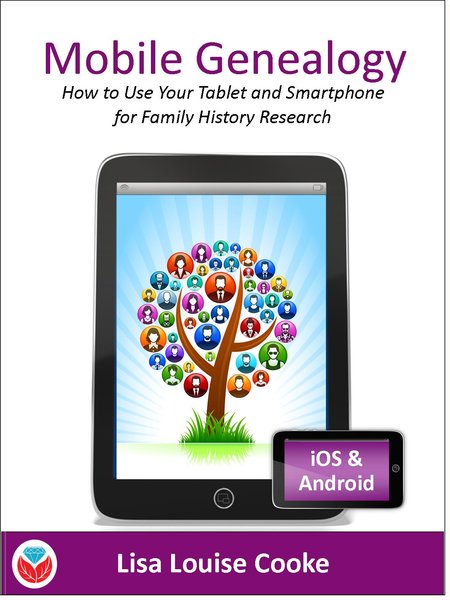 Here’s a another mobile computing tip my book Mobile Genealogy: How to Use Your Tablet and Smartphone for Family History Research.
Smartphones and other mobile devices offer a plethora of editing tools. It is well worth the investment of a few extra seconds to clean up and maximize images as you go. This is particularly true of records that need to be clear for future reference or printing.
Try applying a filter to your images for maximum readability. I like the Noir filter in my iPhone’s Photos app editor.
More Gems on Using Mobile Devices for Genealogy
How to Use Your Mobile Device for Genealogy: Free Video!
3 Tips for Getting the Most Out of Your Mobile Device
by Lisa Cooke | Sep 2, 2018
FOR ANDROID USERS: How to Get the Premium Feed on Your Android Mobile Device
 Recommended app: Podcast Addict for Android, available in the Google Play Store.
Follow these steps to set up the Premium Podcast using the Podcast Addict app for Android. Examples shown below are on a tablet, so keep in mind that it may look slightly different on your device.
1. Download the Podcast Addict App
Podcast Addict app
Google Play Store
On your device, go to the Google Play Store and download the Podcast Addict app.
(*Note: If you’ve never used the Google Play store you may be required to set up an account, including payment information. This is unrelated to Genealogy Gems, but necessary in order to download apps from the Google Play Store.)
Recommended app: Podcast Addict for Android, available in the Google Play Store.
Follow these steps to set up the Premium Podcast using the Podcast Addict app for Android.
NOTE: Examples shown below are on a tablet, so keep in mind that it may look slightly different on your device.
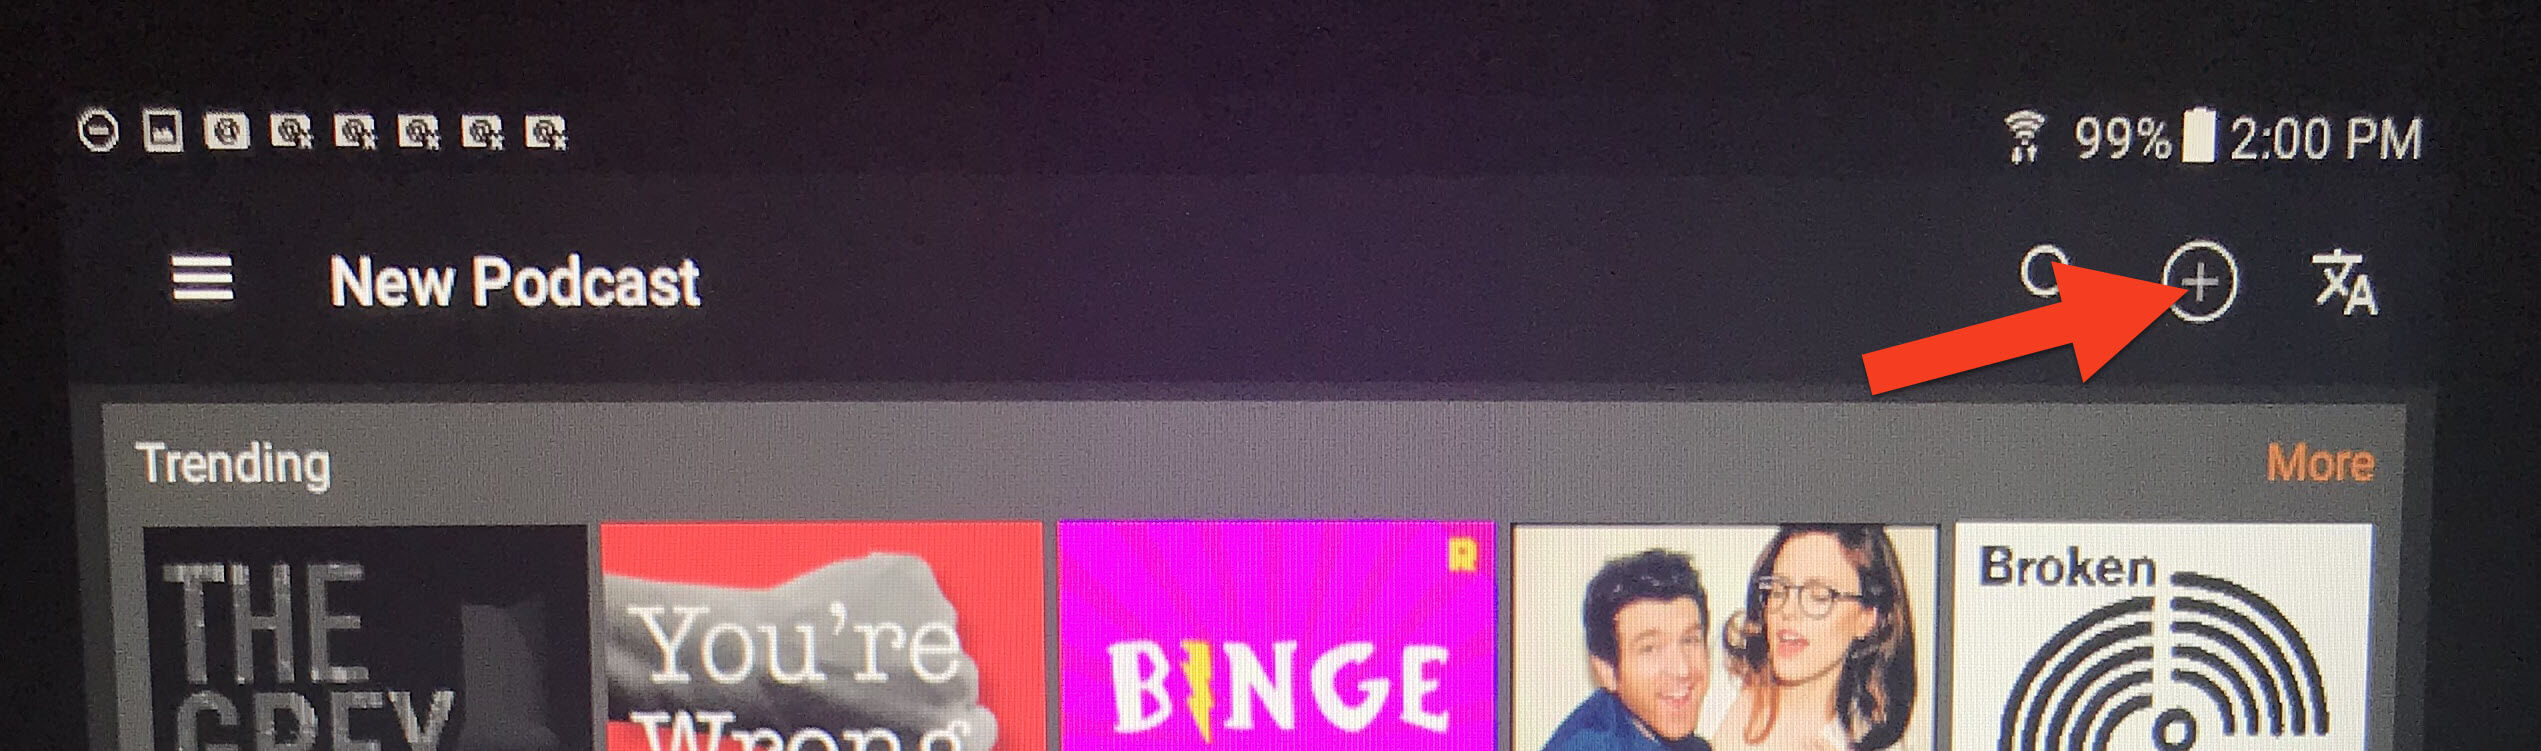
2. Add the Genealogy Gems Premium Podcast Feed
Tap the + icon to add a feed
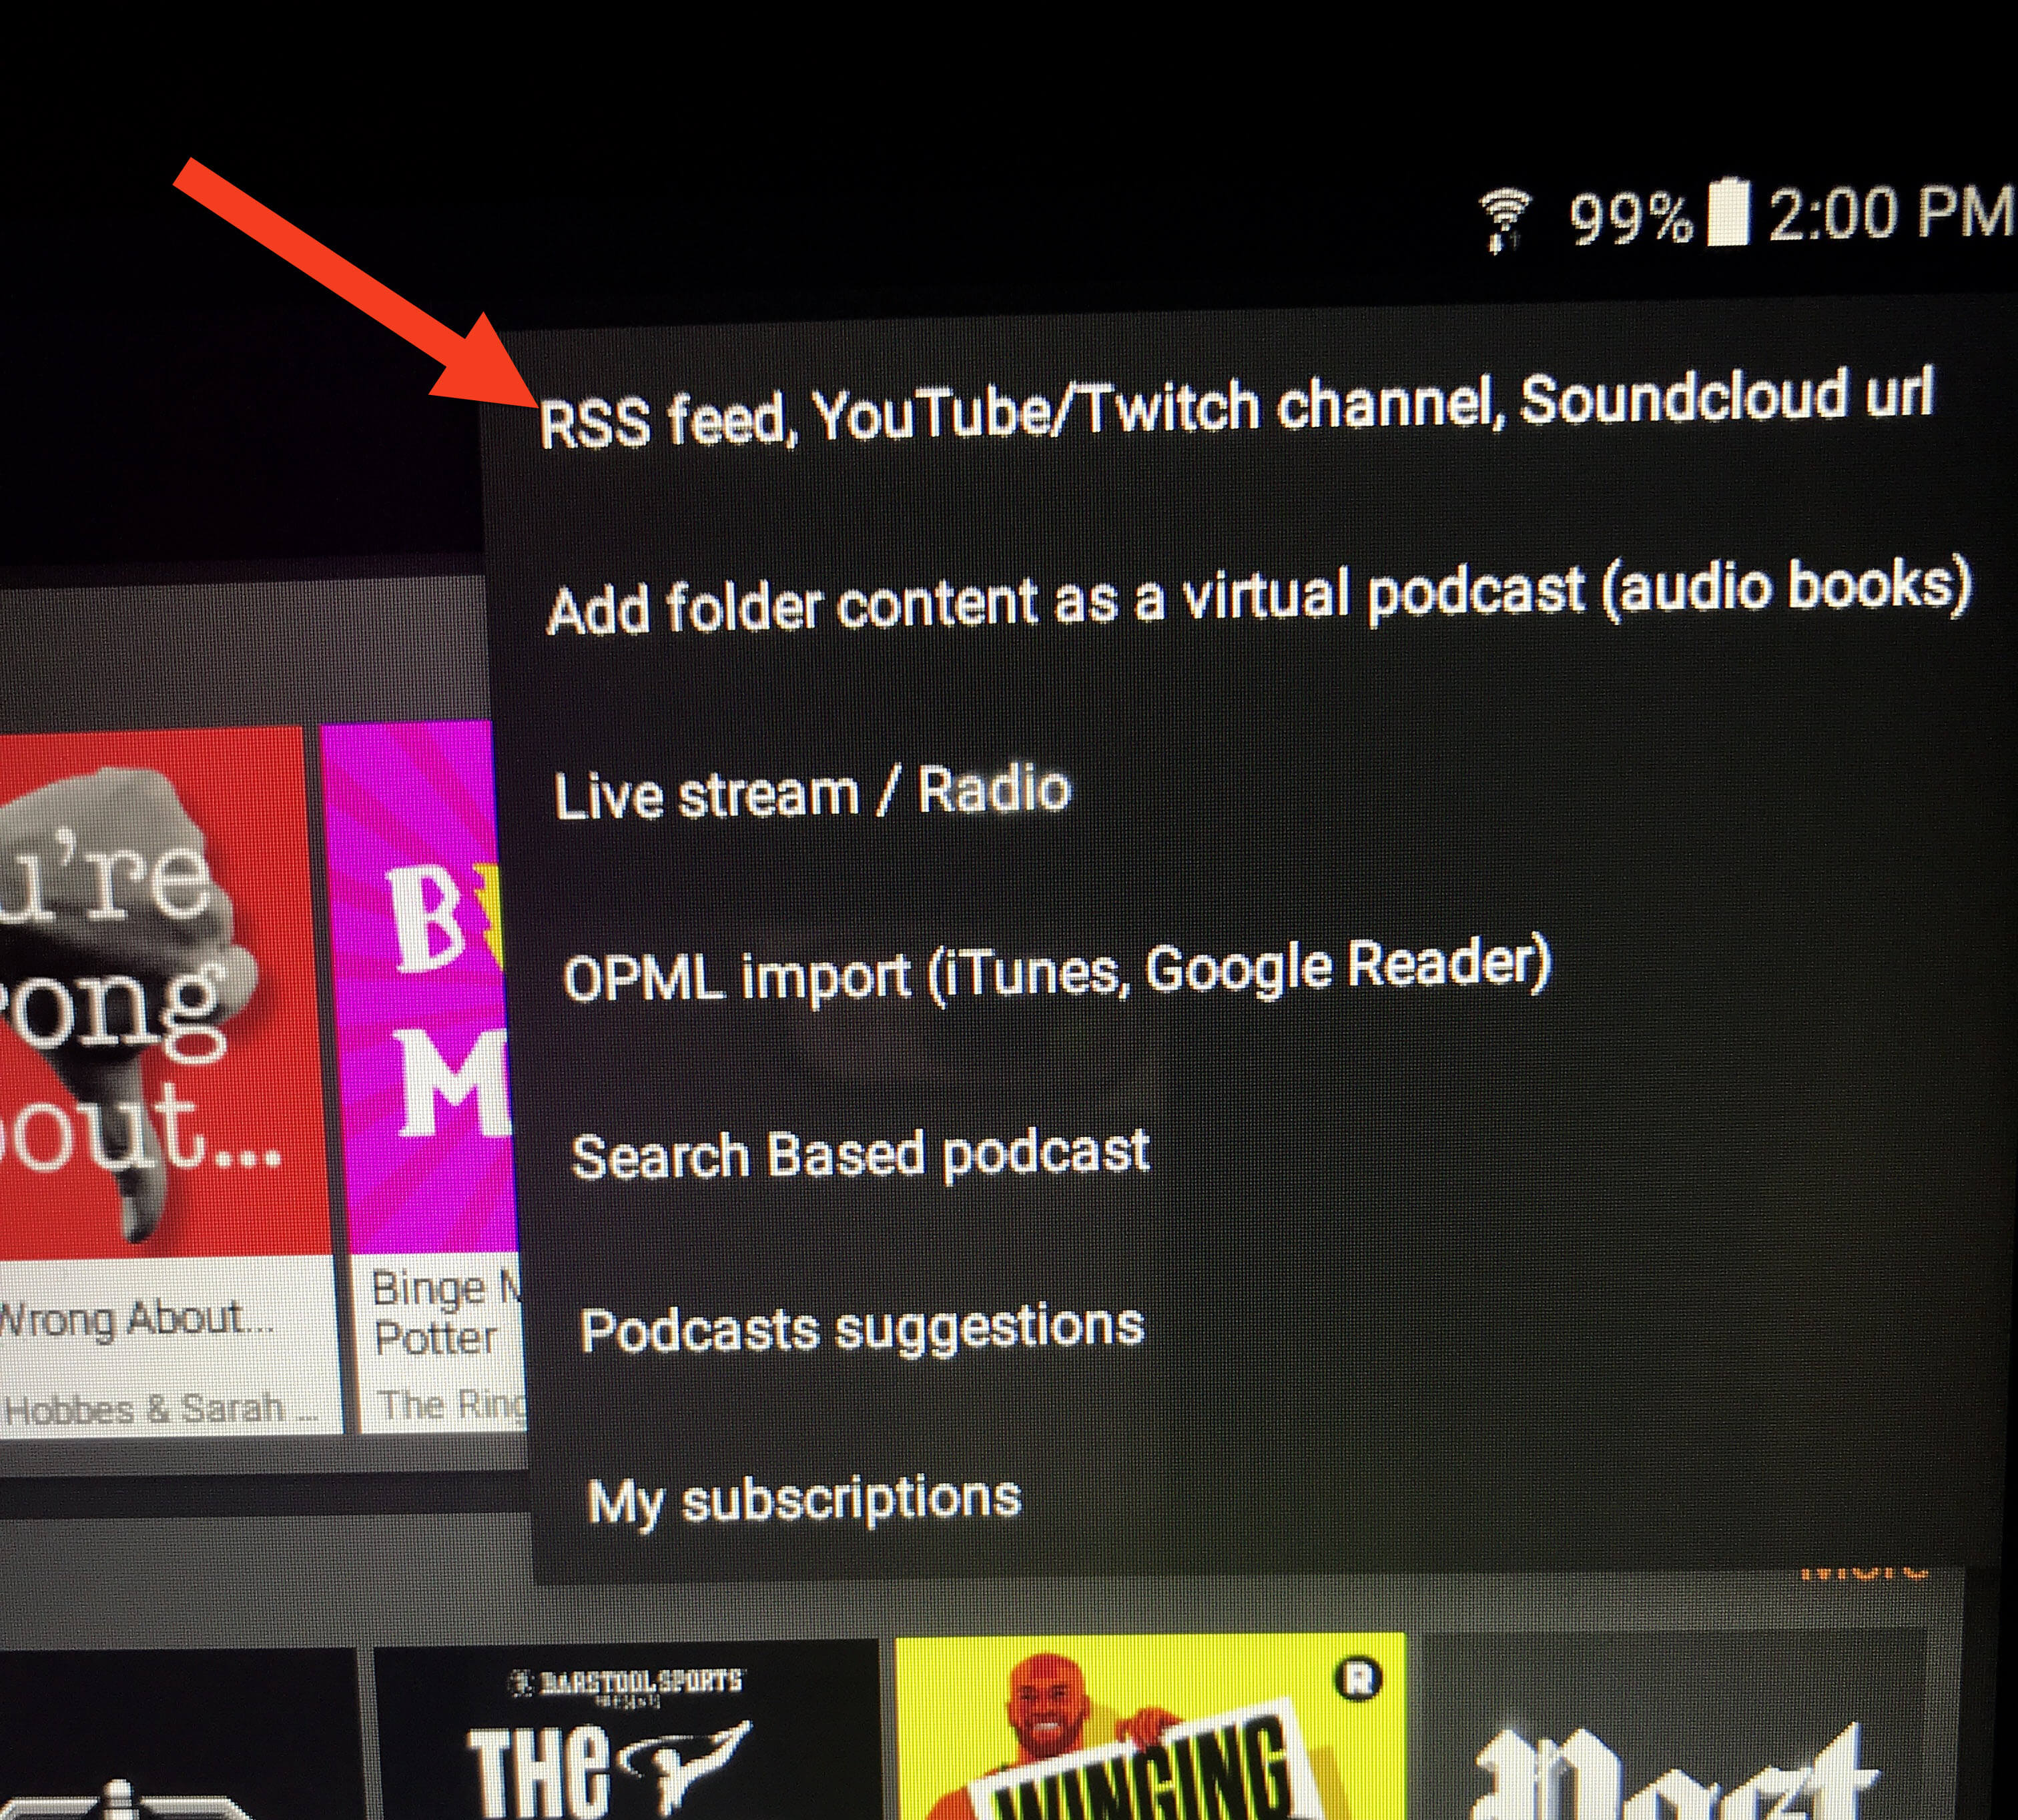
Tap “RSS Feed, YouTube/Twitch Channel, Soundcloud URL”
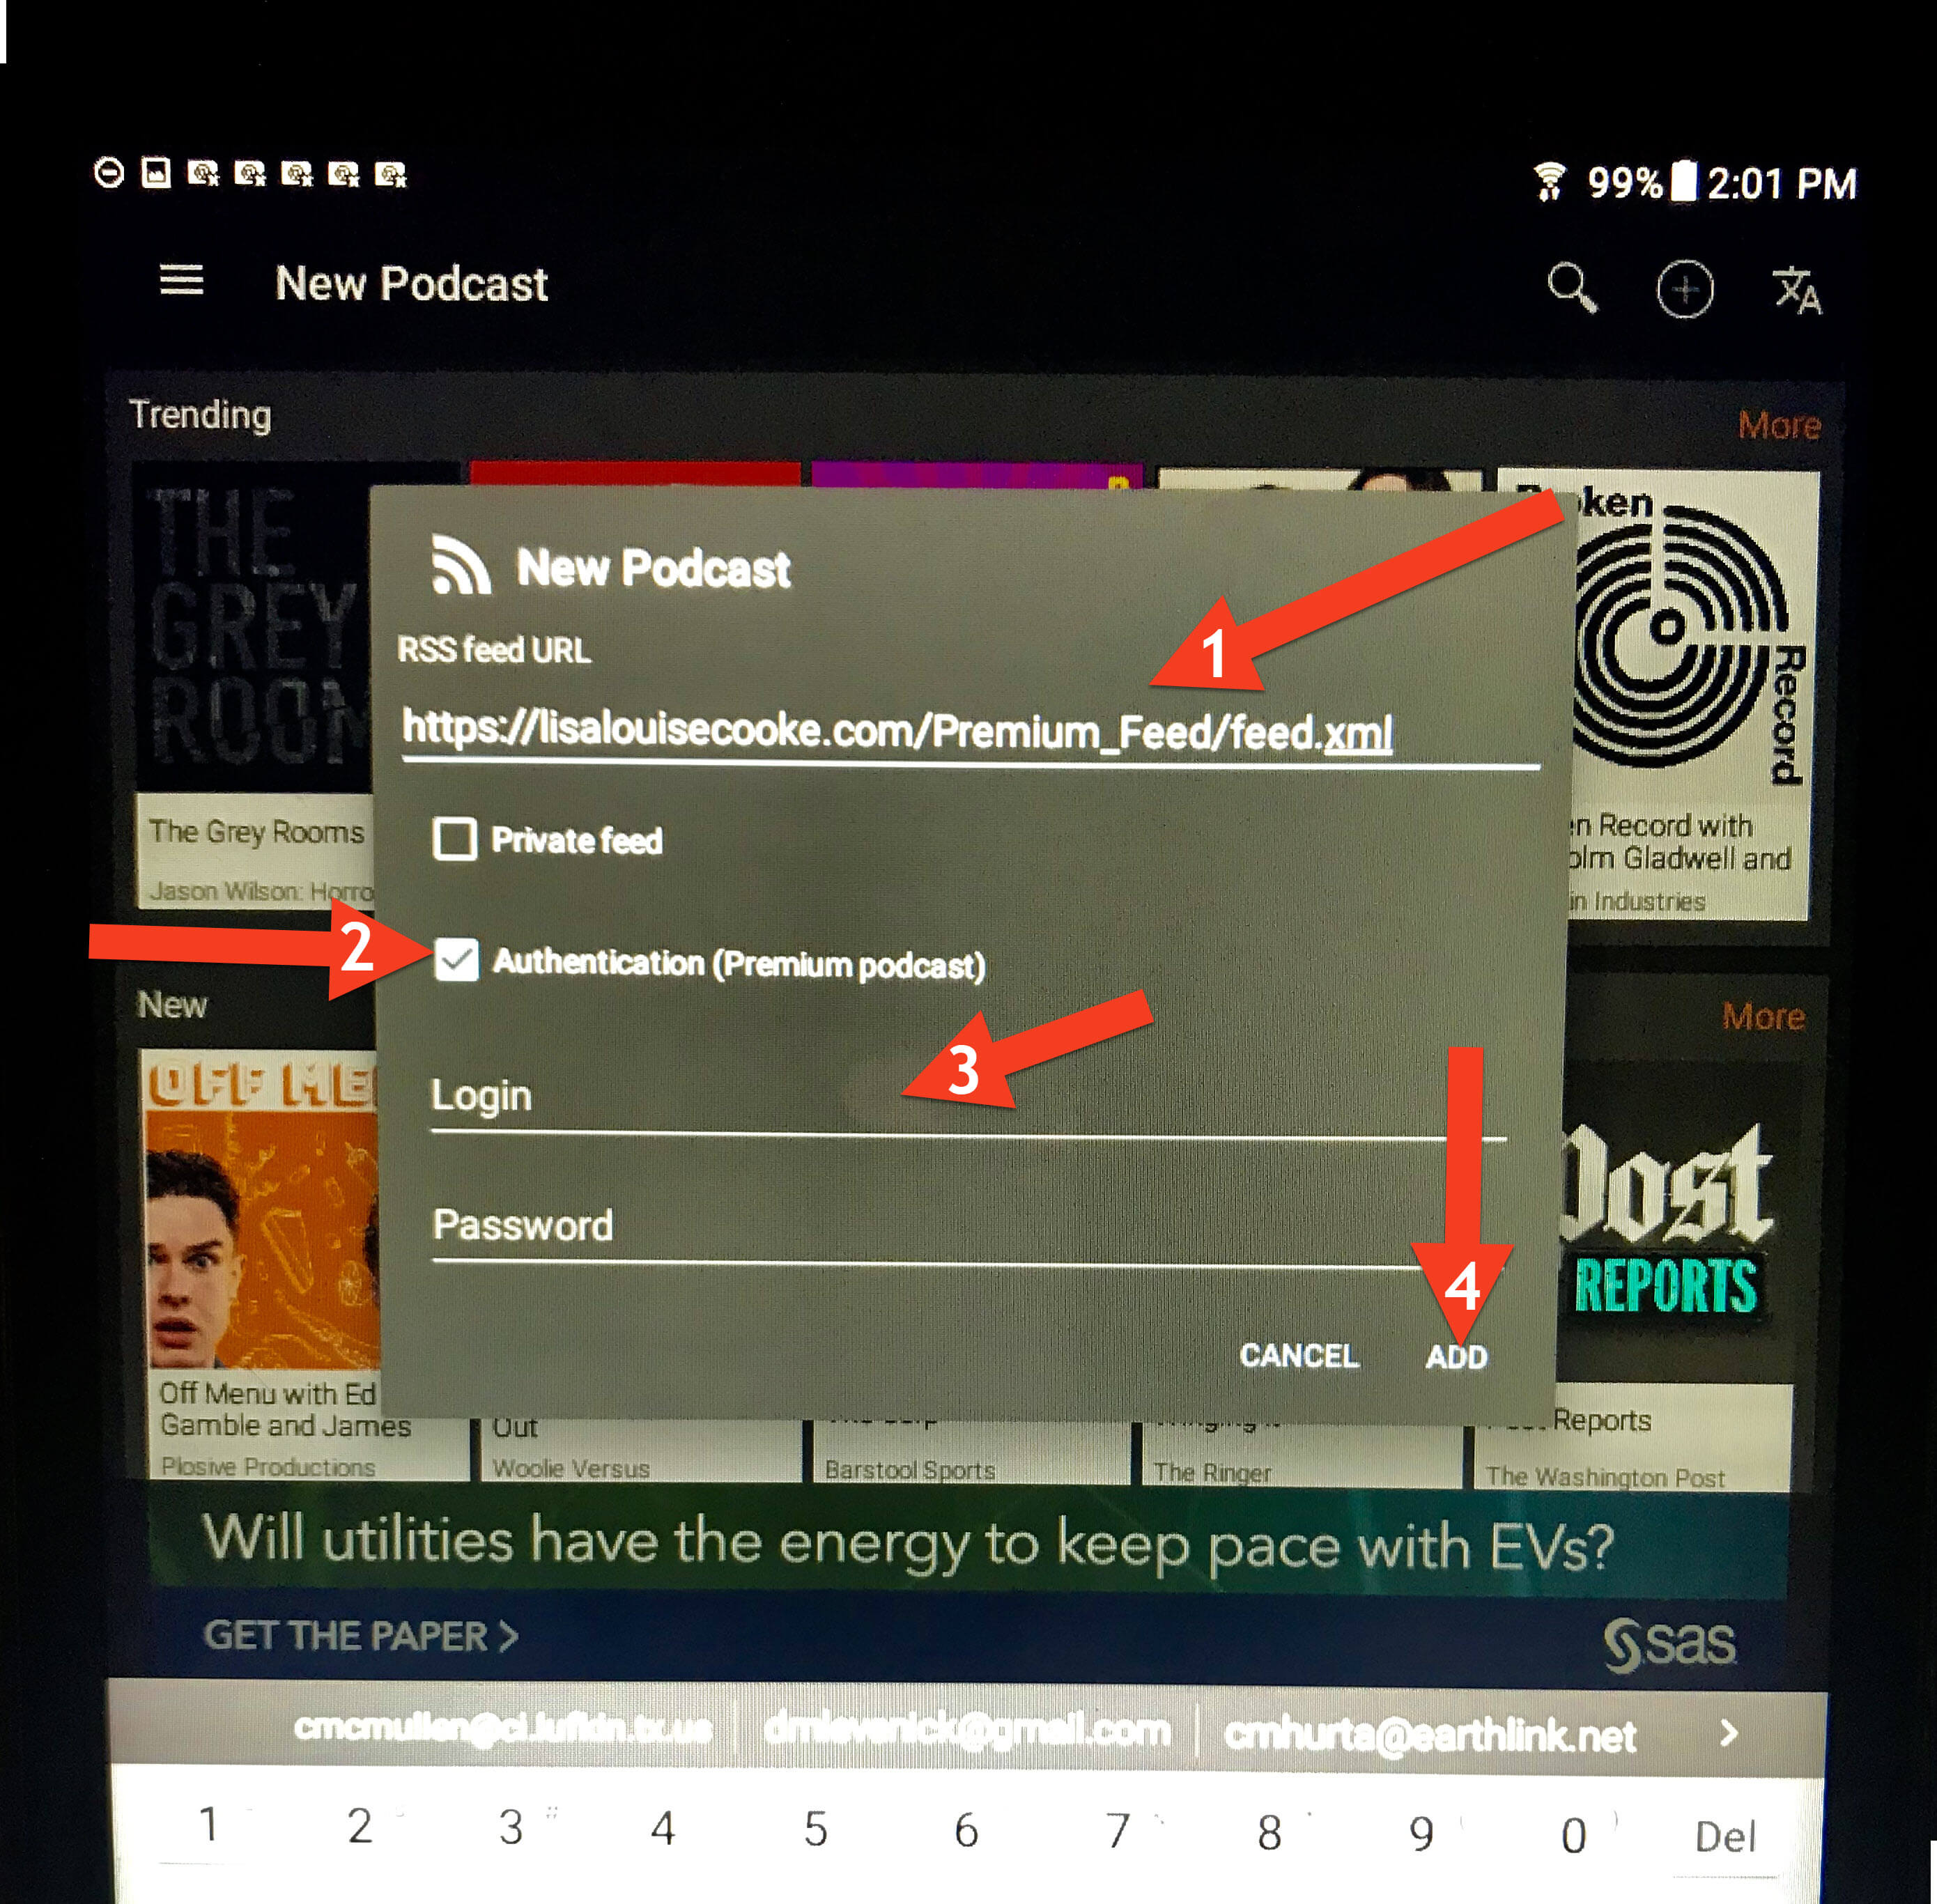
In the “RSS feed URL” field, copy and paste this address to ensure it is exactly correct with no extra spaces at the end (the feed address is case sensitive):
https://lisalouisecooke.com/Premium_Feed/feed.xml
- Check the box for “Authentication (Premium Podcast)”
- Type in your Genealogy Gems Premium Membership username and password. You MUST use your membership username, NOT your email address.
- Tap “Add”
Your Podcast home screen will now have the Genealogy Gems Premium Podcast.
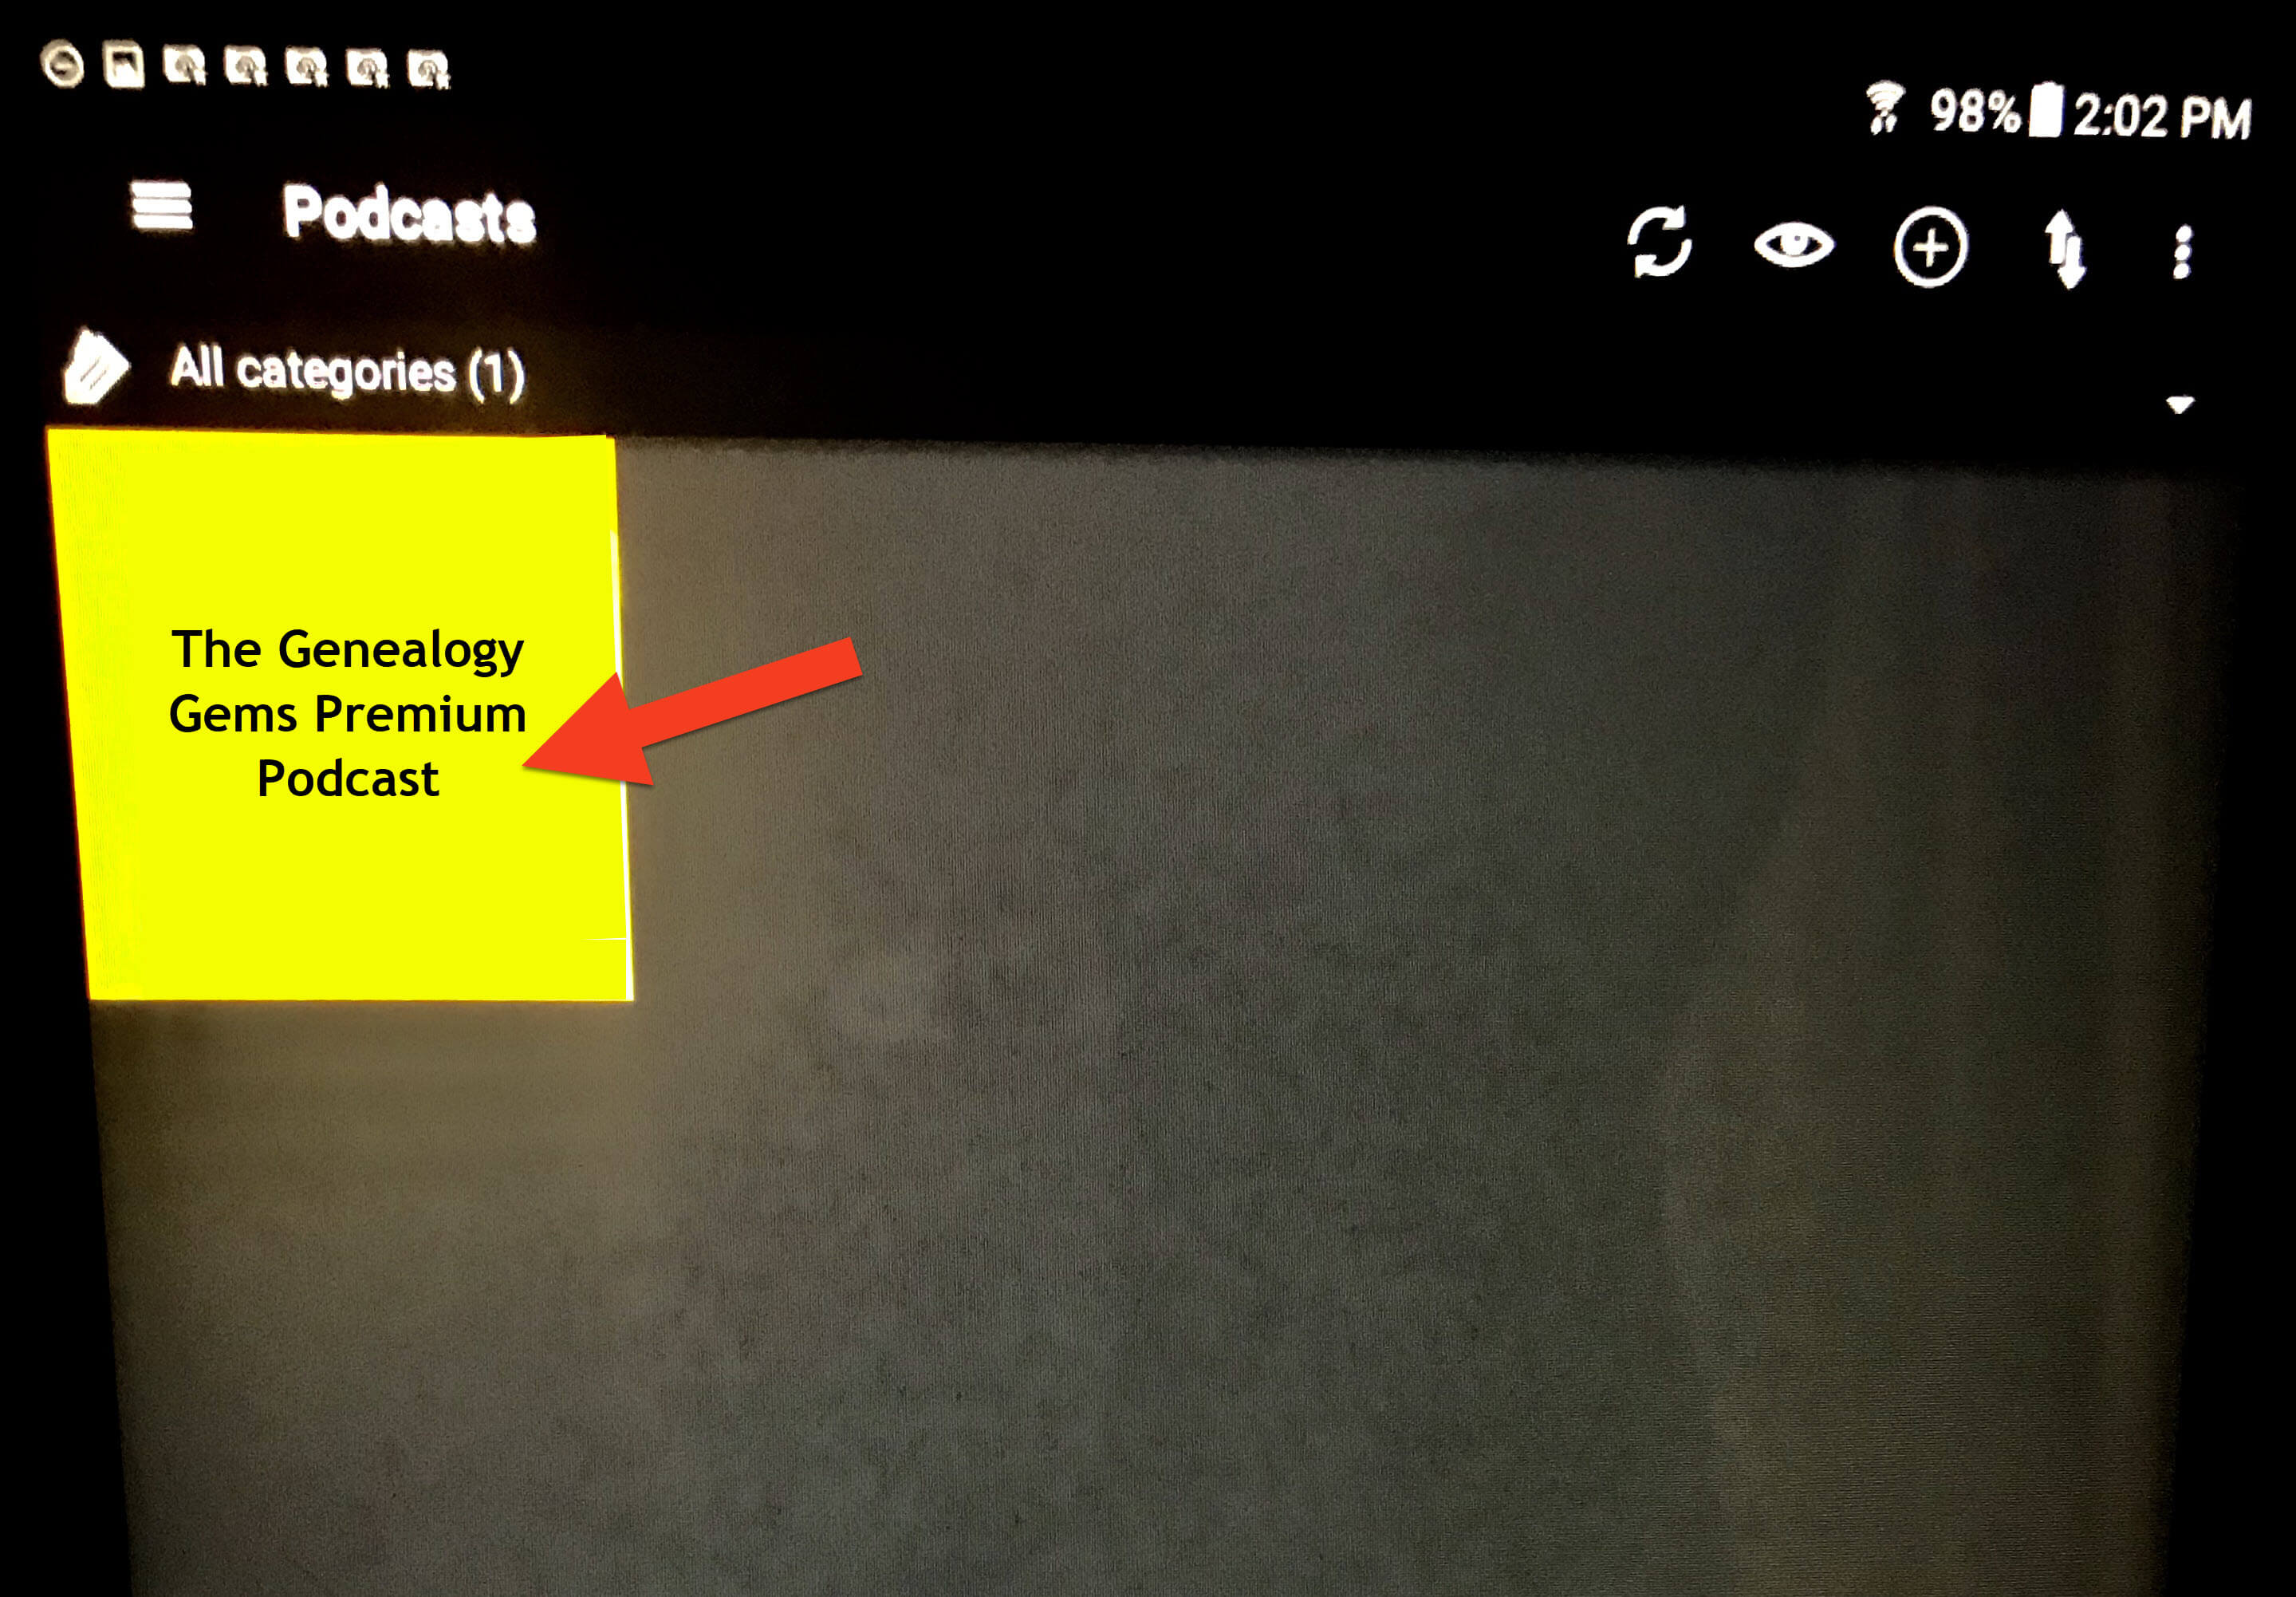
Tap the podcast icon. It may appear yellow like this or it may be our logo) to reveal all episodes, starting with the most recent episode at the top of the list.
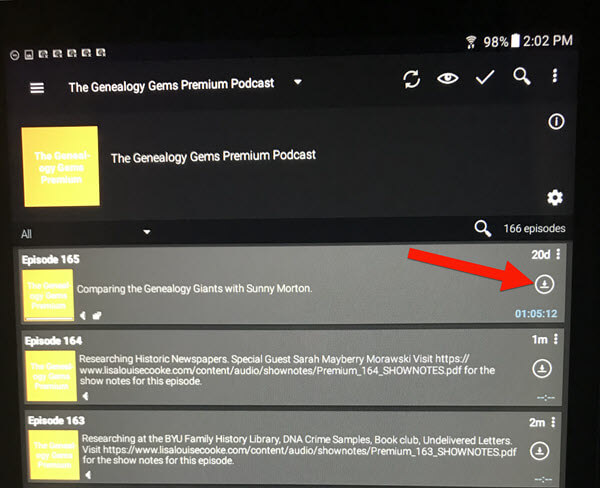
3. Downloading Episodes
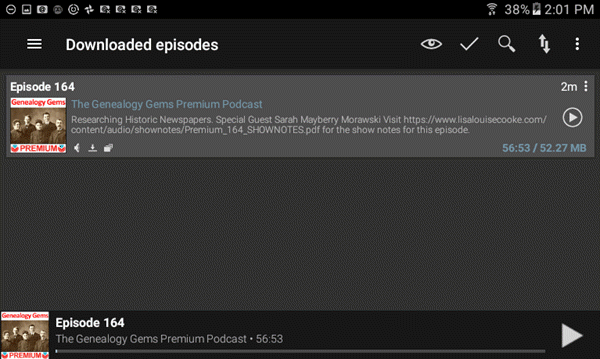
You can download episodes so that you can listen offline, without an internet connection or using your device’s cellular data. Download an episode by tapping the down arrow icon on the right:
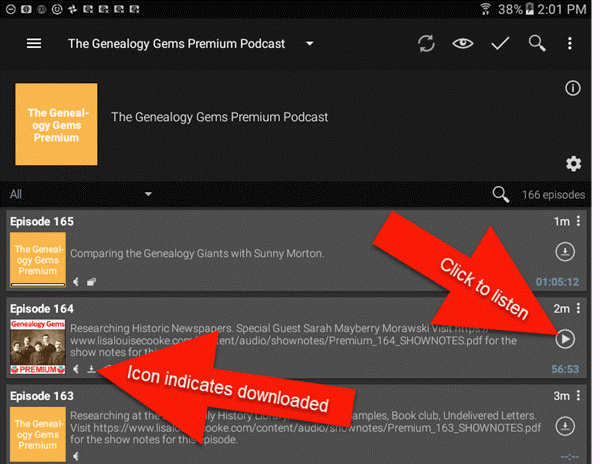
Once the episode is downloaded, a play button will appear that you can click to listen. A small download icon will appear indicating that this episode is downloaded to your device:
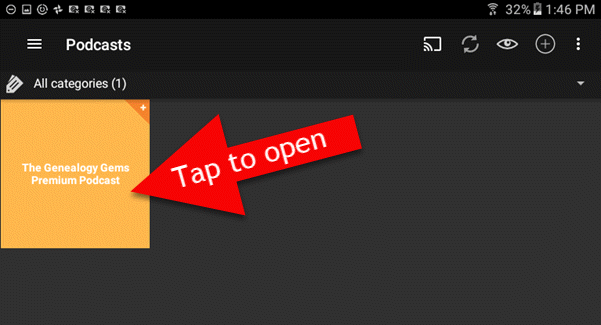
3. Listening to Episodes & Viewing Show Notes
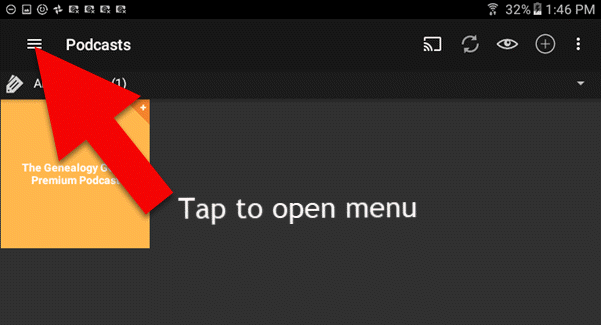
When you open the app, tap the Genealogy Gems Premium podcast to access episodes:
You can go straight to the episodes you’ve already downloaded through the app’s menu. Tap the three lines icon:
Then tap Downloaded episodes:
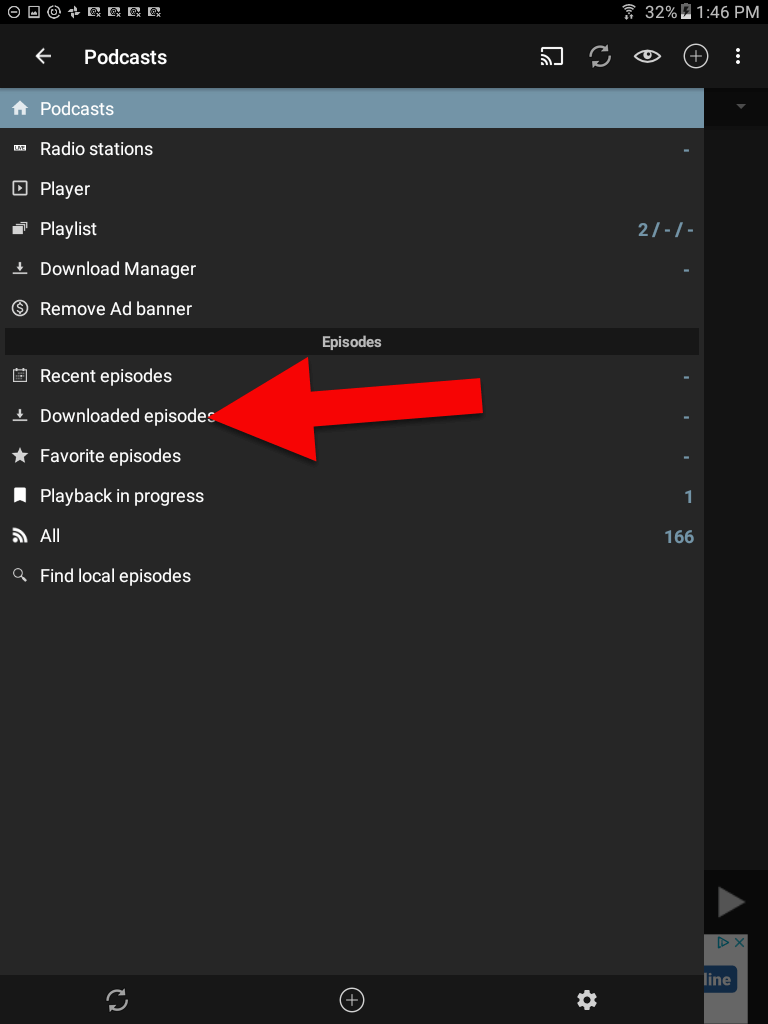
On this screen are only the episodes you have downloaded for offline listening. To return to all episodes just tap the 3 line icon in the upper left corner.
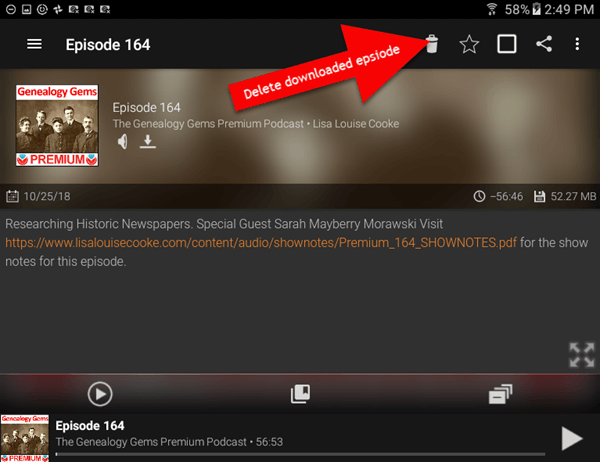
4. Deleting Downloaded Episodes
After you have listened to a downloaded episode, you can delete it to free up the space on your device. (Don’t worry, all of the episodes are still available through the main podcast feed in Podcast Addict.) To delete an episode in the Downloaded Episodes area, tap the 3 dots icon on the episode you want to delete:
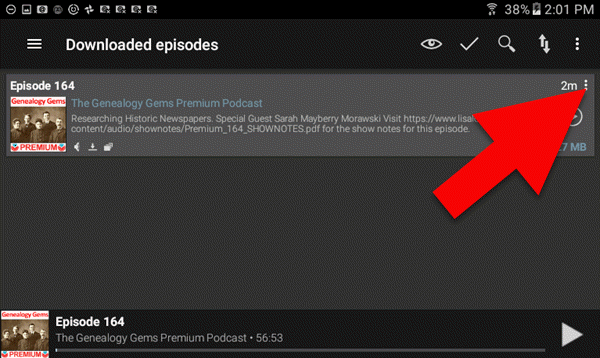
(Note: If you want to delete all the episodes that you’ve already played, click the 3 dots icon at the very top of the right-hand corner, and then tap “Delete Played Episodes”)
On the page for that downloaded episode tap the trash can icon to delete it from your device:
Need More Help?
If you’re experiencing error messages or other technical difficulties, please visit our Premium eLearning FAQ page and head to the Troubleshooting section towards the bottom. You’ll find answers to the most common causes of problems and solutions and tips to fix them.