“Because of your consistent message of starting a family blog [and] anecdotal success from listeners, I started a family history website. A blog just seemed too small…. The ultimate goal is to display the family information for my known relatives as well as create a site that will pop up on Google search results and hopefully put me in contact with new relatives.
My question is about displaying the family tree on the website. I want to have a page that shows my family tree. I did not know how to accomplish that, so I decided to include links to my ancestry and myheritage family trees. The problem with this method is that ancestry requires you to have an account to view the tree, and MyHeritage only shows you some of the family tree and requires an account to view the rest. This is not a great method to share the family tree with relatives because not everyone has, or wants, an account with these sites. Is there a website where I can upload my family tree’s GEDCOM file and then link to it on my website where it will display all the members of my tree?”
It’s always great to hear that Genealogy Gems is helping out. Congrats on the website David! I recommend blogs to my readers because they are quicker and easier to set up, but in reality I would rather recommend they create a family history website like you are doing. It’s better suited for the long haul of getting your word out and connecting with others.
You pose a great question, and so I did what I just coached everyone in my latest episode #171 to do: just Google it! What you are describing is a ‘website plugin’ so I Googled: family tree website plugin and…Ta-da! There are some out there.
I found one for Word Press (which is where I build my site) so I may have to give that one a try. However, since you are using Weebly I went back and added “weebly” to the search and there are definitely some hits there, though I’m not sure if they specifically include a visual tree plug in. Try the searches and see if you find something you like.
In the digital era, it’s more important than ever to digitize your family history: tree data, photos, stories, interviews, home movies and compiled research. Digitizing preserves the information against loss and allows others to enjoy it now. And for future...
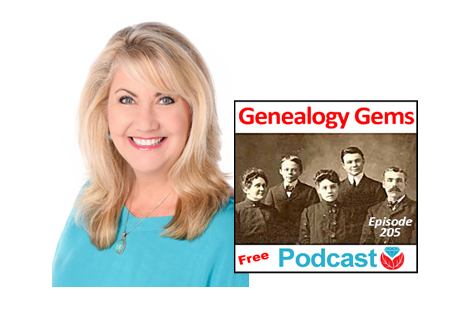
The Genealogy Gems Podcast
Episode #205
with Lisa Louise Cooke
This episode breaks two huge pieces of genealogy news and shares two great conversations:
FamilySearch ends microfilm lending: how you can get the records you need;
RootsMagic adds Ancestry.com compatibility: sync your Ancestry.com tree to your master RootsMagic file and search Ancestry.com from within the software;
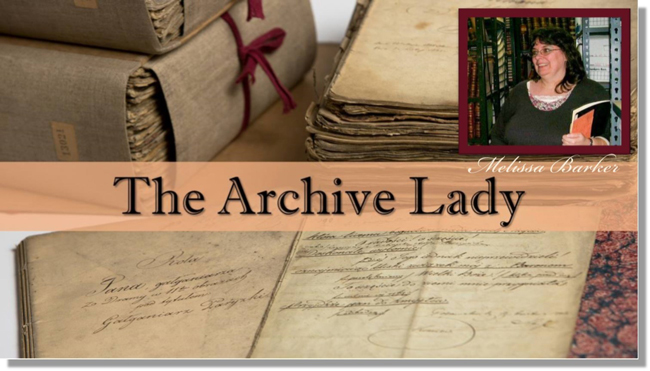
Melissa Barker, the Archive Lady, talks about visiting archives to explore original manuscript record treasures;
Nicole Dyer shares a fun family history activity idea to do with kids?do you have a family gathering coming up that could use this inspiration?
Lisa Louise Cooke shows you how to use the free Google Earth Pro software to create your own historic map collection customized for your genealogy and family history research. By the end of this class you’ll have a permanent collection of hundreds of gorgeous historic and vintage maps from around the world, organized and ready to use for family history.
Click here to watch a free preview of this full-length video class. Genealogy Gems Premium website members can watch the whole thing: click here to learn more.
The 4th Annual Northwest Genealogy Conference
This episode today is brought to you by the 4rd Annual Northwest Genealogy Conference, hosted by the Stillaguamish Valley Genealogical Society, north of Seattle in Arlington, WA. Centering on the theme, “Where Does Your Story Begin?” it’s four days PACKED full of genealogy.
There will be well-known and respected keynote speakers, including our friend and genetic genealogist Diahan Southard, speaking on DNA; Kenyatta Berry of Genealogy Roadshow fame, speaking on Caribbean research and using slave schedules in research; and Daniel Earl speaking on Putting History in Your Family History.
Starting off with the Free Day Wednesday afternoon, Speaker Peggy Lauritzen will address beginner’s issues in her Genealogy 101 presentation, which is also a good refresher for the more seasoned genealogists. There will be such great genealogical information for all levels, AND it’ll be lot of fun!
Between classes take a chance to meet a distant cousin with the “Cousin Wall”. Participate in the genealogy-related scavenger hunt, the Wednesday evening meet and greet and the Friday dress-as-your-ancestor day, and much, much more!
Go to www.NwGC.org for details and to register. Check it out now — registrations are limited, so it’s good to get in early. It’s August 16-19, 2017. It’ll be a great show: don’t miss it!
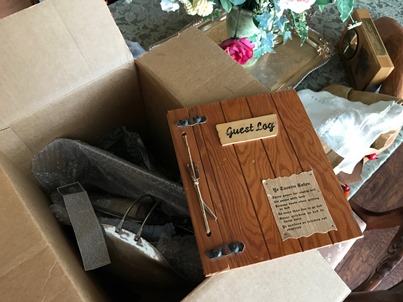
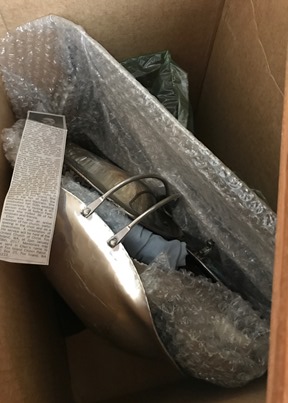
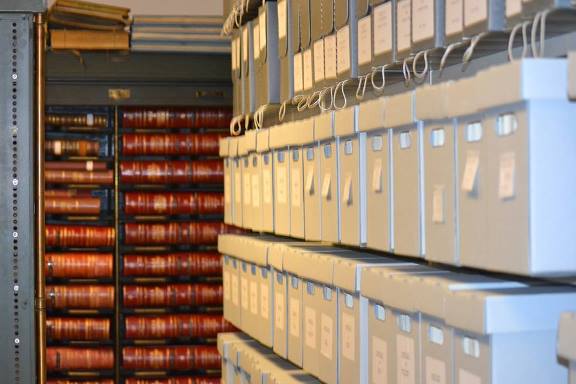
Items in danger include original items in attics, basements, etc.
What to preserve first? The most precious and original items you have!
Restoration tips:
Clean documents and photos with archival sponges. Lay the item perfectly flat. Gently place a finger or hand to hold it steady. Work with the sponge from the center outward, in small sections.
Keep two-dimensional items as flat as possible.
Encase fragile items in Mylar sleeves (buy from archival supply companies).
Image courtesy of Melissa Barker and Houston County, TN Archives.
Visiting an archive:
Call ahead! Don’t trust the operational hours from the website. Ask about parking ? it’s often very limited. Ask ahead about access to archival items of interest.
Archive etiquette: Follow the rules. Be courteous when working with staff.
Museums, societies, archives, and libraries may all have collections in back rooms you can’t see?but you can ask for them.
Vertical Files – in folders in cabinets
Manuscript Collections – underused in genealogy! Ask for finding aid.
Loose Records – the working papers of a court case, for example
Unprocessed Records – not yet incorporated into the official collection
Tips for using your mobile devices in archives:
Ask for procedures for taking photos with your own device. There may be rules against this or a use fee.
Capture the source information by photographs: cover page, page number, folder, box number, manuscript collection name, etc.
If you’re listening through the Genealogy Gems app, your bonus audio content for this episode comes from Melissa Barker, the Archive Lady, with more about finding and using original manuscript records in your genealogy research. The Genealogy Gems app is FREE in Google Play and is only $2.99 for Windows, iPhone and iPad users.
Lisa Louise Cooke uses and recommends RootsMagic family history software. From within RootsMagic, you can search historical records on FamilySearch.org, Findmypast.com and MyHeritage.com. RootsMagic is now fully integrated with Ancestry.com, too: you can sync your RootsMagic trees with your Ancestry.com trees and search records on the site.
Keep your family history research, photos, tree software files, videos and all other computer files safely backed up with Backblaze, the official cloud-based computer backup system for Lisa Louise Cooke’s Genealogy Gems. Learn more at http://www.backblaze.com/lisa.
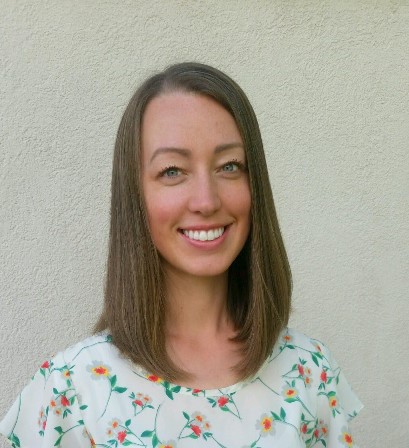
INTERVIEW: NICOLE DYER
Nicole has been researching her ancestors and delighting in their stories for the past 15 years. Nicole volunteers at the Tucson Family History Center teaching a family history story time group for young children.
(Full disclosure: this podcast blog contains affiliate links. We will be compensated if you make a purchase through our link. Isn’t that an awesome way to help keep the free podcast free?!)
Start creating fabulous, irresistible videos about your family history with Animoto.com. You don’t need special video-editing skills: just drag and drop your photos and videos, pick a layout and music, add a little text and voila! You’ve got an awesome video! Try this out for yourself at Animoto.com.
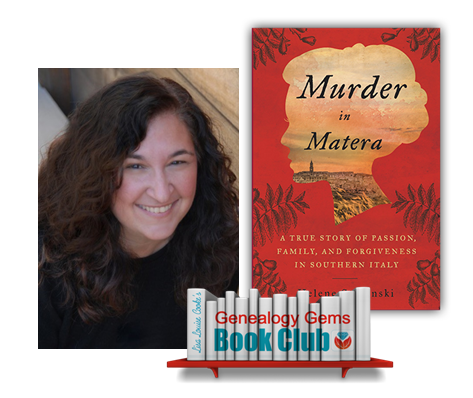
GENEALOGY GEMS BOOK CLUB: A FAMILY HISTORY MURDER MYSTERY!
Show Notes: If you’ve created a MyMap in Google Maps, there’s a lot more that you can do with it if you import it into Google Earth. However, exporting it out of MyMaps as a KMZ that can be used in Google Earth isn’t really obvious. The good news is that it’s not hard to do. I’ll explain how and I’ll also show you how to import the KMZ file into Google Earth.
If you have several items in your MyMaps project, make sure that each item that you want to be included in the file that you’re exporting has a checkmark next to it. Whatever is checked is activated on the map display and will be included in your exported file.
Next, in the upper left corner of Google MyMaps, you’ll see three vertically stacked dots. When we click that, you’ll get a menu that includes Download KML. KML and KMZ are file extensions that are supported by Google Earth.
You’ll also see View Map in Google Earth in this menu. If you click that the MyMaps project will open in a new web browser tab in the web version of Google Earth. You don’t want that because the web version does not have all the features that are available in the free downloadable software version of Google Earth.
Click to select Download KML. KML stands for Keyhole Markup Language. This is a geographic file. The difference between KML and KMZ is that KML is typically a single item while a KMZ is a zipped file potentially containing several items. Each placemark and data item added to your project is a single item. When you have several like in our example project, you will want to export it as a KMZ. So even though the menu says Download KML, go ahead and click it.
When you click it you’ll get a pop-up menu with two options:
Keep data up to date with network link KML (only usable online).
This will include all your data. If any of that data is coming from another source on the cloud and that source updates, your data will update in Google Earth.
Export as KML instead of KMZ. Does not support all icons. This can zip your project as a .KMZ but it might not transfer all your icons, particularly those that might be coming from another source on the cloud.
In many cases, either of these would be fine. But when in doubt, I select Keep data up to date with network link KML so that all my project data will remain current.
After you make your selection, your file will be exported to your hard drive. You can select the destination where you want it saved. It will be a KMZ file because there are multiple items that have been zipped into one package.
How to Open an Exported MyMaps KMZ File
On a PC you will see the downloaded KMZ file in the bar at the bottom of your screen. If you click the up arrow you can open the location on your hard drive where the file was saved. You can also click Open. That opens the KMZ in a program that can read it like Google Earth if it’s already installed on your computer. The easiest way to open the file is to simply double-click it. Your computer will automatically detect that you are opening a KMZ file and it will automatically launch your Google Earth software, and open and display the file in it. It may take a few extra moments to load and run because it’s trying to do two things at once, and Google Earth is a pretty robust program.
There are three panels in Google Earth:
Search (where you enter names, addresses and more to fly to locations in Google Earth),
Places (your Google Earth files and folders These are private and are not published by Google.)
and Layers (data that can be streamed from cloud sources.)
Your project file will be in the Temporary Folder of the Places Panel. Google places opened files in the Temporary folder because it doesn’t know whether you just want to look at it one time, or you want to keep it. When you want to keep a file, you will need to drag and drop it onto MyPlaces at the top of the Places panel, or into a folder you have created.
Also, Google Earth doesn’t autosave. So it’s important to save your work before you close the program. Otherwise, your file will be lost. To save your file, in the menu at the top of the screen select File > Save > Save MyPlaces.
How to Display a MyMaps File in Google Earth
There is a small arrow next to your project file in the Places panel that indicates it is a nested project folder. Click the arrow to display the contents of this zipped container. Inside is the actual MyMaps project folder or the project. Continue to click arrows to reveal the nested content. Now that you can see the individual items, you can now work with them.
To display the entire project on the screen, double-click the main project file (not one of the nested items). Click only to highlight it. Don’t click the linked title because that will only display the descriptive text you included in your original MyMaps project.
Everything that you saw in MyMaps is now in Google Earth. You can check and uncheck items within the project in the Places panel depending on what you want to be displayed on the screen.
How to Add Content to a MyMaps File in Google Earth
You can easily add additional content to your project. Click to select the project, then add content such as a Placemark. If you selected the Keep data up to date with network link KML option when you exported your file, you won’t be able to add items to the existing folders that came over from MyMaps. However, you can add individual items or new folders by selecting the top-level project.
The beauty of working with the project file in Google Earth is that you can now add content from the Layers panel, some of which was not available to you in MyMaps. You can also add additional items from the Toolbar at the top of the Google Earth screen.
Learn More about Google Earth for Genealogy
Get the book:
The Genealogist’s Google Toolbox, 3rd edition by Lisa Louise Cooke. This book includes 7 full chapters on Google Earth for genealogy.
More Videos and Show Notes Articles on Using Google Earth for Genealogy:
Visit the Maps & Geography category on the Video & Show Notes page on the Genealogy Gems website.
 recommend blogs to my readers because they are quicker and easier to set up, but in reality I would rather recommend they create a family history website like you are doing. It’s better suited for the long haul of getting your word out and connecting with others.