Beginning British Genealogy: What You Must Know to Start
With about 1/3 of Americans claiming British ancestry, chances are that at some point you will need to extend your research across the Atlantic Ocean. Genealogical research in the British Isles has some important differences when compared to the United States. Guest blogger Kate Eakman, a Senior Researcher for Legacy Tree Genealogists, clarifies confusing terms and helps you get your research started on solid footing!
Britain? England? The United Kingdom?
When beginning British genealogy research, it’s important to first talk about the difference between British and English research. There are several terms which get used interchangeably but which really refer to different locations.
Great Britain is an island, the largest island in the British Isles.
On the island of Great Britain are three of the four sovereign nations which make up the United Kingdom, or the U.K.: England, Wales, and Scotland. Northern Ireland on the island of Ireland is the fourth country of the U.K.
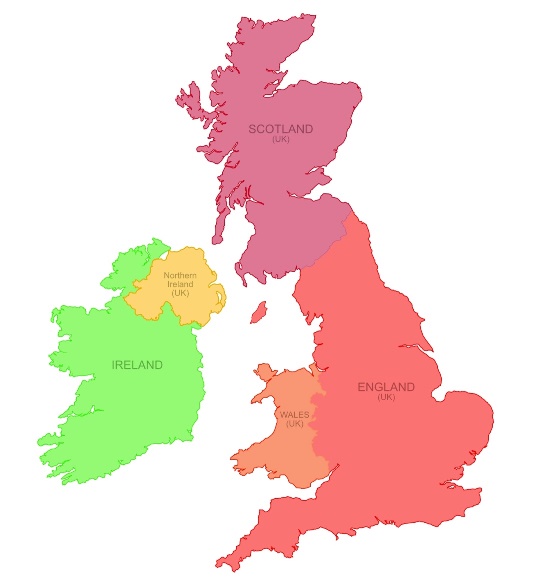
The four countries of the United Kingdom and the Republic of Ireland. Map courtesy Nate Parker.
Usually, when people talk about their British ancestors, what they really mean are their English ancestors. Although we Americans often treat the two words as interchangeable they really aren’t, and I suspect our English friends giggle a bit when they hear us misuse the words.
The four countries of the U.K. have some similarities but many important differences, and that is equally true for genealogical research. Rather than trying to explain all of those differences, this post will focus on English research.
One last thing to keep in mind when we talk about genealogical research in England is that today the country is divided into counties, which are sort of the equivalent of states in the U.S. Older records might refer to those counties as shires, and over time the borders have shifted, shires and counties were added, divided, or absorbed into each other. So a good map or two will be a useful tool to keep handy while you research your English ancestors.
Usually, when people talk about their British ancestors,
what they really mean are their English ancestors
What do you know?
Before beginning British genealogy research and making that leap across the pond, it is a good idea to consider what you already know about your English ancestors. Of course, you have a name, and you probably have an approximate date of birth.
- Were you fortunate enough to find the name of a town or county where that ancestor lived or do all of the census reports and vital records simply say “England”?
- If the ancestor arrived as an adult, what occupation did he pursue?
- When did he or she arrive in the U.S.? Are there any clues on the passenger list to tell you where to start looking?
- Once you have reviewed all of the information you have already acquired about your English ancestor, it’s time to start your research.
Beginning British Genealogy Research with the Census
The first step in most genealogical research is to study the existing census reports. Designed as a means to count the population for a variety of years, the census of Great Britain (including Scotland) is taken every ten years with the earliest records available in 1841. Due to very restrictive privacy laws, the most recent census available is from 1911, with one really valuable exception being the 1939 Register, available at FindMyPast.
Used for genealogical purposes, the census can give a snapshot of the family at the time the census was taken, as well as provide invaluable information such as the birthplace of the individual being recorded, occupation, birth year, and familial relationships. Elderly parents, or widowed mothers, aunts, or sisters, can be discovered living with younger members of the family.
Drawbacks of using the census for genealogical purposes include inaccurate name spellings, inaccurate age reporting, and inaccurate assumptions made by the enumerator. Another thing to keep in mind is that in the 1841 census the enumerated rounded down to the nearest five years the ages of people over 15. So a person who was listed as 25 could have been 25 through 29 years old.
It is important to remember that for the census reports through 1901 the enumerator copied the household information into books, and these copies are what we have today. Of course, when information is copied it is susceptible to error. The person who completed the census form may have had difficult-to-read handwriting, or the enumerator may have entered things on the wrong line. The individual reports have been kept for the 1911 census and offer a greater likelihood that the information they contain is very accurate.
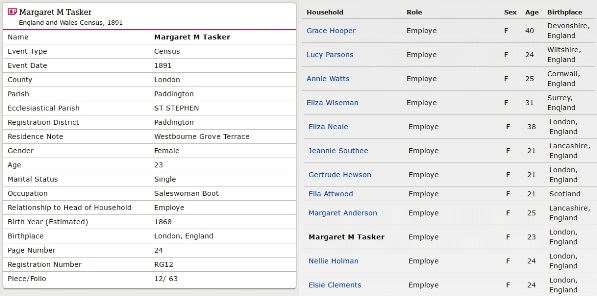
An example of a transcription from the 1891 English Census from Familysearch.org.
Detailed transcripts of English census records are available for free on FamilySearch and the images can be found for a fee at FindMyPast.
It is important to remember that for the census reports through 1901 the enumerator copied the household information into books, and these copies are what we have today.
Civil Registry of Vital Events
All English births, marriages, and deaths were required to be registered in a civil registration office beginning in July of 1837. In addition to the records themselves, there are indices which list the name of the person who was born, married, or died, the place where the event was registered, and the quarter and year in which the event occurred. Because the General Register Office (GRO) will only search one year on either side of the date provided, it is best, but not required, to include the index information when ordering documents from the GRO.
Free BMD is a free database which allows you the most freedom to search for the birth, marriage, and death index record of your relatives. You can enter whatever information you know including the place where the event happened, a specific year or range of years, age, and mother’s maiden name.
Depending on the time period, the index may be handwritten or mechanically printed. The information can then be used to order a copy of the actual record from the General Register Office (GRO) in England for about $10 per record.

An example of handwritten (left) and mechanically printed (right) birth index entries. Photos courtesy https://freebmd.org.uk.
The information contained in birth records includes:
- Name, date, and place of birth;
- Father’s name (if given at time of registration), occupation; and
- Mother’s name, maiden surname.
The parents’ places of birth were added after 1969, and the mother’s occupation is listed after 1984.
Marriage records include:
- Date and place of marriage;
- Name, age and marital status (spinster/bachelor, widowed, divorced) of the bride and groom;
- Occupation and usual address;
- Name and occupation of the fathers of the bride and groom, with a note if either man was deceased at the time of the marriage;
- Names of the witnesses;
- Name of the person who solemnized the marriage.
Death records in the United States are often relied upon to provide the names of the parents. English death records do not include that information and therefore are not as useful for genealogical purposes. Each death record includes:
- Name, date, and place of death;
- Date and place of birth (before 1969 a certificate only showed age of deceased);
- Occupation and usual address;
- Cause of death;
- The identity of the informant.
There are other records available, which we will talk about in a later post, which can be used to find and trace your English family members. The largest group are the religious records, and sometimes those can help you extend your family back in time to the 1600s – 400 years or more!
Beginning British Genealogy Important Take-Aways…
- “Great Britain” is an island. “The United Kingdom” is a country. And “England” is a country. Normally, when people are talking about their British ancestors they are referring to their English ancestors.
- England has counties, or what used to be known as “shires,” which function sort of like our states. The borders have changed over time, as have some of the names, so use a map when necessary to verify where you are researching.
- Census records are available from 1841 through 1911. Really good transcriptions are available for free at Family Search, or on the for-fee site Find My Past. And remember that age idiosyncrasy about the 1841 census.
- Finally, civil birth, marriage, and death records are available from the GRO. You can use the index listings to find the most likely match for your ancestor, and those can be found online at Free BMD.
Have fun and good luck finding your English ancestors!
 Kate Eakman is a Senior Researcher for Legacy Tree Genealogists, a worldwide genealogy research firm with extensive expertise in breaking through genealogy brick walls.
Click here to learn more about Legacy Tree services and its research team.
(Read our Disclosure and Affiliate Disclaimer on this page)
Don’t Miss this Genealogy Record Collection at Ancestry!
Show Notes: A compiled history is kind of like standing on the shoulders of the giants of genealogy that came before you. OK, so maybe they weren’t giants, but they did document what they found and they published it so that you can benefit from it. This means that rather than having to start from scratch, you can look at the research that’s already been done. This provides you with clues and information that you can track down and verify for yourself to add to your family tree. In this week’s video, I’m going to show you one of my favorite collections of compiled family histories at Ancestry, and the search strategies you’ll need for success.
Watch the Video
Show Notes
Downloadable ad-free Show Notes handout for Premium Members.
A compiled history is kind of like standing on the shoulders of the giants of genealogy that came before you. OK, so maybe they weren’t giants, but they did document what they found, and they published it so that you can benefit from it. This means that rather than having to start from scratch, you have the opportunity to take a look at the research and the work that’s already been done by somebody else before you. This provides you with clues and information that you can track down and verify for yourself to add to your family tree.
Just like online family trees, not every compiled family history is well documented or well sourced. However, they can still be a great help.
Compiled Family Histories at Ancestry
So, where do we find compiled histories? One of my favorite places to find them is at Ancestry.com. They have a particularly terrific record collection called North America Family Histories 1500 to 2000. It’s not going to pop up in your regular search results. You’ll find it through Ancestry’s Card Catalog. It contains nearly a thousand privately published family history books containing over 4 million records. They focus particularly on the 18th and 19th century families, especially with Revolutionary War and Colonial ties. But you’ll also find some European family histories included, and particularly those with some nobility connections, which can take families are way back in time.
Today I’d like to introduce you to this exciting collection. Whether you need a little rejuvenation of your own family history, or you’re just getting started, either way compiled histories are a tried-and-true record collection that all genealogists should use.
How to Find the Collection
On the Ancestry.com homepage on desktop, in the menu click SEARCH > Card Catalog. It’s important to understand that a small percentage of the total records at Ancestry are delivered to you through hints. Therefore, it’s important not to just rely on hints, and take advantage of the entire card catalog. It’s really the best place to go when you know the title of a collection, like this one. You can type in the entire title or just a few keywords, pull up the collection and then search only within that collection.
Record collections have different searchability. Some may have an index, some may not, and some are just browsable. When searching, keep in mind that any deviation from the actual words in the title can cause it not to appear in the results. If you don’t see what you expected to find, double check your keywords. Even something like whether a word is singular or plural and affect the results. If you don’t have a specific title in mind, but you just want to browse, try a variety of synonyms, or reduce the number of words.
On the results page, you can hover over the title to get a little overview description. Click the title and you’ll find two ways to search the collection: the Browse this Collection column and the Search form.
Browse this Collection Column
Have fun and explore the collection using the Browse this Collection column. Select the first letter of a family surname, and then under Subject you’ll see an alphabetical listing of books with surnames. Click the title of a book to view the entire digitized compiled family history.
This brings up an important point. the Browse feature is just for the titles themselves. So, when you look for a surname, don’t be discouraged. If you don’t see it listed. It’s very possible that a branch of your family by that surname could be included in a book that is focused on a different surname.
The Search Form
The search form allows you to get really specific in your search with a variety of search parameters. It can also find names within a book regardless of whether the name appears in the title or description. Try it out for yourself. Get a feel for home many people appear in the collection with a particular surname, or with a first and last name. From there you can narrow down further.
Each result includes a View Record and a View Image icon. View Record provides you with some details about that person to help you determine if it’s your relative. You’ll find a variety of details depending on the amount of information available in the book. Take a moment to learn a little more about the book by clicking the Source tab. Investing a few moments up front to get familiar with the source that you’re looking at can be extremely helpful. It’s going to give you some context about who wrote this book, what it covers and possibly where a physical copy can be found. Click Learn More and scroll down the page. There you’ll find more specific information about what you might be able to find within the pages of the compiled family history. In addition to names, compiled histories may include birth date and place, baptism date and place, marriage date and place, death date and place, burial date and place and name of parents and spouses.
It’s also very handy on the search form that Ancestry will auto-populate people from your family tree based on the surname you enter so that you can fill in their information and search with one click.
Navigating within a Compiled Family History at Ancestry.com
Click the View Image icon on any search result to gain access to the digitized book. The scanned page will be zoomed in to the place on the page where the person you searched for is located. Adjust your view with the Zoom in and out tool on the right side of the screen.
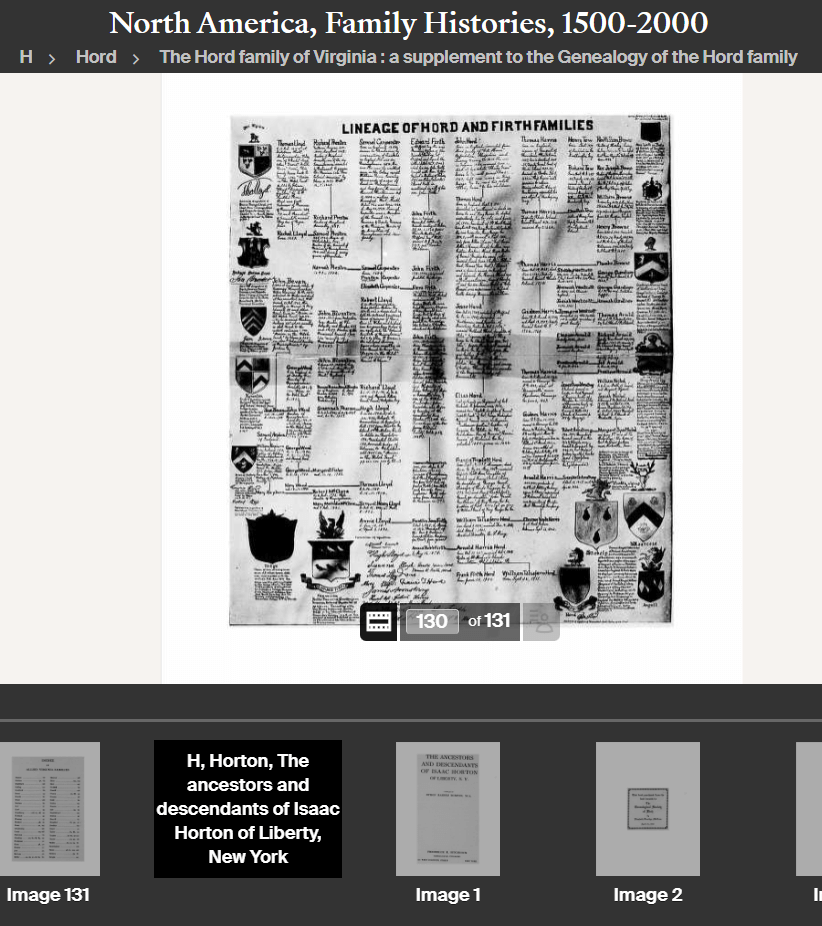
Example of a page from a compiled family history at Ancestry.
At the bottom of the screen, you’ll find the filmstrip. This displays all of the individual pages of the book in order. If you want to dedicate the entire screen to the book page, click the filmstrip X to close it. If you want to return to the filmstrip, click the filmstrip icon.
The current image number (not necessarily the same as the page number) will be displayed. Learn more about the book by going to the title page. The easiest way to do that is to type “1” in the image number box and click Go. The title page and the pages immediately following it can provide you with important source information. You may also find introductory pages including the background of the author, how the book is organized and instructions on how to interpret the content within the book.
Oftentimes, at the end of the book, you will find an index. Again, the easiest way to get there is to look at the total number of pages of the book listed in the film strip bar, and then enter that number into the image field and click Go. This will jump you to the end. Use the left and right arrow keys to navigate as needed.
Improving Ancestry Images
Depending on the condition of the book and the quality of the original scanning, some books may have pages that are a little unclear or muddy-looking. You can improve the look of these pages. Click the Tool Menu icon on the right side of the screen. Here you’ll find several options. For improving the way the image looks.
If a page has a horizontal image or photo turned vertically, use the Rotate Left and Rotate Right tools.
To make the page easier to ready, try Invert Colors. Black type on a white page then becomes white type on a black page which often makes it much easier to read.
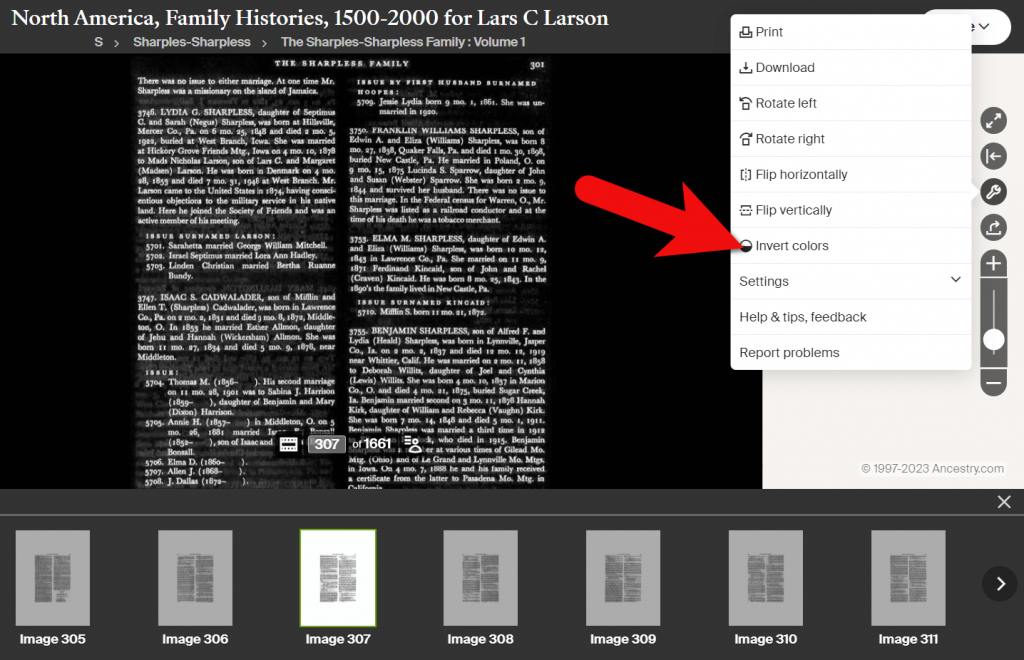
Tools Menu > Invert Colors
Downloading a Compiled Family History at Ancestry
You can print or download pages from the compiled family histories at Ancestry. Having a digital version means you can read it offline and even if you no longer have an Ancestry subscription. In the Tools menu, click Download to click the current page you are viewing as a JPEG.
To print the page on paper or save it as a PDF, select Print in the Tools menu. A big advantage of the Print option is that you can opt to Also print index and source data. This will give you the page, the information specific to the person you searched for that was indexed by Ancestry, and the source information.
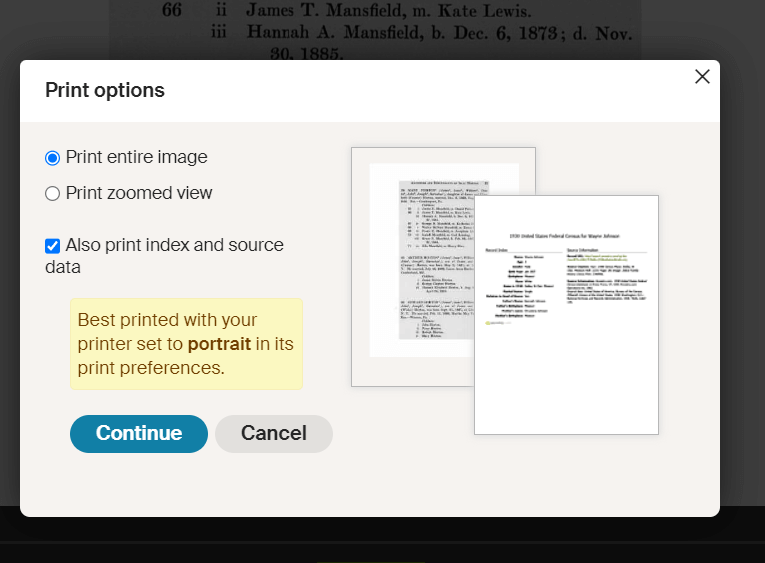
Use the Print to PDF function so that you can include the indexed information and source details.
Explore More Compiled Family Histories
The North American Family Histories Collection 1500-2000 at Ancestry is such a wonderful goldmine of information. If you dig into this collection, it’s going to whet your appetite to track down more compiled family histories on other websites, in your library, and at the archives.
Resources
Downloadable ad-free Show Notes handout for Premium Members.
RootsTech 2014: Use your iPad for Genealogy Research at the Family History Library
![]() Thinking about attending RootsTech in Salt Lake City, Utah in 2014? Then I’m guessing a trip to the Family History Library (FHL) is part
Thinking about attending RootsTech in Salt Lake City, Utah in 2014? Then I’m guessing a trip to the Family History Library (FHL) is part 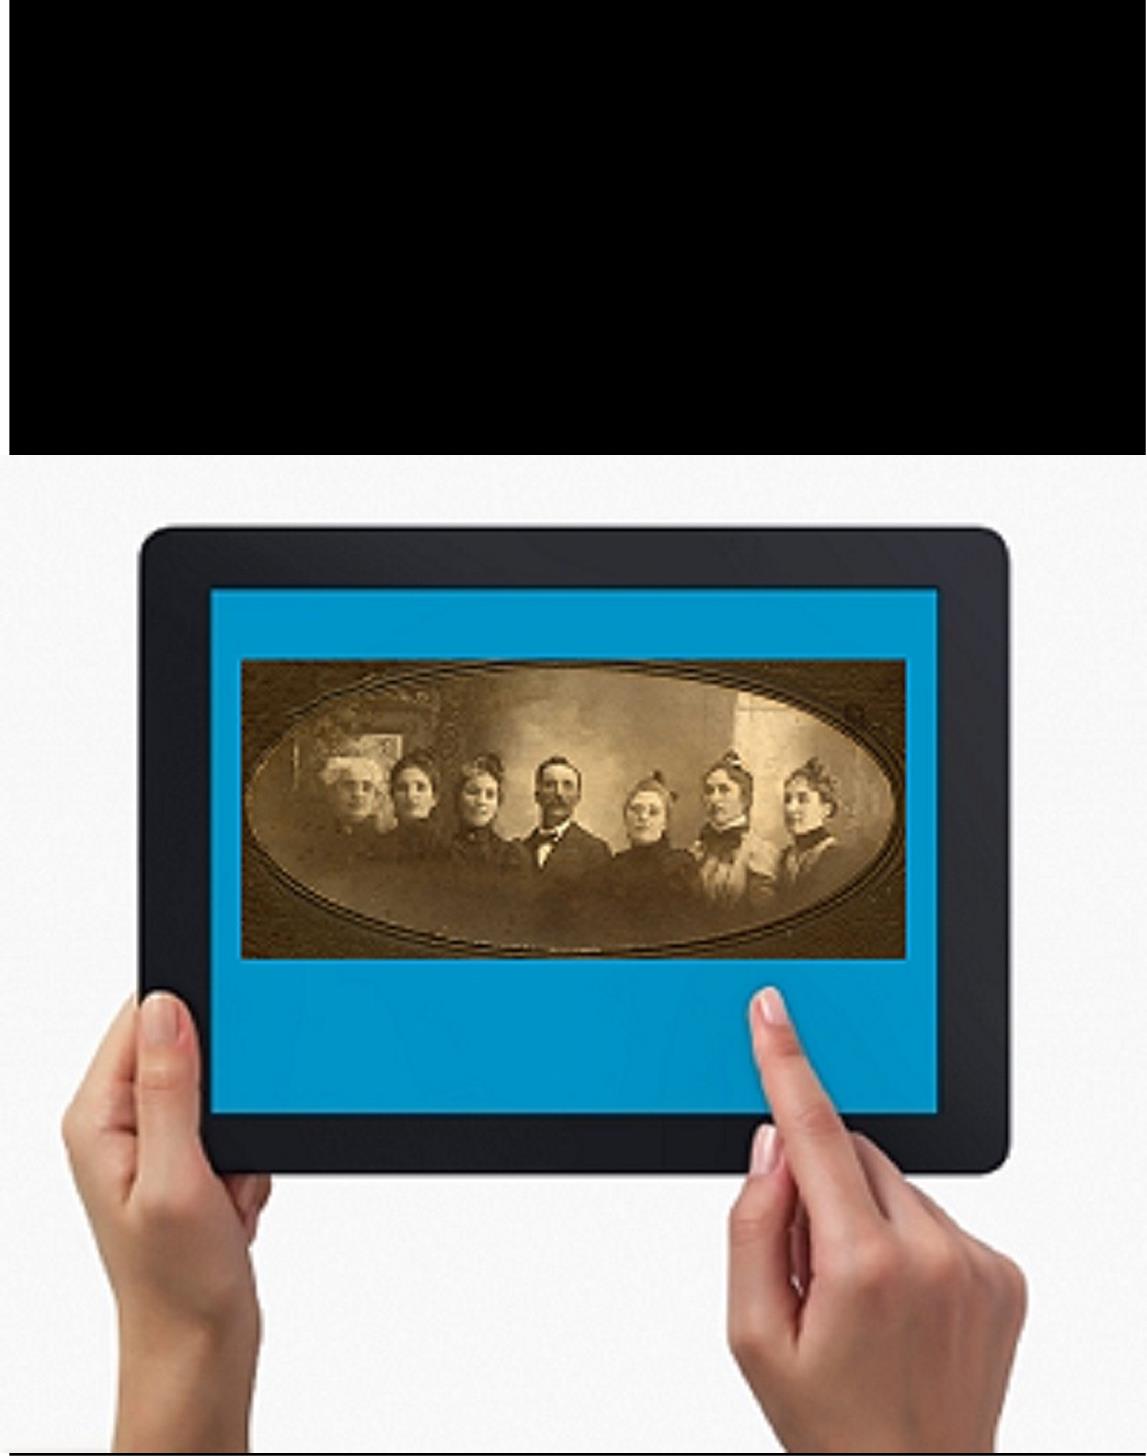 of your plan. Here’s a great tip: bring your iPad or tablet computer and don’t make a single photocopy while you’re there!
Last year, I spent two days researching at the FHL before RootsTech got going. I was up and down a lot between floors, looking at all kinds of books, microfilmed and microfiched materials and even big old maps. On a previous trip, I would have spent a LOT of money on photocopying, even though the copy services there are very low priced. I would have wanted color copies of the maps, so that would have cost more. I would have wasted a lot of time in line to use the copiers–time I would have wanted to spend researching.
But I didn’t waste any time or money. I used my iPad. I have a generation 4 with the rear-facing, 5 megapixel camera, and I used it practically nonstop…
1. Copying material from books. Whenever I found a book page (or a few pages) I wanted to copy, I first imaged the cover pages with the source citation info. Then I imaged the inside pages, making sure the image captured the page number. When I needed to record that a book didn’t have anything on my ancestors, I put a sticky note on the inside front cover saying “checked for Johnsons, didn’t find” (or whatever), then imaged the page with the sticky note on it. This was easy and fast. I sometimes imaged books while standing right in the library stacks! I didn’t have a scanning app on my iPad at the time, but remember you can also use an app like Scanner Pro to scan multipage documents, convert them to PDFs and straighten out and enhance the images.
2. Copying material from microfilm. Okay, it’s not perfect quality, but you can take decent digital images of microfilmed material right from the microfilm reader. First, image the microfilmed page at the beginning saying what the source is (or a note with the source description or even the box with the microfilm number on it). Then stand just in front of the microfilm reader with the iPad. Point the camera down to the displayed image, taking care not to block the projection of the image from the reader above. Here’s an example of what it looks like. Like I said, it’s not perfect because of the angle and lighting. Glare can be a problem so you may want to take a few shots. But you can read these images and most of the time, you don’t need keepsake quality out of microfilm. You just need to capture data. I followed up with some cropping and enhancement editing right on my iPad.
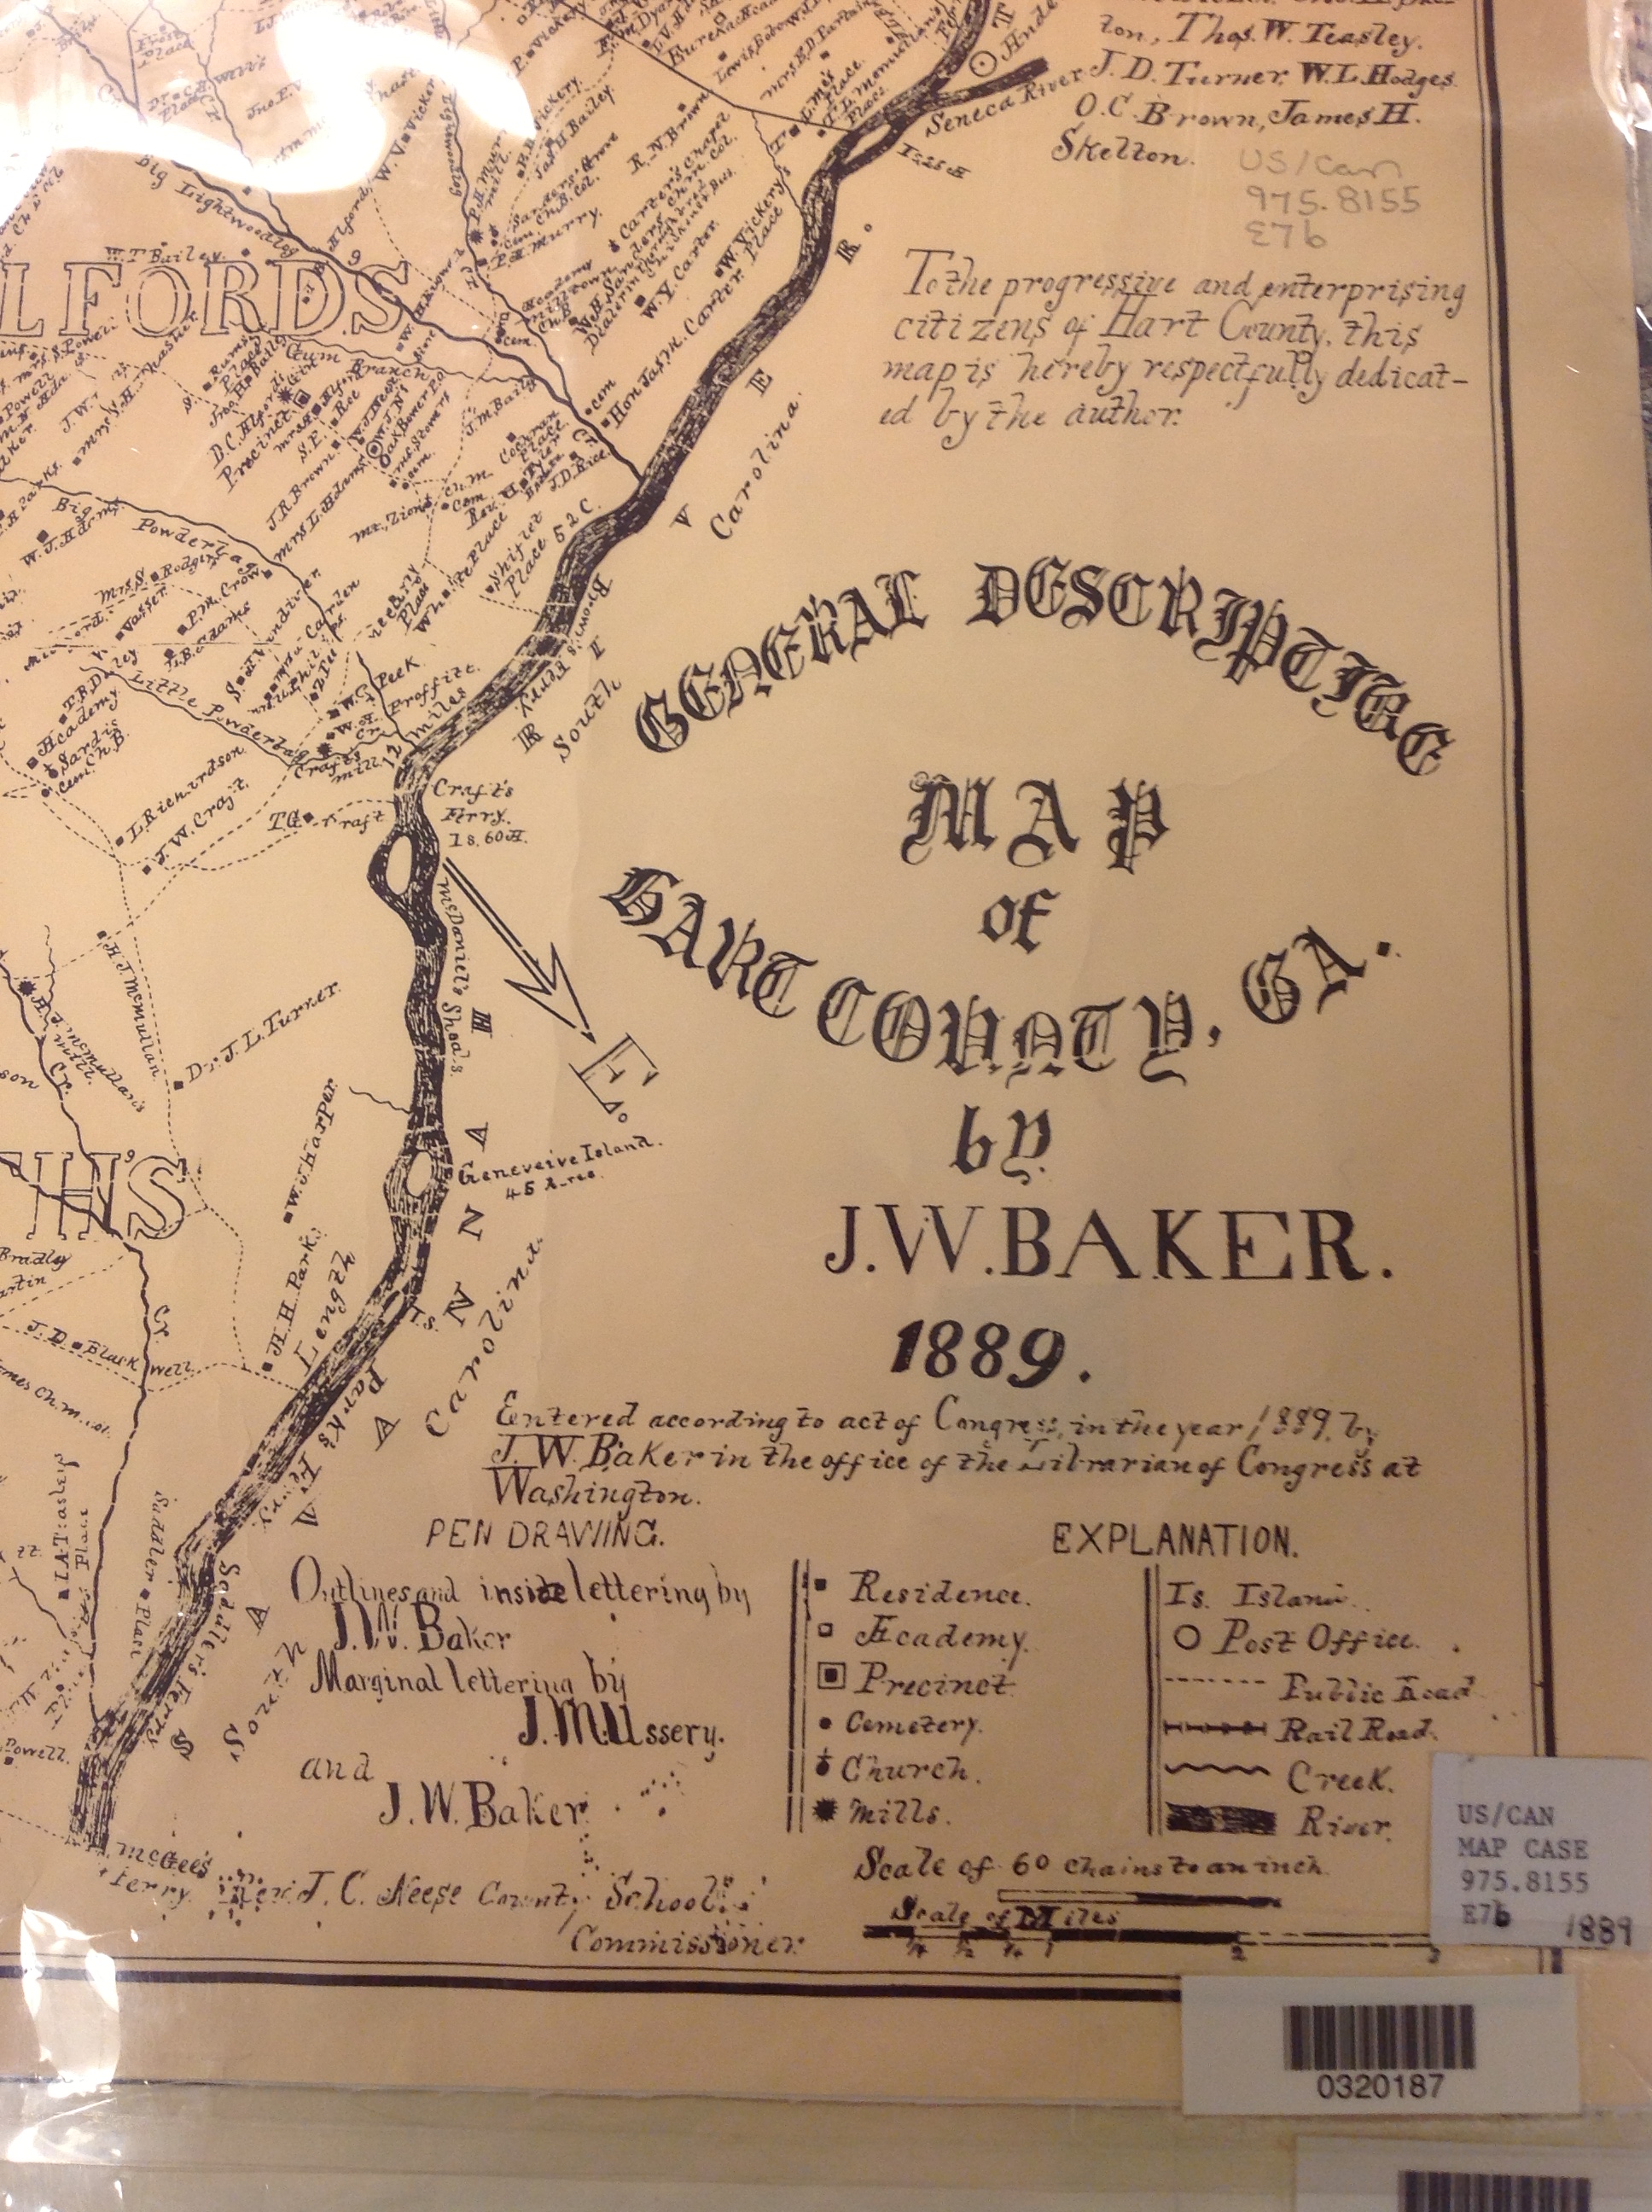 3. Copying material from a map or other folio items. The same general idea applies to imaging maps and other oversized materials. First, image the source citation information, often found on a label at the bottom of the page or on the back. Image the map key, including which way is north, scale, and other details. Then image as much of the map as possible to get an “establishing shot.” Finally, zoom in to the areas of greatest importance to you. Again, it’s not perfect. Laminated items may have glare issues as you can see by the shot shown here. But you may get what you need out of your digital image, especially if you move around so the glare isn’t covering the important areas on the map.
Remember to organize all your images when you get back to your hotel room or home while your memory of the visit is still fresh. Keep source citation shots together with the images you took. Load them into Evernote, if you use it. Organize them as you would other computerized research materials: in surname files, etc.
Finally, remember that fair use and copyright laws still apply to all images you take, whether on a photocopier or your personal digitizing equipment. The Family History Library does allow people to take their own digital images, but not all libraries and archives do. Some repositories rely on the income from copying to fund their facilities. ASK before using your iPad at other libraries! But as you can see, you can save yourself time and money–and have all your research notes and copies already digitized and ready for use on-the-go.
This post was written by Genealogy Gems Contributing Editor Sunny Morton. (Just so you know, I’m not a longtime iPad pro. I learned everything I know about using an iPad for genealogy from reading Turn Your iPad into a Genealogy Powerhouse. Then I adapted what Lisa taught me for the way I research.)