When you’re working on our genealogy, you’ve got data and records coming from all directions: websites, interviews, archives, downloadable documents, and more. Some of it you’re actively working on, some of it you need to save for later, and the rest has already been analyzed and is ready for archiving. This variety of data requires a variety of storage locations.
In this audio podcast episode I’m going to share with you my genealogy data workflow. We’ll talk about how it all fits together to ensure an uncluttered desk and the ability to instantly put my hands on what I need when I need it.
Don’t miss the Bonus audio for this episode. In the app, tap the gift box icon just under the media player. Get the app here.
Get the Free Genealogy Gems Newsletter
The Genealogy Gems email newsletter is the best way to stay informed about what’s available with your Premium eLearning Membership. Sign up today here.
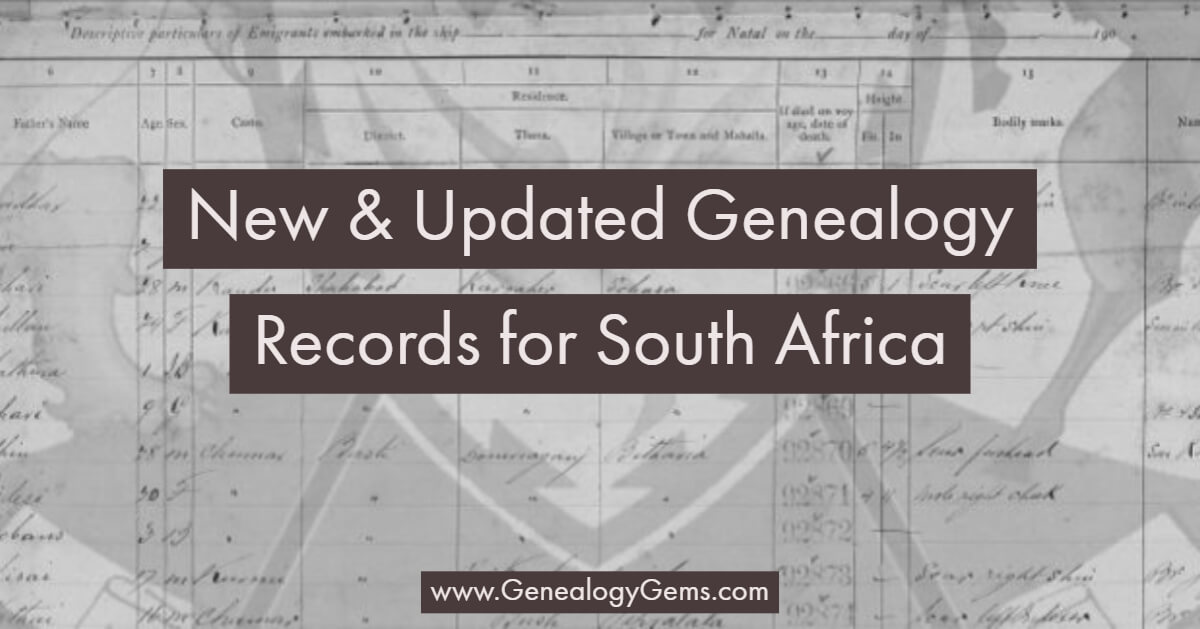
Featured this week are new and updated records for South Africa. The all-free site FamilySearch has two new and one updated collection for South Africa including death and probate records and passenger lists. Ancestry.com also has an updated collection of church records going back to the 17th century. Also new at Ancestry.com are four genealogy records collections for Essex, England.
Featured: South Africa Genealogy Records
If you have ancestors that lived in South Africa, you may already be familiar with some of the challenges of researching them. And if you’re new to genealogy or to your ancestors that lived in South Africa, you might be in for a surprise when it comes to records: census records aren’t available! They are routinely destroyed after being abstracted and thus not available to the public.
So where’s the best place to start looking? Most genealogy experts will tell you to start with death notices. A death notice is different than a death certificate, in that it’s not an official document. Rather, it is a document provided by next of kin, friends, or associates of the deceased. Information provided may not be 100% accurate or reliable, but it can often provide really helpful details and a glimpse into the person’s life.
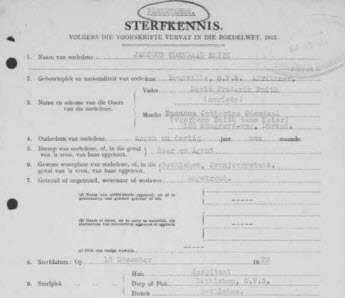
FamilySearch as a new collection of South Africa, Orange Free State, Probate Records from the Master of the Supreme Court, 1832-1989. There are over 300,000 records in this set, and the most useful records in the collection are the death notices, which give detailed information. The probate records usually have multiple pages and are included in a probate file, which is identified by a probate number.
When a person died, the nearest relative or other connection should have completed a death notice and sent it to the Master of the High Court within 14 days of the death. These records might tell you the deceased’s name, birthdate and place, marriage status, parents’ names, the names of their children, information about property and wills left, and more.
There is an updated collection of actual death certificates at FamilySearch, which is the Transvaal, Civil Death, 1869-1954 collection. “Death certificates are arranged chronologically and alphabetically by place and include full name, parent’s name if under the age of ten, mother’s residence, age, sex, birthplace, marital status, occupation, whether pensioner or pensioner’s dependent, place and date of death, residence, place of burial, cause and duration of death, and background of informant. For the years 1899-1902, records are arranged separately by internment camp and district where death occurred.”
If you’re an Ancestry.com subscriber, you can also check out the recently updated collection of Dutch Reformed Church Registers, 1660-1970. This collection contains records from various locations which were part of historic Cape Colony, including Namibia, Cape of Good Hope province and Transvaal province. Record coverage will vary depending on location. It is also available at FamilySearch.
Essex, England
Ancestry.com has four new collections of genealogy records for Essex, England. These BMD records date back as far as the 16th century and may hold important details about the lives of your ancestors living in Essex.
Church of England Births and Baptisms, 1813-1918: “Children were usually baptised within a few days or weeks of birth. The records generally include when the baptism took place and in what parish, child’s Christian name, parents’ given names and the family surname, residence, father’s occupation, and who performed the ceremony. Sometimes you’ll find additional details such as date of birth. Early records may contain less detail.”
Church of England Marriages, 1754-1935: “Couples were usually married in the bride’s parish. Marriage records typically include the bride and groom’s names, residence, date and location of the marriage, names of witnesses, condition (bachelor, spinster, widow, or widower) and the name of the officiant. Some records may also include the father’s name and occupation.”
Church of England Baptisms, Marriages and Burials, 1538-1812: “This collection contains images of Church of England parish registers of baptisms and burials during the years 1538–1812, and marriages during the years 1538-1754 from Essex, England.”
Get more new and updated records every week!
Each week we round up the new and updated genealogy records collections for you in a helpful article so you can jump right into researching! Our free weekly email newsletter always has the latest records round up article, as well as other featured articles on genealogy methodology, inspiration, tips and tricks, and more. Plus the newsletter also lets you know where there is a new episode of The Genealogy Gems Podcast, new videos, and updates on news and events. And best of all it’s free! Sign up today to get our email newsletter once a week in your inbox.
About the Author: Lisa Louise Cooke is the producer and host of the Genealogy Gems Podcast, an online genealogy audio show and app. She is the author of the books The Genealogist’s Google Toolbox, Mobile Genealogy, How to Find Your Family History in Newspapers, and the Google Earth for Genealogy video series. She is an international keynote speaker and the Vice President of the Genealogical Speakers Guild.
Disclosure: This article contains affiliate links and Genealogy Gems will be compensated if you make a purchase after clicking on these links (at no additional cost to you). Thank you for supporting Genealogy Gems
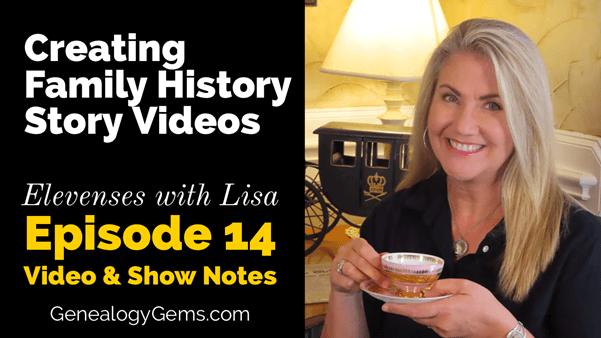
Don’t just gather genealogical information. Take the time to tell your ancestors’ stories!
Video is the perfect medium for sharing your family’s history. It captures the interest of the eyes and the ears.
In this episode my special guest is Kathy Nielsen. She’s a librarian from California who recently started creating videos. She’s going to walk you through the simple yet effective process she followed. Then I will share additional things to consider and strategies that you can use.
If you’re not interested in creating a video, that’s OK. Today’s episode will make you a better storyteller and will provide you with inspiring story examples by other genealogists.
Elevenses with Lisa Episode 14 – Creating Family History Story Videos
Watch the video and read the full show notes here.
After listening to this episode, watch Elevenses with Lisaepisode 16How to Make a Video with Adobe Spark to learn how to make videos quickly and easily for free.
Genealogy Gems Premium Members can download the handy PDF show notes for each of these Elevenses with Lisa episodes. Simply log into your membership, and then in the menu under “Video” click “Elevenses with Lisa.” Click the episode and scroll down to the Resources section of the show notes.
Genealogy Gems Premium Members can download the show notes PDF from the Resources section on that page.
Don’t miss the Bonus audio for this episode. In the app, tap the gift box icon just under the media player. Get the app here.
Sunday, September 27th. “The Irish philosopher and statesman Edmund Burke stated in 1790 that “People will not look forward to posterity who never look backward to their ancestors.” For those that do the looking forward, or those just idly curious about in their roots, today is Ancestor Appreciation Day. Census records play an important role in researching individual details, but the law mandates a 72 year wait for access. Annually, though, the Bureau’s American Community Survey compiles statistics for detailed ancestry or ethnic groups or populations in the nation. The largest reported ancestry is German, at over 41-million of our nearly 330-million population. The Irish of Edmund Burke come second, with nearly 31-million, or more than remain in Ireland itself.” Profile America
Stay Up to Date with the Genealogy Gems Newsletter
The Genealogy Gems email newsletter is the best way to stay informed about what’s available with your Premium eLearning Membership. Click here to sign up today.
Get Unlimited Photo Enhancement and Colorization at MyHeritage
Get genealogy records and unlimited Enhanced and Colorized photos as a MyHeritage PremiumPlus or Complete Plan Subscriber. Click here to start a free trial.
“I use MyHeritage to research my family tree.” Lisa Louise Cooke
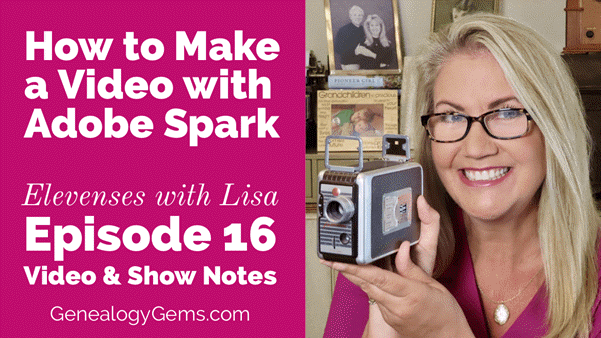
In last month’s episode we talked about how to construct a great family history story for video. Video is the perfect medium for sharing your family’s history. It captures the interest of the eyes and the ears.
In this episode I’ve got the ideal tool for you to use to make your video: Adobe Spark Video. Adobe Spark Video is a free app and website tool that makes it easier than ever to create shareable videos.
Click below to listen:
Genealogy Gems Podcast Episode 246 with Lisa Louise Cooke October 2020
Watch the Companion Video & Get the Full Show Notes
This episode features the audio from Elevenses with Lisa Episode 16 – How to Make a Video with Adobe Spark. Watch the video and read the full show notes here.
After listening to this episode, watch Elevenses with Lisaepisode 16How to Make a Video with Adobe Spark to learn how to make videos quickly and easily for free.
Genealogy Gems Premium Members can download the handy PDF show notes for each of these Elevenses with Lisa episodes. Simply log into your membership, and then in the menu under “Video” click “Elevenses with Lisa.” Click the episode and scroll down to the Resources section of the show notes.
Get Unlimited Photo Enhancement and Colorization at MyHeritage
Get genealogy records and unlimited Enhanced and Colorized photos as a MyHeritage PremiumPlus or Complete Plan Subscriber. Click here to start a free trial.
“I use MyHeritage to research my family tree.” Lisa Louise Cooke
Stay Up to Date with the Genealogy Gems Newsletter
The Genealogy Gems email newsletter is the best way to stay informed about what’s available with your Premium eLearning Membership. Click here to sign up today.