DNA Matches: What You Can Do with All Your Genetic 4th Cousins
(Update 2020) When genealogists take an ancestry DNA test, they are looking for more than just their ethnicity results. They are also very interested in receiving information on other people who have tested who closely genetically match them. They want to know who the closest matches are, and if those matches have family tree information that they can share.
However, with all the people testing these days, (some being genealogists and some not) the volume of matches can become overwhelming very quickly.
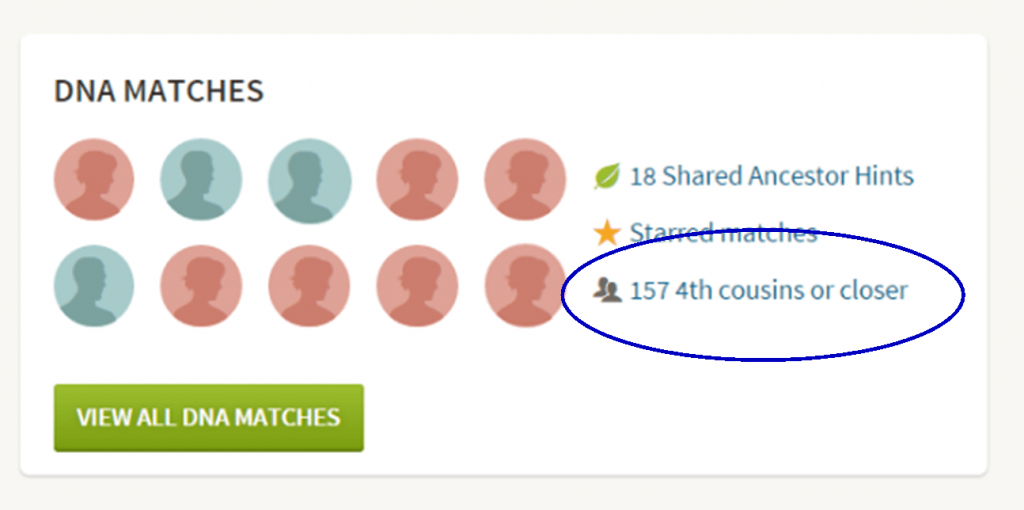
Are you one of those people who have way too many genetic “4th cousins or closer” among your DNA matches? Have you ever wondered “What do I do with all these matches?!” If so, keep reading. We’re going to explore some of your options, and most importantly, how to determine how genetically close your cousins really are.
Doing the DNA Math on Your Cousins
Math can provide us with a degree of certainty in genetic genealogy. Each of us has two biological parents. We have four biological grandparents, and eight great-grandparents.
However, the farther back we go the less we can rely on math.
For example, on paper you should have sixty-four 3rd great grandparents. However, many of us find that the same person occupies more than one slot on our pedigree chart. While this significantly decreases the workload for traditional genealogy, it adversely impacts your genetic genealogy. Especially when it comes to that long long list of 4th cousins you have in your match list at any of the three major DNA testing companies.
Depending on how intermarried your lines are, you may be seeing individuals on your match list that genetically look like your fourth cousins, but they are genealogically your sixth cousins – EIGHT TIMES! So how can you tell the difference?
There are two parts to that answer: one you can control, and the other you can’t.
Distinguishing DNA Matches with Genetic Tools
While your fourth cousins and your eight-time-sixth cousins may look similar genetically, there are often small clues in the genetics that can help you tell the difference. This distinction can sometimes be detected by a testing company who, through research and validation, has been able to fine-tune their algorithms to detect these subtle differences.
Your Genetic 4th Cousins
You can participate in this double checking process by using some of the genetic tools that are available to you at Family Tree DNA, or at Gedmatch.com. But since you may not be an aspiring geneticist, let’s focus on the genealogical work you can do to determine if a match is truly a fourth cousin.
Use Google Earth to Plot Your DNA Matches
A fourth cousin designation just means that you and your match are separated by between six and twelve degrees (people). So that might be five back on your chart to your common ancestor, and five down to your match, which would make you true fourth cousins. It could also be some other permutation of that.
For our example, let’s assume true fourth cousins. That means that the two of you share one of thirty-two 3rd great grandparents (16 couples). In order to find out which set, you have two genealogical identifiers: surname and location.
Therefore, the first thing you should do is make a list of the surnames and locations of those thirty-two 3X great grandparents.
Now, most of us do not know all 16 of those couples, so you are going to have some holes. Feel free to fill in those holes with surnames on subsequent generations that will carry through to this fifth generation.
A great tool to plot your own list of ancestors geographically is the free downloadable Google Earth software.
Check to see if you have the latest version of Google Earth downloaded to your desktop or laptop computer. On your desktop, look for a grey and white globe. If you see a blue and white globe, you have the older original free version of Google Earth. However, a few years ago, Google made their Google Earth Pro version free to everyone, and it is now the standard.
If you do have Google Earth Pro (the grey globe software) then you’re ready to go.

The grey Google Earth globe on the desktop.
If you don’t have it, then you will need to download it.
How to Download the Free Google Earth Software:
- Go to http://www.google.com/earth/download/gep/agree.html
- Click the blue download button
- Read the Terms and Conditions
- If you agree to them, click the Agree and Download button
- Follow the installation guide
- When complete click Run Google Earth
Now that you have Google Earth, you can begin by creating a folder in the Places panel in Google Earth devoted to your 16 couples. Here’s how:
1. In the Places panel, right-click on MyPlaces and select Add > Folder:
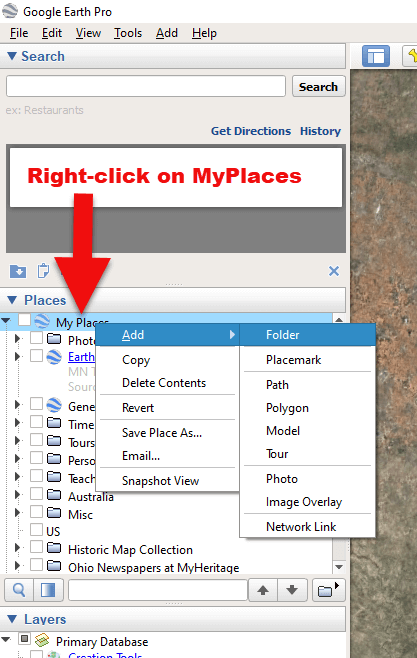
Right-click on MyPlaces > Add > Folder
2. Name the folder and then click OK:
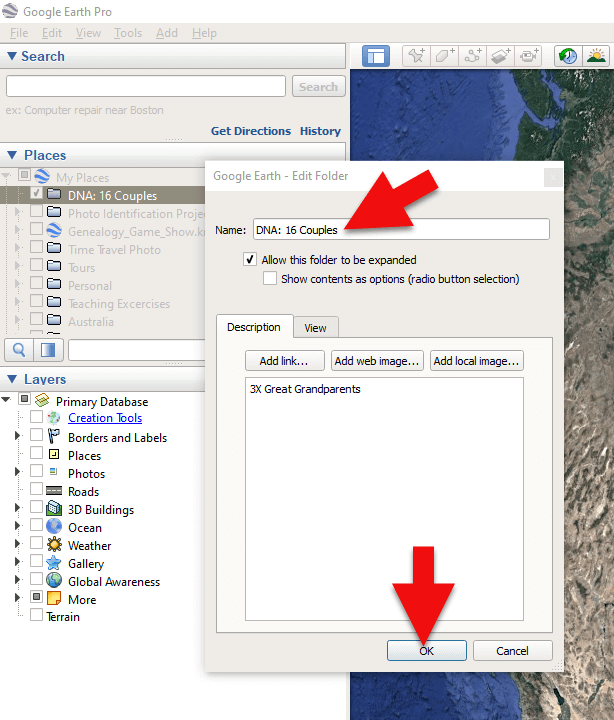
Creating a folder in Google Earth
3. Now you will see your new DNA folder for your 16 couples in the Places panel. If you don’t see it, look toward the bottom of the list. You can move the folder to any location within the list by dragging and dropping it.

Create a folder in Google Earth for DNA 16 couples
Once you have your DNA folder created fro your 16 couples, you can then easily plot your surnames and locations.
How to Plot Your Surnames and Locations in Google Earth:
1. Click your new DNA folder to select it. This will ensure that the placemark you are about to create will be stored in that folder.
2. In the search box (upper left corner of the Google Earth software) type in the first location and click Search. Google Earth will fly to that location on the map.
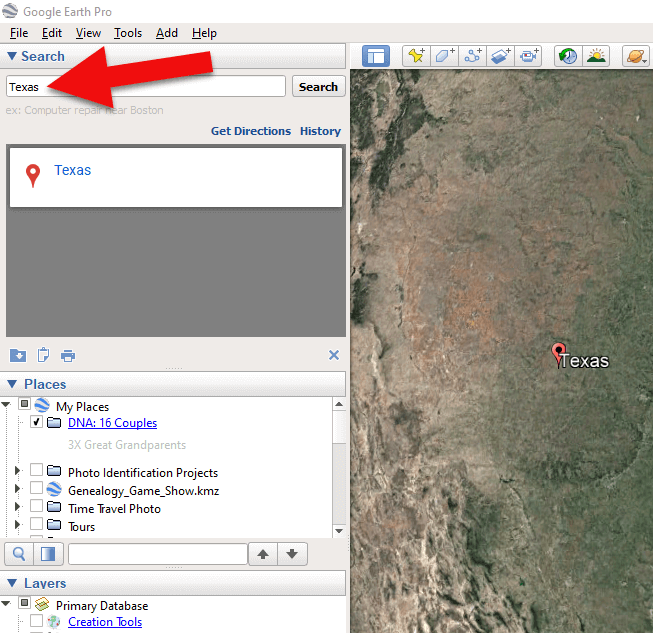
Type the locaton in the Search box and click Search.
3. In the toolbar along the top of the screen, click the placemark button to place a pushpin in that location:
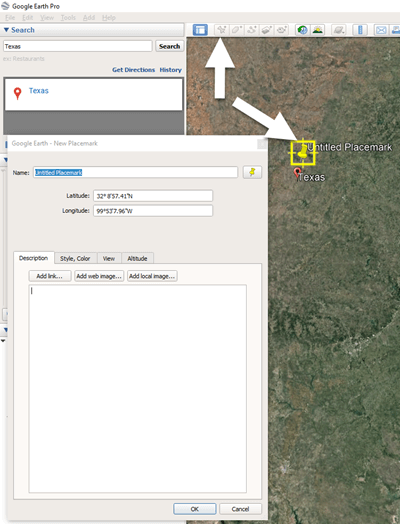
Click the Placemark button in the Google Earth toolbar.
4. In the Placemark dialogue box, enter a title for hte pushpin placemark. Click the OK button to close the box and set your placemark.
5. Repeat the process for all the locations.
Then evaluate the fifth generation of your fourth cousin matches for genealogical information that lines up with any of the items on your list.
You can also plot the surnames and locations of your matches in Google Earth. This is where Google Earth really comes in handy. The free software makes it very easy to see when your ancestral home may be bordering the locations of your matches. Those with whom you find a similarity become your best matches, and your best chance of determining your connection. Those without an obvious connection cycle to the bottom of your pile for a genetic evaluation. You can perform these same kinds of searches for your second and third cousins as well.
As you begin to become more familiar with the fifth generations of your matches, you may also start to see patterns of surnames or locations emerge among your matches. These then become the surnames and locations that might be able to fill the missing spaces in your pedigree chart.
More Genetic Genealogy and Google Earth Gems
If you are new to using Google Earth, I have several suggested resources for you by Lisa Louise Cooke:
- How to Use Google Earth for Genealogy (FREE VIDEO)
- Google Earth for Genealogy Video Training digital download
- If you are a Genealogy Gems Premium member, Tune in to Genealogy Gems Premium podcast, episode 131, for tips on how to run a more thorough genetic evaluation on those 4th cousin matches.
Here’s a video of the authors discussing three common DNA misconceptions:
Authors: Diahan Southard and Lisa Louise Cooke

