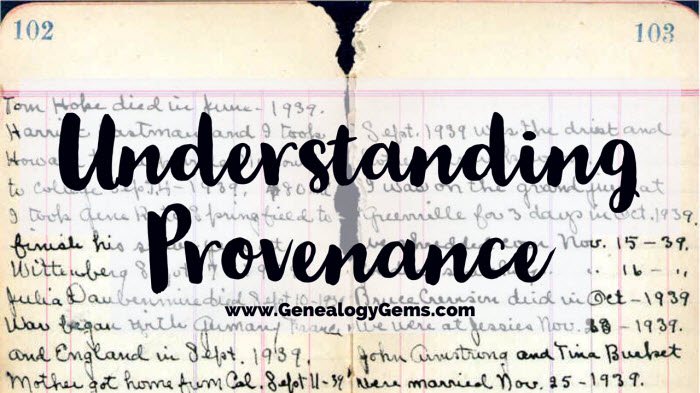
Understanding Genealogy Sources: Why “Provenance” Matters
Before you rely on any genealogical sources for your family history research, you should know their provenance. Ask these questions about the records you find—and you’ll better understand the source and what it may (or may not) be telling you.
Genealogy Gems
In the art world, knowing the provenance of a piece is crucial to understanding its value. Provenance looks at an object’s origins, history, and ownership. These can shed light on whether the piece is authentic. In other words, it tells us whether it truly was created by the attributed artist in the stated timeframe. It also provides insight into the value of the item.

Provenance defined
Genealogical sources: Why provenance matters
The principle of provenance is true for genealogical sources, too. Records created at the time of an event by eyewitnesses are generally much more credible. Documents created in places associated with your relatives, by people who knew them, are much more likely to pertain to them (rather than to other folks by the same name). The same holds true for objects that are passed down through the family. Therefore, whether you’re looking at a family Bible or a typescript of a reminiscence you find online, it’s important to learn as much as you can about it so you know how much to trust it.
Questions to ask about your genealogical sources
What type of document or item is it? When was it created?
The nature of an object or record can often tell you something about its history or credibility. In the case of a photograph, we might ask these questions:
- What type of photograph is it? (tintype, carte de visite, Polaroid, etc.)
- Is there printing or writing on the back of the photo?
- If it’s a studio portrait, is the studio’s name and location identified?
For example, this photograph is a daguerreotype. It is a type of image taken on a silver-coated copper plate. Photo expert Maureen Taylor says these types of photos were in most use from 1839 to about 1865. You can learn additional clues from Maureen about using hairstyles, fashions, and other clues in the actual image in her book, Family Photo Detective.
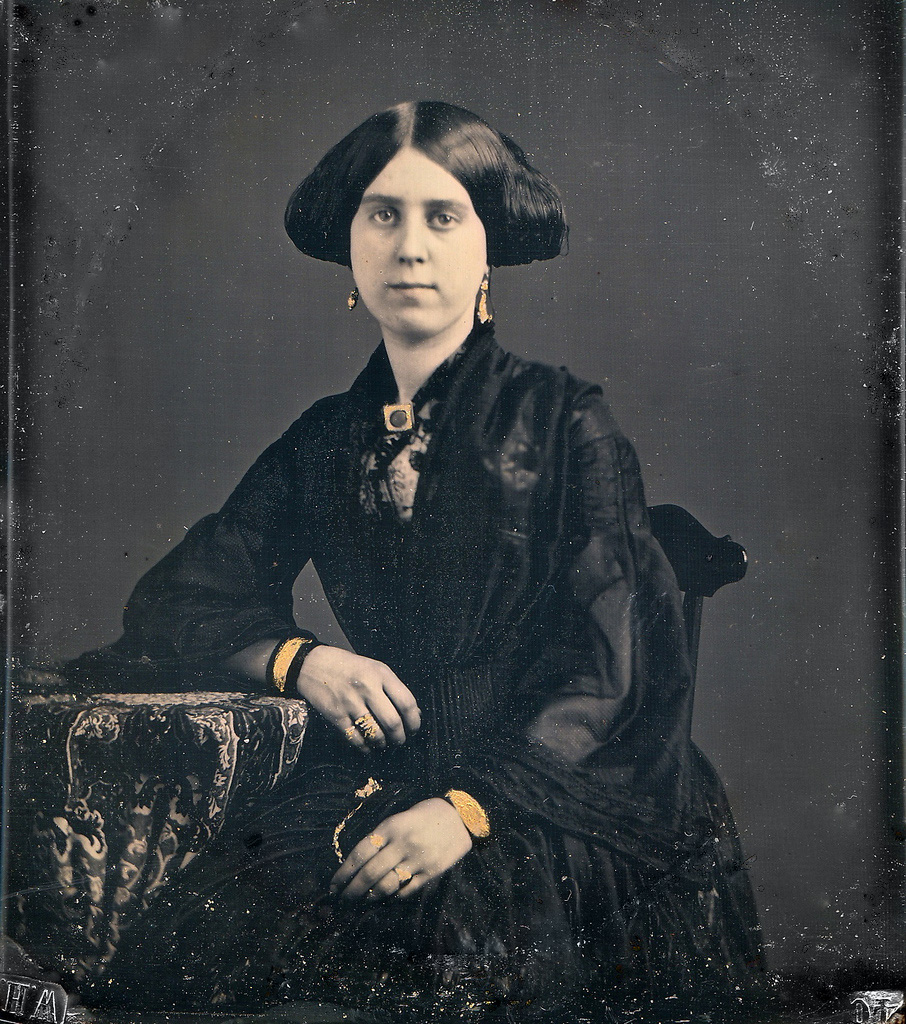
Daguerreotype
Perhaps you have a manuscript in your grandma’s handwriting. Is it a diary or an autobiographical sketch? Is it dated or signed? Is it an original or a photocopy?
You will likely date these items, associate them with specific relatives, and judge the reliability of their contents based on answers to questions like these.
If a document isn’t identified, study it closely for clues as to what it is. Contributing Editor Sunny Morton has spent a lot of time studying old diaries and life story writings. Here are some tips from her on understanding them:
- Diaries and journals were created gradually over time. You may see date headers before some entries and changes in the handwriting or ink. Entries often focus more on the present or immediate past than the deep past and they wouldn’t reveal future events because they hadn’t happened yet.
- Autobiographical sketches or reminiscences may or may not be labeled and dated as such. These were usually written much later in someone’s life, often over a short period of time. The writer’s tone may be more formal, introspective, defensive, or self-conscious as she reflects on the past.
Look at all other documents and items that are associated with the source in question. For example, not long ago I received a box of old family items from my sister-in-law. The box originally belonged to my mother-in-law (Pat) and held an eclectic mix of mementos. One item of particular interest was a Guest Book sporting a cover made of wood. I immediately understood the significance of the cover because my father-in-law (Bill) had worked his entire career in the forest products industry. But that didn’t mean that the book actually belonged to my in-laws. Further examination was required.
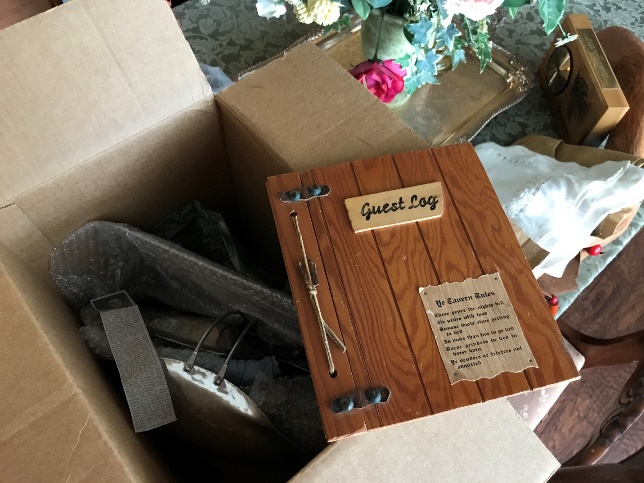
The Guest Log
Before removing the book from the box, I made note of what was tucked in around it. Perhaps all of these items were unrelated, or perhaps they had all come out of the same closet. Slow and careful examination is key identifying all the potential clues about the item.
It took several hours of reading through the various entries to determine that the Book was given to Pat and Bill as a gift by Pat’s parents. It contained many original signatures acquired over many years from a wide range of friends and family.
If you’re looking at digitized records online, read the description of the record collection. If you’re in an archive, read the finding aid or other collection description. (Genealogy Gems Premium subscribers can learn more about using finding aids in Genealogy Gems Premium Podcast episode #149.)
Records or artifacts may come with dates or timeframes associated with them. Sometimes there is no date or only a rough range of possibilities. You may have to rely on clues from several sources to date the item and match it up with your family history timeline. For example, this quilt was found in a suitcase in my Grandmother Pauline Moore’s closet after her death with this note pinned to it.
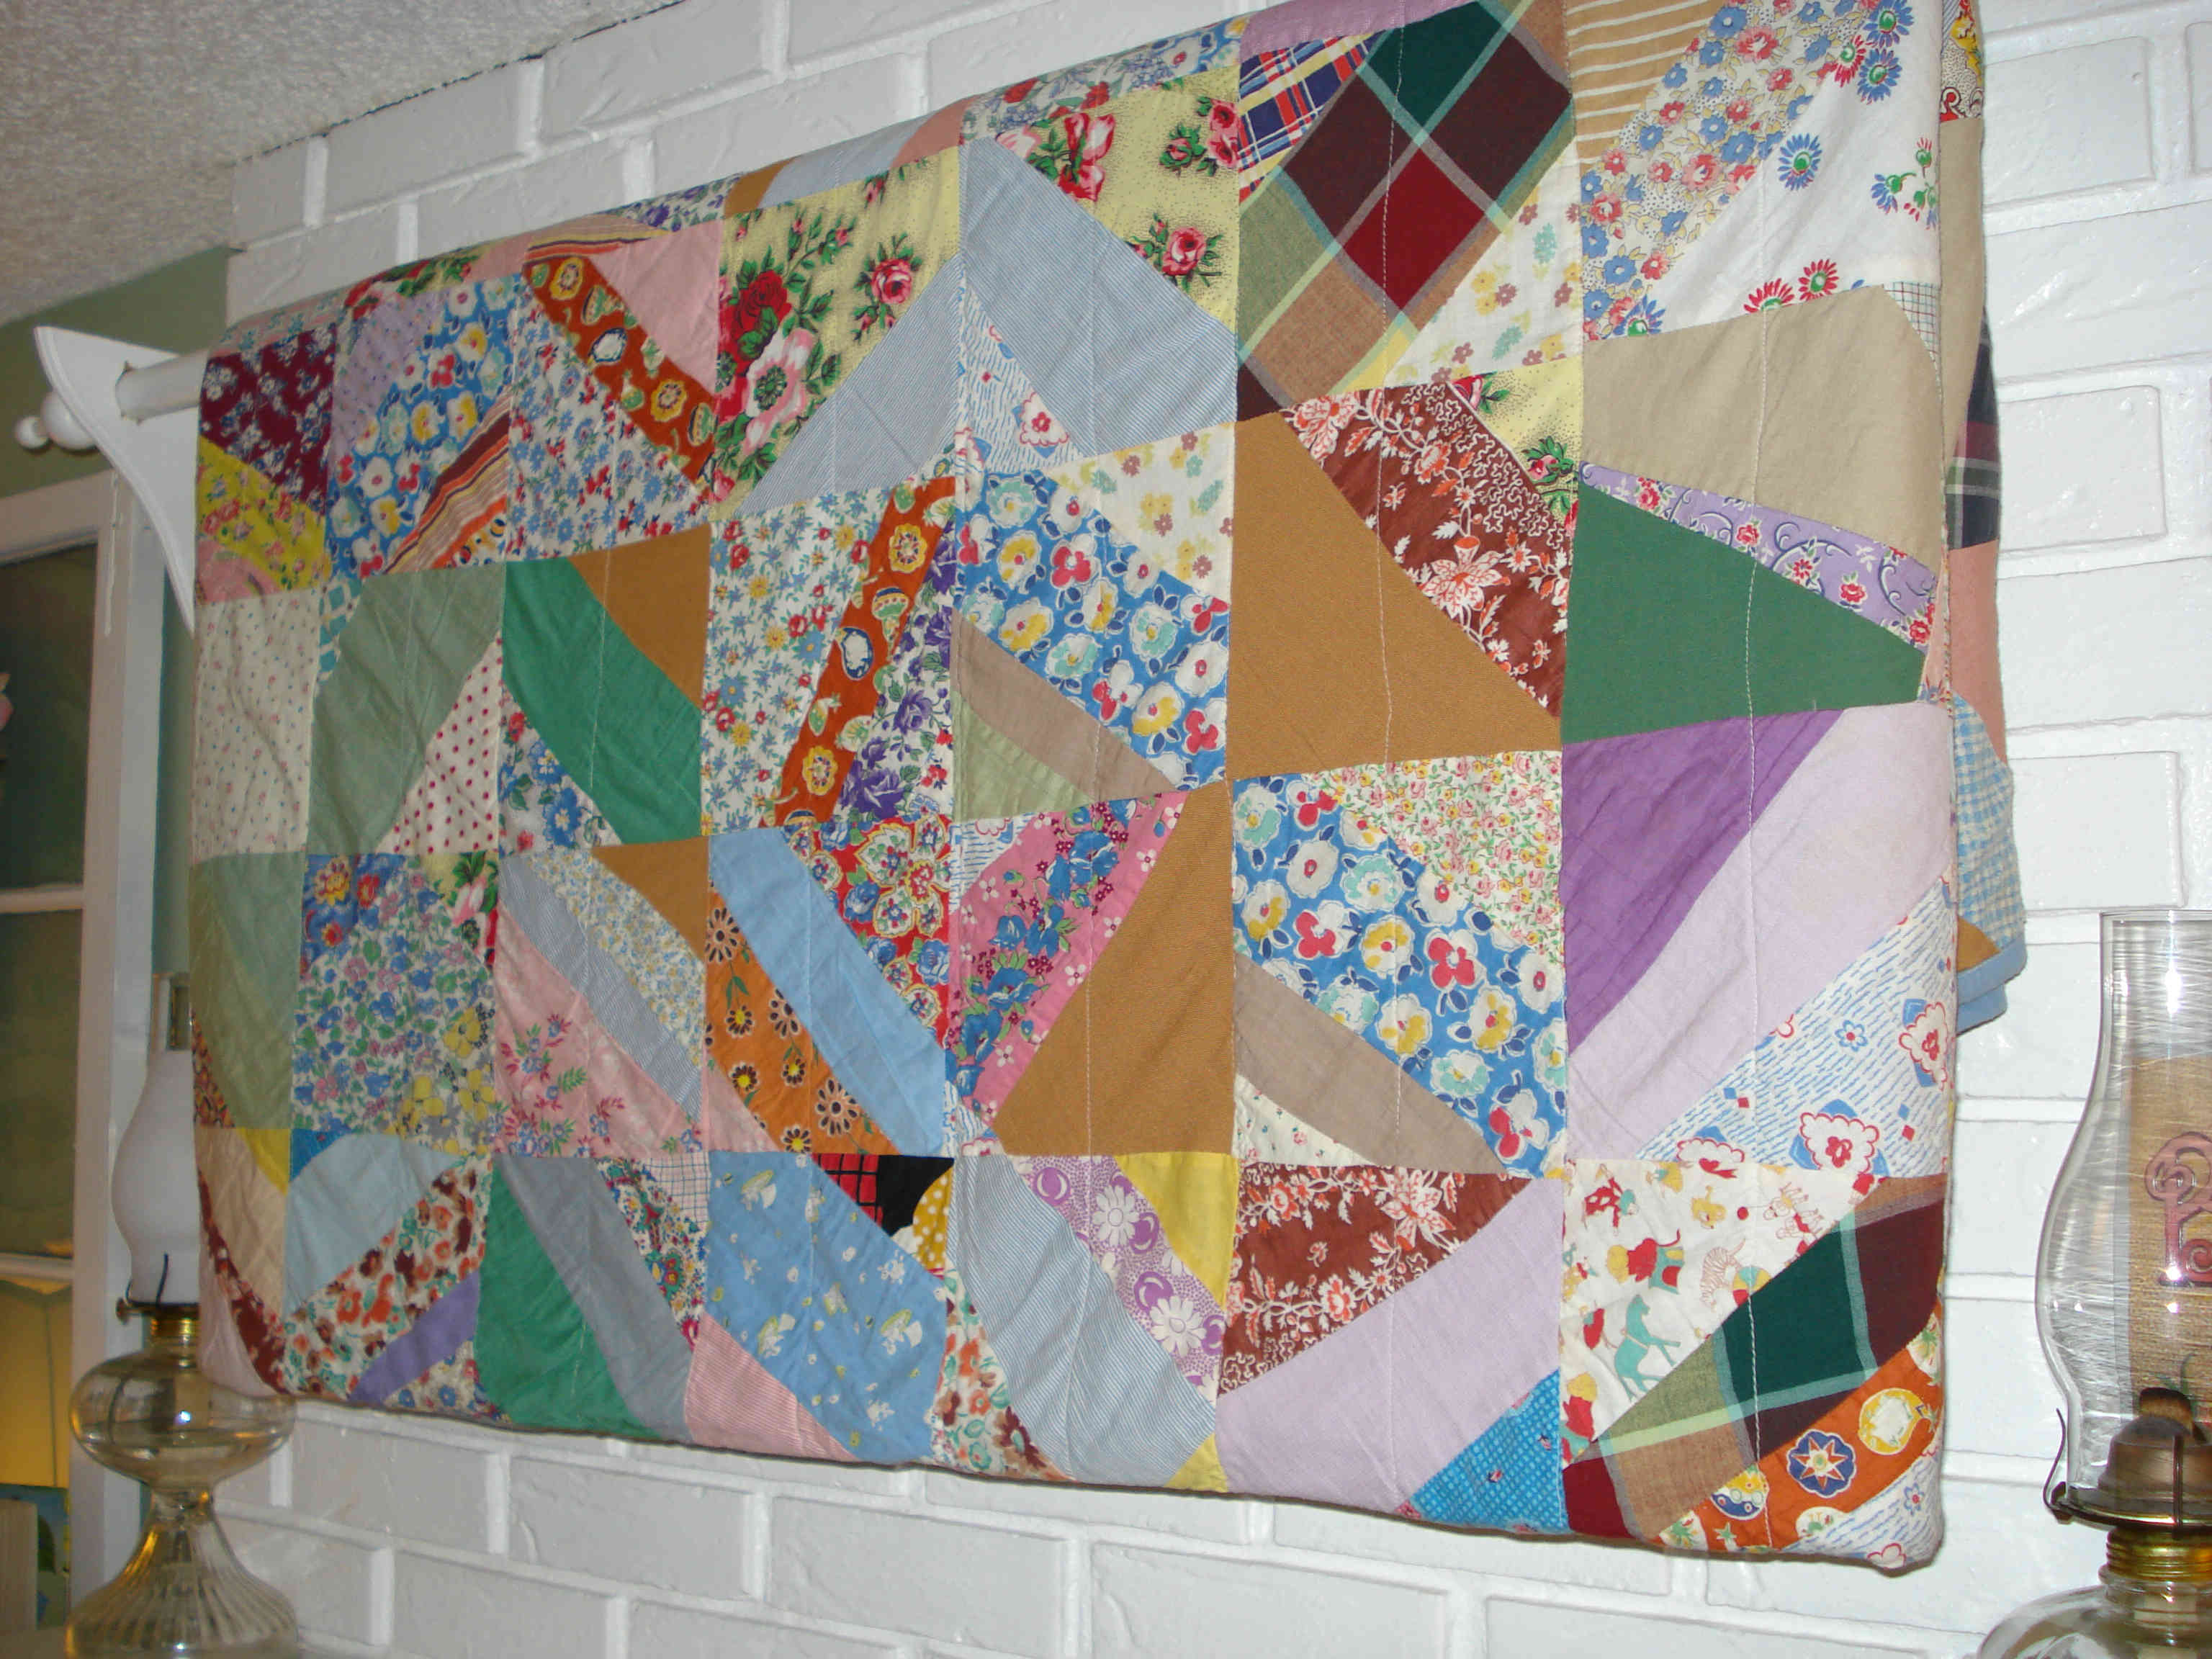
The quilt made by my great grandmother
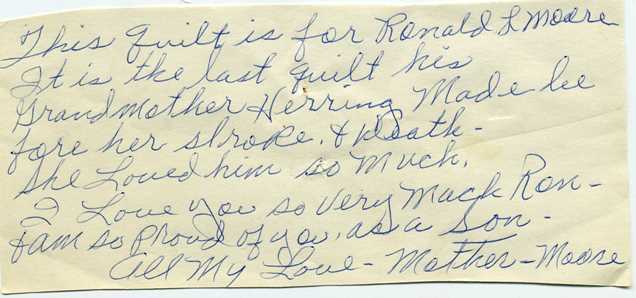
The note that was pinned to the quilt.
She says in the note that it was made by her mother before her stroke, which occurred in the 1960s. Based on the flour sack fabrics, I would date it more in the range of 1925-1945. It’s possible that she may have hung on to all these scraps and made it later in life. But I know from past conversations with my grandmother that most of her mother’s quilting was done in the earlier timeframe. Adding strength to my theory is a dress that hangs in my laundry room. I inherited the dress from my grandmother years ago. I have photos of her wearing it in the pre-World War II era. It contains some of the exact same fabric that makes up the quilt.
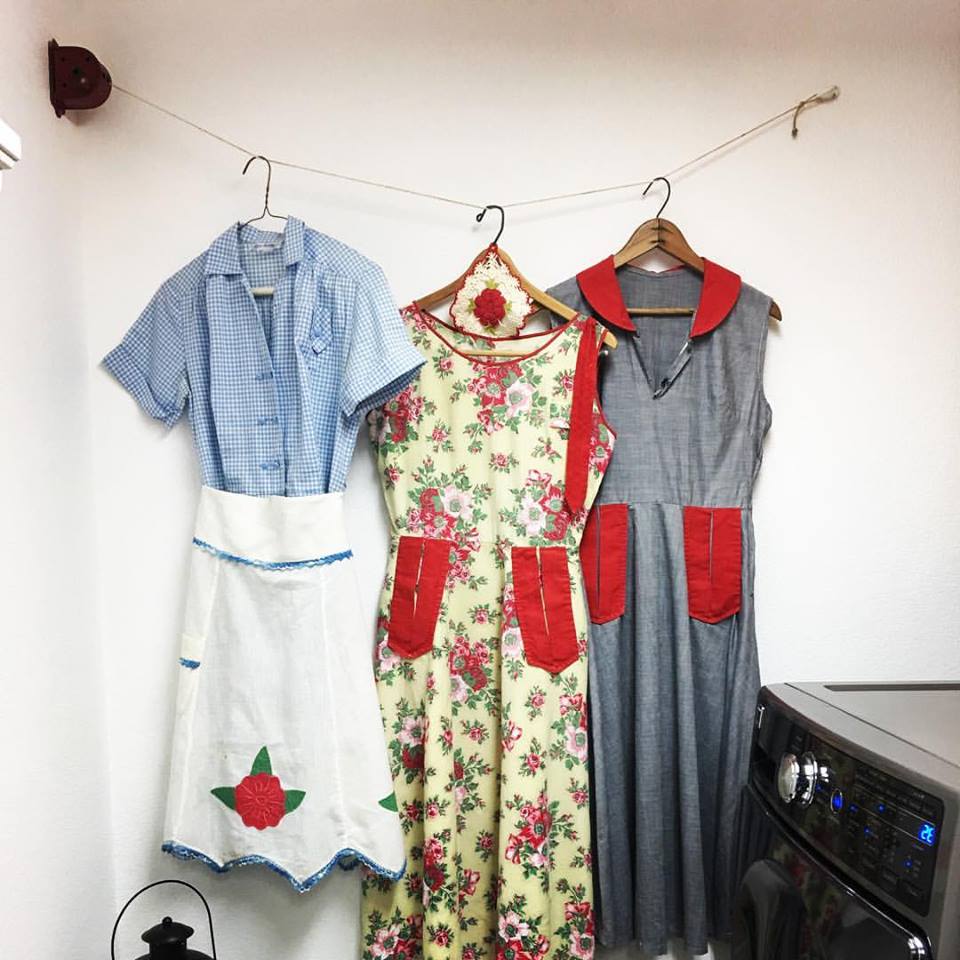
My grandma’s 1940s house dresses.
Finally, with documents especially, consider whether you’re looking at the original version, meaning the first format it ever took. Whenever possible, consult the original. Indexes, typed-up copies, or abstracts are convenient reference tools. In some cases, they are the only versions you’ll be able to access. However, they may not be as complete or accurate. Handwritten copies of older originals may have been made in the days before photocopying technology.
Here’s a digital copy of a 4-page family history written by Sunny’s great-aunt Lena Hall (1903-1981). Sunny received this copy from her mother. The title “as told by” at the beginning hints that this is a typed version of an oral history. If an original audio taped version still exists, Sunny doesn’t have it. So in this case, this is the best version she can get.
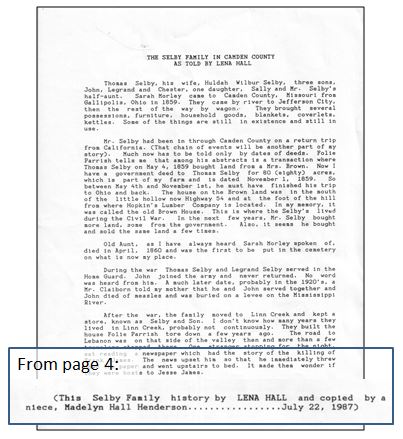
Document by Lena Hall
When was it written? A note at the end simply says the document was “copied by a niece” in 1987. It was created after 1950 because Aunt Lena names that as the year her father died. Aunt Lena states that her parents now had “25 grandchildren, 58 great-grandchildren, and 4 great-great-grandchildren.” Studying a complete family tree in descendancy view would likely reveal when her parents had only four great-great grandchildren—perhaps the best way to date this document.
If you can’t identify or assign a rough date to an artifact, consult a professional historian, genealogist, appraiser, or others with knowledge of particular documents or objects.
Where was it created and where has it been kept over the years?
Sometimes, family history sources are labeled with place names, like the city stamped on the front of an old photographic studio portrait. These can help you connect them with your family—or confirm that they don’t pertain to your family.
Where the source has been kept over time, and who has kept it, is an important part of provenance. For example, last summer, I was given this camera by my uncle.

He said it was originally owned by my grandma, Alfreda Louise Burkett. Much to our delight, we discovered that the camera had unexposed film inside! I scurried off to a few local stores, and quickly learned that the film pre-dated the current standard 35mm film, and they couldn’t process it. As I mentioned before, there are times when you will need to consult an expert, and this was one of them. Google led me to a specialty photography store about an hour from my home. It also served up this website which revealed that the camera type (Kodak Senior Six-20) was produced from 1932-1937.
The knowledgeable folks at the photography store connected me with a highly specialized film developer in Colorado. I’ve sent the film for processing. They told me the film type (C-22) can be dated to pre-1970s. This time frame makes sense: my grandma passed away in 1986.
As long as it has taken for this camera to make its way to me, I’m going to have to wait a little longer to see what the roll of film reveals. There is so little of this film still in existence that it can take up to 18 months for the developer to collect enough of it to warrant a processing run. When the happy day arrives that the photos appear in my mailbox, I’m optimistic that the images will further help me narrow down the timeframe between the 1930s and the 1970s when they were taken.
This chain of ownership—from my grandma to her son to me—is strong and reliable, based on my confidence in my uncle’s memory and honesty. This makes me more confident that the pictures inside that camera will be of my family. Stay tuned, because I will surely share the outcome here on the blog.
Why was it created?
The original purpose of a source is highly relevant to how much faith you put in its contents. For example, a woman might have altered her testimony in divorce proceedings in an effort to minimize damage to her own reputation and future. A man filling out his draft registration paperwork may have lied about his age or citizenship, either to avoid military service or in order to be included despite being under age. And most certainly newspaper articles may be filled with a variety of biases by the author, publisher, or those being interviewed. Give careful thought to these possible motivations when evaluating the contents of records.
Does it appear to be complete?
Whenever possible, consider a source as a whole. It’s tempting to want to zero in on the paragraphs or photos that interest you most, but you may miss out on important information that changes what this source has to tell you. The specific placement of a photo in an album can be as significant as the printed photographic image. A photo’s position can indicate the relationship of the people in the photo to others on the same page, or the timeline of events.
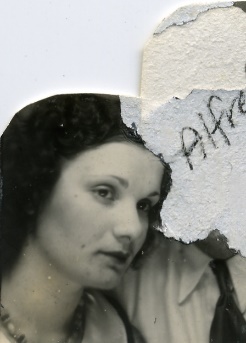
Image: Genealogy Gems
Take note if any part of the source appears to be missing or illegible, especially if it appears that some of it has been deliberately removed, erased, or crossed out. You may be able to make more sense of the partial information—or take a guess at why it was removed—as you learn more about the family. (My grandma’s diaries from the 1930s gave me insight into this photo!)
There may be a perfectly innocent reason for the change. But you may also be seeing evidence that someone who wanted to erase unpleasant memories or conceal a scandal.
Who was the informant?
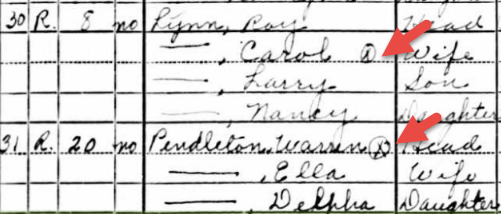
The informant in any record is the person who supplied the information. Sometimes this is the same person who created a record, such as the writer of a diary. In the case of a U.S. census, the informant is the person in a household who told the census enumerator about the people who lived there. In most cases, it’s impossible to know who the informant was. Thankfully in 1940, census enumerators were instructed to mark the informant with a circled “X,” as shown in these two households.
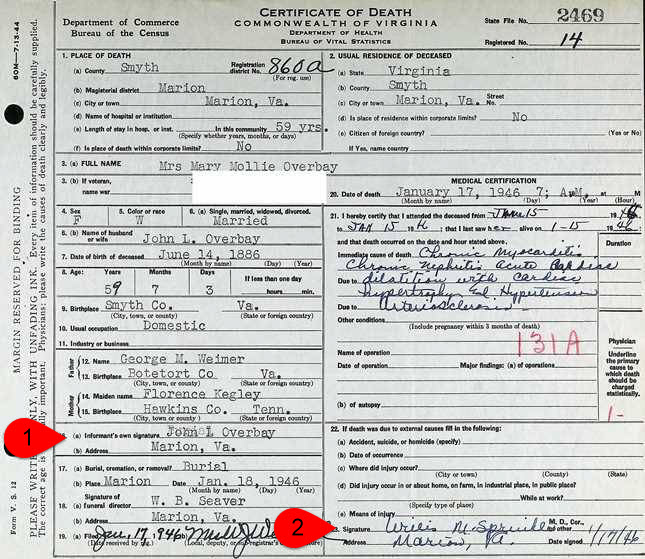
Remember that a source may have multiple informants, who would have been in the best position to provide certain kinds of information. Below is the death certificate for Mary Mollie Overbay, beloved grandma and hero of Genealogy Gems contributing writer Margaret Linford. (Read more about her here.) In this death certificate, Informant #1 reported the deceased’s personal information, and would typically have been a close relative. Informant #2 provided the medical particulars relating to the death, and would typically have been the attending physician.
Death Record Informants
What primary and secondary information is revealed in this record?
Historical evidence can either be considered primary or secondary information. Genealogical scholar Thomas W. Jones defines these terms in his book, Mastering Genealogical Proof:
- “Primary information is that reported by an eyewitness. Primary information often was recorded soon after the event, but it may be reported or recorded years or decades later.
- Secondary information is reported by someone who obtained it from someone else. It is hearsay.”
The same document can include both primary and secondary information (which is why we now talk less about primary and secondary sources and more about information). On the death certificate above, Informant #1 shares the deceased’s last name, so was likely a relative. He likely had first-hand knowledge of the deceased’s marital status, spouse’s name, and occupation. If Informant #1 was the deceased’s father, he would also likely have provided primary information relating to the deceased’s birth, place of residence, and parents’ names. Secondary information he reported would include his own birthplace (as father) and that of his wife (since he presumably wasn’t present for it). If Informant #2 was the deceased’s attending physician, he would have provided primary information about the deceased’s immediate and contributing causes of death.
How do all these clues add up?
It’s clear that as genealogists our goal is not only to evaluate each family history source, but also each piece of information it provides. We need to scrutinize it from many angles and make some judgments. Asking the right questions helps us ultimately answer the all-important question: how much do you trust what this record is telling you?
Next steps: Keep learning
Is there more to do after you review a family history artifact or record and extract every piece of information from it? You bet! Create a research plan that will help you find other records to verify or shed additional light on the information in the document. For example:
- If you’ve got a death certificate, look for other death-related records, such as an obituary, tombstone inscription, and funeral home records.
- Follow up on additional leads provided in the source. A death certificate sometimes mentions a Social Security number or military service, both of which have their own paper trails.
If you’re new to research plans or looking for a way to take them paperless, you’ll find detailed answers in my video class “Using Evernote to Create a Research Plan.” The video and handout download are available to Genealogy Gems Premium Members.

Genealogy Gems Premium Video Class
 Double good news: AncestryDNA has made some improvements to the way they calculate your genetic matches, but they haven’t messed with the site format or layout. There is one downside–so keep reading.
 Of those windows, you may share the “etch a pai” with another individual in the database, earning that cousin a spot on your match page. However, the truth is, that bit could say “sketch a painting” or “stretch a painful leg” or “fetch a pail.” With Ancestry’s new method, they are able to see farther on either side of the matching segment, making this clearly “fetch a pail.” That means better matching, which means more confidence in your cousin matches.