Now you can choose whose Facebook activity shows up at the top of your news feed. We hope the Genealogy Gems Facebook page is on your See First list!
Facebook now has a new feature to allow you to select which friends and pages you want to see at the top of your news feed. Along with your close friends and relatives, we hope you’ll include the Genealogy Gems Facebook page on your See First list.
Here’s how to do it:
1. Go to the Facebook friend or fan page you want to add to your See First list.
2. Look for the “Following” (for friends) or “Liked” (for fan pages) button on that profile picture.
3. Click it, then select “See First.”
It’s that easy! You can choose up to 30 people to see first in your feed.
Why bother? In the past, even if you “Like” a fan page like our Genealogy Gems page, it didn’t necessarily show up in your feed. And it could be easy to miss posts from the people you care most about (especially if they don’t post very often). Now you won’t have to chance missing updates from your “besties,” kids or grandkids, or favorite online groups.
Show Notes: Have you seen records from Geneanet popping up in your Ancestry hints? Here’s the answer to a Premium Member’s questions about the Geneanet records she is seeing show up as Ancestry hints. Learn how to figure out what new record hints like this are and how to decide how much weight to give them.
I received the following question from Monete, a Premium Member: What is this new thing I’m seeing on Ancestry hints, Geneanet community trees? It’s a good question, and a common one. Genealogy websites like Ancestryare adding new record collections all the time. It’s important to know how to quickly understand what the new record collection is about, where it comes from, the scope and most importantly, decide how much weight to give it.
Records Included in Ancestry Hints
It’s important to note that not all records are included in Ancestry hints. Only 10% of Ancestry® records appear as hints. So we want to keep in mind that although we’re seeing lots of new hints for records, they aren’t by any stretch of the imagination all of the records in the Ancestry collection. Hints are made up of the most popular record collections. There’s always going to be a need to continue to do your own research and to explore other records.
Where to find Ancestry Hints
You’ll find hints in a variety of places such as:
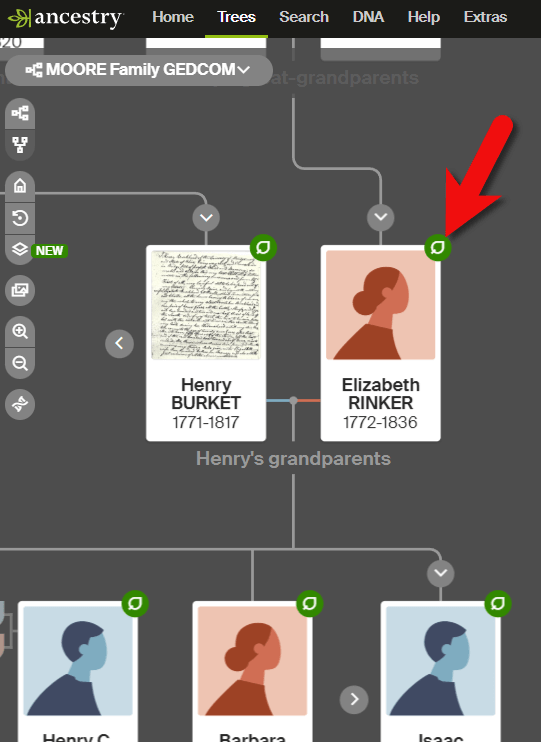
the leaf icon at the top of the screen near your account profile
attached to ancestors in your family tree
on ancestor profile pages
Ancestry hint in family tree
Reviewing and Comparing Ancestry Hint Information
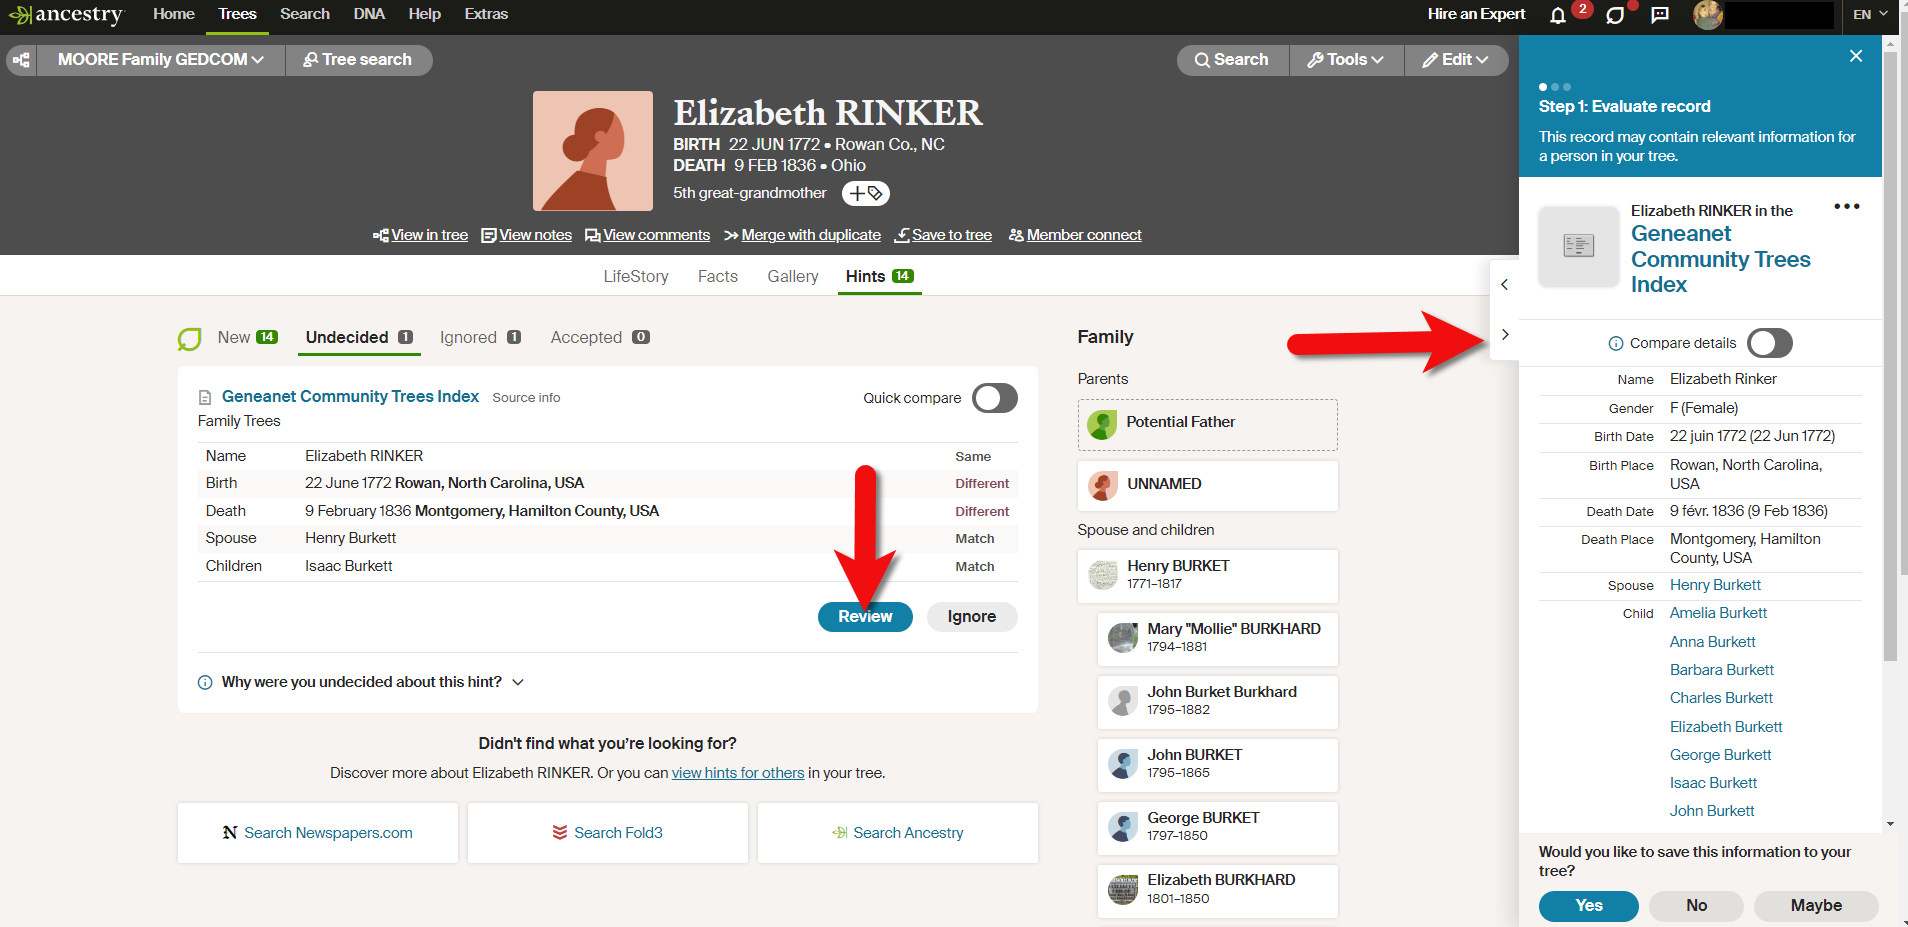
View the hint by clicking the Review button. In the case of hints from the Geneanet Community Trees Index, you’ll see the pop-out panel prompting you to evaluate the record.
Click the Review button to reveal the side panel.
Compare the details of the hint to the known details in your ancestor’s profile by clicking the CompareDetails slider button. This allows you to review and compare each piece of information.
In a case like this where we are unfamiliar with the record collection, it’s important to learn more about it before we compare and make decisions about the information. That way, as you evaluate each piece of information you are considering adding to your family tree, you will have a much better idea whether you trust the source, and you’ll be better able to interpret the information it is providing.
To learn more about the record, it’s a logical next step to click the hyperlinked record name at the top of the panel. However, in this case we notice it just brings up to a full-size page where we are again being prompted to review and add the information to our tree.
Use the Ancestry Card Catalog
When you run across something like this, the first thing to keep in mind is that this record collection they are referencing is obviously part of their total collection, which means we should be able to find it in the card catalog. That’s the best place on Ancestry to learn more about it. Copy the name of the record and then go the Card Catalog. You’ll find the Card Catalog in the menu under Search > Card Catalog. It can be helpful to access the Card Catalog in a new browser tab so that you can jump back and forth between the catalog entry and the record you’re reviewing. You can open it in a new tab by right-clicking on Card Catalog when selecting it from the Search menu.
The card catalog is something that we don’t think of using that often. But really, we should because this is where all the other records are that are not coming up in our hints are listed. It’s also a really terrific resource to tell us more about the record collections that we’re running into as we’re doing our research and evaluating our hints.
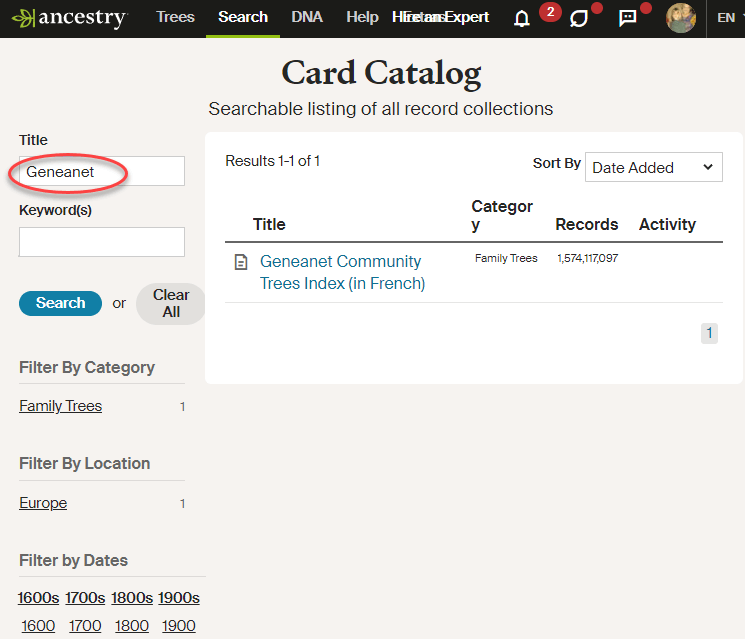
On the Card Catalog page, paste the name of the record collection that you copied in the Title search box. If for any reason it doesn’t come up right away, try typing just the keywords into either the Title box or the Keywords search box.
You should see the collection in the search result. When you hover over the collection title it tells you when it was published, if it was recently updated, and the beginning sentences of the collection description. You will see what type of record it is by the category in which Ancestry placed it, and get a sense of the size of the collection.
Searching the name of the record collection in the Ancestry Card Catalog
In the case of Geneanet, the category is family trees. So, without knowing anything more about it, we would expect this is probably user-contributed information, rather than, let’s say, a census record created by the government, or a birth record recorded by a pastor in a church. These family trees were created by many other genealogists. They may or may not include source citations or even be accurate.
Let’s learn even more about the collection. Click the title of the record collection. The next page will feature search fields and related records. Skip that for now and scroll down to the bottom of the page. This is where you really get to the heart of things about the collection. First you’ll see SourceInformation. Basically, this is saying Ancestry is the source (that’s where you found the hint) and Ancestry got it from Geneanet.
Next you’ll see the About section. This will help us determine the original purpose of the collection, how it was created, and so on. The About section tells us that this is an online database. And it tells the original data came from the Geneanet Community Trees Index in Paris, France.
Next you’ll find Using this Collection which provides an overview of the kind of information you can expect to find in the records. Next is Collectionin Context. This explains “Geneanet was created in 1996 as a way to connect genealogical resources. They use a unique, collaborative model to share family resources while building community. Genealogists, both amateur and professional, are connected with users and genealogical societies. Anyone may upload content.”
“Anyone may upload content” is the key phrase here. People add information to family trees for a variety of reasons. Sometimes they are just testing out a theory and they aren’t even sure it’s accurate. And many people copy and paste information from other people’s trees. All of this means that we can only use this information as clues, not as facts. We must do our own research and homework to find the records that back up the assertions made in the record. Family tree records if used unwisely could easily introduce errors into your family tree.
Finally, in the About section we find the Bibliography which includes a clickable link over to the original sources for these records: Geneanet. Take a moment to visit the site. You can also learn more by some quick googling. Typically, companies like this are going to be listed on Wikipedia pages as well. That’s a that’s a good place to get a basic summary about when was this company founded, find out when it was purchased by the big genealogy website, if it is currently active, and the main website link. All that kind of stuff we can typically find over in the right-hand kind of summary column on the Wikipedia page.
Using and Managing Ancestry Hints
Hints can be great clues, but they can also put rabbit holes in your genealogical path and derail your research goals. This hint might not be your top priority right now. It might not be the most important aspect of your ancestor’s life. Or it might be super interesting, and in that case you can go for it. But I encourage you not to get addicted to just responding to hints. It’s OK to put it on the back burner, leave the hint and don’t even deal with it. You can mark it Maybe and then come back to it later. But don’t let it sidetrack you from your research goals.
That’s the thing about genealogy. It is becoming more and more automated. Have you found that it just feels like it’s happening more and more on its own? It’s sort of being fed to us through the automation, the machine learning, that’s happening on these websites. However, first and foremost, we need to keep our brains engaged. We need to be the one who does the evaluation and ultimately makes the decision as to what we think is accurate about our ancestor and our family history.
In the case of Geneanet, Wikipedia tells us it was created in France and ultimately was acquired by Ancestry in August 2021. We saw on the Card Catalog entry that the index was published on Ancestry in 2022. So, we are looking at information coming from an index. We’re not looking at the actual record. These records are housed on the Geneanet website. You can access the actual record by clicking the View on Geneanet link on the Ancestry record hint page
In this blog and video series I’m showing you how you can create captivating videos about your family history quickly and easily with Animoto. In this final installment we will put the finishing touches on your video and produce it.
In Episode 1
…we laid a foundation for the family history video that you are going to create. Watch Episode 1 here.
You may notice when you previewed your video that the timing needs a little adjustment because its moving a little too fast or too slowly. You can fine tune the speed at which the images are shown and the length of the song by clicking the Gear icon in the upper right corner of the editor (just above the images). In the pop up window you can trim the song and slide the lever to change the pace. When you’re done, click Save and preview the video again to see the changes. Sometimes adding or subtracting images will also help perfect the pace.
Settings
Before you produce your video, be sure to click the Settings button and take a moment to review the title of your video, how your name appears as the producer, and add a date if you want. You can also add a description, which I highly recommend because it helps the people you share the video with understand what they are about to see.
Call to Action
Another really cool feature in the settings is the Call to Action button. A Call to Action invites your viewers to do something, such as:
visit your family website or blog
visit your family Facebook group (which is a really neat idea, especially when you’re organizing a family reunion)
complete a questionnaire about the family history
There are so many ways to engage your viewers! Animoto allows you to add a Call to Action button to your video at the end that you can link to any where you want to take them on the web.
To add your Call to Action, click to check box for Show Call-to-Action button. Then type in a name to label your button such as Visit our Family Reunion Facebook Page. In the field next to URL, type in or copy and paste the website address. For example: www.genealogygems.com. Click the Save button, and your call to action will appear on your video.
Producing Your Video
After making your edits and previewing your video one last time, you’re ready to produce it. Click the Produce button, which will take you to the Produce Video page. Here you have one more opportunity to edit the title, producer name, date, and description.
On the side bar you can select the resolution size of your video. Producing your video can take a few minutes and depends on the length of your video. The good news is that Animoto will conveniently send an email to notify you when it is ready.
Your final produced video will appear on its own page where you can view it again. You’ll see another link along the side for Video Settings. Click it and you will find additional settings that can now be customized. One important setting is Privacy Options, which lets you to designate whether or not you want to allow viewers to comment on your video or be able to share it on social media. When you’re done, click Save to go back to the video page.
Sharing your Family History Video
Your family history video is now ready for sharing, and there are loads of options available. You can share by:
Email
Facebook
Twitter
sharing a link to the video
uploading it to YouTube
You can also post it on your own website by copying the Embed code and pasting it into the source code of a webpage on your website. Click the More button and you’ll find many more social media options for sharing your video. I would also highly recommend that you download a copy of the video as well to your computer for permanent storage.
Continuing with Animoto
Once your free trial is over you will have to subscribe to Animoto if you wish to continue creating videos. There are many options to choose from so you can find the one that fits your needs.
If you only need to make one or a couple of videos at a time, you could do all your planning before making a purchase. Then you can purchase one month’s Personal use of Animoto. If you have several or ongoing projects, purchasing the 1 year subscription saves quite a bit compared to the monthly subscription. Plans include unlimited HD video creation and sharing. Click this link to go to Animoto and click Pricing at the top of the page for all your options.
Think of the Possibilities!
You could create videos for:
weddings
birthdays
holidays
graduation parties
family reunions
retirement parties
genealogy society events
your genealogy website or blog
tutorials and classroom teaching
your facebook page
…the possibilities are endless! Click here to start your free Animoto trial. And I’d LOVE to see your family history videos! Comment below and include a link to your video.
Show Notes: Discover more than 100,000 old family photos on Dead Fred. Founder Joe Bott explains how to find photos of your relatives on this free website.
Video Premiere and live chat
Watch the Video
Show Notes
Would you like to find more old family photos? One of the secrets is to search places where other distant relatives (and even people not related to you) are uploading old photos – hundreds of thousands of photos!
In this video, Dead Fred founder Joe Bott explains how to find photos of your relatives on his free website. Joe will also provide some of the back story on how he ended up devoting his life to helping families find their photos, and how in the world he decided on this most unusual name for his website!
From Joe: “I’m sitting down here in my little niche, scanning photos and putting them on my website so people can find them. That’s what I do for retirement now. I post photos, put them on the internet and wait for somebody to come knock on my door and say, “Hey, I know who that is! That’s my great, great whatever!” It’s happened already about 3000 times since I’ve started. Actually 3,157 times, just to be specific.”
What Does the DeadFred Website do?
“You take your photographs taken before 1965, and the people in the photographs have passed on. You can put them on there. It’s free to use. There are instructions on how to post your photos. Where it says Post Your Photos, click on that and just go ahead and do it.
When you post your first photo, you’ll receive a password in your email. You use that to manage your postings.
You can post as many photos as you’d like. Now, I might take a day or two to get it up on the website because I check every photo that comes in to make sure there’s nothing untoward. Because they do pop up every once in a while.”
After you post the photo, other DeadFred users will search the website, and that’s how old family photos can get reunited with descendants.
It’s also useful if you want to learn more about a photo. When you post your photo, include additional comments and questions. When you’re logged in you can post a sticky note.
Why was the website named DeadFred?
“People often ask me why it is called DeadFred, and that gives me the opportunity to tell them that Dead Fred is a photo.”
The photo Joe is referring to is of Frederick the Great, who died in Germany. “The young man had cancer of the throat and died. My great great grandfather was living during that time in Germany, so that’s sort of the genealogy connection to it.”
The reason behind the name DeadFred
Joe and his family were sitting around a table trying to figure out what to call the website. He had purchased the photo of Frederick the Great on ebay and it came in the mail. “We opened it up and one of my sons, I have four boys, one of them said, ‘Well, we’ll just call it that, Fred.’ Everybody seems to like it. That’s the story.
“That photo of Fred is on my website…Just scroll down on the right-hand side and you’ll see him.”
Has Joe always been fascinated with old photos?
“Not always. In fact, I didn’t know I was fascinated with photographs until 1965 while I was in the Navy. I was in Newport Rhode Island, and I was walking down the street and it started to pour, I mean really pour, and I didn’t want to get my suit wet, my sailor outfit. So, I ran into this antique store. I hadn’t looked like I was going to buy something, but I found something. I found this photo album, and it just totally amazed me. And it most likely said, “buy me!” and I had to. I didn’t have a lot of money back then. I don’t have a lot of money now, but I didn’t have a lot of money back then either. And I bought it for $18. Now $18 in ’65 was a lot of money, especially for a sailor that has just joined the Navy. So, I bought it. And that was my first album. I have it sitting up here on my cabinet. But that’s how it started. I just said, wow, look at this. I couldn’t get my eyes off it!”
Reuniting Photos with Families: A Success Story from Joe
“When I was working. I was driving up to Iowa. And I stopped in store at the antique store. I found some photos in a box – a whole family – and I bought it. I worked out a deal. I learned how to do that over the years. I got a good deal on it. I went home and I scanned the photos. They were from Saskatchewan, Canada.
I got a phone call, or I actually got an email. I eventually got a phone call from a woman from South Saskatchewan who says “that’s my whole family. My grandparents, their aunts and uncles, the cousins, the whole shebang!” And apparently, now this is in the 1980s, late ‘80s, early ‘90s, and those pictures were taken 100 years before. The family left Saskatchewan and they moved to Iowa and farmed there until they all died out. There wasn’t anybody to take the photographs. So, there were the boxes, so I bought them, and I put them up on the website. Somebody from Saskatchewan said they knew who they were. And they sure did. Then I sent them home. That was an exciting moment for me right there.
Now there’s a lot of stories like that. There are stories where people cry when they find their photographs. There are cases when somebody is dying, and there’s a picture of a wife or a mother and their family wants to show them a picture before they die. So, there’s a lot of stories to be told. I could write a book about people that have found photographs. I sent out a couple every week now. Matter of fact, I just sent one of a baby, which was great. The baby has died now, got old and died at the age of 88, and I sent it out to his grandson. Yeah. My mind’s getting older, so I can’t remember as much as I would like to as far as names and places. But these kinds of things, they stick in your head.”
How to Post Photos on DeadFred
The first step in submitting a photo to DeadFred is to make sure it meets the guidelines. Currently, they accept photos that are earlier than 1965 and that, for privacy reasons, the people in the photo are deceased. Make sure to identify the photo in some way. This could mean including a country, date, state, etc.
Scan your photo in JPG format. Per the website, for best results, scan at 150 dpi resolution or higher and save at 72 dpi.
On the home page, under the Tools column on the right-side, click Post Photos in the menu. Under Step One, read the directions, check the box for the Terms of Service, and click the Choose File button to locate the photo file on your computer. Then click on the “Upload Image” button.
Your photo will receive a unique record number. Follow the prompts on the page, type in the identification information in the proper fields, and then submit.
You can expect your photos to appear on the DeadFred website typically within 3-5 days of being uploaded.
4 Ways to Search for Photos at Dead Fred
Every photograph on DeadFred website is unique, as is the information associated with the photo. That’s why there are 5 ways to search for them. Here’s how:
1 Surname Search
There are two options for searching Dead Fred for photos by surname. Option 1: Quick Search Field and Option 2: Linked first letter of the surname.
2 Detailed Search
On the home page, click the link for the Detailed Search. This will take you to a form that you can complete. The more information you can enter into the Detailed Search form, the better your chances of finding a match.
3 Search by Photographers
Of important note on the Detailed Search form is the Photographer field. Many old photos, particularly cabinet cards from the late 19th and early 20th centuries include the stamp of the photographer. Sometimes you’ll find a tremendous amount of detail about the photographer on the backside too. Use this information to conduct a photographer search.
Searching by a photographer is a great way to find other photos potentially related to your family’s history. Take a look at the photos you already have for the family you want to search for and make note of the photographers. Then, conduct a search by entering the surname of the photographer in the Photographer field. This will retrieve all photos listing that photographer’s name.
4 Keyword Search
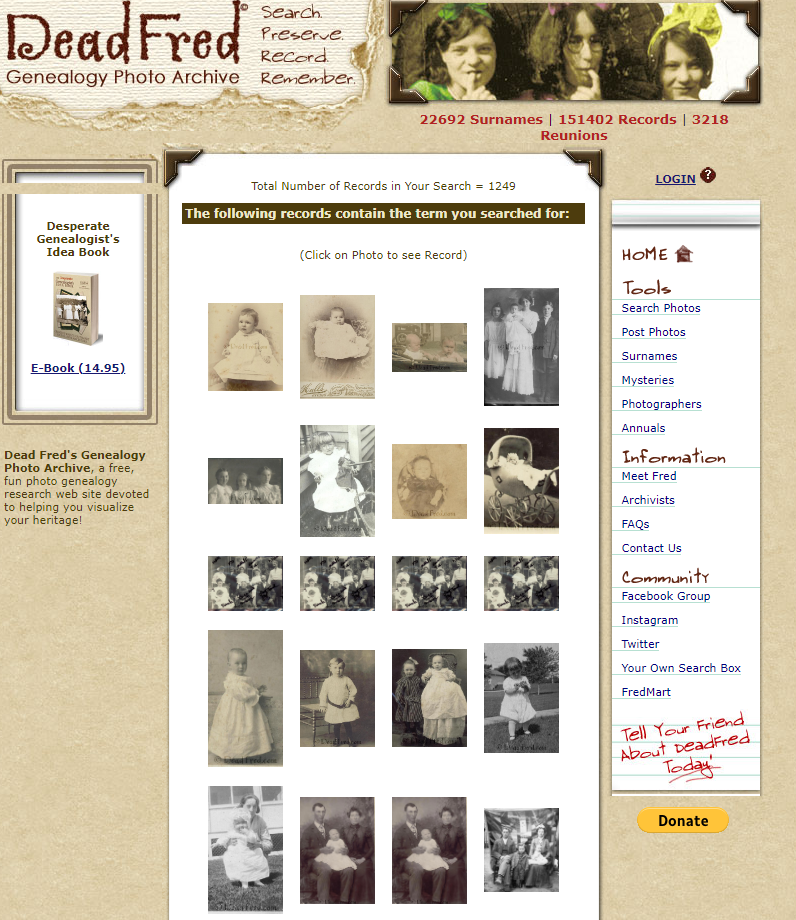
Many DeadFred users include surnames that are related or associated with the photograph in the Comments field if they are not certain of the subject’s identity. You can take advantage of this in your search by using the Keyword search field on the home page of the website. For example, search on the word baby and you’ll get all the photos where that word is mentioned in the Comments.
Keyword Search results for baby
Accessing DeadFred Photos
When you click a photo on the search results page, it will take you to that photo hosted on the Dead Fred website. Notice that the page URL ends in .jpg indicating this is the image file itself. You can right-click on the image for usage options.
 Now you can choose whose Facebook activity shows up at the top of your news feed. We hope the Genealogy Gems Facebook page is on your See First list!
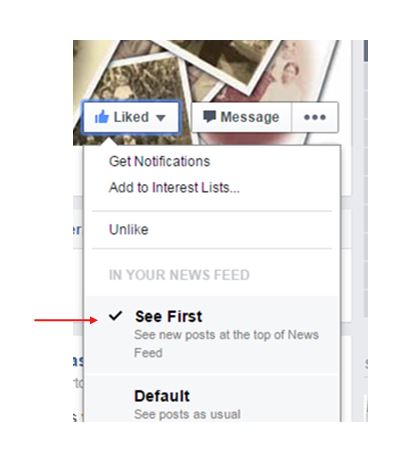 1. Go to the Facebook friend or fan page you want to add to your See First list.