Access by logging in to your MyHeritage account and find this tool under the Family Tree dropdown menu:
This podcast is sponsored by:
MyHeritage.com is the place to make connections with relatives overseas, particularly with those who may still live in your ancestral homeland. Visit www.MyHeritage.com
A Similar Tool: RootsMagic Problem Search
In RootsMagic, find it under the Tools menu. Select Problem Search, then Problem List to select the different kinds of problems you can have RootsMagic identify for you and to choose what age ranges you decide are out of bounds for a new father or mother.
Meet Team Black: Joe and Madison Greer of Portland, OR
Relative Race: “What happens when genealogy meets reality TV? Using their DNA as a guide, contestants embark on the ultimate road trip across America, completing challenges and meeting unknown relatives along the way.”
Click here to watch past episodes online for free. The last two episodes of season two, 9 & 10, will air back to back respectively at 7pm MT/9pm ET and 8pm MT/10PM ET on Sunday, April 30.
BONUS CONTENT FOR GENEALOGY GEMS APP USERS Free PDF summary of 8 top genealogy TV shows from the past several years and where you can watch them online?a few of them for free, including Relative Race.
Thanks to Your DNA Guide Diahan Southard for joining us to talk about this new development in genetic genealogy. Click here to learn more about Diahan’s how-to DNA video tutorials and personal consultation services for solving your family history mysteries with DNA.
A multi-generational novel about a Swedish immigrant and the town he builds in the American Midwest by luring other Swedish settlers and a mail-order bride. As characters die, they take up residency in the local cemetery and continue to comment on the activities and people of the town.
Show Notes: Whether you want to visit the village where your ancestor was born on your next vacation, or you just want to find their records, you’ll need to know the exact place name and location. Professional genealogist Rich Venezia of Rich Roots Genealogy joins me in this video to help us pin down those ancestral places.
Ancestral Villages: Why near enough isn’t good enough.
Lisa: This is such an important topic; we’ve got to know where people came from to be able to track them down. I was just reading your article. It’s called Hometown Heroes, and the September / October issue of Family Tree Magazine. In it, you said something really interesting right off the bat, which was you said that “near enough isn’t good enough.” What are you trying to help people understand when you say that?
Rich: When we start with our research, we’re often starting with censuses especially, right? Those are often kind of the backbone of a lot of American research. And so, if people are moving around a lot, or if you aren’t exactly sure where they lived, because of the decennial census, you might be able to track them around and say, for example, they were living in California. Then you could figure out what they were first in Los Angeles, and then we went to San Francisco ,or whatever. But a lot of other countries, especially Western and Eastern European nations, don’t have similar types of these censuses, or at least not that are available to us. And so, if we only know, let’s say, the state where they’re from, or the province or region in a different country, it’s often really difficult to figure out where the records are, because a lot of times the records are going to be held at a really local level. So, unless you know that exact town or village, more often than not, you’re going to have a lot of difficulty getting any records and moving your research further back in the old country, because you really need to pinpoint that exact location.
Lisa: That’s a great point. Sometimes a record says, Warsaw, but they weren’t really in Warsaw, they were just really close by. Is that fairly common?
Rich: Yeah, precisely. My parents, I got to tell them that we know the exact Italian villages where their grandparents were all from. They always said Naples, right, or they heard Naples as part of their family story, but none of them are from Naples. They’re all from 45 minutes or an hour and a half outside of Naples. But I think that happens pretty frequently in the type of research that we’re doing.
Even today, when you meet people around the world or across the country, they’ll probably won’t often say the suburb of New York or Philly or DC, where they’re from. They will usually just say the city that’s close by. So, I think that kind of pervades today. Remember that when you see big cities listed on a death record or something like that, you might need to dig a little further to ascertain whether it was indeed that city or if it’s someplace that’s close by.
16 Records that can help you find your ancestor’s village
#1 Ship Manifests
Lisa: In the article, you give 16 sources that we can turn to, to try to pin this all down. Let’s start with number one, which I think is excellent, which is ship manifest.
Rich: Ship manifests are a great way to start when we’re looking for our ancestors who came over voluntarily and were interested in finding a better life for their family.
The problem with manifests is that they weren’t really used to regulate immigrants because of the laws in the United States until around the late 1800s. And so, because of that, there’s not always great detail on them. So, if you’re like me, and you have a lot of 20th century immigrant ancestors’ manifests, and they can often give you most all of the information that you need. But if you’re researching earlier ancestors, you might very well never find a manifest because there wasn’t one created, or the manifest is only going to give you a country of origin as opposed to any place more specific.
#2 Naturalization Records
Lisa: Number two is naturalization records. I love these. I just think they’re an amazing resource. Tell folks about what these are and what they might have for us.
Rich: Naturalization records are often kind of the next steppingstone when we’re researching immigrant ancestors. They relate to the process to become a US citizen, which was never a requirement, so you may find them for immigrant ancestors, but you may not.
Again, starting in the 20th century, we see really helpful information on these records, we generally get exact places of birthplace of last residence, which certainly isn’t always the same information, ship of arrival, and lots of other great details. But because of kind of the lack of regulation of these, or lack of federalization of these records, the forms weren’t standardized prior to the early 1900s. And as such, again, we run into this situation where every now and again, you’ll find a record from the 1850s that is super helpful and gives an exact place of origin and lots of other great genealogical details. But most pre-1906, naturalization records aren’t generally going to give you that exact location of origin that you really need to go across the pond.
Lisa: Sounds like we have to do a lot of collecting of all the different records. You never know which one’s going to have it. I know, in the case of my great grandparents, that was the only document that mentioned this little village of Kotten in East Prussia. Everything else was much more generic, and kind of the general area. So, you never know.
#3 Vital Records
Lisa: Number three is vital records. Birth marriage and death, right?
Rich: Right. These are a great way to, again, collect a lot of documentation and see maybe where, if you’ve got 10, or 15, or 20, to order, only one or two of them might have the precise information that you’re looking for. But if you’re researching a family that came over at different times, if you’ve got uncles and aunts and cousins, you want to get all of those records, because it might only wind up being the last nephew’s death record that lists the place of origin of his parents. And it sounds crazy, but I’ve seen it before, where you gather together all of this documentation, and if there’s 30 possible records to get, it’s the last one that has what you need. But that makes it really important not to skip out on all the records because it could be the only thing that mentions it, especially sometimes for earlier immigrants.
#4 Marriage Licenses
Lisa: Number four is marriage licenses and, and marriage records, which typically are somewhat older than some of the other available vital records, correct?
Rich: Yeah. I do very little colonial research, but I do know, there’s often colonial marriage bonds that people might be able to find. But also, in a lot of places, like in Pennsylvania, where I live, for instance, the marriage licenses in the county start in 1885. But the births and deaths for the state don’t start until 1906. So, you do often find that marriage records or marriage licenses might wind up predating some of the vital records.
In some cases, like for New York City, for instance, you may have the opportunity to get two or more different records related to the same event. There might have been an application for a marriage license, and then a marriage license or a marriage certificate or marriage return. And a lot of times, they’re not necessarily filed together. You might need to go digging around and looking to see if there are other records.
For instance, in New York City, they have a second set of marriage records. They have marriage licenses that people have to fill out prior to getting married, and the marriage certificate. And so between, I think it’s 1908 and 1937, there’s the secondary document that you definitely have to get because it asked for birthplace. It also asked for parents’ birthplace, and that information is not listed on the certificate. So, if you just stop with a certificate, you might be missing some great additional information.
Lisa: Hmm, reading between the lines, I’m really hearing you saying we’ve got to research the jurisdiction to know what they have, and what kind of records are created in their process because that varies a lot.
Rich: In Pennsylvania, we started marriage record keeping in the counties in 1835. And actually, for the first six years, there was a second copy that went to the state. So, if you happen to have people married in this small timeframe, you’ve got a county record. That’s the county record that was sent to the state which should be identical but might not be.
There’s also the potential for the religious record, right. And in some places they had city marriage returns as well, so there might be a possibility to find three or four or even five different records that all document the same event, but because the records are kept by different people, for different reasons, there might be a lot more information on some than on others.
Lisa: Every record has possibility. I love it!
#5 Church Records
Lisa: Church records can go much older too, right?
Rich: Right. Absolutely. And that’s especially for folks researching ancestors who were Catholic. The Catholics were, and are, notorious record keepers. And they’re often very interested in figuring out or noting down, where the parties had been baptized to make sure that people getting married were Catholic, or the people that were baptizing their children were Catholic.
We’ve also got great records that go quite far back like the Quakers. There’s the Friends records, many of which have been digitized by Ancestry. And of course, there are other religions that have their own records, many of which may have not yet been digitized, but which could certainly include the same type of information about origin or place of residents, place of baptisms, something like that. So, it’s always a good idea to make sure to look for those types of records as well.
#6 Draft Registration Cards
Lisa: For number six we go a new direction toward military records: World War One and World War Two draft registrations. This might be new to some people/ Tell us about these.
Rich: Sure. These are records that are generally relatively easily findable on the big websites, Ancestry, FamilySearch, Findmypast, MyHeritage, etc.
Oftentimes, they did ask for a place of birth. And so most immigrants who were here in the early to mid-1900s, that were born sometime from about the mid-1870s forward, should end up in these records, but that doesn’t mean that they served in the military. But if they were a man of draft age, they would have needed to fill one of these out.
Again, we run into this issue of the more recent, usually the more records are available. But in this case, it’s great, because you’re not just looking for people that wound up becoming citizens, you’re not just looking for people that may have been Catholic or whatever. All men that would have been between these certain ages on these dates, would or should have filled out these records. And so, these records may indeed, specify that exact location of origin.
#7 Military Serve and Pension Records
Lisa: Yes, they are one of the most comprehensive collections available. it really does cover everybody, which is terrific. But if they did serve, for number seven you have military service and pension records.
Rich: These are one of kind of the first ports of call that I would want to look into for an earlier immigrant ancestor.
We have pension records back to the Revolutionary War, and they move forward. The War of 1812, of course, was the big preserve the pensions project a few years ago, and they go up to the Civil War, and even a bit later, to the Spanish American War.
Folks whose immigrant ancestors served in the military, even if they came over 250 years ago, their pension records or their military service records could be really helpful. A lot of times, there’s things like affidavits that say, my name is John Smith, but I was born on this date, and this place, or it might even just say, the county in Ireland, for instance, or England. But even still, that’s obviously much more helpful than just Ireland or England.
There’s sometimes things like copies of family Bible records, or marriage records, because you have to remember that when we’re talking about pension records, we’re oftentimes talking about other people that would have been affected. So, if the ancestor died in the war, or shortly thereafter, their widow or their minor children could have been eligible for this pension. And so of course, they would need to prove the relationship. So, if the marriage occurred back in the old country, or something like that, there might be copies of these records, affidavits, some type of testimony that provides that which could all lead us to clues about that immigrants’ origins.
Lisa: Yes, it’s a record collection that could lead to many different kinds of records.
#8 Employment Records
Lisa: Number eight might be a little bit rarer, but gosh, if it exists, it would be well worth going after: employment records.
Rich: Yeah, these records sets definitely require a bit more advanced research. You definitely first need to figure out where your ancestor worked. But also, a lot of times, you need to do a lot of digging to determine where the records are, if they even exist, right? A lot of times we’re talking in archives, you’ve got to get boots on the ground, you’ve got to get your hands dirty with old records. But there are some really excellent employment records, some of which have been digitized. But we’re talking very few of these records have had been put online. Some railroad records have been, and so some of those have been put on some of the big websites. But a lot of times, we’ve got to figure out where the company was headquartered. Is it headquartered in a different place now than it was 100 years ago? Where might these records be, and also what type of records might exist.
There are some great repositories. The Historical Society of Pennsylvania, the Heinz History Center, in Pittsburgh, for instance, has a great selection of employment records for Pittsburgh based companies, Alcoa, Heinz, Westinghouse. If your ancestor happened to go to work at one of these places, these records have now been put in an archive. They’re much more accessible than if the archive still remains with the company which may be much more difficult to get your hands on.
You may find things like applications for employment, or even just information about employees. There could be information about place of origin, there might be newspaper, there might be periodicals, a lot of companies did newsletters. And so there might also be things about somebody that passed away, which can elicit information, or new hires, for instance. There’s all sorts of possibilities.
This is definitely not the type of thing that you search it, and you find it easily. These are often hard-won victories, but they can be some really great, really interesting records. And oftentimes, well, sometimes, they may include a photograph as well, which can be really special.
Lisa: I agree with you, they do pose more of a challenge. They are kind of a good back pocket item when nothing else is panning out. And I have to say, I had a grandfather and a great grandfather who worked for the railroad. I was amazed to see the Railroad Retirement Board records available through the Atlanta National Archives. I mean, it was well worth it!
#9 Social Security Applications
Lisa: Well, gosh, well, silly me! I forgot to ask rich about item number nine, and that record group is social security applications. In his article, he says, “Social Security began in the mid-1930s, and most everyone who was alive and eligible applied throughout the following decades. Social security applications known as the SS-5s, asked for both a place of birth (albeit, often just to country of birth) and parents’ names. The SS-5s are available for a fee through a Freedom of Information Act request to the Social Security Administration.
#10 Alien Registrations
Lisa: Next we have alien registrations. I haven’t done much research in this area. Tell us about this.
Rich: Alien registrations weren’t really very regulated until the latter part of the 1800s, early part of the 1900s. Prior to that point, there are only a handful of times where there might be some instances of alien registration. But we do see some during the Alien and Sedition Acts shortly after the country was formed in the late 1700s. Unfortunately, most of the alien registrations from that timeframe were destroyed.
There was a period of time where, if you were naturalizing, you had to provide a copy of that alien registration. There is a 12-year period in the 1800s where naturalization records will contain a copy of an alien registration and they can contain information about exact location when they arrived. All the members of the family, the minor children, what have you, and that’s just not what we often find on these early naturalization Records.
There are some instances where earlier you’ll find some alien registrations available. And then once we get to the 20th century, of course, we have many more available during World War One and World War Two. There were enemy aliens who had to register, there was a nationwide alien registration in 1940. There’s a couple of statewide alien registrations in Maine, Minnesota and North Carolina. So those records are also available.
Alien registrations are a bit more difficult to research and wrap your head around, because it really depends upon the location of where they were living. You have to determine if there was some type of alien registration happening at that time.
The only really comprehensive registration, in terms of alien registrations, would be the one that occurred right before World War Two in 1940 and continued on to 1944. If you do have ancestors that were 19th or 20th century immigrants, if they’re an alien and in the 1940 census, that’s a really good indicator that they should have an alien registration form.
Alien Registration records are currently only available through the USCIS genealogy program. It’s quite a hefty fee to order a record, but the hope is that eventually they’ll make their way to the National Archives. We don’t know when that will happen.
I have heard some instances where folks who emigrated in the 1860s, 1870s, that were old men, but had never naturalized, were found in this 1940 alien registration form, and it is the only American document that tells a location of origin. So, it’s really important and might very well be worth the money to make that request if you would expect them to show up in those records based upon their alien status in 1940. And if you’ve exhausted a lot of the other possibilities of places to look for their place of origin.
#11 County Histories
Lisa: Number 11 is one of my favorites, and I think probably one that I’ve had a lot of success with, perhaps you have as well, and that is county histories. Thankfully, those are much more readily available than alien registrations.
Rich: The great thing about county histories as you well know, was this big push at the centenary of the country to document the histories of the counties and the United States and the people who lived in them. And so, we will often again, see much earlier immigrant ancestors in these books. Even people that had had long since been deceased, because their children or grandchildren were noting how they were the founders of the county or what have you.
County histories are sometimes giving a mini biography of an immigrant. Whether it’s someone who’s alive, or has since deceased, it will often say, at least what part of their country of origin they came from. So, those can be really helpful in providing some of those details, as well as information about how long they’ve lived in the county, what they did, how they got to the county. There’s sometimes some really interesting stories in there, and sometimes photos as well. So, county histories are definitely a great option for folks whose immigrant ancestors were 18th and 19th century arrivals as opposed to more recent arrivals.
#12 Newspapers
Lisa: And that leads right into number 12, which is newspapers. As I hear you talk about the stories we read in county histories, I think newspapers would be a great place to go and look for another take on those stories. Right?
Rich: Yeah, absolutely!
When we think of newspapers, we usually think of obituaries, which might list a place of origin. But of course, there’s all sorts of other things that might be listed.
If people were named as the executor in the will of their parents or sibling that was left back overseas, that might be listed in the paper, because there might have been some requirement about a legal notice about that. Or you might find steamship arrivals specifying so and so are coming to join Mr. And Mrs. Smith of this city. And they might even specify where they’re coming from more precisely than just that they arrived on the steamship. So, there’s a lot of great opportunities in newspapers.
And of course, more and more are getting digitized. A lot of states have their own digital newspapers, projects. And there’s some outside the box possibilities as well like ethnic newspapers, like religious newspapers, or company newspapers, or periodicals.
There arew all sorts of places that you might be able to find some really interesting newspapers about your ancestors, whether they tell you place of origin or not. Newspapers were great gossip rags, right? So, you can find some really interesting stuff in there about who’s fighting with who or, who’s playing at the church baseball game that weekend, or whatever. There’s all sorts of fun stuff that can be found in there.
Lisa: Yeah, I’ve even seen articles where they’re talking about folks gathering, I think it was at a Catholic church, and they were saying they all knew each other back in County Mayo, you know. It wasn’t the point of the article, but they mentioned it.
Rich: You never know when those types of little things are going to come up. I just can’t over overstate their importance. They can have so much utility. And, as more time goes on, more and more are being digitized. So, you know, if you were on the big newspaper websites a while back, look, again, in six months, look again in 18 months, because there’s just so many resources that are being added. And, and so many small towns, they have their own little weekly newspaper or whatever. And those are really where you want to go if your ancestors live somewhere rural. That’s where you’re going to find the really interesting articles, and also the articles that might be more detailed, which could give you things like place of origin or other genealogical details that you’re missing.
Lisa: Yeah, that is excellent advice about going back and revisiting. In fact, some of the websites even now have a way to alert yourself. They’ll message you if they upload something that matches something you searched in the past. I keep finding new things that weren’t there two years ago.
Lisa: Okay, we’ve covered so many great resources. And we’ve got four left and you never know which one is going to be the goldmine. Tell us about #13, cemetery records. Tombstones?
Rich: We think of tombstones as the first place to look. I’ll often find, especially with Irish immigrants, their descendants love to place on the tombstones where their families were originally from.
There could be other records as well in the cemetery. They might be dusty books in the basement. You might have to ask real nicely or bring some chocolate or send a check to get access to them. But you never know what type of information you’re going to find in there. And even if it doesn’t give you the exact location of origin, it might be helpful to help you determine family relationships.
If you now have more people to research, and you know that they’re all related, there may be some records that relate to the other people that are in the plot that can give you the type of information that you’re looking for. So of course, we want to start with tombstones.
There could certainly be records at the cemetery office as well. Sometimes records have been digitized, so check with the local genealogical or historical society. We could be talking about a ton of other records that might possibly be available for your cemetery of interest as well.
Lisa: Great point, so many different options there.
#14 Probate Files
Lisa: Speaking of death, #14 is probate files in court records.
Rich: A lot of the earlier probate files pre 1900s for most counties in the United States have been digitized. They’re relatively well indexed.0
When we think about probate files, it often isn’t going to say this person born in this place died on this day. But there might be, perhaps lands that they had a share of back in the old country. Or it could be that, along the way, maybe they came from Europe through Canada, and they had some property in Canada, which could be a helpful piece of information for you to have.
It also might be that if they were a single person or had no family, it could be that the people that needed to be notified were back in the old country. So, you sometimes will find copies of correspondence sent through the consulate back in the old country, notifying the brother that they needed to provide X information if they had a share in this, and how is it going to be handled. And so, both in US consular records that you find at the National Archives or College Park, but also in probate files that I’ve just seen in different county courthouses, you’ll sometimes see these affidavits in other languages noting siblings or other people that needed to somehow be involved in the process.
Now, of course, there are not going to be many or even a lot of these files, but you never know. So, you definitely want to look. And this is, again, where we employ the FAN principle where, if it’s one of five brothers, you’ve got to look at all the siblings.
Lisa: That’s the good news about a location. Siblings may not share the same birth date, but they might all share the same birth location. So, it gives us more people to work on.
#15 Fraternal Organization Records
Lisa: #15 is fraternal organization records. And there’s a lot of different fraternal organizations, aren’t there?
Rich: Yes. Oftentimes, you’ll find these types of records in archives. Very few of these have made their way online. There’s a couple of really good resources available on Ancestry. For instance, they’ve got the Massachusetts Masons, they’ve got the Order Sons of Italy and America for a couple of different states, though, not all of the states. And there’s a handful of other ones that have made their way online.
However, with a lot of these types of records, we’re going to be again, looking for in regional archives and regional repositories. The Historical Society of Pennsylvania has tons of these types of records from all over the country, not just from Pennsylvania. And I’m lucky enough that it’s just around the corner from me so I can go hop over and do some research there anytime. But that’s because they subsumed the collections of the Balch Institute for ethnic studies, which was at Temple University. And so, they have all of these types of ethnic-related fraternal organization records that had been housed at the Balch. Those records made their way over to HSP. And so, there’s a couple of different archives like this around the country. There’s also the Immigrant HistoryResearch Center and Archive at the University of Minnesota. They’ve got tons of fraternal organizational records from all over the country.
Again, this is not beginner research. It’s not necessarily easy research. You first have got to figure out if your ancestor was a member of an organization. Look at obituaries, things like that, to see. If so, where are the records, and are the records for the different lodges in different places. You might need to do quite a bit of calling around to figure that out.
Lisa: You’ve been leading us through some of the low-hanging fruit some of the tougher to get records, and so many of them kind of dovetail into each other and help us lead through a path from one record to the next until we get to the one that has it.
#16 Neighbors
Lisa: This all leads us to your final item here in your article. Number 16 is Neighbors. I don’t think you’re saying I need to go next door, right?!
Rich: You never know, maybe your neighbors can be helpful! Maybe they’re also a genealogist. Maybe they’re a long-lost cousin who knows. Funny story: a few years ago, before I became a genealogist I wound up working with a distant cousin of mine and she was my desk neighbor. So, it could be that your neighbors have what you need! (laughs)
What I’m talking about is the fact that, since the beginning of the country, America has been populated by chain migration. One individual comes from a small town or village, they write back home, their brother comes, then their parents come, then the cousins come and other people from the village come It’s been that way since the 1600s and continues to be that way today because of the need for community, and also people that speak your language. It helps with the ability to find a job more easily, what have you.
You’ll find people that are coming from the same village living in the same neighborhood are oftentimes in the same apartment building. If you’re researching your family, and you have looked at all the documents, and you’ve done all the things, and you can’t figure it out, but they’re living at an address like my Italian grandpa’s at 500, Adams Street in Hoboken, you may find that everybody who lived there was from the same village, or at least from the same area.
When they came to the US, they lived in the same place that allowed them to get jobs more easily, connect with employment opportunities, connect with religious organizations. And so, you also want to look at the people that they’re living with. Who are the people in their apartment block? Who are the people that live next door? Who are the people that are witnessing their deeds that are the executing their wills? Who are the witnesses to their marriage. All these kinds of things could be really helpful.
Of course, that increases the amount of research you have to do 100-fold. But if what you’re really looking for is to figure out exactly location of origin in the old country, and especially if we’re talking earlier immigrants, it can be worth it. It was the same in the 1920s, as it was in the in the 1780s.
You definitely want to branch out and research the folks that your immigrant ancestors surrounded themselves with, whether it’s physical neighbors, or people that continually show up on their documents, as informants as witnesses, as co-signers, as bond guarantors, all of those kinds of things, because those people could very well have come from the same place.
Lisa: Well, when we’re looking at a census record for example and we see Italy, Italy, Italy, listed and they’re all in apartments, then we just grab your article, and we run them through the 16 record sources again, and see if we can at least find an origin for them, which then would at least give us a clue of a place to look.
These are all terrific ideas, and I really recommend that everybody get the Family Tree Magazine September / October 2022 issue and check out your Hometown Heroes article. Thank you so much for helping us today, Rich.
Rich: Thanks for having me. I always appreciate the opportunity to talk to you and to write for Family Tree Magazine. I hope that y’all got some good ideas and I wish you the best of luck in in figuring out where your folks were from and maybe eventually getting to go visit as well.
Lisa: Oh, yes, that’d be even better, wouldn’t it? Thank you so much.
Welcome to this step-by-step series for beginning genealogists—and more experienced ones who want to brush up or learn something new. I first ran this series in 2008-09. So many people have asked about it, I’m bringing it back in weekly segments.
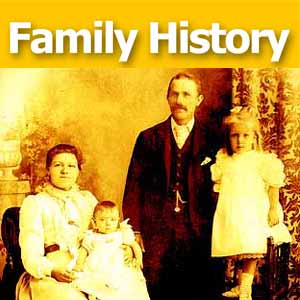
In today’s episode we finish a multi-part, step-by-step series on setting up your own family history blog. In episode 40 you decided what the purpose of your blog is, and we got you started with the free Blogger web site and picked out your blog name and set up the web address for it, and got the basic framework started. In episode 41 two seasoned bloggers inspired us with their posts.
In this episode I talk about adding a few more gadgets and details, doing a bit of pre-planning for your blog posts, publishing your first article, and then talking about how your readers will subscribe to your blog. You’ll also get great tips on how to create genealogy content that others looking for the same ancestors can find easily online.
Episode 42: How to Start a Genealogy Blog, Part 5
OK, let’s head back to the new blog we created in Episode 40. I named mine Blog Your Family History.(This is just a sample blog: my current blog is part of the Genealogy Gems website.) Please note: blogging platforms change over time. The features and layouts I mention have been updated. Just watch for similar features in newer versions of the blog platform.
So far I have the basic layout set up and I added the vintage photograph of the three ladies sharing some written correspondence. If you’re not signed in to your Google account, you’ll notice a link in the upper right corner of your blog page that says “sign in.” You’ll need to click that and enter your user name and password to get access to your blog dashboard – the area where you customize your blog and write your blog posts.
When you sign in you’ll be taken to the dashboard area for your blog. In my case I have a couple of blogs, so they’ll all be listed here in the dashboard. To get back to your blog just click the View Blog link for the blog you want to view. You’ll notice that when you get there the link in the upper right corner now says “sign out” so you know right now you’re signed in. To get back to the dashboard where we can continue customizing the blog, just click the Customize link in the upper right hand corner of the blog. So far we have a couple of “gadgets” or sections of our blog:
the title area at the top;
the blog posts box. In the case of the blog I’m creating here the gadgets run along the right hand side of the blog page.
About Me
the gadget with the photo I added
A followers gadget showing other blogger readers
the blog archive gadget – this is where readers can access blog posts that are over a month old.
So let’s add another gadget by clicking the Add Gadget link in the top gadget box and a window will pop up showing us out options. I’d like to add a search box so that my readers can easily find articles with keywords they are interested in. So just click the plus sign to add the Search gadget and a Configure Search Box window pops up so I can fine tune this gadget the way I want it. So I’ll keep the title as “Search this blog” since that’s pretty straightforward, and I’m going to just have it search this blog so I will keep that check box checked. And click the SAVE button and now I have a Search box on my blog.
So as you can see adding various gadgets to your blog is easy and you can customize them to appear the way you want. And remember you can rearrange them on your dashboard by just clicking and dragging them into the position you want. Once you get the elements of your blog the way you like them – at least for now, and you can certainly make changes any time you want – then it’s time to start blogging.
What to blog about?
Hopefully you’ve decided what you want to blog about – perhaps a specific line of your family, or maybe you’re going to just sort of journal what you work on each day. No matter what approach you take, there are a few things to keep in mind. First, each time you write an article and publish it to your blog page it’s called a “post.” Post is sort of interchangeable with article, and posting is another word for publishing – basically you’ve made the article available on the web.
When you do post an article you will want people—particularly other researchers—to be able to find it. You’ll have better success attracting readers who are researching the same families if you sort of put yourself in their shoes. Ask yourself, what will they be searching on? When someone goes to Google and starts looking for blogs about their family trees, they are using keywords to do that search.
So while you may have some very creative ideas for blog post titles, if you don’t include some of those important keywords (or at a minimum the surnames) they may never find you. And of course sprinkling keywords into your post will also increase its chances of being found. And when we talk about keywords, we’re also talking about key phrases, such as family history, or family tree. Other good keywords are genealogy, birth, death, research, location names, etc. Just the kinds of things you would search on if you were looking for people writing about your ancestors. Remember too that an ancestor’s name is also a keyword phrase.
It’s a good idea to mix it up because you never know how someone else will be searching. For example, I research my husband’s great great grandfather Senator C J Larson of Winthrop MN. So if I’m writing about him, I will use several variations of his name:
C J Larson
Carl Johan Larson
Charles Larson
Charles J Larson
Senator C J Larson
And of course when I use these names in combination with Winthrop, Sibley County, Minnesota, I’m bound to be found by someone also researching him and his family.
Publish your first post
OK, well let’s get right to how to publish your first blog post. At your blog Dashboard (if you’re not there just click the link in the upper right corner that says Dashboard) and click NEW POST. This is like getting a new piece of paper. You’re new post is under the Posting tab and there’s a box where you can write your text and there are some formatting buttons along the top.
My advice is to bite off small chunks. People tend to read something that looks more like a magazine article rather than a novel. And it’s easier to focus in on one topic at a time. So you may want to make your first post a welcome message and explain to your readers what they’ll will be seeing in the future on your blog. I know, you don’t have any readers yet, but since all of your posts are archived, this post will be read tomorrow and two years from now. New readers can find you at any time, and they may very likely take a look at your first post.
The first thing to do is write your post title. I used to wait to title my posts until after I wrote them because writing them often brought to mind the perfect title. But the problem with that is that so often I would forget to go back and type a title in and I would end up publishing without the title. While you can go back and add the title later, it may show up in your readers RSS feeds including those who subscribe to your blog by email. So I find that it works best if I give it the best working title I can come up with, then I write the post, and then I can go back and change it if I want, but if I forget it will at least have a basic title.
Also, remember that your readers probably have many blogs they read – but they probably don’t READ them all, the probably scan the titles and click through to read the ones that sound interesting. So your title has an important job to do. Like the blog text it should contain keywords that will help the post show up in search results, AND it needs to catch your readers’ attention.
When I first started blogging I was always trying to come up with title that as clearly as possible explained what the post was about. But over time I realized that we don’t have to explain it all in the title. In fact, being a bit mysterious or intriguing with the title can entice the reader to click through and read. They’ll find out soon enough all the details of your posting, but your title sets the tone, and catches their curiosity. Of course I don’t advocate bait and switch – but have fun with your titles and use it to your best advantage. And now FINALLY it’s time to actually write your blog post! Of course you can unleash your creativity here, but I do have a few suggestions:
Keep your paragraphs shorter rather than longer – it just makes them easier and quicker to read
Incorporate those keywords and phrases
A picture says a thousand words – add images whenever possible and I’ll show you how in just a moment
Write in your natural voice. Typically blogs aren’t formal, and you will have an easier time writing if you write more like you speak. And that will come across as more genuine to your readers.
Don’t bite off more than you can chew. If you have a lot to say on a particular topic, consider publishing your thoughts in a series of blog posts rather than one really long one. And I find that readers really like following a series.
Once you’ve got it written up, it’s time to a bit of formatting. In Blogger there are a few different fonts you can choose from. Just like in Microsoft word, you highlight the text you want to format and then select from the drop down menu which font, and font size you want. The default font and size might be just fine, but it’s nice to know you do have some flexibility. You can also bold and italicize text by highlighting the text and clicking either button. And like Word you can use Control-B on your computer keyboard for bold and Control I for italicize. You can also put your text in a different color. Again just highlight the text to be changed and click on the capital T button with the color boxes and click on the color you want.
Now a word about formatting. Remember when we discussed that it was a good idea to avoid blog template designs that had dark backgrounds with light type because they are hard on the eyes and difficult to read? Well, over doing text formatting is much the same. It can get hard on the eyes. It’s like the rule of thumb that says you don’t type in capital letters because it looks like you’re screaming at the reader.
Well, overdoing the formatting with a ton of bold and italics and colors just ends up looking chaotic and nothing really ends up standing out. So keep in mind that less is more and use it sparingly so that only the most important things stand out. And just like in Word you can select whether your text is left right or centered justified, or fully justified. And you can create numbered and bulleted lists simply by highlight the text and clicking one of those buttons. And you can also use the Block Quote feature to set text apart as a quotation by indenting it from both sides.
With all of these formatting features you will probably want to see what it will look like to your readers. And that will be different to a certain extent than how it looks here in the post editor. To see it as it will look when posted, click the Preview link in the upper right corner of the text box. When you’re in preview mode the link will then say Hide Preview and to go back to editing or what they call Compose mode just click that Hide Preview link.
Next is the Spell check button, which is something you’ll want to use every time you post. Thankfully if you make a spelling error you can fix it after it’s posted, but it’s so much easier just to run the spell check before you do. There are a couple of more things you can add to this text post to spice it up.
The next button is the Add Image button and it does just that, adds your images and photos. When you click the button an Upload Images window pops up where you can browse your computer hard drive and locate the image you want to add, or if you have a website you can type in the URL address for an image you already have hosted on your website and it will use that image. Keep in mind that Blogger has an 8 MB image size limit, so you might have to reduce some of your photos and save them as smaller files to be uploaded to Blogger. This is often the case when you’ve scanned old family photos at high resolutions that create quite large files.
Once you’ve told Blogger which image to use, you can also choose how you want it to appear on the page on the left, in the center or on the right with the text around it, or you can just leave it as None. And you can also choose whether it is Small, Medium or Large. When you’re ready to go just click the orange Upload Image button and in a few moments it will be processed and you can just click the Done button, the window will close, and your image will now be in your blog post. Again, if you want to see for sure how it will look to your readers just click the Preview link.
You can even upload a video to your blog post. It works much the same way. Click the video upload button. A window pops up and you click the Browse button to locate the video on your hard drive. Blogger will accept AVI, MPEG, QuickTime, Real, and Windows Media video files up to 100 MB in size which is typically about 10 minutes at most. They also have rules about the kind of videos you can upload and require you to click the check box to agree to their terms of service, and then you just click the orange Upload Video button.
Videos take a few minutes to upload, so at first you’ll see the Blogger Uploading Video screen on the video player. You’ll see down at the bottom that it is processing. Once your video appears on the screen then you’re ready to go. If you don’t want to wait while it finishes processing you can click the SAVE button on your post and check back later to make sure it’s complete before Publishing.
And finally, if you decide you want to remove the formatting from you text you can do so with the last button which looks like an eraser. It’s called Remove Formatting from Selection. So in the case of the text that I set apart as a quote, if I want to change it back to regular text, I just highlight the text with my mouse and click the Eraser button and it will go back to normal. If you happen to know HTML you can click the HTML tab and work with your blog post code to further customize it. When you’re done just click the Compose tab to go back to regular editing mode.
Once you have everything formatted, you’ve spell checked and you’ve reconfirmed your title, your ready to send it out to the world! Just click the orange Publish Now button and it will immediately be live on your blog. The next window will say Your blog post published successfully! And you can just click the View Blog link to open a new window and see your published post.
Edit your previous posts
Now if you’re like me then occasionally you’re going to want to go back and edit one of your blog postings. And thankfully that’s very easy to do. Just head back to your Blogger Dashboard and next to the blue New Post button which you would click to create another post, you’ll find the Edit posts link. Just click that and you will see the articles you’ve posted with the most recent one at the top. If you wanted to delete the post all together you just go to the right hand side and click the Delete link for that particular post. To edit the post click the Edit link on the far left side of the post title. This takes you write back into Compose mode and you can make any changes you want. When you’re done, just click the Publish button.
Schedule posts to publish in the future
Do you want to write several posts at once, and have them automatically publish one at a time—once a day, once a week, etc? There’s an easy way to set up your posts to publish in the future. At the bottom of the Text box you’ll see a link called Post Options, just click that. This will expand the box and give you some options. Here you can enter the date and the time that you want the post to go live online. Once you’ve typed that in then just click the Publish button. It won’t be live right now, but will be published at the date and time you specified.
When I first started using this feature I kept clicking SAVE and then wondering why my posts didn’t publish at the right time. But you have to click the Publish button even though you’re not publishing at that very moment. It’s a neat feature, and works great when you’re going to be away but want articles to be published each day. Or like when we talked about breaking up a long article into a series of short articles, you could create them all and then set them to publish once a day or whatever time frame you preferred.
Now you probably noticed that you could also check a box in the Post Options for allowing your readers to post comments. But the best place to set that up is under the Settings Tab. So go to your dashboard, and click Settings. This will take you to the Settings tab which offers a lot of options. Click on the Comments menu link and here’s where you can make your selections as to how you would like your readers to be able to interact with you and your blog. Instant communication and connection with your readers is one of the really unique aspects of blogging, and you’ll find that most folks who read genealogy blogs are interested in a civil conversation. So let’s go through the options here.
Show: I usually have this set to show comments. But you can hide them if you want.
Under Who Can Comment? I would recommend that you allow anyone to comment. After all, you don’t want to prevent that long lost cousin who finds your family history blog in a search to not be able to contact you.
For Comment Form Placement that’s just a personal preference, but I find the pop up window is easy for readers to use.
Another important feature among these settings is the Comment message. And then next you’ll find Comment Moderation. I would recommend that you always moderate your comments, at least to start. This means that when a reader leaves a comment you will have the opportunity to read it and approve it to be published in the Comments section of that blog posting. That way you can eliminate offensive comments. Honestly, I’ve never received anything objectionable, but occasionally I do get people who are fishing for business and simply post “I like your blog” so that they can then tell about their company and give their website address. There’s no harm in setting it to Always and you can change it later if you want.
Then at the bottom of the Comments Setting I like to type in my email address so that I’ll be notified by email if someone leaves a comment that needs to be moderated. And you moderate and approve comments in your Blogger dashboard.
When you’re done just click the orange SAVE SETTINGS button. And again, you can change these settings any time you want. So how do you moderate reader comments? Well, just click on the Posting Tab, and there will be three options:
New post
Edit Posts
Moderate Comments – just click that link. And if you have comments that need to reviewed and approved or deleted you can do it there.
Let readers subscribe to your blog
And finally, let’s talk about how your readers can subscribe to your blog. That’s the other really cool thing about blogging. Each of your new blog articles can be automatically sent to your readers who subscribe. It’s just like subscribing to a magazine. We subscribe to a magazine so we don’t have to go to the store every day to check to see if a new issue has arrived. Subscribing to a blog is the same idea but of course it’s free. And like magazines being delivered to your mailbox, blog posts can be delivered to your readers blog Reader, or email box.
Your readers subscribe to your blog through your RSS feed. RSS stands for Really Simple Syndication which just means an easy way to send out your posts. But you don’t have to know anything about RSS feeds. Blogger does it all for you and I’m really surprised how many bloggers don’t bother to make it easy for their readers to subscribe. Not everyone who wants to subscribe to your blog will quite know how to do it, or be an experienced blog subscriber. You will want to make it as easy as possible for them to get started. Here’s an easy way to do it.
Go to http://www.google.com/webmasters/add.html. Here you can add an “Add to Google” button to your blog. That way your readers can easily add your blog to their iGoogle homepage or to Google Reader, a tool they can use to receive and read blogs.
For Choose your content type select RSS.
Under Promoting select one blog.
Select the style of button you want to put on your blog
Type your blog address into the box, which needs to be your rss feed. In my case, it’s http://blogyourfamilyhistory.blogspot.com/feeds/posts/default?alt=rss. You substitute your blog name in where mine is currently (your blog name in that link instead of blogyourfamilyhistory).
Click the Generate HTML button. The html code you need to add your button will automatically appear in the box, and it’s already highlighted for you so all you need to do is Control C on your keyboard to copy the code to your computer’s clipboard, and then head back to your Blog dashboard.
Click Layout.
Click Add a Gadget.
Click the HTML / Java Gadget. A window will pop up where you can type in a title such as “Subscribe to this blog.”
In the big box press Control V to paste the HTML code that you copied into the box.
Click the SAVE button.
Back on your Layout page you’ll see at the top that you the “page element has been added” and now the top gadget is “Subscribe to this blog”
Want to see what it looks like? Just click the blue PREVIEW button at the top and it your blog will open up in a new window and there you will see the “Add to Google” button. Now EVERYONE can subscribe and follow your blog quickly and easily. Just close that window, and click the orange SAVE button on your layout page. Now click View Blog and try it out for yourself.
Note: I talk here about iGoogle, which is no longer available.
Add the blog to Google Reader to receive each new blog post when it’s published, and have a link to click through directly to the articles and the blog. It’s very convenient and keeps your blog on the minds and lists of your readers. Now you’re all set to go. You can post your articles, which your readers can follow. As you have more time you can fine tune the settings and layout of your blog. Have fun! Best wishes for connecting with other researchers around the world.
Blogging Tip:
In response to one of our recent tips, a reader named Sarah pointed out that there are services now to “slurp up” blogs and publish them into books. We’ll tell you about one service, but encourage you to shop around. At Sarah’s recommendation, we looked into Blurb.com. According to Blurb’s Web site, this online program works with several blogging platforms including Blogger, LiveJournal, TypePad and WordPress.com.
You can customize and edit your book in real time. The automatic slurp action imports and maps blog text, images and comments and then links it into professionally designed page layouts. What an exciting way to preserve your family history. What a great Christmas gift or Mother’s Day gift.
Once you are ready to publish your book, you can control the price by buying a hardcover, dust jacket, soft cover and other designs. These books can be up to 440 pages and as few as 40. Have a blog book within 10 days of ordering. Now, as you can imagine, this is a little pricey but still very, very reasonable. Prices start at just $12.95 for a 40-page softcover and go up from there. You get bookmaking software free!