Here’s our link for purchasing your copy of Snagit (screen clipping tool) Thank you for using our link. Use coupon code GENE15 to get 15% off.(We will be compensated at no additional cost to you, which makes the free Elevenses with Lisa show and notes possible.)
You’re going to learn:
What Snagit does and the problems it can solve for you as a genealogist!
How to screen capture using Snagit
Amazing advanced new features you didn’t know Snagit had and how to use them.
How to do scrolling and panoramic screen clipping (perfect for family trees, historic maps, long web pages and so much more.)
How I specifically use it for my genealogy research.
Add my YouTube channel to your “Favorites” list on YouTube:
Click here to add my channel to your YouTube favorites. Clicking the red “Subscribe” button at the Genealogy Gems YouTube channel will add my channel to your YouTube library which makes it super easy to return to my channel and Elevenses with Lisa any time you’re on YouTube.
How to Use Snagit
One of the things that we all work really hard to do is solve family history mysteries. And as we do that, we are finding all kinds of goodies. But the trick is that we have to capture them. Right? If we don’t, then we may end up losing the trail.
Last week, we talked about citing the sources that we find. This week, we’re going to be capturing our findings in a very visual way, and actually incorporating those source citations. And we’re going to be doing it with the tool that I really absolutely use every single day. And that’s Snagit.
The Image-Capturing Challenges that Genealogists Face
To understand the value of a tool we need to make identify the problems we face and see how it solves them. Here are some of the challenges genealogists face when it comes to capturing images:
We don’t need or want to save the whole page. (Why waste all that ink printing it or storage space saving it?) We may not want to download or copy an image from an unknown website. (No one wants to accidentally put a virus on their computer!)
The page in its entirety is blurred when printed. (This often happens with newspaper pages.)
We need to capture a very long or wide page that can’t be displayed in its entirety on the screen.
We want to annotate or add a citation to the source image.
It takes extra time to save to items to your computer and then add them to other documents in other programs.
Do you identify with some of these challenges? I sure do.
Let’s say that you find an article, a document, or something else, and you want to add an annotation. Maybe you want to add the source citation, a watermark, or just notes to yourself directly onto the image.
It would be time-consuming to clip the image with perhaps the free snipping tool that comes on your computer and save it to your hard drive, and then pull it into another program to annotate it. I don’t know about you, but there’s never enough time for family history so anything that we can do to save time, means we’re going to be able to spend more time with ancestors.
The solution is using Snagit.
Snagit Functionality
Here are just some of the things that Snagit can do:
“Capture” items that appear on your screen
Create videos with audio (Create > Video from Images)
Edit images (You can edit clipped and imported images and photos. You can also send screen shots automatically when using your computer’s snipping tool.)
Convert text on an image to typed text (Grab Text)
Create documents using templates (Create > Image from Template)
“Share” items to other programs with one click.
I have found that snag is so robust, and it has so many different options, I still can’t exhaust all the things that it offers me. But it’s also simple. It’s simple in the way that you use it. It certainly solves simple, everyday problems. And most importantly, it is a program that I can use not just for genealogy, but also for my business and personal use. I like to have tech tools that serve me across the board, if possible, because it takes time to get up to speed on any program. If you’re just getting programs that are only for genealogy, then you end up needing a second program to be able to do similar things in other parts of your life. Why not find tech tools that can serve you across the board. That’s what certainly Snagit does. So, while I’m focusing on showing you genealogical applications for using Snagit, just know that if you’re new to family history, or you stumbled across us this article, and you don’t do genealogy, you’re going to be able to use Snagit for just about everything.
How to Get Started with Snagit
Purchase the software
Download and install
Open it and let it run in the background so you have easy access from your task bar
Yes, there may be a snipping tool built into your computer, and you can use Print Screen. Snagit can blow them away.
How to Capture a Screen Image with Snagit
Display the desired page on your screen
Click the orange Snagit icon in your task bar (Snagit should be running in the background on your computer.) This is the Capture If you don’t see it, click the blue Snagit icon to open the editor and then click the red circle Capture button at the top of the program. After your first capture, the orange Capture icon will then be open and available in your task bar.
Select the Image tab
Set the Selection to Region
Click the large red Capture button
Use your mouse to draw a box around the desired area. You may see flashing arrows. If you click one you will be ablet to scroll that direction to capture more of the page.
When you release your mouse the image will appear in the Snagit editor.
Sometimes we find an item that is larger than is visible on the screen. The page may scroll side to side or up and down. Use Scrolling capture to capture everything in one piece.
How to Scrolling Capture with Snagit
Display the desired page on your screen
Click the orange Snagit icon in your task bar
Select the Image tab
Set Selection to Scrolling Window
Click the large red Capture button
You will see flashing arrows. Click the arrow pointing in the direction that you want to scroll in Snagit will automatically scroll down and capture. Click Stop at any time if you don’t want to capture the entire page.
When you release your mouse the image will appear in the Snagit editor. You can then trim all sides by simply grabbing the handles and dragging.
In some situations you will need more flexibility in your scrolling. Panoramic capture allows you to select the region and then scroll manually, capturing exactly what you want to capture. Think of it as image capture and scrolling capture merged together. Panoramic capture allows you move both up and down and side to side.
How to Panoramic Capture with Snagit
Display the desired page on your screen
Click the orange Snagit icon in your task bar
Select the Image tab
Set Selection to Panoramic
Use your mouse to draw a box around the desired area
When you release your mouse a panoramic capture bar will appear. Click the Start button to being your panoramic capture.
Click in the captured image area and drag the image as needed. The more precise you are in your movement the better the final image will be. You can move in any direction.
When you release your mouse the image will appear in the Snagit editor. You can then trim all sides by simply grabbing the handles and dragging.
Panoramic captures work great for large items like maps, online family trees and newspaper articles just to name a few things. If you zoom out in order to capture these types of items in their entirety you will end up with a blurry item when you zoom in for a closer look. Panoramic solves this problem.
Let’s discuss a few more options for capturing hard to clip items like newspapers. Sometimes, the article you need is continued on a different page or column. With Snagit you can capture the individual pieces and then combine them.
How to Combine Captured Images with Snagit
Capture each section of the article individual using Image Capture (Region)
In the Snagit editor press Control / Command on your keyboard and click each item you want to be included in the combined image.
Press Control + Alt + C on your keyboard or at the top of the screen click Create > Image from Template.
Select the desired page layout. Custom Steps or Steps Portrait works well for articles.
Click on any items (such as numbered steps) and press delete on your keyboard to remove them.
The combined image can then be saved to your computer or shared to another program.
Editing and Highlighting Images
There are many ways to annotate and edit images (both captured and imported) in Snagit including adding:
arrows
text (perfect for adding source citations directly onto the image
call outs
shapes
stamps (Images on images)
lines
squiggles and drawing
step by step numbering
You can also modify images by cutting out portions, blurring and erasing areas, and even magnifying an area on the image!
Snagit Advanced Features and Strategies
Once you’ve mastered the basics there are many more ways to use this tool to power-up your genealogy research. Here are a few more ideas we covered in the video.
How to Grab Text from an Image with Snagit
Option 1 – Grab text from existing image:
Select the image in the editor so that it is displayed in the editing area
In the menu Edit > Grab Text. This will grab all of the text that appears in the image. If you only want a portion of it, click the Selection tool at the top of the screen and draw a box around the area you want to grab the text from.
The converted text will appear in a pop-up window
Copy the text to your computer’s clipboard by clicking Copy All.
Paste wherever you want the text to appear (another document, etc.)
Option 2 – Grab Text While Clipping:
Display the desired page / item on your screen
Click the orange Snagit icon in your task bar
Select the Image tab
Set the Selection to Grab Text
Click the large red Capture button
Use your mouse to draw a box around the desired area. You may see flashing arrows. If you click one you will be ablet to scroll that direction to capture more of the page.
When you release your mouse the image will appear in the Snagit editor. The converted text will appear in a pop-up window
Copy the text to your computer’s clipboard by clicking Copy All.
Paste wherever you want the text to appear (another document, etc.)
Grab Text from Windows Not Easily Copied
We’ll use the example of copying the titles of computer folders into an Excel spreadsheet. Open your file explorer and navigate to the desired folders. Since a mouse can’t be used to copy all the names in one swoop, we will use Option 2 – Grab Text While Clipping instructions above.
Create Videos with Snagit
You can compile separate images into a video and add voice narration.
In the editor select Create > Video from Images
Click to select the first image in the tray
Click the microphone button in the video recording bar if you want to record narration.
Click the Webcam button if you want to appear on screen
Click the red Record button to begin recording.
Click each image in the order desired for the amount of time you want it to appear on the screen.
Press the Stop button when done.
How to Create a Timeline with Snagit Templates
In the editor add images either by importing (File > Import) or capturing
Select the images to be include by holding down the Control / Command key and clicking on them
Create > Image from Template
Select the timeline template
Add a title and captions as desired
Click the Combine button
Productivity with Snagit
One of my favorite features of Snagit is how easy it is to share items to other programs directly instead of having to save them first to my computer. It’s easy to do. Simply select and display the image to be shared and in the menu go to Share > and select the program.
In this episode we take a look at a subject that is difficult, and yet ultimately faced by all genealogists: Downsizing. Whether you need to help a relative downsize, or it’s time for you to move into a smaller place or just carve out more room in your existing home, this episode is for you. You’ll hear specific action steps that you can follow to the make the job of downsizing easier and more productive.
Also in this episode we’ll cover the latest genealogy news, and take a quick look at the 1830 census.
Please take our quick podcast survey which will take less than 1 minute. Thank you!
Genealogy News
New and Returning genealogy-themed television Shows:
A New Leaf on NBC
A New Leaf will be included in the Saturday NBC morning programming block called The More You Know beginning October 5, 2019.
From the Ancestry Blog:
“Each week ‘A New Leaf’ will follow people on the cusp of key life inflection points, who using family history, genealogy, and sometimes AncestryDNA® analysis will go on a journey of self-discovery and learn from the past while looking to the future. In partnership with Ancestry, Fuentes will join families as they learn the importance of appreciating and understanding their family history and ancestors in order to make important life decisions. ”
“Genealogist-on-Demand: Legacy Tree Genealogists Launches Virtual Consultation Service Offering Access to Family History Experts, Any Time, Any Where.
Legacy Tree Genealogists announced today the launch of a new service—45-minute, virtual one-on-one consultations with a professional genealogist. At only 100 USD, these consultations provide users with a cost-effective resource to have their research questions answered in real-time by a professional genealogist, from the comfort of their own home.
Users have the option to schedule either a DNA Consultation with a genetic genealogist who can explain their DNA test results, or a Genealogy Consultation with access to one of their worldwide researchers with expertise in regions around the globe, including England, Ireland, Scotland, and Australia.
Tailored to your specific research questions, the one-on-one consultations are conducted utilizing screen sharing technology that allows the user to share documents, records, or DNA results with the genealogist in a secure, virtual environment.
Legacy Tree will continue to expand its consultation offerings to include additional regions in the near future in order to continue to serve the global genealogy community.”
In the past I’ve told you about the incredible work that Larsen Digital did for me getting some of my old home movies digitized. Well, they’ve just launched a new service where you can send them your old negatives and they will convert them into beautiful high-resolution digital images that you can use. We’re talking 4000 dpi images!
I’ve had boxes of negatives in my closet that I inherited from my paternal grandmother. She had negatives for all sorts of pictures that are either long since lost or the photo album went to someone else in the family.
I really had no idea what these old photos would turn out to be, but I ended up with wonderful images of my great grandmother, my grandparents, my Dad when he was a kid, and countless relatives.
The service is called Value because it’s less expensive than the Pro which includes restoration. It’s a great way to get all your old negatives digitized. Then you can decide if there’s further restoration you want done on select images.
DIY: You can do color correction and repairs yourself with a simple free app like Adobe Fix. See my book Mobile Genealogy for much more on using this and other apps for genealogy.
Negatives can deteriorate over time just like photos. The sooner you get them digitized the better condition images you will have.
Larsen Digital is offering Genealogy Gems listeners a great discount on both the new value service and the Pro negative digitization service, as well as 35mm negatives & 35mm Slides. Visit the Genealogy Gems page at Larsen Digital here and use the coupon code GENGEM.
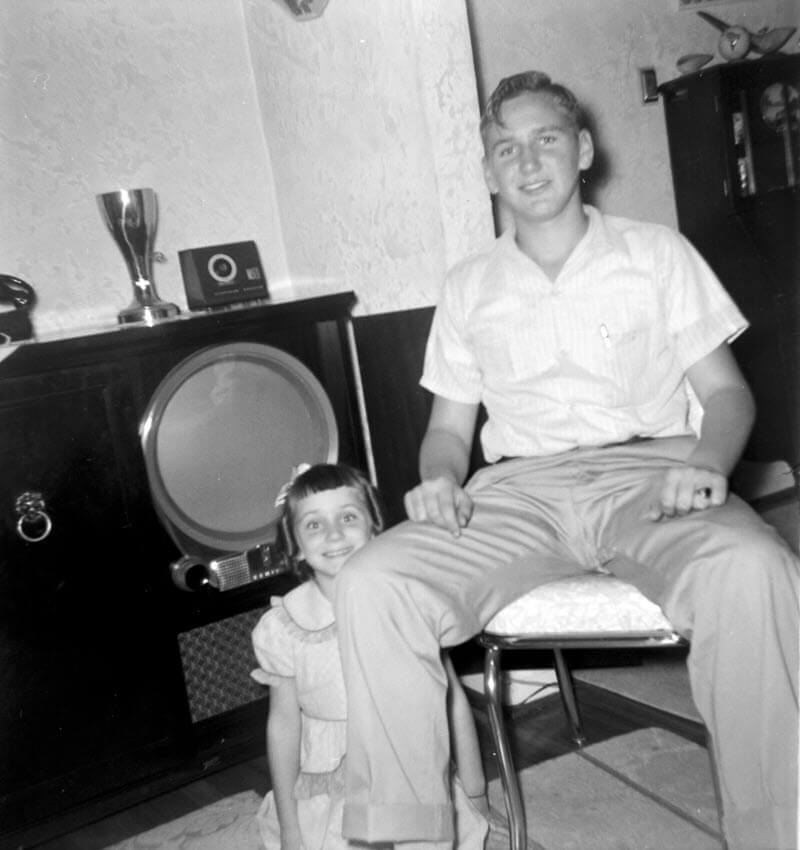
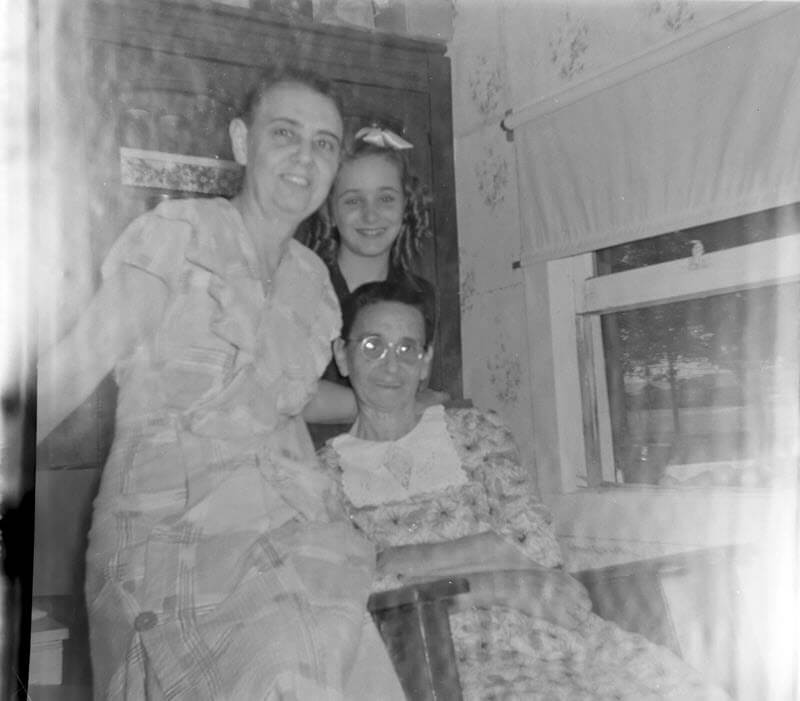
Here are a few examples of old negatives that I had digitized by Larsen Digital.
My Dad with this family’s first TV set!
Never before seen image of my great grandmother (seated), her daughter and grand daughter. Watch the video that autoplays on this page to see how I restored this photo after receiving the digitized image.
It’s really kind of amazing to think I’ve sat on these negatives for so long. I’ve been sending the pictures to my Dad and he’s been emailing me back not just the names and dates, but the stories behind many of these photos.
Findmypast Now Supports Tree to Tree Hints
Long gone are the days of having to search for genealogical records all alone. When you have any part of your family tree online on any of the “Genealogy Giants” websites (Ancestry, MyHeritage, Findmypast and FamilySearch) they do a lot of the hunting for you. They deliver hints that have a good chance of matching up with your ancestors. Your job is to carefully review them and determine if they are your ancestor’s records.
(Genealogy Gems Premium Members: Listen to Premium Podcast Episode #175 devoted to hints at Ancestry that includes a bonus download guide on Genealogy Hints at a Glance.)
Up until now, Findmypast offered hints on birth, marriage and death records. Now they are joining the other Genealogy Giants in offering hints based on other user’s family tree on their website.
Lisa Louise Cooke uses and recommends RootsMagic family history software for her master family tree. Visit www.RootsMagic.com
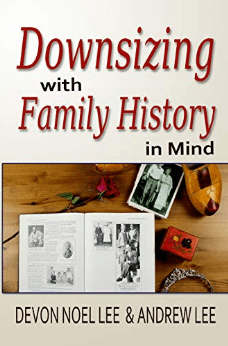
GEM: Downsizing with Family History in Mind with Devon Noel Lee
Get your copy of Downsizing with Family History in Mindhere. (We hope you enjoyed the interview. Disclosure: Genealogy Gems is a participant in the Amazon Services LLC Associates Program, an affiliate advertising program designed to provide a means for sites to earn advertising fees by advertising and linking to Amazon.com. Thank you for supporting our free podcast by using our link.)
Click the image to order your copy.
At some point we all face downsizing. Whether we are helping our parents downsize to a smaller house, or we need to downsize our own belongings to carve out a spare bedroom or just make room in a closet. it’s never really an easy task. And I think it’s safe to say it’s even more difficult for the family historian, because we collect a lot of paper, photos and other things that are often near and dear to our hearts.
Devon Noel Lee and her husband Andrew Lee of the Family History Fanatics YouTube channel have taken on this challenge themselves and they’ve written a new book called Downsizing with Family History in Mind. Here to help you make the tough choices and clear the clutter is Devon Noel Lee.
There are many reasons for downsizing:
To move to a smaller place
Absorbing inherited genealogy
Divorce
To free up space in your own home
Downsizing the sentimental items is the hardest part of downsizing.
Question: A lot of us just think, well it’s a Saturday morning, I think I’ll just do some decluttering. But you say in the book that decluttering doesn’t work. Why is that?
Devon’s Answer:
“There are three things that experts teach us that are absolutely wrong:”
We don’t give ourselves enough time for nostalgia.
We’re really bad at evaluating what’s going to last for the long term
We use the wrong boxes when decluttering – all the experts say to use Keep, Sell and Donate.
Devon recommends the following boxes:
Keep
Giveaway (combining sell and donate) – to family, societies, archive, university special collections, libraries, etc.
Trash (or recycle)
Process
How to “process”:
Digitize
Process the information in your binders and get rid of the binders if no one wants them.
Use it:
Sad to say, most people don’t want your family china. Give yourself permission to use it and enjoy it now. Make memories with it!
Let your children play with things.
Four Basic Downsizing Principles in the book:
Reduce: Divide things into the boxes.
Preserve: This is when you’re going to digitize the things in your process box. Photograph objects. Transfer your genealogy into software and online trees.
Reclaim: Take everything out of the process box after processing, and divide into Giveaway, Trash and Keep. Don’t put things into storage!
Showcase: Put on display what you found worth keeping so it can be enjoyed. Transform what you have into something that is easier to pass on like videos, podcasts, scrapbooks. Focus on story-based items.
From Lisa: It puts us back in control as to what happens to it. Making sure the right people get it.
I’m a big fan of displays. If we haven’t taken a moment to get something on the wall – to put a display together – how can we expect our family to appreciate it and embrace our family history values?
Question: Many downsizing projects are much more than a single day. When you’re faced with a really big job, where do you recommend that people start, and where should they put their primary focus?
The book includes action plans for folks who have:
just an hour
Weekend
3-6 months
6-12 months
Capture what is right now:
Photograph the outside of the home.
Photograph what’s inside.
Then focus on photographing the collections in their context.
Mentioned by Lisa:
Genealogy Gems Podcast episode #21 includes a Gem called Thanks for the Memories. In it, I share an example of mentally walking through my Grandma’s house and capturing all of my memories on paper.
Get a piece of paper or pull up a word document. Close your eyes for a moment and visualize a favorite memory from your childhood.
In my case I started with a favorite place, my maternal grandma’s house. But perhaps yours is the back alley where you and your friends played baseball, or your great uncle’s garage where he showed you how to work on cars. Whatever is meaningful to you.
Now, open your eyes, and write your thoughts one at a time. Just free flow it. They don’t have to be complete sentences.
Later you can try your hand at writing more of your actual experiences or memories of a person. Again, it doesn’t have to be a novel or sound really professional. It’s just the memories from you heart.
Family Photos:
Question: If we have piles and piles of family photos, particularly ones we’ve inherited, how to do we decide which to keep and which to toss? Or do you ever toss?
Devon’s answer:
Get rid of the duplicates!
Keep 1 of the biggest and best and throw the rest away. Don’t bog yourself down with hours spent trying to track down someone else to give them to.
Get rid of blurry, overexposed, underexposed, and meaningless photos.
Unlabeled photos:
There will be some circumstances where you will not be able to keep them. You can’t go into debt for unlabeled photos. You want to separate them from the labeled so that other family members don’t throw them all out together.
If you have time, try to identify them by asking relatives, and posting them to DeadFred.com.
If you can, donate the remaining unlabeled photos to orphaned photo collectors, or toss.
You did the best you can. Don’t feel guilty because your ancestors didn’t label their photos.
Question: What advice do you give your readers who are faced with what to do with their genealogy when they don’t have descendants or when no one in the family wants it? What encouragement can you offer when there is no one who descends from you, or there is no one who wants them.
Devon’s answer:
If you think you don’t have anyone in your family who is interested, you’re wrong.
Downsizing and organizing will increase the chances of someone willing to take it later.
If you don’t have anyone in your immediate family who wants your stuff, start looking for distant cousins actively working on a surname. They won’t want everything. You will have to divide the material. They want it organized.
Do it while you’re living – don’t leave it to someone else.
Digitize it and get it online where it can be shared.
From Lisa:
Getting your stuff in good condition makes it more desirable.
Our collection, broken up, may have much more value to other people.
Get your copy of Downsizing with Family History in Mindhere. (We hope you enjoyed the interview, and thank you for using our link.)
The free podcast is sponsored by:
MyHeritage.com is the place to make connections with relatives overseas, particularly with those who may still live in your ancestral homeland. Click the logo to learn more.
GEM: Profile America – The 1830 U.S. Federal Census
Saturday, October 5th.
The national census to be taken April 1 next year will be the 24th time this once-a-decade count has been conducted since 1790. The fifth census in 1830 profiled a quickly expanding nation, counting nearly 13 million residents — an increase of more than one-third in just 10 years.
New York remained the largest city, while second and third places were a near tie between Baltimore and Philadelphia. Also, among the 10 biggest cities were Charleston, South Carolina, and Albany, New York.
In the decade to follow, Cyrus McCormick invented the grain reaper, opening huge sections of the Great Plains to agriculture, and Texas declared its independence from Mexico.
Gain access to the complete Premium podcast archive of over 150 episodes and more than 50 video webinars, including Lisa Louise Cooke’s newest video The Big Picture in Little Details.
Stay Up to Date with the Genealogy Gems Newsletter
The Genealogy Gems email newsletter is the best way to stay informed about what’s available with your Premium eLearning Membership. Click below to sign up today.
Learn more about Backblaze computer cloud backup and get your computer backed up today at www.backblaze.com/Lisa
Elevenses with Lisa Episode 21 Video and Show Notes
Live show air date: August 20, 2020
Join me for Elevenses with Lisa, the online video series where we take a break, visit and learn about genealogy and family history.
How to Find Free Genealogy Resources
In the genealogy community it’s often said, “Only a fraction of genealogical records are online.” That’s true indeed, but it’s not a reason not to start your search online. A more helpful and accurate piece of advice would be “while not everything is online, all search for genealogical information starts online.”
The reason for this is simple. Online research before you go will reveal:
If the materials are available at a more convenient location
If the materials are available somewhere online for free
The call number, location, and other specific information you need to quickly access the materials once you arrive.
Details about gaining access to the facility and materials.
The last bullet point above will help you avoid the disappointment of discovering an unforeseen closure, or that the specific records you need are actually help at a satellite location.
New genealogical information and records are uploaded daily to the internet. Some of this information is available for free. In this article and episode we will cover strategic ways to locate and access free genealogy online.
The Amount of Data Continues to Increase – Read more about the growth of online information here.
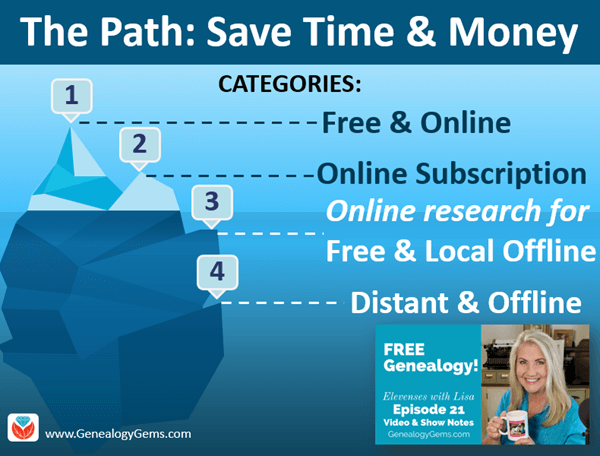
The Path of Least Resistance to Free Genealogy
Most genealogists want to obtain records at the lowest available cost with the least amount of travel. Therefore, always starting your search online just makes good sense.
Here’s our path of least resistance:
Free and Online: FamilySearch, Google, WorldCat
Online and Subscription: Ancestry, MyHeritage, Findmypast, niche sites
Free and Locally Offline: Libraries, Archives, Universities
Offline and Distant: Examples include the National Archives, Allen County Library, Family History Library, NEHGS
The FamilySearch Catalog: New digitized images are added daily from microfilms & digital camera operators. These include books, maps, compiled family histories, and more. The catalog also includes materials that are not online but are available at the Family History Library in Salt Lake City or through Inter-library loan.
The FamilySearch Wiki is a free online genealogical guide comprised of more than 93,000 articles. It covers 244 countries, territories, and islands. It includes links to genealogy databases and online resources as well as how-to information.
Use the FamilySearch Wiki Watchlist to follow pages of research interest. Here’s how to watch Wiki pages for new and free genealogy content:
Log in with your free FamilySearch account
navigate to the desired page
click the Watchlist link in the upper right corner of the page.
Look for the Watchlist link, and the blue buttons that lead to free online genealogy records for that location.
Google.com
Google is still your best bet for finding sources both online and offline.
You can dramatically improve your search results by incorporating search operators into your search. Watch episode 13 of Elevenses with Lisa to learn about how to use search operators when googling for genealogy.
Learn how to google for free genealogy in episode 13.
Find More Free Genealogy with these Google Search Strategies
The most comprehensive and best-selling book on the topic of using Google for genealogy: The Genealogist’s Google Toolbox, by Lisa Louise Cooke.
Google Alerts Finds Free Genealogy for You
Set up free Google Alerts to be on the lookout for new and updated search results. You’ll receive them by email, and you can control the frequency.
Google Alerts do the work of searching for free genealogy for you.
How to Create a Google Alert:
Highlight and copy (Control C on Windows or Command C on Mac) the search query that you typed into the Google search box
Go to www.google.com/alerts
Sign into your free Google account
Paste (Control V or Command V) your search query into the Search Query box on the Google Alerts page
Select the Result Type you desire (ex. Everything, News, etc.)
Select how often you wish to receive alerts
Select How Many results you want to receive (I recommend Only the Best Results)
Enter / Select the email address you want your alerts to be sent to
Click the Create Alert button
Partnerships Make Free Genealogy Available
Many of the genealogy giants enter partnerships with each other in order to facilitate digitization and indexing of genealogical records. This means that the same materials may be found in different locations on the web, and sometimes for free.
WorldCat.org
17,900 subscribing member libraries in 123 countries collectively maintain WorldCat’s database which is the world’s largest bibliographic database.
Use WorldCat to check that you are indeed accessing the resource from the most convenient repository and if it’s available for free. Here’s how:
Run your search
Click an item
Under Find a Copy in the Library enter your zip code
The library closest to you will be listed at the top
Once you get your search results, look to the left in the Formats box. There you can quickly narrow down to only items that are online by clicking boxes like DownloadableArticle. Some of these may require a log in on the website you are referred to.
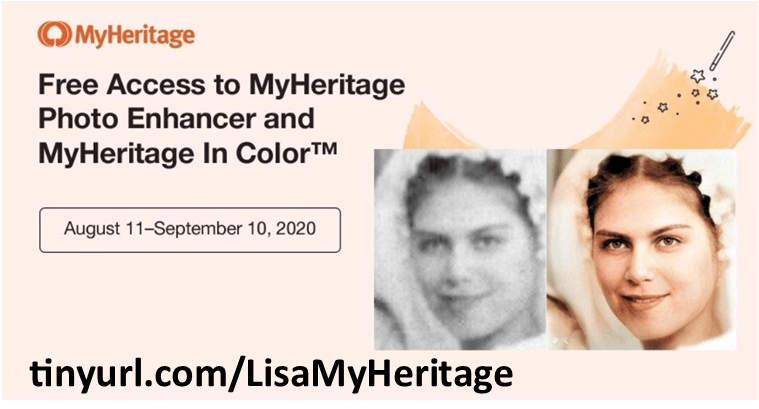
To find free records at MyHeritage.com, go to https://tinyurl.com/LisaMyHeritage. In the footer menu of the website, click on Historical Records. Then fill in your search criteria. (Update: If you don’t see Historical Records in the footer, go to Research > Collection Catalog and search on the keyword “free.”) Scroll down the search results and look for the green free tags.
Findmypast.com
To find free records at Findmypast which specialized in British genealogy but also includes records from around the world, go to https://tinyurl.com/FMPLisa.
(Some links in our articles are affiliate links. We will be compensated at no additional cost to use when you use them. This makes it possible for us to bring this free show to you. Thank you!)
Google Site Search Can Help Locate Free Genealogy
A site search works like many search operators as previously discussed in Elevenses with Lisa episode 13 (watch and read here.) It provides Google with specific instructions about the type of search you want to conduct with your search terms and keywords.
This Site search tip comes from Lisa Louise Cooke’s book The Genealogists’s Google Toolbox.
Site search runs your query only on the specified website. This is extremely helpful and efficient if:
you have a particular website in mind that you want to search,
you aren’t having success using the search field provided by the website,
the website you want to search doesn’t have a search field.
Here’s an example of a Site search:
Free Pennsylvania site:ancestry.com
Try running the search above for yourself. You’ll find results that include many free genealogy records pertaining to Pennsylvania. Substitute the words to meet your search needs.
Construct a Site search for Free Genealogy by first typing in the words and phrases you wish to search for. Include the word free. Leave the appropriate spacing between them and follow the last item with a space. Then type site: and add the website home page address (URL). You can copy the URL and simply paste it in place. There is no space between the colon and the URL. And note that www is not required.
Searching for Offline Local Sources with Free Genealogy Information
To find what’s local and free:
Search WorldCat.org (be sure to use the Zip Code filtering to find the genealogy materials at the location closest to you.)
Use Google to search.
Find your local Family History Center here. These centers have unique free resources as well as free access to some subscription genealogy websites.
When you find a library, archive or other repository, visit their website and look for:
Databases they offer
Their online catalog to plan your research
Other associated libraries
Details on planning a visit
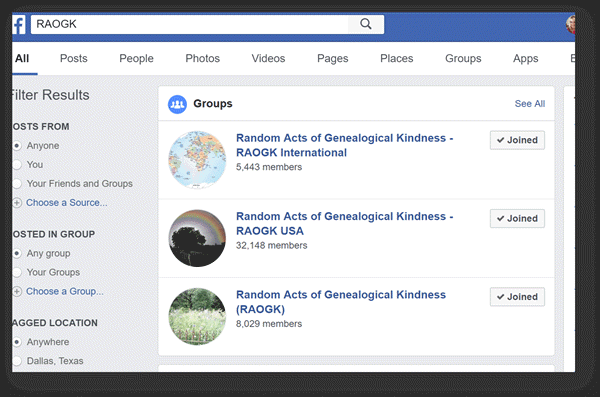
Get Free Genealogy Help on Facebook
Search for Random Acts of Genealogical Kindness (RAOGK) on Facebook.
In Elevenses with Lisa episode 74 Lisa Louise Cooke answers the question “I inherited the family genealogy – NOW WHAT?!”
You’ll learn:
how to get started dealing with genealogy research that’s been given to you
organizational strategies
incorporating the inherited genealogy into your research
what to do with inherited genealogy materials you don’t want to (or can’t) keep
Original air date: Oct. 14, 2021.
Episode 74 Show Notes
(Get your ad-free cheat sheet download in the Resourcessection at the bottom of this page.)
I Got Handed the Family Genealogy, Now What?
Inheriting genealogy is a big responsibility and can be a bit overwhelming. Even if you haven’t been fortunate enough to receive much from other researchers in your family, chances are your descendants will be faced with inheriting your research. That’s why this week’s Elevenses with Lisa episode 74 is for everyone!
As exciting as it can be to receive new genealogical information, it presents challenges such as:
figuring out if each piece of information is correct,
finding a way to process it and blend it into what you already have (or if you’re new to genealogy, what you DON’T have!)
finding a place to put it,
and making the hard decisions about what you can’t keep.
So in this video I’m going to share with you my top strategies that I’ve used myself more than a few times. So take a deep breath, grab a soothing cup of Chamomile tea, and let’s get started.
I’ve received many emails over the years from folks who have faced the challenge of inheriting genealogy research done by another family member.
Jim R wrote me to say:
“I am going through my family tree and have a question. My aunt spent a lot of time back in about 1985 and had a huge hardback book of printed up of the family tree. But I was told by a few family members that some of the information in it isn’t true. How do I go about doing my own research, and properly compare the info? I need to figure out what is right and what is wrong. This is fun, but frustrating at the same time. Thanks.”
Don’t Take Inherited Genealogy at Face Value
Accuracy (or lack thereof) can a real issue when we receive someone else’s work. We can’t just take it at face value, especially if the researcher did not cite their sources. There’s no way to know if an ancestor on their tree is truly your ancestor until you look at the genealogical source documents for yourself. If they haven’t listed which sources they used, you’ll have to go find them. The good news is that it should be a little easier to find them based on the information provided about the ancestor. Usually when you get a family tree from a relative, it will at a minimum include important dates like birth, marriage and death, and hopefully some of the places where those events occurred.
Jim inherited a large, compiled history book, but you may be fortunate enough to receive an entire lifetime’s worth of research. Well, some folks would feel fortunate, others may not! No matter how much you’ve inherited, the genealogical process remains the same: start with yourself and work backwards. It may be tempting to start focusing on new ancestors you see in the family tree you just acquired, but resist the temptation. We must always prove the relationships connecting us to each generation going back in time so we don’t end up adding someone to the tree who doesn’t belong there.
So let’s stop for a moment and go back to the beginning, when you first inherit your relative’s genealogy research. What do we do first?
Assess what you have inherited.
Jim received one big book. But if you’re like me you may have received boxes of items, many loose and unorganized.
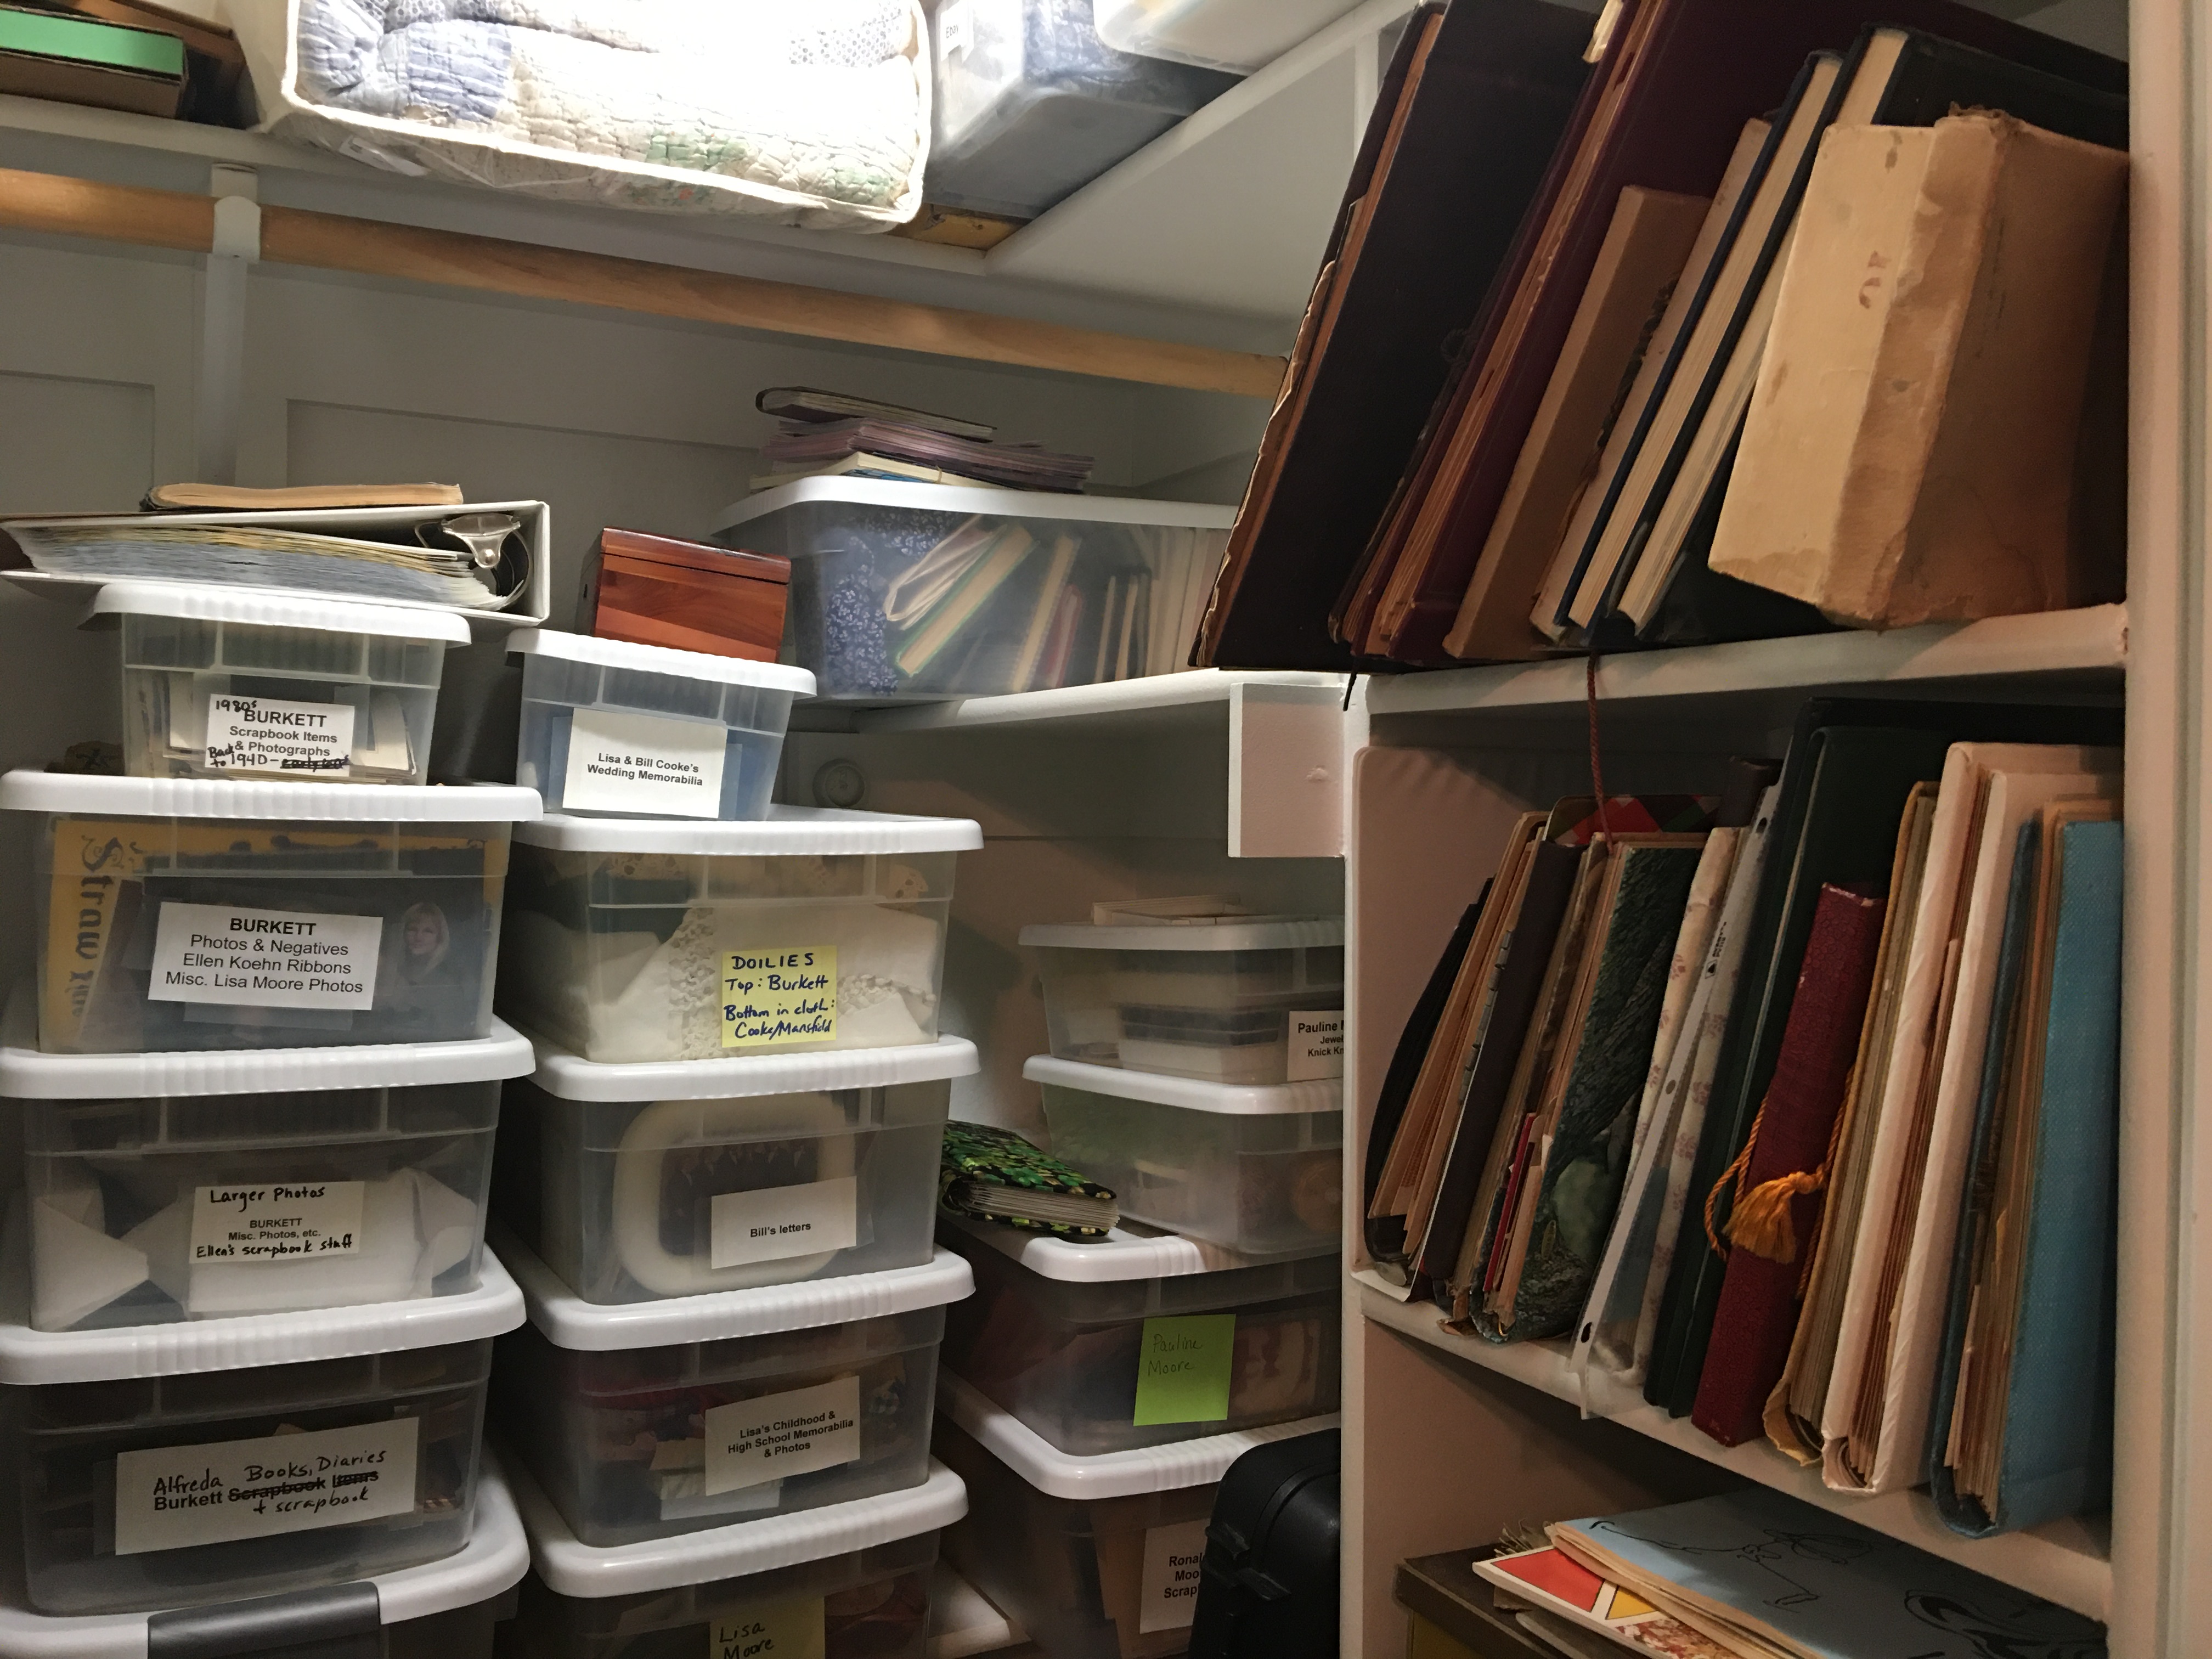
I like to divide it up by families and place each pile into a separate bin, in chronological order as much as possible. I use clear stackable bins because you can see what’s inside. I’ve used these for years and never detected an ounce of damage. Damage is more likely to come from heat, moisture and mishandling than stored undisturbed in a plain storage bin in a room temperature stable environment such as a closet.
Use 3×5 white index cards to label each bin. Use a medium black sharpie pen to write the family surname in large bold letters, and place the card inside the box at one end facing out. You will be able to see it through the clear bin. You can also simply tape it on the outside of the bin.
You’ll also need one location where all the bins can be stored until you’re ready to work on them. A spare closet or even under a bed can work. The important thing is they are all together undisturbed and easily accessible. Once items are sorted and stored, you can then pull out one bin at a time to work on.
If your inherited genealogy appears to be well organized, such as in scrapbooks, keep it in context. Don’t take it apart and divide it up. There’s something to be learned from the order in which things were added to the book.
my spare closet with bins of inherited genealogy awaiting processing.
Take inventory and prepare to track your progress.
It’s important to recognize that it isn’t likely that all of the materials and information will be digestible in one sitting. And it helps tremendously when you set up a process that makes it easy to pick up the project and put it down easily while keeping track of where you left off.
You can track your progress in a variety of ways:
a project log spreadsheet,
Word document
Evernote or One Note
A spiral notebook
Take a moment up front to put your tracking mechanism in place and be as consistent as possible in using it.
I use Excel spreadsheets for my tracking. I find it very helpful to create a separate tab for each item within the collection (book, scrapbook, computer disk, address book, etc.) This helps provide me with a complete inventory at a glance. On each tab I add columns applicable to the type of item and information it contains.
Get a genealogy software program.
If you’re new to genealogy, or you’ve only had your family tree online, now is the time to get a genealogy software program. It will not only help you stay organized, but it will also give you a mechanism for consistently adding source citations. Your genealogy software database while also serve as the “brain” of all your efforts. The database gives you one place to focus your efforts and systematically add information. Also, it puts all of it in your control on your own computer, not solely in the hands of a genealogy website that could be gone tomorrow.
There are a handful of genealogy software database programs on the market. Family Tree Maker, Legacy and RootsMagic are all good and reliable. MyHeritage offers Family Tree Builder for free.
No matter which one you choose, download and install it on your computer. Then make sure that you have an automatic cloud backup service installed and running on that computer. I have used Backblaze for years. You can get a free 15 day trial here which will give you an opportunity to see how easy it is to get up and running. (Disclosure: this is an affiliate link.)
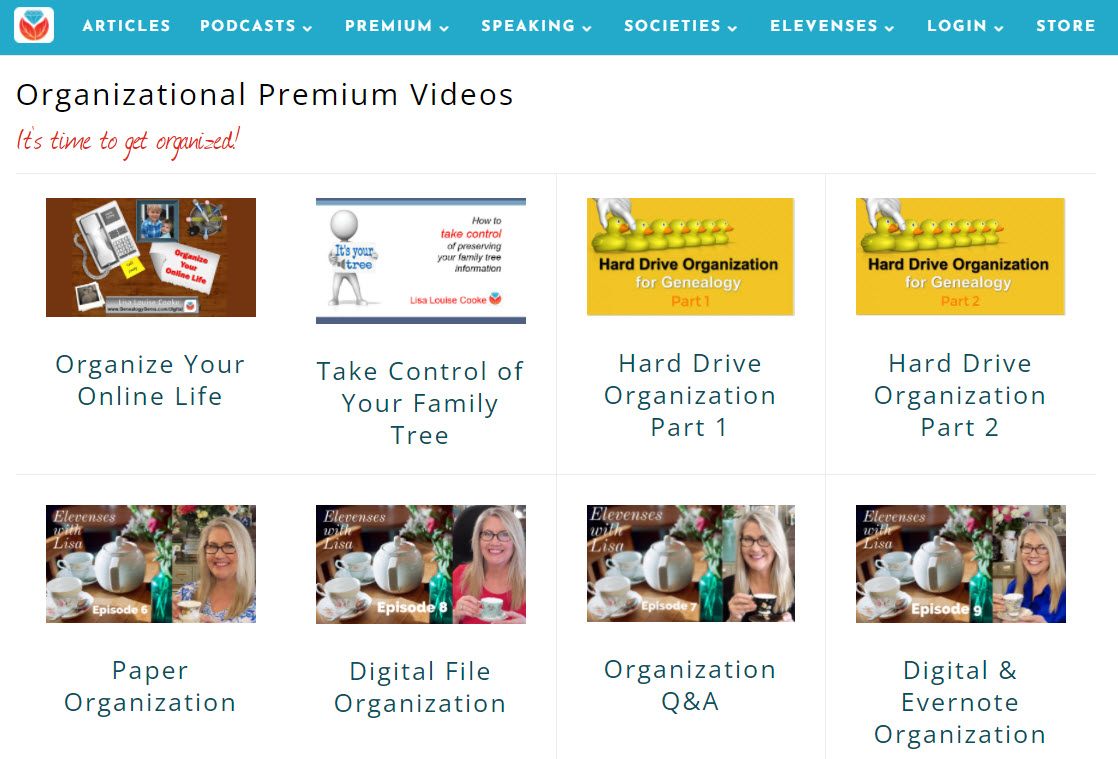
Learn more with my Premium Member classes on organizing genealogy.
Start processing the inherited genealogical information.
Whether you are new to genealogy or a longer time researcher, start by entering the information you inherited starting with yourself or your parents and then add family members going back in time generation by generation. As I said previously, I know it can be tempting to jump to older generations to work on, but you must methodically prove each generational connection in order to have an accurate family tree.
In Jim’s case, he inherited a compiled history book from his aunt, so he will want to start by turning to the page that contains himself or his closest ancestor (probably his parents.) On his tracking spreadsheet he could include columns for ancestor’s name, page number and notes, and enter that information as he works on each person’s record. By doing so, he will always know where he left off.
A compiled history is just one source, and in fact, it is not even a primary source. This means that even if sources have been cited in the book, it’s important to locate and review those sources to confirm that you agree that the conclusion is accurate. After all, this is your tree and research now.
Never enter a new ancestor without cited sources. If the book or paperwork names someone, and even provides some specific information about them, your job is to go find the records to prove it. Once you are satisfied you are ready to enter the person and their information into your database, and of course, cite your sources.
A few decades ago, back when I was doing genealogy strictly as a hobby and not professionally, I found an amazing compiled family history on my Wolf family line. It contained thousands of people, was meticulously compiled and full of details, and did not include a single source!
Since the book wasn’t an heirloom or one of a kind, I found it very helpful and simple to make a small pencil tick mark next to each person as I worked on them. I set about painstakingly finding sources for every piece of information that was new or conflicting with what I had. As you can imagine, that’s a very big job. Since time is always at a premium I didn’t research everything, particularly information that was not critical to the identification of the ancestor, or perhaps was about a collateral individual. However, I did not enter anything into my database that was not researched and proven. This means you’ll need a way to keep track of what has not yet been researched. I used a red pencil to place a tick mark next to items yet to be researched about an ancestor. You could also opt to add a column to your spreadsheet to track it and then return to it later.
Did I add everyone listed in the book in my database? Absolutely not! I focused specifically on direct ancestors and included their children. Once I made my way as far back as I could go in the book, I selectively filled in additional people from collateral lines that were of particular interest or closely associated with areas that I wanted to research further. Rest assured there is no right or wrong way to do this. Do what is most important to you in the most accurate and methodical way you can.
Cite your sources every step of the way.
Talk to any experienced genealogist and you’ll probably hear some regrets about not citing their sources when they first began doing genealogy. Source citations are like an insurance policy. It’s not very satisfying to invest in it now when everything is fine, but down the road when trouble arises you’ll be glad you did.
So what kind of trouble are we talking about? No family tree is immune from occasional problems such as:
discovering an inconsistency in your family tree
uncovering a new source that directly contradicts one of your conclusions
being contacted by another researcher who is challenging something you have posted or published about your family tree.
The only way to address these situations is to review the sources you used. And that’s where your source citation comes in mighty handy! They help answer the questions and also prevent timewasting duplication of effort.
If the only source for a particular event is the book, go out and find the original record to verify it is correct, and cite both in your database.
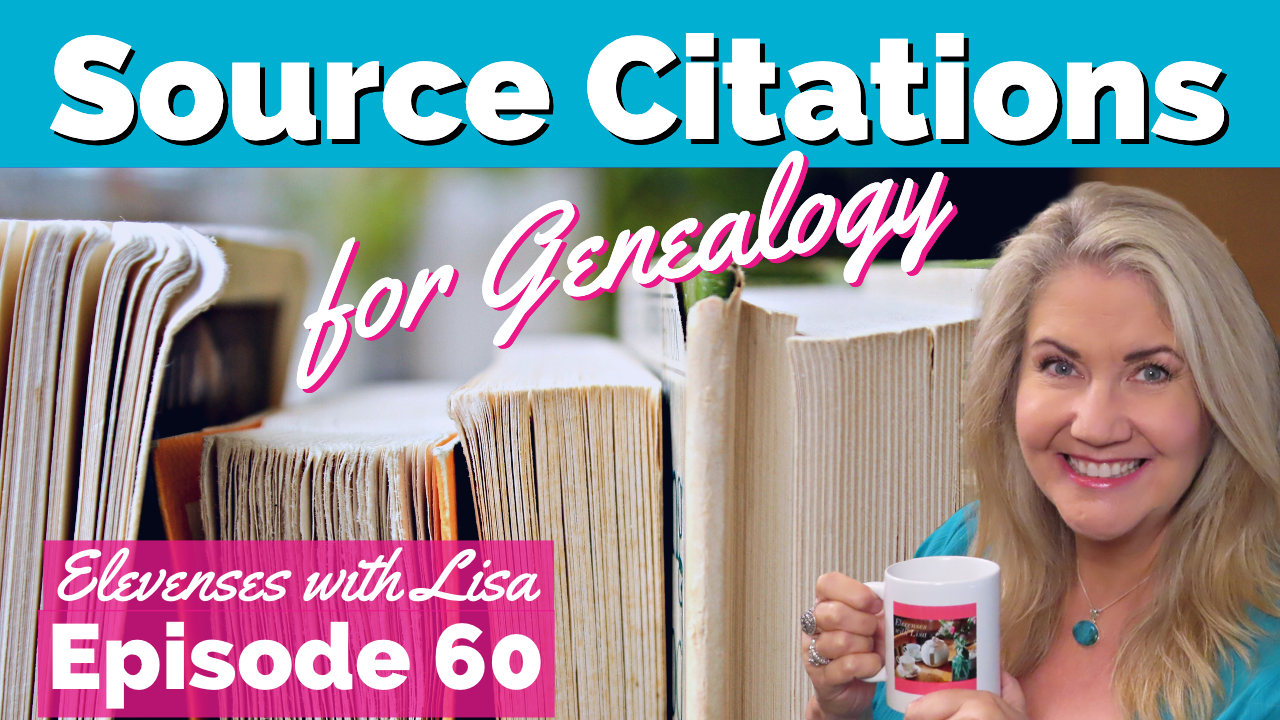
Learn more about citing your sources by watching my free video Source Citations for Genealogy (episode 60 of Elevenses with Lisa).
Elevenses with Lisa episode 60
What to do when you can’t keep all the genealogy you inherited.
As painful as it is to say, it isn’t always possible to keep all of the genealogical items that come your way. The reality is that shelf and closet space have limits, and our collection can grow unmanageable when added to the research of previous generations.
Start by seeing if you can reduce it. Strive to digitize all items that you want to save that are not originals, heirlooms or not readily available somewhere else.
Need help digitizing? I use Larsen Digital. Click our link and use the discount coupon codes found on the webpage.
Once digitized and recorded in your database, you can toss them. Recently I went through boxes of photographs I inherited from my paternal grandmother. Many were from the late 1970s and early 1980s when double prints were all the rage. By simply tossing duplicates and low quality photos (such as half of grandma’s hand over the camera lens) I was able to reduce the collection by almost a third!
Donation is also an excellent option. Digitize and take photos of the items and then they can be donated to a library, archive, genealogical society or other organization with an interest in them. Sometimes the shared interest is not as much in the particular families as the locations from which they hailed. One woman told me at a recent seminar that when she asked her local archive about her materials, they were ecstatic. They immediately spotted old buildings in the photos that no longer exist but held an important place in the town’s history. You never know what may be meaningful to others.
The Genealogy Center at the Allen County Public Library in Fort Wayne is an excellent resource for both free digitization and donation. Watch Elevenses with Lisa episode 31 to learn more.
Learn more about donating your genealogy in episode 31.
I recently heard from a Hal Horrocks, a long-time member of the Orange County California Genealogical Society. In 2017 they started a program called Rescue the Research. They strive to preserve the research done by their past members. It’s a great example of making hard-won genealogy research more accessible to others while reducing the burden on closet space.
Donation isn’t for everybody. However, sadly it is sometimes the only option when you don’t have descendants or relatives interested in retaining your research. Don’t despair. Donating your research is bound to elicit a genealogy happy dance from some future genealogist who comes across your research!
You can learn more about protecting, preserving and donating your genealogy research by watching my video class Save Your Research from Destruction (Elevenses with Lisa episode 10, available exclusively as part of Premium Membership.)
Your ancestors and your descendants will thank you.
It’s been famously said that “you can’t take it with you” when you leave this earth.
“You can’t take it with you”
By following these strategies and addressing that reality now, there’s one very important thing you will be leaving behind: the legacy of family history. One that avoids burdening the next generation while providing a lasting connection between all of the generations of your family tree.
Resources
Get My Free Genealogy Gems Newsletter – click here.
Elevenses with Lisa is our little slice of heaven where friends get together for tea and talk about the thing that never fails to put a smile on our face: Genealogy!
Are you ready for a year of successful genealogy? Learn how to develop an effective research plan, and preserve and protect your genealogy. Keep reading for the show notes that accompany this video.
10 Questions to Rate Your Readiness for Genealogy Success
1. Have you selected a place to start?
I started learning how to play the guitar in 2020. I began with an online course to learn the basics, and I picked one song that I really wanted to learn how to play.
For three months I worked my way through the course and played that song over and over every day. This resulted in two things: I learned how to play the song, and my husband took a blow torch to my guitar! (Just kidding.)
At the end of those three months I had several weeks where I just didn’t feel I was making any progress at all. I practiced every day, but I wasn’t getting anywhere.
It turns out that I had reached my initial goals – I knew the most popular chords, had memorized the Pentatonic Scale and could play the song Crazy On You for a captive audience in my home. However, I had not stopped to identify my next set of goals. Therefore, stagnation set in.
In an effort to restart my learning and success trajectory, I spent an evening looking through my record collection and I made a list of 6 of my favorite songs. Then I put them in the order I wanted to learn to play them. Most importantly, I identified which one was my top priority to learn. Once I did that, I knew exactly how I was going to spend my practice time.
It sounds simple, but finding and deciding on the place to start (or restart) is really easy to miss. When it comes to genealogy there’s always a bright shiny object online ready to gobble up a few precious minutes, or hours, or days! Having a predetermined project goal in mind will help you get down to business faster and keep you from wandering aimlessly.
2. Have you developed a project research question?
Once you know what your project will be, it is time to formulate the general question. In other words, what is the question you are trying to answer?
In this episode I shared the family story that had been handed down the McClelland family about their ancestor Washington McClelland. The story went like this: “He immigrated to the U.S. from England. He was working on the railroad when he met a girl in Idaho. She became pregnant. They married. He converted to the LDS church. They raised a family together.”
The general research question was “is this story true?” That’s a big question, and one that we’ll break down further in question #3.
Genealogy Gems Premium Members can learn more about formulating research questions by watching the segment HowAlice the Genealogist Avoids the Rabbit Hole Part 1 in Elevenses with Lisa Episode 2. It’s available in the Premium Videos area of the Genealogy Gems website. Don’t miss the downloadable handout! You’ll find the link under the video. (Learn more about becoming a Premium Member here.)
3. Do you have a Research Plan for your genealogy project?
The general project question can usually be broken down into several bite-sized actionable questions. In the example of “Is the story about Washington McClelland true?” we can break that question down into several questions:
Where exactly was Washington from in England?
When did he come to the United States?
Why/how did he end up out West?
Did he work on the railroad?
When and where did he marry?
When was their oldest child born?
Did he join the LDS church?
And many of these questions can likely be broken down further. These more focused question help provide the framework for the project’s research plan. They can then be re-sorted so that they follow a logical progression of answers.
The next step will then be to identify and prioritize the sources (records) that are likely to provide the necessary relevant evidence. Then determine the order in which you will locate each identified record. Finally, add where you think you can find the records to the plan.
4. Do you have the research forms you need?
There are many different types of genealogy research forms: research logs, blank record forms, checklists, just to name a few.
Research logs are great for keeping track of your research plan progress. Blank record forms (such a blank 1900 U.S. Federal Census form) are very handy for transcribing the pertinent information for analysis. And checklists (such as a list of all types of death records) help ensure that you don’t miss and records, and you don’t look for the same record twice!
Free Genealogy Forms at Family Tree Magazine
Family Tree Magazine offers a plethora of free genealogy forms. You’ll need to register for a free website account to download the forms.
Having an organizational system in place takes the guesswork out of where things should be filed, making it much more likely they will actually get filed. It also ensures that you’ll be able to put your hands on your records whenever you need them.
Here’s a secret: There is no one perfect filing system. The most important thing is that it makes sense to you and that you are consistent in how you use it.
In Elevenses with LisaEpisode 6 (available to Premium Members) I cover step-by-step the system I developed and have used for over 15 years. I’m happy to report I’ve never lost an item. (Whew, what a relief!)
As you work on your genealogy research you’ll find there are two important tasks you will be doing often:
Storing items that you have not had a chance to work on yet (I refer to these pending items as “to be processed.”)
Storing items that need to be filed. (Let’s face it, we rarely want to stop in the middle of an exciting search to file a document.)
Not having a way to store these two types of items leads to clutter and piles on your desk. Here’s my simple solution:
Place a “to be filed” basket next to your desk.
Create a “Pending” tab in each surname 3-ring notebook (if you use my system.) The beauty of the surname notebook Pending section is you have a place to put documents (out of sight) that are associated with a specific family. When you’re ready to work on that family line, grab the notebook and jump to the Pending section to start processing and analyzing the previously found records.
7. Do you have the supplies you need on hand?
Make sure that you have a small quantity of all of the supplies you need for the filing and organization system you are using.
Here’s what my shopping list looks like:
3” 3-Ring View Binders
(allow you to customize covers & spines)
1” 3-Ring View Binder
1 box of Acid-Free Sheet Protectors
3-Ring Binder Tab Dividers
8. Have you settled on a file naming scheme?
How to name digital genealogy files is something we all struggle with. Good intentions don’t make the job any easier. Take a few moments to nail down the basic naming scheme you will commit to follow. I say basic, because there will be times when you’ll need to modify it to suit the file. That’s OK. But always start with the basic format.
Here’s what my basic file naming format looks like:
Year (will force chronological order)
First Name (filed in surname folder)
Location
Example: 1920_robert_m_springfield_oh
Notice in my format I don’t usually include the surname. That’s because I file in surname folders. Notice that I said “usually.” That’s because we are always free to add on additional information like a surname if we think it will prove helpful. For example, if I anticipate that I will have a need to share individual files with other researchers or family members (rather than the entire folder) then I will add the surname so that the person receiving the file has the pertinent information.
8. Are you prepared to make copies?
Protecting and preserving our genealogy for generations to come is a top priority for most genealogists. All of us at some time have worried about what would happen if a website that we upload our content to goes out of business or sells out to another company. Now there is a new reason to take a few extra steps to ensure you don’t lose access to your genealogy data.
Recently, According to Buzz Feed, on Jan. 9 the largest cloud-hosting service notified a large social media network with millions of users that it would be cutting it off from its cloud hosting service. According to the Wall Street Journal, “other tech partners also acted, crippling operators.”
Now we must add to the list of concerns the possibility that a genealogy website we use might be cut off from web hosting. How might this type of action impact our personal family history that we share on websites? Many companies that provide access to millions of historical records and likely house a copy of your family tree and your DNA test results use the same cloud hosting service. In fact, it’s hard to find a company out there that isn’t tethered to it in some way.
My research showed that both Ancestry and FamilySearch have been featured on their website in case studies and blog articles:
The bottom line is that our family history is our responsibility to preserve and protect. While we can benefit from sharing copies of it online, putting all our genealogy eggs in only the online basket puts it at risk because we don’t have control.
While I love the idea of going paperless and I’ve been striving to do that in recent years, I’m changing my tune on this. For several years I’ve been strongly recommending that you get your own genealogy software on your own computer and use it as your master database. All online family trees are simply copies. Many people, particularly those who rely solely on FamilySearch often wondered why I was so concerned. The events of this week make my point and put an exclamation point on the end of it.
Making digital and paper copies of your data is a simple strategy you can put in place today. This means regular print outs of your tree, family group sheets, and the most important genealogical documents. I keep mine in a portable fireproof safe.
We can also make digital copies as well. For example, last year I had all my old home movies transferred to digital and they are stored on my computer. I went the extra step to get copies on DVD and I also copied the digital files onto a terabyte hard drive that is in the fireproof safe.
Remember, your computer is connected to the Internet. If you’ve ever woken up to a Windows update, then you know that tech companies can make changes to your computer. Having your own paper and digital copies are just extra insurance that certainly can’t hurt.
Here’s a checklist of things you can put in place today:
a good printer
extra ink
a stock of paper
a portable terabyte hard drive
Ideas for saving paper and ink:
Print only the most important documents that might be more difficult to replace.
Focus your printing on direct ancestors.
Print in draft mode (depending on the document) and / or black and white to save ink.
Make double-sided copies.
When possible, add two documents to each side of the paper so that one piece of paper holds 4 documents.
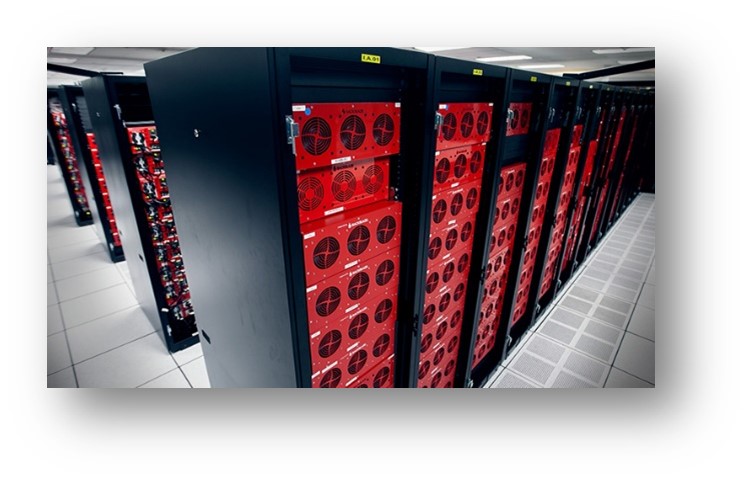
9. Is your computer backed up to the Cloud?
I use and recommend Backblazefor computer cloud backup. They have their own storage facility. Here’s what their storage pods look like:
Image courtesy of Backblaze.
I am also an affiliate of Backblaze so I appreciate when you use my link if you decided to make a purchase. I will be compensated at no additional cost to you, and that supports this free show. https://www.backblaze.com/landing/podcast-lisa.html
Learn more: Premium Members can watch the Premium video Your Guide to Cloud Backup and download the PDF handout. You’ll get answers to questions like:
What is cloud backup?
Why should I use cloud backup?
How does cloud backup work?
Is cloud backup safe?
What should I look for when selecting a cloud backup service?
My personal cloud backup choice
10. Have you scheduled ongoing education time?
Pick one area you want to improve your genealogy skills and knowledge and make time each week to learn something new about it.
Thank you for making Elevenses with Lisaand Genealogy Gems one of your places for genealogy learning, laughing and getting refilled!
Use a free service like Blogtrottr.com to receive email notification reminders. Simply paste the Genealogy Gems channel URL into the first field, https://www.youtube.com/GenealogyGems enter your email address and select from the drop-down menu how often you would like to receive notifications. Then click the orange “Feed Me” button. When I post a new video or schedule an Elevenses with Lisa episode you’ll receive an email notification.
Recap:10 Questions to Rate Your Readiness for Genealogy Success
Have you selected a place to start?
Have you developed a project research question?
Do you have a Research Plan for your genealogy project?
Do you have the research forms you need?
Have you established Your Filing System?
Do you have the supplies you need on hand?
Have you settled on a file naming scheme?
Are you prepared to make copies?
Is your computer backed up to the Cloud?
Have you scheduled ongoing education time?
Elevenses with Lisa Archive
Premium Member have exclusive access to all of the archived episodes and downloadable handouts. Visit theElevenses with Lisa Archive.
Let us know if you found this video and article helpful. I’d also like to hear from you about the topics you would like to learn more about in future episodes. Thanks!