Here’s this week’s roundup of new genealogy records online. Highlights: Canadian marriages, German emigrants, Philippines civil registrations, Russian and Ukrainian church records and Michigan marriages.
CANADA – MARRIAGES. A new collection of district marriage register images for Ontario, Canada (1801-1858) is now free to browse at FamilySearch.org. Most entries are for the 1830s-1850s.
GERMANY – EMIGRANTS. The (former) Grand Duchy of Oldenburg Emigrants database just passed the 100.000 person mark. According to a note from the site host, “The database contains beside the emigrant itself also the family members we could trace in Germany or the Country to which he migrated.” Learn more at this blog post from the Oldenburgische Gesellschaft für Familienkunde. Click here to hear online German records expert Jim Beidler talk about new German records online.
PHILIPPINES – CIVIL REGISTRATIONS. FamilySearch.org has added 1.7 million+ browsable records to an existing collection of Philippines national civil registration records (1945-1984). These are described as “marriage and death certificates from various localities,” excluding Manila, for which there is a separate database.
RUSSIA – CHURCH. Nearly half a million browsable records have been added to a free FamilySearch.org collection of church books for Tatarstan, Russia (1721-1939). These are described as “images of births and baptisms, marriages, deaths and burials performed by priests of the Russian Orthodox Church in the republic of Tatarstan.” More records are being added as they are available.
UKRAINE – CHURCH. Another 205,000 browsable records have been added to a free FamilySearch.org collection of church book duplicates for Kyiv, Ukraine (1734-1920).
Thanks for sharing this post about new genealogy records online with your genealogy buddies on your favorite social media sites! We love spreading good news.
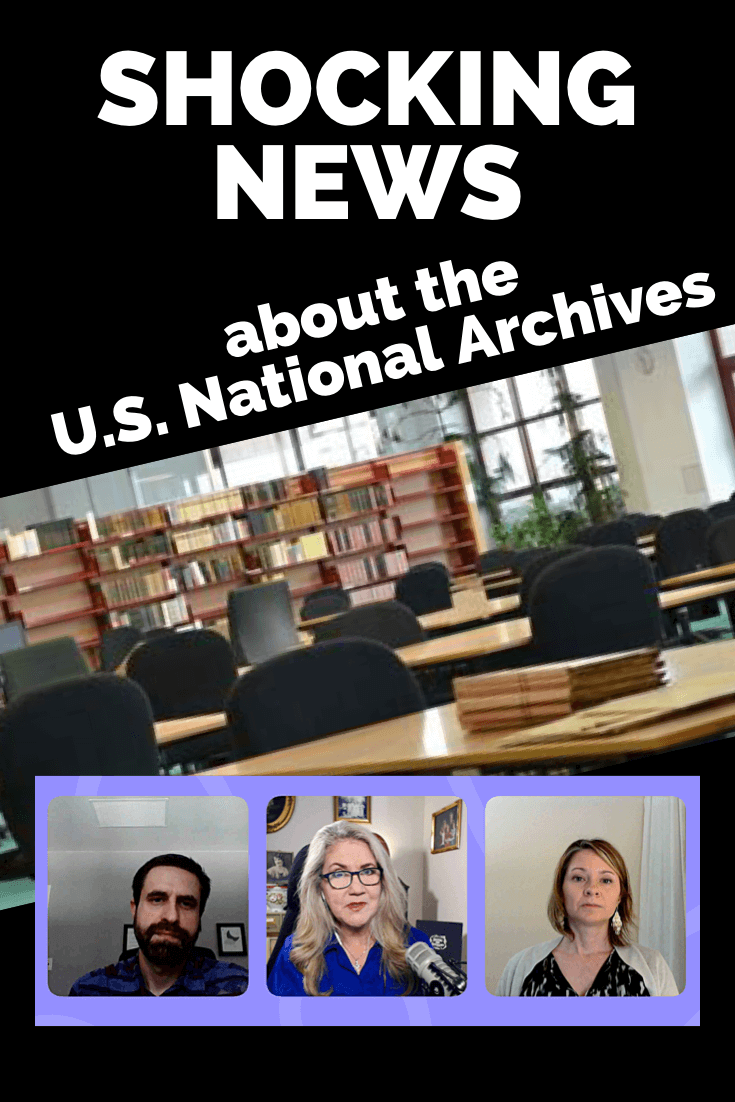
On their website, the U.S. National Archives states their mission is to: “provide public access to Federal Government records in our custody and control. Public access to government records strengthens democracy by allowing Americans to claim their rights of citizenship, hold their government accountable, and understand their history so they can participate more effectively in their government.” (Source: https://www.archives.gov/about/history/about/history/history-and-mission)
Shockingly, as of February 2022 the archives has not been fulfilling that mission for nearly two years! (Source: Visit each facility web page listed at https://www.archives.gov/locations)
Please share and help get the word out.
My guests Geoff Gentilini, President of the Archival Researchers Association, and Jessica Taylor president of the international genealogy research firm, Legacy Tree Genealogists explain:
Geoff Gentilini is the president of the Archival Researchers Association. He is a professional researcher specializing in military records, individual veteran searches, unit histories, and family history research. He is the owner and project manager of Golden Arrow Research. In 2011, Geoff devised a unique process to rebuild the service histories of individual WWI, WW2 & Korean War veterans whose personnel records were lost in the 1973 archives fire. His work has enabled thousands of descendants to gain a better understanding of their ancestors’ military service. He is the president of the Archival Researchers Association, an organization that has been instrumental in advocating (to Congress) for an increase in the budget of the National Archives.
Jessica M. Taylor serves as president of international genealogy research firm, Legacy Tree Genealogists, and as a board member for the Association of Professional Genealogists, the Genealogy Business Alliance, and the Association of Genealogy Educators and Schools. With a degree in Family History – Genealogy and over 20 years of experience, Jessica loves contributing to the genealogy community and pushing the industry forward to better help others discover their roots.
The Scope of the Records at the National Archives
Lisa: Can you give our audience a quick overview of the scope of the records that are housed at the National Archives?
Geoff: There are about 46 facilities, including 15, presidential libraries, 14 archives, 17, federal record centers, and these are spread out across the country. They contain more than 13 billion textual records, 20 million photographs, 40 million aerial images, there’s 75,000 miles of film. These records tell our national story. The holdings are massive.
Today, something like 1% of this material is online. Researchers access the other 99% of these records in our nation’s public research rooms, which are scattered across the country.
I think the National Archives has the goal of digitizing somewhere near 3% of these records by the year 2024. But as we all know, just because something is digitized, that doesn’t necessarily mean that it’s going to be online or usable for research.
Jessica: The first time he said, you know, 99% of the records are digitized, I said “no way, there’s no way that that could be true.” So he sent me information that’s put up by the archives, and I did the math. And I said, “Holy cow, you know, it’s absolutely true.” There are records there that you can’t get any other way, besides going in person to get those records.
Research Rooms
Lisa: I did an entire hour show on the National Archives website last year, and it got on my radar as well, that as wonderful as the site is, and it’s got some access to some things, it’s such a tiny fraction! This means there’s a treasure trove remaining, but you have to access it in person.
Jessica, that leads us to the research rooms because that’s where we gain access to the records. What and where are the research rooms? And who uses them?
Researchers
Jessica: There are 14 National Archives research rooms spread around the country. Washington, DC has a major one. There’s one nearby in College Park, Texas, a few on the West Coast, one in Missouri. So they’re spread out throughout the country.
Each one of these research rooms has different records. So, like we said, they’re all paper still, and in different facilities. If you want a certain type of record, you have to go to that facility to get it.
The people who use these research rooms are obviously genealogists, that’s my primary interest in them, historians, authors, filmmakers, and lots of use for veterans. There are educators, students, I mean, there are so many groups who need these records and have been on hold.
I have a friend who is working on a book that she’s had to put on hold for two years because she needs the information that’s in one of the archives. She can’t complete the book until the archives opens.
The Impact of the Research Rooms Closures
Lisa: Geoff, I know that you work a lot at the National Archives in St. Louis, can you explain to our audience the significance of that particular location, and its closure, and particularly on veterans? How are they affected?
Geoff: The Research Room in St. Louis is really special because it contains the personnel records and military records that tell the story of the men and women who served in the armed forces. These are records from World War I, World War II, the Korean War all the way up through Vietnam, and later.
Many living veterans and veterans’ advocates rely on researchers to work on these more complex research cases. They help to reverse denied benefits claims in many cases. This type of work has been stalled for two years!
From the historical record side of things, this is the work that I used to do primarily in St. Louis. I would rebuild the service histories, the individuals whose records were lost in the 1973 fire, primarily veterans of World War II but also World War I, and the Korean War. Families who really knew nothing about their loved ones service could gain closure by understanding their contribution to the war effort.
This research in St. Louis also helps to do things like correct grave markers for veterans and locate the remains of fallen soldiers who were lost on the battlefield.
At this point, there hasn’t even been a minimal reopening in St. Louis, the way that there was at some other research locations.
Lisa: You’re talking about veteran records. I imagine that people are trying to verify benefits. Don’t you guys work with people who volunteer to help veterans get the records they need so that they can apply for their benefits or is that stalled?
Geoff: Yeah. There is a massive backlog right now of requests that come in from veterans and their families for DD 214 records. These are like the military discharges that you can use to when you’re seeking benefits to get a home loan and things like that. What has happened is that the historical research portion of the archives there has not been reopened, because of that enormous backlog. But at this point, it’s been two years, and they’ve sort of locked the doors. But that that backlog is still growing. The St. Louis Research Room is also a smaller Research Room, and we believe it can be reopened by leaving a smaller footprint.
Lisa: Jessica, can you give us a sense of the financial impact of these closings on the people who rely on access to the research rooms for their work?
Jessica: When when COVID first hit in 2020, and they were closed, that’s the time period when I got in contact with Geoff. What drew me to trying to help his organization initially was people like Geoff who are completely out of work. Their businesses revolve around access to archives, to the National Archives, to specific facilities in specific regions. And so, I thought, wow, I’ve got to help them be able to work again, right?
So we’ve tried and now two years have gone by, and I just can’t imagine how these people are faring. Because they’ve been out of work for two years. I just talked with somebody on LinkedIn who reached out about this petition, and he was so thankful that we have this petition and said, “Well, I’ve been so frustrated. I was actually told, you know, shame on me for building my business model around relying on the National Archives.” And I thought wow, how sad that we can’t rely on the National Archives to open. It just hurts my heart. I mean, beyond that, there is this author I mentioned who is trying to finish her book can’t finish it. It’s been two years!
And of course, we have many clients who have ordered genealogical research that we can’t finish. Many have asked for refunds, because two years is a long time to wait for something like this. So unfortunately, it definitely has had an impact in the genealogy industry and other industries as well.
Geoff: The work that we do is important work. It’s specialized skills, too. And after two years, we’re starting to see our colleagues quit and move on to other things, because how long can you sustain yourself without being able to access these records that enable you to do your job? So that that’s something else too. It’s a loss for the public. We’re losing the expertise and the people that help to tell these stories by accessing these records.
Will the National Archives Reopen?
Lisa: Let’s talk about the reopening because right now, we’ve looked at two full years of closure and lack of access. I was doing some research in anticipation of getting together and talking today and I was looking at what the National Archives is saying about their policy and what they call high, medium and low risk. Even if the risk is considered low, they’re not saying full reopening. They’re talking about appointments and screenings and things.
I know that David S. Ferriero, Archivist of the United States, put out a letter, the most recent one I could find was November 8 of 2021. He says “at low transmission level staff will be on site to complete all types of work, and research rooms are expected to remain open by appointment only.”
Geoff, does that sound like an organization that’s planning on and anxious to get back to full time access?
Geoff: Yes, well, it certainly sounds like a difficult system for someone who would need to be able to do their job five days a week and get in there and really access these records in the way that we need to, to do our jobs. We really are trying to look past that. The restrictions, until we can get back to a level of normalcy, at least in the level of access to records, the sliding scale system with the case rates, and how they open and close. This appears to be how the federal government has structured things for the agencies that fall underneath of the executive branch, the IRS, and the Social Security Administration. Some of this is out of the hands of the archives management.
Other things we think they might be able to do when they do open to kind of prioritize the research rooms and get them back to functioning at pre pandemic levels. That’s really what we’re seeking. We kind of feel like where there’s a will there’s a way. And when 99% of the records that you work with are physical, it really demands that you have the staff and be open to meet that public demand.
Lisa: I noticed on the petition website, which we are going to talk about, there is a way that our viewers can help try to get the message forward to those in power to make a different decision and maybe open this up.
One of the things that’s interesting is that the museum in the Washington DC area is open. It’s in the same building as the research rooms, and those are closed.
Geoff, have they told you anything about ‘here’s the mark, here’s the goalpost? When this happens, we will welcome you all back.’ Do you have any sense of what that place is?
Geoff: I think that the pandemic has been so unpredictable that no one is willing to make any type of you know, there’s no clarity. Everyone is sort of seeking cover. And in this hyper partisan environment that we live in today, nobody’s willing to kind of stick their neck out and say, ‘Well, this is what we’re going to do to take initiative, be imaginative.’ And that’s really what we need so that we can function in a type of new normal when it comes to research.
We know that we’ve got vaccines – 95% of the federal workforce is vaccinated. I believe that you have to either show proof of vaccination status to get inside of the archives or show that you’ve had a negative test. And then of course, you’re required to wear a mask. So, there are things in place to make sure that we have a safe environment when we’re researching. So, the public is safe, and the staff are safe. We just need to figure out how to get back to pre-pandemic levels of access, even if we do have some new restrictions in place, like masks or vaccines or things like that.
Jessica: Geoff mentioned to access the archives, showing that you’re vaccinated, using a mask. So that was in place during the couple of weeks that two of the archives were actually opened in November. We had two archives opened for a couple of weeks, in November. And we did follow all of those protocols. However, they were closed, and the other facilities around the country have never opened since March 2020.
Lisa: And of course, since then, with the coming up Omicron, we know that the vaccinated get ill just like the unvaccinated. So, you’re right, it keeps changing and keeps moving. And that’s where the lack of the goalpost is kind of a challenge.
Let’s talk about some of the ways you’re trying to communicate with the National Archives to see what could be resolved so that everybody feels good about what’s happening and can participate and get what they need.
How You Can Make a Difference in the Reopening
Jessica, you’ve put a petition together. This is what first came to my attention. Tell us about what that is and what your goals are.
Jessica: Absolutely. A main goal that I have with this petition is I just thought ‘I can’t let over two years go by with these important archives being closed, and the leaders of the archives not receive a united strong message from our communities that we care about this, and that it affects us.’ So a major goal is I just want to be able to show them how many people care that they’re closed, especially because it affects us not only now, but genealogists and historians have a long history of having to fight for public access to records.
I don’t want those leaders to look back on this event, years into the future and think ‘well, nobody really seemed to mind that they couldn’t access those records.’ I want them to know that many, many thousands of people cared that they couldn’t access the records.
The ask of this petition is that they reopen by sometime in March 2022. That will be a full two years that many of these facilities have been closed. We’ve seen many other events and businesses and groups have been able to safely reopen, I think that the National Archives is capable of doing the same. I think that it’s important that we ask for that strongly and in the united fashion.
The petition is at https://change.org/reopen archives. We want thousands of signatures. We have about 3000. We’d like to at least double that. We want them to know that these archives matter to the citizens of the United States and the world.
Lisa: I wholeheartedly agree. And I know you’ve just had it up a couple of days, and that’s an amazing start right out of the gate.
As you said, there’s a lot of different players involved who make the decisions, but it’s so important that we make our voice known and our needs known because how else would they incorporate that into the decision-making?
Anything else Geoff that you want to mention about this and things that you would encourage people to do?
Geoff: Something else folks might think about doing is reaching out to your house representative to your senators and just letting them know that you care about this issue that you want to see the archives open all the research rooms back open again. Citizens need and deserve access to government records. That’s the archives mission.
Lisa: it certainly is, and I really appreciate and respect that the two of you have taken some action and made your voices known and hopefully we will ask everybody here watching to help do the same.
Jessica: And please share, you share it, sign it and also share!
Lisa: Yes, That’s the best way to get the word out. Everybody knows another genealogist!
 Here’s this week’s roundup of new genealogy records online. Highlights: Canadian marriages, German emigrants, Philippines civil registrations, Russian and Ukrainian church records and Michigan marriages.
 Thanks for sharing this post about new genealogy records online with your genealogy buddies on your favorite social media sites! We love spreading good news.