I was honored to speak at the first MyHeritage LIVE conference in Oslo, Norway in 2018. After another rousing success in Amsterdam in 2019, the event is coming to Israel in 2020. I’ll be there speaking along with many of your favorites. MyHeritage LIVE is an event like no other that you won’t want to miss. Here are all the details from the folks at MyHeritage.
From Daniel Horowitz, Genealogy Expert at MyHeritage:
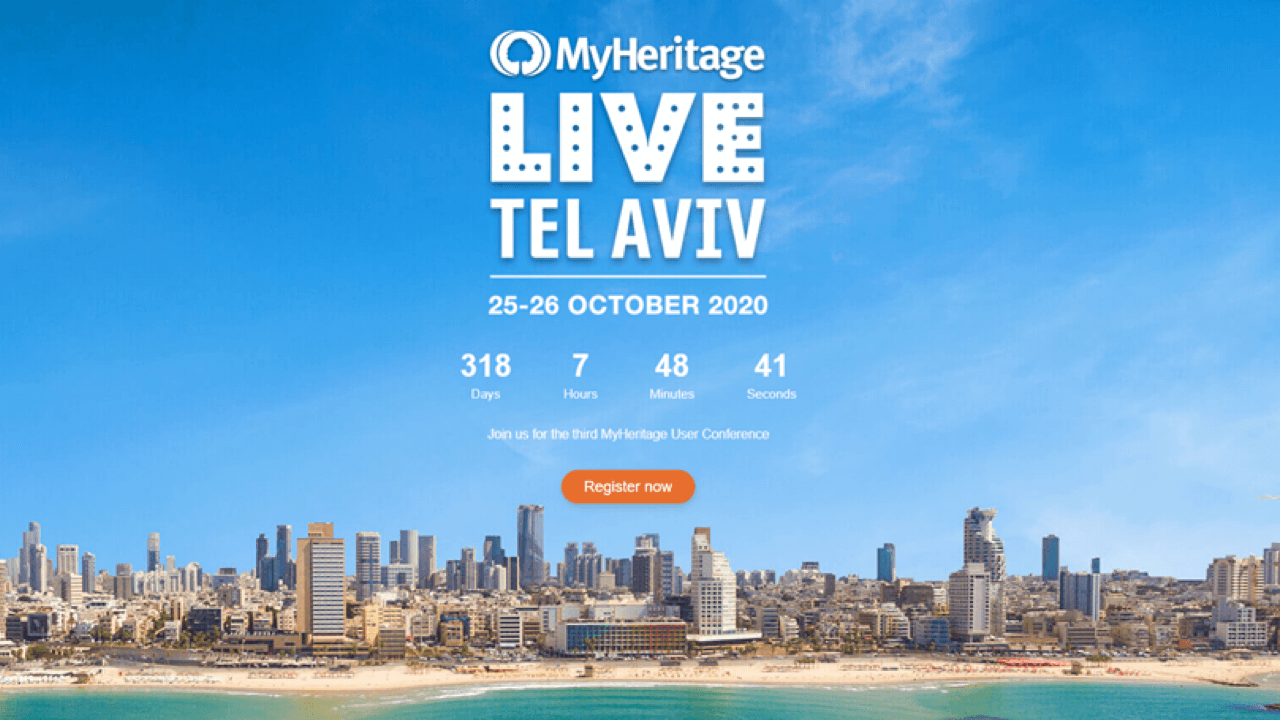
Following the success of MyHeritage LIVE 2018 and 2019, I am delighted to announce that our third annual MyHeritage LIVE conference will take place from 25–26 October 2020 at the Hilton Tel Aviv in Israel!
As one of the most celebrated genealogy events of the year, MyHeritage LIVE brings together family history enthusiasts, top international experts, and MyHeritage staff for two days of fascinating lectures covering the latest topics in genealogy and DNA. Each year, hundreds of MyHeritage users from around the world attend.
The venue is situated right on the Tel Aviv coastline with breathtaking views of the Mediterranean Sea. This year’s conference presents you with a wonderful opportunity to connect with fellow genealogy enthusiasts and tour a unique and beautiful country steeped in ancient history.
In addition to a plenary session from MyHeritage Founder and CEO Gilad Japhet, there will be multiple lectures, panels, and workshops covering genealogy and DNA, as well as sessions from local speakers covering Israeli resources and Jewish genealogy.
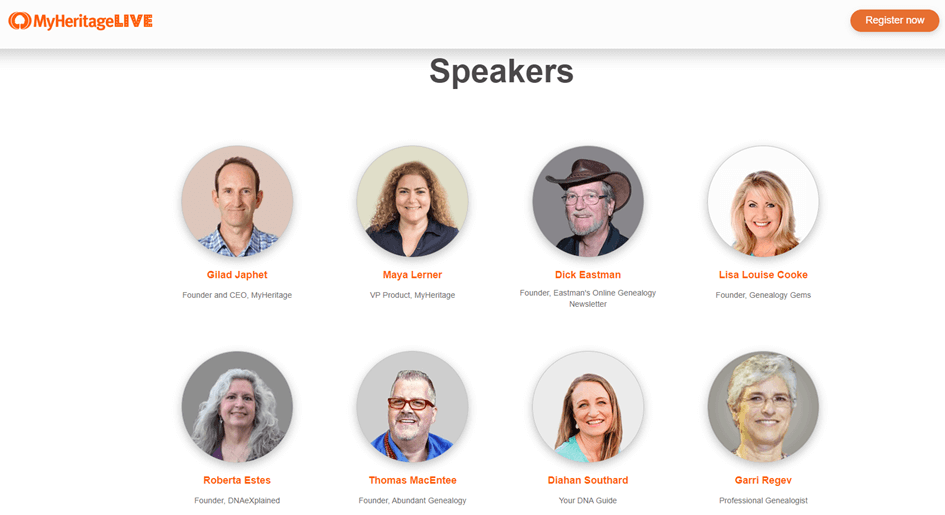
We’ve lined up an excellent array of international speakers including:
Roberta Estes,
Thomas MacEntee,
Dick Eastman,
Diahan Southard,
and Lisa Louise Cooke.
Joining them from Israel will be Garri Regev and Rony Golan along with others to be announced soon.
From the MyHeritage team, you’ll also hear from Maya Lerner, VP Product; Schelly Talalay Dardashti, U.S. Genealogy Advisor; Michael Mansfield, Director of Content Operations; Daniel Horowitz, Genealogy Expert; and more.
We’d be delighted if you share this news with your followers and let them know that they can register now on the MyHeritage LIVE 2020 website to secure early bird pricing of $100 per ticket.
“MyHeritage LIVE 2020 will take place on October 25–26, 2020 at the Hilton Tel Aviv. Set in landscaped Independence Park, this upscale hotel is a short 8-minute walk from the Mediterranean beachfront and just 5 km from the Tel Aviv-Savidor Center train station.
If you haven’t visited Tel Aviv yet, now is your chance to experience a beautiful, vibrant city that’s known as a “city that never sleeps,” making it a perfect fit for night owl genealogists who toil late into the night to work on their research. Explore the past and experience new cultures in a truly unique country steeped in ancient history.”
Tickets
Conference tickets include access to lectures, workshops, coffee breaks, lunches, and the MyHeritage party, all of which you don’t want to miss!
Past events
Both MyHeritage LIVE 2018 in Oslo, Norway, and MyHeritage LIVE 2019 in Amsterdam, the Netherlands received tremendous praise from conference participants, who declared the events some of the best conferences they’ve ever attended.
There were three different tracks: DNA, genealogy, and hands-on workshops. Riveting talks by guest speakers and MyHeritage staff captivated full audiences. MyHeritage Customer Support representatives were on hand throughout the conference to provide comprehensive, hands-on support.
Watch the 2019 Highlights:
Watch My Presentation from MyHeritage LIVE 2018
How to Find Your Family in Newspapers with SuperSearch:
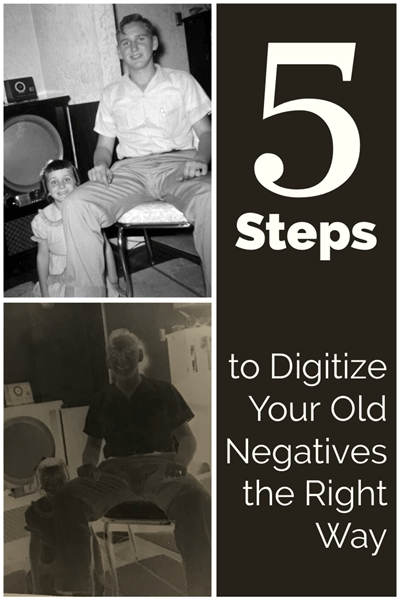
Do you have old family photo negatives in your closet? You may be wondering, “can I still get my old negatives printed into photos? What should I do with these old negatives?” To answer questions like these, we’ll need to think through your goals, budget and resources. Follow these 5 steps to digitizing old negatives and soon you may be looking at your family history in a new way!
Don’t Let Your Old Negatives Languish Like I Did
Having just gone through the process of getting my old family negatives digitized, I’m excited to share with you what I learned along the way.
In my case, I inherited photos and negatives from my paternal grandmother. I’m embarrassed to say how long they’ve been languishing in the guest room closet.
After having amazing success getting my maternal grandmother’s old home movies digitized (you can read more about that and listen to the podcast episode here), I became determined to finally address these items. It was time to see just what these negatives were and get them digitized and preserved. I couldn’t be happier that I did!
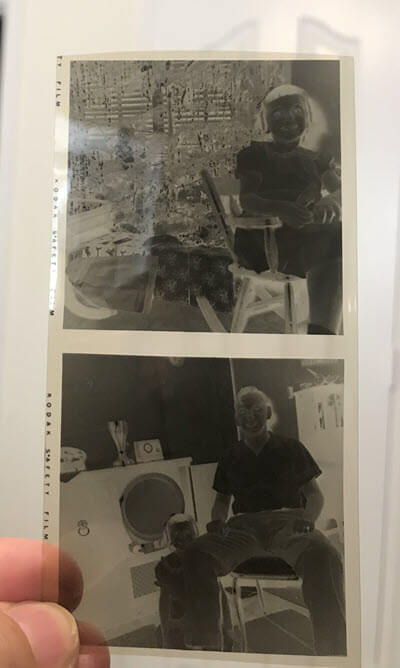
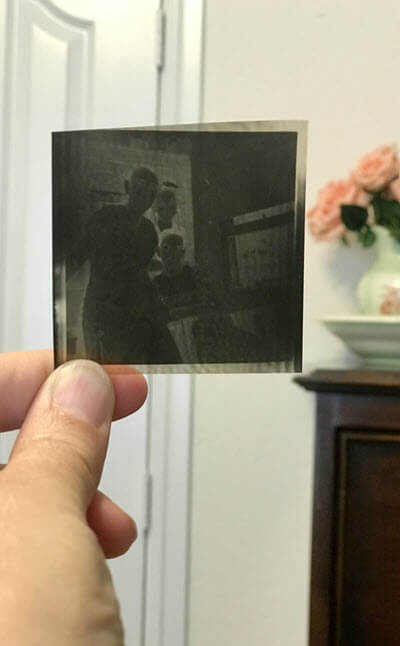
Here’s just one example of the negatives. This one is actually two photos in a medium size format. Though I’ve never seen these images before, I was pretty sure that the bottom picture was my dad and his little sister in the 1950s.
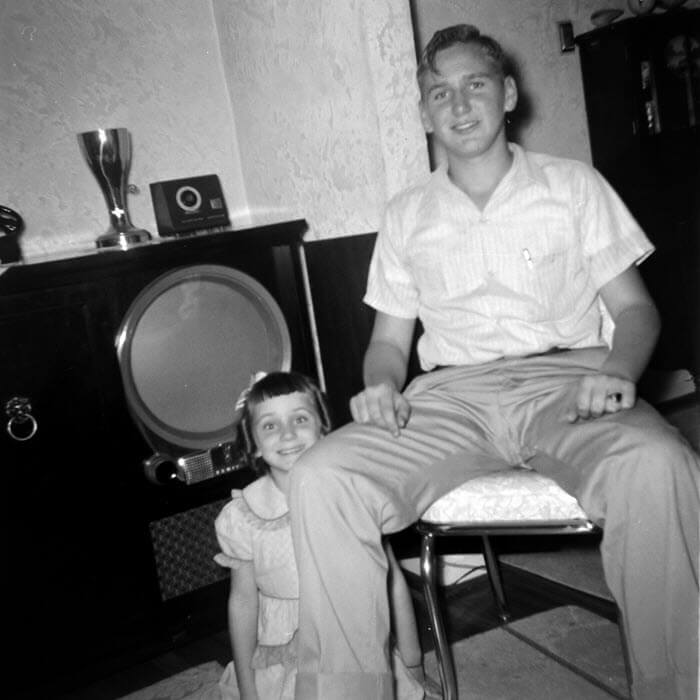
After professional scanning, I can fully enjoy this image:
Getting these photos digitized has given me the opportunity to collect so many more family stories, like the one my Dad told me about the photo above when I emailed it to him:
“That was our FIRST TV, my mom had to have the large cabinet, I’m sure you understand that. Black and white only of course. I was about 12 years old, so that’s about 1951. First TV I ever saw was when my dad took me to his friend’s house and we watched wrestling. We got one not long after that. The first kids program I recall was Howdy Doody.”
Are you ready to finally digitize your old negatives? Here are my 5 Steps to Digitizing Your Old Negatives:
1. Consider Your Budget Before Digitizing Old Negatives
If you’re on a limited budget, you might be tempted to just do the scanning yourself with a home desktop scanner. While that may sound like a cost-effective option, it may turn out to be problematic in the long run. Here are several reasons why:
Home film scanners are an investment.
If you have an older scanner, it may not be suited to digitizing negatives. This means you’ll need to invest in a new flatbed scanner. While these days scanners like mine (the Epson Perfection V600) can scan film as well as documents, you still may not get the clarity and quality a professional service can deliver.
Scan quality can vary.
Scanning on your own puts your images at risk for being unclear. It can also be difficult to get them to a high enough resolution that they can be enlarged beyond their original size.
Negatives should be scanned between 1500-4000 dpi, with 4000 being optimum. Professional services like the one I used can reach these numbers, but it’s very important to ask exactly what the output will be when ordering. I get all my negatives digitized by Larsen Digital where I can select the desired scan size and I know I’ll consistently get the highest quality scan possible. Visit Larsen Digital here where you’ll also find their latest discounts exclusive to Genealogy Gems readers. For a limited time negatives are discounted with the coupon code: GenGem.
Digitizing negatives can be deceivingly time consuming.
Time spent carefully scanning is time not spent doing other things you love. And digitizing your negatives can only go as fast as your scanner can scan. Confirm the scanning time of any scanner you’re considering using and evaluate the quantity of negatives you have.
In my case, I have a fair number of negatives of various ages and sizes. Once they are digitized I don’t anticipate that I’ll have a need to scan more negatives in the future. Therefore buying a new scanner and dedicating desk space to it was not appealing.
Since my negatives were old family photos, I wanted to ensure that they were done right, so I opted for professional digitizing. In the end the financial investment was about the same. However professional scanning won hands down when it came to the quality of the scans and the time and space I saved. I would rather spend time researching my ancestors than scanning their negatives!
Keep reading because our next steps will help you keep your costs down while still getting your negatives professionally digitized.
2. Make Three Piles to Separate Your Negatives
Since we want to get our negatives digitized in the most cost-effective way it’s important to take a moment to identify which negatives are worth digitizing. We’re going to sort our negatives into three piles:
Pile #1: Digitize
These are the negatives you are going to send to the professional scanning service.
Pile #2: Archive
These are the negatives you want to keep, but don’t plan to digitize.
Pile #3: Throw / Give Away
These are the negatives not worth keeping. (Yes, there are some you don’t need to keep!) It certainly couldn’t hurt to send out an email blast to your family members to see if anyone is interested in keeping them. If not, toss!
As you can see, not all negatives are alike. So let’s head to step three and let’s start sorting in a discerning way.
3. Determine if You Already Have Photographic Prints of Your Negatives
Since digitizing photographs is generally less expensive than digitizing negatives, you will want to check to see if you already have a photo printed from the negative. This means it’s time to take a closer look at your negatives.
Here are just a few easy and low-cost options for viewing your negatives:
Do it the old-fashioned way.
Hold the negative up to a lamp.
Use your phone or tablet.
Here are two simple options:
1) Turn on your phone’s flashlight feature and then turn your phone around to face you and hold the negative in front of it.
2) Use a free app to turn your phone’s screen into a light box.
I downloaded the free Screen Light to my iPhone which is also available on Android. Open the app and adjust the setting to maximum “White” and “Light.” You can then hold your negative in front of it or even lay it on the screen.
I reviewed my pile which included negatives from my own family as well as the ones my grandmother gave me. I knew I had prints of all the color negative strips of the family I raised. In fact, in many cases I had double prints! (Remember the days of the double print developing?)
In the case of the negatives I inherited from my grandmother, I wasn’t so sure that I had photos of everything. The photos were probably printed when the negatives were developed, but I didn’t necessarily inherit all of the photos.
I carefully combed through my collection, making sure that I didn’t lose the context of the order in which they came to me. I knew there was a good chance that they may have been at least somewhat in chronological order. That can be valuable information when it comes time for labeling the digitized files.
Consider purchasing some acid-free negative sleeves or envelopes like these so that you not only have a place to safely store them but you can also make notes about important details you notice and whether or not you have prints, etc. (Disclosure: We include affiliate links in our posts for the products we suggest. The compensation we receive if you make a purchase helps support articles like this one and the free Genealogy Gems Podcast. Thank you!)
In the end you will have a pile of negatives that you do have prints of, and a pile that you do not.
4. Select the Best Negatives and Photos to be Scanned
Now that you have reviewed your negatives, let’s make decisions about which negatives and photos will be scanned.
If you do have a photograph of the negative:
Determine if the photo is in better condition than the negative for digitizing. Again, photos are usually less expensive to digitize than negatives.
Typically, the negative will be in better condition, however over the years they may have been smudged or scratched, so a careful review is worth the effort.
If the photo happens to be in better condition than the negative, your next decision will be what to do with the negative that you will not be digitizing.
If the negative is in good condition and is an image of particular importance to you, put it in the Archive pile.
If the negative is not in good condition, and therefore not likely to ever need to be reprinted from the negative again, drop it in the Throw /Give Away pile. I know it’s hard to do, but the storage space you save can be used for other more important things.
If the photo has some flaws and the negative is in better condition, put the negative in the Digitize pile. You may still want to keep the photo for an album or display, but your digitized image will be created from the better quality negative.
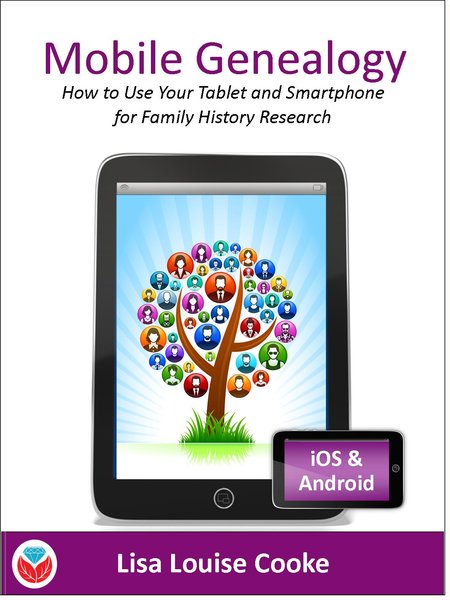
If the printed photo is the item in better shape, but it still has some flaws, don’t fret. These days you can dramatically and easily improve the digitized scan of the photo with the free Adobe Fix app on your phone or tablet. Click the play button on the video player below to watch my short demonstration video:
Learn more about photo restoration on mobile devices in my book Mobile Genealogy available in the Genealogy Gems store.
My book “Mobile Genealogy” includes step by step instructions on using Adobe Fix.
5. Send Your Old Negatives in for Professional Scanning
Now that you have organized a pile of negatives ready for digitization, it’s time to send them out to a professional scanning company.
I sent mine to Larsen Digital. I’ve met them in person and have been impressed with the quality of their work, and the incredibly wide variety of digitization work they can do.
Visit the Larsen Digital website here. This page has special discounts specifically for Genealogy Gems readers. Click on Negatives and you’ll find many options. I was thrilled to see that they could accommodate the variety of negatives I have like:
Medium format black and white negative
You may be a little nervous about mailing your negatives. At first, I was too, but the Larsen staff assured me that their customers safely and routinely mail their negatives. The key is to use a shipping service with tracking. I picked up a small priority box at my local post office. It gave me a little room for a little extra padding inside and I received a tracking number so that I could follow it on the journey. FedEx is another reliable way to go. Larsen was excellent about tracking the incoming and outgoing order.
When the order is complete, you will first receive a link where you can instantly download your digital files. Soon after your original negatives will arrive in the mail exactly as you sent them. Mine even came back in my grandmother’s original envelopes!
Digitized old negatives returned in their original envelope safe and sound!
The Results that Open Up a World of Family History
Needless to say, I am thrilled with the results of my digitization project! Many of the negatives are photos I have never seen before. (What in the world took me so long to get this done?!)
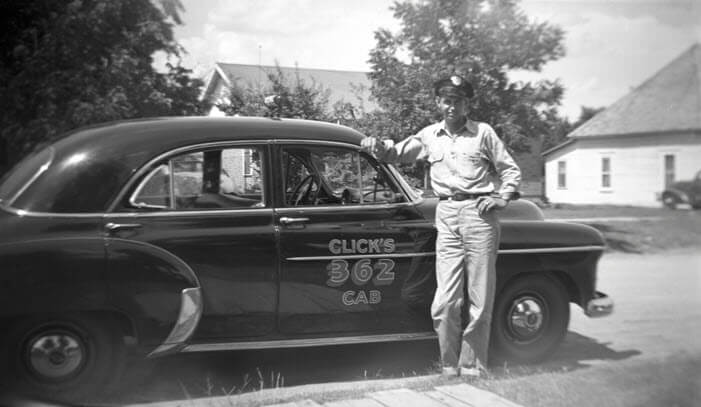
I just have to share a few examples with you. Here’s a photo of my great uncle proudly posing with his taxi cab in Ada, Oklahoma:
My great uncle next to his taxi cab in Oklahoma
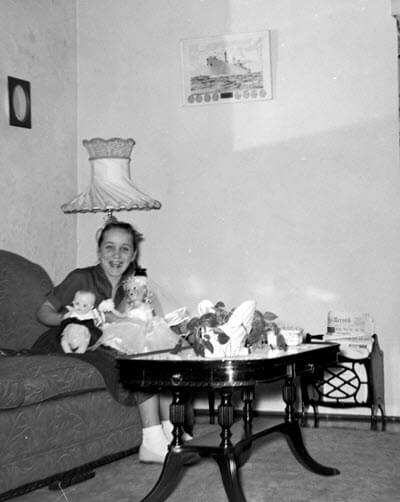
My grandmother was an avid doll collector, so I wasn’t surprised to see my aunt in this photo with dolls. I was surprised and delighted though to spot an important artifact on the wall that held a significance to my grandparents. The framed photo of a ship commemorates one of the many ships produced at the Kaiser shipyards during World War II. Both of my grandparents worked there during the war: my grandfather helped build the ships, and my grandmother worked in in the office assisting with hiring the men and women who worked alongside him.
My aunt at home in the 1950s.
Although this next one has some blurring around the edges due to the person who took the photo, I treasure this rare shot of my great grandmother, my grandmother and her siblings.
The Herring Family: My great grandmother is on the far left, and my grandmother is next to and just behind her.
A New View of Your Family History
Following these 5 steps for digitizing your old negatives will not only lead to new views of your family history, but ensure that your family history photos are preserved for generations to come.
If you found this article helpful, please share it with your friends. I can’t wait to hear in the Comments below the discoveries you make in your closets!
Long gone are the days of having to search for genealogical records all alone.
When you have any part of your family tree online on any of the “Genealogy Giants” websites (Ancestry, MyHeritage, Findmypast and FamilySearch) they do a lot of the hunting for you. They deliver hints that have a good likelihood of matching up with your ancestors. Your job is to carefully review them and determine if they are your ancestor’s records.
(Genealogy Gems Premium Members: Listen to Premium Podcast Episode #175 devoted to hints at Ancestry that includes a bonus download guide on Genealogy Hints at a Glance.)
Up until now, Findmypastoffered hints on birth, marriage and death records.
Today, they are joining the other Genealogy Giants in offering hints based on other user’s family tree on their website.
Details on Tree to Tree Hints at Findmypast
Here’s the press release from Findmypast on the new tree to tree hints:
Findmypast trees collectively contain the details of millions of individuals spanning hundreds of years. This valuable information can now be presented to users in form of tree hints.
As researchers add new ancestors to their tree, Findmypast will automatically compare the relevant names and dates to all those stored on existing trees before suggesting potential matches.
Many people, often unknown to each other, share common ancestors within a few generations. By joining forces and connecting this knowledge, family historians can now benefit from research other members have done on common ancestors.
All tree-to-tree hints can be managed via the normal hint review screens used for Findmypast’s existing record hints.
Shareable information from other trees currently includes:
Facts and events, together with sources and attached records
Timelines
Notes
Initially, tree-to-tree hints will be generated when users actively change a person’s details (or those of a close relative) or open up the hints page for an ancestor’s profile. Between October and November, Findmypast will be running a process to generate tree-to-tree hints for all individuals stored in a tree.
Although a similar service is available on other online family tree providers, tree-to-tree hints are new to Findmypast and the company is keen to reassure users that privacy is of the upmost importance. Information on living individuals will remain strictly private and recipients of hints will not be able to edit or see the original tree.
Findmypast will not share the other member’s details but are actively working a community family tree that will allow exactly this kind of connection and collaboration. Development of the new community tree is still underway and further announcements will be made in the coming months.
More Details on Hints at Findmypast
In addition this press release the company more specific information has been released today on the company’s blog. Of special note is the following:
Can anybody see my tree?
No, they can’t. No-one will be able to ‘browse’ or ‘search’ other trees on Google, or within the Findmypast site. It’s just the information on deceased relatives that can be shared as hints and even then, only to Findmypast members with common ancestry.
What information will be shared?
Shareable information from other trees will include:
Facts and events, together with sources and attached records
Timelines
Notes
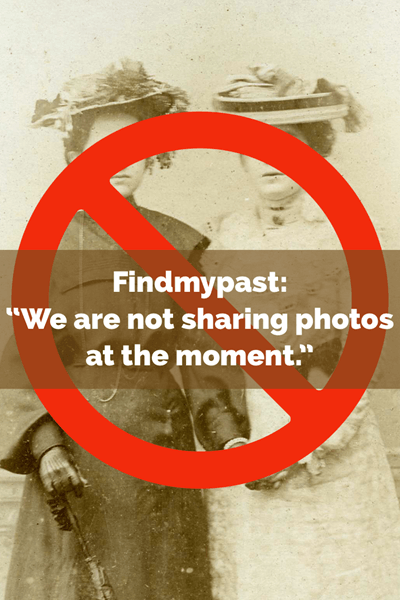
Will photos be shared?
No. Many people may have more stringent privacy and ownership concerns around photos of their ancestors. So we are not sharing photos at the moment.
On Sept. 29, 2019 Findmypast announced that hinting was live on the website. They also clarified who would have access to the feature:
“Tree-to-tree hinting is already helping people find parts of their ancestry they were unable to before. Best of all, it’s free for a limited time, so you can see how it works.”
So like the other Genealogy Giants websites, hints will be available only to subscribers in the long run.
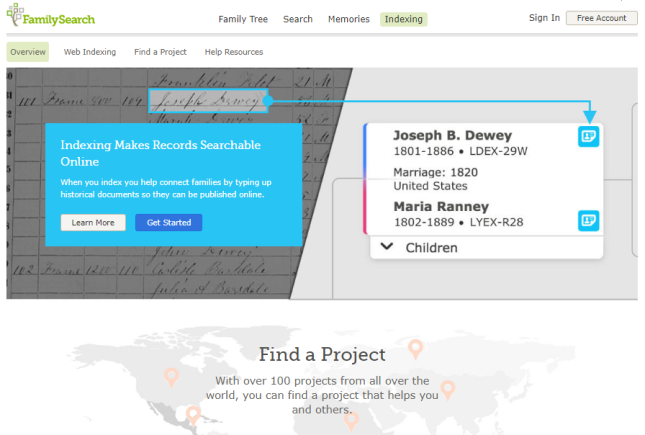
You’re invited to participate in a global FamilySearch indexing event! Join thousands of volunteers worldwide October 20-22, 2017 as they index historical records that will help genealogists (maybe you) climb your family tree. If you can index in another language, you have a VIP invitation–your skills are especially needed.
This coming weekend, FamilySearch is throwing its annual global indexing party: a three-day event designed to get genealogists away from their own database searches for just long enough to contribute to building those databases. It’s the Worldwide FamilySearch Indexing Event, and it runs October 20–22, 2017.
What is FamilySearch indexing?
Indexing is the process of extracting ancestral information from the world’s historical documents and putting them into online databases to help researchers find their ancestors in them more easily.
Here’s a quick video that illustrates the process (it’s a super cute video):
Why Is There a FamilySearch Indexing Event?
FamilySearch runs the world’s best-known volunteer online indexing system. This system has helped tens of thousands of volunteers index millions of names that are now searchable for free on FamilySearch.org and other websites. The annual three-day FamilySearch indexing event concentrates the year-round efforts of indexers into an energetic burst of activity. It also shines a light on the important service performed by FamilySearch indexers and attracts new (and lapsed) helpers to the cause.
Last year’s event galvanized over 100,000 volunteers, who indexed more than 10 million historic records in the three-day period. A FamilySearch representative stated, “From its beginning on Thursday in Southeast Asia and Australia to its conclusion Sunday night in the Pacific, the event attracted a wide range of participants. Volunteers contributed online from home or participated in locally organized events from Zurich, Switzerland, to the Rocky Mountains in the United States.”
Indexing volunteers with non-English language skills are particularly needed at this time. Over 200 FamilySearch digital camera teams are currently photographing historic records from non-English speaking countries. The effort has created a huge need and opportunity for indexers to make these records freely searchable online.
Volunteers can choose from projects of interest from all over the world and in several languages: English, Spanish, French, German, Italian, Portuguese, Russian, Japanese, Polish, Swedish, and Dutch.
What’s New at This Year’s FamilySearch Indexing Event?
This year, the FamilySearch indexing portal became entirely cloud-based, a step forward in this increasingly mobile world. Now you can index on-the-go on your tablet or phone as well as at your computer. You can also modify the layout of your dashboard based on personal preferences, set and track individual goals, and even create groups with friends (or others interested in working on a common project, such as your society members).
RSVP for the FamilySearch Indexing Event
This year’s FamilySearch indexing event has a dedicated webpage where you can RSVP and learn more. All you need to begin indexing is a FamilySearch.org account and access to the internet. (And for this event, a little bit of time between October 20-22, 2017.)
Learn more about FamilySearch Historical Records in the Genealogy Gems Podcast
David Ouimette is known to his FamilySearch colleagues as “the Indiana Jones of genealogy” because of his globe-trotting adventures in discovering historical record treasures. Hear from him in the newest free episode of Lisa Louise Cooke’s Genealogy Gems Podcast. Click here to listen!
 You’re invited to participate in a global FamilySearch indexing event! Join thousands of volunteers worldwide October 20-22, 2017 as they index historical records that will help genealogists (maybe you) climb your family tree. If you can index in another language, you have a VIP invitation–your skills are especially needed.
 This coming weekend, FamilySearch is throwing its annual global indexing party: a three-day event designed to get genealogists away from their own database searches for just long enough to contribute to building those databases. It’s the