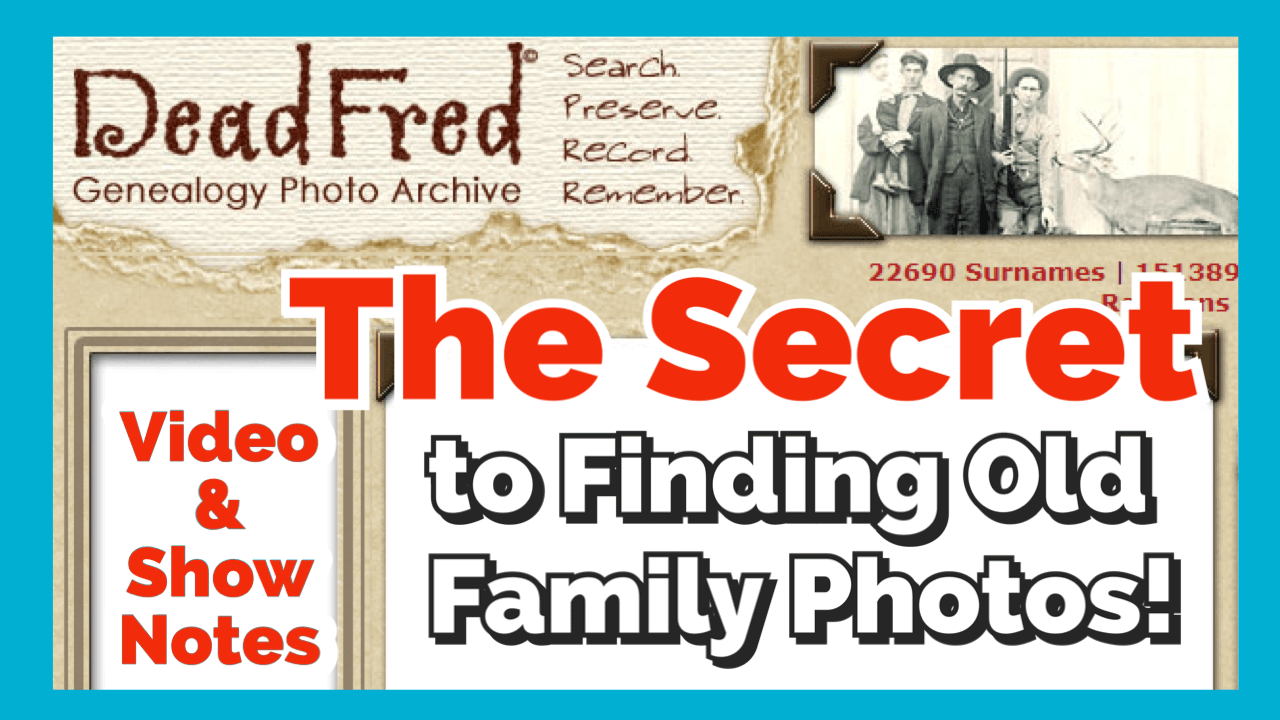
Show Notes: Discover more than 100,000 old family photos on Dead Fred. Founder Joe Bott explains how to find photos of your relatives on this free website.
Video Premiere and live chat
Watch the Video
Show Notes
Would you like to find more old family photos? One of the secrets is to search places where other distant relatives (and even people not related to you) are uploading old photos – hundreds of thousands of photos!
In this video, Dead Fred founder Joe Bott explains how to find photos of your relatives on his free website. Joe will also provide some of the back story on how he ended up devoting his life to helping families find their photos, and how in the world he decided on this most unusual name for his website!
From Joe: “I’m sitting down here in my little niche, scanning photos and putting them on my website so people can find them. That’s what I do for retirement now. I post photos, put them on the internet and wait for somebody to come knock on my door and say, “Hey, I know who that is! That’s my great, great whatever!” It’s happened already about 3000 times since I’ve started. Actually 3,157 times, just to be specific.”
What Does the DeadFred Website do?
“You take your photographs taken before 1965, and the people in the photographs have passed on. You can put them on there. It’s free to use. There are instructions on how to post your photos. Where it says Post Your Photos, click on that and just go ahead and do it.
When you post your first photo, you’ll receive a password in your email. You use that to manage your postings.
You can post as many photos as you’d like. Now, I might take a day or two to get it up on the website because I check every photo that comes in to make sure there’s nothing untoward. Because they do pop up every once in a while.”
After you post the photo, other DeadFred users will search the website, and that’s how old family photos can get reunited with descendants.
It’s also useful if you want to learn more about a photo. When you post your photo, include additional comments and questions. When you’re logged in you can post a sticky note.
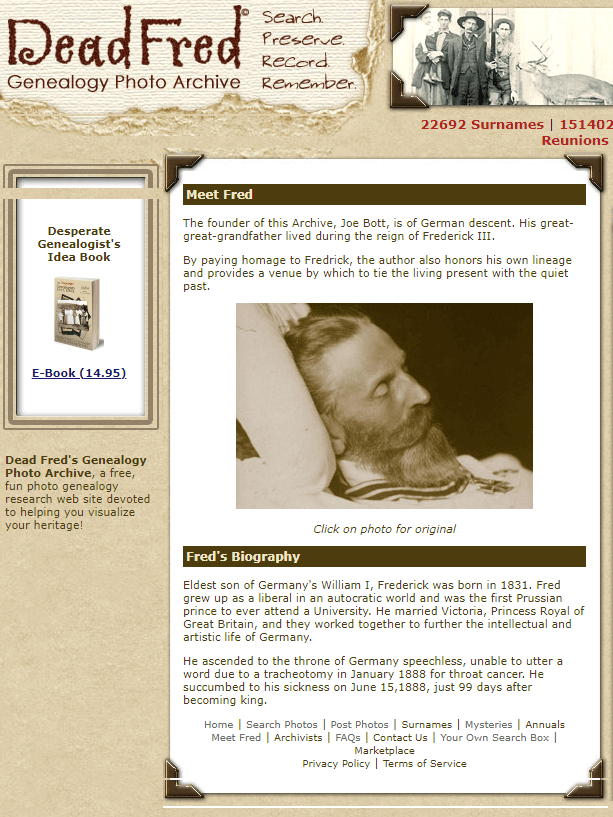
Why was the website named DeadFred?
“People often ask me why it is called DeadFred, and that gives me the opportunity to tell them that Dead Fred is a photo.”
The photo Joe is referring to is of Frederick the Great, who died in Germany. “The young man had cancer of the throat and died. My great great grandfather was living during that time in Germany, so that’s sort of the genealogy connection to it.”
The reason behind the name DeadFred
Joe and his family were sitting around a table trying to figure out what to call the website. He had purchased the photo of Frederick the Great on ebay and it came in the mail. “We opened it up and one of my sons, I have four boys, one of them said, ‘Well, we’ll just call it that, Fred.’ Everybody seems to like it. That’s the story.
“That photo of Fred is on my website…Just scroll down on the right-hand side and you’ll see him.”
Has Joe always been fascinated with old photos?
“Not always. In fact, I didn’t know I was fascinated with photographs until 1965 while I was in the Navy. I was in Newport Rhode Island, and I was walking down the street and it started to pour, I mean really pour, and I didn’t want to get my suit wet, my sailor outfit. So, I ran into this antique store. I hadn’t looked like I was going to buy something, but I found something. I found this photo album, and it just totally amazed me. And it most likely said, “buy me!” and I had to. I didn’t have a lot of money back then. I don’t have a lot of money now, but I didn’t have a lot of money back then either. And I bought it for $18. Now $18 in ’65 was a lot of money, especially for a sailor that has just joined the Navy. So, I bought it. And that was my first album. I have it sitting up here on my cabinet. But that’s how it started. I just said, wow, look at this. I couldn’t get my eyes off it!”
Reuniting Photos with Families: A Success Story from Joe
“When I was working. I was driving up to Iowa. And I stopped in store at the antique store. I found some photos in a box – a whole family – and I bought it. I worked out a deal. I learned how to do that over the years. I got a good deal on it. I went home and I scanned the photos. They were from Saskatchewan, Canada.
I got a phone call, or I actually got an email. I eventually got a phone call from a woman from South Saskatchewan who says “that’s my whole family. My grandparents, their aunts and uncles, the cousins, the whole shebang!” And apparently, now this is in the 1980s, late ‘80s, early ‘90s, and those pictures were taken 100 years before. The family left Saskatchewan and they moved to Iowa and farmed there until they all died out. There wasn’t anybody to take the photographs. So, there were the boxes, so I bought them, and I put them up on the website. Somebody from Saskatchewan said they knew who they were. And they sure did. Then I sent them home. That was an exciting moment for me right there.
Now there’s a lot of stories like that. There are stories where people cry when they find their photographs. There are cases when somebody is dying, and there’s a picture of a wife or a mother and their family wants to show them a picture before they die. So, there’s a lot of stories to be told. I could write a book about people that have found photographs. I sent out a couple every week now. Matter of fact, I just sent one of a baby, which was great. The baby has died now, got old and died at the age of 88, and I sent it out to his grandson. Yeah. My mind’s getting older, so I can’t remember as much as I would like to as far as names and places. But these kinds of things, they stick in your head.”
How to Post Photos on DeadFred
The first step in submitting a photo to DeadFred is to make sure it meets the guidelines. Currently, they accept photos that are earlier than 1965 and that, for privacy reasons, the people in the photo are deceased. Make sure to identify the photo in some way. This could mean including a country, date, state, etc.
Scan your photo in JPG format. Per the website, for best results, scan at 150 dpi resolution or higher and save at 72 dpi.
On the home page, under the Tools column on the right-side, click Post Photos in the menu. Under Step One, read the directions, check the box for the Terms of Service, and click the Choose File button to locate the photo file on your computer. Then click on the “Upload Image” button.
Your photo will receive a unique record number. Follow the prompts on the page, type in the identification information in the proper fields, and then submit.
You can expect your photos to appear on the DeadFred website typically within 3-5 days of being uploaded.
4 Ways to Search for Photos at Dead Fred
Every photograph on DeadFred website is unique, as is the information associated with the photo. That’s why there are 5 ways to search for them. Here’s how:
1 Surname Search
There are two options for searching Dead Fred for photos by surname. Option 1: Quick Search Field and Option 2: Linked first letter of the surname.
2 Detailed Search
On the home page, click the link for the Detailed Search. This will take you to a form that you can complete. The more information you can enter into the Detailed Search form, the better your chances of finding a match.
3 Search by Photographers
Of important note on the Detailed Search form is the Photographer field. Many old photos, particularly cabinet cards from the late 19th and early 20th centuries include the stamp of the photographer. Sometimes you’ll find a tremendous amount of detail about the photographer on the backside too. Use this information to conduct a photographer search.
Searching by a photographer is a great way to find other photos potentially related to your family’s history. Take a look at the photos you already have for the family you want to search for and make note of the photographers. Then, conduct a search by entering the surname of the photographer in the Photographer field. This will retrieve all photos listing that photographer’s name.
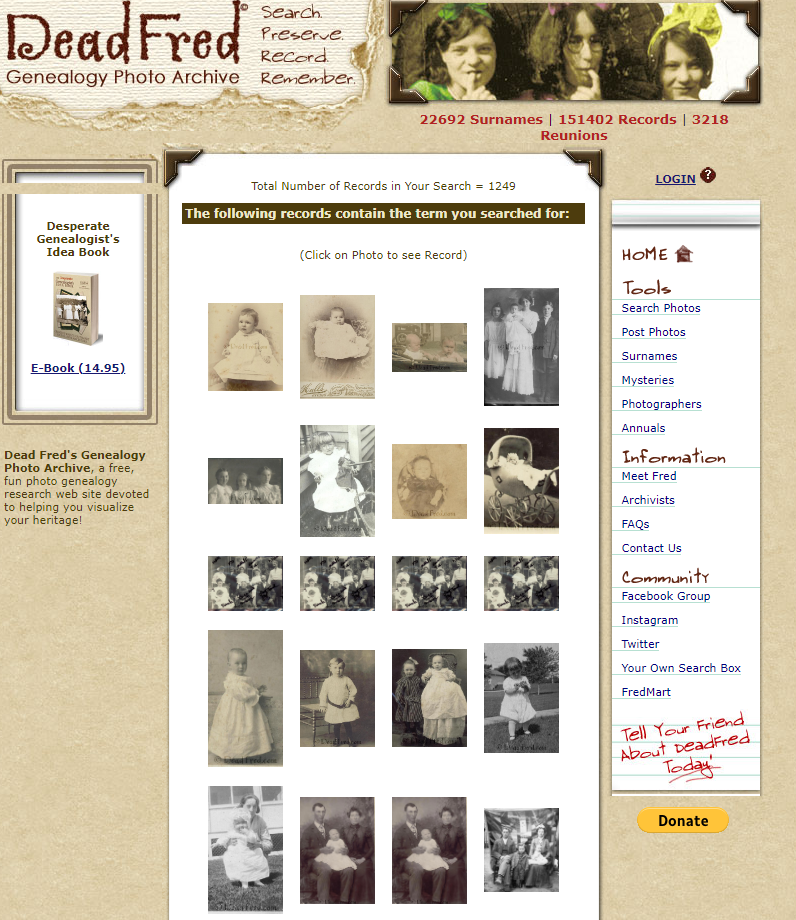
4 Keyword Search
Many DeadFred users include surnames that are related or associated with the photograph in the Comments field if they are not certain of the subject’s identity. You can take advantage of this in your search by using the Keyword search field on the home page of the website. For example, search on the word baby and you’ll get all the photos where that word is mentioned in the Comments.
Keyword Search results for baby
Accessing DeadFred Photos
When you click a photo on the search results page, it will take you to that photo hosted on the Dead Fred website. Notice that the page URL ends in .jpg indicating this is the image file itself. You can right-click on the image for usage options.
AUDIO PODCAST SHOW NOTES: Discover more than 100,000 old family photos on Dead Fred. Founder Joe Bott explains how to find photos of your relatives on this free website, as well as how to post your unidentified photos. Who knows, someone else may spot your photo and have the answers.
This interview is also available in video form here on the show notes page (below). And if you’re a Genealogy Gems Premium Member, you can download the show notes as a PDF cheat sheet in the Resources section at the bottom of the page.
Listen to the Podcast Episode
To Listen click the media player below (AUDIO ONLY):
Click to learn more about Genealogy Gems Premium Membership.
Genealogy Gems Podcast App
Don’t miss the Bonus audio for this episode. In the app, tap the gift box icon just under the media player. Get the app here.
Get the Free Genealogy Gems Newsletter
The Genealogy Gems email newsletter is the best way to stay informed about what’s available with your Premium eLearning Membership. Sign up today here.
Archives is an invaluable resource if you want to make your family history research simple and affordable. Visit Archives.com and let your family history journey begin.
Newspapers.com
Get 20% off a Publisher Extra subscription. Click here and use coupon code GenealogyGems
Google offers a variety of ways to help you find and search for images. In fact, there are so many different ways it can get a little confusing. In this video and article I’m going to show you how to find images and photographs that apply to your family history. Who knows, we may even find an ancestor’s photo. I’m also going to show you how you can use Google Images to even help identify some of the images and photos you have in your family scrapbooks. These are my best image search strategies and they come my book The Genealogist’s Google Toolbox.
Follow along in the show notes below. The step-by-step instructions are available in an ad-free show notes cheat sheet which is downloadable in the Resources section at the end of these show notes. (Premium Membership required.)
How to Find Photos and Images with Google Images
When it comes to searching for images, part of the confusion comes from the fact that the search experience on desktop and mobile are a bit different. So, let’s start with running a basic image search on computer desktop. There are actually two ways to do that.
#1 Google search for images at Google.com on desktop:
Go to Google.com
Run a search
Click Image results
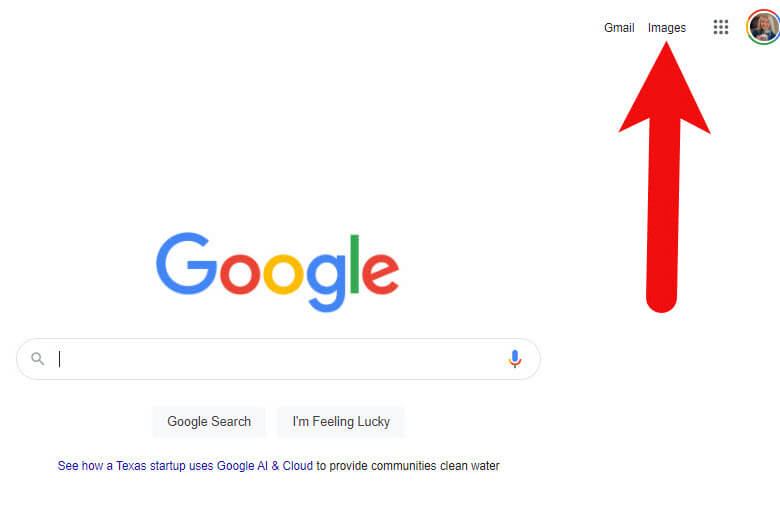
#2 Search for images at Google Images on desktop:
Go to https://images.google.com or go to Google.com and click Images in the top right corner (Image 1)
Image 1: How to get to Google Images from Google.com
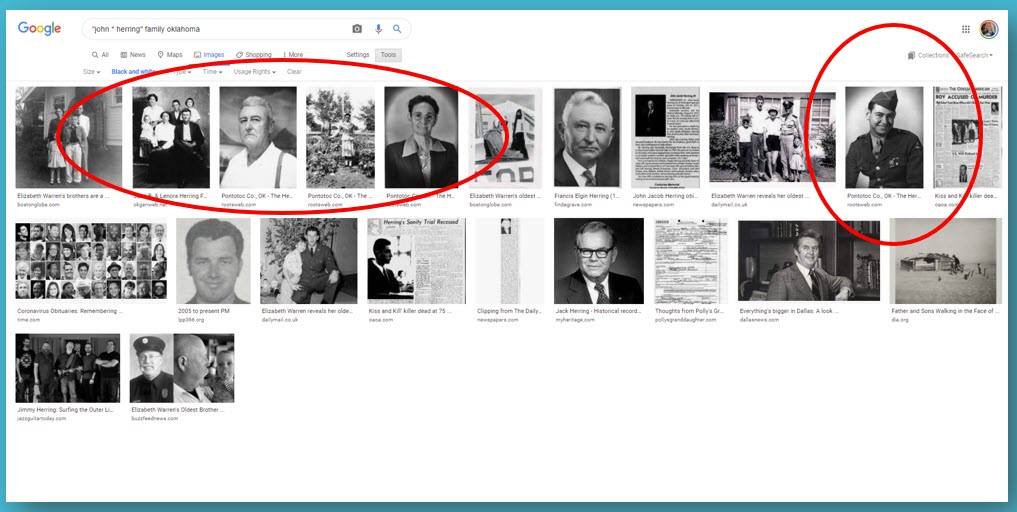
Run a text search: Example: John Herring
Images results will be presented
If I’m in a hurry, I’ll usually just search from Google.com because I’m probably over there anyway. But if I really want to find the best image, or I expect to do some digging, I go directly to Google Images.
How to Get the Best Google Images Results
Searching for a name is fine, but chances are there are and have been many people with that name. You’ll need to narrow things down and provide Google with more specific information about what you want.
There are a several excellent ways to refine and dramatically improve your results. The best place to start is by using a few powerful search operators.
The first search operator is quotation marks. By putting quotation marks around a word or a phrase you are telling Google that it must:
Be included in each search result,
Be spelled the way you spelled it,
And in the case of a phrase, the words must appear in the order you typed them.
You can also use an asterisk to hold the spot for a middle initial or middle name. This is important because without it, Google may pass over these since the name was presented in quotation marks which means its to be searched exactly as typed.
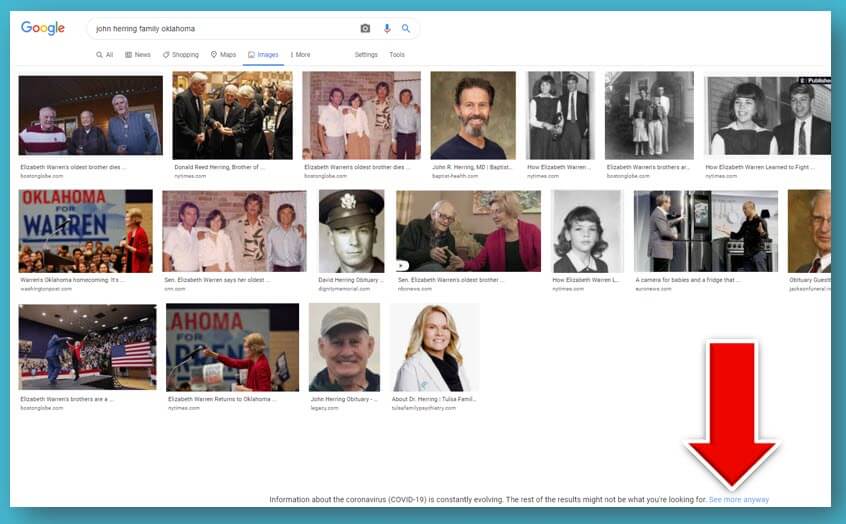
Notice in the following screen shot how this refined search appears. The search operators have made quite an improvement in the image results. I’ve located four photos of my great grandfather! (Image 2)
(Image 2) Google Images found photos of my great grandfather
Google might restrict how many images it shows you. Click See more anyway at the bottom of the screen to reveal all the results. (Image 3)
(Image 3) Click to see more image results
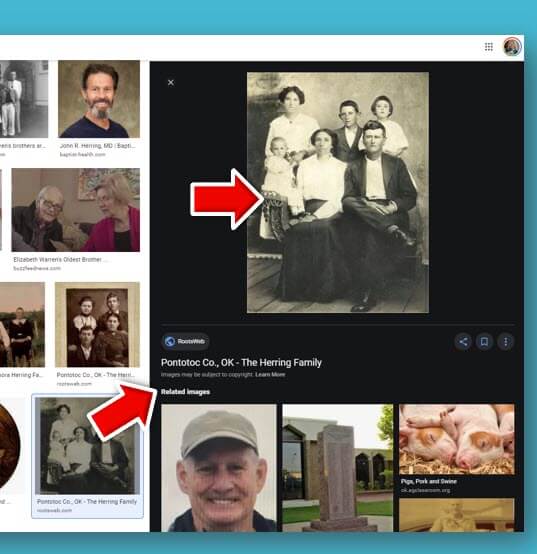
You may need to scroll down to see even more results. Click an image to preview it. (Image 4)
(Image 4) Click to preview Google Image results
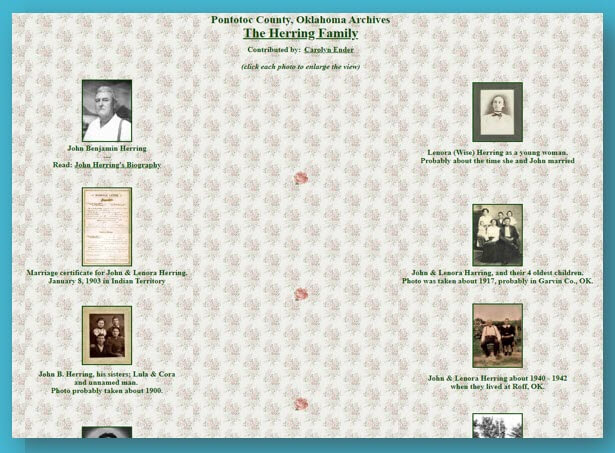
Click the enlarged preview image again to visit the website where it is hosted. I’ve got my fingers crossed that since this website is hosting a photograph of my ancestors, it just might have more. And indeed, it does – genealogy happy dance! (Image 5)
(Image 5) Old family photos found on this web page
How to Narrow Down an Image Search to Old Photos
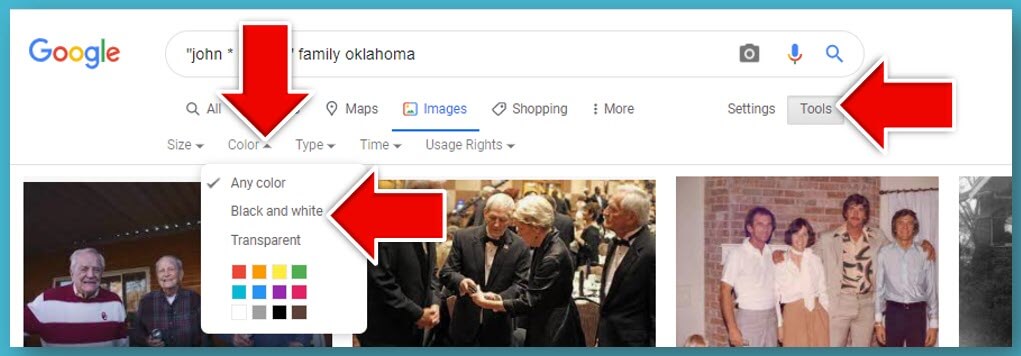
One of the ways you can zero in on old photos is by filtering down to only Black and White images. This makes sense because most of our older family photos are black and white.
On the Google Images search results page click the Tools button. This will cause a secondary menu to drop down. Click the Any Color menu and select Black and White. (Image 6)
(Image 6) How to filter Google Image results
Now all of your image results will be black and white. It’s easy to tell that most of these are older photos. (Image 7)
(Image 7) Filtered image results
Permission to Use Images Found with Google Images
If you want to use any of the photos you find, you’ll need to ensure that you have permission to do so. Start with the FAQ at Google Search Help. This page will help guide you through issues like Fair Use and how usage rights work. In the end, the best thing to do when in doubt is to contact the person who posted the photo and explore any requirements they may have regarding use of the image.
How to Use Google Images to Identify Images and Photos
Do you have unidentified photographs, old postcards or other images in your family scrapbooks or photo albums? Google Images just might be able to help!
Start by first digitizing the image (I use a flatbed scanner) and saving it to your computer hard drive. Then head to Google Images on your computer and click the camera icon in the search field. This will give you two options:
Paste URL (we’ll get to that in just a bit)
Upload an image (this is the one you want – click it)
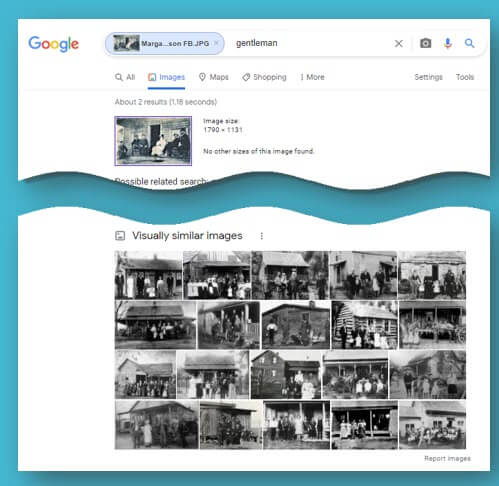
Click Choose File and grab the photo you saved to your computer. Google Images will search the Web for that image. It may find an exact copy, or it may deliver visually similar images.
Notice on the Google Images search results page that Google has added keywords to the search field at the top of the page. You’ll also see a tiny version of the image you searched. The keywords may be rather generic such as gentleman, family, etc. Try replacing these words with more specific words about the photos and what you are looking for. For example, you could replace the word gentleman with your ancestor’s name in quotation marks, or replace the word family with the family surname and the town where they lived. Experiment and try different variations to see what provides the best results.
How to Upload an Image to Google Image Search (Reverse Search):
Navigate to and select the digitized photo you saved to your computer.
Google will attempt to find that exact image. If not the closest visually. You will see words in the search field along with your photo. These words describe what Google AI noted about the photo. For example, when I upload a photo of Margaret Scully sitting in her rocking chair, Google note “sitting” and delivered old photo of people sitting. When I upload a photo of the John Herring family Google notes “family” and provides old photos of family groups. Neither Margaret nor the Herrings are well-known, so this isn’t a surprise. If I upload a postcard from an ancestor’s scrapbook of a well-known or famous location, Google will likely find additional copies on the web and provide background information on the location and a website address for it if there is one.
You can revise this search by replacing the words that Google noted (i.e. family) with the person’s name of the surname. In the case of the John Herring group photo, I replaced family with Herring and then John Herring.
Remember the option to Paste URL? Use this when you find a photo on a website, (or if you have posted a photo on your own website or blog) and you want to find more like it. Right-click (PC – or Control Click on a Mac) on the image and Copy Image Address. Next, head back to Google Images, click the camera icon and paste the URL. Google will use that image to run your image search.
How to Search an Online Photo with Google Images (Reverse Search):
Right-click on a PC (Control Click on a Mac) on the image on the web page.
In the pop-up menu select Copy Image Address.
Go to Google Images.
Click the camera icon in the search field.
Paste the image URL that you copied to your computer clipboard (on a PC use Control V on your keyboard.)
Click the Search by Image button to run your search.
Searching with your own image or an image you find online can help you discover many more website that have the visual content you need. In this episode I searched using an Elevenses with Lisa viewer’s old photo and revised the search with the name of the town. This resulted in a wonderful assortment of websites to look at that also hosted photos from the same town and timeframe.
The initial Google Image results added the keyword gentleman to the search field. But you can see by the visually similar images it found that it was able to target photos that included more similarities than just gentleman. These photos also matched in other important ways (Image 8):
House
Porch
Multiple People
White dress
Old photo
(Image 8)
Who might have photos online of your family? Here’s just a short list of possibilities:
Archives
Libraries
Historical Societies
Newspapers
Genealogy Websites
Cousins
Social Media
How to Use Google Image Search on Mobile
The Google Images camera icon allows you to conduct reverse image searches. However, whether you use a browser app like Safari or Chrome to go to Google Images or you use the Google search app, you won’t find the Google Images camera icon in the search field. Google Images is different on mobile than it is on computer desktop. The main difference is that there is no camera icon for uploading images to search. However, there’s a little secret for getting around that problem.
On an iPhone / iPad you can switch your settings for the Safari app so that it behaves more like a desktop computer. And for our purposes, that means getting the camera icon in Google Images.
How to Search Your Own Image Using Google Images on an iPhone or iPad
Open the Settings app
Scroll down and tap the Safari app
Scroll down and tap Request Desktop Website
Tap the slide to activate All Websites
Close the Settings app
Open Safari
Go to Google.com – if you’re signed into your account you can tap the apps icon (9 dots) and open Images or just google Google Images
Now you have the camera icon in your search bar ready to reverse search images!
How to Reverse Search a Web Image on an iPhone or iPad (Reverse Search Images)
When you find a photograph on a website in Safari, press and hold the image
Tap Copy
Go to Google Images (after changing your settings to Desktop Website)
Tap the camera icon
In the Paste URL field press and hold and tap Paste
The web image URL will appear in the search field.
Tap the Search by Image button to run your search.
Original air date: 10/1/20 Join me for Elevenses with Lisa, the online video series where we take a break, visit and learn about genealogy and family history.
Google Lens with Lisa Louise Cooke
What is Google Lens?
Google Lens is a free technology that Google says helps you ”search what you see.” It uses the latest in Optical Character Recognition (OCR) and artificial intelligence to accomplish tasks.
In this video and article we’ll discuss where you can get Google Lens and how to use it for a wide variety of tasks.
Hang on tight to your phone and let’s jump in!
Google Lens is in Google Photos
Google Lens is doing much of the work in Google Photos. It can detect the faces in your photos, and allow you to search by face. It can also detect objects and text, making it a super fast way to search the photos and images you store in Google Photos.
If you’re not interested in storing all of your photos on Google Photos, that’s OK. As a genealogist, you could still use it for more strategic purposes. You could use it just for family history photos and related genealogical images like documents and photos of tombstones. All of the content you add can then be quickly and easily searched for and found. It can even help you identify a known ancestor in other photos where you may not have recognized it was the same person.
We will talk about specific ways to use Google Lens in Google Photos. But first, let’s talk about all of the ways you can get your hands on Google Lens.
Where can I find Google Lens on my phone or tablet?
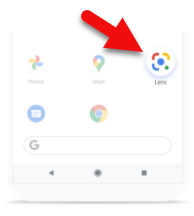
Google Lens is available on most mobile devices but not all. Some Samsung devices don’t currently support it. Here’s where you can find Google Lens.
Google Lens is built into Google Photos – Download the Google Photos app to your phone. Pull up one of your photos and look for the Lens icon at the bottom of the screen. If it is there, your phone supports Google Lens.
Google Lens in the Google Search app – You will see the Lens icon in the search bar if your phone supports Google Lens.
The Google Lens app – On Android devices look for the Google Lens app in the Google Play app store.
Where can I find Google Lens on my computer?
Google Lens is primarily a mobile tool although Google Lens is built into the functionality of Google Photos. (It works behind the scenes – you won’t find a Google Lens icon.)
However, you can use your phone to user Google Lens to capture text and then send it to the Chrome browser on your desktop computer.
Using Lens in the Google Photos App
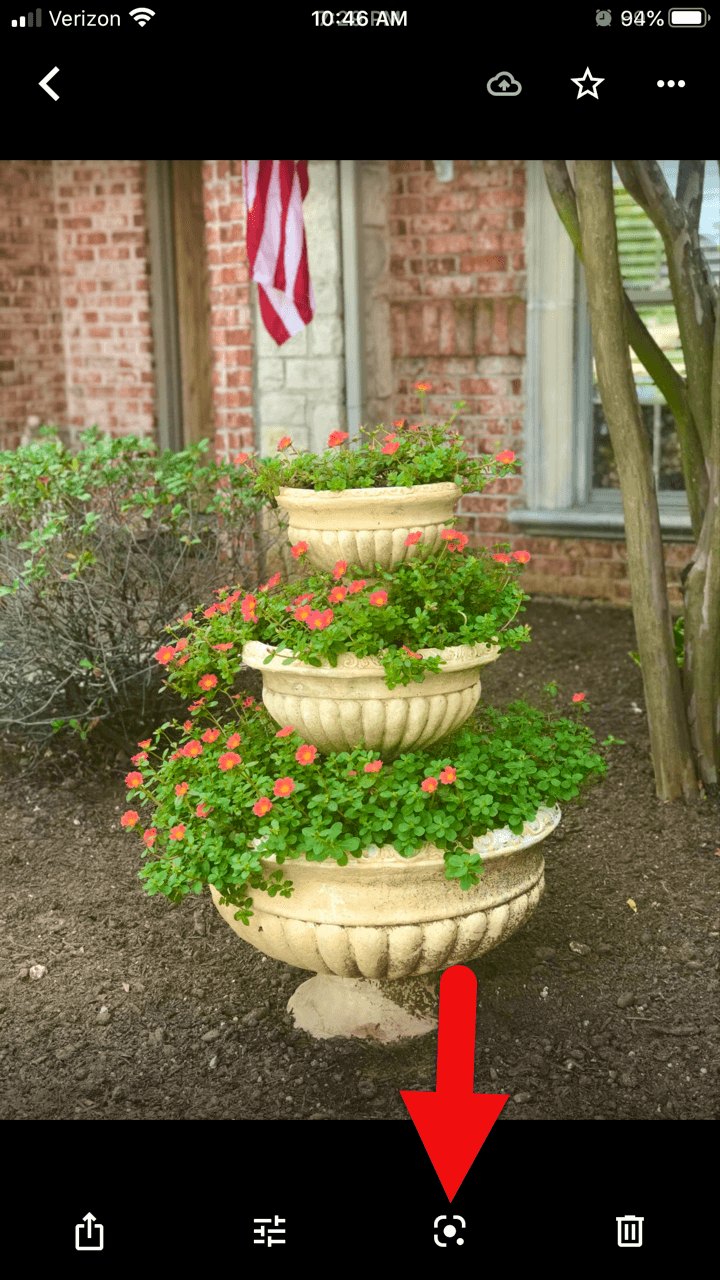
To use Google Lens on your photos in the Google Photos app, you’ll first need to give the app permission to receive the photos you take with your phone. You can then open the Google Photos app and select a photo. In this episode I used the example of a potted plant (Image A below).
(Image A) Google Lens in the Google Photos app
Tap the Google Lens icon at the bottom of the screen and you will receive search results that include the name of the plant, photo examples of the same plant, possible shopping options, and web pages providing more information about that plant.
Here’s another way you can use the Google Lens feature in the Google Photos app:
Take a photo of a business card. (I used Google’s PhotoScan app to do this. The app does a great job of removing glare and other distortions that can occur when you photograph something with your phone. You can download the free Google PhotoScan app from your device’s app store.)
Access the photo in the Google Photos app.
Tap the Google Lens icon.
Lens turns the information on the card into actionable buttons:
Add to contacts
Call now
search on the web
go to the website
Google Lens is in the Google Search app
On many mobile devices such as the iPhone (but not all devices) the Google Lens icon will appear in the search bar. If you’re not sure if you already have the Google Search app on your phone, go to the app store app on your phone and search for “Google Search.” You will see the app listed with a button that either says “Open” (because it is already on your phone) or “Install” (because it is not yet on your phone.)
You can also check to see if they app is on your phone by searching for “Google Search” in the search bar of your phone.
Here’s what the Google Search app looks like on a phone (Image B below):
(Image B) Look for the Google Search app on your phone.
The Google Lens App
If you have an Android phone, search the Google Play store for the Google Lens app. Here’s what the app looks like (Image C below):
(Image C) Android users with phone’s supporting Google Lens will find the app in the Google Play app store.
What Google Lens Can Do
Once you start using Google Lens the possibilities for its use can seem endless. Here’s a list of the kinds of things Google Lens can do:
Shopping
Identify Objects
Copy Text from printed materials or objects
Search for Text on printed material or objects
Solve math problems
Read text to you
Translate text
How to Use Google Lens to Read a Book
Before you buy that next history book or go through the trouble of requesting it through inter-library loan, why not let Google Lens determine if it is already available for free online? This next tip works really well for old books that are likely to be in the public domain or printed before 1924.
Open the book to the title page
Open the Google Search app on your phone
Tap the Google Lens icon
Hold your phone over the title page
Tap the search button
If the book is available on Google Books, the title will appear along with a blue “Read” button
Tap the “Read” button to access, read and search the book on Google Books for free!
(Image D) Point your phone’s camera or Google Lens at the QR code
Open the camera on your phone and point it at the QR code above (Image D) to be taken to the book in the Genealogy Gems store. Use coupon code LENS to get 20% off!
One of the advantages of tuning into the live broadcast of each Elevenses with Lisa show is participating in the Live Chat and asking your questions.
From Rosalyn: Lisa are the old photos hanging on your wall the originals or copies? They are very nice. Lisa’s Answer: I always put copies in frames when I hang them on the wall because light can fade originals. They are all my family.
From Jn Rollins: Does it do the same identification for birds? Lisa’s Answer: I haven’t snapped a photo of a bird, but I’m sure it could. I used it on a photo of a bird, and it identified it perfectly.
From Susan: I have to download an app to get the lens icon? Lisa’s Answer: If you have an Android phone, you may be able to download the free Google Lens app from your app store. Otherwise, you will find the icon in the Google Search app or the Google Photos app on supported devices.
From Patriva: Is Google Go the same as Google Search? Lisa’s Answer: Google Go is a “lighter faster” search app. I think it may be geared more toward Samsung devices. I have a Samsung Tab and it doesn’t support Google Lens.
From Carrie: Does this work with the Google Chrome app? Lisa’s Answer: The Chrome app doesn’t have the Google Lens icon.
From Jn Rollins: I installed Lens a while ago on my Android phone, but when I open Google search the lens icon doesn’t appear next to the microphone icon. How can I change that? Lisa’s Answer: Some Android devices (like Samsung phones) don’t support Google Lens so you won’t see the icon. Check the app store to see if they offer the Google Lens app for your phone. However, I’m guessing it probably won’t be offered since it sounds like your phone doesn’t support Google Lens.
From Christine: I love this technology for speeding up research! But I have some reservations—what privacy are we giving away? How will Google use our search history? Lisa’s Answer: I would not use Google Lens for anything I consider “sensitive.” Go to the privacy settings in your Google MyActivity to learn more.
From Lynnette: Can you put the text into Evernote easily? Lisa’s Answer: Absolutely! Tap to copy the detected text, open an Evernote note, press your finger in the note and tap Paste to paste the text.
From Colleen: I see you are google searching. Does doing this with photos allow others to access my google photos when searching for an item? For example, the example you used with the purse? Lisa’s Answer: To the best of my knowledge your photos are not searchable by others online. However, it is possible that Google uses the image internally to “train” the machine learning. Go to the privacy settings in your Google MyActivity to learn more.
From Christine: Lisa, can this be used to compare photos to determine if they are the same person? Thanks for sharing all your wisdom! Lisa’s Answer: Yes! Watch my Premium membership video called Solving Unidentified Photo Album Cases.
From Caryl: Don’t know what a symbol is on a headstone? Now this would be oh so helpful!! Lisa’s Answer: Yes, indeed!
From Susan: I quickly took a photo of the book cover, so now I can get your book! Is it better to buy directly from you or go to Amazon? Lisa’s Answer: The book is available exclusively at my website: https://www.shopgenealogygems.com
From Debbie: Will FamilySearch’s app be independent, or will it work / integrate with Google? Lisa’s Answer: FamilySearch would not be integrated. However, as handwriting technology is developed I’m sure you’ll find it in use in both places.
Please Leave a Comment or Question
I really want to hear from you. Did you enjoy this episode? Do you have a question? Please leave a comment on the video page at YouTube or call and leave a voice mail at (925) 272-4021 and I just may answer it on the show!
If you enjoyed this show and learned something new, will you please share it with your friends? Thank you for your support!