The US Public Records Index can be useful for genealogy–if you understand what it is and how to use it properly. Here’s an example and some tips.
Not long Russ sent in this tip recommending the US Public Records Index for genealogy:
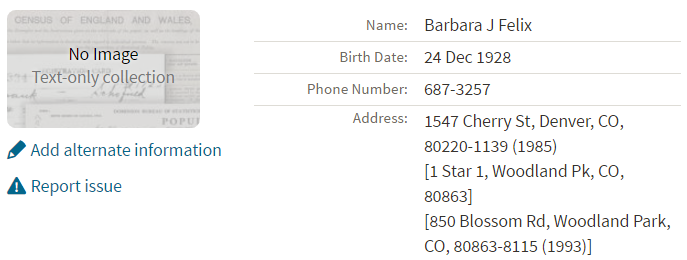
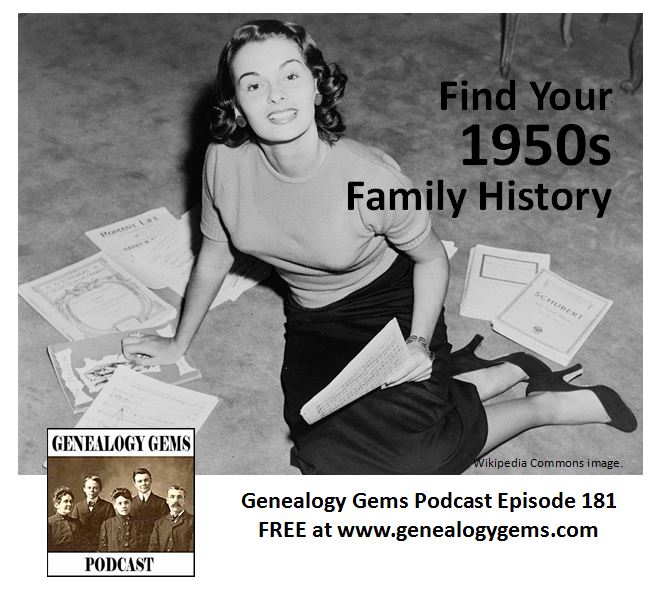
“I was listening to Genealogy Gems Podcast 181 [in which] you were talking about where do we search while we are waiting for the 1950 Census….I recently discovered a wonderful resource, on Ancestry.com, that I have used along with city directories. The name of the record group doesn’t sound interesting but it can be a Gem for you: the US Public Record Index, 1950-1993, Volume 1 and 2. Volume 1 is far more interesting with more data. A search will return a name AND birth date, along with more than one address, zip code and sometimes phone numbers.”
Here’s a sample search result:
Russ kindly sent me Ancestry’s description of its online database for Volume 1, which says that original data comes from public records spanning all 50 states, such as voter registration lists, public record filings, historical residential records and other household database listings.
Collection Profile
What: U.S. Public Records Index
Where: Ancestry, FamilySearch, MyHeritage
Years Spanned: 1950-2009
Source Type: Lacking original source citations.“Hints to go on and follow up with further research into verifiable sources.”
Then he shared the following example of using the US Public Records Index to find recent relatives that he can’t look up yet in the 1950 census:
“I had a hint for a cousin in a yearbook. I know that she recently lived in Philadelphia, Pennsylvania. I didn’t know where she went to college and I know her birthday. The name is not unique, not also not common. At the same time, I had the hint for the Public Record Index. You know those things we can’t use in a proof argument, but there [she] was in Philadelphia. The yearbook had her picture and only her name, not spelled the way I know it, but the Public Record Index puts her in Philadelphia at the right time and place.
I have seen 2 or 3 addresses for folks in the 1980s and 1990s in these indexes. Not all addresses have dates, but some do. I have one cousin with 5 addresses since 1983 and he won’t be in a census until the 1960 Census Records are released.”
The U.S. Public Records Index pops up in my search results sometimes, too. Both volume 1 and volume 2 are searchable on Ancestry.com, as Russ says, in separate databases. Each has over 400,000 records in it. There’s also a free partial version of this database for 1970-2009 at FamilySearch.org and yet a third version at MyHeritage, with 816 million records, with nearly the same time frame. The FamilySearch database says its data comes from “telephone directories, property tax assessments, credit applications, and other records available to the public.”
More on the US Public Records Index
Here are a few tips worth mentioning about the US Public Records Index. Some of these points come from the FamilySearch wiki:
Not everyone who lived in the U.S. appears in the index, and you’re more likely to find birth information for those born between 1900 and 1990. What you’ll find is primarily where someone lived, and often when they lived there.
It’s rarely possible to positively identify a relative in this index since there’s limited information and it spans the entire country for up to a half-century, and you can’t follow up on the record it comes from because the index doesn’t say where individual records come from. So as Russ says, this is a great resource to use in combination with other records. It’s a similar concept to the way you might consult family trees that lack sources: hints to go on and follow up with further research into verifiable sources.
When you find more recent listings, you can sometimes find telephone numbers for living distant relatives. If the thought of cold-calling distant relatives seems a little intimidating, listen to my Family History: Genealogy Made Easy podcast, episodes 14-15, for tips–and to get your courage up!
National Archives (US) facilities are closing or restructuring in three locations. But steps are being taken to maintain access (local or online) to the
National Archives, Washington, D.C. Wikimedia Commons Image by Edbrown05.
treasure trove of research materials at these facilities.
A recent press release states, “As part of ongoing budget adjustments, Archivist of the United States David S. Ferriero announced the permanent closure of three National Archives facilities. This year, the National Archives facility in Anchorage, AK, will close and two facilities in the Philadelphia, PA, area will be consolidated to a single site. Within the next two years, two Archives’ facilities in Fort Worth, TX, also will be consolidated to a single site. These closures and consolidations will result in estimated annual cost savings of approximately .3 million.”
“The National Archives budget is devoted primarily to personnel and facilities, both of which are essential to our mission,” the Archivist stated. “I recognize these cuts will be painful; however, we are committed to continuing to provide the best service to our customers and best working conditions for our staff nationwide.”
Here’s the scoop on each of the affected locations:
National Archives – Anchorage, AK, facility closing:
The National Archives’ facility in Anchorage, AK, will close permanently in FY 2014. The employees who work there will be offered positions at other National Archives facilities, with the National Archives paying relocation expenses. The less than 12,000 cubic feet of archival records in Alaska will be moved to the National Archives at Seattle, WA, where the National Archives will digitize these records so that they remain available to Alaskans through the internet. In addition, we will move approximately 7,500 cubic feet of records center holdings to Seattle, WA.
National Archives – Philadelphia, PA, facility consolidation:
The National Archives currently maintains two facilities in Philadelphia—a records center and archives at Townsend Road, and a small “storefront” archival facility at 900 Market Street in the city center. These facilities are in the same commuting area, and archival records are currently moved between the two for research use. The Market Street facility will close in FY 2014, and those employees will move to Townsend Road or telework locations. The less than 5,000 cubic feet of archival records stored at Market Street will be moved to Townsend Road, where the majority of the archival records already are stored. The Townsend Road facility’s research room will be modified to better provide appropriate access to researchers, and community outreach programs will continue.
National Archives – Fort Worth, TX, facility consolidation:
The National Archives currently maintains two facilities in Fort Worth: a combined records center and archives at John Burgess Drive, and a smaller “storefront” facility at Montgomery Plaza. The National Archives will permanently close the Montgomery Plaza facility in FY 2016. All employees at the Montgomery Plaza location will move to John Burgess or telework locations. No original records are stored at Montgomery Plaza, and researchers will have continued access to archival records through the research room at John Burgess Drive.
What’s at National Archives facilities for family history researchers? Learn more here.
The Genealogy Gems Podcast Episode 199 with Lisa Louise Cooke
Click the player below to listen:
In this episode, Lisa celebrates Canada’s 150th anniversary with Claire Banton from Library and Archives Canada. You’ll also hear how Lisa will be marking another anniversary in 2017: the 10th year of this Genealogy Gems podcast.
More episode highlights:
An inspiring follow-up email from Gay, whose YouTube discovery Lisa shared in episode 198, and a great conference tip from Barbara just in time for RootsTech.
Genealogy Gems Book Club Guru Sunny Morton announces the new Book Club title.
Your DNA Guide Diahan Southard shares thoughts about DNA testing with kids.
JOIN THE CELEBRATION! 10th ANNIVERSARY AND 200th EPISODE
You’re invited to send in well-wishes and win a chance at a prize!
Share a memory of listening to this podcast, such as: When did you start listening? What’s one of your favorite things you’ve learned from this show?
Lisa will randomly select one response to receive a free year of Genealogy Gems Premium membership. Thanks for helping all of us here at Genealogy Gems celebrate 10 years of doing something we love!
NEWS: ROOTSTECH 2017
RootsTech will be held on February 8-11, 2017 in Salt Lake City, UT: learn more and register.
Lisa will be live-streaming FREE sessions the marked session via the free Periscope app. Get it in Apple’s App Store or Google Play. Sign up for a free account and follow Lisa Louise Cooke to tune in. Sign up for notifications in Periscope, and your phone will “ping” whenever Lisa starts streaming! Broadcasts stay in the Periscope app for 24 hours. Like and follow the Genealogy Gems Facebook page to hear about more streaming sessions!
NEWS: FAMICITY KICK-STARTER
Famicity is a free, private website for families to share pictures, videos, memories, family activities and the family tree. The company has been very successful in France where it was launched, and the founder is working to bring the new English platform to the United States. He’s launched a Kickstarter campaign to support their U.S. launch. Click here to support it.
BONUS CONTENT FOR GENEALOGY GEMS APP USERS If you’re listening through the Genealogy Gems app, your bonus content for this episode is a tutorial on Feedly, an easy way to consume just the online content you want. The Genealogy Gems app is FREE in Google Play and is only $2.99 for Windows, iPhone and iPad users
Lisa Louise Cooke uses and recommends RootsMagic family history software. From within RootsMagic, you can search WebHints on FamilySearch.org, Findmypast.com and MyHeritage.com. Soon RootsMagic will also be able to search records and even sync your tree with Ancestry.com, too.
Keep your family history research, photos, tree software files, videos and all other computer files safely backed up with Backblaze, the official cloud-based computer backup system for Lisa Louise Cooke’s Genealogy Gems. Learn more at http://www.backblaze.com/Lisa.
MAILBOX: YOUTUBE DISCOVERY FOLLOW-UP
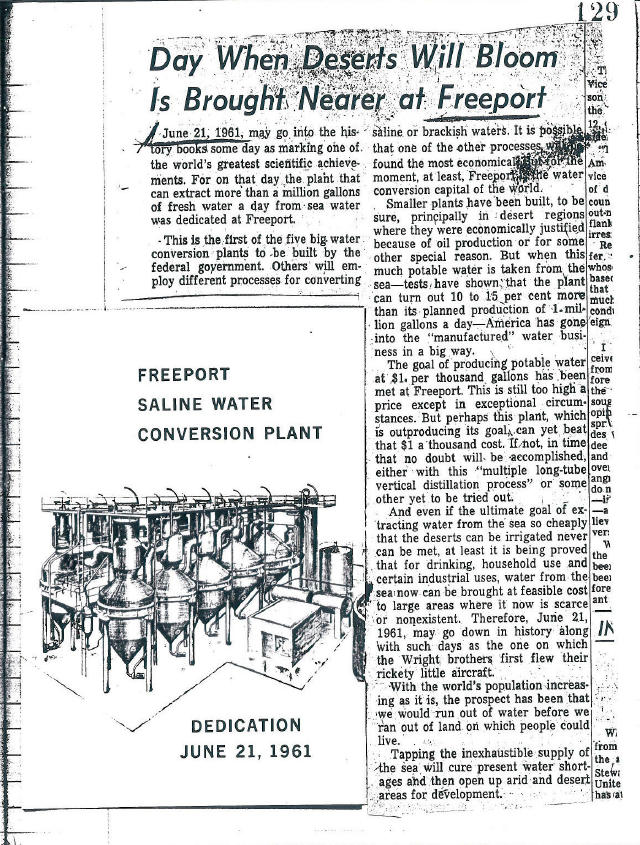
Remember the YouTube success story from Genealogy Gems Podcast episode 198? Gay as a young woman attended a dedication ceremony for the saline water treatment in Freeport, Texas?and with Lisa’s tips she found video footage on YouTube.
Gay wrote back to send us more about that, including this page from her diary that day and this news clipping. Check out the news clipping to see why that plant was so important, Pres. John F. Kennedy gave the dedication speech. (See what newspapers can tell you?!)
Find your own family history on YouTube. Click here to learn how or read an entire chapter on YouTube in Lisa Louise Cooke’s book, The Genealogist’s Google Toolbox, 2nd revised edition.
Click here to learn how to turn family stories and artifacts like these into videos to share with relatives.
Learn to find articles such as this one that can put your family’s story in context?locally and even nationally. Read How to Find Your Family History in Newspapers by Lisa Louise Cooke.
INTERVIEW: CLAIRE BANTON, LIBRARY AND ARCHIVES CANADA (LAC)
Claire Banton obtained her Masters of Library and Information Studies degree in 2006. She has worked in Reference Services at LAC for 10 years, where she has enjoyed learning something new every day. She is currently Chief, Orientation Services, where she works with an awesome team who help people search for information. She loves being an information detective and helping people overcome their research challenges.
Start with the LAC website (genealogy resources page) whether you are visiting in person or not. There are loads of free databases and some unindexed digitized records. The Topics page will tell you what they do and don’t have.
There was no border control from the US to Canada prior to 1908, so there are no Canadian records of earlier crossings. [Tip: see border crossings to the US, 1895-1956 at FamilySearch.org and Ancestry.com.]
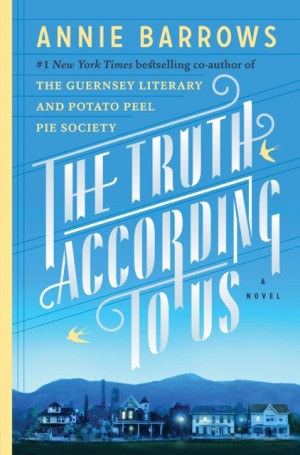
It’s the summer of 1938, and wealthy young socialite Miss Layla Beck is now on the dole as a WPA worker, assigned to write a history of the small town of Macedonia, West Virginia. As she starts asking questions about the town’s past, she is drawn into the secrets of the family she’s staying with?and drawn to a certain handsome member of that family. She and two of those family members take turns narrating the story from different points of view, exploring the theme that historical truth, like beauty, is often in the eye of the beholder.
Click here to read an introduction to using WPA records for genealogy.
I was talking with a fellow mom the other day about all the demands that are placed on kids’ time today. They have school and homework, many have after school sports and clubs, religious meetings, some have jobs or at least chores at home, not to mention all the time required to text, check social media, and hang out with friends. As parents and grandparents, we want our children to spend time on things that matter, things that will prepare them for their future lives and mold them into their future selves.
According to a 2010 study out of Emory University, if we want to encourage kids toward an activity that will positively impact them, we should steer them toward family history. The researchers reported that “children who know stories about relatives who came before them show higher levels of emotional well-being.”
Now, I know I don’t need to convince you of this. You are already sold on genealogy. But I share this in the hope that it will push you over the edge and this will erase any hesitancy you have about sharing this love with your children and grandchildren.
Now, since you know this is me, the genetic genealogist talking, you can probably guess what I’ll suggest for getting kids interested in family history. DNA testing is a great way to personally and physically involve them. First of all, there is the tangible process of taking the sample at home, and the marvel at how such a simple act can produce the amazing display of our ethnicity results.
Since each of us is unique, it will be fun for them to compare with you and other relatives to see who got what bit of where. This will naturally lead to questions about which ancestor provided that bit of Italian or Irish, and wham! You’ll be right there to tell them about how their 5th great grandfather crossed the ocean with only the clothes on his back, determined to make a new start in a new land.
If there are parts of the ethnicity report that you can’t explain, use that as a hook to encourage them to start digging and to find out why you have that smattering of eastern European or south east Asian. Taking them for a tour of the DNA match page you can show them how they share 50% of their DNA with their sister (whether they like it or not!) and how they share 25% with you, their grandparent!
DNA test results give kids a totally unique look at their personal identity with technology that is cutting edge. Looking at their DNA test results can turn into a math lesson, a science lesson, a geography lesson, a lesson on heredity or biology, a discussion on identity?wherever you want to go with it! DNA is the perfect introduction to the wonders that genealogy can hold, especially for children who are so good at wondering.
Click here to learn more about Diahan’s series of how-to videos, available to Gems fans for a special price. Or start your DNA journey with the guide that will help you get started with kids’ genetic genealogy:
Disclosure: This article contains affiliate links and Genealogy Gems will be compensated if you make a purchase after clicking on these links (at no additional cost to you). Thank you for supporting Genealogy Gems!
New online! Denmark church records, Yorkshire parish records, English and Irish estate records, French church and civil registration records, German vital records, Irish townland indexes, and U.S. collections for Georgia, New York, Ohio and Pennsylvania. They’re all...
 More Gems on Researching Recent Relatives


 MAILBOX: YOUTUBE DISCOVERY FOLLOW-UP
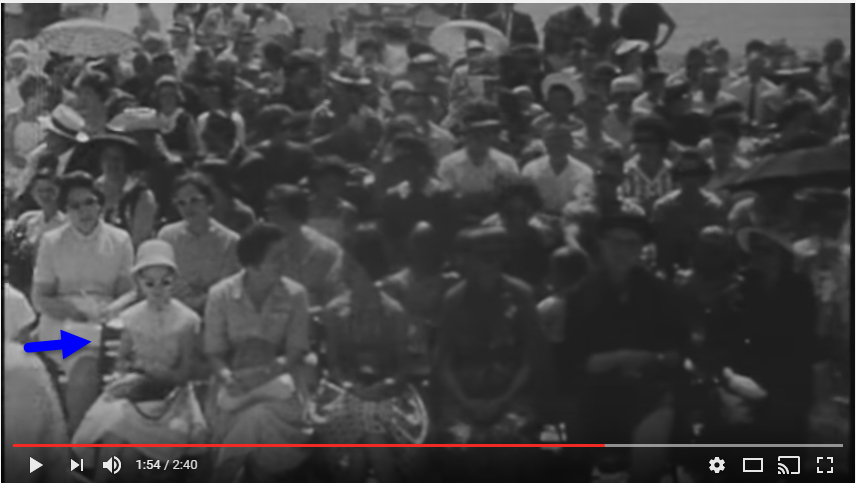


 I was talking with a fellow mom the other day about all the demands that are placed on kids’ time today. They have school and homework, many have after school sports and clubs, religious meetings, some have jobs or at least chores at home, not to mention all the time required to text, check social media, and hang out with friends. As parents and grandparents, we want our children to spend time on things that matter, things that will prepare them for their future lives and mold them into their future selves.