Blog


5 Ways to Improve Old Home Movies
Show Notes: In this video, Lisa Louise Cooke demonstrates 5 ways to improve your old family home movies so that they are more enjoyable to watch. See how you can transform a short home movie into an integral part of family history. She will demonstrate editing techniques in Camtasia software, but these strategies can also be applied in many other video editing software programs.
Video and show notes
Watch the Video Lesson
Show Notes
Family History comes in many forms. But one of the most exciting is old home movies. I’m going to show you the five best ways to polish them up and make them shine so that your family can enjoy them for generations to come. (Downloadable ad-free Show Notes handout for Premium Members.)
Video Digitization and Editors
Larsen Digital: I got my family video and audio tapes digitized at Larsen Digital, a family-owned business that cares about family history. Click here to get 15% off on your Larsen Digital order when you use our exclusive coupon code GenGem.
Camtasia: Use this link to Camtasia and our coupon code GENE15 to get 15% off for a limited time. Be sure to scroll down the page to find the Buy Now buttons for Camtasia and Snagit. (Note: Maintenance and asset add-ons are optional and can be opted out of if desired during checkout. Discount applies to Snagit as well!)
1. Correctly Size Your Video
The first way to improve your home movies is to get the size right. That’s one of the most challenging parts and probably the most overlooked item when it comes to video production. You need to determine the original video size. Chances are you have already gotten your old home movies digitized. But if you haven’t done that, first, you need to send them into a reputable company. I use Larsen Digital.
Or perhaps somebody in your family has sent you a video and you’re not sure what the size is. We can take a look at that in the file manager on our computer. Right-click on the video file and go to Properties. You will see what size of the file is in MB. Click on Details, and there you can see the frame width expressed in pixels. The example video I worked on is 480 px by 360 px. This is quite small when you consider that an HD video is more in the range of 1920 x 1080. Because my video was so small it means it’s probably better suited for sharing on social media or on a website; something that can take a smaller video and display it properly. The large HD size would play better on YouTube or a big screen.
Now that we know the size of our video, we’re going to set the canvas size to match in our video editing software. That’s the key. When you see a video that’s blurry or doesn’t look quite right, it may be because the canvas was set improperly, or the video is not large enough for the place where it is being displayed. If edits were made but the video size wasn’t taken into account it can cause problems. You can’t take a really small video and make it really big and expect it not to get blurry or distorted.
I use Camtasia as my video editing software, and the first thing I do is go in and set the canvas size so that it matches up with the size of my original video. To do this in Camtasia, go to the top of the canvas and you may see a percentage size, such as 50%. That means the canvas we see as we edit is actually about ½ the size of what the produced video will be. That just has to do with video editing, so don’t worry about it. Click the down arrow and go to Project Settings. Camtasia provides preset standard sizes to make it easy. You can see that 1920 by 1080 is HD. My video was much smaller, so I can either pick from a smaller preset size or select Custom. I like to use Custom and enter the exact size I want. In this case I will enter the size of the digitized video I will be working on which is 480 by 360.
Next, import the video by clicking the Plus sign in the Media Bin and locating the file on your computer. You can then click it in the Media Bin and drag it and drop it on to the timeline at the bottom of the screen. It should fit the canvas perfectly.
I’m working on editing a short little home movie that one of my viewers, Kate, sent me. It’s a wonderful little video of her with her siblings and her parents when she was a child. The original video was pretty small, but there were some other issues with it as well. And that leads us into our next best practice.
2. Correct the Video Speed
Often times old home movies may appear speeded-up. That was certainly the case in Kate’s home movie. Things are moving very quickly making it really hard to figure out who’s who and just get a chance to look at their sweet faces. There are several things that we can do to correct this in Camtasia.
Speeded-up movies can happen due to issues with the little sprockets on the sides of the original film, or missing frames – there are a number of reasons why this might happen. Also, the person filming may have made many cuts, starting and stopping repeatedly in an effort to try and capture the action. Unfortunately, the end result can be the film moves far too quickly and appears jerky. When you’re in the middle of filming, that doesn’t seem so bad. But the final resulting film can seem jumpy as if you’re jumping from one thing to the next. We can slow this down and create some pauses so we can really see the people in the film.
Start by clicking the video clip to select it. Right-click the clip to reveal the menu and select Add Clip Speed. On the right-hand side of the screen, you will now see the Properties of Clip Speed. Here you can see the size of our video. Clip Speed will default at 1.00 which means we’re using the exact same speed of the original video. It is 100%. But we want to slow this down. Change the minutes and seconds to adjust the speed. Going from 1 minute to 2 minutes will make it twice as long, thereby slowing the video down accordingly. You can speed the video up by shortening the length of time.
Review your adjustments. You can drag the playhead to any location (this is called scrubbing) to review that portion of the video.
There are also opportunities to do additional things with speed to improve the viewing experience. One of the things we can do is Extend a Frame. If you have a spot on the video where you’d like to take a pause and be able to see someone in the film a little longer (such as a child running by the camera) you can select that moment and make it longer. Place the playhead at the exact spot where you want the moment to last longer, and right-click on the video clip. Select Extend a Frame. Select the seconds to the desired length. Review your work and make adjustments as needed.
You can Undo at any time by clicking Control Z or in the menu under Edit > Undo.
Another way that you can extend a frame is to click on the clip and split it by clicking the Split button. Then you can slide the section on the right down the timeline. With your playhead on the end of the first section, right-click and select Extend a Frame. Then you can click and drag the end of the extended frame to the desired length. (You can see how long it is by that little text box that’s showing up just down below.) Once you’re happy with it, drag the split off section back up against the first clip so that it will run smoothly when played.
3. Correct the Color
The next way you can improve your old home movie is by applying color correction. If the video is black and white (as in my example) there may be minimal work to do, but small adjustments can make a nice improvement.
You can also use color correction to be creative and distort things, but generally speaking, the goal will be to improve the overall look and make it as natural as possible.
If you’ve split your frames during the editing process, you’ll want to be sure to apply color correction to all of them. You can do that by dragging your cursor across all of the clips to highlight them. You can tell they’re highlighted because they have yellow outlines.
Next, go to Visual Effects in the menu on the left side of the screen. There are several from which to choose. Click Color adjustment which gives you several options and it’s fun to play with the various properties. You can colorize things make them interesting. You can change the frame of the entire video, such as rounding the corners, or making it look like the video is playing on a computer.
To apply Color Adjustment, drag and drop it onto the highlighted clips. You can bring the settings back to the original colors by setting everything to zero. Then you can play with brightness, contrast and saturation to get exactly the look you want. Small adjustments can even improve black and white home movies. You can also make spot correction by just selecting portions of the film that need correction. You can isolate those portions by splitting the clip into sections.
4. Add Annotations
Have you got any old photo albums at home where nobody wrote down the names or the places or the dates. It drives you crazy, particularly if you love family history, and you’re trying to get things right. Well, we don’t have to leave our home movies unlabeled either. You can add context to this historical video document through annotations. We can’t assume that everybody’s going to know who everybody is in this old home movie. There are things that we can do to add that context to the film, so that no matter how far into the future, anybody watching this video will know who they’re looking at and what was important about it to the people who were involved.
Adding context is particularly important for older home movies that are silent. So, let’s put on our Cecil B DeMille or John Ford hat and do what they would have done to their silent movies: add titles. We will do this with Annotations in Camtasia.
How to Add Annotations / Callouts in Camtasia
Click Annotations in the left-hand menu to display your options. There are some nice basic annotations that come with Camtasia. You can also create your own custom library and themes. Select the desired style. (You can also get more of these types of assets over the TechSmith website.)
Since we’ve extended frames to highlight certain people and actions, these are great places to add annotations. Go to the extended frame and place the playhead there. Click the annotation style you want and drag it onto the canvas. I like to use the Callout that has text on a background which works well as a label on the screen. It’s very easy to read. Double-click on the text of the Callout and type the name or context information.
Resizing Annotations
You may see that you have extra whitespace at the top and the bottom of the label. Click on the little handles around the label (Callout) and pull to resize.
Stylizing Annotations
You can also change the properties and the spacing in the Call Out Properties on the right side of the screen. You can change the label outline color and background color. Use the color picker to pick a coordinating color from the video or select from the color palette. You can also change the thickness of the border. Text can also be formatted to suit your needs.
Reposition annotations by clicking on it and dragging it to the desired location.
Copying Annotations
Speed up the process by copying annotations, pasting them at the desired location on the timeline, and then updating the text. If you don’t see the pasted annotation, it might be on top of the one you copied. Also, check the position of the playhead on the timeline. If the playhead isn’t on the annotation, it will not appear on the canvas.
You can extend each annotation to the exact desired length by grabbing the edge and dragging it on the timeline.
Fade Transitions
Another way to create a pleasant viewing experience is to add Fade Transitions at the beginning and end of annotations.
5. Cite Your Source: End Titles
We’ve added annotations to tell more about who is in the film along the way. However, the source of the overall package of this video needs to be cited as well, just like any good genealogy record. A great place to do is by adding a title card at the beginning and / or end of the home movie video.
I particularly like to add the source citation at the end so that when they finish watching the video, they will see how it came to fruition, where it originally came from, who did the editing, and notes about the improvements applied.
If you’ve made changes such as color correction it’s important to mention that at the end in the source citation. This end title can explain what you did that alters it from the original piece. We do this with photos, and the same thing holds true here for home movies. We want to make sure that people know the difference between what was original and real and what was added in post-production.
You can create a simple custom title card at the end by using an annotation. Place the playhead at the desired location on the timeline and go back to the Callouts under Annotations. I like to use the simple text only callout. Drag and drop it onto the canvas or the timeline. Highlight the text to select it and type your text. I recommend small amounts of information on multiple callouts, separated by Fade Transitions. Review your work carefully to ensure that the viewer has enough time to read through each title card you create. You can drag the edges of each callout to shorten or lengthen them, but keep in mind you might need to move the callouts that follow the one you’re working on further down the timeline to make room.
Bonus: How to Add Music
One last little thing you can do to your video is music. Import that mp3 music file into your Media bin, and then drag and drop it onto the timeline. If the music isn’t long enough, add a second copy. Trim blank space at the end of the first piece of music and then butt the second piece up against it.
If your music is longer than your video, shorten the music to match. Then, go to Audio Properties on the left side of the screen (it may be under More) and drag and drop Fade Out to the end of the music.
Share Your Home Movies
I love old home movies, and I love getting them into tip top shape so that they can be enjoyed for many years to come by countless people. There are so many different ways you can share your home movies. You might want to upload it to YouTube. If you do, add some family information in the video description so that other people can find them. You can also share videos on social media, by text or email, etc. There are so many different ways to share your family history, and I think that moving pictures is one of the most exciting. Your family will appreciate the extra effort you put into improving them and making them more enjoyable to watch.
Resources
- Downloadable ad-free Show Notes handout for Premium Members.
- Watch and read How to Edit Home Movies by Lisa Louise Cooke.
- Subscribe to the free Genealogy Gems newsletter and get a free bonus gift PDF.

Learn more about Genealogy Gems Premium Membership.
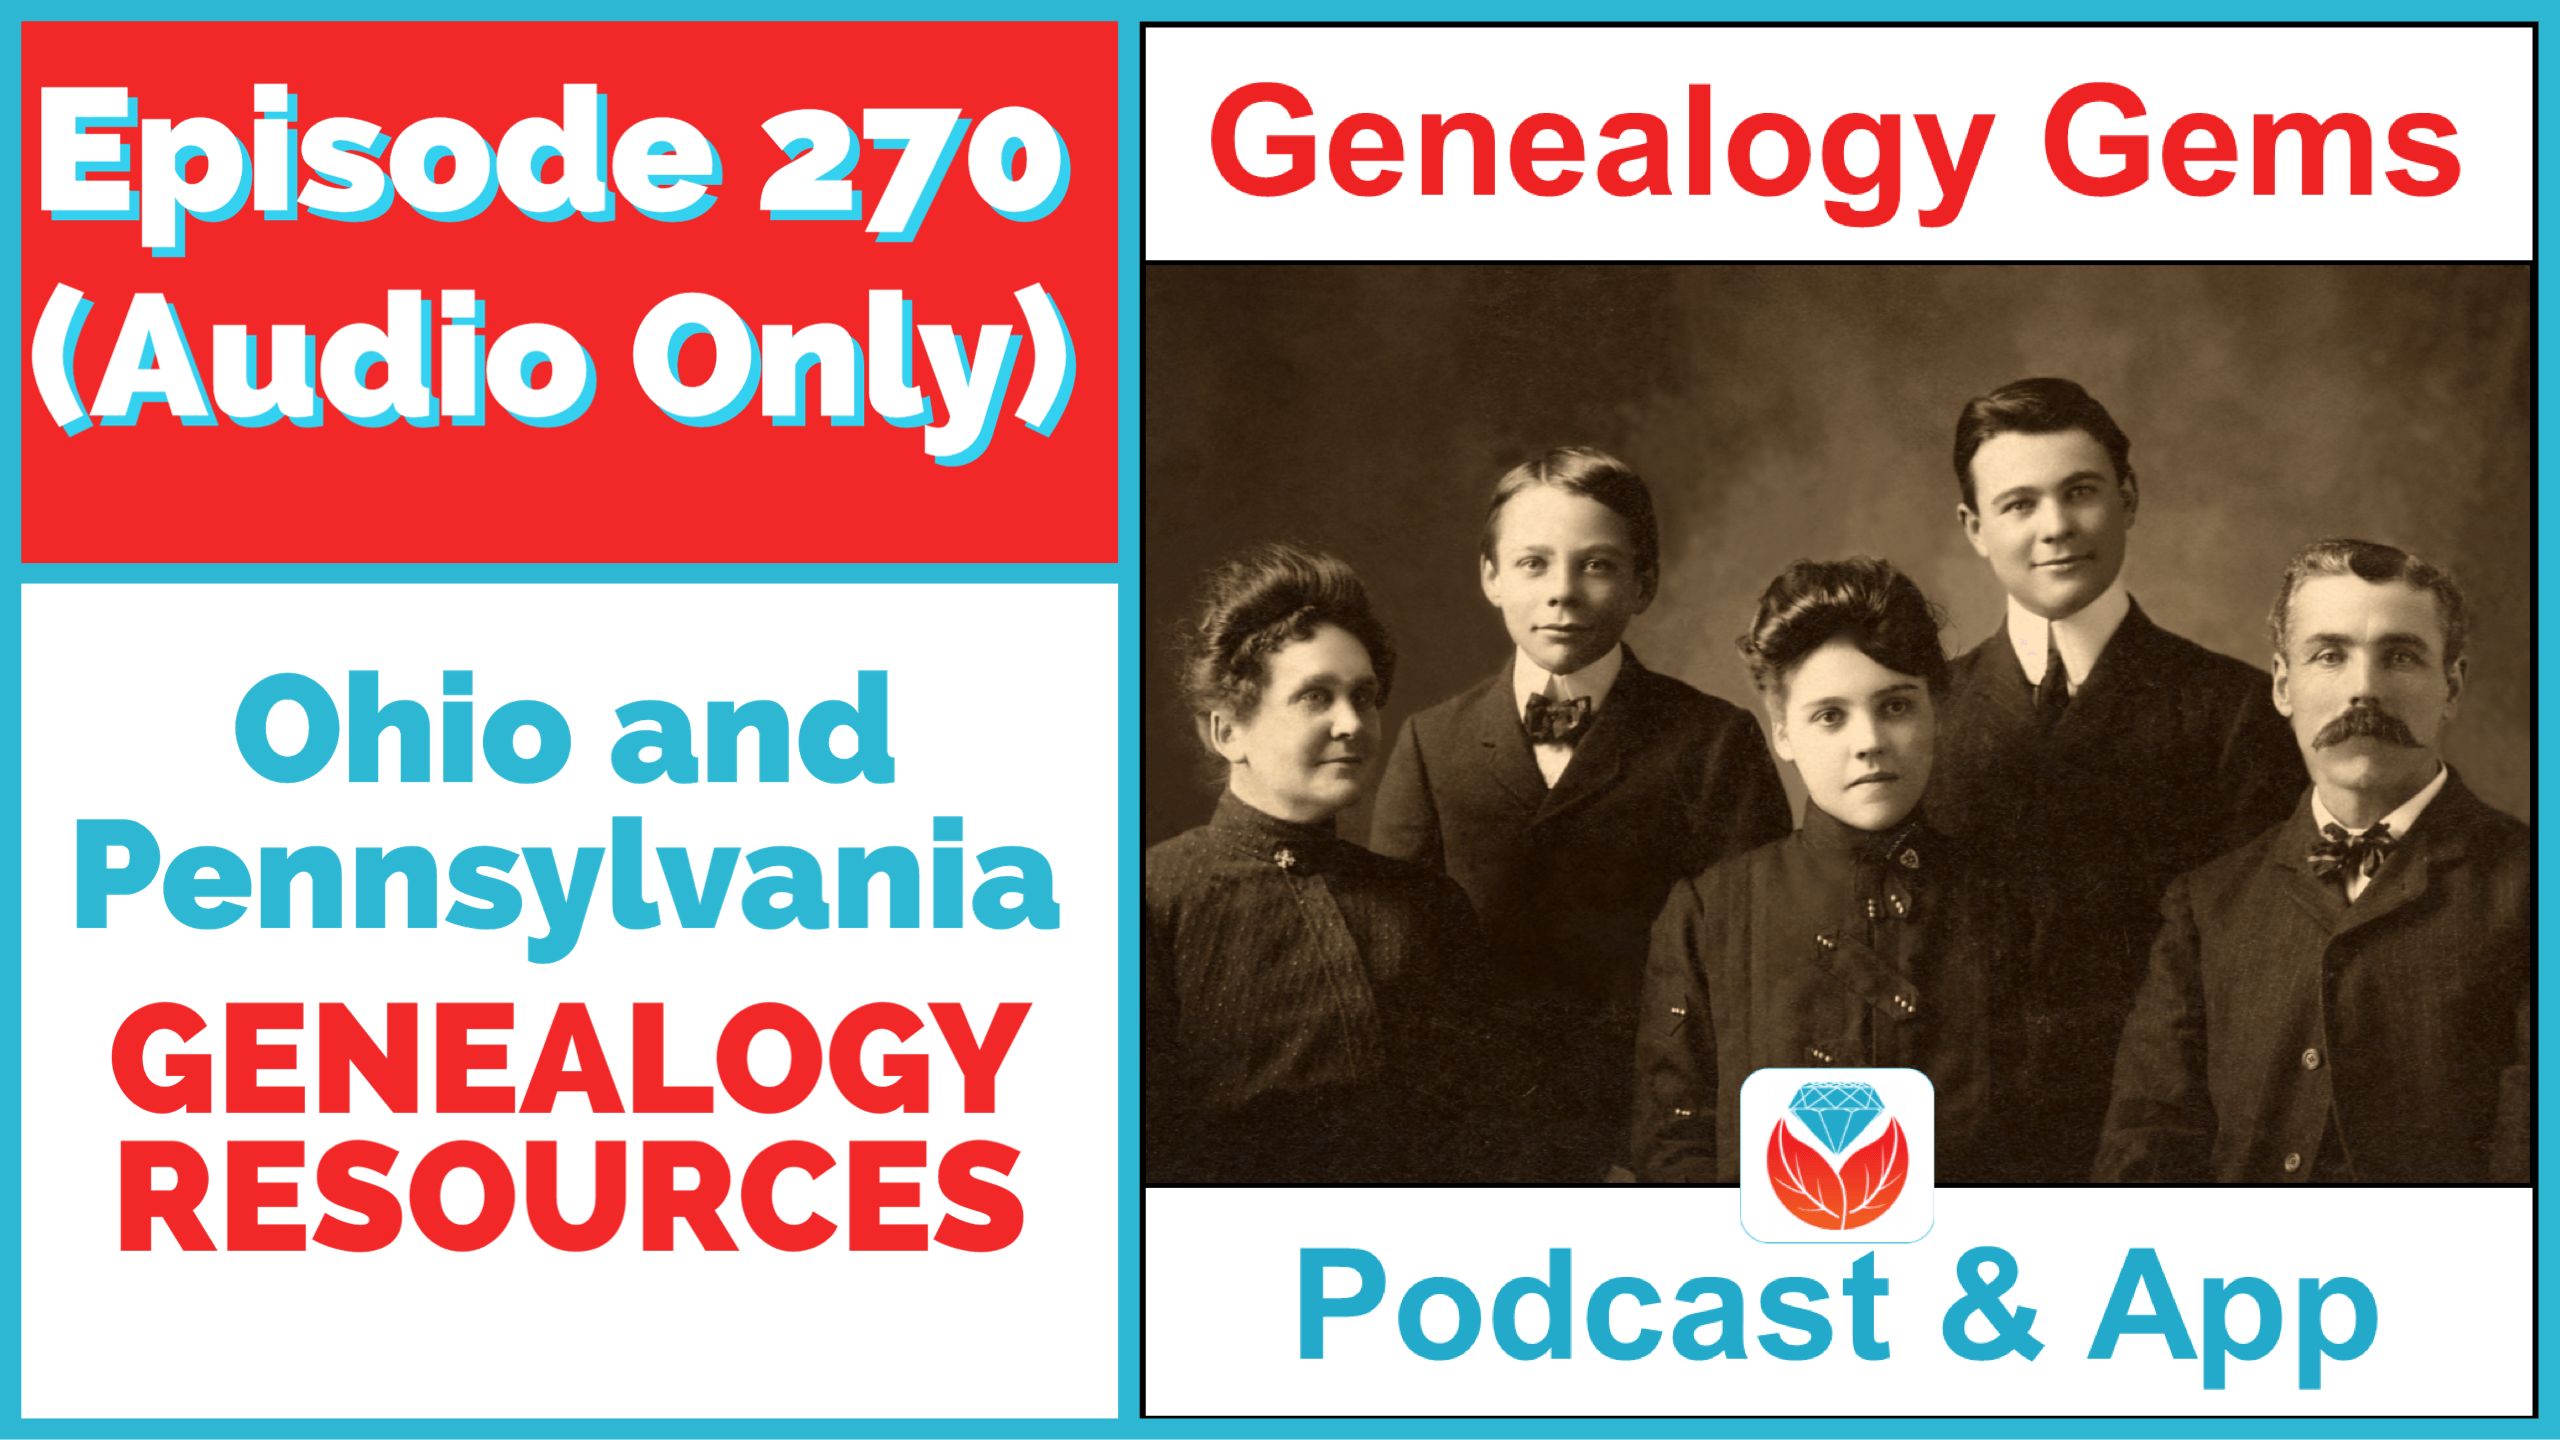
Pennsylvania and Ohio Genealogy – Podcast Episode 270
In this episode, we’re going to be visiting two of the most pivotal states in the U.S. for genealogy research. These states played key roles in the development and expansion of the United States of America, and we’re going to explore a top online resource for each.
First up is the state of Pennsylvania, officially known as the Commonwealth of Pennsylvania. It was founded in 1681 through a royal land grant to William Penn, and established as a haven for religious and political tolerance. And since for over 300 years the port of Philadelphia was a major gateway for arriving immigrants, many many family trees include people who passed through Pennsylvania. One of the best and most important resources for records of interest to genealogists is the State Library of Pennsylvania, and we’ll be exploring it today with Kathy Hale, the Government Documents Librarian, and Amy Woytovich, the Genealogy Librarian at the State Library of PA.
Then we will head west to Ohio which joined the union back in 1803, and where many of our ancestors settled, or passed through on their way West. The Ohio Memory website is a rich source of historical materials that tell the story of this state and potentially many American families. Jenni Salamon, the Ohio Memory Digital Services Manager will be joining me to explain the depth of the available materials and provide insight into how to best navigate the website.
Listen to the Podcast
Resources
- Downloadable ad-free show notes (Premium subscription required Become a Genealogy Gems Premium Member today.)
State Library of Pennsylvania
The State Library of Pennsylvania Background
The library has been a federal repository library since 1858, and is one of the oldest in the country. The government printing office deposits materials here.
The State Library of Pennsylvania Collection
The State Library of Pennsylvania physical collection includes:
- 30,000 volumes
- 100,000 reels of microfilm
- A million pieces of microfiche
The State Library of Pennsylvania digitized items include:
- County and family histories
- Local histories
- Small church histories from rural areas
- City directories
- Passenger lists
- Regimental histories (Revolution to Spanish-American War)
- Pension Lists
- Pennsylvania Published Archives (collection of military, government, marriage, immigration records from colonial times)
- The 1940 U.S. Federal Census
Pennsylvania Documents
Example: a report for Pennsylvania of the 25th and 50th anniversaries of the Battle of Gettysburg. Includes information gathered at reunions including names, pictures, and more.
U.S. Government Documents – Serial Set
This collection includes reports to the legislature from agencies and institutions. Example: The Daughters of the American Revolution (DAR) were compelled to provide to Congress a yearly report of the names of people approved by DAR. These can be accessed through many libraries, the federal government or by contacting the State Library of Pennsylvania via email: Ra-reflib@pa.gov
Library Research Guides
Amy discusses research guides available on the website. However, here is the link to the topics she specifically mentions such as Cemeteries and Zeamer collection – recorded information about Cumberland County PA cemeteries.
These research guide pages include links to additional helpful websites.
The Genealogy Page
At the top of the page look at the For General Public tab which will take you to all of the genealogy research guides. Visit the Genealogy page at the State Library of Pennsylvania.
Newspapers
The library’s collection of newspapers includes papers from all 67 Pennsylvania counties on microfilm. They do have a lot of digitized newspapers at the Pennsylvania Photos and Documents Collection at the Power Library.
The Power Library
You can find the Power Library by going to the libraries home page, and under the For General Public tab go to Our Collections > Power Library. Or visit the Power Library website at Powerlibrary.org.
Electronic Databases: you have to be a resident with a library card.
Digital Documents: you don’t have to be a Pennsylvanian to access this collection.
At the top of the Power Library home page on the right you’ll find Digital Docs and Photos.
There you will find many materials from Pennsylvania colleges including yearbooks. You can browse by subject area, with Genealogy being one of those areas.
Interlibrary Loan and Lookups
At the time of the interview the library was not open for interlibrary loan and lookups. Check the website for the latest updates.
The library does loan its newspaper microfilm. Up to 5 reels of microfilm per request. Kathy says that if you find a newspaper article at Newspapers.com and you see the title, date and the page that an article is on, you can provide the information to the interlibrary load reference librarian at your local library and place a request for a scan of the article from the State Library of PA microfilm. The article can then be returned to you digitally through interlibrary loan. The digitized scan is yours to keep.
The Librarians Favorite Collections
Amy’s Pick: Historic maps found at the library’s website Home > For General Public > Genealogy and Local History > Maps and Geographic Information. This includes Sanborn Fire Insurance Maps. Note: log in with a library card may be required. Contact the library with questions.
Kathy’s favorite collections include:
- Map Collection consisting of over 35,000 maps.
- The 5 generations from the Mayflower collection.
Usage of Materials
Usage rights and copyright are important considerations when utilizing library materials. Usage depends on the individual item’s copyright. It should be researched as much as possible. Check the meta data of digital images for copyright information.
State Library of Pennsylvania Help
“Think of Amy and I as your personal librarians.” Kathy Hale, Librarian
Contact State Library staff by phone at 717-787-2324 or by email at:
- Reference Questions: ra-reflib@pa.gov
- Law Reference: ra-law@pa.gov
- Interlibrary Loan: ra-ill@pa.gov
- Makerspace: ra-edmakerspace@pa.gov
Learn More About the State Library of PA Collections
In episode 43 of Elevenses with Lisa we discussed genealogy records available for free at the Internet Archive. The State Library of Pennsylvania has been partnering with he Internet Archive to digitize many additional items from their collection. You can access these items for free at the State Library Internet Archive Collection. This collection includes a large number of World War I materials as well as a growing number of 19th and 20th century pamphlet volumes.
Lisa’s Tips for Using the State Library of Pennsylvania Website
Maps for Genealogy
At the website go to Home page > General Public Tab > Our Collections > Search our Resources
- Type in a location and the word map
- Use the filters on the right side of the page > Library > State Library
- Click to select a map
- Try filtering to Full Text Online
- Look for the Online Access link, just above Text Item Call Number.
On the map viewer page, click the thumbnail button (looks like a checkerboard) to see multiple pages at a time. You’ll find the Download button in the bottom right-hand corner. The Print button is in the upper right corner.
Cite your source: Go back to the result page, and scroll down. Click the red button called Cite This. This allows you to copy the source citation which you can then paste into other documents and programs.
Newspapers for Genealogy
The Library of Congress Chronicling America website has many Pennsylvania old newspapers, but it doesn’t include all of the newspaper that the library has in its collection. Here’s how to find old Pennsylvania newspapers at the State Library website:
- On the State Library website go to General Public > Research Guides > Newspapers
- Click the link to the Pennsylvania Newspaper Archive
- Browse by title or date, or use the drop-down menus
- On the viewer page, zoom into the desired article. Then click Clip/Print Image
- Right-click on the clipped image to save it to your hard drive.
- The Persistent link is the URL address to your clipping.
Google Site Search Tip
This tip comes from my book The Genealogist’s Google Toolbox and my Premium Membership video The Genealogist’s Google Search Methodology.
Many websites have their own search engine. However, each search engine is only as good as it was programmed. If you can’t find what you want on a website like the State Library PA website, try using a Google site search. Site search tells Google to search for your search terms only on the website you specify. Here’s how to do it:
- Go to the library website
- Copy the home page link (remove the extra stuff to get down to the root address)
- Go to Google.com
- In the search field type in a keyword(s) (for example, a surname) then type a space, and then type site:
- Paste the website address that you copied right next to the colon. Do not put a space between site: and the address.
- Press Enter to run the search.
- The search results page will include pages from that website where Google found your search terms.
In my example in the video, you can see that Google found the one page mentioning the surname in a listing of microfilms much faster than I would have found it digging around and navigating the website itself. This page was not a card catalog entry so it would not have come up in a search of the catalog on the website.
On long pages such as in my example, I use Control + F (Windows. Command + F on Mac) to quickly find the surname on the page.
Our Sponsor for this episode:
Get 20% off Newspapers.com. Click here and use coupon code genealogygems

Record Collection #1: Ohio Memory
Website: https://ohiomemory.org
Special Guest: Jenni Salamon, Ohio Memory Digital Services Manager
If your family has any connection with the state of Ohio – and sometimes I think it’s hard to find anyone who doesn’t have at least one ancestor who did – then you’re going to love the Ohio Memory collection and website.
Even if you don’t have a direct connection with the state of Ohio, like all collections it’s worth taking a peek. Records don’t care about state lines, and many items in the Ohio Memory collection touch far beyond the Ohio border.
OhioMemory.org was featured in Family Tree Magazine’s 75 Best State Genealogy Websites list in a recent issue of the magazine. I host the Family Tree Magazine podcast, and recently had the opportunity to interview Ohio Memory’s Digital Services Manager, Jenni Salamon for that audio show. Since there’s so much to see at Ohio Memory I’m excited to share the video of that conversation.
What is Ohio Memory?
Ohio Memory is the collaborative digital library program of the Ohio History Connection and the State Library of Ohio. Established in 2000. It was originally established as a bicentennial project they wanted a way to capture some of Ohio’s history and share it more broadly. Ohio turned 200 years old in 2003.
Ohio Memory worked with institutions around the state to build the online collection. They picked their favorite collections which were then digitized and made available as an online scrapbook. Initial submission by 260 institutions resulted in over 13,000 contributed items, and Ohio Memory continues to grow.
Most of the contributing organizations are public libraries, and some are university libraries. Other organizations such as historical societies, government institutions, special libraries, religious archives also contribute to the collection.
What kind of genealogical resources are available at Ohio Memory?
A wide-variety of materials make up Ohio Memory including:
- Early Ohio state history
- American Indians
- The Civil War
- World War I
- Maps
- Drawings
- Paintings
- Archaeological artifacts
- Photographs
- Journals
- Objects
- Oral Histories (audio and video)
- Newspapers
- Yearbooks
- Present Day government records
All 88 Ohio counties are represented in the Ohio Memory collection.
Tips for Searching for Records at Ohio Memory
Everything at Ohio Memory is digital and keyword searchable thanks to Optical Character Recognition (OCR). However, they do sometimes connect back to other catalog records.
Search Tip: Finding Images at Ohio Memory
When you use the search box on the home page you will be searching both the text and the metadata provided by the contributor. If you want to search just visual items (photos, images, etc.) select “exclude full-text sources.”
It’s important to use keywords relevant to the time period that you are searching. Restrict your format to what you want right from the homepage.
Historical Newspapers at Ohio Memory
The newspaper collection of Ohio Memory does not overlap with the Library of Congress’ Chronicling America collection, but they are all part of the same story and collection. They have contributed a large amount of newspapers to Chronicling America over the years. At last count there are a million pages between the two collections.
Ohio Memory focuses on titles and time periods different from the content on Chronicling America. At Ohio Memory you’ll find deeper runs of newspapers and more recent newspapers. New newspaper content is being added regularly.
They also have some very early newspapers that are significant to Ohio history such as the Ohio State Journal which was the paper of record for Ohio during the 19th century. The Ohio State Journal collection covers 1830-1875 an important time period in Ohio’s growth and the Civil War.
The Lebanon Western Star newspaper from southwest Ohio near Cincinnati and Kings Island is another important newspaper. It covers Ohio history from a more rural area.
Old Yearbooks at Ohio Memory
A lot of Ohio Memory’s public library partners have access to yearbook collections through their partnerships with local schools. Many have worked to digitize their materials and put them on Ohio Memory. Some are quite early, some more recent although not very recent due to privacy concerns.
Many of the yearbooks at Ohio Memory come from northwest and northeast Ohio. You’ll also find student histories from southwest Ohio from a couple of universities, as well as other related materials such as student photos.
Is Ohio Memory Free?
Yes! They used to have one collection that was behind a pay wall. That was the Underground Railroad Wilbur H Siebert collection which features information about underground railroad activities in Ohio and beyond. It’s a strong resource for looking at research methods of the era, and the stories of how the underground railroad operated. That collection was opened up a couple of years ago and has remained free.
Ohio Memory Help Resources
Videos, an FAQ and search guides are available to help you learn how to dig into the Ohio Memory website. You can also reach Ohio Memory by email for additional assistance.
The Future of Ohio Memory
They continue to digitize and add new materials based on their strategic goals. Recently they focused on President Warren G. Harding since it is the 100th anniversary of his election. They are continuing to add more content to that collection.
Ohio Memory has about 40 active partners around the state that are choosing items from their own collections for inclusion. Examples include Wood County in northwest Ohio, Mount Saint Joseph University and the Sister of Charity in the Cincinnati area. They welcome new partners every year.
Copyright and Usage at Ohio Memory
While you may or may not find things specifically about your ancestors, Ohio Memory offers a wonderful opportunity to find things that help fill in their story and their community.
You are free to use items for educational and personal use without needing extra permission. If you’re a family historian and you are wanting to put a picture in a presentation for your family or you just want to keep it with your own research records, you are welcome to do so.
Jenni Salamon, Ohio Memory’s Digital Services Manager says that if you want to post something on social media, simply include a link back to the Ohio Memory site so others know where it came from Ohio Memory. If you want to use an item for a formal publication or commercial use, contact Ohio Memory. Copyright varies by item and research is required.
Our Sponsor: Visit Fort Wayne
Fort Wayne, Indiana is the home of the second-largest free genealogy library in the country. Make your plans to visit today. Learn more at https://www.visitfortwayne.com
Learn more about the free genealogy resources atVisitFortWayne.com
Become a Genealogy Gems Premium Member
Premium Members have exclusive access to:
- Video classes and downloadable handouts
- The Genealogy Gems Premium Podcast
- Downloadable ad-free show notes PDF handouts
Become a member here.
Genealogy Gems Podcast App
Don’t miss the Bonus audio for this episode. In the app, tap the gift box icon just under the media player. Get the app here.
Get the Free Genealogy Gems Newsletter
The Genealogy Gems email newsletter is the best way to stay informed about what’s available with your Premium eLearning Membership. Sign up today here.
Follow Lisa and Genealogy Gems on Social Media:
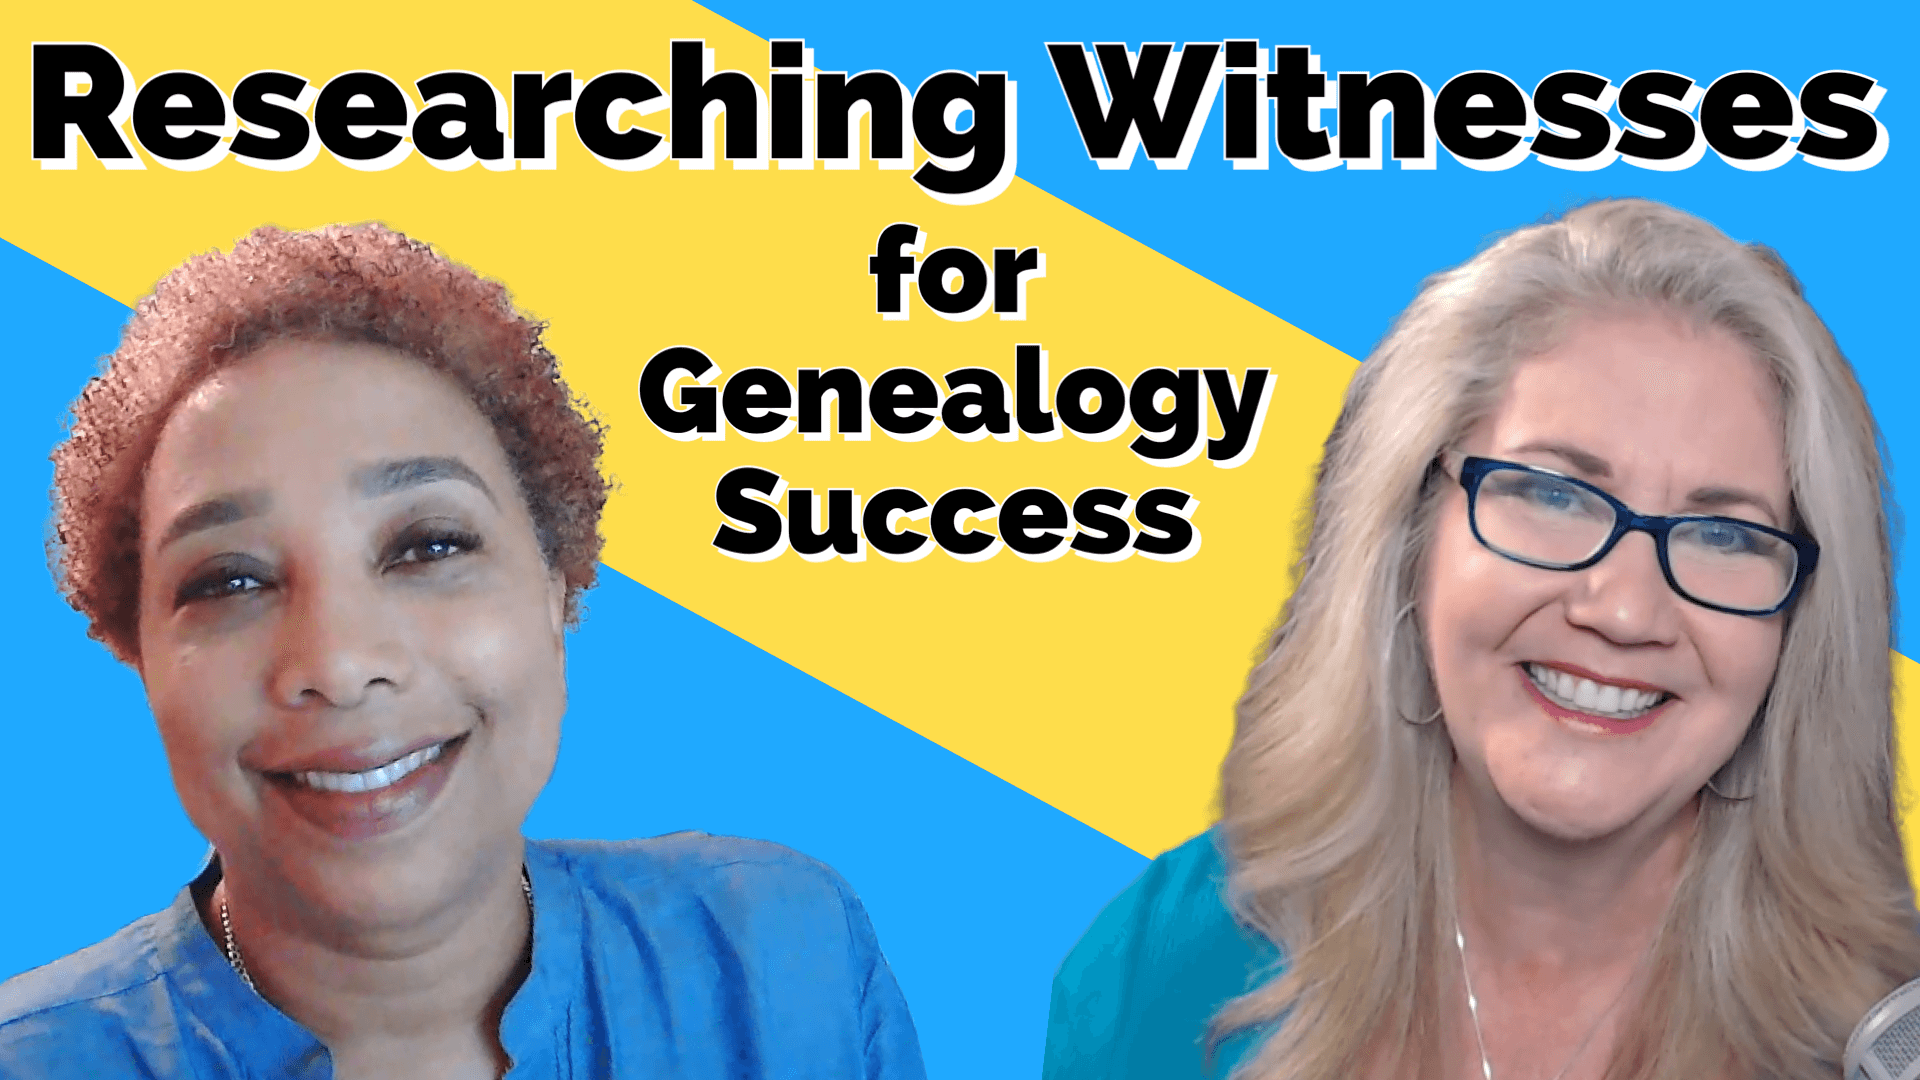
How to Research Witnesses for Genealogy Success
Show Notes: You may not have been around when your ancestors lived, but there were witnesses to the important events in their life. Genealogist Robyn Smith shares her 3 step process from her new Family Tree Magazine article called Witness Testimony.
Pin it on Pinterest! Free Genealogy Video
Get ready to find out how the witnesses named on your ancestors’ records can help you bust brick walls in your genealogy research!
Watch the Video Interview
Show Notes
(This interview has been minimally edited for clarity)
Downloadable ad-free handout with time stamps and links. (Premium Membership required)
Why You Should be Researching Witnesses
Lisa: I learned a lot from your article in family tree magazine. And I wanted to chat with you a little bit about that, because I think researching our ancestors’ witnesses is fascinating, and it’s something that people don’t always think about. We may focus on the names we recognize and not so much on the ones that we don’t. I’d love to have you give your “elevator speech” if you will, as to why people should be taking the time to research witnesses.
Robyn: Most of us in the genealogy community eventually hear about this thing called “cluster research”. We hear this phrase, the FAN club that genealogist Elizabeth Shown Mills describes, where we take a look at the Friends, Associates and Neighbors of our ancestors. I would consider witnesses and bondsman in that FAN club, in that cluster.
Simply put, witnesses can help us find more family. That’s the benefit of researching these individuals and the records in which they find them. We can break through some brick walls. And this type of research can also tell us about the community ties and some of the customs in that time and place. So, witnesses and bondsman are always my secret research strategy.
What is a Bondsman?
Lisa: You mentioned bondsman, and that might be a new term for some folks. We might be used to seeing perhaps an immigration record or a birth record, and we see witness. What is a bondsman?
Robyn: This is one of those terms in genealogy that has a slightly different meaning historically than it does today. By bondsman we just mean someone who pledges a sum of money as a bond for another. Sometimes in these records, we might see that they’re called a Surety. You might see that term used. The difference between that and a witness is that there’s a financial obligation involved. I always try to tell people, it’s similar to cosigning a loan today. Most of us would probably not cosign a loan for people that we didn’t trust or that we didn’t know very well. And so, if you can keep that concept in your mind, that’s the value and the benefit of researching those witnesses and bondsman.
Lisa: Yes, when there’s a financial tie, there’s some kind of relationship there. And I guess if we can research them, that might lead us back to even more records about our own ancestor.
Genealogical Records that Include Witnesses
What kind of records will we find them in? In what type of records are we going to find witnesses and even more specifically, this term bondsman?
Robyn: The big one we think of, of course, is marriage bonds. We hear that phrase a lot. We may see them in marriage records, almost all deeds are going to have some sort of witness involved, and wills. Also, in probate records we will see executors and administrators often have to have bonds. If you’re going to serve as guardian to someone, typically, that person has to have a bond as well. And so those are sort of the big ones.
We can also think of court cases, civil court cases when you’re trying to secure someone’s appearance at a future court meeting. And I actually have seen the courts go after that bondsman if that person doesn’t show up. So, some of these records can get pretty juicy.
And of course, I think a lot of us are probably familiar with pension, military pension records and southern claims.
The only thing that I would caution people to watch out for is sometimes the witness is really just the county clerk, a local lawyer or local justice of the peace. So, it’s in researching that witness or that bondsman that you’ll find out the relationship if there is any, to the person of interest that you’re researching.
Lisa: That’s a really good point.
The Goal of Researching Witnesses in Records
Do you go after witnesses primarily because you’re wondering if they are related? Or is it also about that FAN principle where they may not be related, but researching them might actually lead me to more records about my own ancestor because of their will, depending on what the relationship was? Do both of those play into the way you approach them?
Robyn: I would say both. I’m actually really excited when I see a witness or bondsman because the curiosity serves you very well, in genealogical research, as we know. It’s a good thing to be a nosy genealogist. I want to know, why is that person there? That’s the question that I’m trying to answer. And more than a few times, it has led me to more family that I didn’t know about, particularly if that individual had a different surname.
Now, another gotcha is that sometimes they end up in the records with just their initials. So, we first have got to confirm who that person is before we’re ready to say that they’re related to our person of interest. So, there are some cautions that we may need to be aware of as we’re doing this research. But it’s another stone to overturn as you’re doing your research. And I love it when I see a person listed in a record. I’m excited!
Lisa: Me too! I feel like oh, my gosh, I finally have another avenue that I can pursue, particularly in a brick wall situation.
3 Step Process for Researching Witnesses
In the article, you provide a three-step research process. Will you walk us briefly through that process?
Step 1: Transcribe the Document
Robyn: The first thing that I do when I find a document concerning my ancestor that has a witness or bondsman, is to transcribe the document. I want to make sure that we all are comfortable with the practice of transcribing. Transcription ensures that you are actually reading every single word in that document. It’s going to help you notice all of the details that you might miss if you are just looking at it in its current format.
There are a lot of great free tools available to us for transcribing. There’s GenScriber, or there’s Trint. I would also recommend Family Tree Magazine’s cheat sheet on reading old handwriting. That becomes very handy when you’re doing this transcription.
Step 2: Do the Research
The second step is to then do the research. I always say you want to research in a variety of records. I actually research the person as if they were my ancestor already. That means I’m looking in census records and deed records and court records and everything else trying to establish who this person is. And the things that we learn along the way, are not just that this person is in this time and place, which is very important to us as genealogists, but it also gives us a hint as to how old the person was. It also gives us a hint about their literacy in terms of whether they sign with their mark or whether they sign with a signature. It is in this second step, doing the deep research, that you probably will uncover whether or not the person is related to your family.
Step 3: Research the Law
The third step is to research the laws because as we know, laws governed everything about the sources that we use a genealogy. They’re going to govern who can serve as a witness and a bondsman, how old that person has to be, and also how many were necessary.
We need to be aware that these laws are going to differ from state to state or colony or a locale and also throughout time. I look at the published date laws that I can find in databases like Internet Archive and Hathi Trust and Google Books but you and also visit your local library, law library, or archive. You may have to do some deep digging.
Those are the three steps that I recommend: transcribe the document, research the individuals you find, and make sure that you research the laws.
Lisa: Fantastic advice!
The Power of Transcribing Genealogy Records
I’d love to ask you a little bit more about transcription because I think that is a step that can be tempting to skip. People think, oh, well, I read it, I want to get going! I want to add people to my tree, and they are tempted to not take the time to transcribe. Will you tell us a little bit more about transcription? Why should we take that time? And what are we looking for, instead of just typing the words?
Robyn: Transcription to me is one of the basics of one of the basic genealogical skills I think we need to master in order to be successful, particularly once we start going back further in time and encountering those much more complicated problems. And it’s one of those basics that will remind you, if you don’t do it over and over again, that there’s a reason why it’s recommended in genealogy.
I can’t tell you how many phrases I’ve realized that I don’t fully understand as I’m transcribing. And Step one is to understand what that document is telling you. So, if there’s a phrase that I come across, I might email an archivist, or I might call one of my genealogy friends who’s got a little bit more experience in that particular time and place. Transcribing helps us to do that, and it helps us to understand.
When I transcribe, I also typically turn it into an abstract. I’m also making sure that I do a citation. So, to me, those are the building blocks of successful genealogical research.
I would also include keeping a research log and have a research plan. Those to me are very critical research building blocks to long-term success in genealogy.
I understand the impulse to want to skip transcribing. But I can tell you over and over again that I come across phrases that I thought I knew, but once I’m transcribing it, I really realized that I don’t. There are lots of wonderful webinars and classes that you can take on transcription that can teach you simple rules when you’re transcribing, and they’re easy to learn. They’re not complicated rules. And I think that once you start doing it, you’ll get more comfortable with the process. It will really become second nature.
I hope that I can encourage everyone with our conversation to do more of that transcribing. I did a lot of it earlier, not necessarily knowing or understanding all the rules, and now I’m going back and sort of revisiting those documents. It’s always amazing when things will jump out at you that you didn’t notice before, or it just didn’t resonate.
I always recommend having a genealogy buddy. You can say to them, hey, can you take a look at this and tell me what you see? You can have a fresh set of eyes look at it and ask you a question. I’m a genealogy junkie, so I find all of this really, really exciting to me. I kind of lean into it. We’ve all got other things to do in our lives. I try to do an hour here and there; it might be an hour this weekend. But I’m sort of just always working towards a goal. And that transcription, I tell you, that’s a key first step!
Witness Research Example
Lisa: I don’t mean to put you on the spot, but do you have a witness story or just something that you spotted that you just would love to share with us?
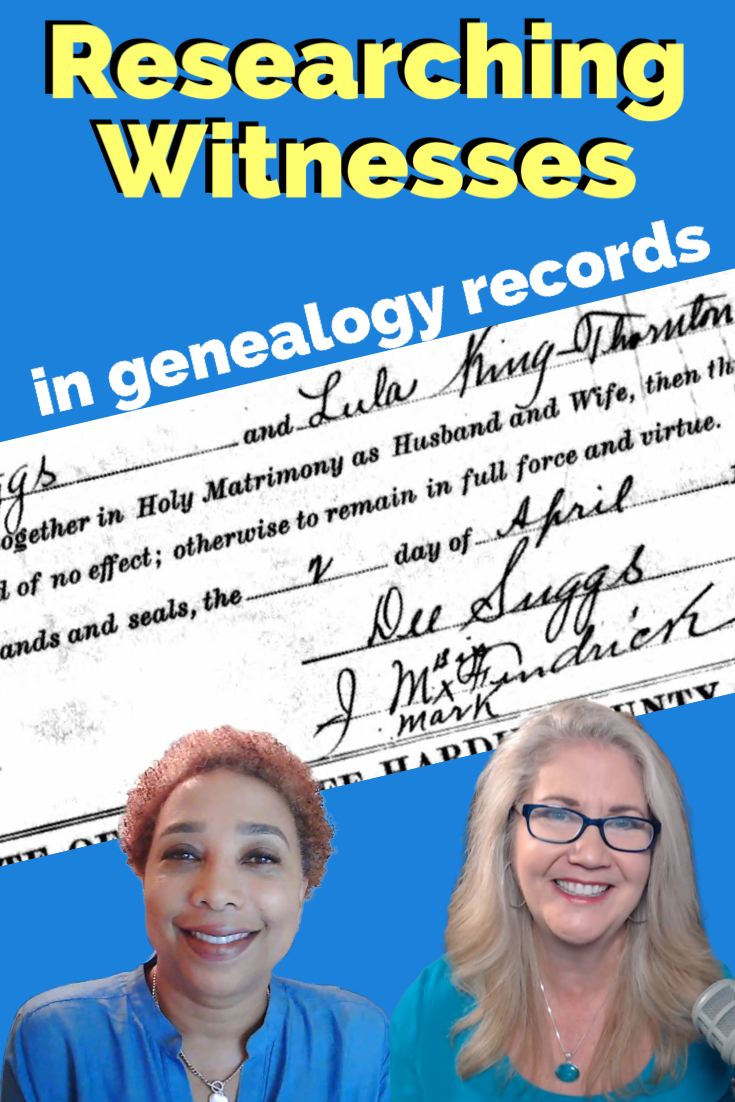
Robyn: I do! My mother’s family, my maternal family is from Tennessee. I was researching my second great-grandfather, Mike Fenricks in Tennessee, where he lived. Almost every source in his life asserts that he was born in Alabama. And so, this is a problem that a lot of genealogists have. I had no idea where in Alabama I’m even though I thoroughly went through all of the sources that were available in that time and place.
I noticed that he served as bondsman to a man named Dee Suggs. And then I noticed that he jointly took a couple of sharecropping deeds with this same man Dee Suggs.
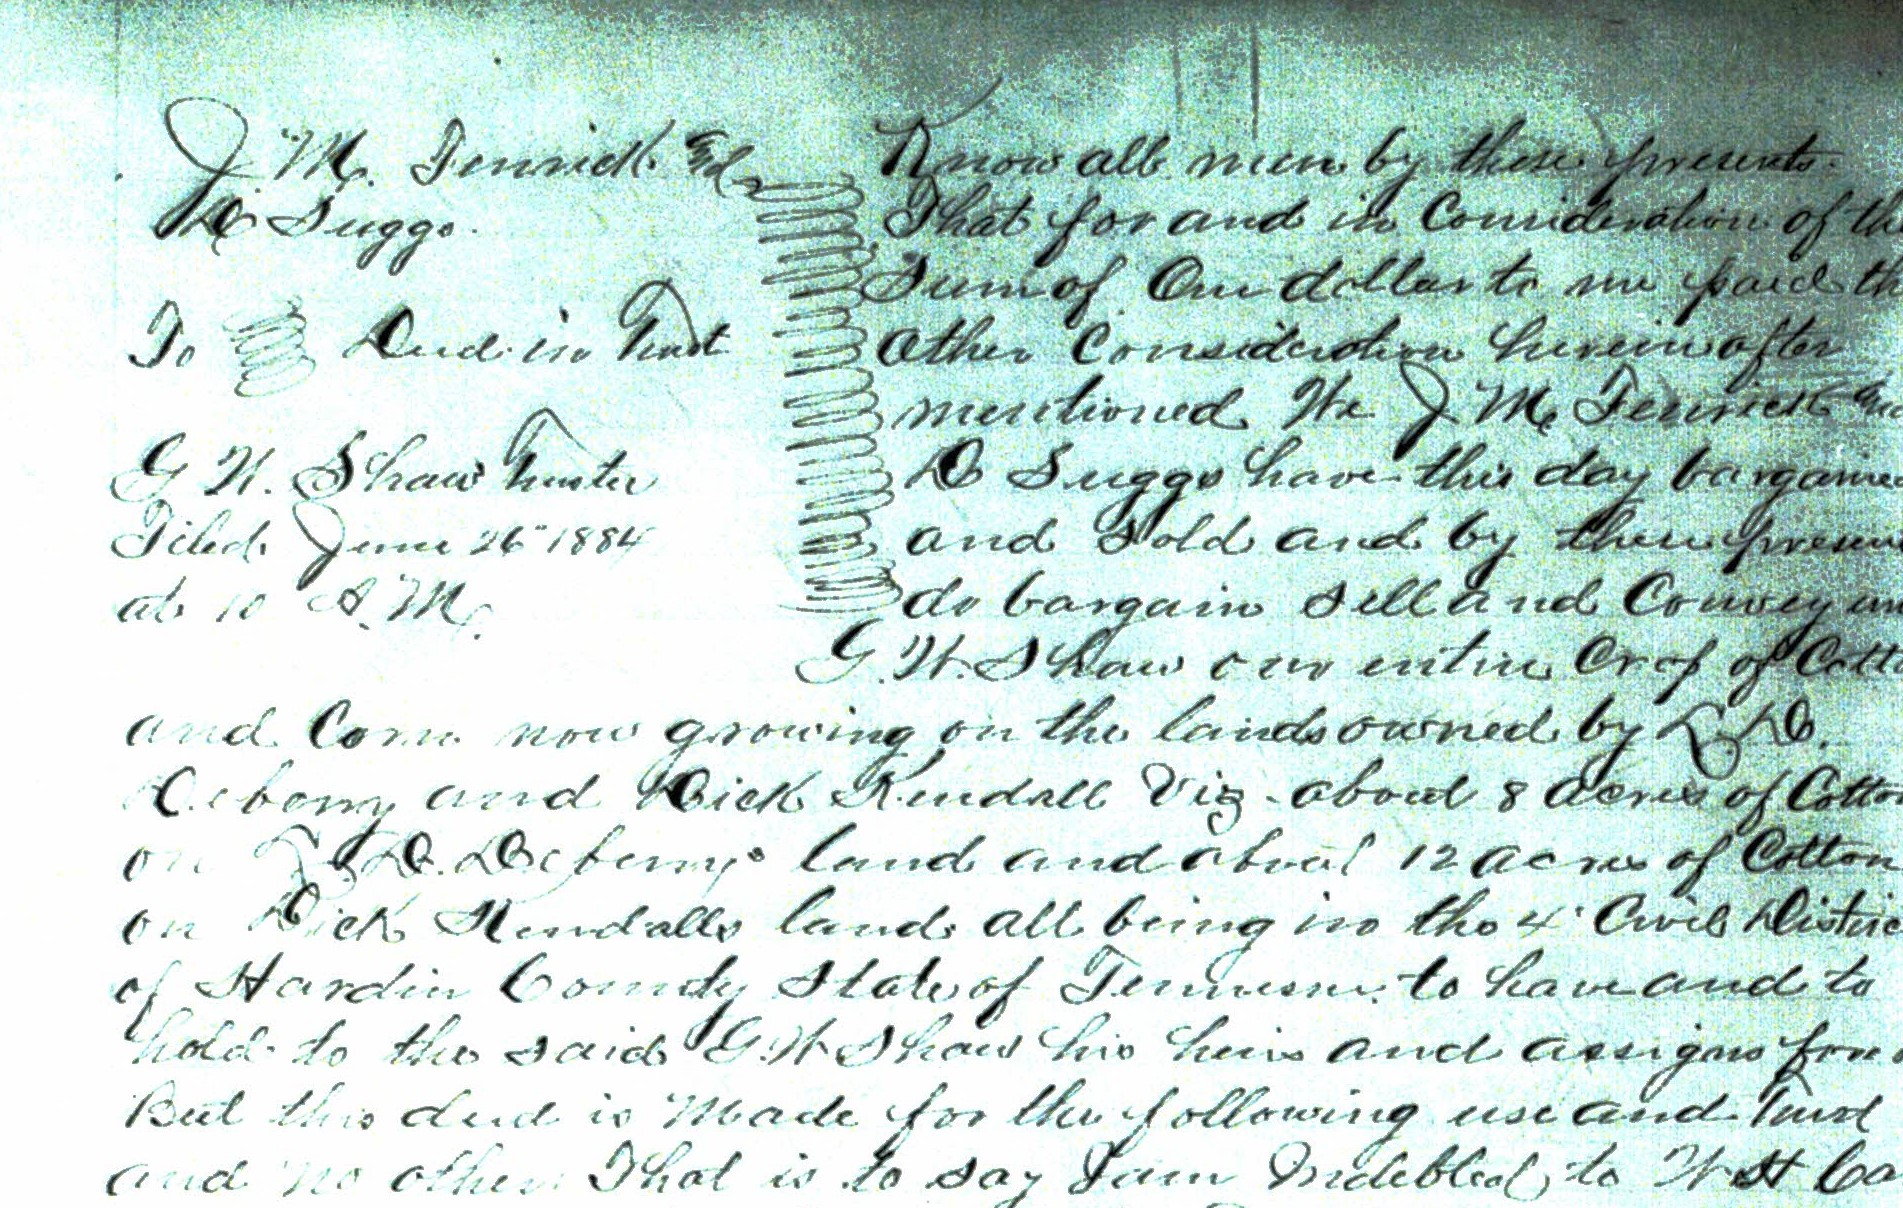
Sharecropping Deed: JM Fenrick and Dee Suggs
I also found him living in Dee Suggs’ house in 1920. So, the wheels start turning! Why is he interacting with this man and Dee Suggs who was also born in Alabama?

The Dee Suggs household in the 1920 U.S. Federal Census
So, when the records ran out, for my ancestor, I started researching Dee Suggs. And where did this witness lead me? Dee Suggs led me back to Lawrence County, Alabama. And in that 1870 census household was a man named Mike. And that man ended up being his brother, it was his half-brother. And the same man is my second great, great grandfather. They had migrated to Tennessee together. They had been formerly enslaved, and I found a Freedmen’s Bureau contract that their mother signed where she calls all of them, her children. The 1870 census doesn’t provide relationships, so I had that critical labor contract that said, Sofrona and her four children. And so, it makes all the sense in the world why he’s associating with him and living with him, and jointly, promising bond for him. It is because they were half-brothers!
Lisa: I knew you’d have a great story!
Robyn: That story is the crux of my cluster genealogy lecture that I do. I go into more details, but following Dee is what led me to that community and his place of origin in northern Alabama. It was very exciting.
Learn more about Robyn Smith
Lisa: And I know you bring many stories to your readers at Reclaiming Kin. Please tell us the URL address and what they will find there at your website.
Robyn: Thank you so much. The URL is www.reclaimingkin.com. I call it a genealogy teaching blog, and what I mean by that is, I might start off with something from my family history, but every single post is meant to teach a skill. And so, every post there talks about a methodology, a strategy or resource. It’s not just about my family history, it’s about helping all genealogists to grow their skills, and also meet the special challenges of researching the enslaved. I’d be really happy if your listeners would come to the blog, take a look, sign up for my mailing list. And I’ll send you a free PDF, all my favorite research tips.
Lisa: Robyn, thank you so much. We’ll all look forward to your article Witness Testimony in the Family Tree Magazine Jan / Feb 2023 issue. And I look forward to hopefully talking to you again soon.
Robyn: Thank you so much for having me on today, Lisa.
Learn more about Transcription
There’s so much more to learn about doing transcriptions! Check out my full-length Premium video class called Transcribing and Analyzing Historical Documents. It’s part of Premium Membership, and it is going to tell you everything you need to know about how to do transcription, the tools that I recommend, and so much more. And along with that video class, you also get the downloadable handout. Becoming a premium member has a lot of perks. Learn more here.
Resources
Downloadable ad-free Show Notes handout for Premium Members.