Family History Episode 42: How to Start a Genealogy Blog, Part 5

Family History: Genealogy Made Easy Podcast
with Lisa Louise Cooke
Republished August 26, 2014

family history genealogy made easy podcast

Free podcast – available in all major podcast apps.


https://lisalouisecooke.com/familyhistorypodcast/audio/fh42.mp3

Download the Show Notes for this Episode

Welcome to this step-by-step series for beginning genealogists—and more experienced ones who want to brush up or learn something new. I first ran this series in 2008-09. So many people have asked about it, I’m bringing it back in weekly segments.

In today’s episode we finish a multi-part, step-by-step series on setting up your own family history blog. In episode 40 you decided what the purpose of your blog is, and we got you started with the free Blogger web site and picked out your blog name and set up the web address for it, and got the basic framework started. In episode 41 two seasoned bloggers inspired us with their posts.

In this episode I talk about adding a few more gadgets and details, doing a bit of pre-planning for your blog posts, publishing your first article, and then talking about how your readers will subscribe to your blog. You’ll also get great tips on how to create genealogy content that others looking for the same ancestors can find easily online.

Episode 42: How to Start a Genealogy Blog, Part 5

OK, let’s head back to the new blog we created in Episode 40. I named mine Blog Your Family History. (This is just a sample blog: my current blog is part of the Genealogy Gems website.) Please note: blogging platforms change over time. The features and layouts I mention have been updated. Just watch for similar features in newer versions of the blog platform.

So far I have the basic layout set up and I added the vintage photograph of the three ladies sharing some written correspondence. If you’re not signed in to your Google account, you’ll notice a link in the upper right corner of your blog page that says “sign in.” You’ll need to click that and enter your user name and password to get access to your blog dashboard – the area where you customize your blog and write your blog posts.

When you sign in you’ll be taken to the dashboard area for your blog. In my case I have a couple of blogs, so they’ll all be listed here in the dashboard. To get back to your blog just click the View Blog link for the blog you want to view. You’ll notice that when you get there the link in the upper right corner now says “sign out” so you know right now you’re signed in. To get back to the dashboard where we can continue customizing the blog, just click the Customize link in the upper right hand corner of the blog. So far we have a couple of “gadgets” or sections of our blog:

  • the title area at the top;
  • the blog posts box. In the case of the blog I’m creating here the gadgets run along the right hand side of the blog page.
  • About Me
  • the gadget with the photo I added
  • A followers gadget showing other blogger readers
  • the blog archive gadget – this is where readers can access blog posts that are over a month old.

So let’s add another gadget by clicking the Add Gadget link in the top gadget box and a window will pop up showing us out options. I’d like to add a search box so that my readers can easily find articles with keywords they are interested in. So just click the plus sign to add the Search gadget and a Configure Search Box window pops up so I can fine tune this gadget the way I want it. So I’ll keep the title as “Search this blog” since that’s pretty straightforward, and I’m going to just have it search this blog so I will keep that check box checked. And click the SAVE button and now I have a Search box on my blog.

So as you can see adding various gadgets to your blog is easy and you can customize them to appear the way you want. And remember you can rearrange them on your dashboard by just clicking and dragging them into the position you want. Once you get the elements of your blog the way you like them – at least for now, and you can certainly make changes any time you want – then it’s time to start blogging.

What to blog about?

Hopefully you’ve decided what you want to blog about – perhaps a specific line of your family, or maybe you’re going to just sort of journal what you work on each day. No matter what approach you take, there are a few things to keep in mind. First, each time you write an article and publish it to your blog page it’s called a “post.” Post is sort of interchangeable with article, and posting is another word for publishing – basically you’ve made the article available on the web.

When you do post an article you will want people—particularly other researchers—to be able to find it. You’ll have better success attracting readers who are researching the same families if you sort of put yourself in their shoes. Ask yourself, what will they be searching on? When someone goes to Google and starts looking for blogs about their family trees, they are using keywords to do that search.

So while you may have some very creative ideas for blog post titles, if you don’t include some of those important keywords (or at a minimum the surnames) they may never find you. And of course sprinkling keywords into your post will also increase its chances of being found. And when we talk about keywords, we’re also talking about key phrases, such as family history, or family tree. Other good keywords are genealogy, birth, death, research, location names, etc. Just the kinds of things you would search on if you were looking for people writing about your ancestors. Remember too that an ancestor’s name is also a keyword phrase.

It’s a good idea to mix it up because you never know how someone else will be searching. For example, I research my husband’s great great grandfather Senator C J Larson of Winthrop MN. So if I’m writing about him, I will use several variations of his name:

  • C J Larson
  • Carl Johan Larson
  • Charles Larson
  • Charles J Larson
  • Senator C J Larson

And of course when I use these names in combination with Winthrop, Sibley County, Minnesota, I’m bound to be found by someone also researching him and his family.

Publish your first post

OK, well let’s get right to how to publish your first blog post. At your blog Dashboard (if you’re not there just click the link in the upper right corner that says Dashboard) and click NEW POST. This is like getting a new piece of paper. You’re new post is under the Posting tab and there’s a box where you can write your text and there are some formatting buttons along the top.

My advice is to bite off small chunks. People tend to read something that looks more like a magazine article rather than a novel. And it’s easier to focus in on one topic at a time. So you may want to make your first post a welcome message and explain to your readers what they’ll will be seeing in the future on your blog. I know, you don’t have any readers yet, but since all of your posts are archived, this post will be read tomorrow and two years from now. New readers can find you at any time, and they may very likely take a look at your first post.

The first thing to do is write your post title. I used to wait to title my posts until after I wrote them because writing them often brought to mind the perfect title. But the problem with that is that so often I would forget to go back and type a title in and I would end up publishing without the title. While you can go back and add the title later, it may show up in your readers RSS feeds including those who subscribe to your blog by email. So I find that it works best if I give it the best working title I can come up with, then I write the post, and then I can go back and change it if I want, but if I forget it will at least have a basic title.

Also, remember that your readers probably have many blogs they read – but they probably don’t READ them all, the probably scan the titles and click through to read the ones that sound interesting. So your title has an important job to do. Like the blog text it should contain keywords that will help the post show up in search results, AND it needs to catch your readers’ attention.

When I first started blogging I was always trying to come up with title that as clearly as possible explained what the post was about. But over time I realized that we don’t have to explain it all in the title. In fact, being a bit mysterious or intriguing with the title can entice the reader to click through and read. They’ll find out soon enough all the details of your posting, but your title sets the tone, and catches their curiosity. Of course I don’t advocate bait and switch – but have fun with your titles and use it to your best advantage. And now FINALLY it’s time to actually write your blog post! Of course you can unleash your creativity here, but I do have a few suggestions:

  1. Keep your paragraphs shorter rather than longer – it just makes them easier and quicker to read
  2. Incorporate those keywords and phrases
  3. A picture says a thousand words – add images whenever possible and I’ll show you how in just a moment
  4. Write in your natural voice. Typically blogs aren’t formal, and you will have an easier time writing if you write more like you speak. And that will come across as more genuine to your readers.
  5. Don’t bite off more than you can chew. If you have a lot to say on a particular topic, consider publishing your thoughts in a series of blog posts rather than one really long one. And I find that readers really like following a series.

Once you’ve got it written up, it’s time to a bit of formatting. In Blogger there are a few different fonts you can choose from. Just like in Microsoft word, you highlight the text you want to format and then select from the drop down menu which font, and font size you want. The default font and size might be just fine, but it’s nice to know you do have some flexibility. You can also bold and italicize text by highlighting the text and clicking either button. And like Word you can use Control-B on your computer keyboard for bold and Control I for italicize. You can also put your text in a different color. Again just highlight the text to be changed and click on the capital T button with the color boxes and click on the color you want.

Now a word about formatting. Remember when we discussed that it was a good idea to avoid blog template designs that had dark backgrounds with light type because they are hard on the eyes and difficult to read? Well, over doing text formatting is much the same. It can get hard on the eyes. It’s like the rule of thumb that says you don’t type in capital letters because it looks like you’re screaming at the reader.

Well, overdoing the formatting with a ton of bold and italics and colors just ends up looking chaotic and nothing really ends up standing out. So keep in mind that less is more and use it sparingly so that only the most important things stand out. And just like in Word you can select whether your text is left right or centered justified, or fully justified. And you can create numbered and bulleted lists simply by highlight the text and clicking one of those buttons. And you can also use the Block Quote feature to set text apart as a quotation by indenting it from both sides.

With all of these formatting features you will probably want to see what it will look like to your readers. And that will be different to a certain extent than how it looks here in the post editor. To see it as it will look when posted, click the Preview link in the upper right corner of the text box. When you’re in preview mode the link will then say Hide Preview and to go back to editing or what they call Compose mode just click that Hide Preview link.

Next is the Spell check button, which is something you’ll want to use every time you post. Thankfully if you make a spelling error you can fix it after it’s posted, but it’s so much easier just to run the spell check before you do. There are a couple of more things you can add to this text post to spice it up.

The next button is the Add Image button and it does just that, adds your images and photos. When you click the button an Upload Images window pops up where you can browse your computer hard drive and locate the image you want to add, or if you have a website you can type in the URL address for an image you already have hosted on your website and it will use that image. Keep in mind that Blogger has an 8 MB image size limit, so you might have to reduce some of your photos and save them as smaller files to be uploaded to Blogger. This is often the case when you’ve scanned old family photos at high resolutions that create quite large files.

Once you’ve told Blogger which image to use, you can also choose how you want it to appear on the page on the left, in the center or on the right with the text around it, or you can just leave it as None. And you can also choose whether it is Small, Medium or Large. When you’re ready to go just click the orange Upload Image button and in a few moments it will be processed and you can just click the Done button, the window will close, and your image will now be in your blog post. Again, if you want to see for sure how it will look to your readers just click the Preview link.

You can even upload a video to your blog post. It works much the same way. Click the video upload button. A window pops up and you click the Browse button to locate the video on your hard drive. Blogger will accept AVI, MPEG, QuickTime, Real, and Windows Media video files up to 100 MB in size which is typically about 10 minutes at most. They also have rules about the kind of videos you can upload and require you to click the check box to agree to their terms of service, and then you just click the orange Upload Video button.

Videos take a few minutes to upload, so at first you’ll see the Blogger Uploading Video screen on the video player. You’ll see down at the bottom that it is processing. Once your video appears on the screen then you’re ready to go. If you don’t want to wait while it finishes processing you can click the SAVE button on your post and check back later to make sure it’s complete before Publishing.

And finally, if you decide you want to remove the formatting from you text you can do so with the last button which looks like an eraser. It’s called Remove Formatting from Selection. So in the case of the text that I set apart as a quote, if I want to change it back to regular text, I just highlight the text with my mouse and click the Eraser button and it will go back to normal. If you happen to know HTML you can click the HTML tab and work with your blog post code to further customize it. When you’re done just click the Compose tab to go back to regular editing mode.

Once you have everything formatted, you’ve spell checked and you’ve reconfirmed your title, your ready to send it out to the world! Just click the orange Publish Now button and it will immediately be live on your blog. The next window will say Your blog post published successfully! And you can just click the View Blog link to open a new window and see your published post.

Edit your previous posts

Now if you’re like me then occasionally you’re going to want to go back and edit one of your blog postings. And thankfully that’s very easy to do. Just head back to your Blogger Dashboard and next to the blue New Post button which you would click to create another post, you’ll find the Edit posts link. Just click that and you will see the articles you’ve posted with the most recent one at the top. If you wanted to delete the post all together you just go to the right hand side and click the Delete link for that particular post. To edit the post click the Edit link on the far left side of the post title. This takes you write back into Compose mode and you can make any changes you want. When you’re done, just click the Publish button.

Schedule posts to publish in the future

Do you want to write several posts at once, and have them automatically publish one at a time—once a day, once a week, etc? There’s an easy way to set up your posts to publish in the future. At the bottom of the Text box you’ll see a link called Post Options, just click that. This will expand the box and give you some options. Here you can enter the date and the time that you want the post to go live online. Once you’ve typed that in then just click the Publish button. It won’t be live right now, but will be published at the date and time you specified.

When I first started using this feature I kept clicking SAVE and then wondering why my posts didn’t publish at the right time. But you have to click the Publish button even though you’re not publishing at that very moment. It’s a neat feature, and works great when you’re going to be away but want articles to be published each day. Or like when we talked about breaking up a long article into a series of short articles, you could create them all and then set them to publish once a day or whatever time frame you preferred.

Now you probably noticed that you could also check a box in the Post Options for allowing your readers to post comments. But the best place to set that up is under the Settings Tab. So go to your dashboard, and click Settings. This will take you to the Settings tab which offers a lot of options. Click on the Comments menu link and here’s where you can make your selections as to how you would like your readers to be able to interact with you and your blog. Instant communication and connection with your readers is one of the really unique aspects of blogging, and you’ll find that most folks who read genealogy blogs are interested in a civil conversation. So let’s go through the options here.

  • Show: I usually have this set to show comments. But you can hide them if you want.
  • Under Who Can Comment? I would recommend that you allow anyone to comment. After all, you don’t want to prevent that long lost cousin who finds your family history blog in a search to not be able to contact you.
  • For Comment Form Placement that’s just a personal preference, but I find the pop up window is easy for readers to use.
  • Another important feature among these settings is the Comment message. And then next you’ll find Comment Moderation. I would recommend that you always moderate your comments, at least to start. This means that when a reader leaves a comment you will have the opportunity to read it and approve it to be published in the Comments section of that blog posting. That way you can eliminate offensive comments. Honestly, I’ve never received anything objectionable, but occasionally I do get people who are fishing for business and simply post “I like your blog” so that they can then tell about their company and give their website address. There’s no harm in setting it to Always and you can change it later if you want.
  • Then at the bottom of the Comments Setting I like to type in my email address so that I’ll be notified by email if someone leaves a comment that needs to be moderated. And you moderate and approve comments in your Blogger dashboard.

When you’re done just click the orange SAVE SETTINGS button. And again, you can change these settings any time you want. So how do you moderate reader comments? Well, just click on the Posting Tab, and there will be three options:

  1. New post
  2. Edit Posts
  3. Moderate Comments – just click that link. And if you have comments that need to reviewed and approved or deleted you can do it there.

Let readers subscribe to your blog

And finally, let’s talk about how your readers can subscribe to your blog. That’s the other really cool thing about blogging. Each of your new blog articles can be automatically sent to your readers who subscribe. It’s just like subscribing to a magazine. We subscribe to a magazine so we don’t have to go to the store every day to check to see if a new issue has arrived. Subscribing to a blog is the same idea but of course it’s free. And like magazines being delivered to your mailbox, blog posts can be delivered to your readers blog Reader, or email box.

Your readers subscribe to your blog through your RSS feed. RSS stands for Really Simple Syndication which just means an easy way to send out your posts. But you don’t have to know anything about RSS feeds. Blogger does it all for you and I’m really surprised how many bloggers don’t bother to make it easy for their readers to subscribe. Not everyone who wants to subscribe to your blog will quite know how to do it, or be an experienced blog subscriber. You will want to make it as easy as possible for them to get started. Here’s an easy way to do it.

  1. Go to http://www.google.com/webmasters/add.html. Here you can add an “Add to Google” button to your blog. That way your readers can easily add your blog to their iGoogle homepage or to Google Reader, a tool they can use to receive and read blogs.
  2. For Choose your content type select RSS.
  3. Under Promoting select one blog.
  4. Select the style of button you want to put on your blog
  5. Type your blog address into the box, which needs to be your rss feed. In my case, it’s http://blogyourfamilyhistory.blogspot.com/feeds/posts/default?alt=rss. You substitute your blog name in where mine is currently (your blog name in that link instead of blogyourfamilyhistory).
  6. Click the Generate HTML button. The html code you need to add your button will automatically appear in the box, and it’s already highlighted for you so all you need to do is Control C on your keyboard to copy the code to your computer’s clipboard, and then head back to your Blog dashboard.
  7. Click Layout.
  8. Click Add a Gadget.
  9. Click the HTML / Java Gadget. A window will pop up where you can type in a title such as “Subscribe to this blog.”
  10. In the big box press Control V to paste the HTML code that you copied into the box.
  11. Click the SAVE button.
  12. Back on your Layout page you’ll see at the top that you the “page element has been added” and now the top gadget is “Subscribe to this blog”

Want to see what it looks like? Just click the blue PREVIEW button at the top and it your blog will open up in a new window and there you will see the “Add to Google” button. Now EVERYONE can subscribe and follow your blog quickly and easily. Just close that window, and click the orange SAVE button on your layout page. Now click View Blog and try it out for yourself.

Note: I talk here about iGoogle, which is no longer available.

Add the blog to Google Reader to receive each new blog post when it’s published, and have a link to click through directly to the articles and the blog. It’s very convenient and keeps your blog on the minds and lists of your readers. Now you’re all set to go. You can post your articles, which your readers can follow. As you have more time you can fine tune the settings and layout of your blog. Have fun! Best wishes for connecting with other researchers around the world.

Blogging Tip:

In response to one of our recent tips, a reader named Sarah pointed out that there are services now to “slurp up” blogs and publish them into books. We’ll tell you about one service, but encourage you to shop around. At Sarah’s recommendation, we looked into Blurb.com. According to Blurb’s Web site, this online program works with several blogging platforms including Blogger, LiveJournal, TypePad and WordPress.com.

You can customize and edit your book in real time. The automatic slurp action imports and maps blog text, images and comments and then links it into professionally designed page layouts. What an exciting way to preserve your family history. What a great Christmas gift or Mother’s Day gift.

Once you are ready to publish your book, you can control the price by buying a hardcover, dust jacket, soft cover and other designs. These books can be up to 440 pages and as few as 40. Have a blog book within 10 days of ordering. Now, as you can imagine, this is a little pricey but still very, very reasonable. Prices start at just $12.95 for a 40-page softcover and go up from there. You get bookmaking software free!

FTM’s 101 Best Genealogy Websites: Here’s the Latest List!

Family Tree Magazine has released its newest list of 101 best genealogy websites–and we’re on the list! This year’s list is all about the best free genealogy websites–for US.research, military records, tech tools and more. 

Each year, Family Tree Magazine publishes its list of the 101 best genealogy websites. They love sharing their favorite sites with readers and honoring those who create these sites. We just heard that the new list is out–and we’re on it!

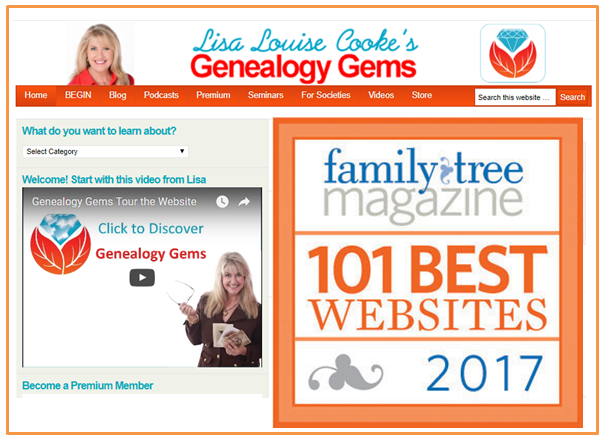
This year, the list focuses on websites that provide genealogy information and records for free. Categories include:

  • Big genealogy websites
  • Online vital and grave records
  • Military genealogy websites
  • Genealogy immigration websites
  • Genealogy map websites
  • Old newspaper genealogy websites
  • Genealogy library websites
  • US genealogy websites
  • Websites for sharing your genealogy
  • Online genealogy technology tools
  • UK & Irish genealogy websites
  • International genealogy websites
  • Genealogy social history websites
  • Online genealogy tips and help

Genealogy Gems appears in that final category. Here’s what Family Tree Magazine has to say about us:

More than 200 free podcast episodes with research experts make Lisa Louise Cooke’s “genealogy radio” website a must, along with how-to videos, a genealogy book club and a helpful news blog.

We share this category with only five other honorees, including RootsTech and YouTube! Click here for the full list of 101 Best Websites.

Genealogy Gems Podcast Episode 223

Genealogy Gems Podcast Episode 223

Click player below to listen:


Bit Players in Someone Else’s Show

If you happen to catch an old episode of the TV Series Buffy the Vampire Slayer, you may be surprised to spot Ben Affleck dribbling down a basketball court in the not so highly acclaimed role of Basketball Player #10.

And you might need to set your popcorn down and rewind while watching Monk from 2006 on Amazon Prime Videos to confirm that indeed you did just see Jennifer Laurence from Hunger Games fame pull off a lion mascot head after a high school game in the infamous role of “Mascot Girl”.

Or how about funny man Jack Black of School of Rock fame in the walk-on part of “Taxi Driver” on the iconic 1980s comedy The Golden Girls.

Yep, at some point we are ALL bit players in somebody else’s show. And that is even more true with old home movies

Your friends, your neighbors and even perfect strangers have likely at some point captured you or someone in your family in one of their own old home movies. And the same is true for your ancestors. As long as film has been around, the chances of someone in your family tree appearing in someone else’s videos at some point in time is actually quite high.

And think about it, when film – or moving pictures – came into being right around 1895, it had the capability of capturing someone born as early as even 1800. That’s a lot of potential generations of your family!

David Haas MD knows this better than most folks. he has experienced first-hand that any one of us may find ourselves, quite by surprise, as the keeper or even the Archivist of film footage that connects to potentially hundreds if not thousands of other people and families. And there’s a very good possibility that yours is one of those families.

Your family could very well indeed be one that has been a bit player in somebody else’s film, and you didn’t even know it. But that’s OK, because thanks to technology, it’s never been easier to find the celluloid that once lay sleeping in a stranger’s attic.

The best place to start our story is how I came to know David Haas.

I’ve been encouraging you through this podcast, my book The Genealogist’s Google Toolbox (which includes an entire chapter devoted to YouTube) and my in-person lectures to turn to online video, and specifically YouTube in search of your family. Long time listener Debby Warner Anderson contacted me to let me know that she had followed my suggestion with dramatic results. She wrote:

“I had interviewed my Dad to get details of his memories and found the 2 YouTube links about the 1945 Macy’s Parade that my father went to and the video about W.C. Handy who my Dad remembered seeing. My Dad was so tickled to see the YouTube videos to go with his memories. It gave my family members and my son a real glimpse in to my Dad’s memories.  Thank-you for the suggestions!”

I clicked the link she shared to an article that she wrote on her blog called Debby’s Family Genealogy. The article called Recording a Family Thanksgiving Tradition described the find in detail and included the video, called Macy’s Thanksgiving Day Parade – 1945.

David Haas MD had uploaded this video to YouTube, and it’s one of hundreds on his YouTube channel under his name David Haas MD. You need only click it and watch just a few moments to be mesmerized. The video, comprised of old home movies, is striking in its color quality, and you instantly feel yourself falling back in time, pulled there even further by the haunting music that serves as the backdrop to this silent film.

I was so taken by how this video, sitting out there for free on YouTube, fit so beautifully into Debby’s family history, helping to bring it just a bit more into focus.

I sat and watched the Macy’s Day parade video all the way through. It was so clear that it was carefully and thoughtfully restored and shared, and that it must have come from someone else’s personal home movie collection.

Clicking on the name of the person who uploaded any video on YouTube will bring you to their YouTube channel. Anyone can have a free YouTube channel by simply signing in with a free Google account and uploading a video. It’s called Creators Studio, and these days it sports an impressive collection of tools that anyone can use to create, enhance and share videos.

Many channels will have only one or maybe a handful of videos. This is not the case with David’s channel. It’s difficult to scroll down the page far enough to get to the end of the impressive video list. Where did all these home movies come from? What motivated him to invest the time to make the available on YouTube?

Literally hundreds of people appear in the 4 ½ minute Macy’s Parade (1945) film: the folks in the parade, the people lining the streets and even the people watching from the fire escapes of the surrounding buildings.

The film was created by William G Whitman Sr. A veteran of World War I, he made his way after the war as a bit of a jack of all trades, and the path eventually got the ball rolling that led to the home movies.

William G Whitman, Sr. was David’s grandfather on his mother’s side. William, his wife Catherine and their 10 year old daughter Catherine who is David’s mother can be found in the 1930 census living in Brooklyn. At that time William says he’s a manager of a store. By 1940 he has followed his passion and is proudly declaring he works in Photographic retail as a photo finisher.

But it was as far back as the year that the Great Depression hit, 1929 that William began capturing his growing family on film. In those early movies David’s mother, Catherine, was just 9 years old. David’s collection of films span from this time period all the way through the mid-1970s.

In the earliest of the home movies which you can see on David’s YouTube channel, William Whitman did what most of us do, take home movies of the people and things we love the most. In those films, David’s mom clearly relishes being in front of her father’s camera. She worshipped her father, who was a bit of a big kid himself.

“My mother always remembered things in a sunny way…it’s very much like the pictures we see on the internet, where people tend to post the most rosy possible pictures.  Often times, I think it’s the same with the home movies. You really have to dig deeper to kind of get the whole story.”

This phenomenon of capturing and sharing the rosiest version of ourselves is nothing new. And as genealogists, we are in the perfect position to leverage old movies like these and dig deeper for the rest of the story. Story is a running theme through William Whitman’s films. You only need to watch a few to see what a keen eye for composition and telling stories that he had. He developed his skill while shooting weddings professionally.

William got his whole family into the act of shooting, developing and editing his films. After his daughter Catherine (image below) married David’s father, he too joined in. William passed his skills and knowledge onto his son-in-law. He soon started shooting film of his own further adding to the collection of home movies.

Catherine Anna Haas
 

Lawrence W. Haas

As with so many genealogical tales, great treasure troves like these films are often found with three part deep digging and one part luck. In David’s case, the path to the treasure starts with the family’s refrigerator. His father used to project the movies onto the white kitchen refrigerator. Many years later, after his parents passed away, he found his father’s movies. But it wasn’t until his Aunt Markie mentioned that there were much older 16mm movies in existence dating back to the 1920s that the rest of the collection was discovered in the basement. David set to work getting them digitized.

David not only discovered that these movies were a priceless find for his own family, he soon realized that they held a vast amount of treasure for many other families in a wide variety of locations. “It really was about the people…they needed to be shared!” He felt a moral obligation to do so, and it soon turned into an obsession.

The Gold Waiting to be Found

And that’s the gold here! If we are all bit players in everybody else’s show, and this show was happening in so many different locations, then there are a lot of bit players out there waiting to be found by their families too, right there in David’s films. While the films of course covered Brooklyn where David’s family lived, they branch out to Queens NY, Ventner NJ, and as far away as San Francisco.

The genealogical value in old home movies is immense. If as researchers we can occasionally shift our focus from ancestors’ names to locations, we could very possibly hit pay dirt and find old films online that include our family.

It was in the town of Suffern, NY that David’s father shot quite a bit of footage, but there’s plenty to be had in many different locations. Once he posted them on YouTube the response was swift.

“Our Suffern – A Remembrance Through Home Movies”.

(This compilation of footage was created to commemorate the 40th Reunion of the Suffern High School Class of 1975. It is 41 minutes in length and premiered on October 3, 2015 at the historic Lafayette Theatre in downtown Suffern, NY.)

The color video Haas family, Mickey Mantle’s 500th Home Run, Yankee Stadium 1967 on David’s YouTube channel garnered dozens of comments from grateful viewers.

His father filmed elements of the game that the news didn’t which viewers appreciated. And some had been at that very game.

We’re Not Getting Any Younger

David stresses that timeliness is important when it comes to sharing old home movies like these. “People aren’t getting any younger” he says, and “Others may have insights you may miss.”

One connection made through sharing the movies on YouTube, that just barely missed making a personal connection, revolved around David’s mother’s younger sister, his aunt Margaret Whitman. She lived in Brooklyn in the 1930-1940s, and there are movies of “Markie” with her friends. One film from the 1930s included her good friend Charlie Russell. (Watch below starting at about the 30 second mark.) A few years ago, David received a message from a Charlie after he saw one of the videos! Sadly, he made the connection literally a week after Markie passed away at the age of 89. “If I could have made this connection 6 months earlier it would have been so wonderful for both of them. By then all their other friends had passed away.”

Another viewer who was touched by the films was a woman who saw herself walking around the Suffern swimming pool with her mother. It was priceless to her since her parents later died in an airplane crash and she had few photos of them. That was one of many stories.

“There was a little league game that my father filmed in Suffern, and there was a young boy who struck out, and as he was walking off and one of the coaches kind of patted him on the butt, sort of saying “good try, good job”, and then the game was over and they were all kind of hugging each other because they won the game. And this young boy ended up seeing the film now, I guess 50 years later. His father had passed away not long after that little league game, and here he was seeing his father who was his coach, encouraging him after he struck out. And again, he said he couldn’t speak for hours. It was just amazing.”

Another woman even found her parents in one of the videos on Coney Island where they ran a pony ride with her grandfather!

David’s willingness to share his family’s treasure trove of home movies put him in a unique and unexpected position to touch many people’s lives in truly meaningful ways. The only difference between him and many others who have even just a few spools of film is that he took action to share them. And along the way, he learned some important lessons about what makes film so distinct in its value. It’s those unique characteristic that told him more about his own family. “What I’ve learned is that photographs are powerful, but there’s nothing like moving images”.

David’s father had captured the moments of other people’s lives while filming his own. David didn’t use to be interested in genealogy. His father, however, was obsessed with it. But now, David finds that he is grateful to be able to pull the genealogy back out and reconstruct who the people are in the movies.

It’s a word so often associated with genealogy – obsessed. David’s father became obsessed with it and now David has become obsessed with processing and making available his cache of his father’s and grandfather’s home movies. This has in turn gloriously ensnared him in the world of genealogy.

David hopes by sharing his story of how these videos have impacted and continue to impact the lives of strangers from around the world, it will inspire all of us who have a few reels of old family movies to make it a priority to get them digitized and make them available. Our families and other unknown families are counting on us.

“One thing that I’m really passionate about is that people  who have home movies, if they can, they should really do their best to get them digitized” David continues, “Having gone through the experience, and it’s really been transformative, I feel very passionate about getting my wife’s movies, her family’s movies or her father when he was arrived, getting these converted and sharing these with my wife’s family. So that they can really forever see these movies and share them with their children, so that they can be passed down for generations.”

The Process: Digitize, Enhance and Share

We’ve all seen the commercial where they peer into the camera and aske “what’s in your wallet”. Our question today is “what’s in your closet”. I’ve looked through my closets and I have several home movies my grandmother shot on 8mm film. I also have a box full of VHS tapes from back when Bill and I got our first video camera right after we got married in the 1980s.

The process for digitizing and sharing your home movies can appear daunting at first glance. That’s why I asked David Haas MD to share some specifics about his project so that you can learn what you need to consider and some tips from somebody who’s already been through this in a big way.

Although David’s collection of film runs about 10 hours, has several hundred videos because he kept them short – about 4 minutes long each. This is a smart strategy because of the attention span of YouTube viewers. It’s also about the length of a song, which makes setting them to music easier.

David went the extra mile and created a website where he makes available indexes of all the videos which can be searched by location, year and person. David really thought about the potential value of these films and set up a system for making it easier for visitors to find what they are looking for. In a case like his where he has such a volume of these 3-5 minute videos, this is a huge help to other researchers. But don’t worry if having your own website isn’t in your wheelhouse. YouTube has a powerful search engine, and it’s called Google. You can make your videos very easily searchable by simply including the details that pertain to a particular video in the video description that appears below the video on YouTube.

Since your videos will be on your YouTube channel, researchers be able to simply go to your channel’s home page and type a name, place event or some other set of keywords in your channel’s search box. Google will search just your channel and retrieve only the videos that match the search terms. If you want to see this in action, go to my YouTube channel at youtube.com/genealogygems  or David’s channel and try a search.

Digitizing Your Home Movies

The first step is to get the movies digitized. It can be a pretty scary thought to send your precious movies off to some stranger. David considers his videos his “most priceless possession.”

Through a bit of trial and error, David landed with a company who could do the job. He first tried a local place but ultimately went with Video Conversion Experts in Chandler AZ. They did an excellent job and cleaned them up and optimized the film. He recommends overnighting your films so that you can control when they arrive. You can receive both hard drives and DVDs of the digitized movies.

Watch this video from Video Conversion Experts. It explains the difference in quality that they provide. The difference between a company like this and the big box stores conversion is dramatic!


Sharing Your Home Movies on YouTube

At first, David thought he would take the movies to the local library. His daughter Anna convinced him to try editing them with iMovie and then uploading them to YouTube. The first film he edited was called A Drive through Suffern.

Free video editing tools:

(Mac) iMovie – https://www.apple.com/imovie/

(PC) Movie Maker – https://www.microsoft.com/en-us/p/movie-maker-10-tell-your-story/9mvfq4lmz6c9?activetab=pivot:overviewtab

Thank goodness for David’s daughter Anna Haas! Just think if these videos had only landed in one physical location like a library versus online. Now another generation of the Haas family has entered the picture to preserve the family’s legacy and touch the lives of so many others. And it’s Anna’s inspiring music that provides the backdrop for the Macy’s Day Parade and several others.

Get the song Find Your Home here on her album Crazy Is.

Visit Anna Haas’ website: http://annahaas.com

Anna’s YouTube channel: https://www.youtube.com/user/annahaasmusic

Anna Haas Music Video: Find Your Home (watch below)

When you love people, you just can’t justify keeping old home movies to yourself. You can’t in good conscience leave them in dusty boxes stuffed away in the back of closets in risk of deteriorating to dust. For the woman who saw her parents again in the swimming pool video, to the man who felt the affection from a father long gone, and for countless unnamed others the action that David has taken to digitize, preserve and share his home movies has been valuable beyond words.

“Don’t be afraid to do it, don’t hesitate to do it. even if you don’t have the skill set to do it, there are other people who are more than happy to kind of walk you through it and help make it happen. I would be extremely encouraging of everyone to convert their old movies and share them as widely as possible.” – David Haas MD

Resources

Collection of articles on the topic of video at the Genealogy Gems website

Browse his phenomenal collection of home movies at David’s website

You’ll find inspiration and you might just find an ancestor captured on film. Because we are all bit players in everybody else’s show.

Production Credits

Lisa Louise Cooke, Host and Producer
Hannah Fullerton, Audio Editor

My deepest thanks to David and Anna Haas for sharing their family photos, videos and music with me for this episode.

Disclosure: As an Amazon Associate, Genealogy Gems earns from qualifying purchases you make when clicking from the links we provide. It doesn’t cost you anything extra but it helps support our free blog and podcast. Thank you!

Best of New and Updated Genealogy Records Collections

This week the entire Genealogy Gems team is heading to Dallas to present a two day event at the Dallas Public Library. With Lisa, Sunny and Diahan so busy, I’ve decided to take the reins this week and bring you a roundup of my favorite genealogy records of 2017! This compilation includes collections that are new, updated, and just plain fun! I’ve really enjoyed digging back into these and finding new genealogy gems. And I’d love to know: what exciting and helpful collections have you been using this year? Please share in the comments below!

The Catholic Heritage Collection at Findmypast

In February of 2017, Findmypast announced the new Catholic Heritage Archive. Roman Catholic Church genealogical records go back centuries and are meticulously preserved, but difficult to obtain for the general public. Findmypast partnered with British and American Archdioceses to bring up to 100 million Catholic Church records online. Millions are available to search online now, and more will continue to be added.

English Roman Catholic Records
Irish Roman Catholic Records
Scottish Roman Catholic Records
United States & Canada Roman Catholic Records


Sanborn Fire Insurance Maps at the Library of Congress

The Library of Congress has put online nearly 25,000 additional Sanborn Fire Insurance Maps–and more are coming! Over the next three years, more will be added monthly until all 50 states are covered from the 1880s through the 1960s. This is definitely a collection to keep an eye on!

Sanborn maps show detailed information about neighborhoods, buildings, roads and more for thousands of towns in the U.S. and beyond. A sizable collection of pre-1900 Sanborn maps are already online at the Library of Congress (use the above link). Watch the short video below to learn more about them. The full length class is available to Genealogy Gems Premium Members.

https://youtu.be/Rhv5vtWwONM

Click here to learn more about how to use this outstanding online collection.


WWI Centennial – Free Records at FamilySearch

2017 marked the 100th anniversary of the United States entering World War I, and there was a wealth of records and historical resources featured online. I’m highlighting the collection of millions of WWI records available for free at FamilySearch.org, because who doesn’t love free?!

United States World War I Draft Registration Cards, 1917–1918
California, San Francisco, World War I Enemy Alien Registration Affidavits, 1918
Louisiana World War I Service Records, 1917–1920
Maine, World War I Draft Registration Index, 1917–1919
North Carolina, World War I Service Cards, 1917–1919
Texas, World War I Records, 1917–1920
United States Index to Naturalizations of World War I Soldiers, 1918
United States, YMCA World War I Service Cards, 1917–1919


Italian Civil Records at FamilySearch

Back in March, FamilySearch added to their unique collection of Italian genealogy records. Five specific locales in Italy have Civil Registration records online. Civil registrations include such things as births, marriages, and deaths. They can also include marriage banns and ten-year indexes. Of course, availability of records will depend on the time period and the location. In some cases, this collection goes back as far as the 15th century!

Italy, Viterbo, Civil Registration (State Archive), 1870-1943
Italy, Mantova, Civil Registration (State Archive), 1496-1906
Italy, Grosseto, Civil Registration (State Archive), 1851-1907
Italy, Rieti, Civil Registration (State Archive), 1840-1945
Italy, Enna, Civil Registration (State Archive), 1866-1944

Learn more about Italian genealogy: In the video below, Lisa sits down with Mary Tedesco of Genealogy Roadshow (on PBS in the US) and talks about doing the TV show, and her tips for conducting Italian genealogy research. This is just one of the many genealogy videos on our Genealogy Gems YouTube Channel.

https://youtu.be/6E8BuprPqsw


New England Vital Records

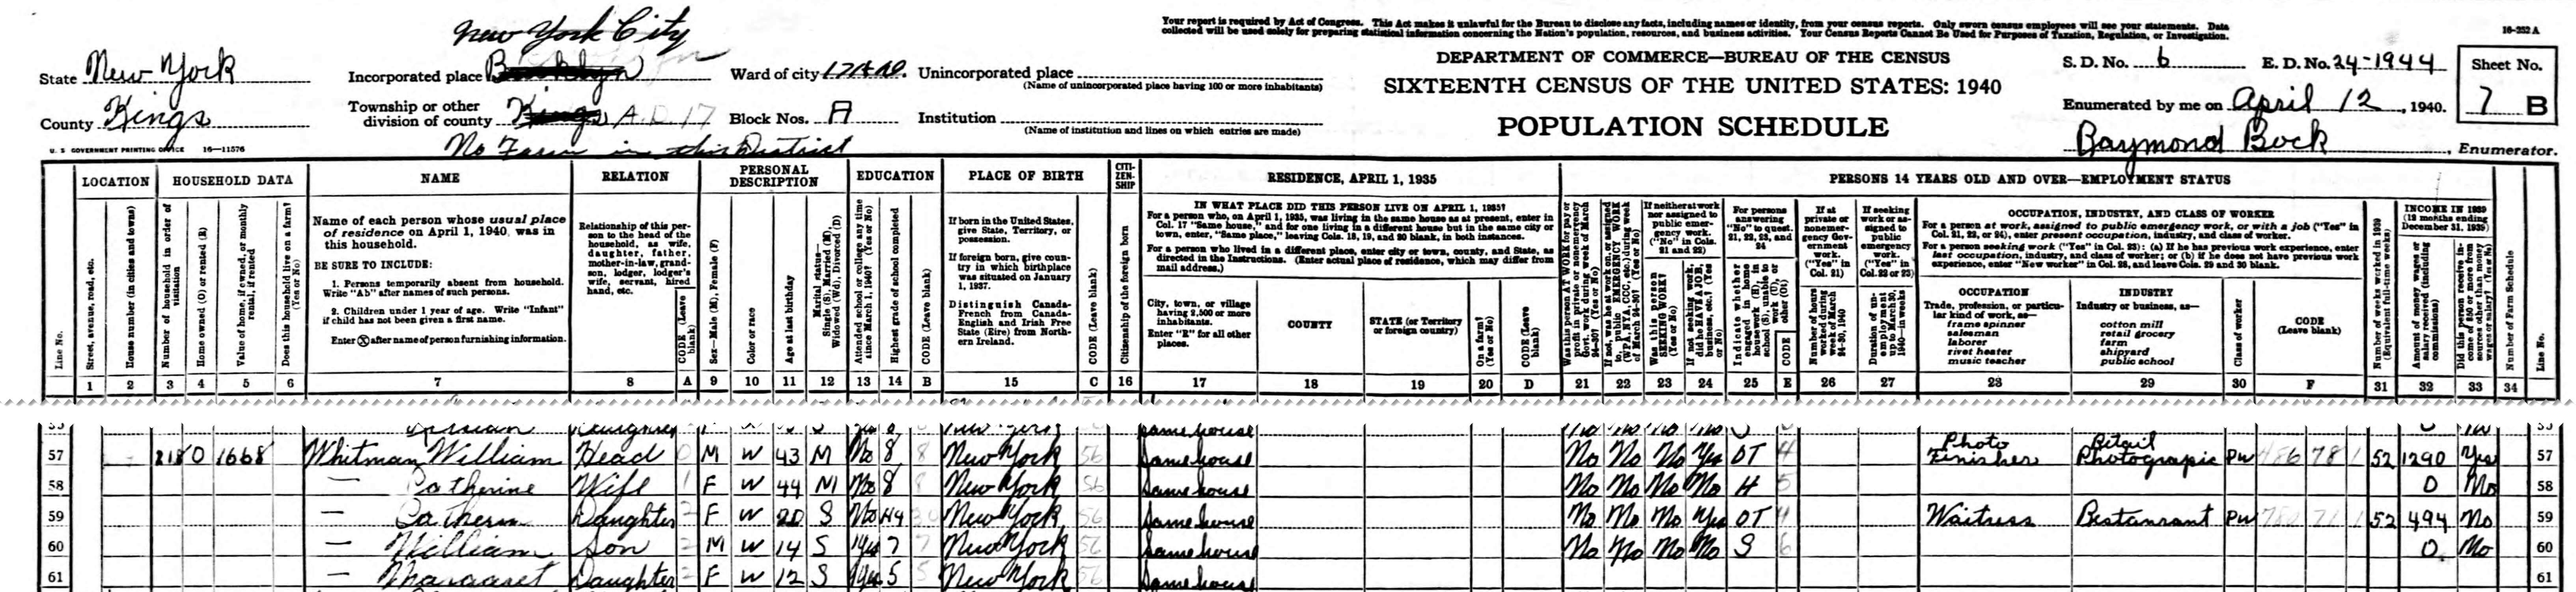
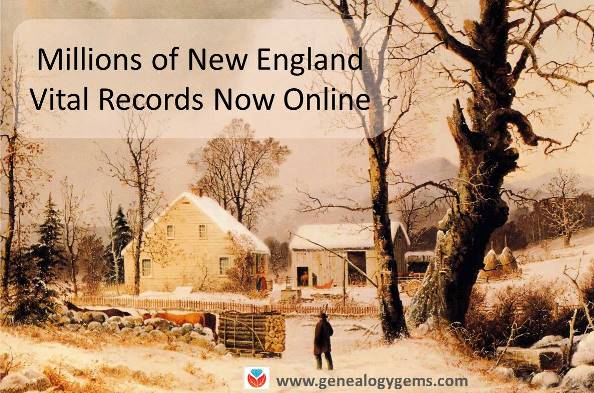
Millions of New England vital records became available online in May of this year, dating back as far as the 17th century. Collections are highlighted below:

Connecticut. More than 755,000 indexed names added to FamilySearch.org’s free collection, Connecticut Marriages, 1640-1939.

Maine. FamilySearch.org added nearly a half million indexed names to its collection of Maine Vital Records, 1670-1921.

Massachusetts: New images have been added to the New England Historic Genealogical Society’s collection for the Roman Catholic Archdiocese of Boston, 1789-1900: Immaculate Conception (Salem)St. Mary (Salem), and Sacred Heart (Roslindale).

Rhode Island. FamilySearch added over a half million new indexed names and 30,000 digital images to its free collection, Rhode Island – Vital records. These are described as “Certificates and registers of births, 1846-1898, 1901-1903, marriages 1901-1903 and deaths, 1901-1953 acquired from the State Archives in Providence.”


British Emigration Records at Findmypast

We often talk about immigration, with an I, but have you researched your ancestors emigration records with an E? The 1600s saw a boom in British emigration, and Findmypast has curated several fascinating collections:

Early emigration from Britain 1636-1815 is a collection from Findmypast containing over 21,000 records that allow you to learn if your ancestors left Britain for North America or the West Indies. The collection includes 10 pieces from The National Archives including colonial papers, general entry books, passenger registers, and weekly immigration returns.
Britain, early emigration to Barbados
 centers on your British ancestors who left for a settlement in Barbados between 1678 and 1715. With over 20,000 assorted documents, this collection includes baptisms, burials, censuses, landowner lists, and more.
Britain, Royal African Company, 1694-1743 is a collection of over 55,000 records to uncover the details of those on board the Royal African Company’s ships to and from Africa as well as the names of those who lived and died at company forts. These Findmypast records came from The National Archives T 70 series, Company of Royal Adventurers of England Trading with Africa and Successors.

Click here to learn more about researching and working with emigration records.


…and just for fun…

Sydney, Australia – 19th Century Complaint Letters

When I saw this collection, I was totally tickled! I would love to find an ancestor’s complaint letter, as a window into their daily life and surrounding neighbors.

Over 56,000 letters written by residents to the City of Sydney in the latter part of the 1800s have been digitized and added to the City of Sydney Archive online. A city historian quoted at the Daily Telegraph.com said people’s complaints “range from the mundane to the bizarre,” such as “foul smells, night time noise, stray farm animals and smoke billowing from homes and blacksmiths’ forges.” This same online city archive also hosts a collection of historical photographs, a full run of Sands directories, postal directories, and other resources for researching your house history. Find this collection by clicking Archives Investigator and then “Letters Received by Council, 1843-1899.”


If you want to see what other records we’ve covered, there’s any easy way to narrow down to your specific ancestors! Visit our home page at www.GenealogyGems.com, and select a category from the drop-down menu on the left:

You can choose categories like Canadian, German, Irish, African-American, Australian, and more. You’ll receive of list of every article where that topic was featured or included. This is a super easy way to find new records collections for any area you’re currently researching. You can also choose other categories like newspapers, technology, organization, etc. for helpful how-tos, research strategies, and updates. And you can always use the search bar in the top right corner of our website if you don’t see your topic listed.

There’s a treasure trove of genealogy gems on our website!

Pin It on Pinterest

MENU