by Lisa Cooke | Nov 10, 2017 | 01 What's New, Australian, Records & databases
New at Ancestry.com are Boston Catholic records, thanks to a partnership with the New England Historical Genealogical Society. Also new this week are big updates for the Big Apple with lots of new and updated collections for New York. Additional new collections for the United States, Australia, and New Zealand are highlighted this week.
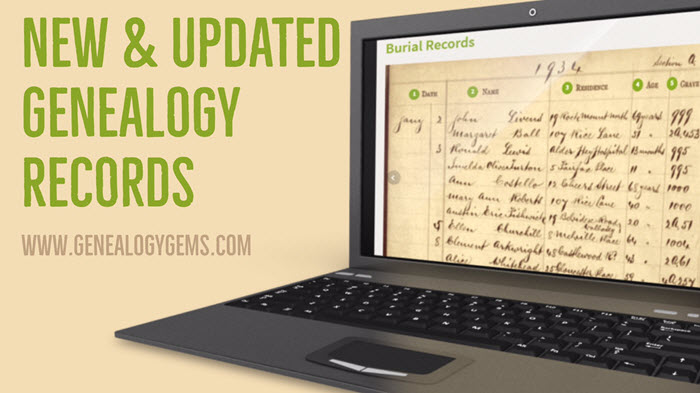
Boston Catholic Records Now at Ancestry.com
Ancestry and New England Historic Genealogical Society (NEHGS) have collaborated to make Roman Catholic Archdiocese of Boston Records now available on Ancestry.com. This unique collection includes approximately 10 million names from Massachusetts Catholic records from the late 1700s to the early 1900s.
“The detailed documents in this collection are a critical resource for researchers, historians, and genealogists, especially when secular records are spotty or lost,” said Brenton Simons, President and CEO of the New England Historic Genealogical Society. The records within the bound volumes contain several sacraments of the Catholic Church, including baptism, confirmation, holy communion, marriage, holy orders, and the anointing of the sick.
Big Updates for New York
You can search a free index of New York City marriages, 1908-1929, at Internet Archive, thanks to a “Reclaim the Records” initiative. This is an index to an important set of records originally kept by the New York City Clerk’s Office: “the 1908-1929 application, affidavit, and license for a marriage, a…three-page document that is generally dated a few weeks before the actual marriage took place.” MyHeritage has also just added the New York City Marriage License Index 1908-1929.

You’re likely to spot some famous folks like Humphrey Bogart in this NYC Marriage License Index at MyHeritage!
New York City Marriage Announcements, 1833-1836 are available at Findmypast, with notices from two newspapers: The Sun and the New York Transcript.
Also new at Findmypast is an Image Browse collection of New York State Religious Records 1716-1914. The New York Genealogical and Biographical Society transcribed and published religious records of baptisms, marriages, and deaths from dozens of New York State churches of various denominations.
Back over at MyHeritage is a collection of New York Newspapers, 1806-2007 with nearly 2 million pages from various cities and towns throughout the state.
Lastly, the Troy Irish Genealogy Society has published Transcriptions from the St. Agnes Cemetery Tombstones in Menands, NY. From the description: “The inscriptions are overwhelmingly of Irish immigrants to the Capital District Region. While some inscriptions merely say “Ireland” a large number are more specific and identify the County in Ireland along with the name of the town and the name of the Parish.”
Additional United States Collections
Illinois. The State of Illinois has repaired and digitized 57 maps that the Illinois National Guard used during World War I. According to the description, “the maps feature the guard’s 33rd division, which was the only distinctly Illinois division that saw active service during the war in France.”
North Carolina. The State Archives of North Carolina has announced the launch of the Brimley Collection Online. Named for Herbert Hutchinson Brimley, the first leader of The North Carolina State Museum of Natural History, this collection of photographs from the late 19th and mid-20th century include people both common and renowned, scenes of cities and towns, rural landscapes and farms, agricultural activities and products, industrial concerns, and more.
Arkansas. More than 200 issues of the Commonwealth College Fortnightly are now searchable online. This newspaper ran from 1926 to 1938 and this digital collection provides a complete record of activity at Arkansas’ historic radical labor school.
Australia & New Zealand Databases
You have to love records that include photographs! Ancestry.com has a new collection for Queensland, Australia, World War I Soldier Portraits, 1914-1918. This unique collection comes from portraits taken at the soldier’s camp at Enoggera, Queensland and published in The Queenslander newspaper until the end of the war in 1918.
A newly digitized archive for New South Wales is now available online. Prisoners in Pictures details the stories of nearly 50,000 prisoners incarcerated in New South Wales between 1870 and 1930. The prisoner stories are told through photography, text, an online catalog, and short films with interviews from archivists such as the one below:
https://youtu.be/QJmBRdEmXS0
In New Zealand, the Victoria University of Wellington has released a database of 12,000 imperial soldiers who fought in the New Zealand Land Wars of the 1860s. From the description: “The database provides searchable public access to the names, regiments, and dates of service of soldiers who fought in New Zealand. It is the first installment of what will grow into a larger publicly accessible resource.”
by Lisa Cooke | Nov 20, 2014 | 01 What's New, Ancestry, Brick Wall, DNA
“This is really the first time a DNA testing company has so fully integrated genetics and genealogy. We can now find cousins in the database who do not share our particular genetics, but who do share some of the genetics of our common ancestor. This is huge.” -Diane Southard, Your DNA Guide
I blogged a couple of weeks ago about some changes taking place over at AncestryDNA . You will recall that they are planning to slash your match list
  to allow only “invited guests” to your personal DNA party. (Read that post to be reminded why this is a good thing.)
Ancestry has officially announced the launch of this feature update and reports that on average users will see an 80% reduction in the number of matches shown. I had a chance to look at the new site before it launched and one of my favorite features is the question mark that appears next to your match. Clicking on the question mark on your match page will bring up a menu of references to help you better understand the inner workings of matching at Ancestry, including those confidence levels that are a part of every relationship prediction. In this table below you can see that ancestry has tried to give you some fairly solid guidelines by which to assess the quality of your matches. You will want to focus on those matches with a confidence score of “High” or above to have the best chance of genealogical success. 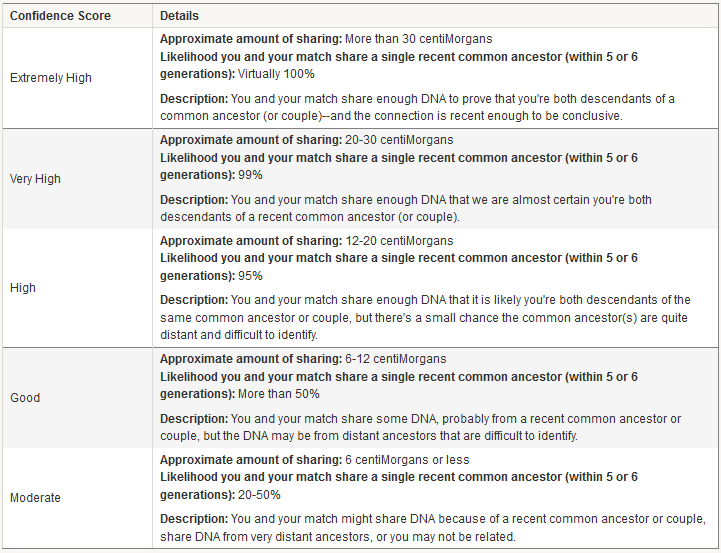 But an update to the matching feature is only the beginning of the new features at AncestryDNA
 . Today Ancestry announced “DNA Circles,” a tool that helps you identify others who share common ancestors with you. The new “DNA Circles” feature has the potential to impact the way you do genetic genealogy at Ancestry. Here’s why: Autosomal DNA (the kind that Ancestry is testing) has a spotty inheritance pattern. On average we only have half of the DNA of each of our parents, only 25% of our grandparents, only 12.5% of our great grandparents and so on. This means that AncestryDNA and its competitors (Family Tree DNA and 23andMe) are only able to genetically identify 50% of your genetic 4th cousins. This means that there could be 50% MORE people in these databases that you are actually related to, people that should have been invited to your DNA party, but didn’t have a ticket. Now with DNA Circles, there is a metaphorical “after-party.” After parties are “hosted” by one of your relatives. Ancestry searches your pedigree and that of your matches back 7 generations looking for suitable hosts. An ancestor qualifies as a host if they have two or more descendants who hold an invitation. At this after-party you can meet some of these long lost cousins that, while related to you, lost their ticket to your DNA party. After-party invitations are provided to those who meet three very important qualifications:
- They have their DNA attached to their PUBLIC family tree.
- AND that PUBLIC family tree has the name of the hosting ancestor on it.
- AND this person shares DNA with at least one other person who also meets the above two criteria.
Here’s an example. Below is an image of the new AncestryDNA home page. You can see I am a part of two DNA Circles (some of you will be much more popular and invited to several after-parties. For me–just the two for now). Let’s take a closer look at my DNA Circle hosted by my paternal 5th great grandfather Minus Griggs (who knew the guy liked parties?!).  Clicking on the DNA circle brings up this page where there are three things I want to show you:
- This is your relationship to the host.
- This is a list of the individuals who have passed the three criteria listed above and have been invited to this after-party.
- This is the innovative part. You see that the first two matches (after me–I am listed first) have only “Tree Match” in this column. This means that these two people, both descendants of our host, Minus Griggs, didn’t ever appear on my DNA match list. We do not share enough DNA to be considered genetic relatives. However, the third member of the circle has the “DNA Match” designation, meaning that this match DOES appear on my match page. In fact, this is my ONLY DNA match in the circle (there are three others not shown here). That means that this DNA circle has connected me to FIVE other cousins. All because I share DNA and genealogy with the third member of this circle, and he shares DNA and genealogy with everyone else.
I can click on each circle member to see exactly how Ancestry THINKS we are related. This is my first opportunity to DOUBLE CHECK this relationship that Ancestry has handed me, to be sure that both my match and I really did receive tickets to the same after party.
Here is what that page looks like for me and one of my matches.
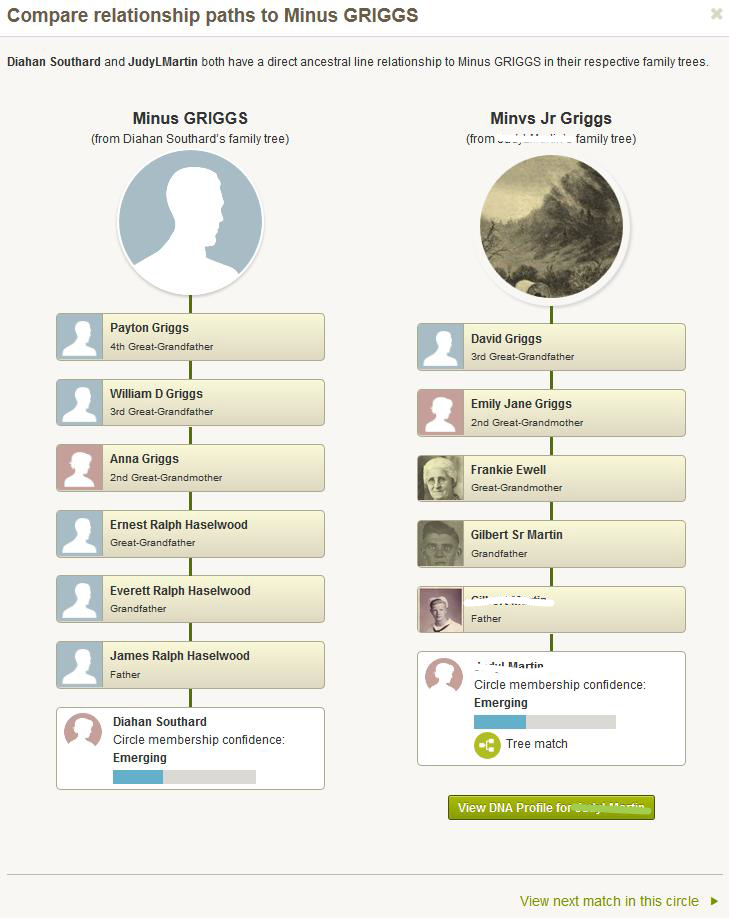 This is really the first time a DNA testing company has so fully integrated genetics and genealogy. We can now find cousins in the database who do not share our particular genetics, but who do share some of the genetics of our common ancestor. In my opinion, this is huge.
There is one catch, and it is going to be a big one for some of you. In order to see your DNA Circles, you have to be an Ancestry.com subscriber.
Even though I am excited about these changes, I can’t help but hope for just one step more. In order to identify these DNA Circles, Ancestry has identified pieces of DNA that can be fairly reliably assigned to a particular ancestor. There are likely others in the Ancestry database who have these pieces of DNA, we can call them partial tickets to the after-party, but who are lacking the second requirement: a pedigree documenting a relationship to that ancestor. I hope in the future the folks at Ancestry will honor those partial ticket holders, and allow them to the after-party, so we can sit around with our peanuts and pretzels and figure out how we are all related. Until then, I am going to enjoy the two after-parties hosted by my two generous ancestors.
 Ready to walk through the process of using DNA for your genealogy? Let me be your guide! Check out my quick
 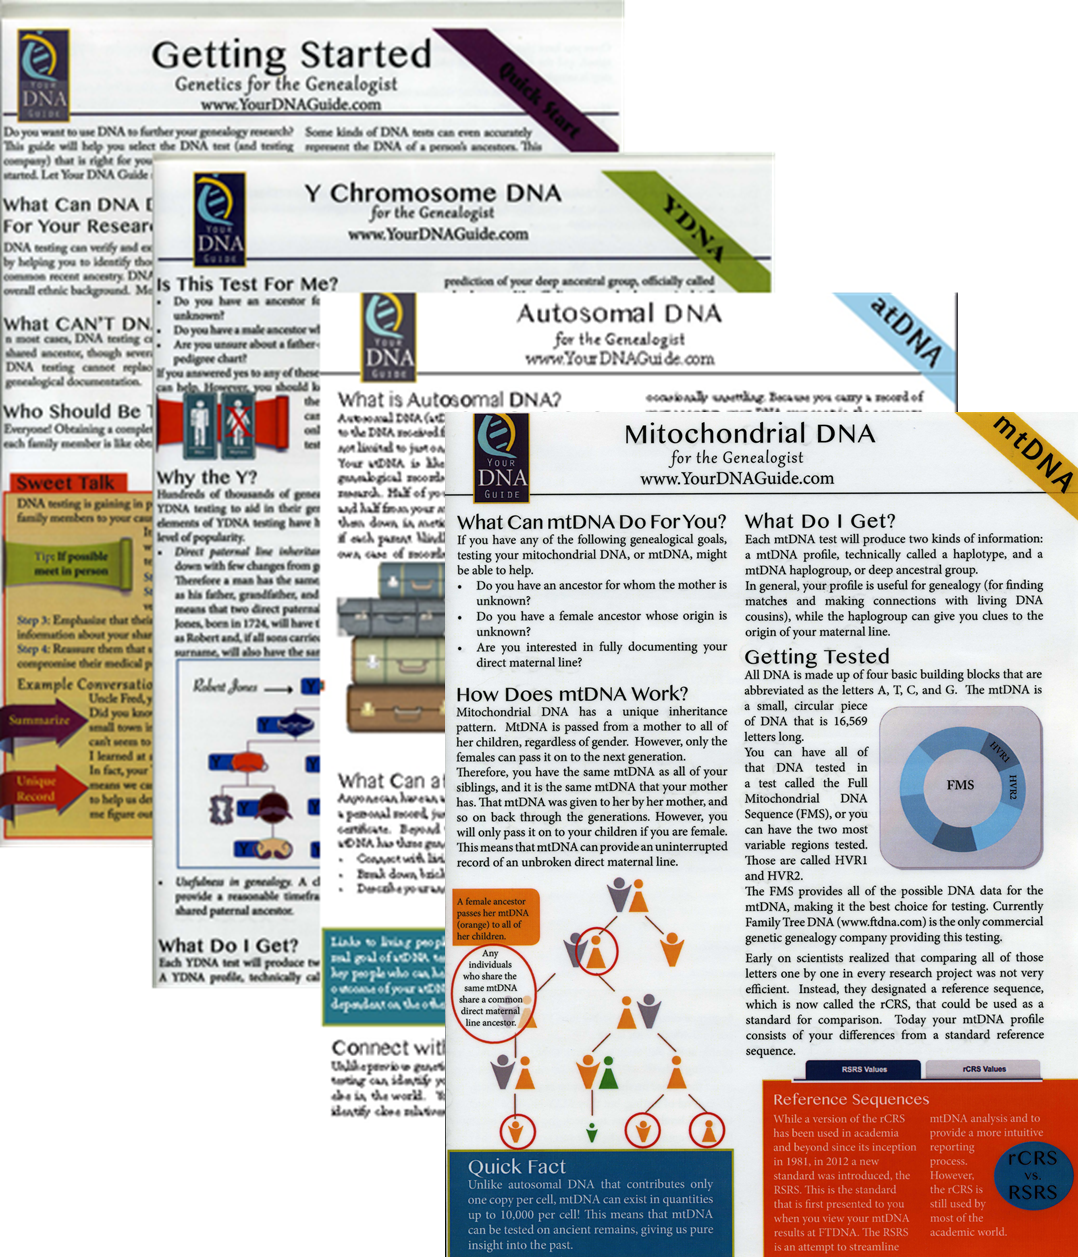 guides (left) Purchase each guide individually or pick up the bundle of all 4 for the best deal!
Visit my website to learn about expert consultations with me. You’ll get customized guidance on which tests to order and how to maximize your results for your genealogy research.
by Lisa Cooke | Oct 19, 2014 | 01 What's New, Ancestry, DNA
 You may recall from our recent DNA discussion on the Genealogy Gems podcast (Episode 168) that Ancestry.com recently discontinued their mtDNA and YDNA tests (the two that trace our direct maternal and direct paternal lines) to focus on autosomal DNA (which delivers information about both your mother’s and your father’s side of your ancestral tree).
Well, recently I attended an all-day meeting hosted by Ancestry.com: a summit to talk about current trends and accomplishments at Ancestry DNA , and ideas about the future of DNA testing at Ancestry.com.
The meeting included a diverse group of Ancestry representatives, from CEO Tim Sullivan to members of the marketing, scientific, communications, and even computer science departments, as well as some of the top voices in genetic genealogy. It was an open and lively discussion, and I walked away with a few gems I want to share with you today.
More Powerful DNA Hints Coming
In AncestryDNA, the ‘shaky leaf” hints are meant to help you find a common ancestor between you and your DNA matches. The computer code behind the old hints was not very efficient. Lazy, in fact. It started at the bottom of your tree—and the bottom of your match’s tree—and slapped on a shaky leaf at the first sign of a shared common ancestor.
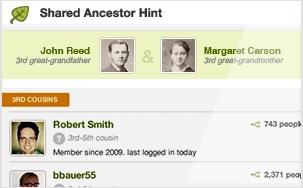
While this method worked for a large number of cases, it was leaving a lot of stones unturned. But the IT guys at Ancestry have beefed up the computer power, allowing them to cover a much greater distance through our trees and the trees of our matches before making a judgment about the best place to assign that shaky leaf.
The result? Better hints about how you and your match COULD be related. Remember, the leaf is still just a SUGGESTION on how you and your match might be related. It is not a crystal ball.
Did You Know?
- Ancestry DOES store your DNA samples in a secure location.
- Ancestry spent months designing their own DNA collection kit.
- Ancestry was able to attract some of the brightest scientists in the field of population genetics because of YOU. You with your documented pedigree charts and your willingness to help move this science of discovering our ancestors forward.
Looking Ahead
There is no question that the genetic genealogy industry is rapidly advancing, and our discussion with Ancestry certainly didn’t disappoint. While I will be sharing with you in future posts about some of the exciting changes, I do want you to be ready for one that buy anxiety medication online uk will be coming online fairly soon.
It has to do with your matches. If you have been tested by AncestryDNA, you may have been initially excited, then nearly immediately overwhelmed, by the number of individuals listed in your match page, all claiming to have some kind of connection to you and your family tree.
All three major genetic genealogy testing companies (AncestryDNA, Family Tree DNA, and 23andMe) are using basically the same laboratory methods to glean information from your DNA. What differs is how they use that data to draw conclusions about your ethnic heritage and about your relationships to other individuals. As it turns out, AncestryDNA has been reporting far more individuals as your relatives than it should have.
 You can think of it like this: You have sent out tickets, in the form of your genetic code, to an exclusive party where you (of course!) are the star. However, you have lost the guest list and you are counting on the testing company to check the ticket of each guest before they enter your party to be sure they were really invited.
AncestryDNA was relatively new in the role of party bouncer, and in the interest of not turning away any VIP guests, they initially allowed guests into your party who had (gasp!) forged tickets!! But as AncestryDNA admits more guests, the experience it’s gained in party monitoring is starting to show.

You see, each of the forged tickets has some unique qualities that have started to send up red flags to the team of scientists at AncestryDNA . They are now in the process of carefully documenting what each forged ticket looks like and tossing those unwanted guests out on their ear.
The short of it: in the near future your match list at Ancestry will be much shorter. Which is good news to you, as it means only those invited genetic cousins will be around eating hors d’ oeuvres and ready to talk about your shared common ancestry.
Each testing company has its strengths and weaknesses. It was good to have a bit of insight into this one company and come to a greater understanding about why it is they do what they do. It is a great time to be in this young genetic genealogy industry, with so much room to grow and change. I will let you know when I find the next genetic gem.
Disclosure: This article contains affiliate links and Genealogy Gems will be compensated if you make a purchase after clicking on these links (at no additional cost to you). Thank you for supporting Genealogy Gems!


 to allow only “invited guests” to your personal DNA party. (


 This is really the first time a DNA testing company has so fully integrated genetics and genealogy. We can now find cousins in the database who do not share our particular genetics, but who do share some of the genetics of our common ancestor. In my opinion, this is huge.
 guides (left) Purchase each guide individually or pick up the

 You can think of it like this: You have sent out tickets, in the form of your genetic code, to an exclusive party where you (of course!) are the star. However, you have lost the guest list and you are counting on the testing company to check the ticket of each guest before they enter your party to be sure they were really invited.