by Lisa Cooke | Nov 9, 2016 | Genealogy Gems Podcast
 Episode 197
with Lisa Louise Cooke
This episode celebrates the most recent family history there is: our own. A chat between host and producer Lisa Louise Cook and Gems editor Sunny Morton explores the meaning and memories behind heirlooms hanging in Lisa’s bedroom. They comment on the larger value, for self and others, of recording our own memories in honor of Sunny’s new book, Story of My Life: A Workbook for Preserving Your Legacy.
Also in this episode:
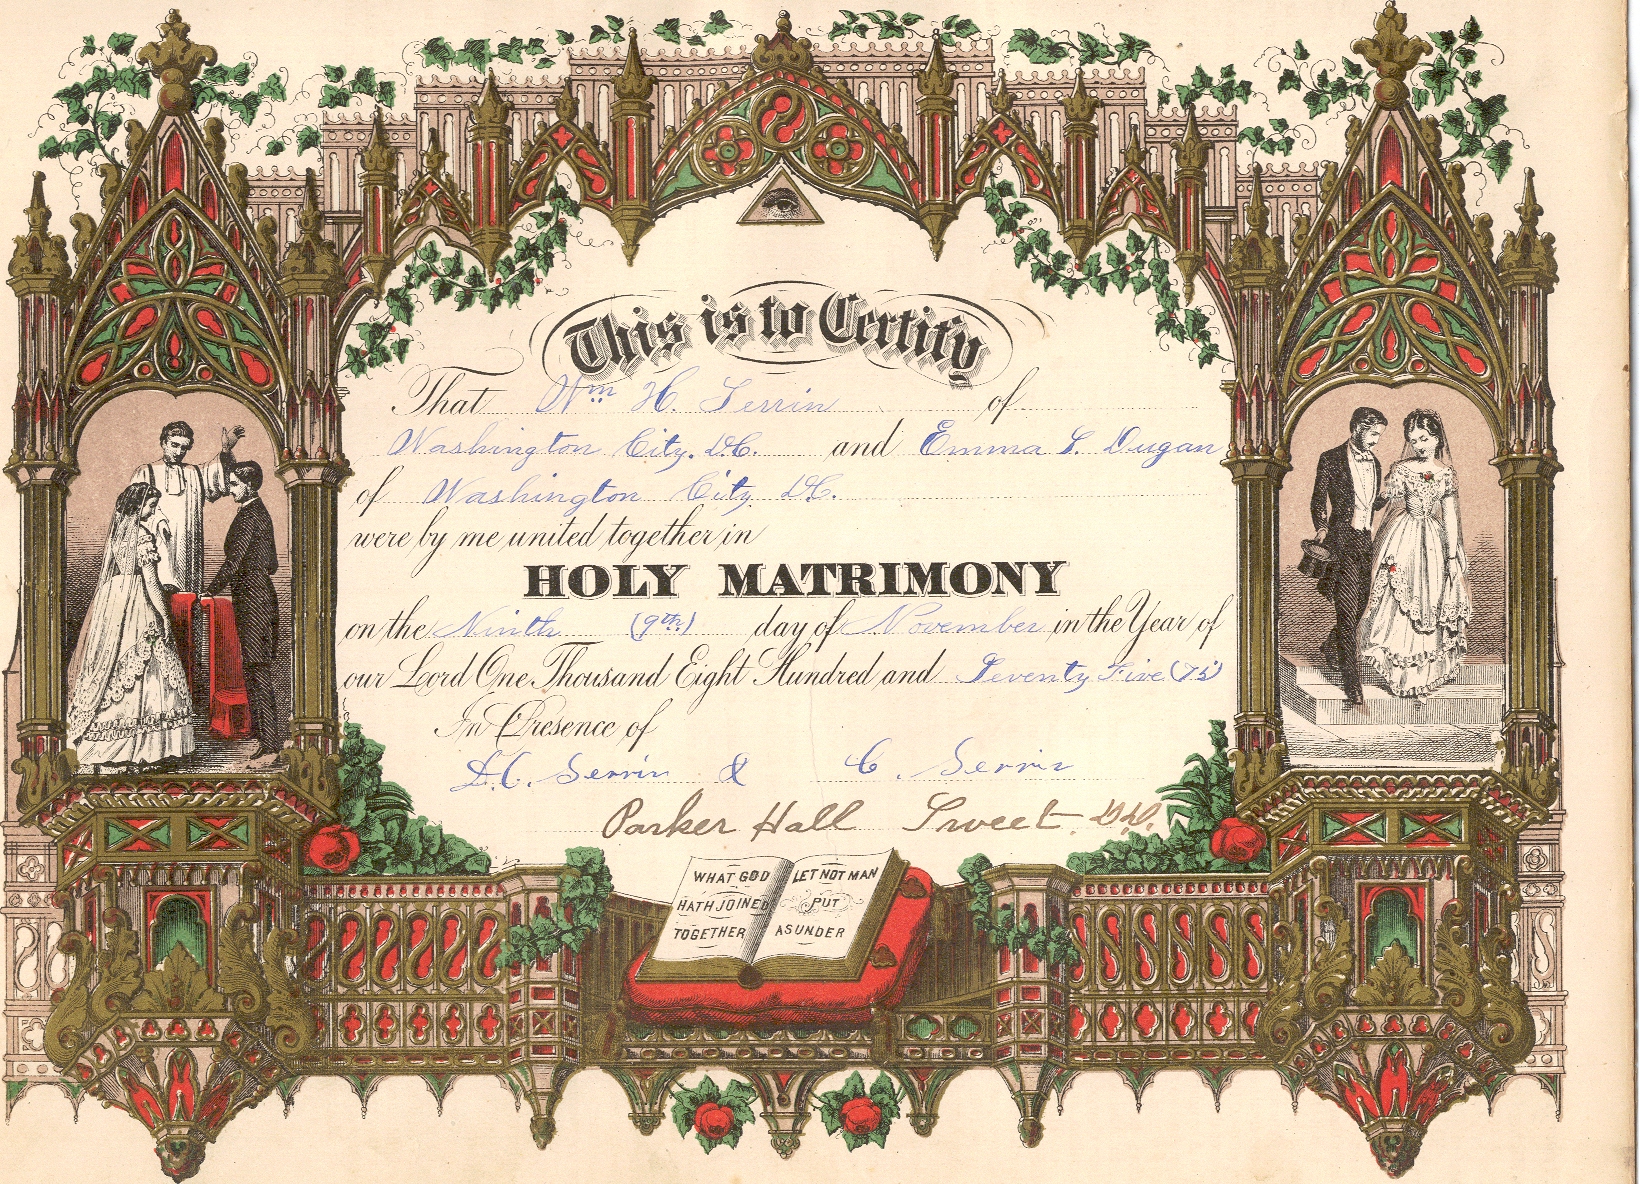
- A spotlight on new marriage records online for the U.S. and around the world.
- Lisa walks a listener through several tips for learning more about her immigrant ancestors (a mother and daughter). Lisa shows how to use today’s technology tools to help with traditional research skills such as locating passenger lists, immigrant society records and naturalization.
- Your DNA Guide Diahan Southard talks about organizing your DNA matches so you can get the most out of them.
- Genealogy Gems Book Club featured author and Victorian lifestyle expert Sarah Chrisman describes what it’s like in her home–which doesn’t use electricity–as the days grow shorter and the darkness comes earlier.
NEW RECORDS ONLINE: Marriage Records
New York City Marriages: a new index to more than 3 million marriage licenses for recent New York City marriages (1950-1995)
Free FamilySearch marriage record collections recently added or updated include:
- Arkansas Church Marriages, 1860-1976
- Nebraska, Box Butte County Marriages, 1887-2015
- Ohio, County Marriages, 1789-2013
- Tennessee, County Marriages, 1790-1950
- Washington, County Marriages for 1855-2008
- Washington, Marriage Records, 1854-2013
- California, County Marriages, 1850-1952
- New Zealand, Civil Records Indexes, 1800-1896
- Belgium, Antwerp, Civil Registration, 1588-1913; Belgium, East Flanders, Civil Registration, 1541-1914; Belgium, Liège, Civil Registration, 1621-1914; Belgium, Limburg, Civil Registration, 1798-1906
- Nicaragua Civil Registration, 1809-2013
- Russia, Tatarstan Church Books, 1721-1939
- Argentina, Cordoba, Catholic Church Records, 1557-1974
- Sweden, Gävleborg Church Records, 1616-1908; index 1671-1860
Learn more about marriage record research: Listen to Using Marriage Records in Family History: Episode 24 in Lisa Louise Cooke’s free step-by-step podcast, Genealogy: Family History Made Easy.
BONUS CONTENT for Genealogy Gems App Users: Finding Copies of Images Online with Google on Your Mobile Device
If you’re listening through the Genealogy Gems app, your bonus content for this episode is an exclusive step-by-step tutorial PDF that shows you how to use your mobile device and Google to locate copies of images online. Remember, the Genealogy Gems app is FREE in Google Play and is only $2.99 for Windows, iPhone and iPad users.
MAILBOX: Finding a Female Immigrant Ancestor
 Question from Jo: “I have been fortunate to find information about most of my great-grandparents. I have hit a wall with my maternal great grandmother who immigrated from Switzerland to the US in the 1880s when she was 8 years old. I was hoping that by upgrading to International records on Ancestry that I could find the ship and where she and her mother came from. The curious thing for me is that she and her mother traveled solo to the US and went to Cincinnati, Ohio. I’ve been to Cincinnati and have searched there and have found directories with addresses but no profession is listed like other people. I didn’t find any ship records either. Where might you suggest that I look or search to find more information?”
Tips for searching passenger arrival lists:
Consider what ports would have been the most logical point of arrival for an immigrant ancestor based on the time period and the U.S. location in which you find them. Cincinnati, Ohio, was reachable by rail by the 1880s from major ports, as well as by water via the Mississippi River for southern ports, so that doesn’t narrow things down much. According to an Ancestry.com article, more than 80% of immigrants arrived at the Port of New York by the 1890s, so Jo might scrutinize those New York passenger arrival lists for the 1880s again.
Free New York City passenger arrival databases at
Search multiple NYC passenger lists simultaneously at Steve Morse’s One-Step web portal
For “deeper” searching at Ancestry.com or other sites with powerful, flexible search interfaces: do a “nameless search” (without any name) for girls around age 8 for arrivals in particular years. Try additional searches with various combinations of name, place of origin (Switzerland) or “Swiss” in the keyword field, which will bring up that word in the ethnicity or nationality column. That column doesn’t have its own search field in Ancestry.com but it is indexed, so use the keyword field to search it.
Research Swiss immigration to Cincinnati during that time period. Who was coming, why they were coming and where they were coming from? Click here for free tips about researching historical questions such as these.
The Swiss in the United States at Internet Archive
Swiss-American Historical Society and Swiss Center: Genealogy
Tips for researching records of immigrant societies:
In the U.S., the time between an immigrant’s arrival and naturalization is often documented in records of ethnic organizations such as fraternal benefit societies, immigrant aid and colonization societies. These kinds of community groups often existed in cities and towns where specific immigrant groups had a strong presence.
 Become an expert Google searcher (for genealogy and everything else you want to find online) with The Genealogist’s Google Toolbox, 2nd edition, by Lisa Louise Cooke. Or click here to get started with basic Google search strategies you can use now.
Tips for researching naturalizations:
Naturalization records from that time period won’t reliably tell you where an ancestor was from. But they’re still worth looking for, especially if census or other records indicated that the person naturalized.
When looking for women’s and children’s naturalization records, remember that during this time period, they automatically became naturalized if their husband or father did, so individual records for married women and minor children won’t exist under their own names. But a woman could apply on her own, too. Click here to read a free article on women’s naturalizations.
Learn more in a free, 3-episode series on immigration and naturalization records: episodes 29-31 in the free, step-by-step Genealogy: Family History Made Easy podcast.

Lisa Louise Cooke uses and recommends RootsMagic family history software. From within RootsMagic, you can search historical records on FamilySearch.org, Findmypast.com and MyHeritage.com. In the works: RootsMagic will be fully integrated with Ancestry.com, too: you’ll be able to sync your RootsMagic trees with your Ancestry.com trees and search records on the site.
 Keep your family history research, photos, tree software files, videos and all other computer files safely backed up with Backblaze, the official cloud-based computer backup system for Lisa Louise Cooke’s Genealogy Gems. Learn more at http://www.backblaze.com/Lisa.
INTERVIEW: Sunny Morton on recording your own life stories
Story of My Life
“Some people about writing their life stories like I do about going to the gym. I put off going, but once I do I remember how much I enjoy it?and how much good it does me.” -Sunny
Story of My Life: A Workbook for Preserving Your Legacy available as a writeable PDF ebook or as a full-sized softcover workbook
GENEALOGY GEMS BOOK CLUB: Sarah Chrisman


This Victorian Life
Featured Genealogy Gems Book Club author Sarah Chrisman describes what it’s like when the days get shorter and the darkness comes early?in a house without electricity.
 Legacy Tree Genealogists provides expert genealogy research service that works with your research goals, budget and schedule. The Legacy Tree Discovery package offers 3.5 hours of preliminary analysis and research recommendations: a great choice if you’ve hit a brick wall in your research and could use some expert guidance. Click here to learn more.
GENEALOGY GEMS EXCLUSIVE OFFER: Go to www.legacytree.com/genealogygems and use coupon code SAVE100 with your purchase of research services.

MyHeritage.com is the place to make connections with relatives overseas, particularly with those who may still live in your ancestral homeland. Click here to see what MyHeritage can do for you: it’s free to get started.
DNA WITH DIAHAN SOUTHARD
Parents spend a good portion of their parenting time ferreting out the real story from their children. One time when Henry was in Kindergarten he was playing outside with another little boy. I was in and out of the house watching him and checking on other things. Hours later I noticed that his bike had been spray-painted black. When confronted, he claimed he had no idea how such a thing could have happened. Unfortunately, I jumped to conclusions and blamed the other kid (you have to give me credit, at six Henry was such a good boy and had such an angelic face with his blue blue eyes and blonde blonde hair). But as I was on the phone with my husband telling him about the issue I looked over at Henry and I saw it- that guilty look and my stomach sank, recalling the things I had said to the other boy’s mom. “I’ll have to call you back,” I told my husband.
As genealogists, we spend our time trying to ferret out the real story from our ancestors, or at least from the records they left behind, because they’re not sitting in front of us with guilty looks on their faces. We are constantly checking family stories against, say, the information on a census record, then comparing it to the family will, then making sure it all agrees with what’s in the military records. And even if we have total agreement, which isn’t always, more information often comes along, like in the form of DNA testing, and we may find even more apparent discrepancies.
I recently read an article in the Wall Street Journal about a reporter, Cameron McWhirter, who talks about finding just that kind of discrepancy between his family lore and his DNA. He even goes so far as to say, “I am descended, at least partially, from liars.” And he makes the point that “many immigrants reinvented themselves when they arrived here (the United States),” which could be a nice way of saying they had a chance to INVENT a new legacy, not just reinvent it. His assessments are certainly interesting, and worth reviewing, to help us see how DNA testing can affect the way we look at family stories and traditional research results.
McWhirter may be the classic modern genealogist, never having set foot inside a courthouse or scanned through microfiche, relying instead entirely, he reports, on internet research. Now before you roll your eyes, just stop for a minute and appreciate how exciting this is. Here is a man who never gave his family history a second thought, yet because of the death of his parents started to tinker around a bit, and then due to the large volume of information online “was quickly pulled into the obsessive world of modern genealogical research.” I say, score one for the genealogy world!
What he found was that while his dad was proudly and solidly a self-proclaimed Scot, the records and DNA revealed his heritage was actually from Ireland and eastern Europe. McWhirter says that his “father hated Notre Dame, but judging by my results he could have been one-quarter to one-half Irish. He spoke dismissively of people from Eastern Europe, but part of his genetic code likely came from that region.”
McWhirter’s evaluation of his genetic report includes only his ethnicity results, which as you can hear, were meaningful to him in the way they flew in the face of his father’s prejudices and assertions of his own identity. But the ethnicity results fall short of the point of testing for most genealogists. He might even more powerfully transform his sense of family identity if he took a look at his match list and saw an actual living cousin, for example, a third cousin perhaps who was also descended from his German great-grandmother, who maybe never mentioned that she was also Jewish.
Connecting with other cousins who also have paper trails to our ancestors serves to provide further confidence that we have put all of the pieces together and honored the right ancestor with a spot on our pedigree chart. It’s like we multiply our own research efforts by finding more people like us?literally?who are descended from the same people and interested in finding them. As long as they’re as diligent in their research as we are, of course.
At a recent conference I met a 5th cousin. Even with a connection that distant it was exciting, and it made we want to look again at our connecting ancestors and pause for just a minute to marvel how my DNA verified my paper trail back to them, and that part of them was around, in me, and in my new cousin. To me, THAT’s a bigger picture I want to see?when the paper trail comes together with the DNA trail and turns into real live cousins, even if they turn out to be a little different than the stories and sense of identity that were handed to us when we were young.
Maybe you’re something like Cameron McWhirter: you’ve taken a DNA test, been intrigued (or disappointed) by the ethnicity results, but haven’t yet fully explored all your matches on your list.  I’m telling you, you may be seriously missing some opportunities. If that’s you, I may actually have written my new DNA quick guide just for you. It’s called “Next Steps: Working with Your Autosomal DNA Matches.” This guide will teach you how to leverage the power of known relatives who have tested. You’ll get an intro to chromosome browsers and their role in the search process, and access to a free bonus template for evaluating the genealogical relationship of a match in relationship to the predicted genetic relationship. This guide also gives you a methodology for converting UNknown relatives on your match list into known relatives, which is what we’re going for here.
 So check it out, either as a solo purchase or as part of my Advanced DNA bundle.
*Update: The Next Steps guide has been replaced with Breaking Down Brick Walls with DNA.
PROFILE AMERICA: Lights Out
PRODUCTION CREDITS
Lisa Louise Cooke, Host and Producer
Sunny Morton, Editor
Amie Tennant, Content Contributor
Vienna Thomas, Audio Editor
Lacey Cooke, Additional Production Support
FREE NEWSLETTER:
Subscribe to the Genealogy Gems newsletter to receive a free weekly e-mail newsletter, with tips, inspiration and money-saving deals.
Check out this new episode!
Disclosure: This article contains affiliate links and Genealogy Gems will be compensated if you make a purchase after clicking on these links (at no additional cost to you). Thank you for supporting Genealogy Gems!
by Lisa Cooke | Aug 22, 2017 | 01 What's New, Genealogy Gems Podcast
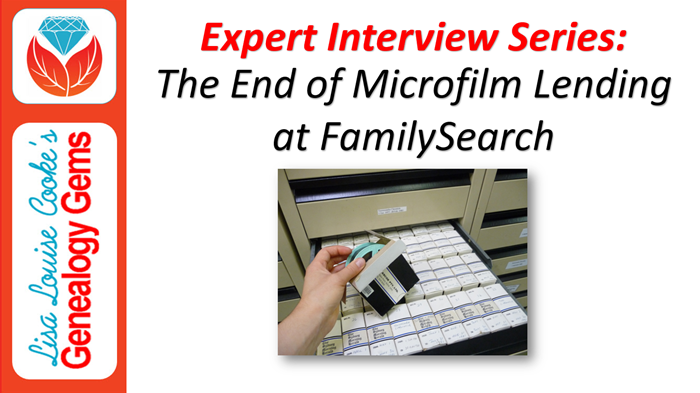
Change is something we can always count on, but that doesn’t make it any easier, does it? Understanding why the change is happening, how it affects you personally, and what you can do to adapt, does. So, when FamilySearch announced the end of their long-standing microfilm lending program, I immediately sought out the key expert who can answer these questions for you.
FamilySearch’s Goal for Microfilm and the Family History Library
It seems like only yesterday I was interviewing Don R. Anderson, Director of the Family History Library about the future of the library and FamilySearch. Back then, in 2009, he made the startling statement that their goal was to digitize all of the microfilms in FamilySearch’s granite vault. (Click here to listen to that interview in my Family History: Genealogy Made Easy podcast episode 16.) Fast forward to today, and we see that in less than ten years that end goal is within sight. We are also seeing the ending of a service nearly every genealogist has tapped into at some point: the microfilm lending program. Family historians have been able to place orders for microfilm to be shipped to their local Family History Center where they could then scroll through the images in search of ancestors.
On August 31, 2017, this service comes to an end.
Fear of the Unknown
It’s sort of scary to see this come to an end before every last roll of microfilm has been digitized and put online (just head to social media to read some of the concerns). It’s definitely been comforting to know that the records you need are just an order form and two weeks away.
I have always found that being armed with information helps alleviate fear, and so upon hearing the news, I reached out to FamilySearch to arrange a special interview with Diane Loosle, Director of Patron Services at FamilySearch. In this special Genealogy Gems Podcast interview, we take the time to really comb through what the end of the microfilm lending program means for you, and what your options are for records access going forward. I’ve been anxious to get this information into your ears and hands, and have spent the entire weekend producing this episode and transcribing it for you.
The Interview: The End of the FamilySearch Microfilm Lending Program
Lisa: One of the constant challenges for genealogists is gaining access to genealogical records that they need for their particular family history research. I imagine that you’ve had that challenge yourself. Thankfully, since 1938 the FamilySearch organization has been microfilming records around the world. They’ve been making these records available through the Family History Library in Salt Lake City, and through a tremendous lending program with their Family History Centers located worldwide. And that may be where you’ve gotten your hands on a couple of microfilms and records over the years. But of course, as the Internet has been more accessible over the last two decades, this is changing the landscape of record access. So more and more we are gaining access to digitized records online, and this has led to a really big change in the long-standing microfilm lending program.
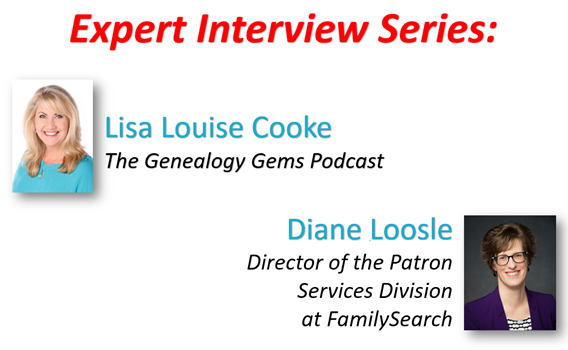
I’ve invited Diane Loosle, the Director of Patron Services Division at FamilySearch, to talk about the change that’s occurred, what it means for you, and what your record access options are going to be going forward. Diane, thanks so much for joining me today.
Diane: I’m so happy I could come, and thank you for inviting me.
The Reasons Microfilm Lending is Coming to an End
Lisa: I imagine that you’ve been very busy with the changes. I know that the last day of the microfilm ordering was August 31, 2017. And you know FamilySearch has been digitizing records for years, so we are going to be shifting from microfilm to digitization. Why is right now the time that the change is happening, where you’re actually discontinuing the physical microfilm lending?
Diane: This is such an exciting time Lisa. We’ve been looking forward to this day for many, many years because when you think about the fact that you can get access to these images immediately in your home, for the most part – there are some that you have to access through a center or library, but the majority are in your home – that’s pretty wonderful. And so we are moving to a place where all of our fulfillment for your needs for your records is going to be digital and that’s what this change is all about.
So the reason that it’s happening now is that, a couple of different reasons. First, we have moved through a lot of the microfilm and have had those digitized and they are up online. So it was a good point with that.
We’ve also seen a huge drop in the orders of microfilms. So there’s not very many being ordered now, so that kind of lined up.
And then also our supplier. We have a single supplier for vesicular microfilm, and I think that’s important to understand that we’re talking about a certain type of microfilm because we use that type to make the copies and send them out to you. We have a single supplier, and that supplier has been kind of raising prices and giving us the indication that they would rather not be in that business. And so with all those things together, and the fact that we would like to take the resources that we are currently using to duplicate films, and send them out, and ship them and all of that, we’d like to take those resources and move them towards bringing you more records digitally.
It seemed like the right time to make this decision to finally finish it. Now we do have some of the collection that has not been completed of course, and I think that’s what’s causing most people concern is, “What happens? Can I get access to that during this time that you are still finishing it off?”
Lisa: Exactly, and you know I have visited the distribution center for your lending program, and it was massive and it looked really complicated. And then when you add on the idea that the access to the actual film itself is changing.
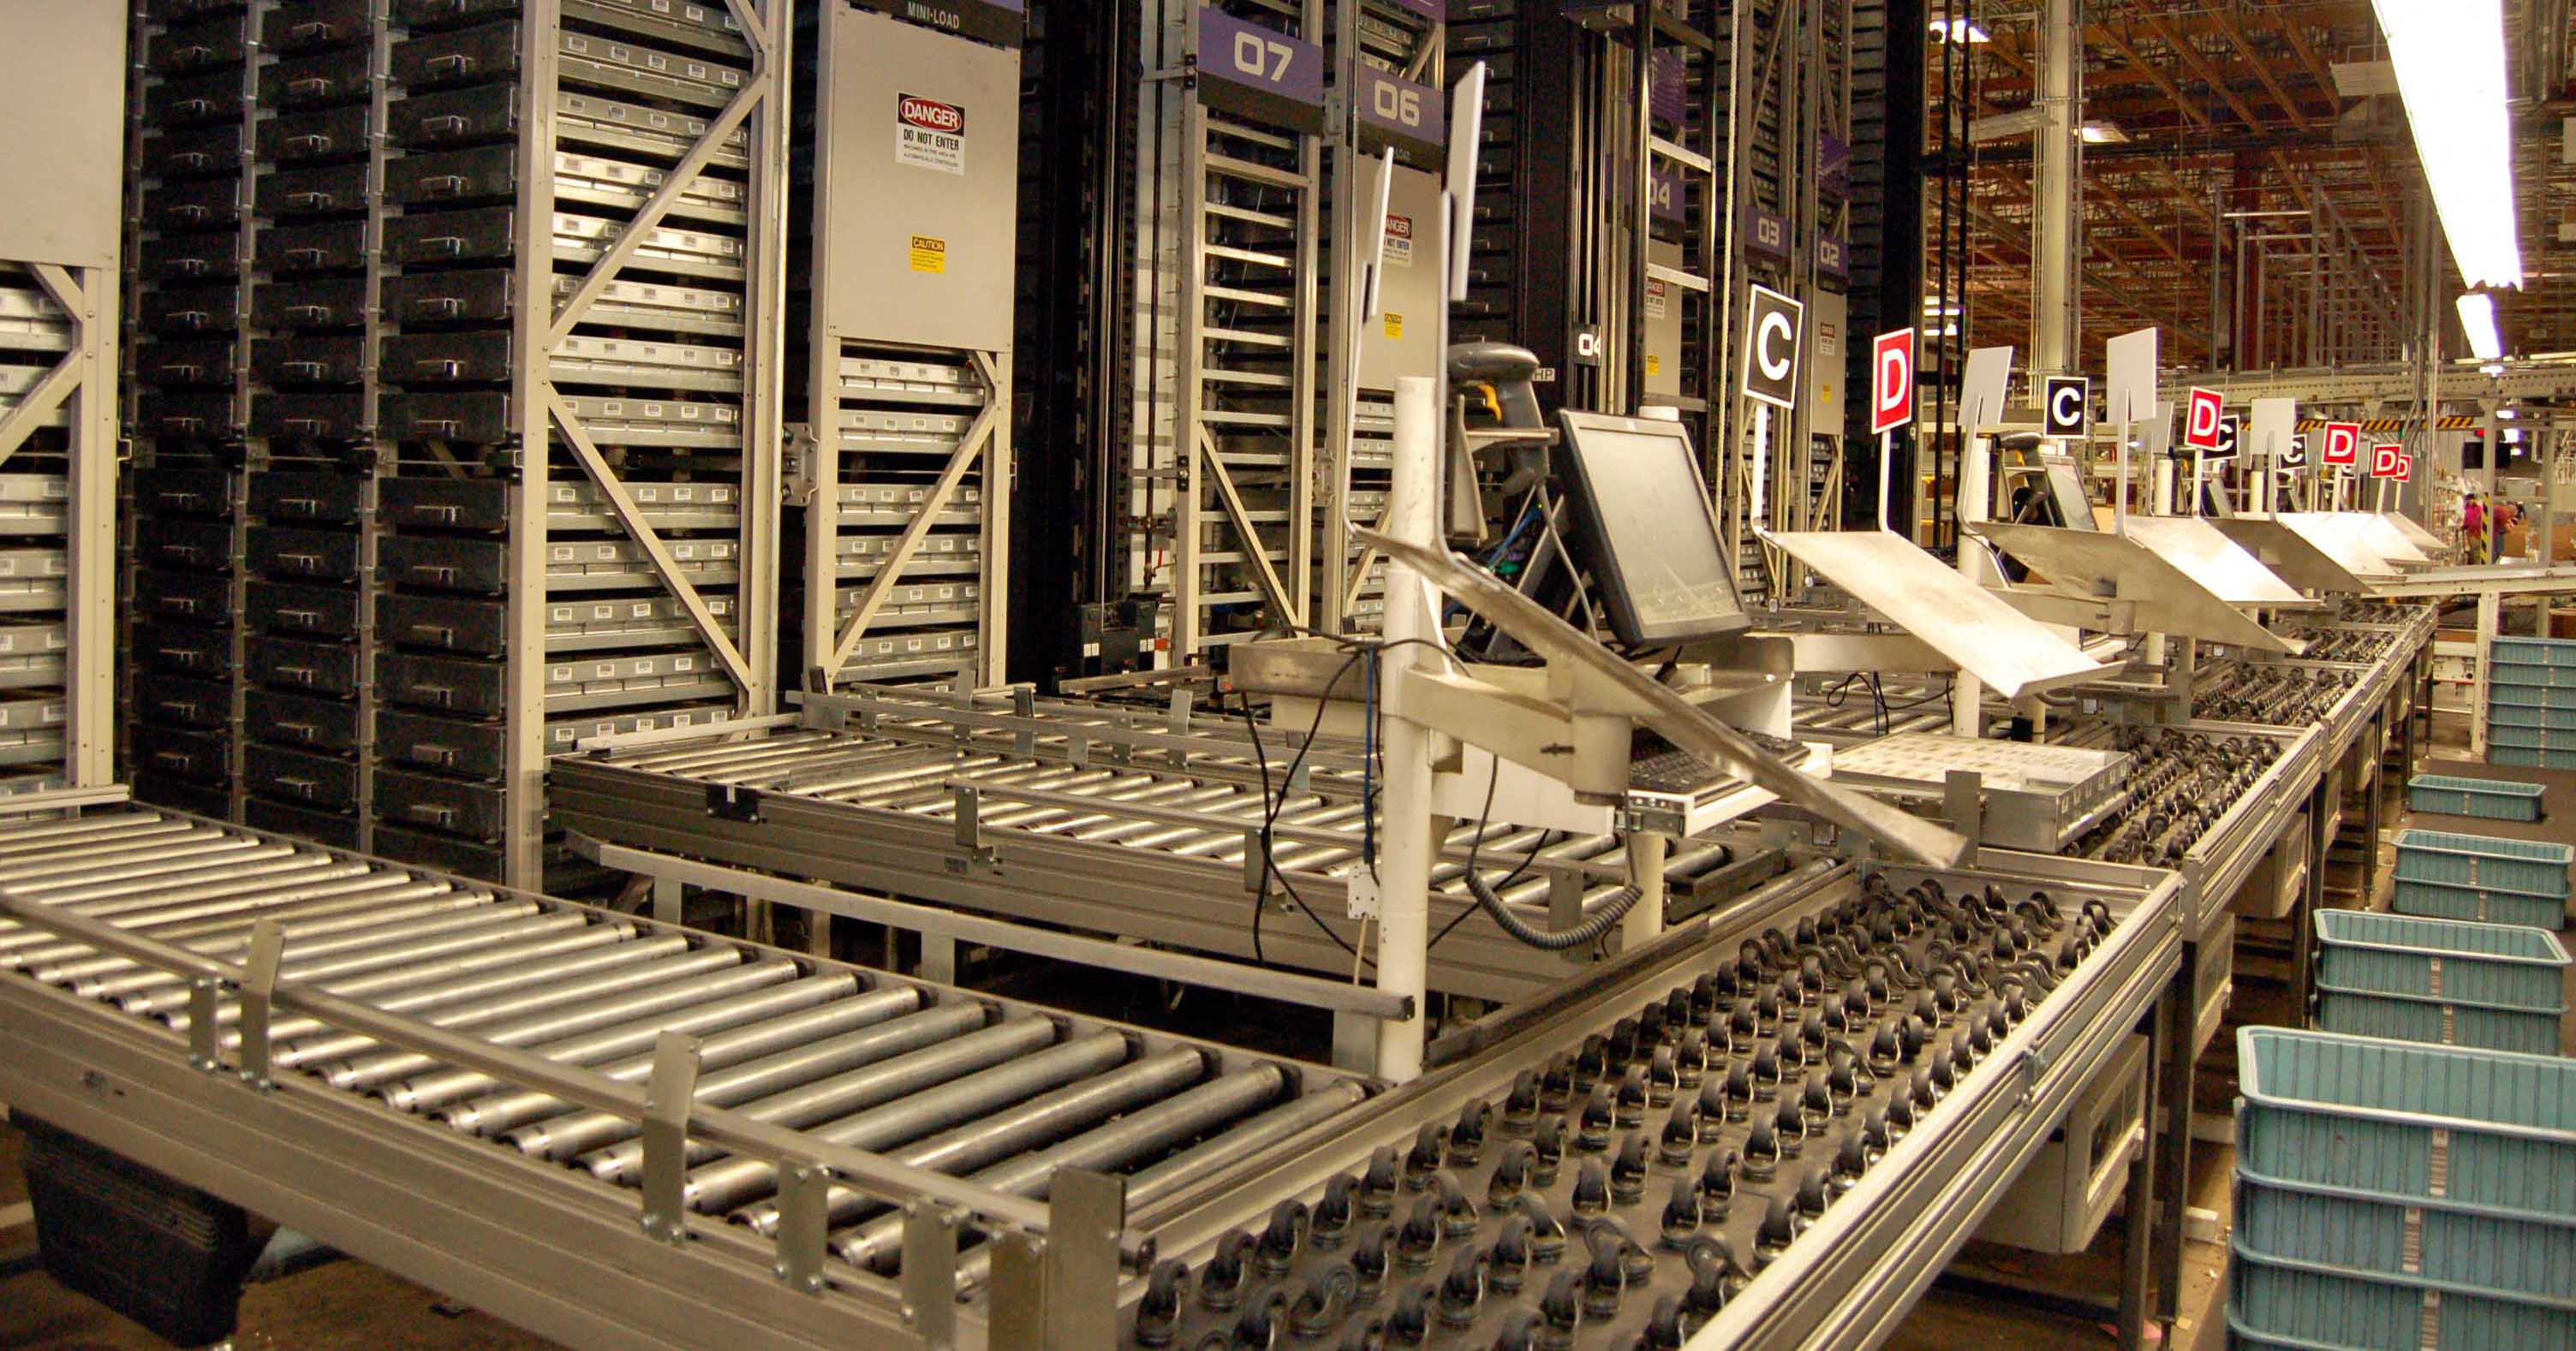
I just got a camera from my uncle, and it’s got 25-year-old film in it. It took me all day to find a local store that could develop it for me!
So, it’s like a perfect storm of a lot of technological changes, which is exciting, because as you said we can access things from home.
Digitization and Publishing Limitations
I know that when it comes to the microfilm that you guys have, the goal has been to digitize all of it. But explain to folks what the limitations are in terms of, do you have the rights to lend it, do you have the rights to digitize and put up online everything that you have microfilmed?
Diane: Right. So we are always limited by the rights associated with the collections because the record custodians stipulate those when we do the agreements. And in microfilm, we’ve been circulating things. Our intention is to circulate digitally everything possible legally for us to do. And that’s the majority of the collection.
Now in the process of doing this, what’s happened over the years is that laws have changed around Data Privacy, particularly in Europe and some other locations around the world. And as we’re going through and reviewing all of these, you can imagine these thousands of contracts for this process, we’re discovering that there are some that because of the changes in the Data Privacy laws, they really should not have been continuing to circulate because of those changes.
So those would then in the future be restricted because of the Data Privacy issues. And those are usually very modern records, those that have living people in them.
So there will be a set of records that maybe you could have gotten on microfilm previously that you would not now be able to get digitally. But that’s because they shouldn’t have been in circulation anyway because of the data privacy changes. But for the most part, what we’re circulating microfilm-wise you will have access to digitally.
Now, about 20% of the collection you have to access through the Family History Library, or through a Family History Center or affiliate library because of the contracts we have. And that was also true with the microfilm of course, and now it’s true with the digital images as well, based on the contracts, so there will be a certain set that is in that category.
Family History Center Affiliates
Lisa: Help us understand what affiliate centers are.
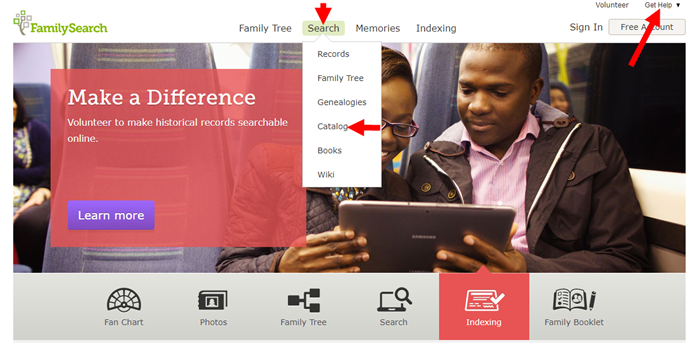
Diane: Affiliates don’t have to return the film they have. Affiliates are usually public libraries or Family History Centers in an LDS chapel. Local leadership will decide. So if they keep them, you can still access them. And the Family History Library in Salt Lake City will maintain a large microfilm collection as well. Go to familysearch.org and in the right corner, you’ll find the Get Help link (and click Contact Us). Search by zip code for affiliates near you. They will appear on a map. Libraries have extended hours compared to Family History Centers.
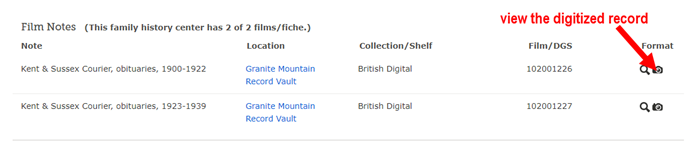
The best way to find out where the films are still located, both physical and digital, is the FamilySearch Card Catalog. Many people aren’t that familiar with the card catalog. Look for the Camera icon, then click to go to the document image.
Lisa: Let’s dig into that a little bit. So we’re talking about, you mentioned the term “affiliate centers” and I know that there are some locations which aren’t technically affiliates. Can you help define that for us? How do we figure out, before we make the jaunt over to the local family history center if that’s one that actually can still have some of the microfilm. Help us sort that out.
Diane: So if you go to any center or affiliate library out there, and I’ll tell you how to find those in just a minutes, they can keep whatever film they already have on hand. There’s nothing that’s saying that they need to send it back. Now that is dependent on decisions made at the local level. So, you know, the leadership of either the affiliate library, which is normally in a public library, or a family history center which is often in an LDS chapel, the local leadership there will make a decision about, you know, the film and what happens to them in the future, but we’re not asking them to send them back. So you’ll still be able to access them. And the library here in Salt Lake will maintain a large microfilm collection as well. So, it will still be available that way.
Now the way that you find these locations is if you go into FamilySearch, up in the right-hand corner there’s a Get Help link, and the Get Help link lets you get in touch with us. And then you can search actually using your zip code to find which centers and affiliate libraries are near you, and both will appear on the map that appears. So, uhm, you can find out which ones are near your location.
The affiliates are, as I said, often public libraries, so they may have extended hours beyond what the family history center might have because the family history center is often as I said in a chapel and manned by volunteers. And so they may not have as many hours as your affiliate libraries may have.
How to Identify Where the Films are Located
Lisa: So whatever they may have had on hand when the lending program came to an end, they had the option to decide if they were going to hang onto it, or if they were going to send stuff back. There’s going to be some just at the Family History Library in Salt Lake City. Do we go into the card catalog to identify where the existing films are still located?
Diane: Yes, so the best way to find out what’s available both digitally and where the films might be physically located is through the FamilySearch Catalog on familysearch.org. So if you go to Search on FamilySearch, and then Catalog, you can look up your location, look up the records your interested in, and it will tell you where those can be found.
Now, if it’s available digitally, and actually most people I’ve talked to where they would have this concern about “oh goodness, I’m not going to have access to my films!”, when I’ve talked with them, and we’ve looked them up, their records were already available digitally, they just didn’t know it. So, if you go in the catalog and look it up where it lists the microfilm, there will be a little camera icon out to the right-hand side, and if you see that little camera icon, you can click on that and that takes you straight in to the digital images for that record.
Now we publish those, we do about digitize about 1,500 microfilms a day at the vault. And we publish those pretty immediately up on to the website through the catalog. You will not find those through the Historical Records part of FamilySearch under Search Records. They’re just through the catalog, so there’s a much larger collection available through the catalog than what you see in the Historical Records section.
How Films are Prioritized for Digitization
Lisa: When we get notifications, I know I get your press releases and such on the new records that are coming out, does that include those? Because we do publish every Friday kind of a run down for all of our listeners out there, what the newest records are that are coming online.
Diane: It does not currently. That publication only includes things that are published online in the Historical Records section of the website. However, with this change, we’re looking to change that so it will include those being published to the catalog. Now the challenge with that is the volume! Because 1,500 films a day is a lot.
And these films, because the way that we did this initially, we prioritized all of the films that had been ordered in the last five years to make sure that those were available digitally, so it’s been kind of piecemeal a little bit.
So, you might have two or three films in a full collection that have been digitized and the rest maybe not, at this point, and so trying to help you understand what is and is not available through that publication. We’re still working through the details. But the intention is, as we go forward, will be to prioritize filling in those collections where maybe one or two films have been digitized and the rest have not yet. We will go through and make sure the whole collection has been digitized. And then we are going to introduce a process where you will be able to let us know if there is a film that you absolutely need. You can let us know, and we will work that into our prioritization and try to get that to you as quickly as we can. You know if you think about how long it took to get a microfilm to be delivered to you once you ordered it, you can think about it’s kind of the same time frame when it might then be available to you digitally.
How to Request that a Microfilm be Digitized
Lisa: How could they be contacting you to make that kind of request?
Diane: We are working on that process right now, trying to finalize it. So there’s kind of two options we’re looking at at the moment: One, you would contact us through our support line, the Help Line. The other is that we would just have a form up that you would fill out. Now the form is going to take more time to get established and up. So we may go out of the gate with not as ideal of a process, but we want to make sure that we can let us know, so we’ll be clear about what that is as we get closer to September 1st.
Lisa: When we get into the catalog, have you already flagged which ones are going to have restrictions, they are just not going to be able to be digitized? Because I think some people might be thinking “Maybe I should just hold on and wait, over the next couple months maybe they’ll get to this one, I’ll put in a request.” But I imagine that’s going to be a big job if you have to go in and try to flag every single one that you know you’re not going to have the rights to digitize. Tell us how you’re going to deal with that.
Diane: Well, that has not occurred and would be pretty impossible to do at this stage, just because of the volume of what we’re dealing with trying to go through. We’re doing it as we go to digitize the films. And so, we discover it as we go, as opposed to knowing it ahead of time.
Lisa: So if they put in a request, you pull it out, go ‘OK well let’s look at doing this,’ and then realize, no, this one’s not going to be able to do it. Then at least they would get that information?
Diane: Yes, they would. Well, what would happen is we’re working on a way so that in the catalog you would be able to identify that. So for example, a request actually came from the community out there that we be able to distinguish if a record can be viewed in my home, or if I have to be at the facility to view it, or if there is some other restriction on it. And so, because of that feedback, we thought “So let’s see if we can figure out a way to help people understand that.” Now, these things probably won’t be ready right out of the gate. But we’re looking for ways to make it simpler for you to understand what the challenges are with the record that you’re trying to access.
Gaining Access to Microfilm and Some Restricted Digitized Records in Person
Lisa: Sure. So, if we’re looking online and we see a record, and it’s not been digitized yet, would we at this point, until you get more formalized processes going, would you still encourage people to get in touch with the Family History Library in Salt Lake City? What other options are they going to have to gain access?
Diane: So first what I would do is I would look, because we’ll maintain the film inventory, so we know where the films are located, so I would first look and see, is this film available somewhere near me? Or if I have an opportunity to come to the Family History Library, and the film is there, great. But, so first look and see if you can locate it, then you can let us know through the channels that we’ll have available to you what the film is, and then we’ll put it into the list to be prioritized to be digitized. But I would always encourage folks to look and see if they are located near where that film already is because that would be much quicker for them to get access to that.
Lisa: If Salt Lake City is the only place, then, of course, this really whittles down to the big fear of everybody, is “Oh that one film I’m going to need, it’s only going to be in Salt Lake City and I can’t get there.” What other kinds of options might a person like that have?
Diane: Well, so I think that there are some options available to them because we have a large group of professional researchers who come to the library every day, and those folks could probably be useful to you in looking up those records and getting copies of whatever is needed. So that’s one option that people could take to do that.
The majority of what we’ll have, I don’t think the case would be that the only place you can get it is the Family History Library. If we do have a fair number of collections that are in that category as we finish this process off, then we’ll look at ways to provide some access where we can. But that access would probably be in a digital way as well. So that would be my suggestion, that they reach out to those who are here every day and could take a look at that. And I think you know there are other websites where you can get access to professionals as well, or just good samaritans, you know, that want to help you out.
Lisa: Absolutely, and there are lots of those. Finally, are there any records that the people listening are going to completely lose access to?
Diane: The only ones that would be in that category is because of data privacy. So, if there was an issue with, you know, a law changed, that made it so that we could no longer provide access to those. But that would have been true in the microfilm world as well.
Lisa: Exactly. So really, it really doesn’t change in that respect. We’re not losing records, we’re changing up how we access them. And I think you’ve helped shed a lot of light on kind of what the process will be and it sounds like you have a big job ahead of you.
“We’re not losing records, we’re changing up how we access them.” Lisa Louise Cooke
Shifting Resources to Meet the Goal
Lisa: How quickly do you think it’s going to help once the lending process is let go of, that the resources start going to all of this other work now that you have to do on the digital side?
Diane: I think it will move pretty quickly for us to, you know, start to do more with the resources we have. For example, we’re collecting around three million images with three hundred camera crews out there, about a week. So, that’s a lot! And we want to shift a lot of resources. Another place we’d like to capture more is with Africa and the oral genealogies project that we have, and gain more access there. So, we’ll be shifting to those. And then, of course, the vault is moving at a pretty good clip already, with about 1,500 films a day, so I think we’ll be able to keep up pretty well with the demand that’s coming at us from people. But, we’ll evaluate that as we go, and determine if we need to boost up more there or not, to be able to move more quickly for folks.
Empowering Genealogists to Learn More
Lisa: Any other questions that I didn’t think about that you’ve been hearing online, in social media, that you’d love to give us some input on?
Diane: Well, we have had some questions from some of the affiliate libraries about how do they get the access? So that’s been happening online a little bit. And so we just want them to know that we’ll be reaching out to them via calling all of them actually, and helping them through this process of setting up the things that they need to technically to be able to get access to the images digitally. So that’s definitely something they should know.
The other thing is that we have a lot of people who don’t actually know how to use the catalog [laughs] because you know they’ve grown up in a search world, or looking at the historical records the browsable images, and a lot of people don’t understand that there’s a lot of different ways to access the records on FamilySearch. So you have Search, which is a very small percentage of the collection actually, compared to the whole, and then you have the Historical Records that are only browsable, and that you can go in and look at the images browsing, and then you have everything that’s been published through the catalog. So there’s kind of three places that they need to look. So I think that’s the biggest piece I’ve seen: people just don’t know. They’re not aware of where to find those things. And you know eventually, it will be nice, maybe when those things come together. But at this point in time, they’re separate. And that’s because we wanted to ensure that you would maintain access. If we could just publish them quickly and maintain access for you, that’s the best in our minds.
Lisa: Absolutely! Well, I know that Sunny Morton here at Genealogy Gems is going to be joining us in future episodes talking more about just those different areas. And I love the way that you kind of laid it out for us because I think a lot of people weren’t that familiar with the differences. And she’s going to be helping us get a little savvier in that ongoing research.
Diane, thank you so much for taking time to visit with me, and to answer some of the questions. I know that you know that the emotions that run high are only because people are so passionate about family history, and they are so appreciative of what FamilySearch has done. It’s been an amazing resource that you guys provide to the public for free, which is just absolutely invaluable. And I know that I have a lot of confidence in where you guys are going because you always are out there looking forward. How far out into the future you guys look and you plan for is just phenomenal! It’s not just about us accessing records, it’s going to be for generations to come, and I love the fact that you guys are really laying the groundwork for that.
Diane: Well, thank you, Lisa! We are all about getting you access to records so that you can find your ancestors, and we will always be about that. I’m glad that I could come and help people to understand what’s happening and hopefully be a little less concerned about the change. I know it’s difficult, but it’s a wonderful change too.
Lisa: Thanks again Diane!
Diana: Thank you, Lisa!
Check out this new episode!
by Diahan Southard | Aug 26, 2014 | 01 What's New, Beginner, Family History Podcast
Family History: Genealogy Made Easy Podcast
with Lisa Louise Cooke
Republished August 26, 2014

Free podcast – available in all major podcast apps.
https://lisalouisecooke.com/familyhistorypodcast/audio/fh42.mp3
Download the Show Notes for this Episode
Welcome to this step-by-step series for beginning genealogists—and more experienced ones who want to brush up or learn something new. I first ran this series in 2008-09. So many people have asked about it, I’m bringing it back in weekly segments.
In today’s episode we finish a multi-part, step-by-step series on setting up your own family history blog. In episode 40 you decided what the purpose of your blog is, and we got you started with the free Blogger web site and picked out your blog name and set up the web address for it, and got the basic framework started. In episode 41 two seasoned bloggers inspired us with their posts.
In this episode I talk about adding a few more gadgets and details, doing a bit of pre-planning for your blog posts, publishing your first article, and then talking about how your readers will subscribe to your blog. You’ll also get great tips on how to create genealogy content that others looking for the same ancestors can find easily online.
Episode 42: How to Start a Genealogy Blog, Part 5
OK, let’s head back to the new blog we created in Episode 40. I named mine Blog Your Family History. (This is just a sample blog: my current blog is part of the Genealogy Gems website.) Please note: blogging platforms change over time. The features and layouts I mention have been updated. Just watch for similar features in newer versions of the blog platform.
So far I have the basic layout set up and I added the vintage photograph of the three ladies sharing some written correspondence. If you’re not signed in to your Google account, you’ll notice a link in the upper right corner of your blog page that says “sign in.” You’ll need to click that and enter your user name and password to get access to your blog dashboard – the area where you customize your blog and write your blog posts.
When you sign in you’ll be taken to the dashboard area for your blog. In my case I have a couple of blogs, so they’ll all be listed here in the dashboard. To get back to your blog just click the View Blog link for the blog you want to view. You’ll notice that when you get there the link in the upper right corner now says “sign out” so you know right now you’re signed in. To get back to the dashboard where we can continue customizing the blog, just click the Customize link in the upper right hand corner of the blog. So far we have a couple of “gadgets” or sections of our blog:
- the title area at the top;
- the blog posts box. In the case of the blog I’m creating here the gadgets run along the right hand side of the blog page.
- About Me
- the gadget with the photo I added
- A followers gadget showing other blogger readers
- the blog archive gadget – this is where readers can access blog posts that are over a month old.
So let’s add another gadget by clicking the Add Gadget link in the top gadget box and a window will pop up showing us out options. I’d like to add a search box so that my readers can easily find articles with keywords they are interested in. So just click the plus sign to add the Search gadget and a Configure Search Box window pops up so I can fine tune this gadget the way I want it. So I’ll keep the title as “Search this blog” since that’s pretty straightforward, and I’m going to just have it search this blog so I will keep that check box checked. And click the SAVE button and now I have a Search box on my blog.
So as you can see adding various gadgets to your blog is easy and you can customize them to appear the way you want. And remember you can rearrange them on your dashboard by just clicking and dragging them into the position you want. Once you get the elements of your blog the way you like them – at least for now, and you can certainly make changes any time you want – then it’s time to start blogging.
What to blog about?
Hopefully you’ve decided what you want to blog about – perhaps a specific line of your family, or maybe you’re going to just sort of journal what you work on each day. No matter what approach you take, there are a few things to keep in mind. First, each time you write an article and publish it to your blog page it’s called a “post.” Post is sort of interchangeable with article, and posting is another word for publishing – basically you’ve made the article available on the web.
When you do post an article you will want people—particularly other researchers—to be able to find it. You’ll have better success attracting readers who are researching the same families if you sort of put yourself in their shoes. Ask yourself, what will they be searching on? When someone goes to Google and starts looking for blogs about their family trees, they are using keywords to do that search.
So while you may have some very creative ideas for blog post titles, if you don’t include some of those important keywords (or at a minimum the surnames) they may never find you. And of course sprinkling keywords into your post will also increase its chances of being found. And when we talk about keywords, we’re also talking about key phrases, such as family history, or family tree. Other good keywords are genealogy, birth, death, research, location names, etc. Just the kinds of things you would search on if you were looking for people writing about your ancestors. Remember too that an ancestor’s name is also a keyword phrase.
It’s a good idea to mix it up because you never know how someone else will be searching. For example, I research my husband’s great great grandfather Senator C J Larson of Winthrop MN. So if I’m writing about him, I will use several variations of his name:
- C J Larson
- Carl Johan Larson
- Charles Larson
- Charles J Larson
- Senator C J Larson
And of course when I use these names in combination with Winthrop, Sibley County, Minnesota, I’m bound to be found by someone also researching him and his family.
Publish your first post
OK, well let’s get right to how to publish your first blog post. At your blog Dashboard (if you’re not there just click the link in the upper right corner that says Dashboard) and click NEW POST. This is like getting a new piece of paper. You’re new post is under the Posting tab and there’s a box where you can write your text and there are some formatting buttons along the top.
My advice is to bite off small chunks. People tend to read something that looks more like a magazine article rather than a novel. And it’s easier to focus in on one topic at a time. So you may want to make your first post a welcome message and explain to your readers what they’ll will be seeing in the future on your blog. I know, you don’t have any readers yet, but since all of your posts are archived, this post will be read tomorrow and two years from now. New readers can find you at any time, and they may very likely take a look at your first post.
The first thing to do is write your post title. I used to wait to title my posts until after I wrote them because writing them often brought to mind the perfect title. But the problem with that is that so often I would forget to go back and type a title in and I would end up publishing without the title. While you can go back and add the title later, it may show up in your readers RSS feeds including those who subscribe to your blog by email. So I find that it works best if I give it the best working title I can come up with, then I write the post, and then I can go back and change it if I want, but if I forget it will at least have a basic title.
Also, remember that your readers probably have many blogs they read – but they probably don’t READ them all, the probably scan the titles and click through to read the ones that sound interesting. So your title has an important job to do. Like the blog text it should contain keywords that will help the post show up in search results, AND it needs to catch your readers’ attention.
When I first started blogging I was always trying to come up with title that as clearly as possible explained what the post was about. But over time I realized that we don’t have to explain it all in the title. In fact, being a bit mysterious or intriguing with the title can entice the reader to click through and read. They’ll find out soon enough all the details of your posting, but your title sets the tone, and catches their curiosity. Of course I don’t advocate bait and switch – but have fun with your titles and use it to your best advantage. And now FINALLY it’s time to actually write your blog post! Of course you can unleash your creativity here, but I do have a few suggestions:
- Keep your paragraphs shorter rather than longer – it just makes them easier and quicker to read
- Incorporate those keywords and phrases
- A picture says a thousand words – add images whenever possible and I’ll show you how in just a moment
- Write in your natural voice. Typically blogs aren’t formal, and you will have an easier time writing if you write more like you speak. And that will come across as more genuine to your readers.
- Don’t bite off more than you can chew. If you have a lot to say on a particular topic, consider publishing your thoughts in a series of blog posts rather than one really long one. And I find that readers really like following a series.
Once you’ve got it written up, it’s time to a bit of formatting. In Blogger there are a few different fonts you can choose from. Just like in Microsoft word, you highlight the text you want to format and then select from the drop down menu which font, and font size you want. The default font and size might be just fine, but it’s nice to know you do have some flexibility. You can also bold and italicize text by highlighting the text and clicking either button. And like Word you can use Control-B on your computer keyboard for bold and Control I for italicize. You can also put your text in a different color. Again just highlight the text to be changed and click on the capital T button with the color boxes and click on the color you want.
Now a word about formatting. Remember when we discussed that it was a good idea to avoid blog template designs that had dark backgrounds with light type because they are hard on the eyes and difficult to read? Well, over doing text formatting is much the same. It can get hard on the eyes. It’s like the rule of thumb that says you don’t type in capital letters because it looks like you’re screaming at the reader.
Well, overdoing the formatting with a ton of bold and italics and colors just ends up looking chaotic and nothing really ends up standing out. So keep in mind that less is more and use it sparingly so that only the most important things stand out. And just like in Word you can select whether your text is left right or centered justified, or fully justified. And you can create numbered and bulleted lists simply by highlight the text and clicking one of those buttons. And you can also use the Block Quote feature to set text apart as a quotation by indenting it from both sides.
With all of these formatting features you will probably want to see what it will look like to your readers. And that will be different to a certain extent than how it looks here in the post editor. To see it as it will look when posted, click the Preview link in the upper right corner of the text box. When you’re in preview mode the link will then say Hide Preview and to go back to editing or what they call Compose mode just click that Hide Preview link.
Next is the Spell check button, which is something you’ll want to use every time you post. Thankfully if you make a spelling error you can fix it after it’s posted, but it’s so much easier just to run the spell check before you do. There are a couple of more things you can add to this text post to spice it up.
The next button is the Add Image button and it does just that, adds your images and photos. When you click the button an Upload Images window pops up where you can browse your computer hard drive and locate the image you want to add, or if you have a website you can type in the URL address for an image you already have hosted on your website and it will use that image. Keep in mind that Blogger has an 8 MB image size limit, so you might have to reduce some of your photos and save them as smaller files to be uploaded to Blogger. This is often the case when you’ve scanned old family photos at high resolutions that create quite large files.
Once you’ve told Blogger which image to use, you can also choose how you want it to appear on the page on the left, in the center or on the right with the text around it, or you can just leave it as None. And you can also choose whether it is Small, Medium or Large. When you’re ready to go just click the orange Upload Image button and in a few moments it will be processed and you can just click the Done button, the window will close, and your image will now be in your blog post. Again, if you want to see for sure how it will look to your readers just click the Preview link.
You can even upload a video to your blog post. It works much the same way. Click the video upload button. A window pops up and you click the Browse button to locate the video on your hard drive. Blogger will accept AVI, MPEG, QuickTime, Real, and Windows Media video files up to 100 MB in size which is typically about 10 minutes at most. They also have rules about the kind of videos you can upload and require you to click the check box to agree to their terms of service, and then you just click the orange Upload Video button.
Videos take a few minutes to upload, so at first you’ll see the Blogger Uploading Video screen on the video player. You’ll see down at the bottom that it is processing. Once your video appears on the screen then you’re ready to go. If you don’t want to wait while it finishes processing you can click the SAVE button on your post and check back later to make sure it’s complete before Publishing.
And finally, if you decide you want to remove the formatting from you text you can do so with the last button which looks like an eraser. It’s called Remove Formatting from Selection. So in the case of the text that I set apart as a quote, if I want to change it back to regular text, I just highlight the text with my mouse and click the Eraser button and it will go back to normal. If you happen to know HTML you can click the HTML tab and work with your blog post code to further customize it. When you’re done just click the Compose tab to go back to regular editing mode.
Once you have everything formatted, you’ve spell checked and you’ve reconfirmed your title, your ready to send it out to the world! Just click the orange Publish Now button and it will immediately be live on your blog. The next window will say Your blog post published successfully! And you can just click the View Blog link to open a new window and see your published post.
Edit your previous posts
Now if you’re like me then occasionally you’re going to want to go back and edit one of your blog postings. And thankfully that’s very easy to do. Just head back to your Blogger Dashboard and next to the blue New Post button which you would click to create another post, you’ll find the Edit posts link. Just click that and you will see the articles you’ve posted with the most recent one at the top. If you wanted to delete the post all together you just go to the right hand side and click the Delete link for that particular post. To edit the post click the Edit link on the far left side of the post title. This takes you write back into Compose mode and you can make any changes you want. When you’re done, just click the Publish button.
Schedule posts to publish in the future
Do you want to write several posts at once, and have them automatically publish one at a time—once a day, once a week, etc? There’s an easy way to set up your posts to publish in the future. At the bottom of the Text box you’ll see a link called Post Options, just click that. This will expand the box and give you some options. Here you can enter the date and the time that you want the post to go live online. Once you’ve typed that in then just click the Publish button. It won’t be live right now, but will be published at the date and time you specified.
When I first started using this feature I kept clicking SAVE and then wondering why my posts didn’t publish at the right time. But you have to click the Publish button even though you’re not publishing at that very moment. It’s a neat feature, and works great when you’re going to be away but want articles to be published each day. Or like when we talked about breaking up a long article into a series of short articles, you could create them all and then set them to publish once a day or whatever time frame you preferred.
Now you probably noticed that you could also check a box in the Post Options for allowing your readers to post comments. But the best place to set that up is under the Settings Tab. So go to your dashboard, and click Settings. This will take you to the Settings tab which offers a lot of options. Click on the Comments menu link and here’s where you can make your selections as to how you would like your readers to be able to interact with you and your blog. Instant communication and connection with your readers is one of the really unique aspects of blogging, and you’ll find that most folks who read genealogy blogs are interested in a civil conversation. So let’s go through the options here.
- Show: I usually have this set to show comments. But you can hide them if you want.
- Under Who Can Comment? I would recommend that you allow anyone to comment. After all, you don’t want to prevent that long lost cousin who finds your family history blog in a search to not be able to contact you.
- For Comment Form Placement that’s just a personal preference, but I find the pop up window is easy for readers to use.
- Another important feature among these settings is the Comment message. And then next you’ll find Comment Moderation. I would recommend that you always moderate your comments, at least to start. This means that when a reader leaves a comment you will have the opportunity to read it and approve it to be published in the Comments section of that blog posting. That way you can eliminate offensive comments. Honestly, I’ve never received anything objectionable, but occasionally I do get people who are fishing for business and simply post “I like your blog” so that they can then tell about their company and give their website address. There’s no harm in setting it to Always and you can change it later if you want.
- Then at the bottom of the Comments Setting I like to type in my email address so that I’ll be notified by email if someone leaves a comment that needs to be moderated. And you moderate and approve comments in your Blogger dashboard.
When you’re done just click the orange SAVE SETTINGS button. And again, you can change these settings any time you want. So how do you moderate reader comments? Well, just click on the Posting Tab, and there will be three options:
- New post
- Edit Posts
- Moderate Comments – just click that link. And if you have comments that need to reviewed and approved or deleted you can do it there.
Let readers subscribe to your blog
And finally, let’s talk about how your readers can subscribe to your blog. That’s the other really cool thing about blogging. Each of your new blog articles can be automatically sent to your readers who subscribe. It’s just like subscribing to a magazine. We subscribe to a magazine so we don’t have to go to the store every day to check to see if a new issue has arrived. Subscribing to a blog is the same idea but of course it’s free. And like magazines being delivered to your mailbox, blog posts can be delivered to your readers blog Reader, or email box.
Your readers subscribe to your blog through your RSS feed. RSS stands for Really Simple Syndication which just means an easy way to send out your posts. But you don’t have to know anything about RSS feeds. Blogger does it all for you and I’m really surprised how many bloggers don’t bother to make it easy for their readers to subscribe. Not everyone who wants to subscribe to your blog will quite know how to do it, or be an experienced blog subscriber. You will want to make it as easy as possible for them to get started. Here’s an easy way to do it.
- Go to http://www.google.com/webmasters/add.html. Here you can add an “Add to Google” button to your blog. That way your readers can easily add your blog to their iGoogle homepage or to Google Reader, a tool they can use to receive and read blogs.
- For Choose your content type select RSS.
- Under Promoting select one blog.
- Select the style of button you want to put on your blog
- Type your blog address into the box, which needs to be your rss feed. In my case, it’s http://blogyourfamilyhistory.blogspot.com/feeds/posts/default?alt=rss. You substitute your blog name in where mine is currently (your blog name in that link instead of blogyourfamilyhistory).
- Click the Generate HTML button. The html code you need to add your button will automatically appear in the box, and it’s already highlighted for you so all you need to do is Control C on your keyboard to copy the code to your computer’s clipboard, and then head back to your Blog dashboard.
- Click Layout.
- Click Add a Gadget.
- Click the HTML / Java Gadget. A window will pop up where you can type in a title such as “Subscribe to this blog.”
- In the big box press Control V to paste the HTML code that you copied into the box.
- Click the SAVE button.
- Back on your Layout page you’ll see at the top that you the “page element has been added” and now the top gadget is “Subscribe to this blog”
Want to see what it looks like? Just click the blue PREVIEW button at the top and it your blog will open up in a new window and there you will see the “Add to Google” button. Now EVERYONE can subscribe and follow your blog quickly and easily. Just close that window, and click the orange SAVE button on your layout page. Now click View Blog and try it out for yourself.
Note: I talk here about iGoogle, which is no longer available.
Add the blog to Google Reader to receive each new blog post when it’s published, and have a link to click through directly to the articles and the blog. It’s very convenient and keeps your blog on the minds and lists of your readers. Now you’re all set to go. You can post your articles, which your readers can follow. As you have more time you can fine tune the settings and layout of your blog. Have fun! Best wishes for connecting with other researchers around the world.
Blogging Tip:
In response to one of our recent tips, a reader named Sarah pointed out that there are services now to “slurp up” blogs and publish them into books. We’ll tell you about one service, but encourage you to shop around. At Sarah’s recommendation, we looked into Blurb.com. According to Blurb’s Web site, this online program works with several blogging platforms including Blogger, LiveJournal, TypePad and WordPress.com.
You can customize and edit your book in real time. The automatic slurp action imports and maps blog text, images and comments and then links it into professionally designed page layouts. What an exciting way to preserve your family history. What a great Christmas gift or Mother’s Day gift.
Once you are ready to publish your book, you can control the price by buying a hardcover, dust jacket, soft cover and other designs. These books can be up to 440 pages and as few as 40. Have a blog book within 10 days of ordering. Now, as you can imagine, this is a little pricey but still very, very reasonable. Prices start at just $12.95 for a 40-page softcover and go up from there. You get bookmaking software free!
by Sunny | Apr 11, 2018 | 01 What's New, Immigration, Research Skills
If you have immigrant ancestors who arrived in the U.S in the 1900s, these 7 sources can help you track their journey—perhaps even to that overseas hometown, so crucial to your genealogy success! (Thanks to Legacy Tree Genealogists for providing us with this guest...