Show Notes: Getting your old home movies into shape so that they can be easily enjoyed by audiences today can seem daunting, but it doesn’t have to be. With the right video editing tool and a little bit of know-how you can turn digitized home movies into family history fare for all your relations. It’s time to get your home movies out of the closet and onto a screen near you.
Video and show notes
In this video, I’ll show you how to edit digitized home movies in my favorite video editing software program, Camtasia by Techsmith. (Use our affiliate link now through 8/26/22 to get 20% off Camtasia and / or Snagit. We will be compensated which helps support free videos like this one.)
If you already have another program, you can still follow along and learn best practices for great edited home movies that are easy to share and enjoyable to watch.
Don’t have old home movies? You can also use Camtasia to create videos using static images and photos.
Discounts:
Larsen Digital: I got my family video (and audio) tapes digitized at Larsen Digital, a family-owned business that cares about family history. Click here to get 15% off on your Larsen Digital order when you use our exclusive coupon code GenGem.
Camtasia: Use this link to Camtasia and our coupon code GENE15 to get 15% off for a limited time. (Note: Maintenance and asset add-ons are optional and can be opted out of if desired during checkout. Discount applies to Snagit as well! )
Watch the video How to Edit Home Movies:
Show Notes
Have you gotten some of your old home movies digitized, only to have them just sit on your computer. It’s it can happen really easily. It’s certainly happened to me. And in this video, what I’m going to do is show you how easy it is to edit your old home movies yourself, so that you can get them cleaned up and ready to share with your family.
I had a ton of movies that I got digitized a couple of years ago, and they just sat on my computer. Now, all I can say is I’ve been busy making videos for this channel. I guess that’s my excuse for not getting around to them.
Larsen Digital Exclusive Discount on Digitization
Recently, I found another batch of videotapes. I found VHS, High 8, and I even had an audio tape that needed to get digitized. So, I sent it off to my favorite place, Larsen Digital, a family-owned business that cares about family history. Click here to get 15% off on your Larsen Digital order when you use our exclusive coupon code GenGem.
Larson has done an amazing job getting my tapes digitized in the past. They send them back quickly, and you get them on DVD as well as mp4. Larsen Digital is graciously offering all of us a great discount on digitization. If you haven’t gotten your tapes done yet, they will take care of it for you.
When you get those mp4 videos back, they can be fairly large files. That’s because some of those VHS tapes can be six hours long. Therefore, we need to do some editing. If we don’t, they’re going to be really unwatchable. Typically, we have lots of stops and starts and fingers in front of cameras and blank spots on our videos. On our tapes we had lots of chunks where we had filmed TV shows. Then we started filming home movies again! So, home movie videos typically need to be cleaned up because our relatives are not going to want to sit around and watch six hours of random, chaotic stuff.
As family historians it is our job to edit the video into something watchable and enjoyable. The good news is these days it’s not a hard job thanks to the great tools that are available. I’m going to explain how I use my favorite video editing tool called Camtasia. In the video, I’ll show you how easy this is to do. I think if you see it, you will feel like this is something you can do. I really enjoyed editing my own films.
Camtasia Software Discount
Use this link to Camtasia and get 20% off now through 8/26/22. After that you can use our exclusive coupon code for 15% off: Gene15 (works on Snagit too!)
Camtasia is definitely a terrific product and easy to use. I use it to create my Genealogy Gems videos, and I also use it for home movies and all kinds of other projects. If you have your own video editing tool already and maybe you just haven’t gotten started working on your home movies, I think you’re still in the right spot because I’m going to show you how quick and easy it can be to get these tapes cleaned up and made usable. If you don’t happen to have home movies, you might still want to keep watching because Camtasia does a terrific job taking photographs, images, other pieces of content you can add narration and music and all kinds of stuff making your own version of home movies.
Step 1: How to Import video files into Camtasia
In Camtasia you will see the media bin, I’m going to import my media which is my mp4 video file.
You can see on the left side that there are lots of different things we can do. We’re going to touch on the most important for you for editing your home movies. Whatever you have selected, that’s what shows in this column just to the right of the menu. Make sure you’re in Media. (You can also import media through the menu at the top of the screen.) Click the ImportMedia button and navigate to your video file on your computer and open it. This will bring it into the Media bin.
Step 2: How to Select the Correct Project Size in Camtasia
The second step is to select your project size based on what it is you want to do. It’s really important to think about what is going to be the final purpose of the video. Do you want to be able to Airplay this up onto your TV screen on a big screen and be able to see it? If so, then you’re going to need a pretty high-resolution (large) file. Or are you really interested in getting lots of fun clips that you can share out on social media? If that’s the case, you don’t need as big of a file to be able to have it viewed on a mobile device or on the web.
Camtasia makes it super easy for you to find the right project size. At the top, click the down arrow next to the percentage number (called Canvas Options) and select Project Settings. Here you can see the current project size. What we want to do is pick from the standardized dimensions for the product (output) that we need. Here are some examples:
Social media: 1280 by 720 px. That’s a very standard size that would look great on anybody’s tablet or phone.
Full size computer screen or TV: 1920 by 1080 px (HD). That’s a very standard format
You probably don’t have 4k home movies. If you sent your tapes to a very specialized company, they might have the ability to give you 4k output. But it’s really overkill for what you’re trying to do. Typically, the 1080 HD is going to be what you want.
When you click to select the size, it is populated in width and the height. Click Apply. Now you have that exact project size. I think probably one of the biggest mistakes I made early on in my editing career was not checking project size as the first step.
Step 3: Drop the Video onto the Timeline
Next, we’re going to bring the whole movie onto the timeline where can then edit it.
When we hover our mouse over the video in the media bin, we can see all the different shots (this is called scrubbing,) When you start to drag the video out of the bin blue lines appear around the screen areas where the video can be place: the video canvas at the top of the screen and the Timeline at the bottom of the screen where the editing actually is done.
If when you drag the video into your project it looks smaller than the canvas, that means the film is a lower resolution (size) than the project size you selected. You don’t want to get too far apart in those two things. If I had a very small film (low quality) I might want to think about making my project size a little smaller because I don’t want it to look blurry when it’s done. Typically, I think you’ll find that your video file will be a standard size and will fit pretty nicely.
Using Multiple Tracks in Camtasia
I usually drop video directly onto the timeline. The reason is because usually I’ll end up adding stuff additional content to the timeline, and that’s where tracks come into play.
Your project will have two tracks at first. However, you can add many more by clicking the plus sign. Each track gives me the ability to have a piece of content on there. So, I might have my home movie on track one, narration audio on track two, annotations (text) on track three, etc. Each track gives me the chance to have different pieces of content so that I can edit them without cutting up the other items. It’s really convenient having each item on its own track.
Moving Content on a Track
You can easily move your video around on the timeline to position it exactly where you want it. Click on the content (in this case the home movie file) and drag it to the desired location. You’ll see that Camtasia will sort of allow you to “snap” items into the best position. For example, pushing the video up to the beginning of the timeline (the zero mark).
Editing a Video in Camtasia
How do you know where you’re going to be editing? Well, that’s where the playhead comes into play. The playhead is the marker on the timeline that shows us where we are at any point in the video. You can drag the playhead across the video – called scrubbing – to review it.
If you want to see your entire video on the timeline, you will likely need to zoom out. Click the minus sign to zoom out, and the plus sign to zoom in. Keep clicking until you can see the entire bar of video. Hover your mouse on the video and you can see how long it is. My video is 32 minutes, and seven seconds. So, this is the whole film that I’m going to work on. As we do our editing, we’re going to want to be zoomed in because we want to be really precise with our cuts and clean up.
Initial Types of Editing
So, what kind of editing would you be doing? Well, first and foremost, I like to go through and just clean up stuff that I don’t want things like blank spots, damaged footage, and mistakes in filming. As you scrub through the video look for these areas.
Clean-up makes watching home movies much easier on the viewer. Everything comes back to the experience of the viewer that you want to share your videos with. If you want to share home movies with your family, you got to make them easy to watch, right? We want to make them enjoyable. We don’t want them getting seasick or bored. That way when they watch the finished films, they’re going to really enjoy them. And they’re going to want to see more and talk about family history.
Scrub very slowly until you see something you don’t want. Zoom in a little bit more if necessary to see exactly where you want to make your cut. On the playhead grab the red handle and drag it. Then drag the green handle. This identifies the area you want to cut. Press play and the grey playhead will jump to the beginning of the section you marked and play it for you so you can make sure it’s what you want to cut. Review and adjust the handles as needed.
To cut the section, click the Cut button with the scissors icon. (Control X) Review the section one more time to ensure you like the cut. You will see a stitch mark where you made you cut.
These small cuts may not seem like much, but when you do this throughout a 32-minute film, you may end up with a 20-minute film that’s much more watchable.
Adding Transitions to Video in Camtasia
One of the other things that you might want to do to make your video even more watchable is to create some transitions between scenes or clips. To do this, bring the playhead back to the stitch mark where you made your cut, and zoom in to make sure you’re right on top of it. Click the video to select it so that Camtasia knows this is the content you are working on. In the menu on the left, click to select Transitions.
There are many to choose from, however most people don’t really enjoy watching lots of wild crazy transitions. It can actually make them feel seasick. It’s better to go with something simpler and smoother. The whole point is to make it enjoyable and watchable for your family members. I really like Fade, and Fade to black. You can add these to your Favorites bin by clicking the Star. That will save you time, so you don’t have to dig through all of the Transitions every time.
Use Fade when cutting within the same scene or clip.
Use Fade to black when cutting between two different scenes or clips.
Place the playhead on the stitched cut, and then click the Split button. Now you can drag the transition onto that spot on the timeline. Camtasia will create a standard-length transition, but you can adjust it by dragging the transition. Move the playhead to a spot just before the transition and press play (or tap your keyboard’s space bar) to review it.
You can change the transition by dragging and dropping a different transition onto it. It will turn red indicating that you are changing it.
Camtasia Undo / Redo
You can undo or Redo in the menu at the top of the screen under Edit.
How to Create a Video Clip
If your film is a hodge-podge of different scenes or a mix of TV shows and home movies (like some of my VHS tapes were) then you’ll want to create clips of just the sections you want so that you can use them in another project. It’s easy to Produce / Export clips from your full-length video without creating a new project.
How to create a clip:
Zoom in on the desired area
Drag the green and red playhead handles to identify the desired clip.
Right-click on the area and select Produce As
This brings up the Camtasia production wizard. Select the desired production size. In other words, you can export the clip at any resolution you choose. It doesn’t have to be the same as your project size that you selected when you started.
Name the clip and save it to the desired location on your computer hard drive.
Click The clip will display on your screen when it’s done.
Additional Content that can be Added to Your Home Movies
Music and Audio files
You can import audio files such as MP3 and WAV into your media bin and then drop them onto a new track in your project. These files can be edited much like you edit video. You can get free music MP3 files from YouTube. Sign in with a free YouTube (Google) account, click on your account icon in the upper right corner of the screen and select YouTube Studio. In the studio, scroll down the menu on the left side of the screen and select AudioLibrary. Here you can search for and download music tracks.
Voice Narration
If you have a microphone hooked up to your computer you can narrate all or just sections of your home movie. This is a great feature particularly when working with older silent home movies. Select VoiceNarration from the menu on the left, and then click the Start Voice Recording button. The recorded narration will appear on a new track on the timeline. You can even write your script and then copy and paste it into the Voice Narration tool.
Annotations
Annotations are a great way to provide more information about what the viewer is watching. For example, you can add text boxes to the video. Choose from a wide range of annotations. Drag and drop the annotation on the timeline. Drag the edges of the annotation to make it the desired length. Click on it to select it and then you move it anywhere on the timeline. When selected, you will see the annotation Properties on the right side of the screen which allow you to customize it. (Font, color, line thickness, etc.)
Our final step here is going to be to export this video. Now, clearly, I haven’t finished on my editing, I’m going to finish up my editing and we’ll come back and we will export the video as a finished cleaned-up film.
Step 4: Save and Export (Produce) a Video in Camtasia
After my initial clean up my 32-minute video is now 19 minutes and four seconds. I’ve saved my family from 12 minutes of video that just wasn’t worth watching and might have gotten them discouraged about watching home movies.
Now it’s time to save your work. In the menu go to File > Save As. Hopefully, you have already created a folder on your computer where you know you’re going to keep your project and all your content. That way, you can work on it again later if you want to make more changes or export more clips.
Next, we’re going to produce the actual edited film. Another way to say it is that we are going to export the edited video. In the menu go to Export and then select where you want to send your video. You can upload directly to locations such as Vimeo or YouTube or Google Drive. If you want to export to your computer select Local File. You will again get the wizard. The wizard is going to remember the last export you did, so be careful to review that and change it if desired. Select MP4 and then click Next and select the folder on your computer and click Finish. Depending on the size of your video, it may take several minutes to render.
Edit Your Home Movies: Wrap Up
I hope that helps you feel empowered to get started editing your home movies. It’s really worth doing and it doesn’t have to be that time-consuming. The trick is to just set aside a little bit of time every week and start doing it right away because they’re not doing anybody any good sitting on your computer where they can’t be seen. Let’s get him out in front of our family and share that family history.
Ready to start your Australian genealogy research? A Legacy Tree Genealogist walks you through essential Australian history, geography, genealogical record types and online resources to trace your family tree “down under.”
Thank you to Legacy Tree Genealogists for providing this guest post.
Australian genealogy can be straightforward, but you do need to know a time period and a place, as well as the family name you are researching. Australia has only been a single country since 1901; before that there were colonies and territories beginning with the first European settlement in 1788. Even today the individual states and territories have their own governments and record systems with no single combined place to research. Therefore, knowing the time period and place where your ancestors lived is essential.
Australian history and geography
European settlement began with the arrival of the First Fleet in 1788, which included both male and female convicts and military and naval personnel. The colony became known as New South Wales, and occupied the eastern half of the continent of Australia including Tasmania (previously known as Van Diemen’s Land). The western half of the continent was never part of New South Wales and was originally known as the Swan River Colony, and later Western Australia.
With the exception of Western Australia, the other states and colonies were originally part of New South Wales. Victoria was known as the Port Phillip settlement before it became self-governing in 1851, and Queensland was the Moreton Bay settlement until 1859. Early records for both of those colonies will be in New South Wales, so it is important to know when the individual colonies and territories were established.
Australia in 1856 – image courtesy Wikipedia (https://en.wikipedia.org/wiki/Territorial_evolution_of_Australia)
Similarly, a knowledge of geography is essential, as Australia is a huge continent with most of the population along the coastline. Another complicating factor is that there may be places with the same name in one or more colonies/states. For instance, if researching ancestors from Maryborough, it would be necessary to identify whether you should be researching Maryborough in Queensland or Maryborough in Victoria.
To make matters even more confusing, some places changed their name! For instance, until 1911 Innisfail in Queensland was called Geraldton, not to be confused with Geraldton in Western Australia on the other side of the continent. Bendigo was originally known as Sandhurst, and many of the goldfield towns in central Victoria were known under the broader name of the Mount Alexander goldfield. Knowing the history and geography will help you immensely as you embark on your Australian genealogy research.
Getting started with Australian genealogy research
If you have Australian genealogy there are many wonderful free online Australian resources that will give you a head start in researching your ancestors and learning more about their heritage. Wikipedia – Australia is a good starting place for an overview if you are unfamiliar with Australian history and geography. Depending on where your ancestors were, read the appropriate sections of history and geography. For example, convicts were sent to New South Wales and Tasmania until 1842 when the colony was opened up for free settlement, but Western Australia only received convicts from 1850 to 1868. The gold rushes in Victoria in the 1850s attracted thousands of people, as did later rushes in Queensland in the 1860s and Western Australia in the 1890s.
Many immigrants were looking for their own land and a better life for their families. Each of the colonies had their own immigration schemes in a bid to attract as many people as they could. Most colonial passenger lists are now indexed and can be searched online at the various state archives. Some states have even digitized the passenger lists, which may be viewed freely online. State archives are a wonderful free online resource, and include offices such as the Queensland State Archives, Public Record Office Victoria, or the Tasmanian Archive and Heritage Office.
A free useful portal site is CoraWeb – helping you trace your family history in Australia and elsewhere. It is divided up into categories such as archives, cemeteries, convicts, maps, probate and will records, shipping, migration, and other genealogy-related topics.
Australian birth, marriage, and death records
Like everything else, you need to know an approximate date and place before you begin to research birth, marriage, and death records. Prior to civil registration there are some church records which consist of mostly baptisms and marriages, with a few burials. Civil registration started at various times, and different colonies collected different information at different times, with South Australia having the least information on the certificates.
Van Diemen’s Land (later Tasmania) was the first to introduce civil registration in 1838, with Western Australia following in 1842, South Australia in 1842, Victoria in 1851, and New South Wales (including Queensland at that time) in 1856. Most states have online indexes available for searching, but only Queensland and Victoria provide digital copies of certificates for download after purchase. Western Australia still requires researchers to mail their applications with no online ordering.
Tasmania is perhaps the most helpful – with their early church records and births, marriage, and death certificates indexed, and digital copies online for free through the Tasmanian Archive and Heritage Office. The Tasmanian Name Index includes free indexed and digitized copies of various genealogical resources.
Federation in 1901 and the National Archives
The individual colonies voted to form the Commonwealth of Australia in 1901, and since then there has also been a Commonwealth (later Federal) government. This took over some government functions such as the military, immigration, citizenship, and naturalization, although some states continued to have their own immigration schemes. This means that post-1901, researchers need to use the National Archives of Australia, as well as the various state archives.
In 1911 the final changes to the map of Australia took place, with the separation of the Northern Territory from South Australia, and the establishment of the Australian Capital Territory within southern New South Wales.
With the centenary of World War One, the National Archives of Australia has digitized all army dossiers and made them freely available online. RecordSearch is the main database, and it can be searched in a number of ways including a “Name Search” and “Passenger Arrivals.” While not every record series is indexed by name, it can be useful to search for an individual’s name, especially if they arrived post-1901 or served in the military during either World War.
Australian Newspapers and Photographs
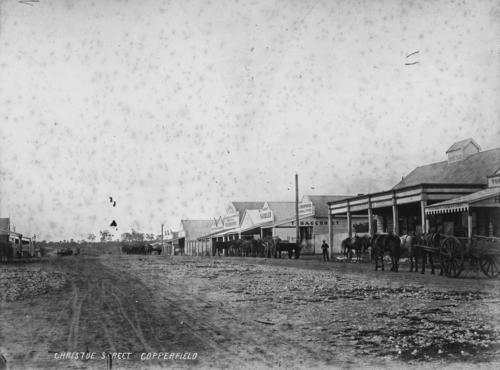
In Australia, digitized newspapers are freely available online through Trove, which is maintained by the National Library of Australia. Along with newspapers, Trove also includes government gazettes, books, articles, maps, manuscripts, photographs, archived websites, and other resources. If you are interested in what a place looked like at the time your ancestors lived there, then try an image search in Trove. Remember that it is continually being added to, so it is essential that you revisit your searches from time to time. (Click here to read another Genealogy Gems article about Trove.)
Christoe Street, Copperfield Queensland in 1876 when my ancestors lived there. Image courtesy State Library of Queensland via Trove.
Individual state libraries also have genealogy sections with online guides to various family history topics. These can be a good place to start, and most participate in the ‘Ask a Librarian’ where you can get advice and information. However, they cannot do individual research – just answer questions.
About Legacy Tree Genealogists
EXCLUSIVE OFFER for Genealogy Gems readers!Receive $100 off a 20-hour+ research project from Legacy Tree Genealogists with code GGP100.
Legacy Tree Genealogists is the world’s highest client-rated genealogy research firm. Founded in 2004, the company provides full-service genealogical research for clients worldwide, helping them discover their roots and personal history through records, narratives, and DNA. To learn more about Legacy Tree services and its research team, visit the Legacy Tree website.
Disclosure: This article contains offers with affiliate links, which may expire without notice. Genealogy Gems will be compensated if you make a purchase after clicking on these links (at no additional cost to you). Thank you for supporting Genealogy Gems!
In this episode, I’ll share a moving family history video, inspired by a listener’s Where I’m From poem. We’ll also discuss RootsTech news, talk to author Sylvia Brown, and Michael Strauss will explain the difference between different kinds of military service: regulars, volunteers and militia in Military Minutes. Listen here or through the Genealogy Gems app.
The Genealogy Gems Podcast
Episode #213
with Lisa Louise Cooke
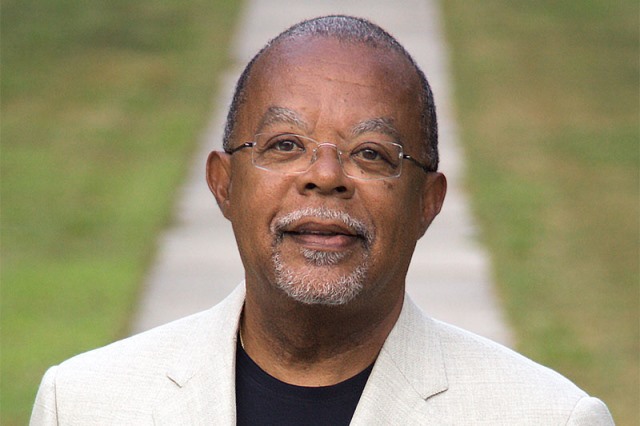
NEWS: HENRY LOUIS GATES, JR TO KEYNOTE ROOTSTECH
Click here to read about all RootsTech keynote speakers
Click here to hear Lisa Louise Cooke’s conversation with Henry Louis Gates, Jr. in the Genealogy Gems Podcast episode 133
Keep your family history research safely backed up with Backblaze, the official cloud-based computer backup system for Lisa Louise Cooke’s Genealogy Gems. Learn more at https://www.backblaze.com/Lisa.
If you’re listening through the Genealogy Gems app, your bonus content for this episode is a lightning-quick tech tip from Lisa Louise Cooke on how to undo that last browser you just closed and didn’t mean to! TheGenealogy Gems app is FREE in Google Play and is only $2.99 for Windows, iPhone and iPad users
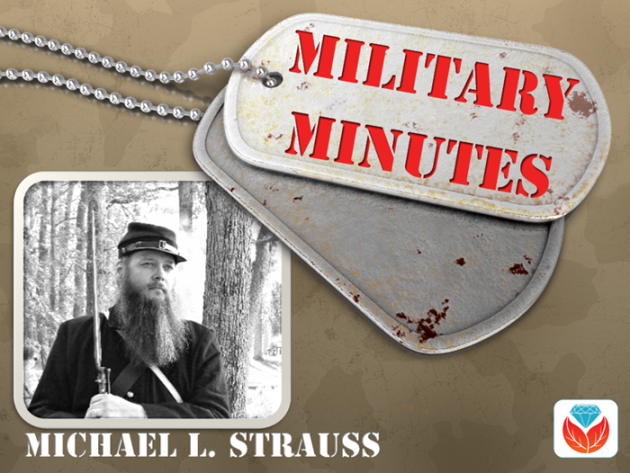
MILITARY MINUTES: REGULAR, VOLUNTEER OR MILITIA?
To gain a better understanding of what life in the military was like for your ancestors, it is essential to know in what capacity someone may have served. Did your ancestor serve in the regulars, or was he a volunteer soldier, or did he have service with the local militia?
These terms are generally associated with the records of the United States Army. The other branches enlisted men using different terminology.
Click here for National Archives reference materials for military acronyms, abbreviations, and dictionaries that will aid genealogists when researching how exactly their ancestors served
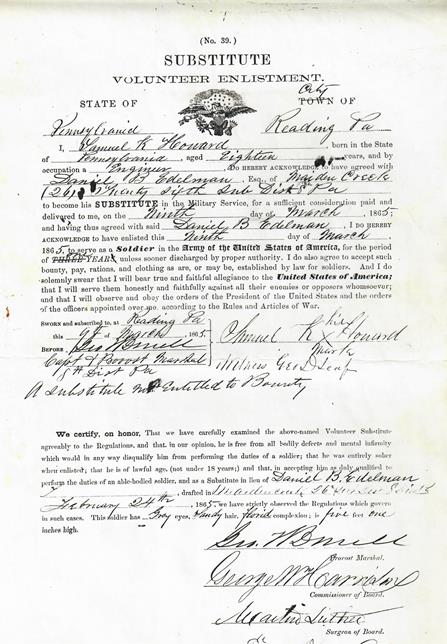
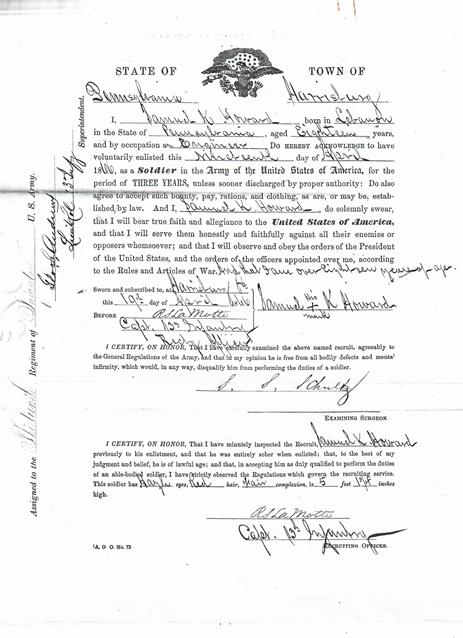
Because of his age he wasn’t able to enlist until 1865 when he turned 18. He was a volunteer soldier who served as a substitute for another man who was drafted.
After his discharge, he again enlisted in the Regular Army in 1866. He was assigned to the 13th U.S. Infantry, where he served one month before deserting at Jefferson Barracks, Missouri.
Samuel was married in 1867 (this may have some relevance to his decision to leave the military). He lived in Pennsylvania from the end of the war until his death in 1913. Shown here in 1876, Lebanon, PA.
Both his Regular and Volunteer Army enlistment forms are included here, along with the above photograph of Samuel with his wife circa 1876 from an early tintype. The forms look very similar, as each contains common information asked of a typical recruit. However they are decidedly different as the one covers his Civil War service and the other his post war service when he joined the regular Army after the men who served during the war would have been discharged.
Learn more about the Where I’m From poetry project and hear a conversation with the original author, Kentucky poet laureate George Ella Lyon in the free Genealogy Gems Podcast episode 185.
Hannah’s Animoto Advice:
You’ll find when using the video templates, timing the photos to the narration can pose some challenges. Originally, when she put the photos in place and “previewed” the video, the narration didn’t line up at all with the images. Hannah explains: “When I was in “creator” mode, I selected a picture that I wanted to appear on the screen for a longer duration then I clicked the “spotlight” button that is on the left-hand side in the editor column. Or If you double click the image, it will open into a larger single view and you can select the “star” button which will do the same thing. I applied this spotlight option to several photos within my gallery. I knew which photos to do this to by previewing the video several times to make sure I liked the timing of it all.
Now if your problem is not with just a few photos but the overall timing, then try editing the pace of your photos. In the top right-hand corner, click the “edit song/trim and pacing” button. Here you can trim you uploaded mp3 audio as well as the pace to which your photos appear. My photos appeared too fast on the screen in comparison to the narration I had, so I moved the pace button to left by one notch and previewed the video. This did the trick and the result was a heart-warming poem, turned into a visually beautiful story.”
Do you have a darn good reason to take action right now to get your family history in front of your family? Perhaps:
a video of the loving couples in your family tree for Valentine’s Day
a video of your family’s traditional Easter Egg hunt through the years
a tribute to the mom’s young and old in your family on Mother’s Day
your child’s or grandchild’s graduation
a video to promote your upcoming family reunion to get folks really visualizing the fun they are going to have
Or perhaps it’s the story of a genealogy journey you’ve been on where you finally busted a brick wall and retrieved an ancestor’s memory from being lost forever.
5 Steps to Jump-Starting Your Video Project
Pick one family history topic
Write the topic in one brief sentence ? the title of your video
Select 12 photos that represent that topic.
On a piece of paper, number it 1 ? 12 and write one brief sentence about each photo that convey your message. You don’t have to have one for every photo, but it doesn’t hurt to try.
Scan the photos if they aren’t already and save them to one folder on your hard drive.
And now you are in great shape to take the next step and get your video made in a way that suits your interest, skill, and time.
4 Easy Methods for Creating Video Update 2022: Adobe Spark Video is now part of and called Adobe Creative Cloud Express. Some or all of the features may require a subscription.
Got an iPhone? iOS 10 now has “Memories” a feature of your Photos app that can instantly create a video of a group of related photos.
There’s the free Adobe Spark Video app now called Adobe Express which can you can add photos, video clips and text to, pick a theme and a music track from their collection, and whip up something pretty impressive in a very short time. Visit your device’s app store or Adobe Express. Watch my video How to Make a Video with Adobe Spark (Premium Membership required)
There’s Animotowhich does everything that Spark does, but gives you even more control over the content, and most importantly the ability to download your video in HD quality. You can even add a button to the end that the viewer can tap and it will take them to a website, like your genealogy society website, a Facebook group for your family reunion or even a document on FamilySearch.
And finally, if you have the idea, and pull together the photos, you can book Hannah at Genealogy Gems to create a video with your content. Go to GenealogyGems.com and scroll to the Contact form at the bottom of the home page to request ordering information.
The most important thing is that your family history can be treasured and shared so that it brings joy to your life today, and also, to future generations. The thing is, if your kids and grandkids can see the value of your genealogy research, they will be more motivated to preserve and protect it.
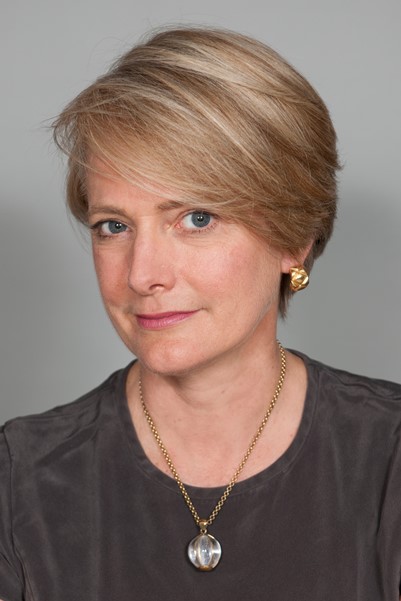
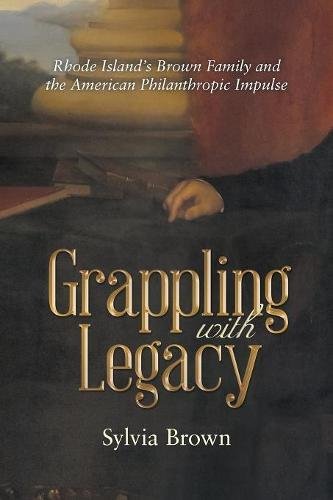
PREMIUM INTERVIEW: SYLVIA BROWN
In Genealogy Gems Premium Podcast episode #155, publishing later this month, Sylvia Brown (of the family connected to Brown University) will join Lisa Louise Cooke to talk about researching her new book, Grappling with Legacy, which traces her family’s involvement in philanthropy, Rhode Island history and the institution of slavery hundreds of years. A Kirkus review of this book calls it “an often riveting history of a family that left an indelible impact on the nation.”
PRODUCTION CREDITS
Lisa Louise Cooke, Host and Producer
Sunny Morton, Editor
Vienna Thomas, Associate Producer
Hannah Fullerton, Production Assistant
Lacey Cooke, Service Manager
Disclosure: These show notes contain affiliate links and Genealogy Gems will be compensated if you make a purchase after clicking on these links (at no additional cost to you). Thank you for supporting this free podcast and blog!
Elevenses with Lisa is our little slice of heaven where friends get together for tea and talk about the thing that never fails to put a smile on our face: Genealogy!
Are you ready for a year of successful genealogy? Learn how to develop an effective research plan, and preserve and protect your genealogy. Keep reading for the show notes that accompany this video.
10 Questions to Rate Your Readiness for Genealogy Success
1. Have you selected a place to start?
I started learning how to play the guitar in 2020. I began with an online course to learn the basics, and I picked one song that I really wanted to learn how to play.
For three months I worked my way through the course and played that song over and over every day. This resulted in two things: I learned how to play the song, and my husband took a blow torch to my guitar! (Just kidding.)
At the end of those three months I had several weeks where I just didn’t feel I was making any progress at all. I practiced every day, but I wasn’t getting anywhere.
It turns out that I had reached my initial goals – I knew the most popular chords, had memorized the Pentatonic Scale and could play the song Crazy On You for a captive audience in my home. However, I had not stopped to identify my next set of goals. Therefore, stagnation set in.
In an effort to restart my learning and success trajectory, I spent an evening looking through my record collection and I made a list of 6 of my favorite songs. Then I put them in the order I wanted to learn to play them. Most importantly, I identified which one was my top priority to learn. Once I did that, I knew exactly how I was going to spend my practice time.
It sounds simple, but finding and deciding on the place to start (or restart) is really easy to miss. When it comes to genealogy there’s always a bright shiny object online ready to gobble up a few precious minutes, or hours, or days! Having a predetermined project goal in mind will help you get down to business faster and keep you from wandering aimlessly.
2. Have you developed a project research question?
Once you know what your project will be, it is time to formulate the general question. In other words, what is the question you are trying to answer?
In this episode I shared the family story that had been handed down the McClelland family about their ancestor Washington McClelland. The story went like this: “He immigrated to the U.S. from England. He was working on the railroad when he met a girl in Idaho. She became pregnant. They married. He converted to the LDS church. They raised a family together.”
The general research question was “is this story true?” That’s a big question, and one that we’ll break down further in question #3.
Genealogy Gems Premium Members can learn more about formulating research questions by watching the segment HowAlice the Genealogist Avoids the Rabbit Hole Part 1 in Elevenses with Lisa Episode 2. It’s available in the Premium Videos area of the Genealogy Gems website. Don’t miss the downloadable handout! You’ll find the link under the video. (Learn more about becoming a Premium Member here.)
3. Do you have a Research Plan for your genealogy project?
The general project question can usually be broken down into several bite-sized actionable questions. In the example of “Is the story about Washington McClelland true?” we can break that question down into several questions:
Where exactly was Washington from in England?
When did he come to the United States?
Why/how did he end up out West?
Did he work on the railroad?
When and where did he marry?
When was their oldest child born?
Did he join the LDS church?
And many of these questions can likely be broken down further. These more focused question help provide the framework for the project’s research plan. They can then be re-sorted so that they follow a logical progression of answers.
The next step will then be to identify and prioritize the sources (records) that are likely to provide the necessary relevant evidence. Then determine the order in which you will locate each identified record. Finally, add where you think you can find the records to the plan.
4. Do you have the research forms you need?
There are many different types of genealogy research forms: research logs, blank record forms, checklists, just to name a few.
Research logs are great for keeping track of your research plan progress. Blank record forms (such a blank 1900 U.S. Federal Census form) are very handy for transcribing the pertinent information for analysis. And checklists (such as a list of all types of death records) help ensure that you don’t miss and records, and you don’t look for the same record twice!
Free Genealogy Forms at Family Tree Magazine
Family Tree Magazine offers a plethora of free genealogy forms. You’ll need to register for a free website account to download the forms.
Having an organizational system in place takes the guesswork out of where things should be filed, making it much more likely they will actually get filed. It also ensures that you’ll be able to put your hands on your records whenever you need them.
Here’s a secret: There is no one perfect filing system. The most important thing is that it makes sense to you and that you are consistent in how you use it.
In Elevenses with LisaEpisode 6 (available to Premium Members) I cover step-by-step the system I developed and have used for over 15 years. I’m happy to report I’ve never lost an item. (Whew, what a relief!)
As you work on your genealogy research you’ll find there are two important tasks you will be doing often:
Storing items that you have not had a chance to work on yet (I refer to these pending items as “to be processed.”)
Storing items that need to be filed. (Let’s face it, we rarely want to stop in the middle of an exciting search to file a document.)
Not having a way to store these two types of items leads to clutter and piles on your desk. Here’s my simple solution:
Place a “to be filed” basket next to your desk.
Create a “Pending” tab in each surname 3-ring notebook (if you use my system.) The beauty of the surname notebook Pending section is you have a place to put documents (out of sight) that are associated with a specific family. When you’re ready to work on that family line, grab the notebook and jump to the Pending section to start processing and analyzing the previously found records.
7. Do you have the supplies you need on hand?
Make sure that you have a small quantity of all of the supplies you need for the filing and organization system you are using.
Here’s what my shopping list looks like:
3” 3-Ring View Binders
(allow you to customize covers & spines)
1” 3-Ring View Binder
1 box of Acid-Free Sheet Protectors
3-Ring Binder Tab Dividers
8. Have you settled on a file naming scheme?
How to name digital genealogy files is something we all struggle with. Good intentions don’t make the job any easier. Take a few moments to nail down the basic naming scheme you will commit to follow. I say basic, because there will be times when you’ll need to modify it to suit the file. That’s OK. But always start with the basic format.
Here’s what my basic file naming format looks like:
Year (will force chronological order)
First Name (filed in surname folder)
Location
Example: 1920_robert_m_springfield_oh
Notice in my format I don’t usually include the surname. That’s because I file in surname folders. Notice that I said “usually.” That’s because we are always free to add on additional information like a surname if we think it will prove helpful. For example, if I anticipate that I will have a need to share individual files with other researchers or family members (rather than the entire folder) then I will add the surname so that the person receiving the file has the pertinent information.
8. Are you prepared to make copies?
Protecting and preserving our genealogy for generations to come is a top priority for most genealogists. All of us at some time have worried about what would happen if a website that we upload our content to goes out of business or sells out to another company. Now there is a new reason to take a few extra steps to ensure you don’t lose access to your genealogy data.
Recently, According to Buzz Feed, on Jan. 9 the largest cloud-hosting service notified a large social media network with millions of users that it would be cutting it off from its cloud hosting service. According to the Wall Street Journal, “other tech partners also acted, crippling operators.”
Now we must add to the list of concerns the possibility that a genealogy website we use might be cut off from web hosting. How might this type of action impact our personal family history that we share on websites? Many companies that provide access to millions of historical records and likely house a copy of your family tree and your DNA test results use the same cloud hosting service. In fact, it’s hard to find a company out there that isn’t tethered to it in some way.
My research showed that both Ancestry and FamilySearch have been featured on their website in case studies and blog articles:
The bottom line is that our family history is our responsibility to preserve and protect. While we can benefit from sharing copies of it online, putting all our genealogy eggs in only the online basket puts it at risk because we don’t have control.
While I love the idea of going paperless and I’ve been striving to do that in recent years, I’m changing my tune on this. For several years I’ve been strongly recommending that you get your own genealogy software on your own computer and use it as your master database. All online family trees are simply copies. Many people, particularly those who rely solely on FamilySearch often wondered why I was so concerned. The events of this week make my point and put an exclamation point on the end of it.
Making digital and paper copies of your data is a simple strategy you can put in place today. This means regular print outs of your tree, family group sheets, and the most important genealogical documents. I keep mine in a portable fireproof safe.
We can also make digital copies as well. For example, last year I had all my old home movies transferred to digital and they are stored on my computer. I went the extra step to get copies on DVD and I also copied the digital files onto a terabyte hard drive that is in the fireproof safe.
Remember, your computer is connected to the Internet. If you’ve ever woken up to a Windows update, then you know that tech companies can make changes to your computer. Having your own paper and digital copies are just extra insurance that certainly can’t hurt.
Here’s a checklist of things you can put in place today:
a good printer
extra ink
a stock of paper
a portable terabyte hard drive
Ideas for saving paper and ink:
Print only the most important documents that might be more difficult to replace.
Focus your printing on direct ancestors.
Print in draft mode (depending on the document) and / or black and white to save ink.
Make double-sided copies.
When possible, add two documents to each side of the paper so that one piece of paper holds 4 documents.
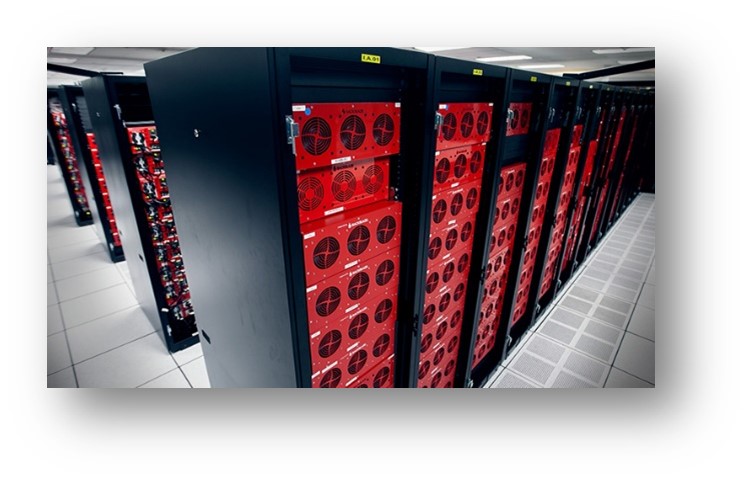
9. Is your computer backed up to the Cloud?
I use and recommend Backblazefor computer cloud backup. They have their own storage facility. Here’s what their storage pods look like:
Image courtesy of Backblaze.
I am also an affiliate of Backblaze so I appreciate when you use my link if you decided to make a purchase. I will be compensated at no additional cost to you, and that supports this free show. https://www.backblaze.com/landing/podcast-lisa.html
Learn more: Premium Members can watch the Premium video Your Guide to Cloud Backup and download the PDF handout. You’ll get answers to questions like:
What is cloud backup?
Why should I use cloud backup?
How does cloud backup work?
Is cloud backup safe?
What should I look for when selecting a cloud backup service?
My personal cloud backup choice
10. Have you scheduled ongoing education time?
Pick one area you want to improve your genealogy skills and knowledge and make time each week to learn something new about it.
Thank you for making Elevenses with Lisaand Genealogy Gems one of your places for genealogy learning, laughing and getting refilled!
Use a free service like Blogtrottr.com to receive email notification reminders. Simply paste the Genealogy Gems channel URL into the first field, https://www.youtube.com/GenealogyGems enter your email address and select from the drop-down menu how often you would like to receive notifications. Then click the orange “Feed Me” button. When I post a new video or schedule an Elevenses with Lisa episode you’ll receive an email notification.
Recap:10 Questions to Rate Your Readiness for Genealogy Success
Have you selected a place to start?
Have you developed a project research question?
Do you have a Research Plan for your genealogy project?
Do you have the research forms you need?
Have you established Your Filing System?
Do you have the supplies you need on hand?
Have you settled on a file naming scheme?
Are you prepared to make copies?
Is your computer backed up to the Cloud?
Have you scheduled ongoing education time?
Elevenses with Lisa Archive
Premium Member have exclusive access to all of the archived episodes and downloadable handouts. Visit theElevenses with Lisa Archive.
Let us know if you found this video and article helpful. I’d also like to hear from you about the topics you would like to learn more about in future episodes. Thanks!
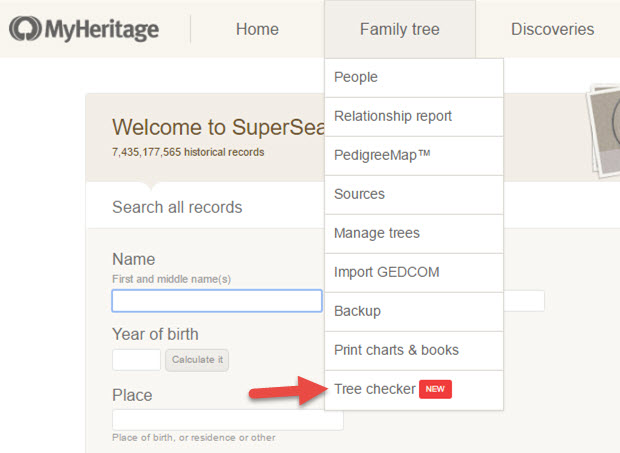
Access by logging in to your MyHeritage account and find this tool under the Family Tree dropdown menu:
This podcast is sponsored by:
MyHeritage.com is the place to make connections with relatives overseas, particularly with those who may still live in your ancestral homeland. Visit www.MyHeritage.com
A Similar Tool: RootsMagic Problem Search
In RootsMagic, find it under the Tools menu. Select Problem Search, then Problem List to select the different kinds of problems you can have RootsMagic identify for you and to choose what age ranges you decide are out of bounds for a new father or mother.
Meet Team Black: Joe and Madison Greer of Portland, OR
Relative Race: “What happens when genealogy meets reality TV? Using their DNA as a guide, contestants embark on the ultimate road trip across America, completing challenges and meeting unknown relatives along the way.”
Click here to watch past episodes online for free. The last two episodes of season two, 9 & 10, will air back to back respectively at 7pm MT/9pm ET and 8pm MT/10PM ET on Sunday, April 30.
BONUS CONTENT FOR GENEALOGY GEMS APP USERS Free PDF summary of 8 top genealogy TV shows from the past several years and where you can watch them online?a few of them for free, including Relative Race.
Thanks to Your DNA Guide Diahan Southard for joining us to talk about this new development in genetic genealogy. Click here to learn more about Diahan’s how-to DNA video tutorials and personal consultation services for solving your family history mysteries with DNA.
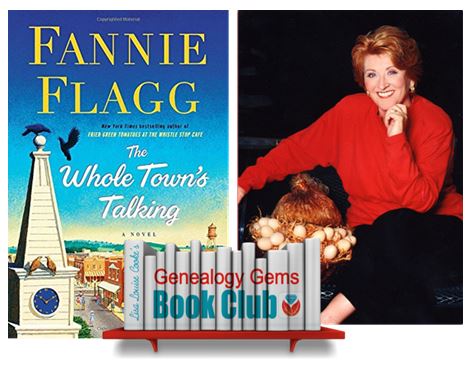
A multi-generational novel about a Swedish immigrant and the town he builds in the American Midwest by luring other Swedish settlers and a mail-order bride. As characters die, they take up residency in the local cemetery and continue to comment on the activities and people of the town.
 Thank you to Legacy Tree Genealogists for providing this guest post.