Double good news: AncestryDNA has made some improvements to the way they calculate your genetic matches, but they haven’t messed with the site format or layout. There is one downside–so keep reading.
While stability and predictability seem like honorable qualities in a company or product, when it comes to tech tools, in the ears of tech companies, those words sound more like dated and old. Of course, we are used to this by now. I had a client tell me recently that he wanted to be in touch sooner, but his grandson “upgraded” his computer to Windows 10 and then promptly left for college the next day, leaving him fighting with a new interface and operating system.
The good news is, you won’t have this problem with Ancestry’s new update. There aren’t any changes to the interface or the layout of the information. In fact, many of you will not even notice at first that your match list has changed. You’ll just see this notification when you log in:
But in fact, there likely have been some adjustments made to your match results:
Some of your third cousins have been demoted to fourth cousins.
Some of your fourth cousins have been demoted to 5th-8th cousins.
Some of your Distant Cousins have disappeared off your match list
You have new cousins on your Distant Cousin match list.
In general, from what Ancestry has showed us, you gain more than you lose.
Changes in the dregs of your match list may not seem like that big of a deal. But Ancestry has made some big changes in the way that they are calculating matches. They are getting better at it. Which means you match list is now more representative of your ancestral connections, even at the very distant level.
There are two big pieces to this matching puzzle that Ancestry has tinkered with in this latest update: phasing and matching.
You will remember our discussion on DNA phasing and how it can impact your matching. Ancestry has developed a robust reference database of phased DNA in order to better phase our samples. Basically, they have looked through their database at parent-child duos and trios and noted that certain strings of DNA values often travel together. It’s like they have noticed that our DNA says “A black cat scared the mouse” instead of “The brown cat ate the mouse” and they can then recognize that phrase in our DNA, which in turn helps our DNA tell the true story of our heritage.
In addition to updating the phasing, Ancestry has revamped their matching method. In the past they viewed our DNA in small windows of information, and then stitched those windows together to try to get a better picture of what our DNA looked like. Now instead they have turned to a point-by-point analysis of our DNA. Again to use a sentence example, with the window analysis we may have the following sentence windows:
ack and J
ill went t
he hill t
etch a pai
l of water.
Of those windows, you may share the “etch a pai” with another individual in the database, earning that cousin a spot on your match page. However, the truth is, that bit could say “sketch a painting” or “stretch a painful leg” or “fetch a pail.” With Ancestry’s new method, they are able to see farther on either side of the matching segment, making this clearly “fetch a pail.” That means better matching, which means more confidence in your cousin matches.
The downside to this update is going to come in the reorganization of some of your relationships. Ancestry has tightened their genetic definition of your third and fourth cousins. Basically, that means that some of your true 3rd cousins are going to show up as 4th cousins, and some of your true 4th cousins are going to be shifted down into the abyss of 5th-8th cousins.
This brings us to the downside of this AncestryDNA update: changes to the Shared Matches tool. The shared matches tool allows you to gather matches in the database that are related to you and one other person, provided you are all related at the 4th cousin level or higher. This tightening of the belt on 4th cousins means that some of them are going to drop through the cracks of that tool, really limiting its ability. Grr. Hopefully, Ancestry will fix that, and expand this tool to include all of your matches. They have their fairly good reasons for this, but still….
So, as the winds of change blow yet another iteration of the AncestryDNA match page, I think we can see this as an overall win for doing genealogy with our genetics at Ancestry.
Disclosure: This article contains affiliate links and Genealogy Gems will be compensated if you make a purchase after clicking on these links (at no additional cost to you). Thank you for supporting Genealogy Gems!
The mysterious deaths of a father and son present a perfect opportunity for using Google for genealogy.
Recently I heard from Lydia, who has just started listening to my podcasts. She asked a great question that Google can help answer:
“I have two relatives, great-grandfather and great-great-grandfather, who died under conditions where an inquest was conducted. I wrote to the county clerk’s office in Joplin, MO. They were only able to send me the “bill” for both inquests, stating they had no other information. What I want to know, what they didn’t answer, was are they the ones to ask for the inquest report? If it still exists who would have it?”
She shared their names (both Esterline) and details about their deaths and I just couldn’t help myself: I had to Google them myself. There’s nothing like a couple of mysterious deaths–two generations in a row!–to pique my curiosity.
Here’s the path I took and take-home tips to offer anyone looking for genealogical records:
1) A Google search for: coroner’s inquest 1928 Missouri delivered the Coroner’s Inquest database at the Missouri Digital Heritage archive. From there, you discover that you can request copies of records by emailing the citation for the record you want to the Missouri State Archives at archref@sos.mo.gov. According to the instructions, “The record will be located, the number of pages counted, and you will be notified by email of the cost of the copies. Upon receipt of a check, the copies will be made and mailed to you. There may also be additional notations in the record about other locations where the files can be accessed.” Interestingly, when I searched for her two relatives, I didn’t find them, but there was a file for a woman with the same surname: Esterline. It’s worth seeing if she’s related somehow.
2) I was suspicious about no other Esterlines coming up in the database, so I tried a search in the Archives on Joplin and Jasper to see if other cases from that town or county come up in the results, and they don’t. Further digging reveals: “The Coroner’s Inquest Database project is ongoing; additional counties will be added to the database as completed.” However, it would be very worthwhile to contact them by email and inquire as to where this county is in the queue and where the physical files are now. Another result in that same Google search reveals which counties the Archive currently does have: includes Andrew, Cape Girardeau, Clinton, Cole, Greene, Pemiscot, Perry, St. Charles, St. Francois, St. Louis, and Stoddard (coverage varies by county).
3) After searching a single database on a website like Missouri Digital Heritage, I always look for a global search page, where I can search all databases on the site at once. Missouri Digital Heritage has one here. A search on Esterline brings up not only death certificates (which you probably already have) but city directory entries, newspapers and more.
4) I always recommend that genealogists get to know their record sources. Again, through my Google search I discovered The Laws of Missouri Relating to Inquests and Coroners (1945). This may provide some further insight. And the FamilySearch Wiki is always invaluable. Here’s the page on Missouri Vital Records and it states that “original records are available on microfilm at the Missouri State Archives.”
5) I pretty much always do a quick search specifically at Google Books since they have over 25 million books. I searched Ben Esterline and the first result was a listing in the Annual Report of the Bureau of the Mines (1932) (the year he died!): “FATAL ACCIDENTS— LEAD AND ZINC MINES Ben Esterline, prospector.” The book is not fully digitized in Google Books, but click “Libraries that have it” and you’ll be taken to the card catalog listing in WorldCat which will show you where you can obtain it.
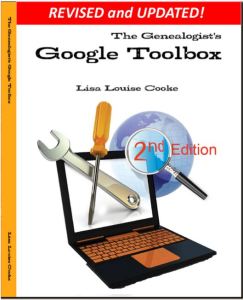
I’m telling you, Google is the most powerful, flexible, furthest-reaching free genealogy search engine out there—and it’s right at our fingertips! But you do need to learn how to use it effectively, or you could find yourself wading through 87,400 results for an ancestor like “Ben Esterline.” Instead, learn the strategies I teach in The Google’s Genealogist Toolbox. This second edition–new in 2015–is fully updated and loaded with techniques and examples on search strategies and tools that help you use Google for genealogy (and everything else in your life!). Click here to order your copy and you’ll start Google searching much smarter, much sooner.
Are you looking for a fun, easy and downright delicious way to share some family history this Christmas? What better way to entice your family to have an interest in the family tree than wrapping that history around a luscious chocolate bar?
DIY: Stuff Their Heritage in Their Stocking
I firmly believe that family history should not sit on a shelf, but should be seen, touched, felt and even tasted!
Sometimes when a passionate genealogist shares the family history discoveries they have made, their relatives are less than enthusiastic to hear about it. (Sound familiar? I know I’ve experience this phenomenon.) This lack of interest may be more about the delivery of the information rather than the information itself. The trick is to serve up the family tree in an appealing and fun way.
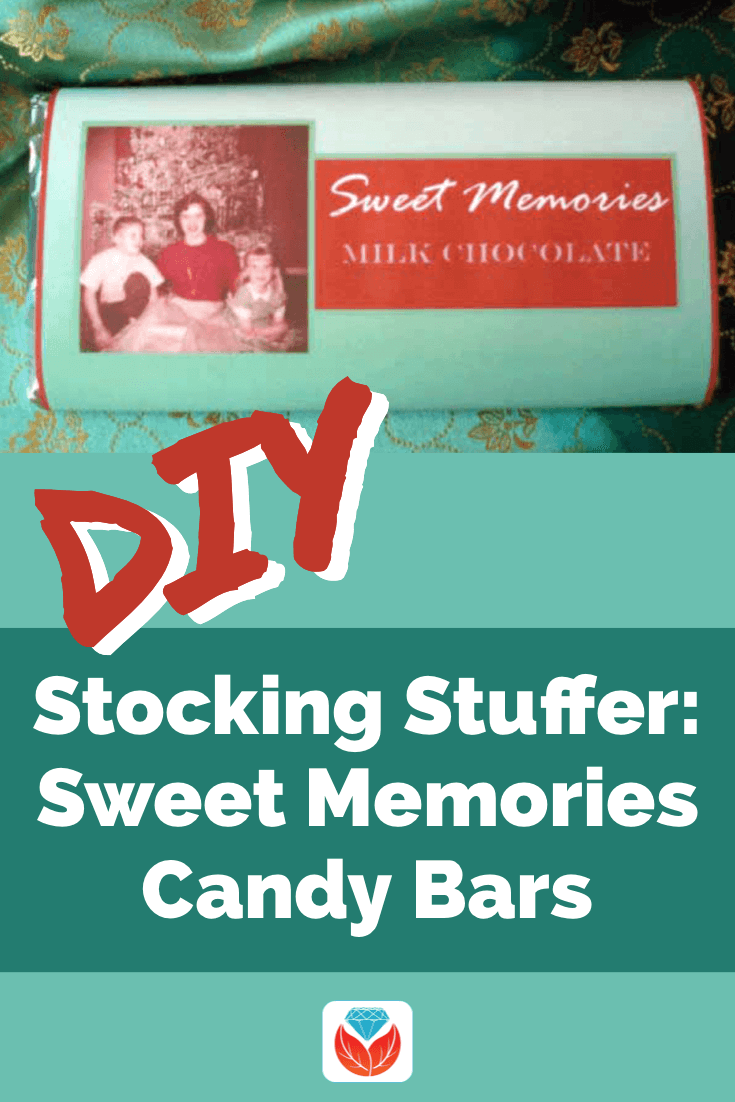
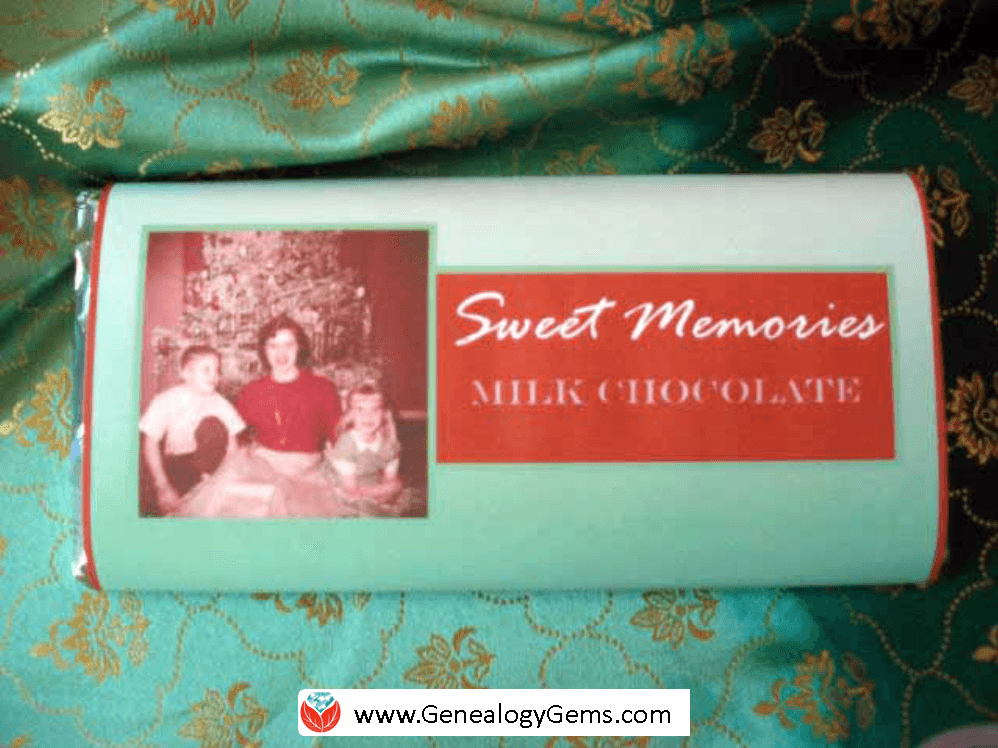
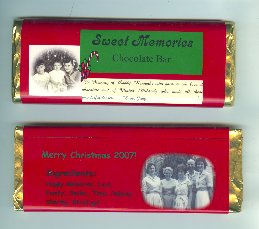
That’s why a few years ago I designed these customized candy bars which I call Sweet Memories. They’re basically your favorite chocolate bar wrapped in a custom label with your own sweet family history memory on it. What could be better than that?!
Here’s the first Sweet Memories stocking stuffer candy bar I made for Christmas.
They are really simple to make. The candy bars themselves are store bought. All you need is a computer, printer and some paper and you can whip some up in an hour or so.
What I especially love about these customized delectable delights is the conversation they stimulate. I loved seeing the surprises on the faces of my family, and then the reminiscing that soon followed. They loved seeing the old photos and the clever list of “ingredients” that provided insight into the character of their ancestors.
Don’t feel like you have to do exactly what I did on mine. Instead of a list of ingredients you could include a short funny story, favorite family quotes, or little-known fun facts about the ancestors in the photo. Use your imagination and have fun!
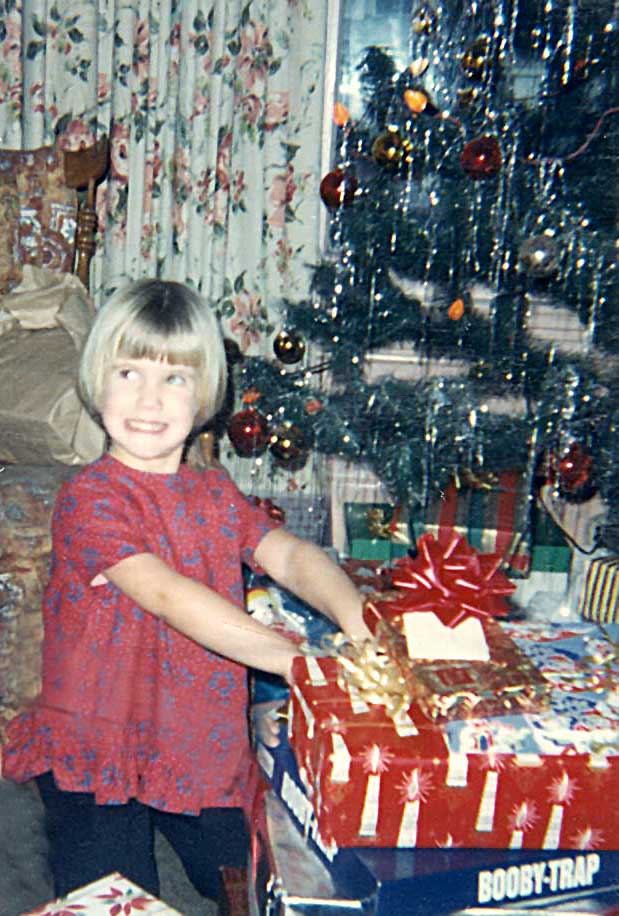
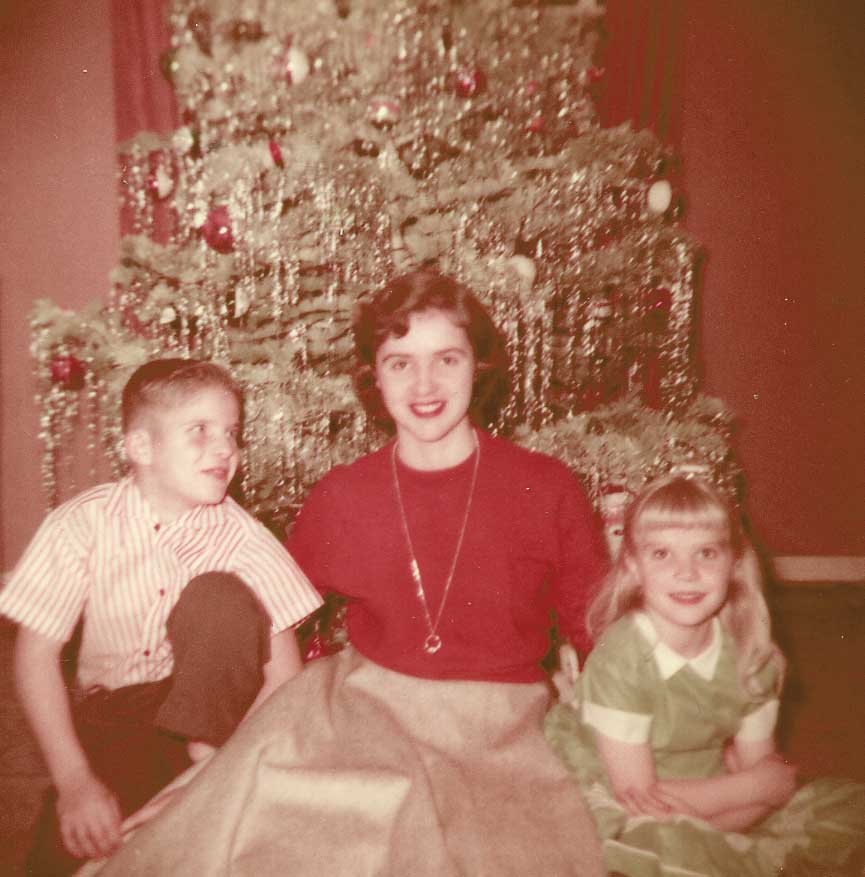
Me having fun at Christmas in 1966. Did you have the Booby-Trap game too? (Leave a comment)
Keep reading because after the step-by-step instructions below, I’ll share some more design ideas.
How to Make “Sweet Memories” DIY Stocking Stuffer Candy Bars
Here’s how to make your own custom labels and turn plain chocolate bars into wonderful holiday gifts for your loved ones.
Start by gathering up the following supplies:
A 3.67 oz approximately sized Chocolate Bar wrapped in foil with a paper wrapper. (Dove and Cadbury are some of my favorites. Hmmmm!)
Bright white printer paper
Computer and printer
A software publishing program that you can create your label in, like Microsoft Publisher. (Or try using a word processing programming using the text box feature.)
Scanned family photos, especially old holiday photos
These instructions are for creating the labels in Microsoft Publisher, but you could also do it in PowerPoint or any other design type software or app.
1. Create a Rectangle
On the blank page, create a 7 ¾” high and 5 ¾” wide rectangle using the Shape tool. This just gives you a nice outline to work in.
2. Add a Background
An easy way to add an interesting background is to scan a piece of scrapbook paper that you like. The scrapbook paper could be textured or have a repeating design. But you could also choose a favorite digital image.
Use the INSERT IMAGE function to get the image onto your page. Next, resize it to fit just over the rectangle that you created.
Another other option for the background is to select the rectangle and use the FORMAT FILL COLOR function to color the box with the color of your choice. I used green and then chose a gradient that went from light to dark for added interest.
3. Add an Old Photo(s)
You can add any digitized photo that you like. Dig through your old family photo albums to find Christmas photos from the past, or simply feature an ancestor or family. You can use the same photo for all your stocking stuffers, or surprise each member of your family with a candy bar featuring a different ancestor.
Use INSERT IMAGE to add your photos and resize them to fit.
For the front side image, I measured down approximately two inches from the top of the label, and that is where the top of the photo was placed. I set it ¼” from the left edge. Both photos are about 2” x 2”.
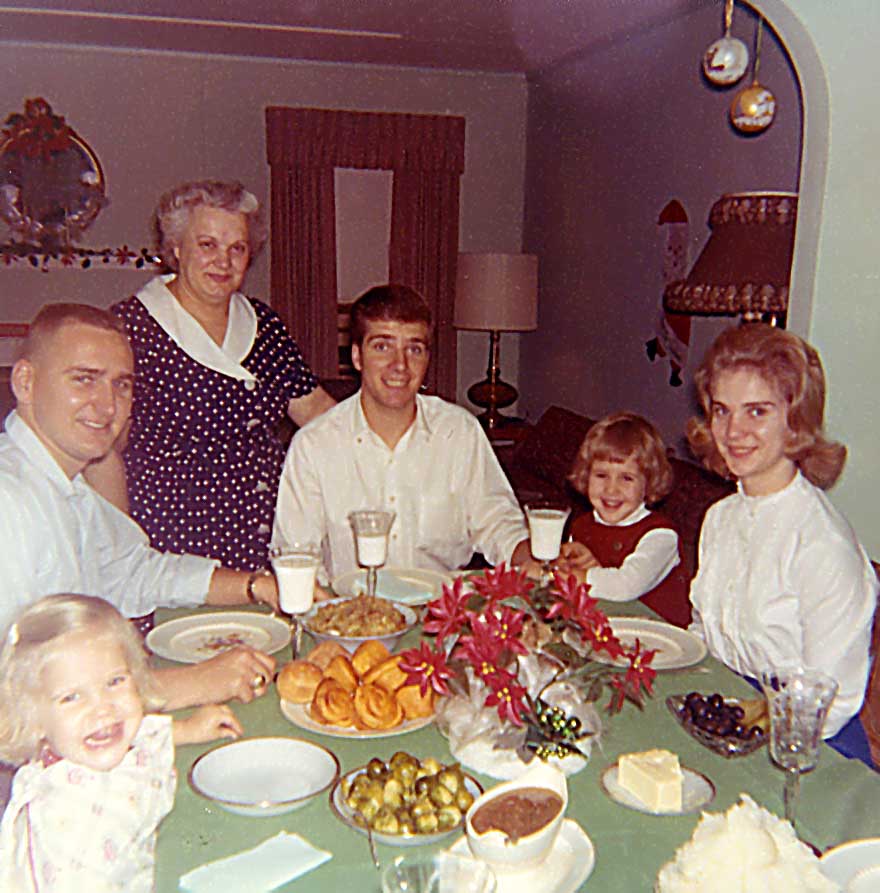
My uncle, mom and aunt in 1956. I used this photo for the front side of my stocking stuffer candy bar label.
4. Adding Photos to the Back of the Label
The backside photo begins 5” from the top of the label and is set ¼” from the left edge.
You may also want to include a small text box that states the date and location of the photos and the names of the people.
Christmas Dinner at Grandma’s House (I’m in the bottom left corner, mouth wide open as usual.) I featured this photo on the backside of my label.
5. Add Descriptive Text
The last step is to insert the text boxes.
Both the “Sweet Memories” text box and the “Ingredients” text box that I included are about 3” wide and 1 1/4” high. You can format them with the borders and colors that you want.
In my example, you’ll see that I took the color cues from the colors in the photos – the crimson red and soft green. Many apps have a color picker feature that will allow you to get an exact match.
6. Add the Ingredients List
Every food item has an ingredients label on it, and this bar is no exception. I had some fun with the ingredients list and played up the family theme. I thought about my memories of my Grandmother and the values and elements she poured into each holiday. So my ingredients list reads:
Love,
Family,
Attention,
Politeness,
Grandma’s Cooking,
Smiles,
Caring
and Time.
Feel free to reflect your own family values in the list.
7. Print Your Label
Once you’ve got everything laid out on the screen the way you want it, it’s time to print.
From the menu, click FILE then PRINT and then click the PROPERTIES button. From this window be sure to select “high resolution paper” or “high brightness” as the media type, and select HIGH for the print quality to make sure you get the best, most professional looking label.
Print the label, then carefully cut it out.
8. Fold the Label to Fit
Follow the folding guidelines shown above, but keep in mind that your candy bar is going to dictate your actual fold lines.
The first fold line for my standard size Cadbury chocolate bar (which you can buy in bulk here) was 1 ½” from the top of the label and the second fold line is 4 ¼” from the top of the label.
(Disclosure: Genealogy Gems is a participant in the Amazon Services LLC Associates Program, an affiliate advertising program designed to provide a means for sites to earn advertising fees by advertising and linking to Amazon.com. Thank you for supporting articles like these by using our links.)
9. Tape the Label Closed
Remove the original wrapper of the chocolate bar, being sure to keep the foil wrapper in place and undisturbed. Use a small piece of double sided tape to stick the label to itself on the backside snugly.
And there you have it, your own custom family history themed chocolate bar! It’s ready to tuck into a Christmas stocking, use at your next family reunion, or at any other time you want to tickle someone’s sweet tooth and share memories.
More DIY Stocking Stuffer Design ideas
I promised you more examples of these Sweet Memories candy bars. Here are some from my Genealogy Gems Podcast listeners.
I love the vignette styling Judy gave her family history photos.
Genealogy Gems Podcast listener Judy shared her version of the Sweet Memories stocking stuffer candy bar.
And this listener took this DIY idea and used it to create candy bar treats for her family reunion. What makes these SO unique is that she used a family heirloom crocheted blanket for her background image. (How clever is that?!) She spread the blanket over the bed of a scanner to make a digital image of that she could use on the label.
Get more DIY project here at Genealogy Gems. You’ll also find great heritage crafting ideas–including photo displays and heritage quilts–on my Pinterest boards. If you enjoyed this idea I’ll hope you’ll share via Pinterest or Facebook. Did you like this idea and do you have other suggestions for a new spin on it or a favorite DIY family history project? I’d love to hear it so please leave a comment below.
“I have been catching up with all of your family history podcasts. Over the years I have collected a wealth of information on the family. Some good, some not-so-good, some out in-the-open, some hidden.
How do you deal with revealing “forgotten” items about family members to other family members? I had an uncle who had a marriage at a very young age, and would like to have forgotten about it. My mother told me about it. I put it on the tree. While showing off the fruits of my labor to his family this “forgotten” marriage was revealed with not happy responses.
The things we find in our tree may not always be “good”, How does a person deal with that? and revealing it to others?”
Secrets, small and large can be found in many families. Skeletons in the closet are often secrets closely guarded by family members.
It’s a tricky business navigating your way through the shakier branches of the family tree, so I’ve invited a special guest to join me on the show who has done an incredible job of climbing those branches in his own family.
Steve Luxenberg is a Washington Post associate editor and award-winning author. In his 25 years at The Post, he has headed the newspaper’s investigative staff and its Sunday section of commentary and opinion. Steve is going to join me for the full episode to talk about investigating and dealing with family secrets as he did in his book Annie’s Ghosts. It’s a riveting tale that kept me feverishly tapping the “Next Page” key on my kindle.
Annie’s Ghosts is about a family secret that Steve stumbled upon in the late 1990s. His mother, who had always claimed to be an only child, had a sister, Annie. And while that was a big surprise all by itself, it was just the beginning of a series of secrets and revelations that Steve unearthed by tapping into his long career as an investigative journalist, and employing newly found genealogy techniques and strategies.
In this interview we talk about being aware of what’s missing in records and stories, rather than just focusing on what is on the page. For those of you who are Premium Members this discussion is a great follow up to Premium Episode #77 where we talked about being more keenly aware during our research.
Steve’s also going to share he thoughts on storytelling, which he truly masters in this book.
And then we get into some of the genealogical techniques he used: how to avoid tainting memories in Interviews, and how to balance the give and take as well as win trust with the person you are interviewing.
And speaking of trust, Steve describes how he was able to be incredibly successful in obtaining sensitive documents and getting cooperation from various government agencies and other repositories.
He’s also going to tell us about a little known legal maneuver that he made that really made the difference for him in obtaining some of the most closely held documents and how you can use it too!
And finally he’ll share his personal feelings about what it was like to get a add a new member to his family, his long lost Aunt Annie.
Enjoy!
Quotes from Annie’s Ghosts:
“What I didn’t expect, as the week wore on, was that the family would expand to take in a new member. But that’s what happened. As people dipped in and out of the records, as the debates flew about what we knew and what we didn’t and whether we should be digging around in the past, Annie gradually became a part of the family consciousness. She was no longer just a name on a hospital record. She was no longer just a secret.”
“I stopped thinking like a son and started thinking like a journalist.”
“I offer to send her the letters; it’s an unexpected present for her, and I’m glad to be able to make the offer, because it allows me to give as well as take, something reporters can’t often do. It’s also a good way to win trust.”
“I want to make sure that if she knows about Annie, she tells me before I tell her, so that I capture her spontaneous memory first.”
 Double good news: AncestryDNA has made some improvements to the way they calculate your genetic matches, but they haven’t messed with the site format or layout. There is one downside–so keep reading.
 Of those windows, you may share the “etch a pai” with another individual in the database, earning that cousin a spot on your match page. However, the truth is, that bit could say “sketch a painting” or “stretch a painful leg” or “fetch a pail.” With Ancestry’s new method, they are able to see farther on either side of the matching segment, making this clearly “fetch a pail.” That means better matching, which means more confidence in your cousin matches.
 When DNA Circles DON’T Mean Connections on AncestryDNA
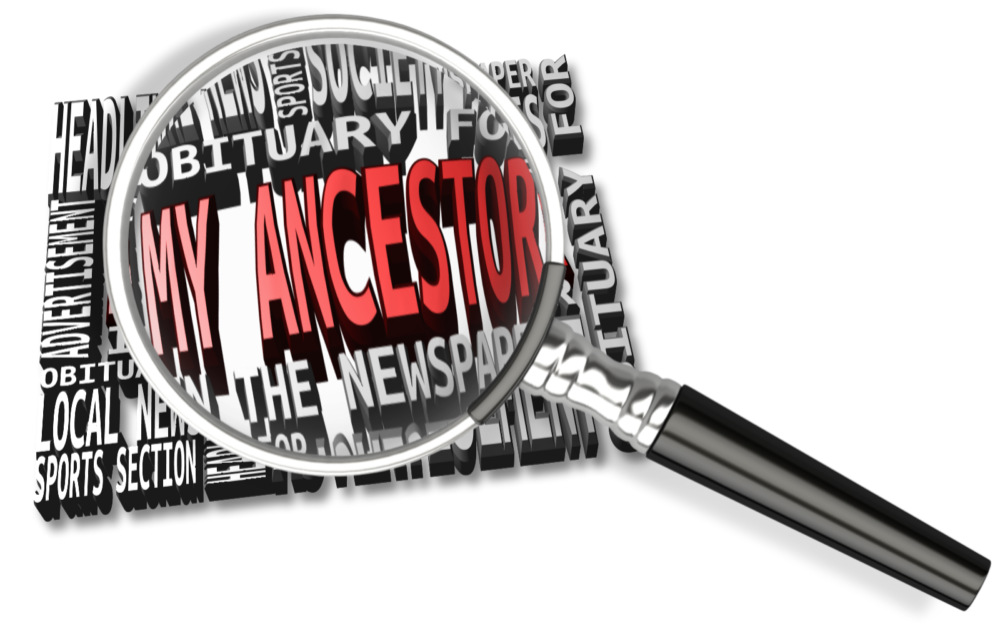
 Missouri delivered the