Recently a friend sent me a link to a TED talk by StoryCorps founder Dave Isay. As a radio broadcast journalist, Dave has spent his life capturing other people’s stories. The profound impact this had on him led him to found StoryCorps, which collects and archives interviews with everyday people.
“Every life matters equally and infinitely,” Dave learned, something we discover as family historians, too. He talks about how inviting someone to talk about his or her life “may just turn out to be one of the most important moments in that person’s life, and in yours.” This is something I try to explain to people about family history interviews: asking respectful questions and listening just as respectfully is a gift we can give our relatives when we interview them.
StoryCorps started with a little recording booth in Grand Central Terminal, one of the busiest places in the world to hold these intimate conversations. Two people share a conversation, one interviewing and the other being interviewed, and a facilitator helps them record the conversation and leave with a copy of it. Another copy goes to the Library of Congress.
In our own ways, we do this when we record loved ones’ life stories. We honor their feelings, experiences and opinions by asking about them and preserving them. Sometimes we share personal moments of understanding, forgiveness or revelation. In my experience, it’s similar to what unfolds in the StoryCorps booths: “Amazing conversations happen.”
In Dave’s TED talk, he shares snippets of some of those amazing conversations, like A 12-year old boy with Asperger’s syndrome interviewing his mother, and a husband sharing his love for his wife: “Being married is like having a color television set. You never want to go back to black and white.”
StoryCorps now has an app that helps people capture conversations like these. A digital facilitator walks you through the interview process, the app records the conversation, and then you can save and share the resulting audio file. Why not record an interview in honor of Mother’s Day or Father’s Day this spring with the StoryCorp app? Or have a meaningful conversation with an aunt or uncle, sibling, cousin or your child or grandchild.
Genealogy Gems Premium members can learn more about preserving the stories of your own life in the Genealogy Gems Premium Podcast Episode 116, in which I interview Laura Hedgecock, author of Memories of Me.
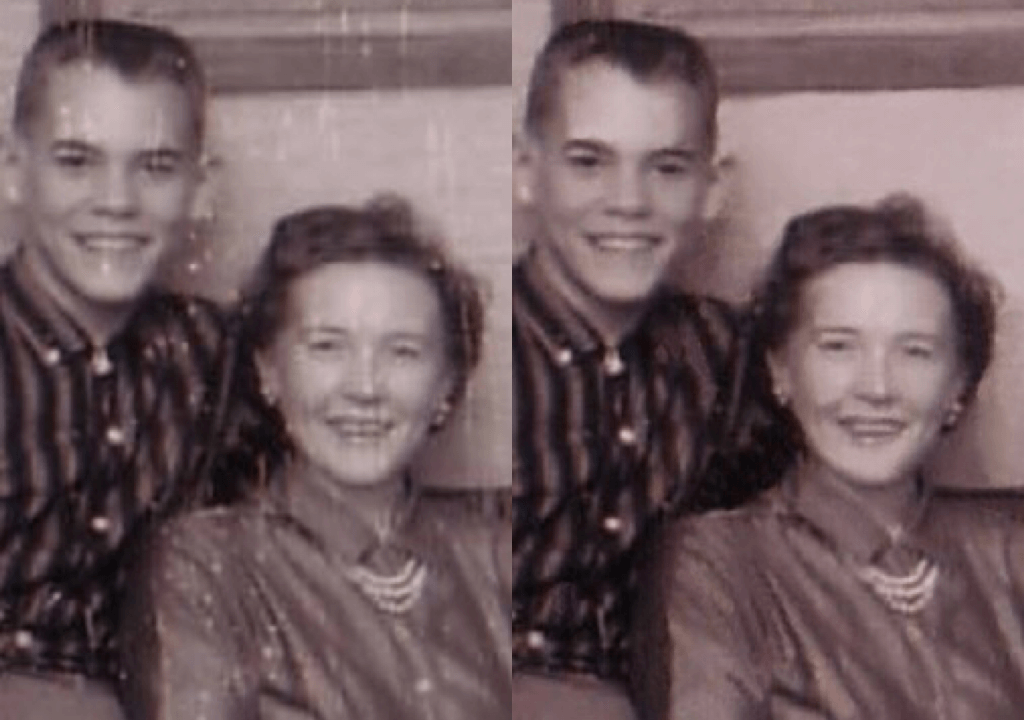
Here’s how to remove damage from photos, such as those commonly found on Polaroid Land pictures. It’s a simple digital photo restoration technique you can use to improve your old family photos. See how Lisa Louise Cooke cleaned up a precious family photo as a surprise for an guest she interviewed—and his touching response.
Last month, I asked esteemed film historian Sam Gill to send me some photos of himself that I could include on the “show notes” page for Genealogy Gems Podcast episode #215.The episode features our conversation on silent films, and the glimpse of early 20th century life that they provide.
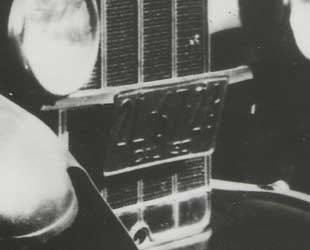
One of the images he shared captures him (when he was in high school) and his mom. Sam told me that it was taken at the time when he started helping her with their family’s genealogy.
“I seem to have only one photograph of my mother and me at that time, which was what they called a Polaroid Land Pictures photo,” he continued. “In the days before selfies and digital cameras, this was a way to have a photo miraculously developed in sixty seconds. That was considered a miracle of photography at the time.
“Although these photos tended to leave streak marks and other blemishes, it’s all I got! I am hoping you might get a kick out of seeing this young kid and his intelligent, forever-curious and talented mother, Florence Louise Jones Gill (aka Mom).”
After learning how much the memories behind that photo meant to Sam, I took the liberty of doing some quick touch up work on it. It’s not perfect, but it’s certainly cleaner:
A treasured old photo of Sam and his mom.
You can try the same techniques I used to remove damaged areas from photos you’ve digitized. It’s easy and free! So, follow along with me, and then keep reading for Sam’s response to receiving the cleaned-up photo.
How to remove damage from photos
(Update) In the past I have downloaded and used the free Adobe PhotoShop Fix app. However, the Adobe Photoshop Express app has now taken its place. You can download it onto your phone or other mobile device for free from the App Store or Google Play. You will find the Retouch feature as a Premium feature.
Then follow these steps:
1. Add a Copy of the Digital Image
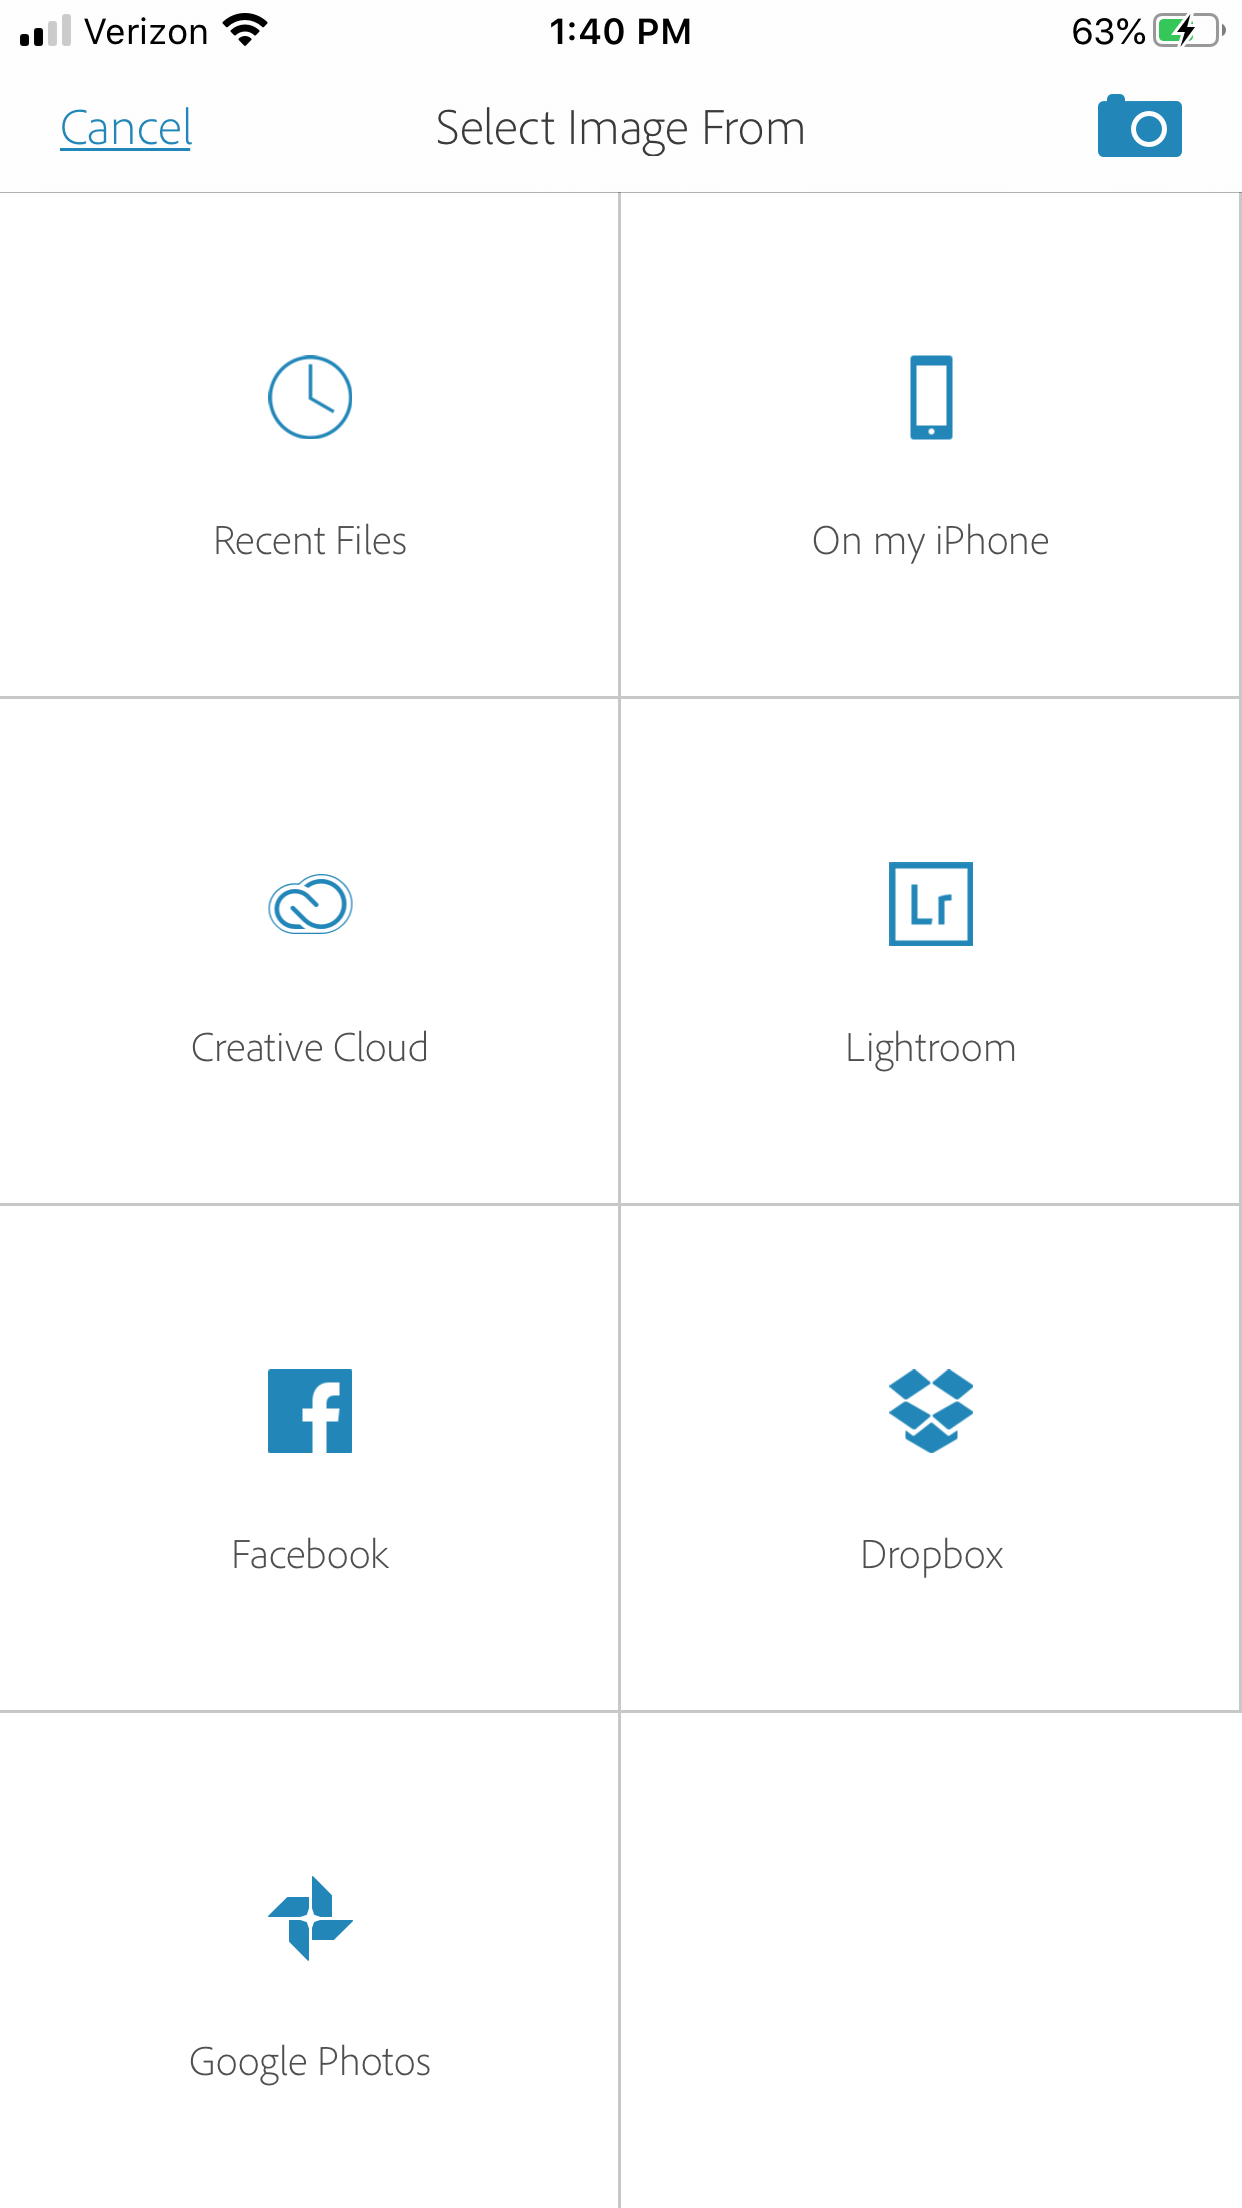
Open the app and tap the Plus sign to add your image. Don’t work with the original photo file. I save mine in Dropbox, but you can also pull your image copies from your phone, Adobe’s Creative Cloud, Facebook or Google Photos.
Tap the plus sign and select the location of your photo.
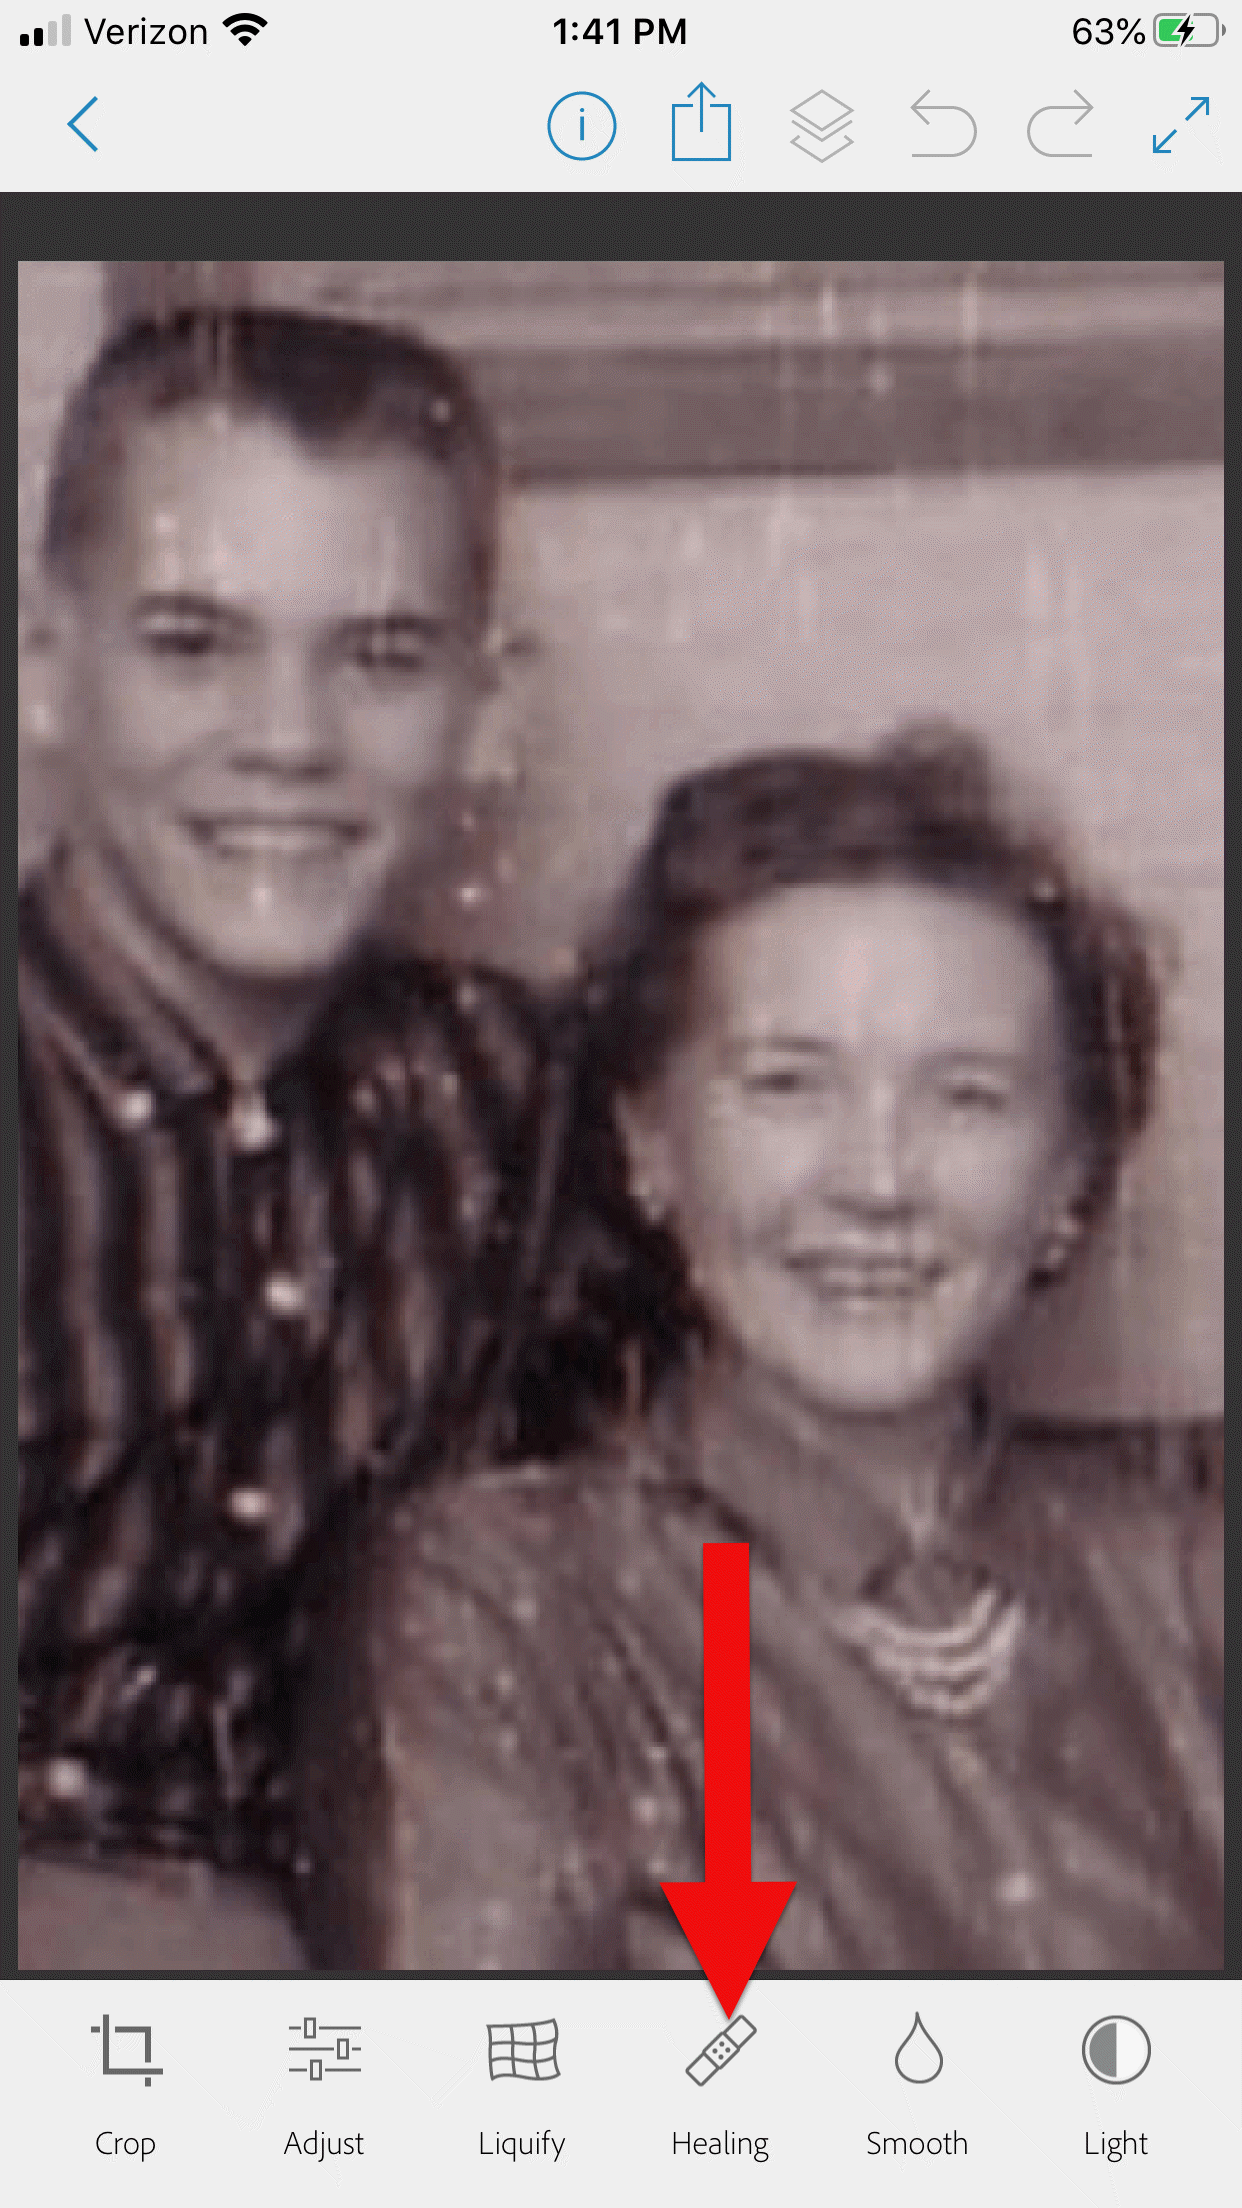
2. Tap Healing in the Menu
This will get you to the tools you will need to do the restoration.
3. Start with Minor Repairs
Start with the easy stuff (don’t go for the face right away,thought it’s tempting). Work on clothing and the backdrop first so you can get a feel for the repair work and refine your retouching movements.
4. Apply the Spot Heal Tool
Use Spot Heal first and see if it takes care of the problem area. Don’w worry about making mistakes. You can always tap the Undo at the top of the screen if you’re not happy with the results.
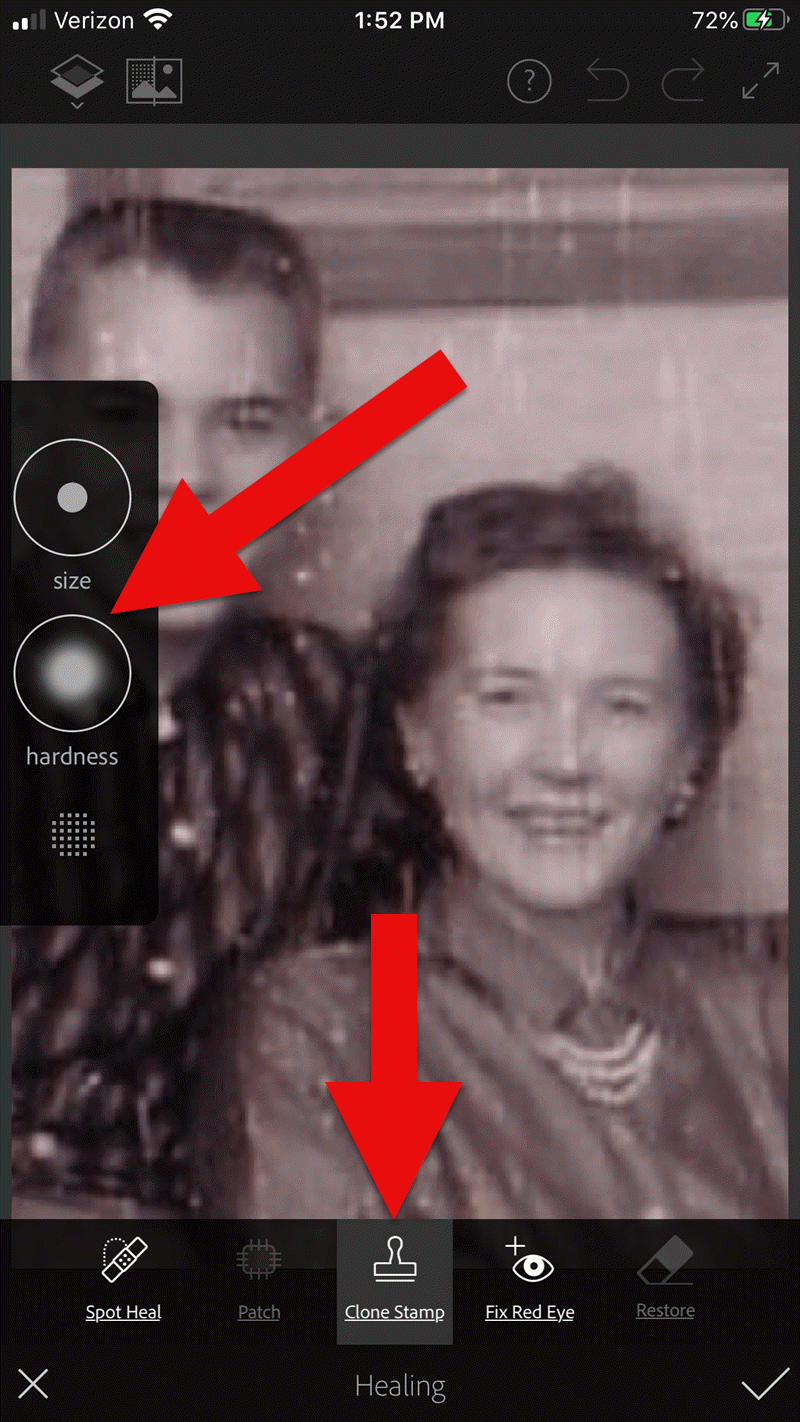
5. Apply Clone Stamp
Use the Clone Stamp tool to select an area on the existing photo that you want to duplicate to cover up a damaged area. For example you can select an unblemished area of the backdrop, duplicate it, and then “paste” it over a blemished area of the backdrop. Keep in mind that even in a single color backdrop, there can be shading, so move the clone stamp around to replicate it accurately.
Tap Clone Stamp in the menu, and use the tools on the left to adjust.
You can adjust the size of the clone stamp selection tool by tapping “Size” in the pop out menu on the left. Selecting “hardness” will give you the ability to cone with a sharp edge or a more feathered edge which is a bit more forgiving when covering another area.
6. Zoom for Greater Detail
Zoom in for better accuracy. To do this, put two fingers together and then them spread apart to enlarge the area.
While zooming in can give you greater control, if you get too close you may start seeing individual pixels (depending on the size and resolution of the original photo) and those can be much trickier to change accurately. Zoom back out often to “stand back” and inspect your work!
7. Adjust as Needed
If you’re going to zoom in, take the time to adjust the size of the tool you are using, whether it’s Spot Heal or Clone Stamp. You can adjust the size of the circle and the “hardness” by tapping the tab on the left side of the screen.
When you’ve completed your initial re
8. Saving
Be sure to save to your work along the way. That way you can always go back to a previous version if you get a little too overzealous. I like to save the image to my device’s Photos, but the app offers a variety of saving locations.
9. Apply Smoothing
In the main menu, use the Smooth tool to refine your work. Start by tapping Face. Chances are you’ll like the effect as it smooths the skin tone. And again, you can always undo if you don’t.
Then tap to spot-smooth areas, particularly backdrops. Beware of over-smoothing – it won’t look natural.
10. Make Final Adjustments
After you complete the repair work, play with other options to improve the image quality. In the main menu tap Adjust. Play with Contrast first, then move on to testing Warmth, Saturation, Shadows and Highlights.
When you’re done, save the finished image one last time to your device’s Photos.
Take Mobile Photo Restoration a Step Further
When I work on improving and restoring my old photos, I often do so in more than one app. It’s rare to find an app that does everything you want, and each has it’s special strengths. Adobe has several other excellent apps, and PhotoShop Mix is one I use quite often after I complete my initial restoration in Adobe PhotoShop Fix.
Import the restored image into the freeAdobe Photoshop Mix app. Here you’ll find even more tools for refining the image. Tap Adjust in the main menu. Experiment with these tools because you can always Undo!:
Auto Fix – I avoid this one!
Temperature
Exposure
Contrast
Highlights
Shadows
Clarity – definitely give this a whirl
Saturation
I was delighted how quickly I was able to significantly improve the photo. Sam and his mom’s faces just radiate happiness.
I sent it off and heard back from him almost immediately:
“I can’t tell you how much it means to me to see this extraordinary repair and restoration work you accomplished on that tiny Polaroid Land Picture of my mother and myself! This picture was taken at the exact same time I began to help my mother with her genealogical work.”
He then shared the story about that first research project with her. The two of them wanted to identify the relative who had rendered some beautiful old paintings hanging in his grandparents’ house. The trail led mother and teenage son to London, Ontario, Canada. As a budding genealogist, Sam was certainly thinking ahead!
“I convinced my mother to let me take along a tape recorder, as I was very interested in sound recordings, and so we recorded my mother’s interviews with family members still in London and related to the same…family.”
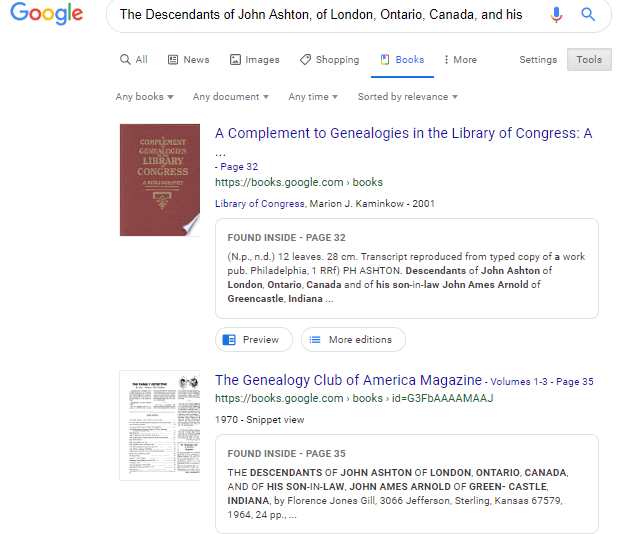
Sam and his mother identified the artistic ancestor who did those paintings: John Ashton. Their research culminated in a “delightful little family history, called The Descendants of John Ashton, of London, Ontario, Canada, and his Son-in-Law, John Ames Arnold, of Greencastle, Indiana (Lyons, Ks.: Lyons Publishing Co., 1964) compiled by my mother, Florence Jones Gill.”
Sam proudly mentions that her book was favorably reviewed. A quick check ofGoogle Booksreveals that there was indeed quite a bit of “buzz” when she published her book! It was referenced in several genealogical publications. Here are the search results in Google Books:
Sam wrapped up his reply with a little life lesson that he learned from his mom, that we can all take to heart.
“You might get a kick out of this,” Sam wrote, “but the only mistake that my mother ever found after the book was published, was the date of her marriage to my father! It should have been 1935, not 1934. One never to take herself TOO seriously, she had quite a laugh over that one.
It was fun helping my mother. Also, as I look back over my life, I must say that I have never known a more “can-do” person than my mother. If something came up that needed attention–no matter what it was–my mother’s usual response was , “WELL, WE’VE GOT TO DO SOMETHING ABOUT THAT !!!”
So my dear Gems, next time we see our family’s history hidden behind damage in an old photo, let us hear Mrs. Gill’s words in our ears “WE’VE GOT TO DO SOMETHING ABOUT THAT!!!”
My book Mobile Genealogy is chock full of more innovative ideas for using your smartphone and tablet for family history. It’s available here in the Genealogy Gems store.
A new AncestryDNA opt-out option allows DNA test takers to not participate in DNA match lists: they do not receive matches or show up in others’ match lists. Your DNA Guide Diahan Southard weighs on in the implications for genealogy researchers who may worry about cousin matches they may miss.
New AncestryDNA Opt-Out Policy
Ancestry.com recently announced an update to their privacy policy. Current and future AncestryDNA users now have the option to opt out of the DNA matching feature.
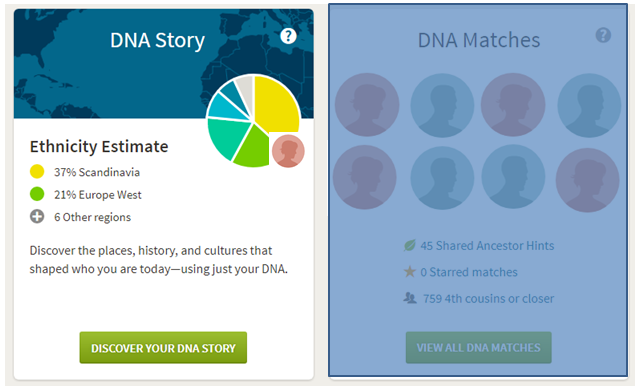
When you take a DNA test, you receive two different kinds of results from the DNA sample that you submit to your testing company:
information about your ancestral origins and
a list of your DNA cousins.
Opting out of matching essentially cuts the value of this product in half. You only get the ancestral origin information, and you forfeit access to your list of genetic matches. Opting out doesn’t just mean you can’t see them: it means that they can’t see you either.
AncestryDNA joins 23andMe in providing this option to their clients. You can look at this move as Ancestry’s response to an ever-expanding global audience, many of whom are not genealogists or are reluctant to have their DNA compared to others for a variety of reasons. It is important for them as a company to provide options for their clients to experience their product in a way that works best for them.
What the AncestryDNA Opt-Out Policy May Mean for You
What does this new opt-out option mean for genealogists? Hopefully, not much will change. Ancestry reports that overwhelmingly, people are opting in.
There has been quite a bit of push-back to this announcement, especially from the adoption community. DNA testing has been a tremendous source of information for those seeking out their biological relatives, and many fear that this change will limit access to quality DNA matches. But we will all still be able to do good genetic genealogy work, even as we are each allowed to choose whether to participate in the matching feature. To understand this better, it is important to see this issue from the other side, from the side of a person who might want to opt out. Here are two possible scenarios:
Scenario #1: Susan would really like to explore her heritage. She hasn’t tested before because she didn’t want to see cousin matches for a variety of personal reasons. But now she does test and opts-out. The community hasn’t lost anything because Susan would never have tested in the first place. But after exploring her ethnicity results and noticing membership in a couple of Genetic Communities, she begins to wonder more about her ancestors and decides to opt-in to matching, after all. In this scenario, the Opt-Out policy offers users a way to comfortably give DNA testing a try.
Scenario #2: Ryan heard about AncestryDNA while watching TV last year and ordered a kit. But then last week he heard about the ability to opt out, and went in and changed his account settings. So one day you could see Ryan on your match list, and the next you didn’t. We as a community would certainly see that as a loss. However, consider the circumstances that might have caused Ryan to hit that opt-out button. Perhaps Ryan had no idea how to use the match list, no interest in using it, and found it a bother to get correspondence from people. Perhaps Ryan found something unexpected, like that he wasn’t his father’s child, and he needed some time to deal with it. Maybe Ryan is under pressure from his sister, who didn’t want him to test in the first place (perhaps she knows something he doesn’t about their family tree, or she’s afraid of how any results and revelations might impact her). The short of it is: It doesn’t matter why Ryan opted out, it is his personal right to do so. Just as an adoptee has the right to seek out their heritage, others have the right to keep their family secrets to themselves. This scenario does support the idea that you should review your DNA matches frequently and record information about them in your own master match list, which I talk about in my quick reference guides, Organizing Your DNA Matches and Breaking Down Brick Walls with DNA. By promptly recording matching results, you will have them to work with even if the tester decides later on down the road to opt out.
As a genealogy community, we can educate others about the value of the match list, while at the same time cautioning them that unexpected connections may appear. So in everyday conversations, share your own experiences—whatever these may be. Maybe it was affirming for you to see that the dad you grew up knowing is indeed your biological father. Perhaps you can share a story about the power of using a list of fourth cousins to discover information about your third-great-grandfather. Maybe you’ve discovered a new connection—and maybe that connection isn’t yet comfortable or fully explained, but you’re glad to know about it.
Learn More about AncestryDNA Testing
Get the most out of your AncestryDNA testing experience with my quick reference guides! I recommend:
A Guide to AncestryDNAHow to find your best DNA matches, interpret ethnicity results, link your tree, understand relationship ranges and DNA Circles, and work with Shaky Leaf hints.
Autosomal DNA for the Genealogist.What autosomal test can tell you, who can be tested, how to interpret your ethnicity results, and more.
Organizing Your DNA Matches.How to keep track of your matches and apply what you learn from them to your family history.
Breaking Down Brick Walls with DNA.What to do next to maximize the power of DNA testing in genealogy. Take your DNA testing experience to the next level and make new discoveries about your ancestors and heritage!
Disclosure: This article contains affiliate links and Genealogy Gems will be compensated if you make a purchase after clicking on these links (at no additional cost to you). Thank you for supporting Genealogy Gems!
Google celebrated Earth Day by releasing Google Earth 7.1 and announcing some great new content! And there are three reasons you will want to make the upgrade:
1. New Hands-Free Navigation Technology
The big news with version 7.1 is Leap Motion support, a touch-free 3d technology that lets you “navigate Google earth with simple hand gestures.” The Leap Motion Controller ($79.99) will start shipping mid-July, so you’ve got some time to get to know Google Earth a little better before you start flying around in it like this:
You KNOW I have to get me some of that!
2. More 3D City Views There’s also exciting new 3D data in Google Earth, most notably for New York City. But there’s also more imagery for other cities around the world: Innsbruck, Austria; Dijon, France; Cagliari, Italy and the Spanish cities of San Sebastian, Santander, Pamplona, Manresa and Burgos. Other U.S. cities with 3D coverage include Miami, FL; Houston, TX; Orlando, FL; Encinitas, CA and Spokane, WA.
3. The Addition of the 50th Country to Google Maps’ popular Street View Feature
You can now view 50 countries buy lasix medication online with Google Maps’ popular Street View feature. The newest nations to be added are Hungary and Lesotho (a tiny country within South Africa), and there’s new or updated coverage for Poland, Romania, France, Italy, Russia, Singapore, Thailand and other locations worldwide. Google calls this “the largest single update of Street View imagery we’ve ever pushed, including new and updated imagery for nearly 350,000 miles of roads across 14 countries.”
Help for Using Google Earth for Genealogy
How can you access these fabulous features, both for fun virtual travel and for seriously fun genealogy research? Upload the latest version of Google Earth for free (for PC, Mac or Linux). Then check out my Google Earth for Genealogy 2-CD Bundle. There’s a reason is this one of my best-selling presentations: Google Earth is one of the best genealogy research tools around! In these CD presentations, I show you how to locate and map ancestral homesteads; use historical map overlays; identify where old photos were taken; create 3D models of ancestral locations; create custom family history tours and much more.
 Recently a friend sent me a link to a TED talk by StoryCorps founder Dave Isay. As a radio broadcast journalist, Dave has spent his life capturing other people’s stories. The profound impact this had on him led him to found StoryCorps, which collects and archives interviews with everyday people.
 StoryCorps now has an app that helps people capture conversations like these. A digital facilitator walks you through the interview process, the app records the conversation, and then you can save and share the resulting audio file. Why not record an interview in honor of Mother’s Day or Father’s Day this spring with the StoryCorp app? Or have a meaningful conversation with an aunt or uncle, sibling, cousin or your child or grandchild.
 Genealogy Gems Premium members can learn more about preserving the stories of your own life in the Genealogy Gems Premium Podcast Episode 116, in which I interview Laura Hedgecock, author of Memories of Me.

 Ancestry.com