“Which big genealogy website should I use?” Genealogy Gems takes on that ambitious family history question in ongoing comparative coverage of the “Genealogy Giants,” Ancestry.com, FamilySearch.org, Findmypast.com and MyHeritage.com. (Disclosure: this article contains affiliate links. we will be compensated if you make a purchase. Thank you for supporting this free blog.)
millions of historical records from around the world;
powerful, flexible search interfaces;
family tree-building tools;
automated record hinting (if you have a tree on the site);
Help/tutorials for site users.
But each has unique strengths and weaknesses, too. You may determine that one or two of these sites meets your needs now. But your family history research needs may change. For example, you may discover an Irish or Swedish ancestor whose records may be hosted on a different site than the one you’ve been using. Or you may find that you need DNA to push back further on your family tree. It’s critical to which sites offer what records and tools, so you know your options when your needs or interests change.
Comparing the Top Genealogy Websites
There are so many features on each site–and an apples-to-apples comparison isn’t easy.
Here’s one example: how many records are on each site? Some sites include DNA results and user-submitted family tree profiles in their total record count. Others don’t. One site has a universal family tree–ideally with one record per person who has ever lived–and the others host individual trees for each user, leading to lots of duplication. Does a birth record count as one record? FamilySearch thinks so. But other sites may count a birth record as three records, because a baby, mom and dad are all named. So it’s not easy to compare historical record content across all the sites.
Click here to learn more about the historical record collections Sunny Morton loves on Findmypast, including British Isles resources and content for tracing your U.S. ancestors!
Do your DNA with MyHeritageDNA! You can also upload your DNA resultsfrom other testing companies to MyHeritage for free and enjoy free matching and analysis tools!
Click here to read what Genealogy Gems loves about MyHeritage.
Reviews of “Genealogy Giants”
“You may have asked, ‘Which is the best online genealogy service for me to use?’….I suspect this video [presentation by Sunny Morton at RootsTech 2017] will answer most of your questions. Topics covered include cost, record types, geographic coverage, genetic testing, DNA matching, search flexibility, languages supported, mobile-friendly, automated matching, and a lot more. Sunny provides the most information about these four sites that I have ever seen in any other one document or video. This is a keeper! I have been using all four of these web sites for years and yet I learned several new facts about them, thanks to Sunny’s online video presentation. I suspect you will learn some things as well.” – Dick Eastman, Eastman’s Online Genealogy Newsletter
“We want to tell you how much we enjoyed the presentation about the comparison of the four major websites. [Sunny] did an excellent job and we were so thrilled with her presentation. She was so prepared and presented it in such a manner as to be understood. Give her our best.” – Eldon and Dorothy Walker
“I am incredibly thankful for your Big 4 session. I’ve never had interest in Findmypast or MyHeritage as I felt FamilySearch and Ancestry had it all…and hadn’t heard of PERSI either. With newly found Irish roots (via DNA), I’m excited to extend some lines that have gone cold.” – a FamilySearch employee
Disclosure: This article contains affiliate links and Genealogy Gems will be compensated if you make a purchase after clicking on these links (at no additional cost to you). Thank you for supporting Genealogy Gems!
These days we are all collecting more ebooks than ever before. We also have more devices than we’ve ever had before. Here’s a solution that gives you access to your ebooks from one convenient location no matter which device you are using.
The Advantage of eBooks
While you may love the feel of the pages of a book rifling through your fingers, there is a distinct advantage to collecting many of your genealogical reference materials and books ebooks. They don’t take up precious shelf space in your house!
However, I don’t live in a digital fantasy-land. I’m keenly aware that there are some challenges you may want to avoid:
purchasing an ebook and downloading it to one device, and then trying to figure out how to access it on your other devices
corralling your ebooks from different sources all together
having to pay for an app or web service to manage them
Don’t Reinvent the Wheel
If you’ve ever attended one of my genealogy classes, or watched one of my videos, at some point you’ve probably heard me say that I use Google Books on a daily basis for genealogy. I don’t say that just because the service provides access to over 25 million books, many of them fully digitized and searchable, and downloadable. It also provides you with your own personal library. Let’s take a look at how Google Books and Google Play Books work together to make that possible:
Google Books is a free and powerful service that also allows you to have your own library within it called My Library. As you search for and find ebooks to aid you in your genealogical research, you can save them to your library.
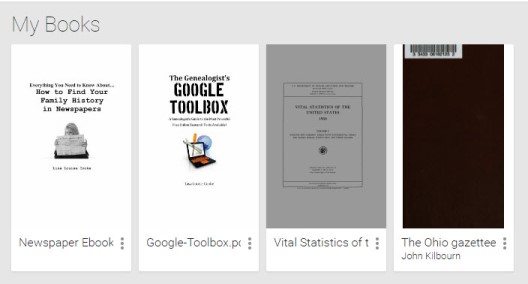
Google Play Books, is sort of the other side of Google Books. It is a vast ebook store that includes a feature called My Books. When you purchase an ebook, it is saved to your My Books. However, it also includes all ebooks that you have saved to your Google Books My Library. Even better, it allows you to upload your own ebooks! This makes it a central clearinghouse for all of your ebooks.
Here’s the bottom line. Think of My Books and My Library as the same thing in two different places: a personal library for your free, purchased and uploaded ebooks. The only reason they have different names is because Google Books has evolved over time into a book store as well. Don’t worry about that. Just know that whether you are searching through Google Books, or shopping in the Play book store, your library is right there with you, no matter what device you are using.
How to Start Using your Google Play Books Library
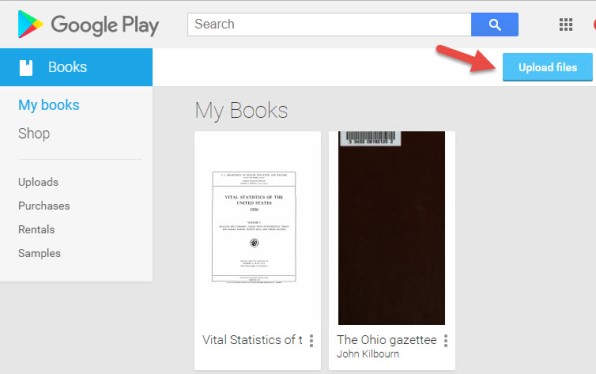
To get started, all you need is a free Google account, which you very likely already have. Go to https://play.google.com/books and sign in. In the menu on the left, click My Books. If you have ever saved a free ebook to your My Library in Google Books you should now see it on your screen.
This library is a place where you can save, upload, and access your digital books from any mobile device. This means everything is conveniently in one place, and accessible from all of your computing devices, both Apple and Android. You’ll have the freedom to read your favorite books on the go, and to access your digital genealogy research library at the drop of a hat.
Yes, there are some other services out there that could also do the job. But if you’re like me and don’t want to invest the time to learn and pay for yet another tech tool, Google Play Books is a great solution, because we are already using Google Books for our genealogy research.
How to Upload Your Own eBooks to Your Google Play Books Library
Let me walk you through the simple steps to putting this free tool to work for you:
1. First, open your web browser and log in to your Google account.
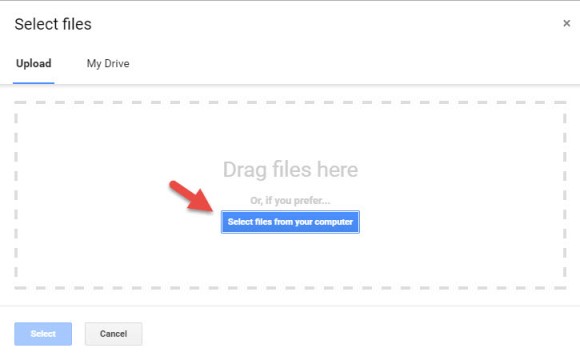
4. Select your ebook files from your computer folders, or drag them into the box shown. You can also click on My Drive to select files from Google Drive. You can choose epub documents or PDFs.
Now, let me stop right here for a second and distinguish between doing this on a computer, and doing it on a tablet or smartphone. What I’m illustrating here is on a computer. I always recommend when you purchase ebooks to download them first to your computer, regardless of whether you plan on uploading them to Google Play Books. However, if you do want to do this on a tablet, for example, there are currently two options from which to pull your ebooks:
“My Drive” which is Google Drive, or
click “Select files from your computer” then tap “More” and select Dropbox.
Trust me, things will work more smoothly if you use your main computer as your hub for downloading, and then upload directly to your Google Books library.
Other things that are good to know:
It may take a minute or two to upload an entire book.
The cover will be the title page, not the actual dust-jacket cover you might be used to.
Currently, you can only search within books you obtain from Google (both free and paid), not the ones you upload.
You can upload 1,000 books into your Google Play Books library.
It’s private. Your books are only visible to you when you login to your Google account; you’re not sharing them with the world.
Your Google Books Library on Your Mobile Device
So now you have found free historical ebooks on Google Books (if you haven’t, take a moment and click here to read my article about using Google Books) and saved them to your Google Books My Library. Then, you uploaded your own ebooks and PDFs to Google Play Books. The final step is to jump on all of your smartphones and tablets and head to the app store. Search for Google Play Books and download the free Google Play Books app to each device. Sign in to the app with your same free Google account, and you’ll have access to all of your ebooks. Your library can now travel with you in your purse or tucked into your pocket.
In the app, tap the three horizontal lines icon in the upper left corner, and then tap My Library. You’ll find your ebooks sorted under the following tabs:
All Books
Purchases
Uploads
Samples
By tapping the three uneven horizontal lines icon in the upper right corner, in each category you can sort your books by:
Recent
Title
Author
Those Pesky Variable Formats
eBooks come in several different formats. While I’m not covering in this article how to convert file types or deal with DRM protected books, there are resources available to help you do so.
The answer? Just Google It!
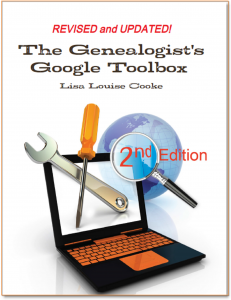
And if you need help figuring out how to effectively Google search, I have a book for that!The Genealogist’s Google Toolbox–the ultimate guide to using all of Google, including a full chapter on Google Books.
PDF – I Love You!
Many white-papers, scholarly works, and quick reference guides come in PDF format, and they upload like a breeze.
PDFs are so versatile, and they play ever-so-nicely with Google Play Books. It’s just another reason to love your Google Books library.
Stock Your Google Books Library
Are you feeling like your Google Books Library has room to fill? All of our quick reference guides are easy-to-upload PDFs, and all of the following genealogy resources are available as digital downloads in the Genealogy Gems store:
For a hand-picked list of novels and other great leisure reading for genealogy lovers, visit the Genealogy Gems Book Club page. I know you’re going to love our suggested best-sellers and best-kept-secrets about family, the search for identity, and fascinating stories in history.
New North American genealogy records online this week! Featured are U.S. military, passenger and yearbook records (including WWII film footage); regional collections for New England and Great Lakes; Congressional statutes; and over 63 million Mexican genealogy records...
When you’re working on our genealogy, you’ve got data and records coming from all directions: websites, interviews, archives, downloadable documents, and more. Some of it you’re actively working on, some of it you need to save for later, and the rest has already been analyzed and is ready for archiving. This variety of data requires a variety of storage locations.
Watch episode 71
In this week’s special episode of Elevenses with Lisa (episode 71) I’m going to share with you my genealogy data workflow. We’ll talk about how it all fits together to ensure an uncluttered desk and the ability to instantly put my hands on what I need when I need it. If that sounds like something that you need help with, please join me this week.
Three ways to watch: 1. Video Player (Live) – Watch live at the appointed time in the video player above. 2. On YouTube (Live) – Click the Watch on YouTube button to watch live at the appointed time at the Genealogy Gems YouTube channel. Log into YouTube with your free Google account to participate in the live chat. 3. Video Player above (Replay) – Available immediately after the live premiere and chat.
Episode 71 Show Notes
Barbara left a comment saying she found our recent videos that we called How Alice the Genealogist Avoids the Rabbit Hole helpful (episode 68 and episode 69), but she did had a question about Evernote. She asks, “Once you have processed (the genealogy record) and extracted the information you need, do you remove them from Evernote and place them in your digital genealogy filing system? I get a bit confused in thinking about what the other purposes of Evernote might be. Wouldn’t I just save my documents, newspaper clippings, etc. to my digital files on the hard drive and also to my Google Drive folders? Is there any need to also have them in Evernote?”
This is a great question, and I think the best way to answer it is to talk about my entire genealogy workflow in which programs like Evernote play a part.
It really helps to have a consistent way to capture and find what you’re actively working on. My workflow works great for me, but its just one way. Follow along with me and see if this might be a flow that will work for you.
The Genealogy Data Flow
Let’s start off with an overview of my workflow. And there are really 5 major workstations, if you will, that your data flows through. Some of these we’ve discussed previously here and also in several Premium Member videos:
Active Genealogy Work
This is the stuff we are working on currently. I several different tools to capture and work on these items: Evernote, genealogy website subscriptions, “pending” folders on my computer, pending tabs in my 3 ring notebooks and physical pending box on my desk. We discussed this in Elevenses with Lisaepisode 7.
Conclusions added to Master Genealogy Database (Software on your computer)
Archival Digital Storage (your computer.) See episode 8 (Digital Archiving) You can certainly keep archival items in Evernote as well.
Archival Paper Storage (your binders.) See episode 6(Paper Archiving)
Cloud backup. I use Backblaze at https://www.backblaze.com/lisa (affiliate link – thank you for your support of our free content)
Incoming Genealogy Sources
Not everything I find while researching is ready to be archived the moment I find it. Some items are actively being found and worked with such as:
Items I’m exploring for the potential application to my current research project
Items pending analysis
Unproven items
Items playing a role in a bigger research question that I want all together for now.
Bright Shiny Objects (BSOs) – stuff I found along the way that doesn’t relate to my current research goals
Not everything is captured on my computer. Many items (photos, audio and video records, typed notes) are captured on my phone and my iPad. So, I need an easy way to funnel everything back to one active workspace. A cloud-based notetaking service allows me to do this because it’s available as software on my computer and an app on my mobile devices. All synchronize through my account on the cloud. I use Evernote (affiliate link – thank you for your support of our free content) so I’ll refer to that, but there are others out there like OneNote, and Google Keep. (Learn more about how to user Evernote in episode 70.)
Evernote allows me to:
Capture and hold items
search and retrieve more effectively than on my computer thanks to OCR (subscription)
work my genealogy research plan
easily collaborate with another researcher by sharing a single link
Store and share media such as audio and video recordings
OK, so does everything go straight into Evernote? The answer is no. So let’s take a look at what happens to a digital item when I get it. I’m going to call it data, but it could be a downloaded genealogy record, a web clipping from a website, a photo of a gravesite I took with my phone, or anything else that includes information I want to use.
Working Your Genealogy Research Plan
When we work our genealogy research plan, we will inevitably locate documents. Typically, these are digital, but sometimes we find a physical document and make a digital copy of it.
Before a digital item is deemed relevant and ready to archive, we have a lot of work to do. We need to evaluate and analyze the document to determine its value and its possible application to our family history. If deemed reliable and applicable, we then need to extract the data and enter it into our family tree software. We may also decide to add some or all of the information to other places such as our online tree if we have one.
Many times, all of this work can’t happen in one sitting. We may need to be able to review and work with the item several times before we’re finished with it. I call this “processing” the document.
Even after its processed, we may still need the item nearby for reference as we work our research plan in the hopes of reaching our goal. At this stage, I consider this item to be “Active.” The opposite of that would be items I consider to be “Archived.” An archived item has been fully utilized and is no longer playing an active role in my research plan. That’s not to say I may not need to reference it again in the future, which is why it must be archived where I can retrieve it. The point is that the item is not relevant to my current active research. For example, perhaps it pertains to my mother’s side of the family and right now I’m working on my father’s side of the family.
My active digital items are typically added to Evernote, which I consider to be my Active workspace. It is not my archival space. However, this is not to say that you can’t store everything in Evernote forever if that’s what you want to do. You certainly could. I’ve given this a lot of thought and there are a few reasons why I don’t store everything in Evernote.
The main reason I don’t store everything in Evernote is that I’m a firm believer in retaining control of my data. If we store everything on a website or in a cloud service (which Evernote is), they (or their hosting provider) could pull the plug tomorrow and it would all be gone. I certainly don’t think that would happen overnight, although there are real cases of that happening. But I don’t want to take the risk, and I don’t want to have to scramble in a panic to move a mountain of data because I’ve been given a 30 day notice that a service is ending or has been sold to another company. (And let’s not even think about the possibility that the email notification of that happening went to my Spam folder!)
In order to retain control of my family history data, my long-term data storage needs to be within my control: my computer, external hard drives (both backed up with Backblaze) and paper print outs. That being said, when it comes to my active research project, I’m willing to trade the risk for the speed and convenience of using an online tool or service such as Evernote. My active research is a small fraction of my total research, most of which has been archived on my computer.
So, when I first find an item, I have a decision to make: where am I going to put it? Will I save it to my computer or to Evernote? It depends on what it is.
Items I save to Evernote:
Items needing OCR to be most useful. Examples: Newspaper articles, web clippings
Items created with my phone or tablet. Examples: Photos of gravesites and documents, interview audio recordings, videos of research trips
Items needing analysis before confirmed as pertaining to my family. Examples: Record downloaded from a genealogy website. I want these in Evernote because everything is together in one place. Tags and the search feature allow me to instantly retrieve any combination of records I need at any given time for cross reference. And if I need to share any or all of the items with another researcher it’s easy to do with just one share link. A cloud notetaking service make working your research plan much easier. (Premium Members watch my video class Collaborative Genealogy with Evernote.
Example:Items pertains to my family but not part of my current research project.
Downloaded genealogy records I don’t have time to process right now.
All items are tagged with relevant information to make them quick and easy to find in addition to keyword searching.
Items I save to my computer hard drive:
Items to I want to keep that have been processed.
Digital scans of visual items. Examples: Family Photos, old postcards
Large files created on my computer (audio, video).
I have a solid system for organizing my folders and file on my computer so it’s quick and easy to find them. If you’re a Premium Member you can watch my step-by-step classes on how to set that up for yourself on my website GenealogyGems.com.
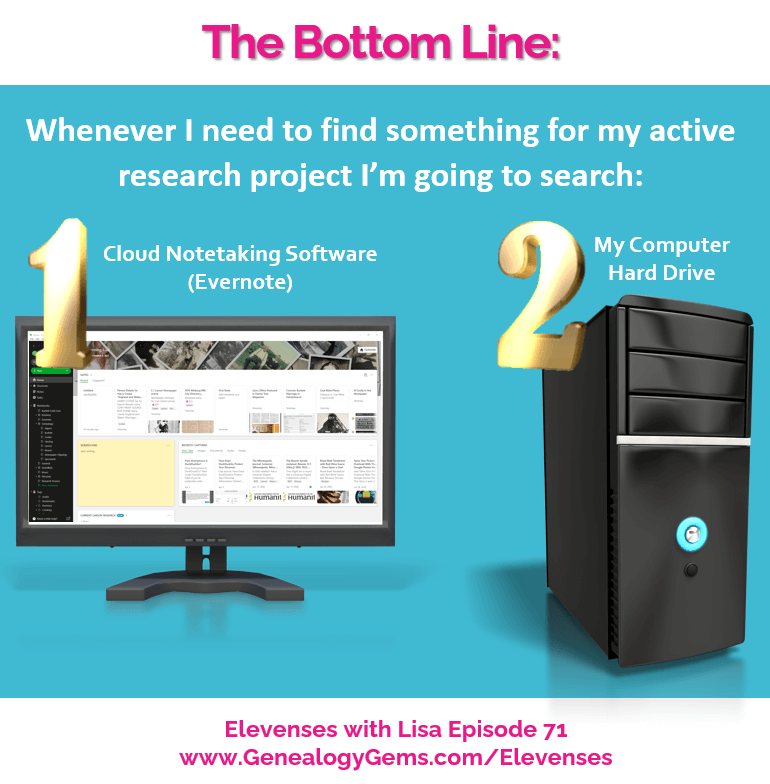
The bottom line is that whenever I need to find something for my active research project I’m going to search my notetaking service first, and then my computer hard drive.
Archiving Processed Items
Once I reach my research goal and I’m done actively using those sources, I’m ready to archive them. I could just leave everything in Evernote, but I want to make sure that all genealogical documents that I referenced as a source in my master database, are archived on my computer for long-term storage that I control, and that is being automatically backed up.
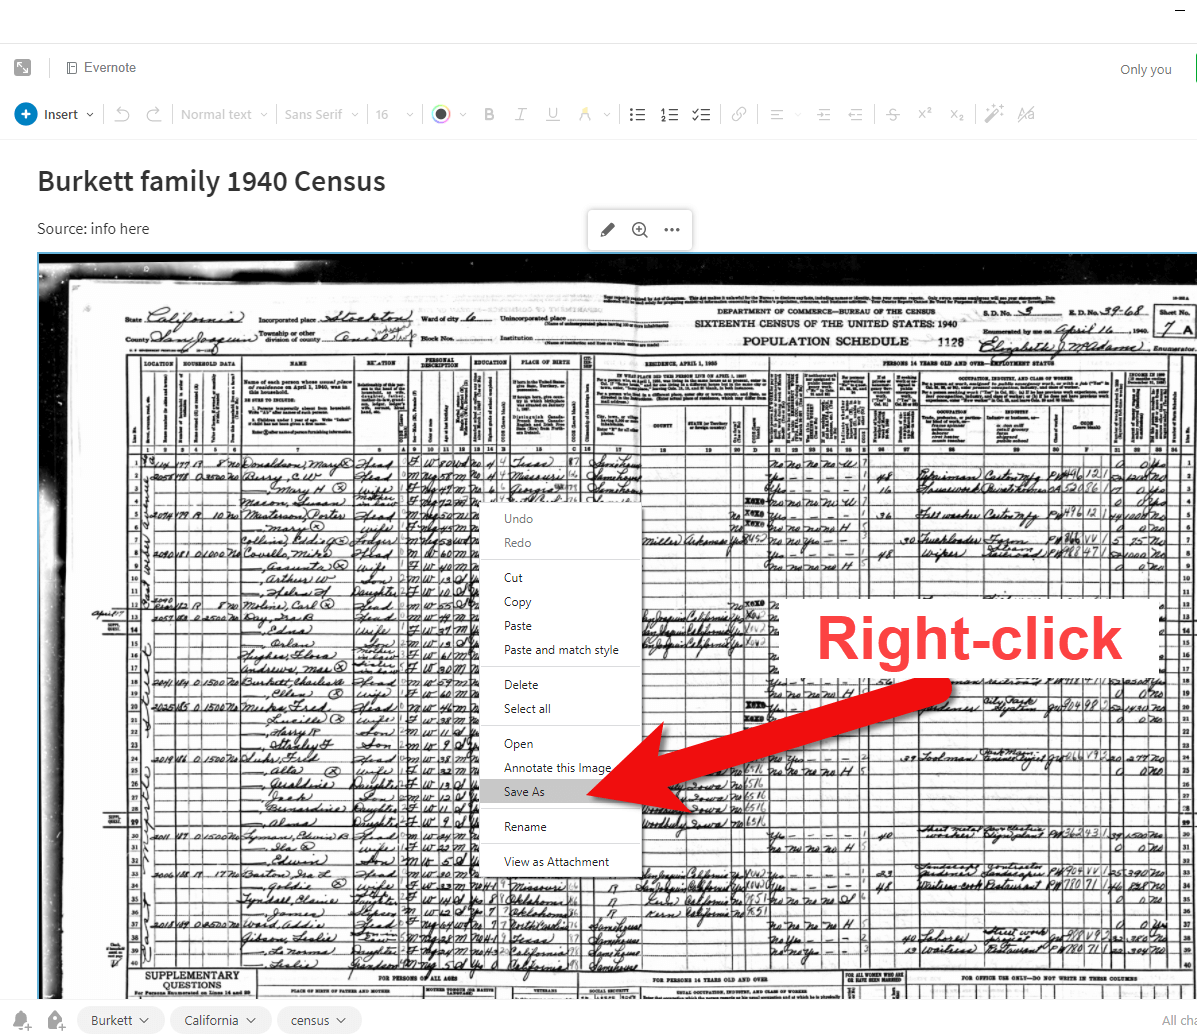
An important thing to understand about Evernote is that you can’t just download everything with one click in its original file format. However, you can save individual digitized items in your note, such as genealogical records, to your hard drive. Since there is no lifetime storage limit, I leave the note intact in Evernote, and I save the image to my computer hard drive. Save the image by right-clicking on it (in Windows, & I think it is Command click on a Mac) select Save As and save it to the appropriate archival folder. I do this at the end of the research project. Now you may feel like your “research project” never ends! But I’m referring to a genealogy research plan.
How to save a document image to your hard drive from Evernote.
You can learn how to create one in Evernote by watching my Premium video class Using Evernote to Create a Research Plan. (Premium membership required.) Of course, after I’ve answered my research question I quickly develop the next one and build a plan around it. So, you’re right, it never actually ends – thank goodness!
How Do I Find It Later?
My software database is the brain of my genealogy operations. I may have family tree information on various genealogy websites, on my computer, in Evernote and maybe even on my own family history website. But my database is the final word on what I have found and believe to be accurate. As I draw conclusions and add data to my family tree in my database, I cite my source. Therefore, everything I need to know about my tree is in one location I control on my own computer. If someone asks me a question about someone in my family tree, I can quickly look up the information and also see where I got it (the source).
“Your genealogy database software is the brain of the organization.” Lisa Louise Cooke
When I want to refer back to one of those sources I would look in one of three places:
My computer archival digital files (especially if it’s not part of my active research plan). This is easy to do because I know my folder system well, and it guides me. I’ve never lost anything yet!
Evernote (particularly if the source is part of my current research plan.)
The surname binder (if my citation tells me or I suspect it would be an archived piece of paper.)
Because I stick to my system, I usually instinctively know where to look. And because of they way each is set up, I can find things FAST!
Final Thoughts
Of course there are always exceptions to any rule, and there may be an item or situation that doesn’t fall perfectly neatly into a category or activity. Use your own best judgement on how to handle those. OCR search capability and great systems for digital and paper items will make it possible to find what you need when you need it. And most importantly, you’ll retain control over your family history legacy.
Be sure to share your Evernote credentials in a secure place and share them with a trusted relative so that the account can be passed on in the future. Learn more about protecting your legacy by watching my video class Saving Your Research from Destruction. (Premium membership required.)