In Elevenses with Lisa episode 79 Lisa Louise Cooke explains:
How to find 1950 US Census Enumeration District (ED) Maps
The purpose behind them and how to interpret the maps
Ways to use the maps for your genealogy
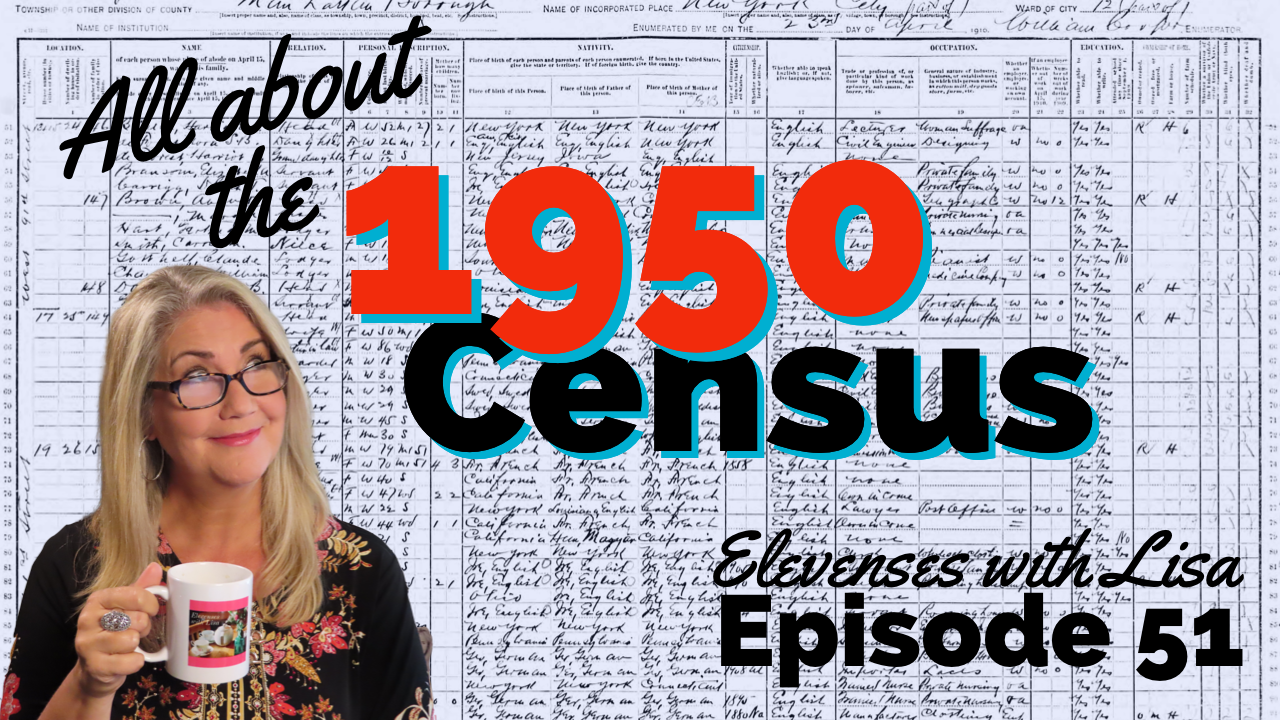
This is a follow up to episode 51 on The 1950 Census for Genealogy. In that episode I discussed the importance of finding your ancestors’ enumeration district numbers in order to be able to find them when the digitized images are released (before the index is available.) In this episode I will walk you through how to locate the enumeration district (ED) number and then find the actual 1950 US Census ED map. We’ll wrap things up with a quick update on the release of the 1950 US Federal Census.
Episode 79 Show Notes
(Get your ad-free Show Notes Cheat Sheet at the bottom of this page in the Resources section.)
As I mentioned in Elevenses with Lisa episode 51 The 1950 Census for Genealogy, prior to 1880, U.S. Marshalls were the enumerators for the federal decennial census. Starting with the 1880 census enumerators were hired and they were each assigned an enumeration district, also known as an ED. These districts had to be mapped out so that the enumerators knew the area they were responsible for counting. Therefore, maps are drawn in anticipation of each census being taken, including the 1950 census.
Learn more by watching episode 51 on the 1950 census.
About the 1950 US Census Maps
It’s always important to understand the purpose of a record or source, and the 1950 Enumeration District maps (ED maps) are no exception. Unlike most maps where it’s all about accurately drawing up the current roads and geographical features, census ED maps are drawn up for the purpose of defining boundaries for the purpose of counting people. This means as we look at ED maps we need to keep a few things in mind.
The first thing to understand is that the 1950 ED maps were not necessarily up-to-date with the lay of the land in 1950. Not all streets, parks and features will be included. The reason for this is that the maps themselves were not created for this purpose. Existing maps were used and then enumeration district boundaries were drawn on them.
Maps came from a variety of sources including but not limited to county and City Planning Commissions, 1940 census bureau tract maps, and city engineers. In fact, from a mapping perspective the variety of maps in the collection are fascinating.
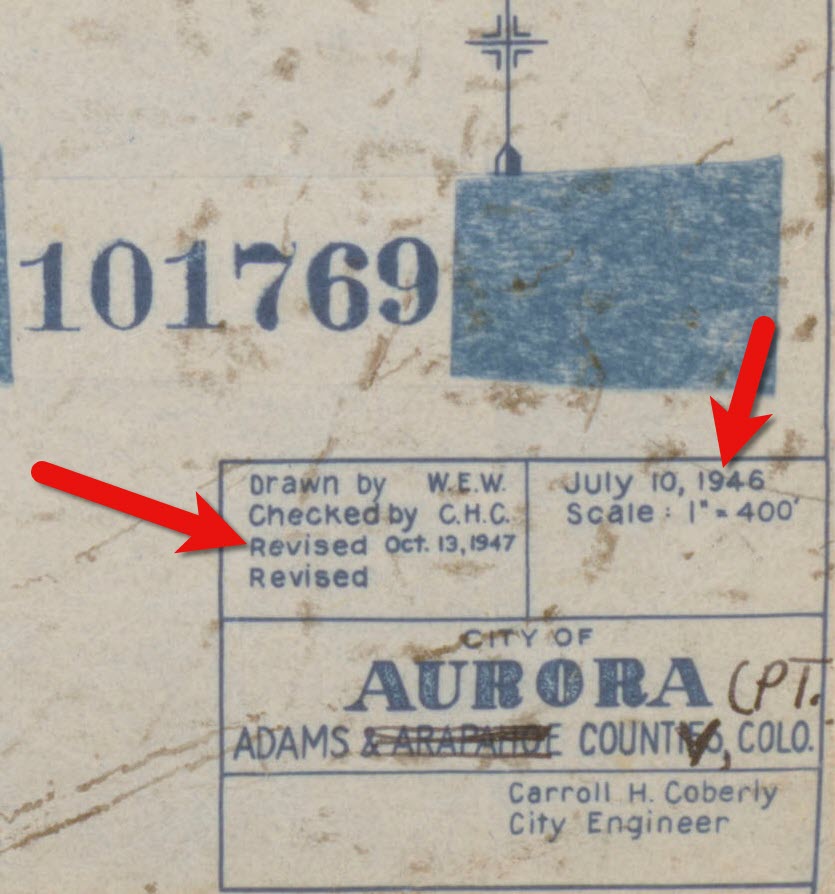
Look for the map title, description, legend and census stamps typically found in one of the corners. In this example (see image) from Aurora, Colorado the map used was originally created by the city engineer in 1946 and was revised in 1947.
1950 census map of Aurora, Colorado (Source: National Archives)
Following the end of World War II, the United States was growing at a quick pace in 1950. This is particularly true of the newly emerging suburbs. Therefore, if your ancestors built a new home in a new development in 1949, don’t be surprised if you don’t see the street on the 1950 census ED map. However, rest assured that the maps still hold value for your family history as they provide many interesting and unique details about the area surrounding your ancestors’ homes.
Each map was stamped with a small legend where the meaning for each of the colored lines drawn could be indicated. From my random sampling of 1950 census maps across the United States it appears that the coloring coding was consistent as follows:
Red = Township
Green = Corporate Limits/Ward
Orange = Enumeration District
Expect to see errors, inconsistencies and omissions in the maps. The more rural the area the more likely the map was compiled from several sources by the Census Bureau cartographers. This compilation created more opportunity for errors, and often used older maps.
Source: National Archives
The Meaning of Census Enumeration District Numbers
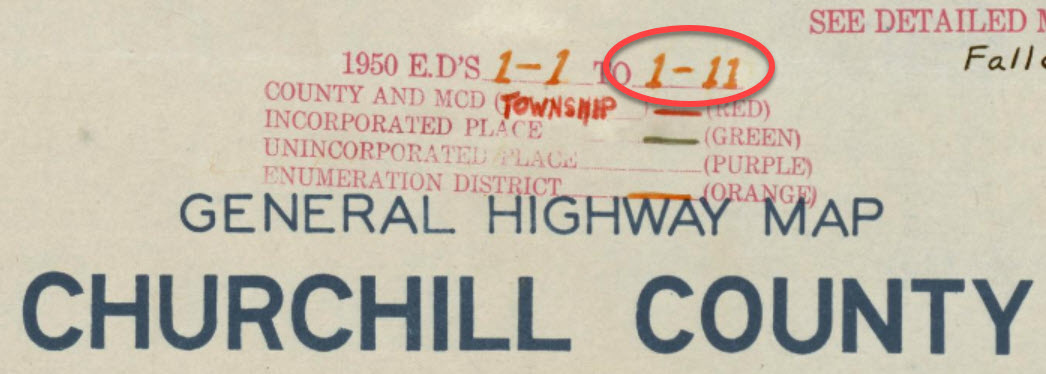
A census enumeration district number is made up of two numbers separated by a dash. The first number (in this example: 1) represents the county/region. The second number represents the area within the county that could be covered by an individual census enumerator within the amount of time provided for taking the census, about 2-4 weeks. The official start of the 1950 US Federal Census was April 1, 1950.
Census enumeration district (ED) numbers on a 1950 census map.
How to Find 1950 Census Maps
Some 8,000 census maps have been digitized and are available at the National Archives. However, the National Archives website can be challenging to navigate. I recommend using the Unified 1880-1950 Census ED Finder Tool at Steve Morse’s website.
1. Go to https:/stevemorse.org
2. In the menu in the upper left corner hover over US Census and in the secondary menu click Unified 1880-1950 Census ED Finder
3. Select the state from the first drop-down menu.
4. Next select the county.
5. Then select the city.
6. You will then see many enumeration district links listed. In order to find the right one for your ancestor’s home, enter the house number and select the street from the next drop-down menu. Don’t worry about directional parts of the address like west or east unless they are offered in the list of street names.
7. As soon as select the street name, the list of ED numbers should be reduced. In this example we are down to three.
8. To further reduce the possible ED numbers, we can select Cross or back street on same city block. If you’re not sure what the neighboring streets are, click the see Google Map This will plot the address you entered into Google Maps where you can then find the closest cross street, and the next streets over. If the address is not precisely marked on the map, check the address that appears in the Google Maps search box.
In my case, the One-Step tool didn’t allow me to specific W. Arcade, so Google Maps just gave me the general area, and not the address. By adding the W. to the address and pressing enter on my keyboard Google Maps was able to precisely plot the location. Now we can make note of the closest cross street (ex. N. Center), the street north of the address (E. Monterey Ave.) and the street south of the address (W. Noble St.)
9. Head back to the Unified 1880-1950 Census ED Finder page and enter each nearby street (you can enter multiple.) This should reduce the ED numbers one. This is the ED that includes your ancestor’s address.
How to Find 1950 Census Maps
1. Make note of the ED number, and then go back and click the button that says See ED Maps for ____________ County. You could have clicked this button without going through the process of locating the ED number, but the ED number makes it much easier to find your ancestor’s home street on the map. This number will also assist you in being able to find your ancestors in the 1950 census before it is indexed.
2. You will now be on the Viewing 1950 Enumeration District Maps in One Step Re-enter the city from the drop-down menu.
3. Click the Get ED Map Images You will receive two links. The first link is Links to NARA viewer will take you to the page on the National Archives website which includes all of the information about the map and the record hierarchy. Source citation information can be gathered from this page.
5. Click the second link called Direct links to jpegs on NARA server. This will take you to the image by itself as hosted on the National Archives website. I find this the easiest way to save the full resolution image to my computer hard drive. On my PC I right-click on the map and select Save Image As.
This page is also important if you want to use this image in another program such as Google Earth. The URL for this page is the direct URL to the image. Notice that it ends in .jpg. This means that it is the image alone, and this link can be used to create a custom map overlay in Google Earth. You can see an example of a custom map overlay in my video Create a Family History Tour with Google Earth Pro at the 06:13 mark.
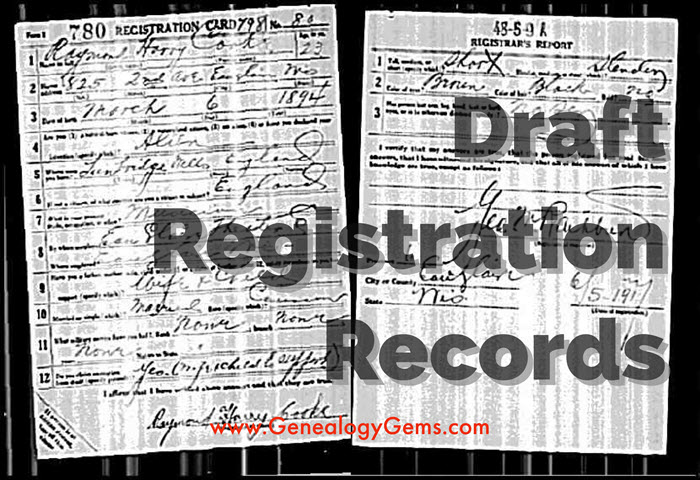
Do you have ALL your ancestors’ U.S. draft registration records–from the Civil War until after World War II? These documents may be filled with genealogy clues, whether your ancestor served in a war or not. Military expert Michael Strauss presents this roll call of U.S. draft registration records you’ll want to check!
Military records can lead genealogists to many new sources of information. One of the first records that you may come across (for our United States ancestors) that could provide unknown information are found in draft registrations. The records are civilian in scope, but can provide clues of prior military service or proof of current war conditions.
The National Archives holds custody overall for the bulk of the draft registrations from the Civil War to post-war World War II. The Archives organizes their records by grouping numbers. The Civil War draft registrations are found in two record groups, RG59 and RG110. Later draft registrations are found in RG147. In all cases, finding aids are available to locate and obtain copies.
Civil War Draft Registration Records
Recruiting poster, New York printed by Baker & Godwin, June 23, 1863. Public domain image hosted at Wikipedia.org (click to view).
Civil War draft records date back to the first national draft which was signed by Abraham Lincoln on March 3, 1863. This draft only applied to men residing in states under Union control. The draft includes several lists detailing information about men eligible to be drafted to fight for the Federal Army. This included consolidated lists for men between the ages of 20-45, which are grouped and divided into two classes of records. This list contains the name, residence, age, race, marital status, place of birth, any former military service, occupation, and remarks for each registrant. (Remarks might include ineligibility based on religious reasons or former service in the Confederate Army.)
Other registrations included medical exams, statements of substitutes, and case files of persons who were draft aliens. (Aliens were ineligible for military service and therefore contain files that document their nativity.) All of these are at the National Archives.
The last group of records includes the descriptive rolls that contain the name, age, physical descriptions, where born, occupation, when and where drafted, and remarks. The descriptive books are located at the regional branches of the National Archives and can be accessed by researchers, as these have not been filmed or scanned. Records are divided into two separate record groups: RG59 (Department of State) covered those men who were aliens and RG110 (Provost Marshal) has all the other lists of men being drafted.
The only Civil War draft registration records available online are the consolidated lists; click here to search them at Ancestry.com (subscription required). On the Confederate side, there are a limited number of draft records available, some at the National Archive and some in the custody of individual state archives.
World War I Draft Registration Records
For a number of years, there was no draft or draft registration. However, when the United States entered the war in Europe on April 6, 1917, the country was totally unprepared for overseas campaigning. This conflict forced our government to consider other means to recruit the tens of thousands of men it would take to wage this war. The Selective Service Act of 1917 authorized the President of the United States to increase the military establishment being passed by Congress on May 18, 1917. The Act directed the Provost Marshal General Office (P.M.G.O.) to select men eligible for military service.
All men were required to register, native-born or aliens. The draft is separated into three registrations:
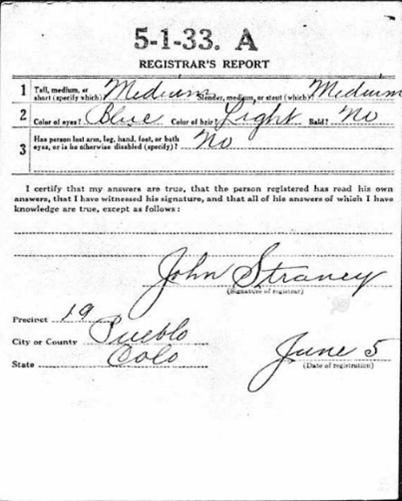
The 1st draft registration was dated June 5, 1917 for men aged 21 to 31 and consisted of 12 questions.
The 2nd draft registration was dated June 5, 1918 for men who had turned 21 since the previous registration and included a supplemental registration on August 24, 1918 for men turning 21 after June 5, 1918. Each consisted of 10 questions.
The 3rd draft registration was dated September 12, 1918 and was intended for all men aged 18 to 45 years. It consisted of 20 questions.
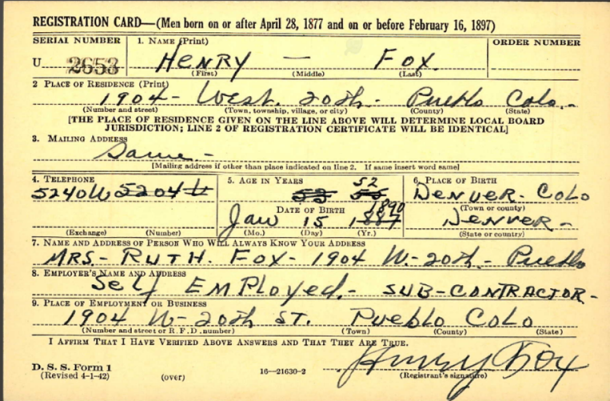
Each registrant was required to provide their name, age, birth date, and birthplace (in 2 of the 3 registrations), occupation or employer, nearest family, and a summarized physical description.
WWI draft registration of Henry Fox. Image from Ancestry.com.
By the end of World War I, nearly 24 million men had registered for the draft (this number excluded registered enemy aliens and those already in the military). The original draft cards are at the National Archives branch in Morrow, Georgia. World War I draft registrations are available online at Ancestry.com, FamilySearch.org, Findmypast.com and fold3. FamilySearch is the only one with free access (a personal subscription or library access is required for the others).
World War II Draft Registration Records
The eve of World War II saw the passage of another conscription act. This act was the Selective Training and Service Act of 1940, and was the first peace time conscription in United States History. This act officially established the Selective Service System. The draft during World War II consisted of seven registrations. The “Old Man’s Draft,” or 4th registration, was for men born between 1877 and 1897, with the other six registrations intended for the younger adult men born after 1897:
1st: October 16, 1940, included all men 21-31.
2nd: July 1, 1941, for those men who reached age 21 since the first registration.
3rd: February 16, 1942, for men ages 20-21 and ages 35-44.
4th: April 27, 1942, for all men between the ages of 45 and 64. The registrants were not eligible for military service (this is the “Old Man’s Draft”).
5th: June 30, 1942, for all men between the ages of 18 and 20.
6th: December 10 – 31, 1942, for all men who had reached the age of 18 since the previous registration.
7th: November 16 – December 31, 1943, for American men living abroad between the ages of 18 and 44.
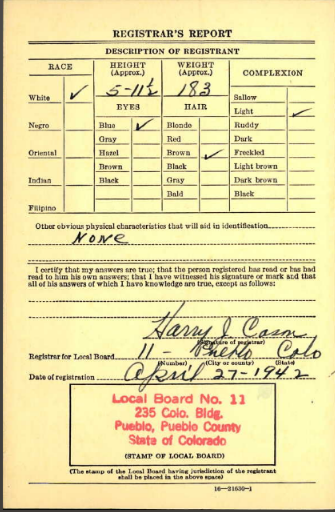
Registrants were required to provide their name, address, birth date, birthplace, and employer’s information, along with a contact individual who would always know the registrant’s information or address. The form also asked for the telephone number of the registrant in addition to a more complete physical description.
WWII draft registration of Henry Fox. Image from Ancestry.com.
Several of the states that recorded the “Old Man’s Draft” were lost. The National Archives no longer has these records available. These states include: AL, FL, GA, KY, MS, NC, SC, and TN.
Not all of the World War II Draft registrations are available online. Less the states above, view 4th registrations online at Ancestry.com, Familysearch.org (index and browse-only images) and fold3. The fold3 database includes 25 states and territories: AL, AK, AR, AR, CO, CT, DE, FL, GA, HA, ID, LA, MD, NV, NM, NC, OK, PA, UT, VA, WV, WY, and the District of Columbia and the Virgin Islands. (On Ancestry.com, the number of states is limited to AR, GA, LA, and NC.) Other states are in the process of being added. However, the remaining states are only available directly from the National Archives in St. Louis, MO.
Some of the other registrations are also available online for a selected grouping of states.
Expert tip: It is not uncommon to find men registered for both World War I and World War II draft registrations, which would depend on their ages.
Post-World War II Draft Registration Records
The draft and registrations didn’t cease with the conclusion of World War II. It was active from 1948 until 1973, when President Richard M. Nixon officially signed legislation that ended the draft. This was suspended in 1975, and five years later, in 1980, President James E. Carter again brought back into activity the Selective Service System. This came in response to the Soviet invasion of Afghanistan. To date, the Selective Service System still remains active, requiring all men to register within 30 days of their reaching the age of 18 years.
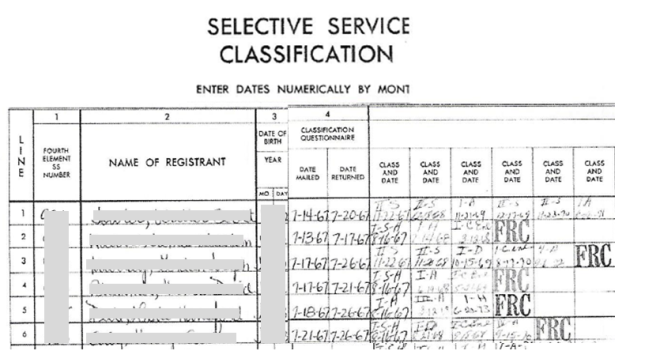
To gain access those records not online from World War II, and for the later registration cards for men for the Korean and Vietnam conflicts and for other years, researchers will need to contact the National Archives in St. Louis, MO. This office handles the original cards for all men born between April 28, 1877 and March 28, 1957. The National Archives fee schedule is in place to request the records by mail. A copy of the Draft Registration Card (SSS Form 1) alone costs $7.00, or order a copy of it along with the Draft Classification History (SSS Form 102) for $27.00. Click here to go to the National Archives’ webpage for ordering Selective Service records.
Draft Registration Records for Men Born after 1960
The law never required men to register who were born between March 29, 1957 and December 31, 1959. The National Archives doesn’t hold copies of records for men born after January 1, 1960. To gain access to draft registration for all other years, contact the Selective Service System directly. Click here for all the details.
Michael L. Strauss contributes the new Military Minutes segment on the Genealogy Gems Podcast. Listen to this segment in the free Genealogy Gems Podcast episode 207.
Disclosure: This article contains affiliate links and Genealogy Gems will be compensated if you make a purchase after clicking on these links (at no additional cost to you). Thank you for supporting Genealogy Gems!
The National Archives Citizen Archivist program is recruiting help to tag, transcribe, and comment on records in the U.S. National Archives catalog. This is a great way for genealogy volunteers to help others discover their family history in the National Archives and learn for themselves what’s there.
The National Archives Citizen Archivist Program
Have you heard? The U.S. National Archives is looking for Citizen Archivists! What is a Citizen Archivist, you ask? A Citizen Archivist is a virtual volunteer that helps the U.S. National Archives increase the online access to their historical records. This is done by crowdsourcing metadata about their records through tagging, transcribing, and adding comments to the U.S. National Archives catalog.
As a Citizen Archivist, you will be volunteering your time to make historical and genealogical records more accessible to the general researching public to help them with their research. This could include genealogists, historians, writers, and other researchers that will benefit from your volunteer work. And who knows, maybe you will find records that belong to your ancestors!
How to Get Started as a National Archives Citizen Archivist
First, you will need to go to the “Citizen Archivist Dashboard” at the U.S. National Archives website. Once there, you will need to register to be a Citizen Archivist (see the screenshot on the right for where to click). Registration is free but you do need this account to be able to contribute to the project. Once you are registered and logged in, you can then navigate to the catalog and choose records from the curated missions.
The “missions” are groups of records that need transcribing or tagging to help the records be more accessible to researchers working online. Some of the missions that are needing transcribing are “Fugitive Slave Case Files,” “Native American Reservations,” and “The Truman-Churchill Telegrams,” just to name a few. New missions are added to the site regularly, so be sure to check back often to see what is new that you would like to work on.
Who Can Contribute as a Citizen Archivist?
Anyone who has a computer and the willingness to volunteer time to this project can contribute. You do not need to commit to any amount of time; you can work at your own pace as you have the extra time. There is even a support community available through the “History Hub” that can answer your questions as you work through the records. (You can click on that at the bottom of the list shown in the screenshot above.)
So, if you have some time on your hands and want to help make historical and genealogical records more accessible online, why not become a Citizen Archivist today? Click here to get started–or click below to read more ideas about how to give back to the genealogy community.
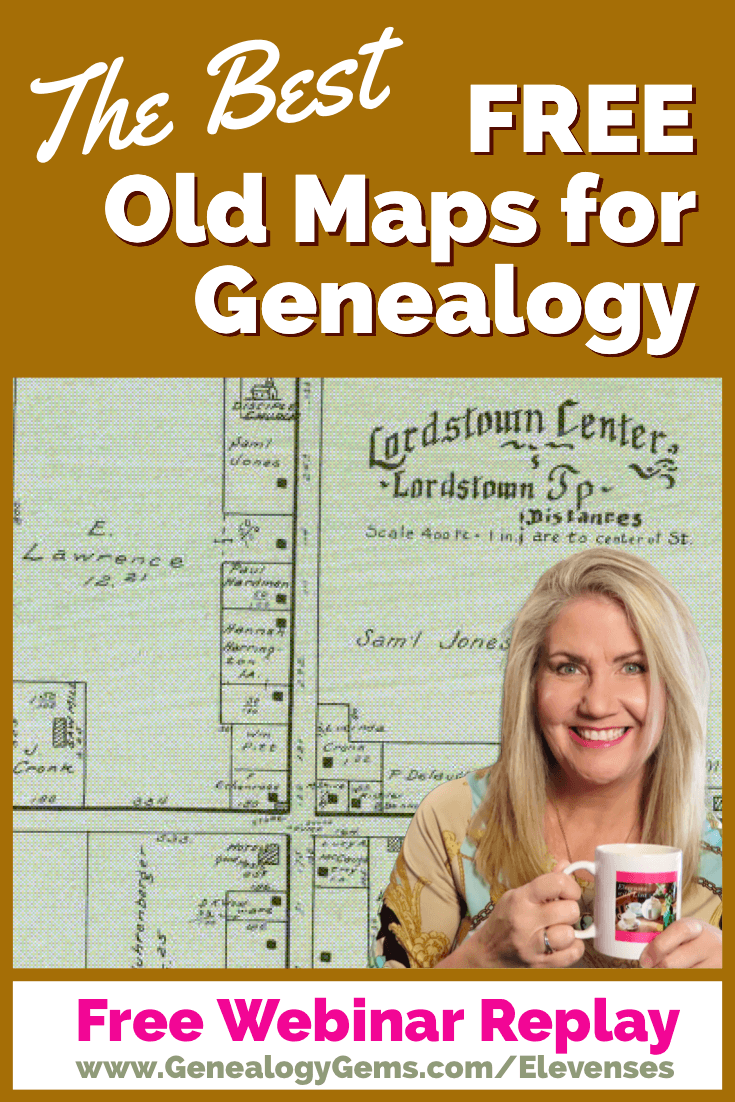
Our ability to find our ancestors is rooted in two important pieces of information: the locations where they lived and the time frames in which they lived there. This means that old maps are essential to our genealogy research.
The good news is that there is an abundance of free digitized old maps available online. One of the best resources is the David Rumsey Map Collection website. There you will find over 100,000 free digitized historic maps. These maps span the globe and centuries. They are perfect for bringing geographic perspective to your family tree.
Elevenses with Lisa Show Notes
In this episode 36 of my free webinar video series Elevenses with Lisa I’ll show you how to navigate this ever-expanding free website. Watch the video and then follow along with the show notes in this article. Here you’ll find answers to questions such as:
What’s the best way to find maps at David Rumsey’s map website?
What is the difference between the search tools (Luna Viewer and MapRank Search)?
What are the advanced search techniques for finding the old maps?
How can I download maps at DavidRumsey.com?
Is it OK to use the maps from DavidRumsey.com in my family history projects?
Rumsey Historical Maps in Google Earth
As we discussed in Ways to Use Google Earth for Genealogy (Elevenses with Lisa episode 12) there are approximately 120 Rumsey old maps available for free in Google Earth. You can find them in the Layers Panel under Gallery. Each map is already georeferenced as an overlay for you.
Click image to watch the video and read the article on ways to use Google Earth for genealogy
You can also create your own overlays in Google Earth using Rumsey Maps or digitized maps from other sources. I cover this step-by-step in chapter 16 of my book The Genealogist’s Google Toolbox.
Best Strategies for Finding Free Old Maps
Once you’ve exhausted the few hundred old maps in Google Earth, head to the David Rumsey Map Collection website. Rumsey’s collection includes over 150,000 map, over 100,000 of which have been digitized and are available for free on his website.
Copyright and Use Permission
You will probably be anxious to use these wonderful old maps in a variety of ways. The Rumsey website provides clear direction on copyright and use permission. Go to: DavidRumsey.com > Home Page > About > Copyright and Permissions.
The good news is that generally speaking, you are free to download and use the digitized maps for your own personal use.
The Best Way to View the Maps
There are several ways to view maps:
The Luna Viewer: Browse and search 100,000+ maps
The GeoReferencer: Help georeferenced maps, compare maps overlays
MapRank Search: Browse & search 6000 maps by time & place
Google Earth: 120 maps in the Layers panel, 140 can be added
Google Maps: 120 maps included
Second Life: View some in 3 dimensions and at a huge scale. Location: Rumsey Map Islands. Includes a welcome center with hundreds of maps, and a 600 meter tall map cylinder showing hundreds of maps.
The Collections Ticker: Pop-out distraction!
Insight Java Client: Downloadable workspace
Of this list, the best two tools to user are:
The Luna Viewer: Browse and search 100,000+ maps
MapRank Search: Browse & search 6000 maps by time & place
I will show you how to use each. Note that in these examples we will be using a computer to search the site rather than a mobile device or tablet.
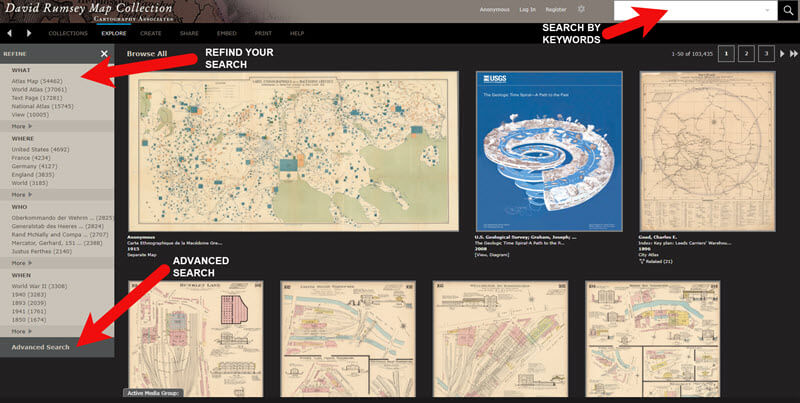
The Luna Viewer: How to browse & search the maps
In the main menu under View Collection select the Luna Viewer. Under Luna Viewer click the Launch Luna Viewer button.
The Luna Viewer at David Rumsey Map Collection
Tips for keyword searching:
In most cases it helps to start with a fairly broad search to see the full range of available maps
Be cautious with abbreviations. “MN” does not return “Minn” or “Minnestota”.
Advance search provides you with the use of full Boolean operators like “and,” “or,” “greater than,” “contains,” and others.
After a search, to return to the full collection, click on “show all” under the search button.
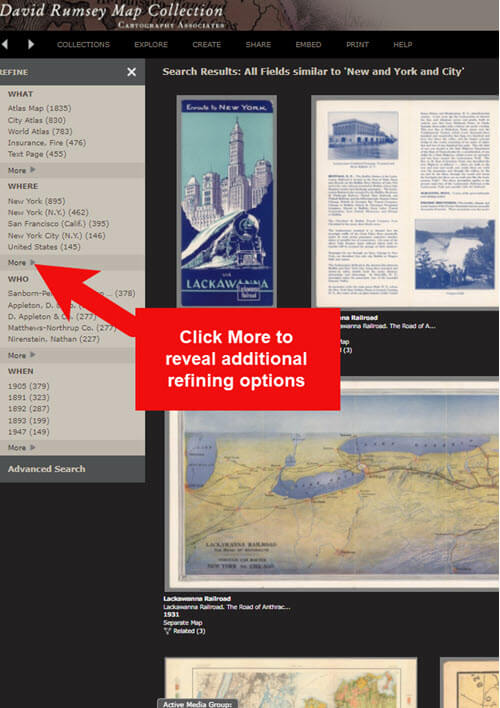
Let’s look at an example of using the keyword search in tandem with the Refine column. If you search for New York City, you will be searching all of the data associated with the maps. Since many maps may have been published in New York City, you will likely see many maps for other areas. You can improve this search by going to the Refine column and under Where clicking on New York City.
The Refine column will show you the first five options in each category (What, Where, Who, When). Click More to reveal all of the additional refining options in that category.
Click More to see all refining options in the Luna Viewer
From the returned results, click a map to view it.
You can select multiple items in the Refine column to filter more narrowly. Remove a filter by clicking it under Remove at the top of the Refine column.
Like genealogical records, old maps may include several pages. Look above the blue BUY PRINT button to see the number of Related maps. In my example of a map of the 1939 World’s Fair in New York City, there were two map pages available. Click Related to display all of the available pages.
Click the Related link to view all related map pages.
DavidRumsey.com Advanced Search
The Advanced Search feature can be found in two locations:
Inside the search box – click your mouse in the box and select Advanced Search from the drop-down list
At the bottom of the Refine column on the left side of the screen.
Advanced Search gives you more control over how you search. Let’s look at an example by searching for Sanborn fire insurance maps.
Searching for Sanborn Fire Insurance Maps
The David Rumsey Map Collection website includes many Sanborn Fire Insurance maps. These maps were created for insurance purposes and provide an incredible amount of detail about individual buildings and dwellings in a given neighborhood.
I recommend using the Advanced Search feature to search for these maps. This is because over the years the name of the company as publisher changed.
How to Find Sanborn Maps:
Click on Advanced Search at the bottom of the Refine column
In the “find all of these words” section, click Fields and select Publisher
Type in Sanborn
On the results page, go to the Refine column and Who click More
There are at least six variations of the Sanborn publishing name.
Old Map books and atlases often include valuable historical text often called historical sketches. You can find these using the Advanced search. Search for the exact phrase Historical Sketch. Run this search and then in the Refine column under Where select an area of interest.
How to Download Maps from DavidRumsey.com
Click the map from the results list
On the map’s dedicated page click the EXPORT button at the top of the page.
Select the appropriate size from the drop-down list. (Larger maps may take a few moments to download)
Typically the maps will download to the Downloads folder on your computer
Tips for Selecting Download (Export) Map Size: Save space on your computer and future headaches by selecting the correct size map for your use. If you plan on using the map to create an overlay or create a nice large print, select the largest size possible ( I recommend at least Extra Large for creating map overlays in the Google Earth.) This will ensure that the map doesn’t appear fuzzy when you Zoom in. High-resolution is also recommended when printing. For example, if you plan on including the map in a book about your family’s history (for personal use, not for resale) a high-resolution map will print crisp and clear. Maps for use on the web or something like a PowerPoint presentation would be fine at lower resolutions.
MapRank Search at DavidRumsey.com
The MapRank Search “app” at the David Rumsey Map Collection website allows you to browse & search 6000 maps by two important criteria: Time & Place.
There are two ways to find the MapRank Search:
In the main menu under View Collection click MapRank Search. Scroll to the bottom of the page and click the Launch MapRank Search
Scroll to the bottom of the home page until you see Featured App – MapRank Search, and click the Launch MapRank Search
How to Find Maps Using MapRank Search:
Start with entering the location name in the search box (in the upper right corner) and click the Find a Place
The location will appear on the modern-day map. The old maps that match the location will appear in the column on the right, prioritized starting with the map that most closely matches what you searched.
Below the modern-day map, move the time slider levers to narrow in on the desired time frame.
Note that the old maps in the results column will change based on the specified time frame.
Broaden the location if desired by zooming out a bit on the modern-day map. Note that the results list will change as you zoom.
Hover your mouse over a map in the results list and notice that a reddish-brown box will appear the selected map and will also appear on the modern-day map. This indicates the area of the map that the old map covers. This will aid you in selecting the map that will suit your needs.
Click a map from the results list and it will open in a new browser tab, although some maps will appear as an overlay on the modern-day map. In that case, click the Luna Viewer button to go to the page where the map can be downloaded.
How to Compare Modern-day Maps with Old Maps
Whether you have found the map by searching with the Luna Viewer or the MapRank Search you will eventually find yourself on the page where the single map is displayed. On the left is the source information.
In the upper right corner of the screen click the View in GeoReferencer button. You will be taken to a page where you can view the old map overlayed on the modern-day map. In the upper right corner move the slider to make the old map transparent so that you can compare between the two maps.
Recap: Comparing the Two Best Search Tools at DavidRumsey.com
Luna Viewer: – 100,000 maps
– Search, then refine
– Sometimes glitchy interface
MapRank Search: – 6000+ maps
– More control with time slider & map
– Map results list ranked by closest coverage
Live Chat Q&A: Answers to Your Questions About David Rumsey Maps
One of the advantages of tuning into the live broadcast of each Elevenses with Lisa show is participating in the Live Chat and asking your questions.
From Megan: What is the difference between Google Earth and My Maps? From Lisa: Google Earth is a free software download. This is where I create what I call family history tours. They are a collection of data points and media that come together as a research tool and storytelling tool. My Maps are created in Google Maps. I prefer creating in Google Earth because it offers more tools and options, and it’s where I keep all my mapping work.
From Gwynn: Heard in the past Java Client might have security holes has this been fixed? From Lisa: Read more about the latest on Java Client at the website’s FAQ page.
From GeneBuds: Must set up account to use Luna Viewer? From Lisa: No, you don’t have to have an account to use the Luna Viewer. “Registering for an account allows you to save your work and preferences, search external media, create Media Groups and Presentations, customize your settings, create annotations, and upload your own content.” As I mentioned in the video, I prefer to do all my work in Google Earth.
From Gwynn: Sanborn Fire Maps: Where do I find the Key to the symbols? Are they the same from year to year or do they change? From Lisa: Here’s the main resource page for Sanborn maps at the Library of Congress. You will find specific information about interpreting the maps including Keys and Colors here.
From Karen: If you are specifically looking for plat maps for our US farmers would you put the word plat in the search field? From Lisa: I would use the Advanced Search and enter the word plat in the “Find all these words” box. Click the plus sign to add an additional “Find all these words” field and type in the name of the location. If that doesn’t deliver the desired result, omit the location and just search on the word plant. Then, on the results page, go to the Refine column and under Where click More. Then you have a nice list to browse. You might spot a map that includes your location. TIP: When you find a result, be sure to check the Related number at the top of the page so that you didn’t miss any additional pages of the map.
From Mark: Lisa and Bill, is the intro music something that you all wrote? From Lisa and Bill: No, it’s by a talented musician named Dan Lebowitz. Our goal this year was to learn to play it ourselves 🙂 We’re glad you love it as much as we do!
Podcast Listener Joan wrote me recently: “I get to spend a day at the National Archives. What should I do to prepare to take full advantage of the visit? I checked their website, but it was not as helpful as I hoped. Any suggestions?”
While this first resource is from the National Archives in the UK, it’s applicable to archives in other countries as well. Check out their video series called Quick Animated Guide.
Another good approach is to search for presentations on archive visits using Google. By conducting a ‘file type search’ in Google you can uncover presentations posted on the Web that are geared to doing research at the National Archives.
I conducted the following search in Google: .ppt national archives research and came up with a Powerpoint presentation called Beginning Your Genealogical Researchat the National Archives which comes from the US National Archives website. When you click the link above you’ll be prompted to RUN the presentation, and I found that it detected Powerpoint on my computer and opened the presentation in my Powerpoint program.
This little genealogy search gem can come in quite handy. Sometimes you know exactly what kind of file or document you are looking for online. By searching for the keywords of the subject and then adding .ppt (the file extension for Powerpoint presentations) Google will pull up only Powerpoint presentations that include those keywords.
You may not be able to get out to genealogy conferences very often, but some creative searching may bring up presentations that cover topics that interest you right from your home computer. That’s a little gem you need to add to your search toolbox for sure! For more search gems check out my book The Genealogist’s Google Toolbox.
Available in the Genealogy Gems Store
And finally, when it comes to preparing for and making a trip to an archive or library Margery Bell of the Family History Centers offered some great ideas for preparing for a research trip, regardless of whether it is to the National Archives or the Family History Library. The interviews are episode 17, 18 & 19 in the Family History: Genealogy Made Easy podcast.
Great question Joan and have a wonderful time! Happy hunting everyone!


 Michael L. Strauss contributes the new Military Minutes segment on the Genealogy Gems Podcast. Listen to this segment in the free
 How to Get Started as a National Archives Citizen Archivist
 The Unclaimed Persons Project