Thousands of Sanborn Fire Insurance maps and a national Civil War burial database are among new genealogy records online. Also: newspapers in Florida, Hawaii, Illinois, Louisiana, and Pennsylvania; vital records for Idaho, Utah, and Washington; Catholic parish records for the Archdiocese of Boston; Maine cemetery plans; New Hampshire Civil War records and New York passenger arrivals.
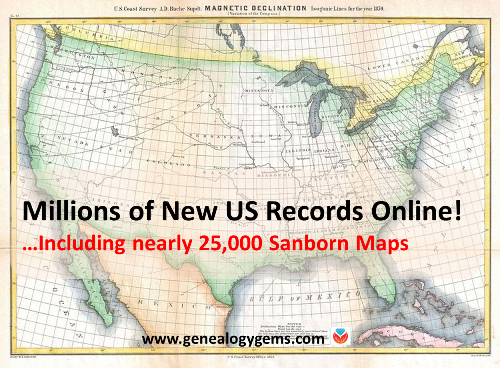
Breaking news! The Library of Congress has put online nearly 25,000 additional Sanborn Fire Insurance Maps–and more are coming! Over the next three years, more will be added monthly until all 50 states are covered from the 1880s through the 1960s.
Sanborn maps show detailed information about neighborhoods, buildings, roads and more for thousands of towns in the U.S. and beyond. A sizable collection of pre-1900 Sanborn maps are already online at the Library of Congress (use the above link). Watch the short video below to learn more about them. The full-length class is available to Genealogy Gems Premium Members.
Civil War burials. Ancestry.com’s new database, U.S., Civil War Roll of Honor, 1861-1865, lists over 203,000 deceased Civil War soldiers interred in U.S. cemeteries. “Records in this database are organized first by volume and then by burial place,” says the collection description. Entries “may contain the name of soldier, age, death date, burial place, cemetery, rank and regiment.”
Newspapers. We’ve noticed the following new digital newspaper content online recently:
Florida, Illinois, Pennsylvania: Newspapers.com recently added or updated newspaper content for the following newspapers (with coverage shown): Chicago Tribune (1849-2016), Fort Lauderdale News (1911-1991), South Florida Sun Sentinel (1981-2017) and the Morning Call [Allentown, PA] (1895-2017). (With a Newspapers.com Basic subscription, you can see issues through 1922; a Publisher Extra subscription is required to access issues from 1923 onward.)
Hawaii: Newspaper content has been recently added to the Papakilo Database, an online archive of The Office of Hawaiian Affairs. The collection currently contains nearly 12,000 issues from 48 different publications, with a total of 379,918 articles. Coverage spans from 1834 to 1980.
Louisiana: A New Orleans feminist newspaper is now available online at Tulane University’s digital library. An online description says: “Distaff was the first and only feminist newspaper published in New Orleans….Distaff served as a forum for women’s voices in politics, activism, and the arts….A preview issue was published in 1973 and the newspaper continued to be published until 1982. There was a hiatus in publication from 1976-1978.”
Maine cemetery plans. “Many Maine cemeteries have plans originally created courtesy of the Works Progress Administration, which reside at the Maine State Archives,” states a recent post at Emily’s Genealogy Blog at the Bangor Daily News website. The post advises us that all of them–nearly 550–are now viewable online at DigitalMaine.com (search for WPA cemetery plans). “These plans are great for locating veterans; some graves are coded by the war of service,” advises the post. “With such an item in hand one could also visit the appropriate town clerk and locate a civilian’s burial as well, I should think.” Thanks for that tip, Emily!
Massachusetts Catholic church records. The New England Historic Genealogical Society (AmericanAncestors.org) has added 13 new volumes to its browse-only collection, Massachusetts Roman Catholic Archdiocese of Boston Records, 1789-1900. “This addition, drawn from the collections of St. James the Greater in modern-day Chinatown, includes the largest volume we’ve scanned yet–1,035 pages,” says an NEHGS announcement. The collection description states that an index is being created and will be available to site members in the future.
New Hampshire Civil War records. The free site FamilySearch.org has added about 25,000 indexed names to its collection of New Hampshire, Civil War Service and Pension Records, 1861-1866. The collection contains an “index and images of Civil War enlistment papers, muster in and out rolls of New Hampshire Regiments and pension records acquired from the New Hampshire state archives.”
New York passenger lists. FamilySearch.org has added nearly 1.2 million indexed names to the database, New York Book Indexes to Passenger Lists, 1906-1942. According to the collection description, names are taken from “books of indexes to passenger manifests for the port of New York. The indexes are grouped by shipping line and arranged chronologically by date of arrival.”
Utah birth certificates. Nearly 33,000 names have been added to an existing FamilySearch database, Utah, Birth Certificates, 1903-1914. “This collection consists of an index and images to birth certificates acquired from the Utah State Archives,” says the site. “The records are arranged by year, county, and month within a numerical arrangement by box and folder number. Many of these volumes have indexes at the beginning or end.”
Sanborn maps are a rich resource for genealogy–but they’re just one kind of map that can lead to genealogical gems! Lisa Louise Cooke teaches tons of strategies for using maps to chart your family history in her Genealogy Gems Premium video series. Discover these for yourself with a Genealogy Gems Premium website membership.
Thanks for sharing this great news on Sanborn maps and more with your genealogy friends!
Disclosure: This article contains affiliate links and Genealogy Gems will be compensated if you make a purchase after clicking on these links (at no additional cost to you). Thank you for supporting Genealogy Gems!
During this giving season, why not give back to the community of global genealogy lovers who quietly and continually enrich our family history research? Here are 4 ways to pay it forward in genealogy from the comfort of wherever you are! One gem you may not have heard of: the British Library’s project to index old maps.
4 Ways to Pay it Forward in Genealogy
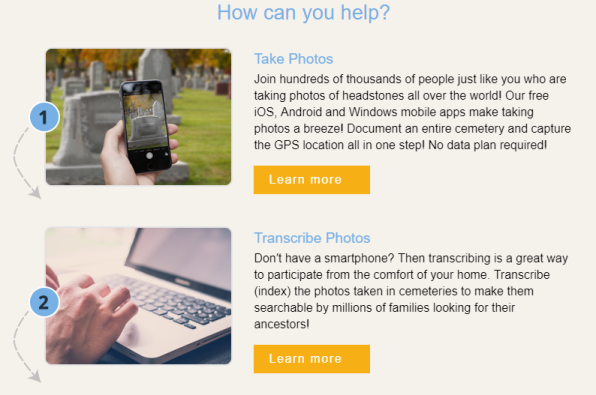
1. Help with global gravestone research.
If you’re like me, you’ve probably discovered the final resting places of many an ancestor–perhaps along with important biographical data and even additional relatives–with the help of websites such as BillionGraves and Find A Grave.
BillionGraves says it’s “the world′s largest resource for searchable GPS cemetery data, and is growing bigger and better every day.” Its volunteers take GPS-tagged pictures of headstones in cemeteries around the world and transcribe them for their free searchable database.
How you can help:
Image headstones: download the free app to your smartphone from the App Store or Google Play. Take images of headstones in cemeteries you visit, whether it’s your own ancestor’s burial place or a local graveyard.
Transcribe personal information found on gravestone images. You can transcribe the images you take or you can visit the site and transcribe images that someone else has uploaded. Click here to get started.
Upload additional source documentation to BillionGraves tombstone images, such as obituaries, cemetery records, and the like. You’ll make these virtual gravestone sites even more genealogically valuable! Click here to learn more.
Find A Grave has a slightly different model for collecting global gravestone data. Here you can create free memorial pages for ancestors, which “generally include birth, death, and burial information and may include pictures, biographies, family information, and more.” You can also upload your own headstone images and transcribe them (or someone else’s images), and you can even upload a spreadsheet of cemetery burials you may have already transcribed.
Who’s behind Find A Grave? It’s owned by subscription website Ancestry.com, but it’s a separate, free site powered by volunteers: “Thousands of contributors submit new listings, updates, corrections, photographs and virtual flowers every hour. The site simply wouldn’t exist without the million+ contributors.”
Find A Grave has recently updated its site to make it more secure, faster, easier to use, and accessible to new devices and other languages. More than 100 million graves from over half a million cemeteries worldwide are already searchable at the site. To get started, download the Find A Grave app at Google Play or the App Store, or just visit the website.
2. Transcribe old documents and maps.
Millions–even billions–of digital images of old documents contain genealogical clues, but those names, dates, and places need to be extracted from those image files before they become easily searchable. Transcribing that information is also known in genealogy circles as indexing (or creating indexes). Here are four places to contribute your indexing skills:
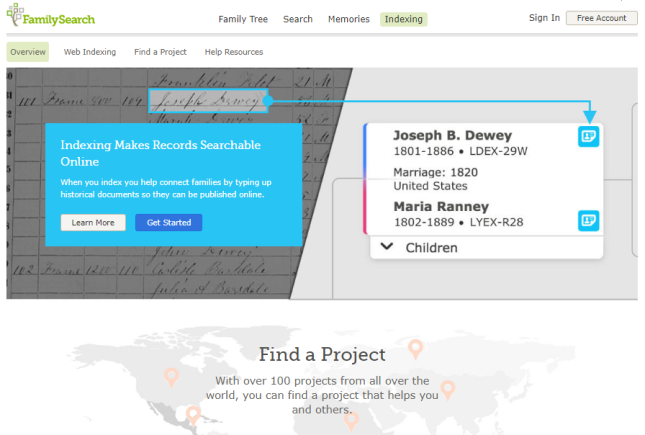
FamilySearch Indexing. Thousands of you have likely participated in this best-known volunteer record transcription project out there. (We blogged about it recently in honor of their worldwide weekend indexing event.) Their indexing platform recently became fully cloud-based, so you can index more easily on your computer or mobile device. Volunteers are especially needed right now who can read Spanish, French, German, Italian, Portuguese, Russian, Japanese, Polish, Swedish, and Dutch.
British Library Georeferencing Project. The British Library is recruiting volunteers to help geo-reference thousands of old maps that are already online. Geo-referencing, or geotagging, means assigning geographic reference points (longitude, latitude) to points on a map image. Doing this with old maps allows them to be linked to their modern-day locations, allowing us to compare the past and present (as Lisa teaches about in her free Google Earth video class). Over 8,000 maps have already been “placed” by participants (and subsequently checked for accuracy and approved by their panel of expert reviewers). The latest phase of the project includes 50,000 maps, mostly 19th-century maps from books published in Europe. The British Library says that “some places have changed significantly or disappeared completely,” increasing both the intriguing challenges for volunteers and the value to those who will benefit from their map sleuthing skills.
Ancestry World Archives Project. “The Ancestry World Archives Project is thousands of volunteers from around the world with a passion for genealogy and a desire to help others discover their roots,” says the project home page. “And all it takes is a computer, some basic software we provide and a little of your time.” Even though Ancestry.com itself is a subscription website, any records indexed through the Ancestry World Archives Project remain free to search on the site.
Here’s a screenshot of their current projects (click on it to visit the site):
National Archives Citizen Archivist Program. “A Citizen Archivist is a virtual volunteer that helps the U.S. National Archives increase the online access to their historical records,” reports Melissa Barker in a recent blog post. “This is done by crowdsourcing metadata about their records through tagging, transcribing, and adding comments to the U.S. National Archives catalog.” Click here to read the full article and get started.
3. Reunite heirlooms with long-lost relatives.
Probably millions of “lost” family items are out there: in flea markets, second-hand shops, online auction listings, perhaps even your own closets or attics. Genealogy Gems has reported many times in the past about genealogy heroes who claim these “orphaned heirlooms” just long enough to research and contact living relatives who would love to find them.
Whether it’s a family bible, an old marriage certificate in a dusty frame, a fading photo album, or a pile of old letters, each “orphaned heirloom” is unique–and so is the experience of tracking down its family and reuniting them. Here are several stories to inspire your next visit to eBay or a secondhand shop:
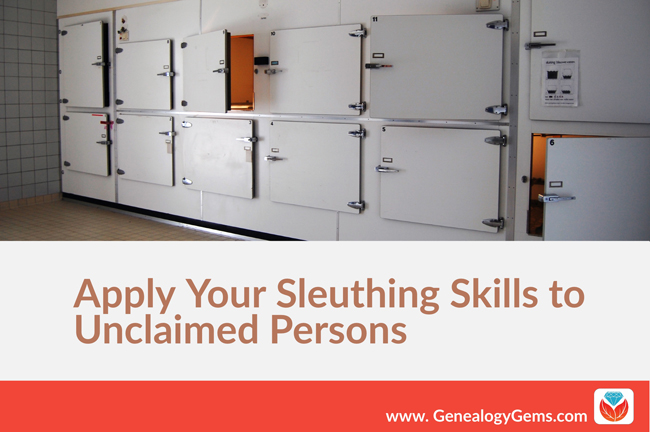
“Many people are aware that it can be a real challenge when a coroner obtains a John or Jane Doe, an unidentified person,” writes Lacey Cooke, Genealogy Gems service manager, who has a forensic anthropology degree. “It presents the difficult task of identifying the person. But few people know that in fact the even bigger problem consuming morgues today is unclaimed persons, rather than unidentified ones: individuals who have passed but with no trace of living relatives to come and claim them.”
Lacey is the one who introduced us to the Unclaimed Persons project earlier this year. With Unclaimed Persons, an online community of volunteer researchers joins forces with medical examiners, forensic investigators, and coroners to help reunite families and bring closure so that the dead can finally be laid to rest. Click here to read more about that effort.
How will you pay it forward in genealogy?
Click on one of the opportunities above–or tell us about one you’ve tried–to give back to your genealogy community this season. This largely-invisible community is all around us and enriches all our efforts, from late-night research sessions by ourselves (in records indexed by volunteers!) to local societies who host classes that inspire us or who answer our obituary inquiries and Facebook posts about their locales. If you are already one of those volunteers, THANK YOU. You are a gem and we here at Genealogy Gems are grateful for you.
P.S. You can also “pay it forward” by sharing free content like this from our website with your genealogy friends and society members. Why not link to this post on social media or in an email and challenge those you know to do good in the genealogy world?
Here’s our link for purchasing your copy of Snagit (screen clipping tool) Thank you for using our link. Use coupon code GENE15 to get 15% off.(We will be compensated at no additional cost to you, which makes the free Elevenses with Lisa show and notes possible.)
You’re going to learn:
What Snagit does and the problems it can solve for you as a genealogist!
How to screen capture using Snagit
Amazing advanced new features you didn’t know Snagit had and how to use them.
How to do scrolling and panoramic screen clipping (perfect for family trees, historic maps, long web pages and so much more.)
How I specifically use it for my genealogy research.
Add my YouTube channel to your “Favorites” list on YouTube:
Click here to add my channel to your YouTube favorites. Clicking the red “Subscribe” button at the Genealogy Gems YouTube channel will add my channel to your YouTube library which makes it super easy to return to my channel and Elevenses with Lisa any time you’re on YouTube.
How to Use Snagit
One of the things that we all work really hard to do is solve family history mysteries. And as we do that, we are finding all kinds of goodies. But the trick is that we have to capture them. Right? If we don’t, then we may end up losing the trail.
Last week, we talked about citing the sources that we find. This week, we’re going to be capturing our findings in a very visual way, and actually incorporating those source citations. And we’re going to be doing it with the tool that I really absolutely use every single day. And that’s Snagit.
The Image-Capturing Challenges that Genealogists Face
To understand the value of a tool we need to make identify the problems we face and see how it solves them. Here are some of the challenges genealogists face when it comes to capturing images:
We don’t need or want to save the whole page. (Why waste all that ink printing it or storage space saving it?) We may not want to download or copy an image from an unknown website. (No one wants to accidentally put a virus on their computer!)
The page in its entirety is blurred when printed. (This often happens with newspaper pages.)
We need to capture a very long or wide page that can’t be displayed in its entirety on the screen.
We want to annotate or add a citation to the source image.
It takes extra time to save to items to your computer and then add them to other documents in other programs.
Do you identify with some of these challenges? I sure do.
Let’s say that you find an article, a document, or something else, and you want to add an annotation. Maybe you want to add the source citation, a watermark, or just notes to yourself directly onto the image.
It would be time-consuming to clip the image with perhaps the free snipping tool that comes on your computer and save it to your hard drive, and then pull it into another program to annotate it. I don’t know about you, but there’s never enough time for family history so anything that we can do to save time, means we’re going to be able to spend more time with ancestors.
The solution is using Snagit.
Snagit Functionality
Here are just some of the things that Snagit can do:
“Capture” items that appear on your screen
Create videos with audio (Create > Video from Images)
Edit images (You can edit clipped and imported images and photos. You can also send screen shots automatically when using your computer’s snipping tool.)
Convert text on an image to typed text (Grab Text)
Create documents using templates (Create > Image from Template)
“Share” items to other programs with one click.
I have found that snag is so robust, and it has so many different options, I still can’t exhaust all the things that it offers me. But it’s also simple. It’s simple in the way that you use it. It certainly solves simple, everyday problems. And most importantly, it is a program that I can use not just for genealogy, but also for my business and personal use. I like to have tech tools that serve me across the board, if possible, because it takes time to get up to speed on any program. If you’re just getting programs that are only for genealogy, then you end up needing a second program to be able to do similar things in other parts of your life. Why not find tech tools that can serve you across the board. That’s what certainly Snagit does. So, while I’m focusing on showing you genealogical applications for using Snagit, just know that if you’re new to family history, or you stumbled across us this article, and you don’t do genealogy, you’re going to be able to use Snagit for just about everything.
How to Get Started with Snagit
Purchase the software
Download and install
Open it and let it run in the background so you have easy access from your task bar
Yes, there may be a snipping tool built into your computer, and you can use Print Screen. Snagit can blow them away.
How to Capture a Screen Image with Snagit
Display the desired page on your screen
Click the orange Snagit icon in your task bar (Snagit should be running in the background on your computer.) This is the Capture If you don’t see it, click the blue Snagit icon to open the editor and then click the red circle Capture button at the top of the program. After your first capture, the orange Capture icon will then be open and available in your task bar.
Select the Image tab
Set the Selection to Region
Click the large red Capture button
Use your mouse to draw a box around the desired area. You may see flashing arrows. If you click one you will be ablet to scroll that direction to capture more of the page.
When you release your mouse the image will appear in the Snagit editor.
Sometimes we find an item that is larger than is visible on the screen. The page may scroll side to side or up and down. Use Scrolling capture to capture everything in one piece.
How to Scrolling Capture with Snagit
Display the desired page on your screen
Click the orange Snagit icon in your task bar
Select the Image tab
Set Selection to Scrolling Window
Click the large red Capture button
You will see flashing arrows. Click the arrow pointing in the direction that you want to scroll in Snagit will automatically scroll down and capture. Click Stop at any time if you don’t want to capture the entire page.
When you release your mouse the image will appear in the Snagit editor. You can then trim all sides by simply grabbing the handles and dragging.
In some situations you will need more flexibility in your scrolling. Panoramic capture allows you to select the region and then scroll manually, capturing exactly what you want to capture. Think of it as image capture and scrolling capture merged together. Panoramic capture allows you move both up and down and side to side.
How to Panoramic Capture with Snagit
Display the desired page on your screen
Click the orange Snagit icon in your task bar
Select the Image tab
Set Selection to Panoramic
Use your mouse to draw a box around the desired area
When you release your mouse a panoramic capture bar will appear. Click the Start button to being your panoramic capture.
Click in the captured image area and drag the image as needed. The more precise you are in your movement the better the final image will be. You can move in any direction.
When you release your mouse the image will appear in the Snagit editor. You can then trim all sides by simply grabbing the handles and dragging.
Panoramic captures work great for large items like maps, online family trees and newspaper articles just to name a few things. If you zoom out in order to capture these types of items in their entirety you will end up with a blurry item when you zoom in for a closer look. Panoramic solves this problem.
Let’s discuss a few more options for capturing hard to clip items like newspapers. Sometimes, the article you need is continued on a different page or column. With Snagit you can capture the individual pieces and then combine them.
How to Combine Captured Images with Snagit
Capture each section of the article individual using Image Capture (Region)
In the Snagit editor press Control / Command on your keyboard and click each item you want to be included in the combined image.
Press Control + Alt + C on your keyboard or at the top of the screen click Create > Image from Template.
Select the desired page layout. Custom Steps or Steps Portrait works well for articles.
Click on any items (such as numbered steps) and press delete on your keyboard to remove them.
The combined image can then be saved to your computer or shared to another program.
Editing and Highlighting Images
There are many ways to annotate and edit images (both captured and imported) in Snagit including adding:
arrows
text (perfect for adding source citations directly onto the image
call outs
shapes
stamps (Images on images)
lines
squiggles and drawing
step by step numbering
You can also modify images by cutting out portions, blurring and erasing areas, and even magnifying an area on the image!
Snagit Advanced Features and Strategies
Once you’ve mastered the basics there are many more ways to use this tool to power-up your genealogy research. Here are a few more ideas we covered in the video.
How to Grab Text from an Image with Snagit
Option 1 – Grab text from existing image:
Select the image in the editor so that it is displayed in the editing area
In the menu Edit > Grab Text. This will grab all of the text that appears in the image. If you only want a portion of it, click the Selection tool at the top of the screen and draw a box around the area you want to grab the text from.
The converted text will appear in a pop-up window
Copy the text to your computer’s clipboard by clicking Copy All.
Paste wherever you want the text to appear (another document, etc.)
Option 2 – Grab Text While Clipping:
Display the desired page / item on your screen
Click the orange Snagit icon in your task bar
Select the Image tab
Set the Selection to Grab Text
Click the large red Capture button
Use your mouse to draw a box around the desired area. You may see flashing arrows. If you click one you will be ablet to scroll that direction to capture more of the page.
When you release your mouse the image will appear in the Snagit editor. The converted text will appear in a pop-up window
Copy the text to your computer’s clipboard by clicking Copy All.
Paste wherever you want the text to appear (another document, etc.)
Grab Text from Windows Not Easily Copied
We’ll use the example of copying the titles of computer folders into an Excel spreadsheet. Open your file explorer and navigate to the desired folders. Since a mouse can’t be used to copy all the names in one swoop, we will use Option 2 – Grab Text While Clipping instructions above.
Create Videos with Snagit
You can compile separate images into a video and add voice narration.
In the editor select Create > Video from Images
Click to select the first image in the tray
Click the microphone button in the video recording bar if you want to record narration.
Click the Webcam button if you want to appear on screen
Click the red Record button to begin recording.
Click each image in the order desired for the amount of time you want it to appear on the screen.
Press the Stop button when done.
How to Create a Timeline with Snagit Templates
In the editor add images either by importing (File > Import) or capturing
Select the images to be include by holding down the Control / Command key and clicking on them
Create > Image from Template
Select the timeline template
Add a title and captions as desired
Click the Combine button
Productivity with Snagit
One of my favorite features of Snagit is how easy it is to share items to other programs directly instead of having to save them first to my computer. It’s easy to do. Simply select and display the image to be shared and in the menu go to Share > and select the program.
 Sanborn maps are a rich resource for genealogy–but they’re just one kind of map that can lead to genealogical gems! Lisa Louise Cooke teaches tons of strategies for using maps to chart your family history in her Genealogy Gems Premium video series. Discover these for yourself with a Genealogy Gems Premium website membership.


 Click on one of the opportunities above–or tell us about one you’ve tried–to give back to your genealogy community this season. This largely-invisible community is all around us and enriches all our efforts, from late-night research sessions by ourselves (in records indexed by volunteers!) to local societies who host classes that inspire us or who answer our obituary inquiries and Facebook posts about their locales. If you are already one of those volunteers, THANK YOU. You are a gem and we here at Genealogy Gems are grateful for you.