by Lisa Cooke | Mar 20, 2017 | 01 What's New, DNA |
Your DNA test results come with raw DNA data. This raw data is the next piece in your DNA puzzle. Your DNA Guide, Diahan Southard, shares some interesting facts about raw DNA data and its use. Dig in and learn why!
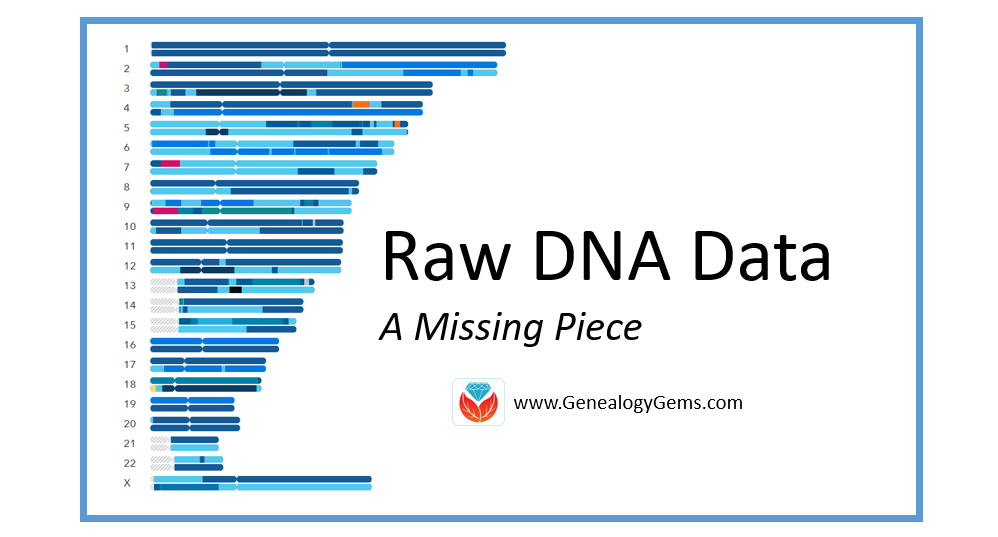
What is Raw DNA Data?
Raw DNA data is the actual output file created by the DNA testing company. You can access your raw data at each testing company, and I strongly encourage that you do. You will need to download and save your raw data results to your computer. For instructions on how to do this, head on over to this page on my Your DNA Guide website.
This file contains your little DNA values at over 700,000 locations tested by your testing company. Any company with the right set-up and analysis tools can help you find matches with other people, and make additional genealogical discoveries. They may also be able to tell you if you like cilantro and are likely to have high blood sugar!
Raw DNA Data Research Projects and Destinations
Raw DNA data has to have a place to go. There are several research projects underway that utilize your data from any of the big four testing companies (Family Tree DNA, 23andMe, MyHeritage DNA, and AncestryDNA) for various genealogical or genetic purposes.
Home page of the DNA Land website
Let’s look at four examples of places you might upload your raw DNA data.
1. Family Tree DNA. If you have tested at 23andMe or AncestryDNA, you can transfer your raw data file to Family Tree DNA for free! You can access all of your matches and use the matching tools. For an additional $19, you can get access to the ethnicity features and other tools.
2. DNA Land. The not-for-profit DNA Land has over 26,000 individuals who have voluntarily uploaded their autosomal DNA test results into their website to be used for research purposes. Their self-stated goal is to “make genetic discoveries for the benefit of humanity.”
3. MyHeritage. MyHeritage also accepts your raw DNA data for incorporation into their genealogical database. You can upload your results for free and receive access to matches along with the ability to contact them. For a one-time fee of $29, you can unlock access to all of MyHeritage DNA’s features and tools as well. Learn more and upload your data here.
4. Geni.com. Geni.com (a family tree collaboration tool) jumped on the DNA bandwagon and announced they too would be integrating DNA into their family tree tool. Utilizing a partnership with Family Tree DNA, Geni.com is utilizing all three kinds of DNA (autosomal, YDNA, and mDNA) in their offering. The interface looks much like what you would see at your testing company: a list of matches with some family tree information.
The biggest takeaway from the recent influx of destinations for your raw DNA data shows us that the integration of DNA into genealogy is in full swing. I estimate every genealogy company and every major genealogy software will offer some kind of DNA integration within the next five years. DNA has certainly earned a permanent spot as a genealogical record type!
A Word of Caution
With all of these options available, and surely more to come, you will want to be careful about who you are giving your raw data to. Make sure you are comfortable with the company and its goals. Be sure you understand what role your DNA will be playing in their research, as well. These are exciting times in the world of genealogy.
Take the Next Steps in Your DNA Journey
 Wherever you are in your DNA journey, we can help!
Take your very first steps and learn how to get started using DNA testing for family history.
If you have already taken the plunge, learn how to harness the power of DNA matching.
For the most help in understanding DNA for family history, take a look at the ten different DNA guides in both print and digital form from Your DNA Guide, Diahan Southard.
by Lisa Cooke | Dec 13, 2016 | 01 What's New, Holidays, Video |
Are you having a hard time coming up with the perfect gift for someone special on your list? The gift of video gives all year round, and doesn’t require you to buy the correct size. Make your video about family history, or the memories of the recipient, and get ready for hugs and smiles of appreciation for your thoughtfulness.
Do you remember the first Christmas that you realized it was better to give than to receive? It’s an amazing feeling when your heart swells at the thought of snagging the perfect present for the people you love the most. But if you’re like me, there are always one or two relatives who present daunting challenges. Perhaps it’s the elder members of your tribe who seem to want for nothing; or a Aunt who quietly returns everything.
My challenge this year is my Dad. He seems to want for nothing, and having an Amazon Wish List isn’t even on his radar. Last year Dad passed his high school scrapbook on to me. It’s brimming with some of his fondest memories: his Boy Scout membership card, newspaper clippings of his football prowess, and the cardboard glasses he wore to his very first 3D movie. I’m pretty sure his heart was swelling when he handed this treasure chest of beloved memories to his daughter, the family historian.
And that’s when I was struck with an inspiration: give it back to him in the form of a video.
Video: Gift Perfection
Here’s why video makes a perfect gift:
- It doesn’t take up precious space on the shelf
- It can be enjoyed from any computing or mobile device again and again
- It can be shared easily with others
If you have been in search of the perfect holiday gift, follow along with me, and give the gift of video.
Creating a Video Gift
If you’re short on time, consider making a video of an old family scrapbook. All you will need is a smartphone and 30-60 minutes. Pull a scrapbook off the shelf, and dust it off because it’s about to get a new life!
Step 1 – Photograph the album
You could use a flatbed scanner to scan each page and the individual items you want to highlight. But you can save a ton of time by putting your smartphone or tablet to use. For me, this was the ideal solution also because so many of the items in the scrapbook had become loose, and I wanted to be able to show the pages as they were originally laid out. By setting the book on a table I could just snap photos rather than turning it upside down on the scanner glass. And don’t worry about snapping the perfect pics because we’ll get them all snazzy in step 3.
Save the images to a free cloud service like Dropbox so that you can easily retrieve them on your home computer.
Step 2 – Head to Animoto.com
(Full disclosure: This post contains affiliate links and I will be compensated if you make a purchase after clicking on my links. I appreciate you using these links because that compensation helps make the Genealogy Gems blog possible. Thank you!)
Although Animoto does have an mobile app, I like using the web version on my computer which provides the advantage of a bigger screen. Click here to go to Animoto, and sign in to your account. Then, just click the Create button to start a new video project.
Choose a Video Style, which will include a music soundtrack. If the music isn’t quite what you had in mind, click Change Song and pick from a robust list of tunes. Animoto’s secret sauce optimizes and paces your slides to jive with the music. If the music is faster, the slides are faster, and if it’s slower, yep, the slides are slower. In the end though, you always have the final choice in the pacing of your slides and your entire video. Need a little extra time? Then just add a second music sound track.
Step 3 – Add Your Photos
Now it’s time to add your photos. Click Add Image, select Dropbox, and navigate your way to the folder where you saved your photos. Click the first one in the list, and then holding down the Shift key on your keyboard, click the last photo in the list, and click the Choose button. There you go: you’ve added all your images in one fell swoop! Imagine the time you saved over adding one item at a time.
I snapped all the full page photos first, and then I went back and snapped some of particular items I wanted to highlight with closeup images. That meant that when I added my photos they weren’t in exactly the right order. Thankfully, all I had to do was drag and drop them in the desired order. Easy peasy!

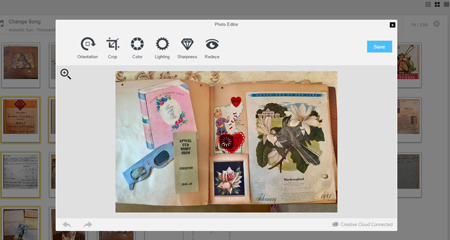
Edit your photos within Animoto.
Another reason I adore using Animoto is that I can do all my editing right there in the dashboard. With a few clicks you can apply a quick crop, slight rotation, and image enhancement with a great result. (Image right)
You even have the option to add video clips with Animoto. So if I had a fancy to add my original video of turning the pages of the scrapbook (above) I would just drag and drop it onto the timeline. And it is that ability to drag images and video from your hard drive straight into Animoto that makes it so quick and easy to use.
Step 4 – Add Title Slides
Although my Dad’s scrapbook really speaks for itself, I decided to add a few title cards to help guide the viewer like:
- The Picture Show
- School Work
- Sports
- Graduation
And title cards are great for “The End” and any other message or credits you want to add.
If you want to add text within your project, click to select the item that your text will follow, then click Add Text from the menu, and it will appear immediately after the previous item. To add text at the end, just click the plus sign in the last box and again type your text. And remember, nothing is set in stone. If you change your mind you can drag the text to a new location, edit it, or delete it all together.
Step 5 – Preview & Publish Your Video
At any time during the process you can click the Preview Video button to see your work. If you like what you see, then click the Produce button in the Preview window to create the final product. And speaking of final products, here’s mine:
Learn More
Are you ready to start creating memorable videos for the loved ones on your list? Click here to learn even more and give Animoto a whirl. (And just think: no wrapping required. You’re welcome!)
by Lisa Cooke | Feb 20, 2017 | 01 What's New, DNA, Kids |
DNA testing for kids is a great way to spark their interest in their heritage, while teaching science, math, geography, and more. Consider these reasons and start with the budget-friendly option of an autosomal test.
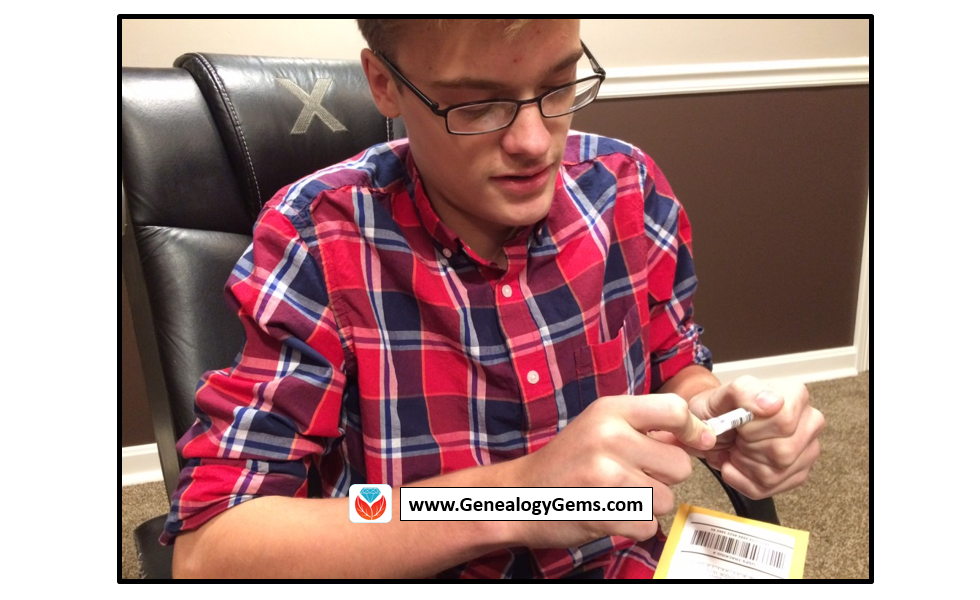
According to a 2010 study out of Emory University, if we want to encourage kids toward an activity that will positively impact them, we should steer them toward family history. The researchers reported, “Children who know stories about relatives who came before them show higher levels of emotional well-being.”
Now, I know I don’t need to convince you of this. You are already sold on genealogy. But let’s explore how DNA testing might be able to help you share your love of family history with your children and grandchildren.
Why Try DNA Testing for Kids
Since you know this is me, the genetic genealogist talking, you can probably guess what I’ll suggest for getting kids interested in family history. DNA testing is a great way to personally and physically involve them. There is the tangible process of taking the sample at home, and the marvel at how such a simple act can produce the amazing display of our ethnicity results. Since each of us is unique, it will be fun for them to compare with you and other relatives to see who-got-what-from-who. This will naturally lead to questions about which ancestor provided that bit of Italian or Irish, and wham! You’ll be right there to tell them about how their 5th great-grandfather crossed the ocean with only the clothes on his back, determined to make a new start in a new land.

If there are parts of the ethnicity report you can’t explain, use that as a hook to encourage them to start digging and to find out why you have that smattering of eastern European or Southeast Asian. Taking them for a tour of the DNA match page, you can show them how they share 50% of their DNA with their sister (whether they like it or not!) and how they share 25% with their grandparent!
DNA test results give kids a totally unique look at their personal identity with technology that is cutting edge. Looking at their DNA test results can turn into a math lesson, a science lesson, a geography lesson, a lesson on heredity or biology, or a discussion on identity. DNA is the perfect introduction to the wonders that genealogy can hold, especially for children.
A Warning and Caution
As with all DNA testing pursuits, this one should not be taken lightly, even with all of its benefits.
An important word to parents: Be sure to keep unintentional consequences in the forefront of your mind. This includes the possibility of revealing family secrets. Talk with your spouse and make sure you are both on the same page. In the end, this is your decision.
An important word to grandparents and other relatives: DNA testing is a parent’s decision. Even though you’re passionate about preserving the family’s history and the benefits of including children are numerous, you must obtain parental consent if you are not the parent.
More About Autosomal DNA Testing for Kids
 Click here to learn more about my series of how-to videos (available to Gems fans for a special price) or start your kids’ or grandkids’ DNA journey with two of my genetic genealogy quick guides. The first is a great overview and the second talks about autosomal testing which is a good test for genetic genealogy beginners.
by Lisa Cooke | Aug 28, 2017 | 01 What's New, Google, Google Earth, Listeners & Readers, Maps, Memory Lane |
Ever thought of visiting your childhood home? Here’s a story about people who are actually buying theirs back. For the rest of us, here’s how to use Google and Google Earth to revisit your childhood home and relive some memories–without spending a dime.
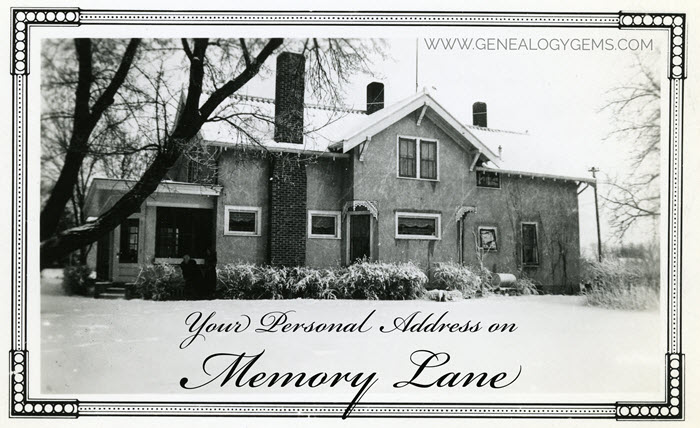
Your childhood home–or perhaps another beloved family home–is your own personal address on Memory Lane. Who wouldn’t love to stroll up to its doors and recapture some memories?
The image above is of my husband’s great grandfather’s home in Winthrop, Minnesota. It’s a home that I have many photos of, have researched, and have come to feel personally connected to although I’ve never seen it in person. It’s one of many ancestral homes that I yearn to visit one day. So as you can imagine, I really enjoyed this report from The Wall Street Journal about a few lucky folks who are living the dream of not only visiting, but owning and restoring, their childhood home.
Even if you’re not interested in buying back an old family home, many of us are curious about the houses we used to love. Are those houses still there? What do they look like now? What else can we learn about them?
Let’s explore three ideas to help you stroll down memory lane. Then, I’ll share a discovery from a Genealogy Gems Premium podcast listener who recently dropped me a line.
1. Find the address for your childhood home
If you don’t recall the street address of your favorite family home, ask a relative or look it up. For U.S. addresses since 1940, you might start with the U.S. Public Records Index, searchable in part or full at Ancestry.com (volumes 1 and 2 for 1950-1993), FamilySearch.org or MyHeritage.com (click here to learn more about that database). Look also in records such as:
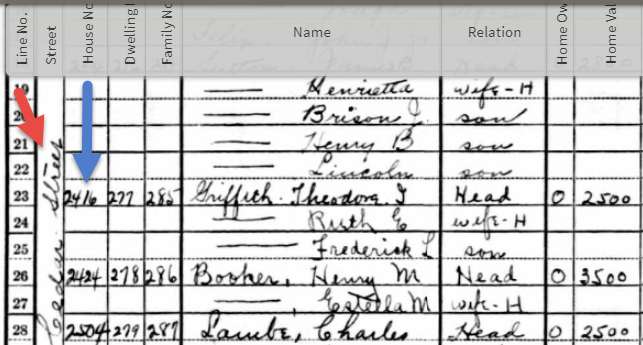
For U.S. addresses from 1880-1940, look to U.S. census records, which include street names and house numbers. In the example below from the 1930 census, you can see “Cedar Street” written vertically by the red arrow, and the house number written for each household entry, as shown in blue.
From the 1930 US census, Ancestry.com.
If you can’t find an address on an old record, but you think you could navigate yourself there on a map, it’s time to go to Google Earth and fly yourself there!
2. Use Google Earth to view your childhood home now
Google Earth is your on-ramp to your own personal Memory Lane. Go to the site, enter an address, and watch yourself “fly” to that address. If you don’t know an exact address but you know where to look, enter a street name or even a city. Then zoom in to the neighborhood and street section of interest. Activate Street View, if it’s available. Not sure how to do that? Watch my free Google Earth for Genealogy Video Class to get started.
Once you’ve found the location, take a close look. Is the house still there? What does it look like now? How has the landscape changed? The neighborhood?
You can use Google Earth to revisit your own childhood home or another family landmark, such as an ancestor’s homestead or burial place. (Click here to read about one genealogist’s virtual trip to an ancestor’s business using Google Earth’s Street View, and click here to see how another genealogist used historical map overlays in Google Earth to identify an old home’s location.)
3. Google the address of your childhood home
Googling the address of your family home may produce unexpected and interesting results like these:
a) Sale listings. If your house has been on the market in recent years, you may be able to find a listing with great details, and even pictures of the inside today. Top Google search results from specific addresses often bring up real estate websites with varying degrees of information, such as square footage, current estimated value, year built, most recent sale date and price, and more. Weed through these entries to see whether Zillow or another similar site shows a current or past listing for sale or rent. These may contain more details and may even have interior and exterior pictures of the house as it is now.
Watch closely—Google may bring up houses nearby, not the one you’re looking for. But even a neighborhood listing for a house built on a similar floor plan may jog your memories of the home and may give you a sense of what the area is like now.
b) Historical information. A Google search result may bring up historical news coverage or obituaries from digitized newspaper websites like Newspapers.com (a subscription may be required to view these in full). Or you may find something really fascinating, like a discovery made by Genealogy Gems Premium member Heather. After listening to me talk about this subject in Premium Podcast episode 141 (click here to subscribe), Heather wrote me this email:
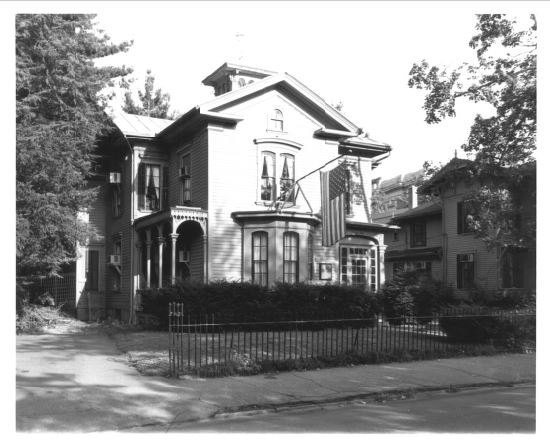 “I love listening to the podcasts while driving to and from work, often sharing my own thoughts with you. This happened yesterday while listening to the latest Premium Podcast episode on family homes. I decided that I had to write and share what I managed to find! Since I have deep family roots in Connecticut back to 1650s, I managed to find a few family homes, but I started searching with the more recent generations and addresses that I knew. The two homes where my great-grandparents (Inez Hart and John Milton Burrall) and my great-grand aunts (Mary and Lucy Burrall) lived were written up in an application for the National Register of Historic Places!
The National Park Service is working on digitizing these applications. I found the application with a narrative description of the home and pictures of the interior and exterior. I have found other applications that have also included some genealogy of the family who lived in the home. Here is the website for the National Park Service and the database search page.”
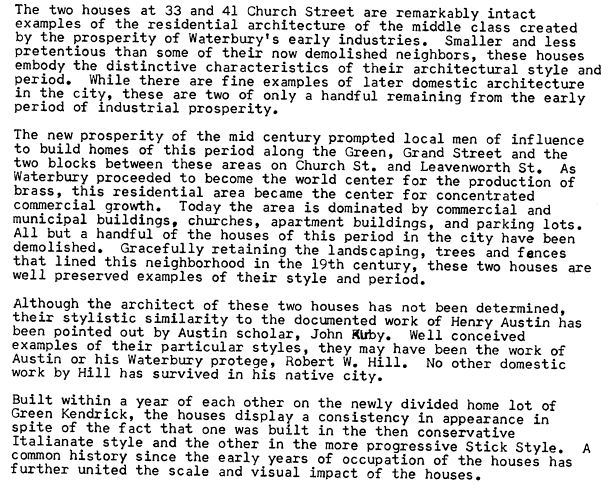
Thanks for sending these in, Heather! And for sending along copies of the applications she found. The multi-page applications (more than 10 pages each!) include historical background on the buildings and former owners, as well as photos and site maps. Above is a photo–and below is an excerpt–from these applications.
When you’re ready for a full-fledged Google education, take a look at my top-selling book, The Genealogist’s Google Toolbox, and my companion video tutorial series, Google Earth for Genealogy.
Disclosure: This post contains affiliate links and Genealogy Gems will be compensated if you make a purchase (at no additional cost to you) after clicking on these links. Thank you for supporting Genealogy Gems!
by Diahan Southard | May 27, 2017 | 01 What's New, Genealogy Giants Websites, MyHeritage
 The new MyHeritage Collection Catalog is making the site even easier to use. Read our 3 favorite uses for the new MyHeritage Collection Catalog, and a description of how MyHeritage counts its records.
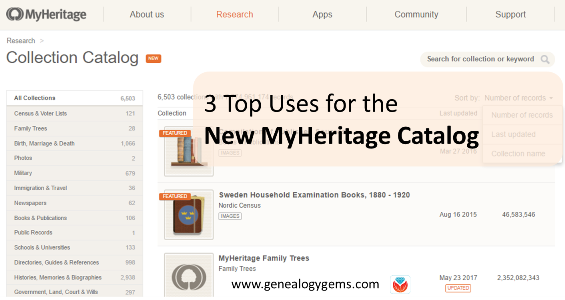
The new MyHeritage Collection Catalog has just been released, and is dedicated to searching records collections on the site. It’s a public catalog, available whether you are a subscriber or not, so now you can easily see whether MyHeritage may have the historical records you need.
It’s a public catalog, available whether you are a subscriber or not!
“The new Collection Catalog provides a useful listing of the collections on SuperSearch and is a gateway to the vast historical treasure trove of 7.8 billion records currently offered by MyHeritage,” says a MyHeritage press release. “The catalog lists our 6,503 main collections and excludes tiny collections that have fewer than 500 records each.” (Those may be added to the catalog later on.)
Here are 3 top uses we see for the new MyHeritage Collection Catalog:
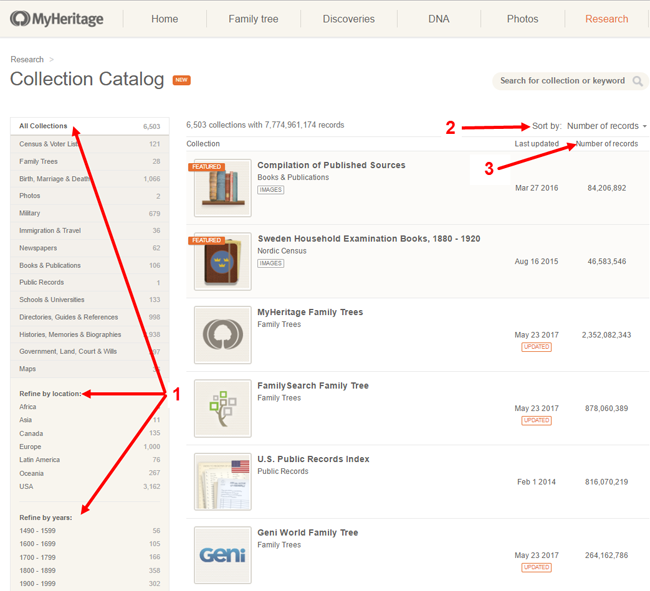
1. Look for specific record types for a particular place and time period. Use the left side menu to select record types, locations and time periods. Within many of those, you’ll be able to choose more specific subcategories. You can also do keyword searches if you’re generally looking for particular kinds of records (“newspaper” or “church”).
2. See what’s new on the site, or what collections have been recently updated. To see what’s been added or updated lately, roll over Sort by and select “Last updated.” You’ll also see a little tag on any collections that are new or have been recently updated. This helps you to know whether you’re seeing the most recent data available, particularly in collections they index from other websites, such as the FamilySearch Tree or Geni World Family Tree.
3. See how many records are in a collection. This may help you determine how comprehensive a particular database might be, and compare how many records for a particular place are on their site.
Speaking of record counts, MyHeritage also shared a description of how they count records. I’m really encouraged to see a major records site do this and I hope this trend continues! In our newest quick reference guide, Genealogy Giants: Comparing the 4 Major Websites, we talk about how difficult it is to compare record content on different genealogy websites because there’s no uniform standard for counting them, and they don’t all define their counting methods alongside their site statistics. Here’s MyHeritage’s description of how they count records:
“In structured collections, such as census records, birth, and marriage records, each individual name is counted as one record. For example, a marriage document naming both the bride and groom is counted as two records. Nicknames or aliases are not counted as additional records. In family trees, each tree profile is counted as one record, even when it is available in more than one language. Each photo is counted as one record. In unstructured collections, such as newspapers or yearbooks, each page is counted as one record even though it may include hundreds of names. We count each page as a single record because we don’t want to inflate the record count by guessing.” (MyHeritage previously published this information in a 2014 blog post.)
Getting the Most from MyHeritage
Here at Genealogy Gems we strive to help you get the most out of the genealogy websites you choose to use in your research. In the case of MyHeritage, we’ve got two jam-packed quick reference guides like no others on the market:
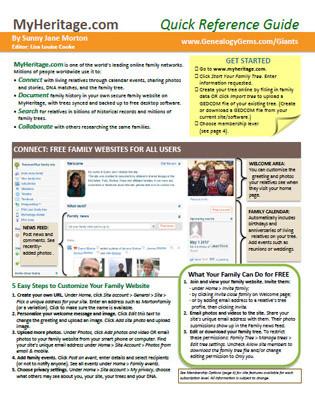 MyHeritage Quick Reference Guide: Newly Updated in 2017!
This guide shows you how to:
- create a family website on MyHeritage (and help your relatives use it for free),
- build your family tree,
- research records and others’ trees,
- get the most from the built-in search tools,
- test or upload your DNA and work with DNA matches,
- quickly navigate the website, and choose the best membership plan (free or paid) for your needs.
Genealogy Giants: Comparing the 4 Major Websites: NEW in 2017
This comprehensive guide helps you answer the question, “Which genealogy records websites should I use?” You’ll learn:
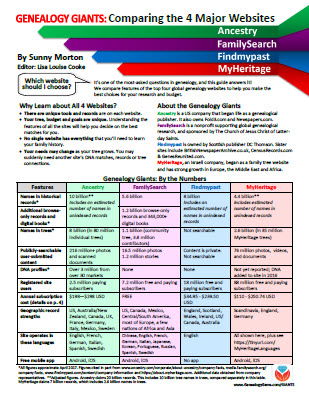 How knowing about all four websites can improve your family history research
- How the sites stack up numerically for historical records, names in trees, DNA profiles, site users, site languages and subscription costs
- Unique strengths of each website and cautions for using each
- What to keep in mind as you evaluate record content between sites
- Geographic record strengths: A unique table has an at-a-glance comparison for 30+ countries
- How to see what kinds of records are on each site without subscribing
- How family trees are structured differently at these websites—and why it matters
- Privacy, collaboration, and security options at each site
- How DNA testing features differ at the two websites that offer it
- What you can do with free guest accounts at each website
- Subscription and free access options
Thanks for sharing this post with others who will want to know about the new MyHeritage Catalog! You are a Gem!

 Wherever you are in your DNA journey, we can help!


 “I love listening to the podcasts while driving to and from work, often sharing my own thoughts with you. This happened yesterday while listening to the latest Premium Podcast episode on family homes. I decided that I had to write and share what I managed to find! Since I have deep family roots in Connecticut back to 1650s, I managed to find a few family homes, but I started searching with the more recent generations and addresses that I knew. The two homes where my great-grandparents (Inez Hart and John Milton Burrall) and my great-grand aunts (Mary and Lucy Burrall) lived were written up in an application for the National Register of Historic Places!

 The new MyHeritage Collection Catalog is making the site even easier to use. Read our 3 favorite uses for the new MyHeritage Collection Catalog, and a description of how MyHeritage counts its records.


