Historic U.S. newspapers are featured in this week’s new and updated records collections, including Hawaii, Colorado, Georgia, and North Carolina. Also new this week are updated New York passenger lists, vital records for England, Welsh newspapers, military and census records for Canada, and Austrian parish records.
Historic U.S. Newspapers & More
This week we were delighted to see lots of historic U.S. newspaper made available online. Newspapers are a fantastic way to find clues about your ancestors, especially when vital records are elusive, and also learn about their daily lives.
Hawaii. If you have family from Hawaii or are interested in Hawaiian history, then you’ll definitely want to check out these three new titles added to Newspapers.com:
In 2010, the Adviser and Star-Bulletin were merged to create the Honolulu Star-Advertiser. If you’re looking for ancestors or other family members in these papers, good places to start include personals columns, society pages, local interest columns, and the like.
Colorado. History Colorado (HC) recently digitized and added two historic Denver African-American newspapers: Statesman (1905-1912), and The Denver Star (1912-1918). While these papers covered news from African-American communities in “Colorado, Wyoming, Montana and the West,” they also covered local news from Denver’s Five Points district. These newspapers cover Denver’s African American culture and community, including its residents, businesses, and aspects of everyday life.
Georgia.Georgia Perimeter College Collection is now available online. The digital collection includes yearbooks, catalogs, and student newspapers from the 1960s to the 2010s. You can browse the collection by decade, date, format, or by the name of the institution at the time each item was published.
North Carolina. The newspaper of Belmont Abbey College in Belmont, NC has been digitized and made available online. There are 44 issues are available to browse spanning from 1971-1979 with issues published every other month. Among the news headlines are graduations, alumni news, fundraising campaigns, appointments of new abbots, and changes on campus reflective of this decade’s larger cultural movements.
New York. MyHeritage has updated their collection of Ellis Island and Other New York Passenger Lists, 1820-1957. This collection contains millions of records of individuals arriving at the port of New York, including individuals who arrived at three well-known immigrant processing stations: Castle Garden (1855-1890), the Barge Office (1890-1892), and Ellis Island (1892-1957).
England – Portsmouth Collection
Findmypast has an exciting new collection for Portsmouth, Hampshire. This collection of scanned images of original handwritten documents contains more than 1.3 million historical records spanning 1538 – 1917. When complete, the collection will be the largest repository of Portsmouth family history records available online. Click the links below to explore the 5 collections:
Also new this week from The British Newspaper Archive is the Ross Gazette. This newspaper is published by Tindle Newspapers in Ross-on-Wye, Herefordshire, England, spanning 1867 – 1910. This collection currently has over 2,000 issues available now, with more continuing to be added.
Welsh Newspapers
Even more historic newspapers are new this week as we head over to Wales. The British Newspaper Archive recently added the Rhyl Journal (Clywd, 1877 – 1897) and Cambrian News(Dyfed, 1863 – 1882) to their database.
Though these collections are relatively small, they can provide wonderful clues and details about your ancestors living in Wales in the 19th century.
Canada – Military and Census Records
New for Canada this week are Certificates of Military Instruction at Fold3, which includes records from 1867 to 1932. There were initially two types of certificates: First Class (battalion-level officers) and Second Class (company-level officers). The information you can find in the certificates in this collection typically includes the man’s name, rank, and residence; the certificate type and date; and the name and location of the school.
The 1921 Canadian Census is now available for free at the Library and Archives Canada. The 1921 Census marked the sixth regularly scheduled collection of national statistics. It officially began on June 1, 1921. This research tool contains 8,800,617 records that are searchable by name.
Austria – Parish Records
Over at Ancestry.com, a new collection of Salzburg Catholic Baptisms, Marriages, and Burials, 1600-1930 is now available. From the description: “This collection contains parish registers from numerous Catholic communities in the city Salzburg, Austria as well as numerous communities that today are part of the Austrian state of Salzburg.” Note that these records are in German, and you should search using German words and location spellings.
Native American Records
Do you have Native American ancestry? Or are you interested in Native American history? Then explore Fold3’s Native American Collection for free November 1-15, 2017. Their unique collection includes records, documents, and photos never before seen online. All you need is a free Fold3 account to start exploring!
Disclosure: This page contains affiliate links and Genealogy Gems will be compensated if you make a purchase after clicking on these links (at no additional cost to you). Thank you for supporting this free podcast and blog!
Chalked full of a rich history, Ellis Island was the leading port of arrival for the United States for sixty years. Read more about this historic place and the inspirational stories of immigrants past.
[Public domain], via Wikimedia Commons.
Ellis Island, in Upper New York Bay, was the gateway for over 12 million immigrants coming to the United States from January 1, 1892 until 1954 when it closed. In our Genealogy Gems Podcast #199, Lisa shared a blurb from Profile America, regarding Ellis Island in which a few key facts were shared.
Ellis Island: What was it like?
Many of our ancestors first stepped ashore at Ellis Island when they came to America seeking a new life. I can only imagine their first thought might have been, “Get me off this boat!” But then, perhaps there was worry and trepidation. Would they be sent home because they were sick? Would they find work, a place to live, or food to eat?
Immigration Day at Half Day School, Lincolnshire, Illinois. 2010. Courtesy of the author.
The very first immigrant was processed in 1892. Her name was Annie Moore and she was a 15-year-old Irish girl. [1] Can you imagine?
One elementary school in Lincolnshire, Illinois recreates this event with their yearly “Immigration Day.” Immigration Day is for all 3rd and 4th students to participate in what it’s like to come to this country for the first time. They dress up, pack up a few belongings, receive little tickets and passports, and experience in a small way the history of many of their ancestors.
Arriving on land again must have been quite the relief to passengers. Especially those in steerage. Steerage or third class passengers traveled in crowded and often unsanitary conditions near the bottom of the ship. Upon arrival in New York City, ships would dock at the Hudson or East River piers. First and second class passengers would disembark, and pass easily through Customs. They were free to enter the United States. The steerage and third class passengers, however, were transported from the pier by ferry or barge to Ellis Island where everyone would undergo a medical and legal inspection. [2]
If the immigrant’s papers were in order and they were in reasonably good health, the Ellis Island inspection process would last approximately three to five hours. The inspections took place in the Registry Room (or Great Hall). Here, doctors would quickly look over every immigrant for obvious physical ailments.
If the immigrant was found with a minor ailment, broken bone, or found to be pregnant, they would be sent to the “Island Hospital, built to restore the health of people suffering minor injuries [and] broken bones.” [3]
An Ellis Island Myth
The ship’s manifest log, that had been filled out back at the port of embarkation, contained the immigrant’s name and his/her answers to twenty-nine questions. This document was used by the legal inspectors at Ellis Island to cross-examine the immigrant during the legal (or primary) inspection. [4]
There are some genealogical myths regarding Ellis Island. Many believe that their ancestors surnames were changed when they arrived. Some even believe the name change was due to the lack of native speakers of different languages and an overall lack of communication. This is not the case.
Nearly all […] name change stories are false. Names were not changed at Ellis Island. The proof is found when one considers that inspectors never wrote down the names of incoming immigrants. The only list of names came from the manifests of steamships, filled out by ship officials in Europe. In the era before visas, there was no official record of entering immigrants except those manifests. When immigrants reached the end of the line in the Great Hall, they stood before an immigration clerk with the huge manifest opened in front of him. The clerk then proceeded, usually through interpreters, to ask questions based on those found in the manifests. Their goal was to make sure that the answers matched. (p.402)
A First-hand Look at Ellis Island
The official, award-winning documentary shown today at Ellis Island (more about that here) is available to watch online below. It is a wonderful way to get a first-hand look at what it felt like to land at Ellis Island and the a land of liberty.
The Genealogy Gems Podcast (get our app) helps you make the most of your family history research time by providing quick and easy-to-use research techniques. Producer and host Lisa Louise Cooke brings you the best websites, best practices, and best resources available! Listen to all of Lisa’s podcast episodes on iTunes for free!
Think it’s too hard to create your own family history video? Think again! You may already have the foundation already poured!
Video is one of the best ways to tell your family’s story. Imagery, text and music comes together to quickly capture the attention of all ages. But whether it’s a blank computer screen or a blank page, getting started is often the hardest part of any creative project.
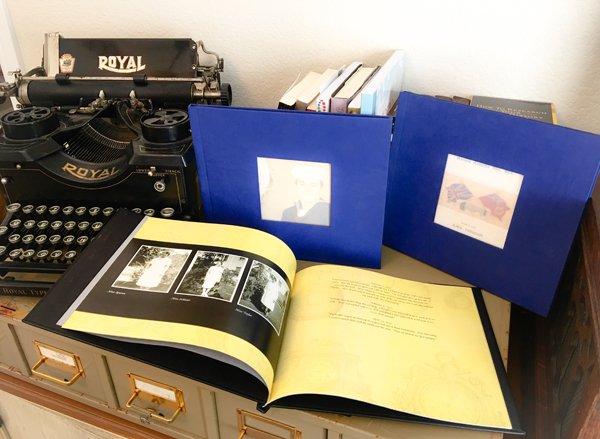
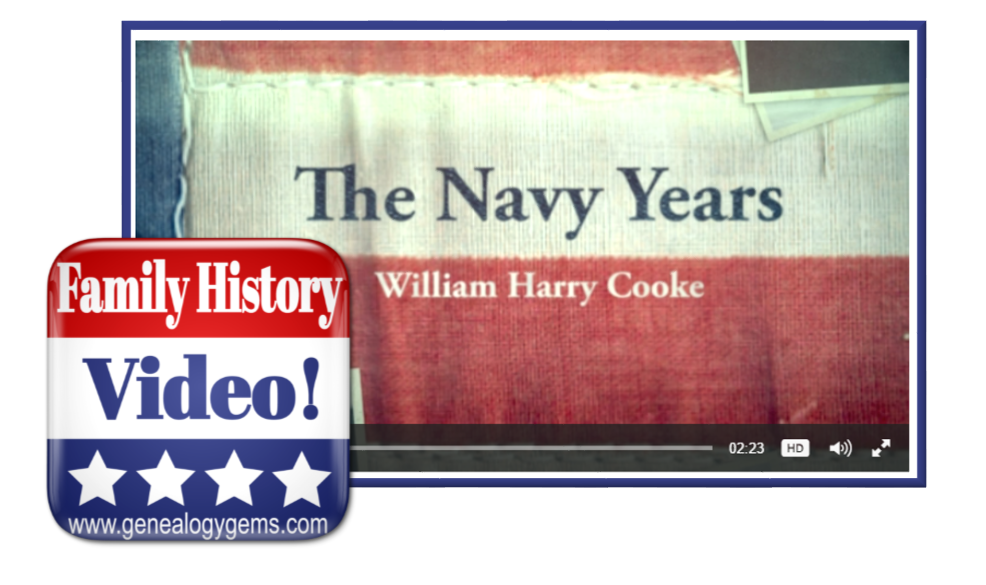
That’s why when I wanted to whip up a tribute video to my husband’s father’s Naval service, I didn’t start from scratch. Instead, I turned to small book I created over ten years ago for inspiration and content. My research of his military career has certainly evolved since I first put those pages together. Creating a new video on the subject gave it a nice facelift in a modern medium that everyone in our family loves!
The Foundation
Back in 2006 Kodak Gallery offered one of the first print-on-demand services to the public. It was a tantalizing idea to think of being able to create my own full color, hard cover book. And what would I write about? Family history, of course!
My husband’s father’s military service records had recently come into our possession, and one afternoon I sat down and scanned all of the photographs and documents at a fairly high resolution (about 600 dpi). I created my first book that day using that imagery, and added text where I had more details. The end result was a mighty nice coffee table styled book. Just 20 full color glossy pages double sided, for a total of 40 pages. This was just about all I could expect of the average attention span of my non-genealogist relatives. To my happy surprise, the book was devoured, with many exclamations of “I’ve never seen that!”, and “oh, isn’t that great!
Fast forward to today. Kodak Gallery is long gone, and today’s relatives rarely have the desire to sit and even flip through pages of a book. What are they willing to spend time on? Video! Brief video, albeit, but video is the book come to life. And so, when in search of a new project to get family history out in front of the clan, I decided to do just that: breathe life into that book I created 11 years ago.
The Process
First, I located the computer file folder containing all of the original scanned images, both photos and documents. I renamed the files to start with a two-digit number so that they would appear in chronological order in the folder on my hard drive. Before I knew it, the story began to emerge on my screen.
(Full disclosure: This post contains affiliate links and I will be compensated if you make a purchase after clicking on my links. I appreciate you using these links because that compensation helps make the Genealogy Gems blog possible. Thank you!)
Then it was off to Animoto, the online video creation tool. Animoto doesn’t require any special skills to create professional looking videos. If you can click, drag and drop you can create fabulous family history videos.
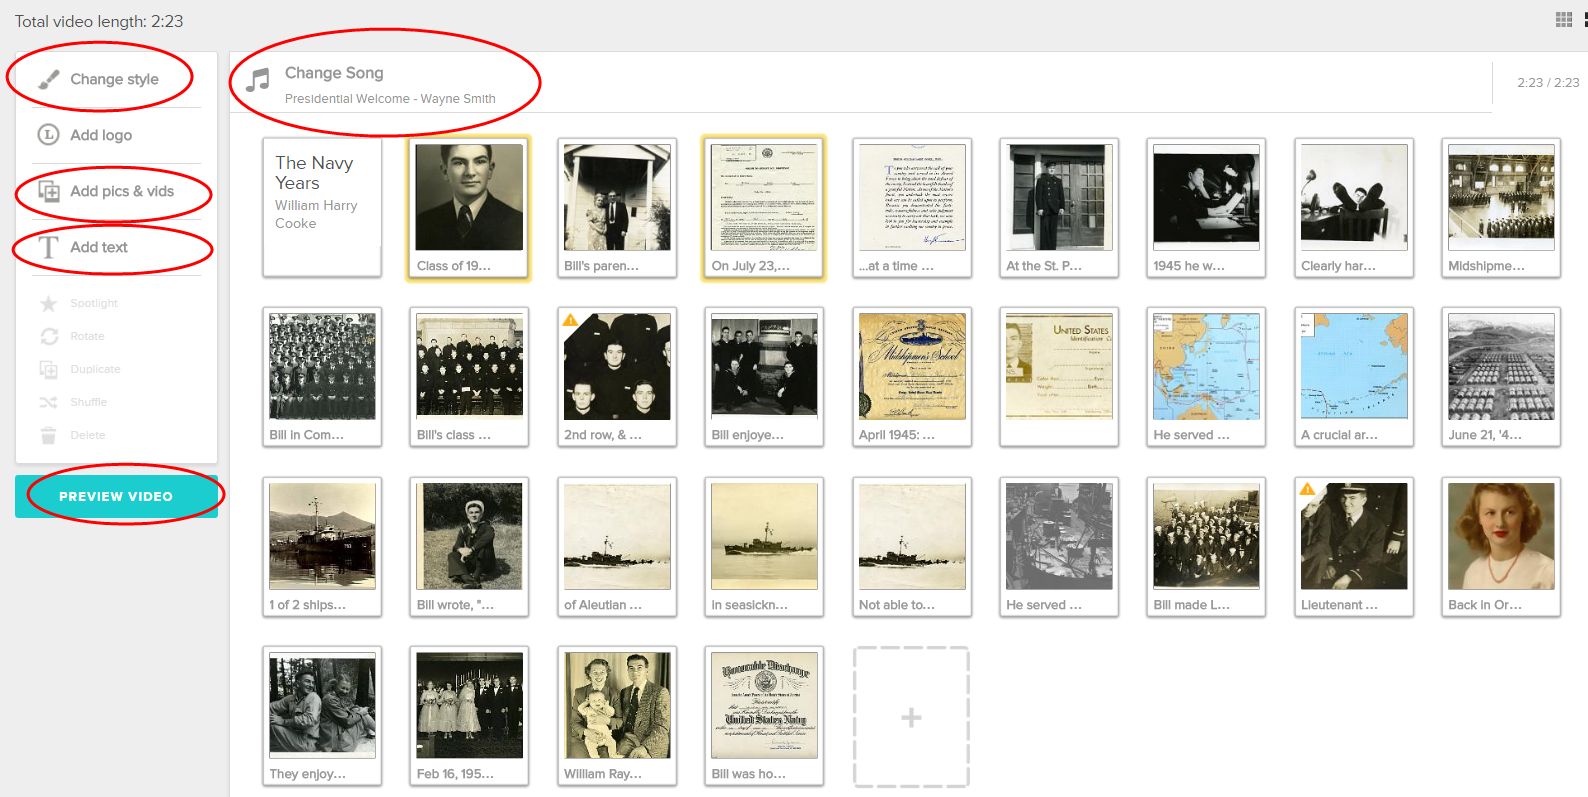
I started by selecting choosing to create a “Slideshow Video” and selecting the video style called Old Glory. Being a patriotic theme it already included the perfect music called Presidential Welcome. If I had wanted something a little different, it would have been easy enough pick another tune out of their vast music library, or upload one of my own.
Next, I dragged and dropped the images into my new project. I already had about 25 images from my original folder, and I was able to add 5 newly discovered scanned documents and photos that really fleshed out the story. One click of the Preview button showed me that I already had an awesome video in the works. All that was left was to add a bit of text to the story
The Video Text
The text part of this project actually turned into a great way to pull my youngest daughter Hannah into family history a bit. She loves making videos on her phone, and during a recent visit she became intrigued by my project. I asked her if she would help me out and use the book as her guide and type captions onto the video images. She obliged, and the next thing I knew she was in the family room, computer in lap, talking with her Dad about his Dad. (This genealogist’s dream come true!) It was easy to add the text to tell the story by adding titles and captions to the video in Animoto.
Time to Produce Your Video
With all the content added, we hit the Preview button, and were amazed how Animoto timed everything to the music nearly perfectly. After a few final tweaks, we hit the Produce button. I must say, I’m really pleased with the results! Watch below, and then leave a comment and let me know what you think.
Make Your Own Video Project
What do you already have lying around the house that would make a terrific video? A scrapbook, or a drawer full of letters and photos? Click here to try out Animoto. I’ve been so thrilled with what I’ve been able to create for my family, that I proudly accepted Animoto as a sponsor of my free Genealogy Gems Podcast, and I happily recommend them. I think you’re going to love how quickly and easily you can bring your family history to life with video too.
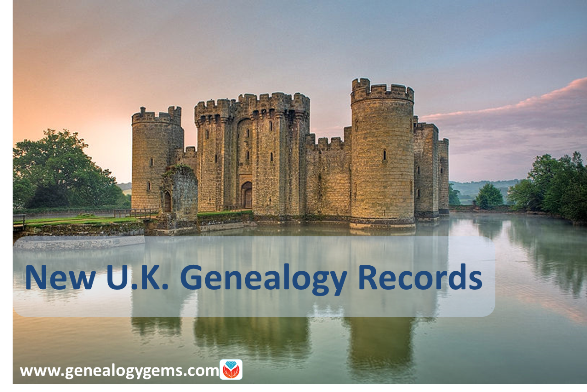
Got ancestors from England, Scotland, Wales or Northern Island? Check out these new UK genealogy records online: 1939 Register updates; newspapers; Scottish postal directories and local resources for Derbyshire and the city of York.
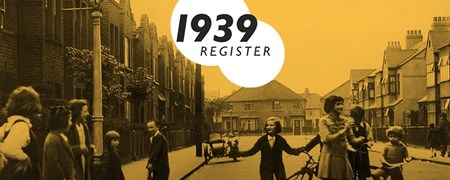
Featured Update: Additions to the 1939 Register online
Over 660,000 new records pertaining to empty, uninhabited addresses across England and Wales have been added to Findmypast’s unique and important online 1939 Register resource.
We asked Jim Shaughnessy at Findmypast how these records can help a researcher. “There are a few things that an empty address can tell you,” he responds. “Knowing the house you are looking for was an empty address in 1939 may help you to direct further research. As with other record sets, the occupations of the neighbors can give you an idea of the area (in terms of the largest local employer).”
The ability to search even vacant addresses “can also give you information about areas [later] destroyed by aerial bombing during the War (and during the extensive regeneration in the decades following),” writes Jim. “The Register was compiled September 1939; bombing began in 1940 and a lot of houses wouldn’t have been rebuilt, particularly in impoverished areas where we had bombsites for years and years afterwards. So from that you could look at how the War changed that area or that street: what doesn’t exist now but did pre-Blitz.”
Jim also pointed out that “Findmypast is the only site on which you can search by address on the 1911 census as well as the 1939 register, plus we have the largest collection of electoral rolls, also searchable by address. You can search by address and then build the entire picture of what your family did.”
In addition, Findmypast has added over 186,000 records to its collection, Sussex, Eastbourne Gazette Newspaper Notices. “This indexed collection includes names found in the paper’s family notices section (announcements of births, marriages, and deaths) as well as other reports on events such as divorces, murders, tragedies, shipwrecks, lynchings, and paternity cases. The newspaper reported on stories in Sussex, but also internationally.”
Derbyshire, England. Over 800 records have been added to Findmypast’s unique collection of Derbyshire Hospital Admissions and Deaths 1855-1913. “The collection now contains over 5,000 records taken from two different sources: Derbyshire Royal Infirmary, Deaths 1892 – 1912 and Victoria Memorial Cottage Hospital, Ashbourne Admissions 1899 – 1913,” states an announcement. “Each record includes a transcript produced by the Ancestral Archives of Derbyshire. Records can include the patient’s admission date, reason for admission, condition after admission, marital status, residence, rank or profession, date of discharge or death, and cause of death.” Looking for other Derbyshire ancestors? Click here to read about online Methodist records for Derbyshire.
York, England. A new Findmypast resource, The York Collection, includes nearly 300,000 genealogical records documenting over 600 years of residents of the city of York. A press release calls it “the largest online repository of historic City of York records in the world….Fully searchable transcripts of each original document are also included, enabling anyone to go online and search for their York ancestors by name, location, and date.”
The collection is comprised of a variety of fascinating documents, including hearth & window tax records (1665-1778); lists of apprentices and freemen (1272-1930); city of York trade directories; electoral registers (1832-1932), city of York school admission registers; city of York deeds registers (1718-1866); city of York militia & muster rolls (1509-1829), and city of York calendars of prisoners (1739-1851). This collection was published in partnership with Explore York.
Scotland Directories
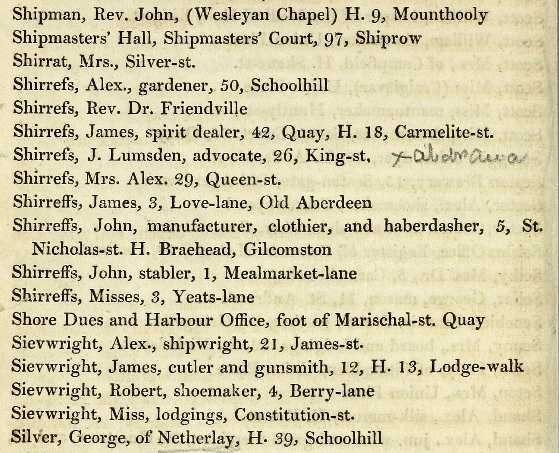
A snippet from an 1820s post office directory for Aberdeen and vicinity. Image on Findmypast.com.
Over 180,000 new record images have been added to Findmypast.com’s collection of Scottish post office directories, now spanning 1774-1942. The collection has nearly 900 browse-only volumes of directories that offer descriptions of Scottish towns along with lists of residents by occupation and address.
Here’s a little background from Findmypast: “Post directories are an excellent source for family historians wanting to trace ancestors on a yearly basis. Directories allow you to fill in the gaps between the census records. They can also provide vital information about your ancestor’s residence, which can lead to the discovery of more records….Directories can add historical context to your ancestor’s story. Directories will give you a better understanding of where your ancestor lived, such as how many businesses were in the town, how many schools, what day was the market day, and how big was the town.”
“Directories may focus on a particular town or district or you can find national postal directories. The majority of post directories comprise a description of the place, along with lists of people by occupation. For example, you will find lists of magistrates, councillors, sheriffs, police officers, and merchants. It is important to remember that post directories are not complete lists of all the residents in the town or county. Also, many directories fail to include women.”
TIP: A browse-only collection of digitized Scottish post office directories for 1773-1991 is available to search for free online at the National Library of Scotland.
Start researching your English ancestors with this free two-part article series:
In this blog and video series I’m showing you how you can create captivating videos about your family history quickly and easily with Animoto.
In the First Episode
In episode 1 we laid a foundation for the family history video that you are going to create. Doing this will save you time and ensure a cohesive, well-told story. We also:
defined your audience
identified and outlined the story that you want to tell
collected the content that you will include in your video
If you missed episode 1, you can watch it below:
Get a Free Animoto.com Account
The first thing to do is to go to Animoto here and sign up for a free trial account, which gives you the full power of Animoto Pro. No credit card is required. This trial period is the perfect opportunity to test drive Animoto and see just how easy it is to use. As I’ve said before, if you can click, drag, and drop, you can make videos with Animoto.
The videos you create during the trial will be watermarked, but still downloadable and shareable. If you decide to use Animoto beyond the trial period, there are several pricing plan options. You can purchase as little as one month for around $16 (check their site for current pricing). If you’ve done your prep work like we did in episode 1, you can create several videos in that time period.
OK, I know you’re anxious to get going, so let’s create a video!
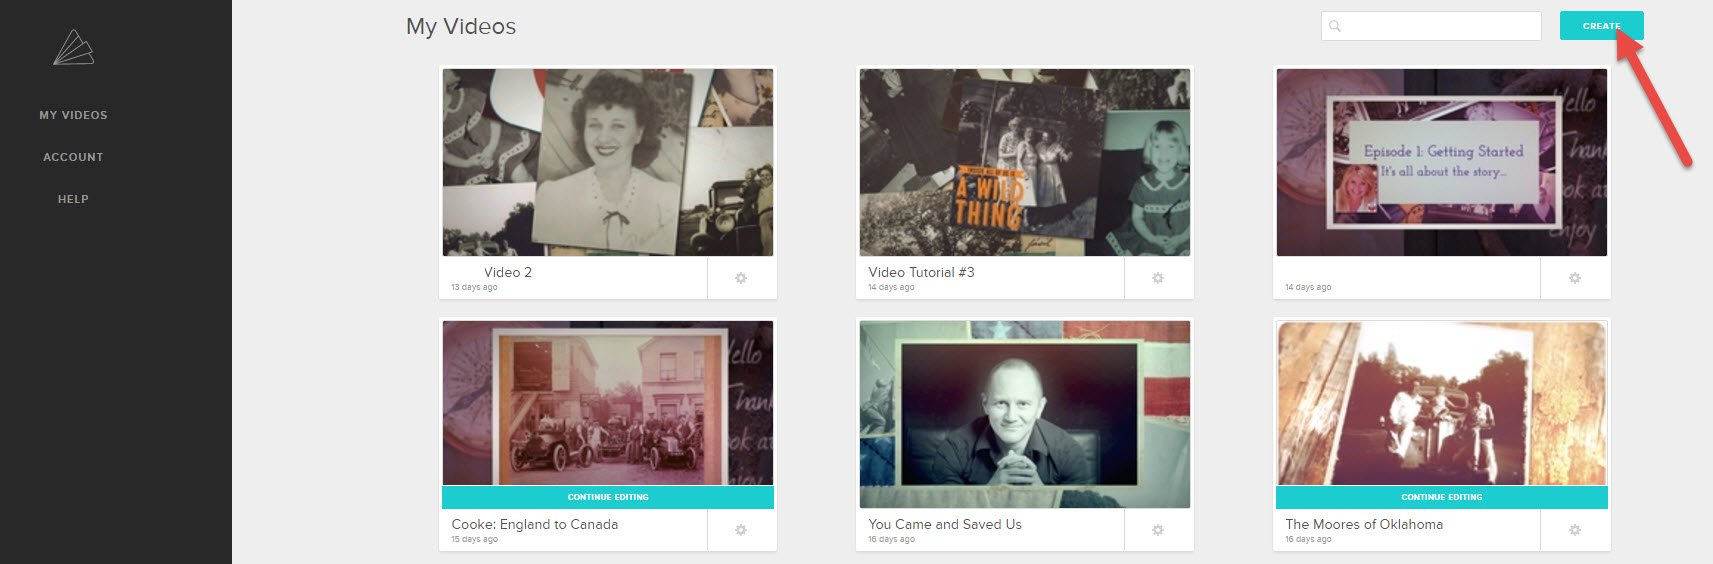
Create!
It’s super easy. Once you’re signed into your account, click the Create button.
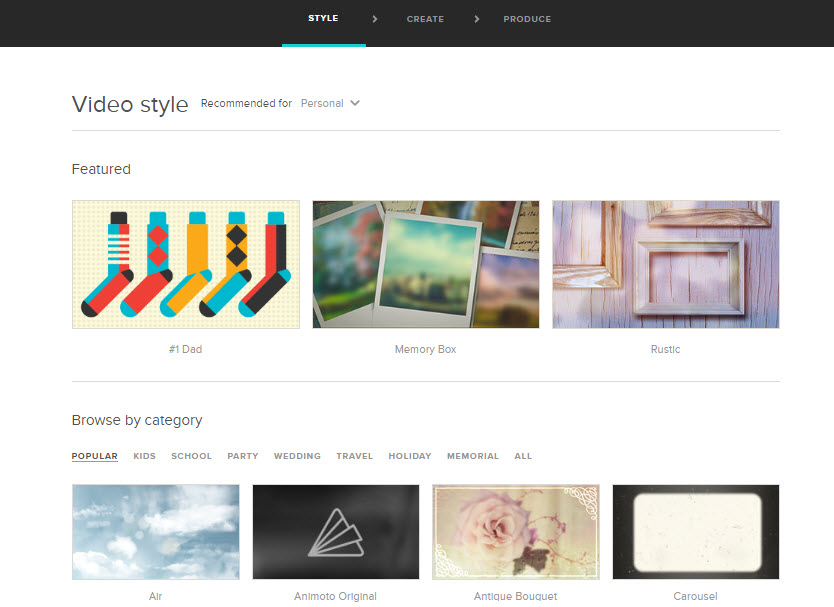
Style
First up, select a style that fits your story. Here are some of my favorites for family history:
Memory Box
Antique Bouquet
Remembrance
Vintage Voyage
Rustic
You’ll notice that some styles have a Premium banner. Those require a Premium subscription. However, if you’ve opted for a Personal level subscription you still have lots of wonderful styles to choose from.
Click on a style that catches your fancy and watch a preview of what it will look like. When you find the one you want, click the Create Video button on that style page. This will load the Video Creator.
Music
The style you chose will include a song, but you can change that if you want to. To select a new song, click Change Song, and you can pick a song from the Animoto library.
You can also upload your own music mp3 file from your computer. (Remember to keep copyright in mind, and make sure you have the rights to use the song.)
But wait, you can add more than music! You can also upload an audio file, such as a family history interview, or even an mp3 file that you created that includes both music and words.
Adding Pictures & Video
Now it’s time to add your photos, images, and video clips. Of course that’s easy because in episode 1 of this series you created an outline for your story, and you copied the files you wanted to use to illustrate that story into a folder on your computer. So you’re all set to go!
There are two ways to add files. From the menu, click AddPics & Vids, or on the timeline click the plus sign in the empty box. In the pop up window you’ll find lots of options for imagery, including stock photos from Animoto. But for now, let’s add the images you put in the folder on your drive (see episode 1).
Under Your Computer click Upload Pictures and Video. Navigate your way to your content folder on your computer’s hard drive. Click to select the first image, and then you can select them all by holding down the shift key on your keyboard, and clicking the last image in the folder. Press Enter on your keyboard to add them to your project.
You can rearrange the order of your images and videos by dragging and dropping them with your mouse. If you decide to eliminate an image, simply click to select it and from the menu click Delete.
Text
Next, we’re going to add text to your videos, creating title cards. Again you can do this from the menu, or just click the plus sign in the empty box on the timeline, and then click Add Text.
In the pop up box you’ll type a title (or the main text) and then you have the option to add a subtitle. This is where the outline we created in Video 1 comes in so handy! When you’re done, click Save. And don’t worry because you can always go back and change any text at any time.
Title cards are great for the beginning and ending of your video and also for transitioning to different parts of the story.
Simply click and drag the cards into the order that you want them.
You can also add text captions to each of your images. Hover your mouse over the image and click Caption under the image. In the pop up window containing your image, click to place your cursor in the text area, type in the desired text, and then click Save.
Spotlighting an Item
You may have a few images or title cards that you want the “camera” to spend a little more time on, thereby spotlighting it. To create that effect, just click to the select the image or title card, and then click Spotlight in the menu. I particularly like to Spotlight title cards so that the viewer has plenty of time to read them.
Previewing
So let’s see how this looks so far, and to do that we’re going to click PreviewVideo. You can preview your video at any time during the production process.
A low resolution version of your family history video will be created in about 15 seconds. Then you can watch and see what little tweaks and changes you want to make. Click Continue Editing to head back to the timeline and keep working.
Next Steps
I hope you’re getting excited about your video projects. Next time we get together, we’re going to bring our projects down the homestretch and produce them into glorious shareable videos.

 Even more historic newspapers are new this week as we head over to Wales. The British Newspaper Archive recently added the Rhyl Journal (Clywd, 1877 – 1897) and Cambrian News (Dyfed, 1863 – 1882) to their database.
 Do you have Native American ancestry? Or are you interested in Native American history? Then explore Fold3’s Native American Collection for free November 1-15, 2017. Their unique collection includes records, documents, and photos never before seen online. All you need is a free Fold3 account to start exploring!
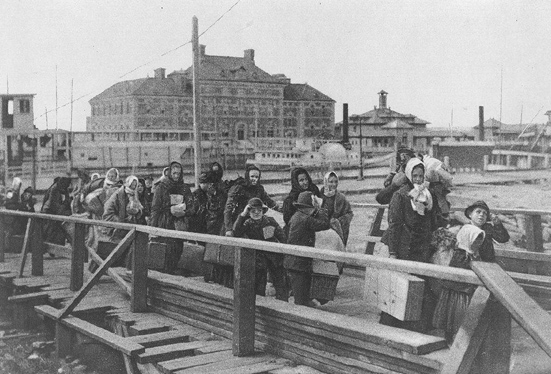


 Video is one of the best ways to tell your family’s story. Imagery, text and music comes together to quickly capture the attention of all ages. But whether it’s a blank computer screen or a blank page, getting started is often the hardest part of any creative project.