In this episode you’ll hear about the change to Google search results, how to reunite found items with their families, and 10 strategies for finding school records for your ancestors.
Watch Elevenses with Lisa live on the Genealogy Gems YouTube channel on Thursdays at 11:00 AM Central. After the live show you can watch the video replay at your convenience. You’ll find the show notes for Elevenses with Lisahere on the Genealogy Gems website.
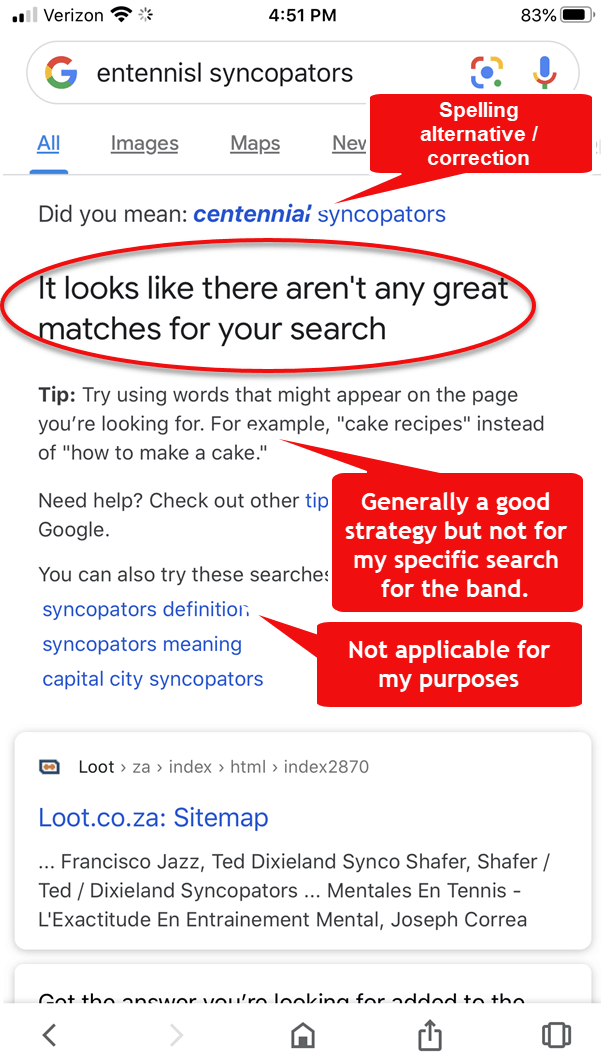
Google Search Update
Watch Episode 6 which features the latest on Google search results.
New Google Message: “No good results.”
MAILBOX: Reuniting Family History
A while back I received an email from Tim. He writes:
“I’m getting back into genealogy in a meaningful way now that my dissertation is done and I realized that I don’t know what to do with all the ‘stuff’ I’ve taken photos of, picked up at yard sales, etc., that could be of genealogical value to someone but not me. I’ve got yearbooks, pictures of the genealogy information inside family bibles, etc. I used to be able to scan and submit to Mocavo for the world to use but that’s gone. With the Rootsweb mailing lists shutting down, do you have recommendations for where I can submit these things so they benefit others?”
From Lisa:
As a matter of I do have a few recommendations for you!
These days a free blog is your own genealogy bulletin board with much greater reach than Rootsweb had. It’s a great way to get the word out about items that you have that you would like to reunite with their families.
Blogger.com (Google’s free blogging platform) is a good choice.
In addition to a photo, include as much text as you can that describes the item.
Tag the items with surnames, record types, and locations.
Encourage people to email you or leave a comment to get in touch.
Interview with Carly Kidd-Osborn
If you have an item that you picked up along your genealogical travels that belongs to someone else’s family history, the Shrubs to Trees – A Pay-It-Forward Genealogy Facebook Group can help. Caryl Kidd-Osborn is the Administrator, and in this episode she explains how the group has helped return over 1500 items to families and how you can enlist their help.
From Caryl: “We are almost 2 years old and in that time we have returned over 1500 “lost” memorabilia items to living family. We’ve given back photos, bronze baby shoes, sheet music that was written by someone’s family member, a marriage license and even someone’s cremains. We aren’t a very big group but we have some wonderful folks who just jump right in with researching the items. It’s a private group since we are dealing with living people. It’s very much a collaboration. Our members are genealogists who, like me, just can’t leave an antique store without taking someone else’s family home with them!”
Here are just a few examples of the precious items that the group has managed to return to grateful families:
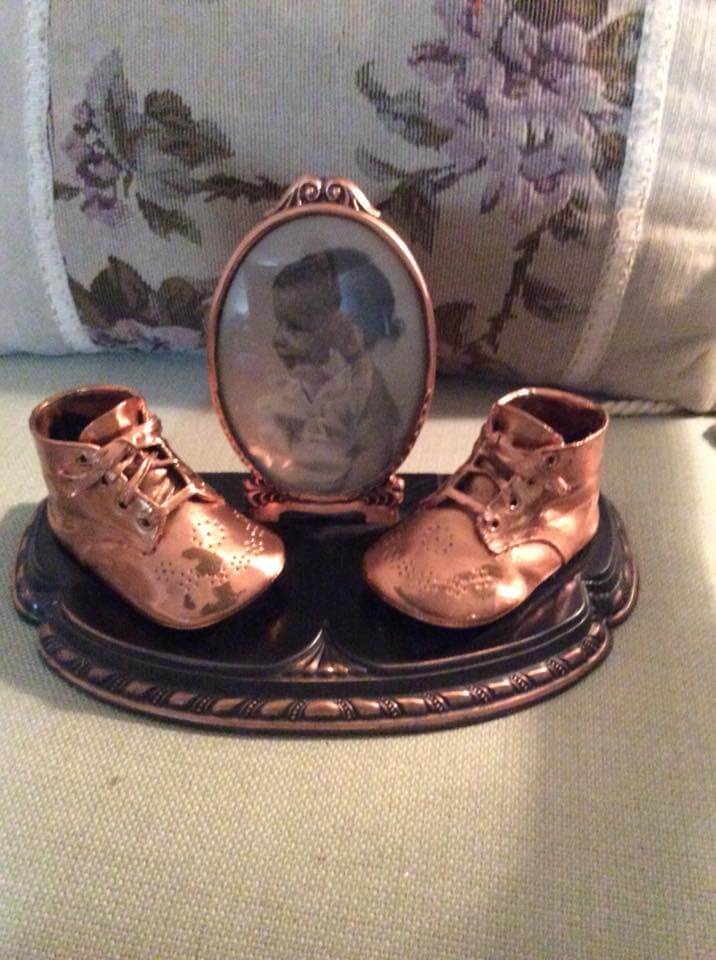
Reunited: Little Renee’s baby shoes
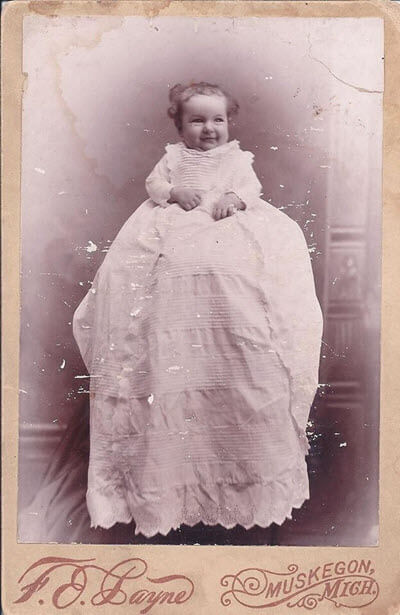
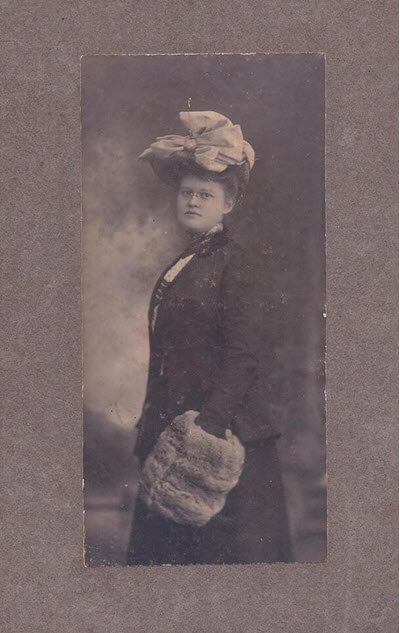
Reunited: A photo of Frances Payne. “Our cutest return,” says Caryl.
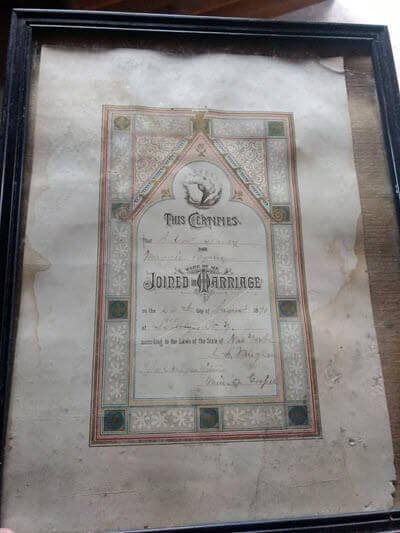
Reunited: Andrew Johney and Maggie Bosley marriage license. This was found at a dump.
Sarah Fooks Tutherly – photo went to the Historical Society in Laurel, DE. The Fooks family was a prominent family in that town, she was a DAR member.
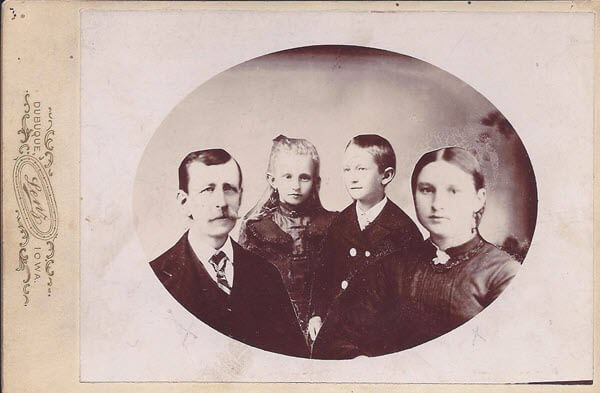
Reunited: The Vandermaas family. The parents had died before the children were of that age so this is a composite of the whole family.
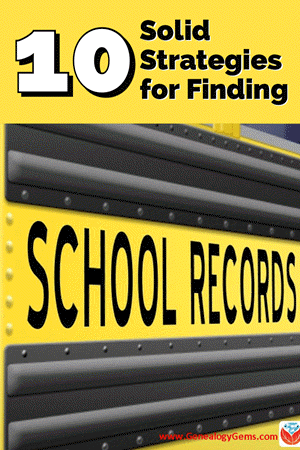
GEM: Top 10 Strategies for Finding School Records for Genealogy
Click here for the complete article on strategies for finding school records.
Gain access to the complete Premium podcast archive of over 150 episodes and more than 50 video webinars, including Lisa Louise Cooke’s newest video The Big Picture in Little Details. Become a member here.
Click to learn more about Genealogy Gems Premium Membership.
Stay Up to Date with the Genealogy Gems Newsletter
The Genealogy Gems email newsletter is the best way to stay informed about what’s available with your Premium eLearning Membership. Click here to sign up today.
In this blog and video series I’m showing you how you can create captivating videos about your family history quickly and easily with Animoto. In this final installment we will put the finishing touches on your video and produce it.
In Episode 1
…we laid a foundation for the family history video that you are going to create. Watch Episode 1 here.
You may notice when you previewed your video that the timing needs a little adjustment because its moving a little too fast or too slowly. You can fine tune the speed at which the images are shown and the length of the song by clicking the Gear icon in the upper right corner of the editor (just above the images). In the pop up window you can trim the song and slide the lever to change the pace. When you’re done, click Save and preview the video again to see the changes. Sometimes adding or subtracting images will also help perfect the pace.
Settings
Before you produce your video, be sure to click the Settings button and take a moment to review the title of your video, how your name appears as the producer, and add a date if you want. You can also add a description, which I highly recommend because it helps the people you share the video with understand what they are about to see.
Call to Action
Another really cool feature in the settings is the Call to Action button. A Call to Action invites your viewers to do something, such as:
visit your family website or blog
visit your family Facebook group (which is a really neat idea, especially when you’re organizing a family reunion)
complete a questionnaire about the family history
There are so many ways to engage your viewers! Animoto allows you to add a Call to Action button to your video at the end that you can link to any where you want to take them on the web.
To add your Call to Action, click to check box for Show Call-to-Action button. Then type in a name to label your button such as Visit our Family Reunion Facebook Page. In the field next to URL, type in or copy and paste the website address. For example: www.genealogygems.com. Click the Save button, and your call to action will appear on your video.
Producing Your Video
After making your edits and previewing your video one last time, you’re ready to produce it. Click the Produce button, which will take you to the Produce Video page. Here you have one more opportunity to edit the title, producer name, date, and description.
On the side bar you can select the resolution size of your video. Producing your video can take a few minutes and depends on the length of your video. The good news is that Animoto will conveniently send an email to notify you when it is ready.
Your final produced video will appear on its own page where you can view it again. You’ll see another link along the side for Video Settings. Click it and you will find additional settings that can now be customized. One important setting is Privacy Options, which lets you to designate whether or not you want to allow viewers to comment on your video or be able to share it on social media. When you’re done, click Save to go back to the video page.
Sharing your Family History Video
Your family history video is now ready for sharing, and there are loads of options available. You can share by:
Email
Facebook
Twitter
sharing a link to the video
uploading it to YouTube
You can also post it on your own website by copying the Embed code and pasting it into the source code of a webpage on your website. Click the More button and you’ll find many more social media options for sharing your video. I would also highly recommend that you download a copy of the video as well to your computer for permanent storage.
Continuing with Animoto
Once your free trial is over you will have to subscribe to Animoto if you wish to continue creating videos. There are many options to choose from so you can find the one that fits your needs.
If you only need to make one or a couple of videos at a time, you could do all your planning before making a purchase. Then you can purchase one month’s Personal use of Animoto. If you have several or ongoing projects, purchasing the 1 year subscription saves quite a bit compared to the monthly subscription. Plans include unlimited HD video creation and sharing. Click this link to go to Animoto and click Pricing at the top of the page for all your options.
Think of the Possibilities!
You could create videos for:
weddings
birthdays
holidays
graduation parties
family reunions
retirement parties
genealogy society events
your genealogy website or blog
tutorials and classroom teaching
your facebook page
…the possibilities are endless! Click here to start your free Animoto trial. And I’d LOVE to see your family history videos! Comment below and include a link to your video.