The Genealogy Gems Podcast
Episode #205
with Lisa Louise Cooke
This episode breaks two huge pieces of genealogy news and shares two great conversations:
FamilySearch ends microfilm lending: how you can get the records you need;
RootsMagic adds Ancestry.com compatibility: sync your Ancestry.com tree to your master RootsMagic file and search Ancestry.com from within the software;
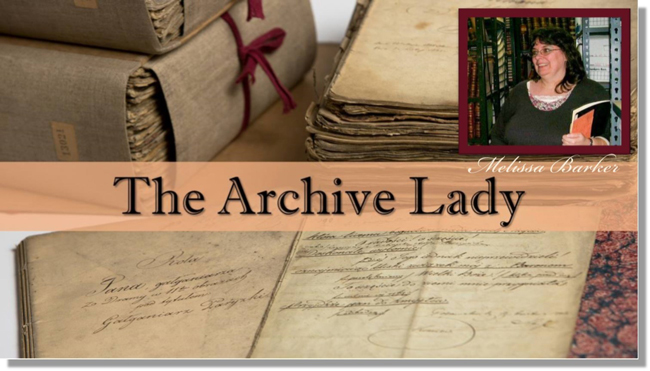
Melissa Barker, the Archive Lady, talks about visiting archives to explore original manuscript record treasures;
Nicole Dyer shares a fun family history activity idea to do with kids?do you have a family gathering coming up that could use this inspiration?
Lisa Louise Cooke shows you how to use the free Google Earth Pro software to create your own historic map collection customized for your genealogy and family history research. By the end of this class you’ll have a permanent collection of hundreds of gorgeous historic and vintage maps from around the world, organized and ready to use for family history.
Click here to watch a free preview of this full-length video class. Genealogy Gems Premium website members can watch the whole thing: click here to learn more.
The 4th Annual Northwest Genealogy Conference
This episode today is brought to you by the 4rd Annual Northwest Genealogy Conference, hosted by the Stillaguamish Valley Genealogical Society, north of Seattle in Arlington, WA. Centering on the theme, “Where Does Your Story Begin?” it’s four days PACKED full of genealogy.
There will be well-known and respected keynote speakers, including our friend and genetic genealogist Diahan Southard, speaking on DNA; Kenyatta Berry of Genealogy Roadshow fame, speaking on Caribbean research and using slave schedules in research; and Daniel Earl speaking on Putting History in Your Family History.
Starting off with the Free Day Wednesday afternoon, Speaker Peggy Lauritzen will address beginner’s issues in her Genealogy 101 presentation, which is also a good refresher for the more seasoned genealogists. There will be such great genealogical information for all levels, AND it’ll be lot of fun!
Between classes take a chance to meet a distant cousin with the “Cousin Wall”. Participate in the genealogy-related scavenger hunt, the Wednesday evening meet and greet and the Friday dress-as-your-ancestor day, and much, much more!
Go to www.NwGC.org for details and to register. Check it out now — registrations are limited, so it’s good to get in early. It’s August 16-19, 2017. It’ll be a great show: don’t miss it!
Items in danger include original items in attics, basements, etc.
What to preserve first? The most precious and original items you have!
Restoration tips:
Clean documents and photos with archival sponges. Lay the item perfectly flat. Gently place a finger or hand to hold it steady. Work with the sponge from the center outward, in small sections.
Keep two-dimensional items as flat as possible.
Encase fragile items in Mylar sleeves (buy from archival supply companies).
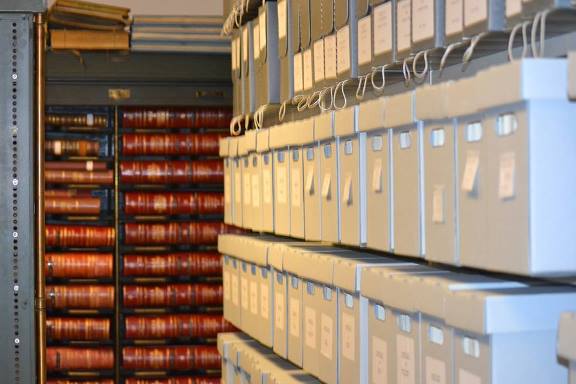
Image courtesy of Melissa Barker and Houston County, TN Archives.
Visiting an archive:
Call ahead! Don’t trust the operational hours from the website. Ask about parking ? it’s often very limited. Ask ahead about access to archival items of interest.
Archive etiquette: Follow the rules. Be courteous when working with staff.
Museums, societies, archives, and libraries may all have collections in back rooms you can’t see?but you can ask for them.
Vertical Files – in folders in cabinets
Manuscript Collections – underused in genealogy! Ask for finding aid.
Loose Records – the working papers of a court case, for example
Unprocessed Records – not yet incorporated into the official collection
Tips for using your mobile devices in archives:
Ask for procedures for taking photos with your own device. There may be rules against this or a use fee.
Capture the source information by photographs: cover page, page number, folder, box number, manuscript collection name, etc.
If you’re listening through the Genealogy Gems app, your bonus audio content for this episode comes from Melissa Barker, the Archive Lady, with more about finding and using original manuscript records in your genealogy research. The Genealogy Gems app is FREE in Google Play and is only $2.99 for Windows, iPhone and iPad users.
Lisa Louise Cooke uses and recommends RootsMagic family history software. From within RootsMagic, you can search historical records on FamilySearch.org, Findmypast.com and MyHeritage.com. RootsMagic is now fully integrated with Ancestry.com, too: you can sync your RootsMagic trees with your Ancestry.com trees and search records on the site.
Keep your family history research, photos, tree software files, videos and all other computer files safely backed up with Backblaze, the official cloud-based computer backup system for Lisa Louise Cooke’s Genealogy Gems. Learn more at http://www.backblaze.com/lisa.
INTERVIEW: NICOLE DYER
Nicole has been researching her ancestors and delighting in their stories for the past 15 years. Nicole volunteers at the Tucson Family History Center teaching a family history story time group for young children.
(Full disclosure: this podcast blog contains affiliate links. We will be compensated if you make a purchase through our link. Isn’t that an awesome way to help keep the free podcast free?!)
Start creating fabulous, irresistible videos about your family history with Animoto.com. You don’t need special video-editing skills: just drag and drop your photos and videos, pick a layout and music, add a little text and voila! You’ve got an awesome video! Try this out for yourself at Animoto.com.
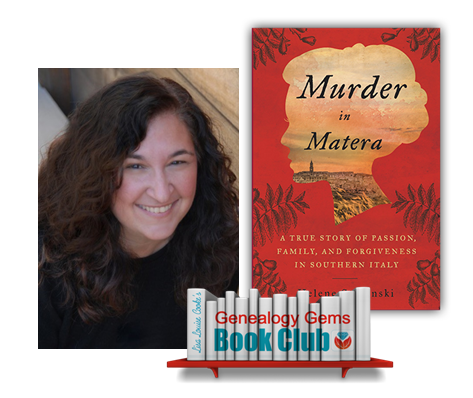
GENEALOGY GEMS BOOK CLUB: A FAMILY HISTORY MURDER MYSTERY!
The Genealogy Gems Podcast Episode 199 with Lisa Louise Cooke
Click the player below to listen:
In this episode, Lisa celebrates Canada’s 150th anniversary with Claire Banton from Library and Archives Canada. You’ll also hear how Lisa will be marking another anniversary in 2017: the 10th year of this Genealogy Gems podcast.
More episode highlights:
An inspiring follow-up email from Gay, whose YouTube discovery Lisa shared in episode 198, and a great conference tip from Barbara just in time for RootsTech.
Genealogy Gems Book Club Guru Sunny Morton announces the new Book Club title.
Your DNA Guide Diahan Southard shares thoughts about DNA testing with kids.
JOIN THE CELEBRATION! 10th ANNIVERSARY AND 200th EPISODE
You’re invited to send in well-wishes and win a chance at a prize!
Share a memory of listening to this podcast, such as: When did you start listening? What’s one of your favorite things you’ve learned from this show?
Lisa will randomly select one response to receive a free year of Genealogy Gems Premium membership. Thanks for helping all of us here at Genealogy Gems celebrate 10 years of doing something we love!
NEWS: ROOTSTECH 2017
RootsTech will be held on February 8-11, 2017 in Salt Lake City, UT: learn more and register.
Lisa will be live-streaming FREE sessions the marked session via the free Periscope app. Get it in Apple’s App Store or Google Play. Sign up for a free account and follow Lisa Louise Cooke to tune in. Sign up for notifications in Periscope, and your phone will “ping” whenever Lisa starts streaming! Broadcasts stay in the Periscope app for 24 hours. Like and follow the Genealogy Gems Facebook page to hear about more streaming sessions!
NEWS: FAMICITY KICK-STARTER
Famicity is a free, private website for families to share pictures, videos, memories, family activities and the family tree. The company has been very successful in France where it was launched, and the founder is working to bring the new English platform to the United States. He’s launched a Kickstarter campaign to support their U.S. launch. Click here to support it.
BONUS CONTENT FOR GENEALOGY GEMS APP USERS If you’re listening through the Genealogy Gems app, your bonus content for this episode is a tutorial on Feedly, an easy way to consume just the online content you want. The Genealogy Gems app is FREE in Google Play and is only $2.99 for Windows, iPhone and iPad users
Lisa Louise Cooke uses and recommends RootsMagic family history software. From within RootsMagic, you can search WebHints on FamilySearch.org, Findmypast.com and MyHeritage.com. Soon RootsMagic will also be able to search records and even sync your tree with Ancestry.com, too.
Keep your family history research, photos, tree software files, videos and all other computer files safely backed up with Backblaze, the official cloud-based computer backup system for Lisa Louise Cooke’s Genealogy Gems. Learn more at http://www.backblaze.com/Lisa.
MAILBOX: YOUTUBE DISCOVERY FOLLOW-UP
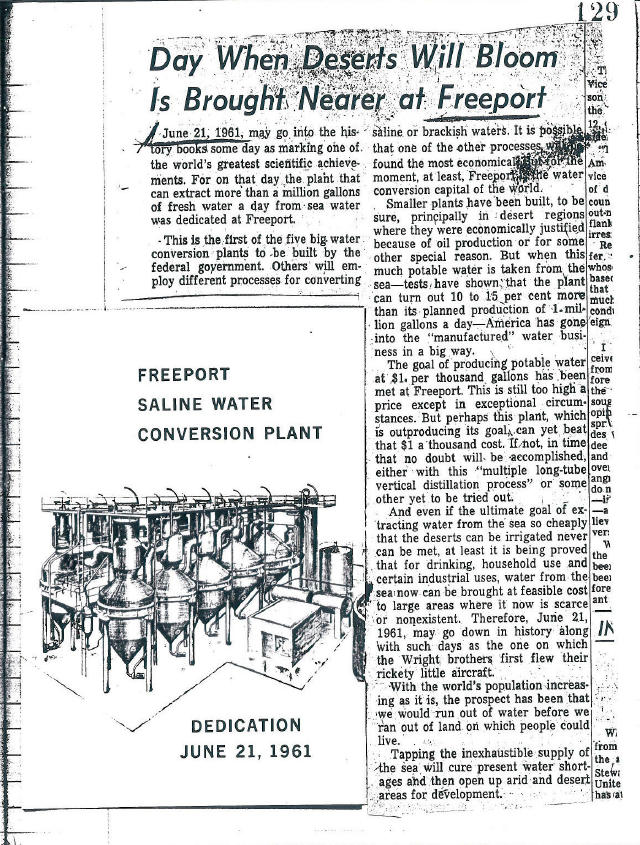
Remember the YouTube success story from Genealogy Gems Podcast episode 198? Gay as a young woman attended a dedication ceremony for the saline water treatment in Freeport, Texas?and with Lisa’s tips she found video footage on YouTube.
Gay wrote back to send us more about that, including this page from her diary that day and this news clipping. Check out the news clipping to see why that plant was so important, Pres. John F. Kennedy gave the dedication speech. (See what newspapers can tell you?!)
Find your own family history on YouTube. Click here to learn how or read an entire chapter on YouTube in Lisa Louise Cooke’s book, The Genealogist’s Google Toolbox, 2nd revised edition.
Click here to learn how to turn family stories and artifacts like these into videos to share with relatives.
Learn to find articles such as this one that can put your family’s story in context?locally and even nationally. Read How to Find Your Family History in Newspapers by Lisa Louise Cooke.
INTERVIEW: CLAIRE BANTON, LIBRARY AND ARCHIVES CANADA (LAC)
Claire Banton obtained her Masters of Library and Information Studies degree in 2006. She has worked in Reference Services at LAC for 10 years, where she has enjoyed learning something new every day. She is currently Chief, Orientation Services, where she works with an awesome team who help people search for information. She loves being an information detective and helping people overcome their research challenges.
Start with the LAC website (genealogy resources page) whether you are visiting in person or not. There are loads of free databases and some unindexed digitized records. The Topics page will tell you what they do and don’t have.
There was no border control from the US to Canada prior to 1908, so there are no Canadian records of earlier crossings. [Tip: see border crossings to the US, 1895-1956 at FamilySearch.org and Ancestry.com.]
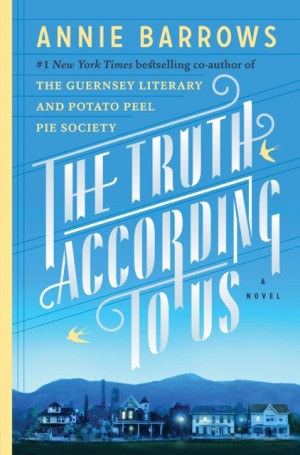
It’s the summer of 1938, and wealthy young socialite Miss Layla Beck is now on the dole as a WPA worker, assigned to write a history of the small town of Macedonia, West Virginia. As she starts asking questions about the town’s past, she is drawn into the secrets of the family she’s staying with?and drawn to a certain handsome member of that family. She and two of those family members take turns narrating the story from different points of view, exploring the theme that historical truth, like beauty, is often in the eye of the beholder.
Click here to read an introduction to using WPA records for genealogy.
I was talking with a fellow mom the other day about all the demands that are placed on kids’ time today. They have school and homework, many have after school sports and clubs, religious meetings, some have jobs or at least chores at home, not to mention all the time required to text, check social media, and hang out with friends. As parents and grandparents, we want our children to spend time on things that matter, things that will prepare them for their future lives and mold them into their future selves.
According to a 2010 study out of Emory University, if we want to encourage kids toward an activity that will positively impact them, we should steer them toward family history. The researchers reported that “children who know stories about relatives who came before them show higher levels of emotional well-being.”
Now, I know I don’t need to convince you of this. You are already sold on genealogy. But I share this in the hope that it will push you over the edge and this will erase any hesitancy you have about sharing this love with your children and grandchildren.
Now, since you know this is me, the genetic genealogist talking, you can probably guess what I’ll suggest for getting kids interested in family history. DNA testing is a great way to personally and physically involve them. First of all, there is the tangible process of taking the sample at home, and the marvel at how such a simple act can produce the amazing display of our ethnicity results.
Since each of us is unique, it will be fun for them to compare with you and other relatives to see who got what bit of where. This will naturally lead to questions about which ancestor provided that bit of Italian or Irish, and wham! You’ll be right there to tell them about how their 5th great grandfather crossed the ocean with only the clothes on his back, determined to make a new start in a new land.
If there are parts of the ethnicity report that you can’t explain, use that as a hook to encourage them to start digging and to find out why you have that smattering of eastern European or south east Asian. Taking them for a tour of the DNA match page you can show them how they share 50% of their DNA with their sister (whether they like it or not!) and how they share 25% with you, their grandparent!
DNA test results give kids a totally unique look at their personal identity with technology that is cutting edge. Looking at their DNA test results can turn into a math lesson, a science lesson, a geography lesson, a lesson on heredity or biology, a discussion on identity?wherever you want to go with it! DNA is the perfect introduction to the wonders that genealogy can hold, especially for children who are so good at wondering.
Click here to learn more about Diahan’s series of how-to videos, available to Gems fans for a special price. Or start your DNA journey with the guide that will help you get started with kids’ genetic genealogy:
Disclosure: This article contains affiliate links and Genealogy Gems will be compensated if you make a purchase after clicking on these links (at no additional cost to you). Thank you for supporting Genealogy Gems!
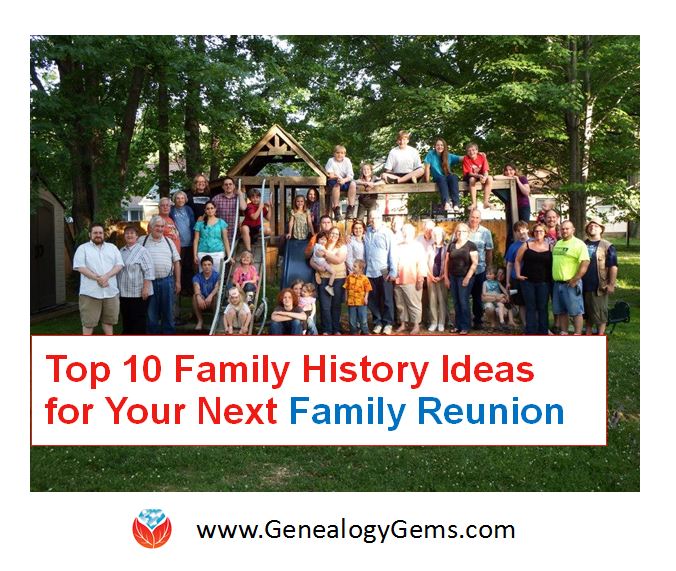
If you’ll be seated at tables, provide an icebreaker that can double as a family history gathering opportunity.
Place a form at each place setting for guests to fill out. (Or a short list of questions for people to answer, if a videographer will make the rounds at each table)
Include questions like:
What’s your earliest childhood memory?
Who’s the earliest ancestor you have a photograph of?
What are three things you remember about great-grandmother?
Can you imagine how thisMartha Stewart placecard on Pinterest (which I found by searching “family reunion history” at Pinterest, a great place for collecting family reunion ideas) might be adapted this way?
3. Put Ancestors at the Center of Things:
Centerpieces or displays that celebrate your heritage will attract curious relatives and may prompt memories and comments.
One of our Premium members sent us a description of her conversation-starting centerpiece: click hereto read about it.
If guests won’t be seated at tables, set up a family history display table next to the refreshments table (where they’re most likely to walk by!). Let them know that this is their gift to you. You could even have some sort of treat or little sticker they can wear that says, “I shared our family history: Have you?”
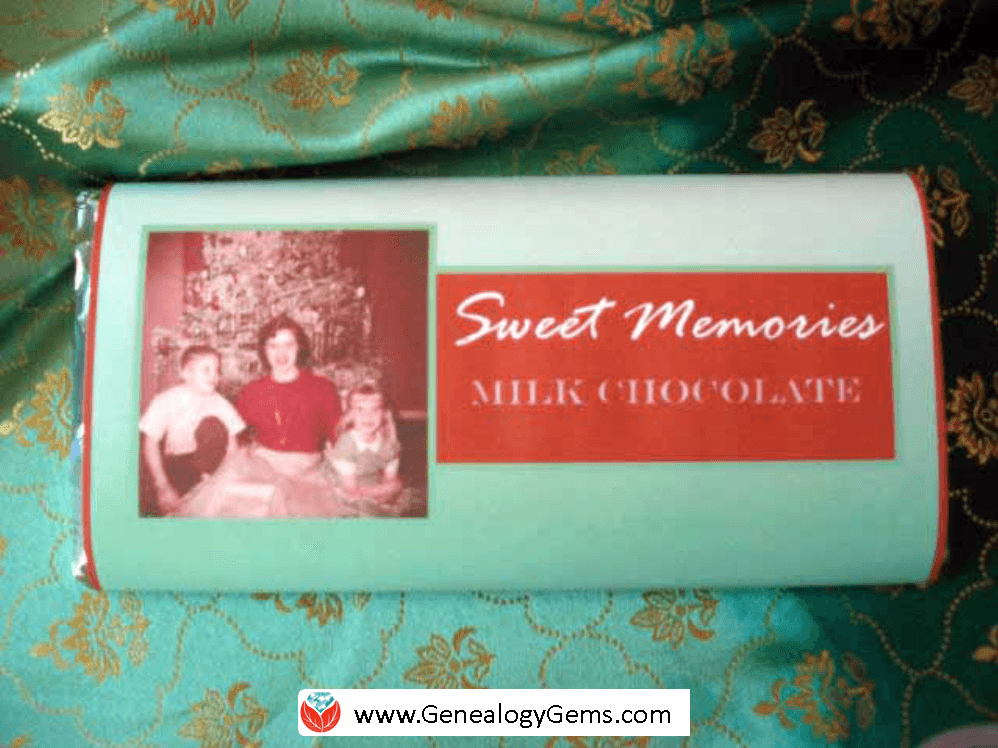
4. Sweet Memories:
Create “Sweet Memories Candy Bars” that feature family history. I write about these in my book Genealogy Gems: Ultimate Research Strategies. They are great conversation starters–and the candy is a definite incentive to get people talking.
My family adored this customized candy bar
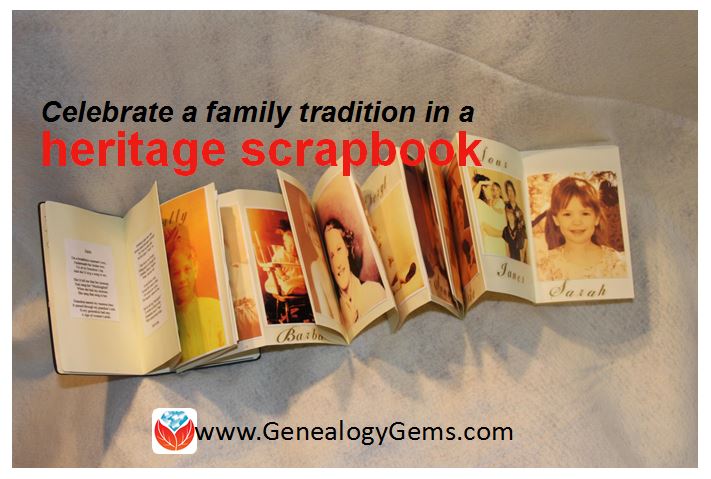
5. Heritage Scrapbook:
A mini, accordion-style scrapbook craft project makes a fun, meaningful activity for all ages. Relatives can work on these alone or in little groups. It’s the kind of project that would be easy to adapt for any family’s background.
6. Have Yourself a Merry Little Family History:
Make a holiday craft that celebrates your heritage. Click here for a free PDF with directions on making a heritage Christmas stocking. Or make a family history-themed wreath, following these instructions I posted on YouTube.
7. Games:
Try a heritage twist on the classic wedding or baby shower games. Create a crossword puzzle or word search with family surnames, hometowns, favorites and more. Here’s a link to one website that creates a puzzle for you for free.
Or invite guests to bring their own baby pictures. Post them for all to see and let your guests guess who each baby is.
8. Cook up some Conversation:
When I was looking for family reunion ideas a while back it occurred to me that my family’s love of food was a great angle to tap into.
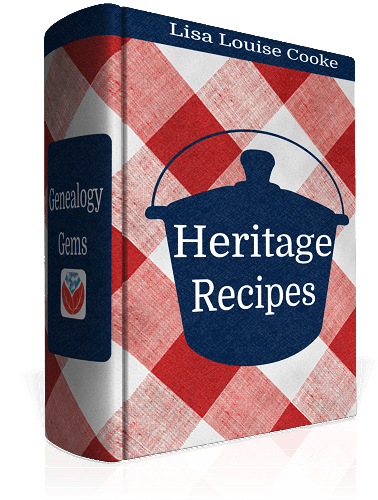
Heritage cookbooks are a time-honored way to share family recipes, and they can double as a reunion fund-raiser if you like.
Ask family members to submit recipes. Add recipes from ancestors. Share them with each family or guest who attends.
Remember, it’s not hard to create an e-book of recipes that you can’t share by email or on Facebook. An easy version of this idea: Snapfishoffers a really cute way to share individual recipes on pre-printed cards. Only one or two recipes required to make this a success!
9. The Amazing Family History Scavenger Hunt:
Create a list of questions that will require some scavenger-hunt type searching among your relatives.
Questions might include finding someone who has at least 10 grandchildren, was born in California, is about to start kindergarten, likes the Beatles, etc.
Research ahead of time so that questions all apply. This activity gets people talking!
10. DNA Day:
Purchase a few DNA kits for genealogy. Have them on hand in case family members want or are willing to have their DNA swabs done. This is especially great if older relatives are coming, but might not complete the swabs if you mailed them to them.
BONUS FAMILY REUNION TIP:
Did you know you can organize a great family reunion on Facebook–even if not everyone is ON Facebook? Click here to read a post with great tips about using Facebook to keep everyone in the loop and share the good times with those who can’t attend.
Be sure to share this article on family reunion ideas with the family reunion planners you know! It can be so helpful to get a fresh burst of ideas when planning big family gatherings.
Welcome to this step-by-step series for beginning genealogists—and more experienced ones who want to brush up or learn something new. I first ran this series in 2008-09. So many people have asked about it, I’m bringing it back in weekly segments.
In today’s episode we finish a multi-part, step-by-step series on setting up your own family history blog. In episode 40 you decided what the purpose of your blog is, and we got you started with the free Blogger web site and picked out your blog name and set up the web address for it, and got the basic framework started. In episode 41 two seasoned bloggers inspired us with their posts.
In this episode I talk about adding a few more gadgets and details, doing a bit of pre-planning for your blog posts, publishing your first article, and then talking about how your readers will subscribe to your blog. You’ll also get great tips on how to create genealogy content that others looking for the same ancestors can find easily online.
Episode 42: How to Start a Genealogy Blog, Part 5
OK, let’s head back to the new blog we created in Episode 40. I named mine Blog Your Family History.(This is just a sample blog: my current blog is part of the Genealogy Gems website.) Please note: blogging platforms change over time. The features and layouts I mention have been updated. Just watch for similar features in newer versions of the blog platform.
So far I have the basic layout set up and I added the vintage photograph of the three ladies sharing some written correspondence. If you’re not signed in to your Google account, you’ll notice a link in the upper right corner of your blog page that says “sign in.” You’ll need to click that and enter your user name and password to get access to your blog dashboard – the area where you customize your blog and write your blog posts.
When you sign in you’ll be taken to the dashboard area for your blog. In my case I have a couple of blogs, so they’ll all be listed here in the dashboard. To get back to your blog just click the View Blog link for the blog you want to view. You’ll notice that when you get there the link in the upper right corner now says “sign out” so you know right now you’re signed in. To get back to the dashboard where we can continue customizing the blog, just click the Customize link in the upper right hand corner of the blog. So far we have a couple of “gadgets” or sections of our blog:
the title area at the top;
the blog posts box. In the case of the blog I’m creating here the gadgets run along the right hand side of the blog page.
About Me
the gadget with the photo I added
A followers gadget showing other blogger readers
the blog archive gadget – this is where readers can access blog posts that are over a month old.
So let’s add another gadget by clicking the Add Gadget link in the top gadget box and a window will pop up showing us out options. I’d like to add a search box so that my readers can easily find articles with keywords they are interested in. So just click the plus sign to add the Search gadget and a Configure Search Box window pops up so I can fine tune this gadget the way I want it. So I’ll keep the title as “Search this blog” since that’s pretty straightforward, and I’m going to just have it search this blog so I will keep that check box checked. And click the SAVE button and now I have a Search box on my blog.
So as you can see adding various gadgets to your blog is easy and you can customize them to appear the way you want. And remember you can rearrange them on your dashboard by just clicking and dragging them into the position you want. Once you get the elements of your blog the way you like them – at least for now, and you can certainly make changes any time you want – then it’s time to start blogging.
What to blog about?
Hopefully you’ve decided what you want to blog about – perhaps a specific line of your family, or maybe you’re going to just sort of journal what you work on each day. No matter what approach you take, there are a few things to keep in mind. First, each time you write an article and publish it to your blog page it’s called a “post.” Post is sort of interchangeable with article, and posting is another word for publishing – basically you’ve made the article available on the web.
When you do post an article you will want people—particularly other researchers—to be able to find it. You’ll have better success attracting readers who are researching the same families if you sort of put yourself in their shoes. Ask yourself, what will they be searching on? When someone goes to Google and starts looking for blogs about their family trees, they are using keywords to do that search.
So while you may have some very creative ideas for blog post titles, if you don’t include some of those important keywords (or at a minimum the surnames) they may never find you. And of course sprinkling keywords into your post will also increase its chances of being found. And when we talk about keywords, we’re also talking about key phrases, such as family history, or family tree. Other good keywords are genealogy, birth, death, research, location names, etc. Just the kinds of things you would search on if you were looking for people writing about your ancestors. Remember too that an ancestor’s name is also a keyword phrase.
It’s a good idea to mix it up because you never know how someone else will be searching. For example, I research my husband’s great great grandfather Senator C J Larson of Winthrop MN. So if I’m writing about him, I will use several variations of his name:
C J Larson
Carl Johan Larson
Charles Larson
Charles J Larson
Senator C J Larson
And of course when I use these names in combination with Winthrop, Sibley County, Minnesota, I’m bound to be found by someone also researching him and his family.
Publish your first post
OK, well let’s get right to how to publish your first blog post. At your blog Dashboard (if you’re not there just click the link in the upper right corner that says Dashboard) and click NEW POST. This is like getting a new piece of paper. You’re new post is under the Posting tab and there’s a box where you can write your text and there are some formatting buttons along the top.
My advice is to bite off small chunks. People tend to read something that looks more like a magazine article rather than a novel. And it’s easier to focus in on one topic at a time. So you may want to make your first post a welcome message and explain to your readers what they’ll will be seeing in the future on your blog. I know, you don’t have any readers yet, but since all of your posts are archived, this post will be read tomorrow and two years from now. New readers can find you at any time, and they may very likely take a look at your first post.
The first thing to do is write your post title. I used to wait to title my posts until after I wrote them because writing them often brought to mind the perfect title. But the problem with that is that so often I would forget to go back and type a title in and I would end up publishing without the title. While you can go back and add the title later, it may show up in your readers RSS feeds including those who subscribe to your blog by email. So I find that it works best if I give it the best working title I can come up with, then I write the post, and then I can go back and change it if I want, but if I forget it will at least have a basic title.
Also, remember that your readers probably have many blogs they read – but they probably don’t READ them all, the probably scan the titles and click through to read the ones that sound interesting. So your title has an important job to do. Like the blog text it should contain keywords that will help the post show up in search results, AND it needs to catch your readers’ attention.
When I first started blogging I was always trying to come up with title that as clearly as possible explained what the post was about. But over time I realized that we don’t have to explain it all in the title. In fact, being a bit mysterious or intriguing with the title can entice the reader to click through and read. They’ll find out soon enough all the details of your posting, but your title sets the tone, and catches their curiosity. Of course I don’t advocate bait and switch – but have fun with your titles and use it to your best advantage. And now FINALLY it’s time to actually write your blog post! Of course you can unleash your creativity here, but I do have a few suggestions:
Keep your paragraphs shorter rather than longer – it just makes them easier and quicker to read
Incorporate those keywords and phrases
A picture says a thousand words – add images whenever possible and I’ll show you how in just a moment
Write in your natural voice. Typically blogs aren’t formal, and you will have an easier time writing if you write more like you speak. And that will come across as more genuine to your readers.
Don’t bite off more than you can chew. If you have a lot to say on a particular topic, consider publishing your thoughts in a series of blog posts rather than one really long one. And I find that readers really like following a series.
Once you’ve got it written up, it’s time to a bit of formatting. In Blogger there are a few different fonts you can choose from. Just like in Microsoft word, you highlight the text you want to format and then select from the drop down menu which font, and font size you want. The default font and size might be just fine, but it’s nice to know you do have some flexibility. You can also bold and italicize text by highlighting the text and clicking either button. And like Word you can use Control-B on your computer keyboard for bold and Control I for italicize. You can also put your text in a different color. Again just highlight the text to be changed and click on the capital T button with the color boxes and click on the color you want.
Now a word about formatting. Remember when we discussed that it was a good idea to avoid blog template designs that had dark backgrounds with light type because they are hard on the eyes and difficult to read? Well, over doing text formatting is much the same. It can get hard on the eyes. It’s like the rule of thumb that says you don’t type in capital letters because it looks like you’re screaming at the reader.
Well, overdoing the formatting with a ton of bold and italics and colors just ends up looking chaotic and nothing really ends up standing out. So keep in mind that less is more and use it sparingly so that only the most important things stand out. And just like in Word you can select whether your text is left right or centered justified, or fully justified. And you can create numbered and bulleted lists simply by highlight the text and clicking one of those buttons. And you can also use the Block Quote feature to set text apart as a quotation by indenting it from both sides.
With all of these formatting features you will probably want to see what it will look like to your readers. And that will be different to a certain extent than how it looks here in the post editor. To see it as it will look when posted, click the Preview link in the upper right corner of the text box. When you’re in preview mode the link will then say Hide Preview and to go back to editing or what they call Compose mode just click that Hide Preview link.
Next is the Spell check button, which is something you’ll want to use every time you post. Thankfully if you make a spelling error you can fix it after it’s posted, but it’s so much easier just to run the spell check before you do. There are a couple of more things you can add to this text post to spice it up.
The next button is the Add Image button and it does just that, adds your images and photos. When you click the button an Upload Images window pops up where you can browse your computer hard drive and locate the image you want to add, or if you have a website you can type in the URL address for an image you already have hosted on your website and it will use that image. Keep in mind that Blogger has an 8 MB image size limit, so you might have to reduce some of your photos and save them as smaller files to be uploaded to Blogger. This is often the case when you’ve scanned old family photos at high resolutions that create quite large files.
Once you’ve told Blogger which image to use, you can also choose how you want it to appear on the page on the left, in the center or on the right with the text around it, or you can just leave it as None. And you can also choose whether it is Small, Medium or Large. When you’re ready to go just click the orange Upload Image button and in a few moments it will be processed and you can just click the Done button, the window will close, and your image will now be in your blog post. Again, if you want to see for sure how it will look to your readers just click the Preview link.
You can even upload a video to your blog post. It works much the same way. Click the video upload button. A window pops up and you click the Browse button to locate the video on your hard drive. Blogger will accept AVI, MPEG, QuickTime, Real, and Windows Media video files up to 100 MB in size which is typically about 10 minutes at most. They also have rules about the kind of videos you can upload and require you to click the check box to agree to their terms of service, and then you just click the orange Upload Video button.
Videos take a few minutes to upload, so at first you’ll see the Blogger Uploading Video screen on the video player. You’ll see down at the bottom that it is processing. Once your video appears on the screen then you’re ready to go. If you don’t want to wait while it finishes processing you can click the SAVE button on your post and check back later to make sure it’s complete before Publishing.
And finally, if you decide you want to remove the formatting from you text you can do so with the last button which looks like an eraser. It’s called Remove Formatting from Selection. So in the case of the text that I set apart as a quote, if I want to change it back to regular text, I just highlight the text with my mouse and click the Eraser button and it will go back to normal. If you happen to know HTML you can click the HTML tab and work with your blog post code to further customize it. When you’re done just click the Compose tab to go back to regular editing mode.
Once you have everything formatted, you’ve spell checked and you’ve reconfirmed your title, your ready to send it out to the world! Just click the orange Publish Now button and it will immediately be live on your blog. The next window will say Your blog post published successfully! And you can just click the View Blog link to open a new window and see your published post.
Edit your previous posts
Now if you’re like me then occasionally you’re going to want to go back and edit one of your blog postings. And thankfully that’s very easy to do. Just head back to your Blogger Dashboard and next to the blue New Post button which you would click to create another post, you’ll find the Edit posts link. Just click that and you will see the articles you’ve posted with the most recent one at the top. If you wanted to delete the post all together you just go to the right hand side and click the Delete link for that particular post. To edit the post click the Edit link on the far left side of the post title. This takes you write back into Compose mode and you can make any changes you want. When you’re done, just click the Publish button.
Schedule posts to publish in the future
Do you want to write several posts at once, and have them automatically publish one at a time—once a day, once a week, etc? There’s an easy way to set up your posts to publish in the future. At the bottom of the Text box you’ll see a link called Post Options, just click that. This will expand the box and give you some options. Here you can enter the date and the time that you want the post to go live online. Once you’ve typed that in then just click the Publish button. It won’t be live right now, but will be published at the date and time you specified.
When I first started using this feature I kept clicking SAVE and then wondering why my posts didn’t publish at the right time. But you have to click the Publish button even though you’re not publishing at that very moment. It’s a neat feature, and works great when you’re going to be away but want articles to be published each day. Or like when we talked about breaking up a long article into a series of short articles, you could create them all and then set them to publish once a day or whatever time frame you preferred.
Now you probably noticed that you could also check a box in the Post Options for allowing your readers to post comments. But the best place to set that up is under the Settings Tab. So go to your dashboard, and click Settings. This will take you to the Settings tab which offers a lot of options. Click on the Comments menu link and here’s where you can make your selections as to how you would like your readers to be able to interact with you and your blog. Instant communication and connection with your readers is one of the really unique aspects of blogging, and you’ll find that most folks who read genealogy blogs are interested in a civil conversation. So let’s go through the options here.
Show: I usually have this set to show comments. But you can hide them if you want.
Under Who Can Comment? I would recommend that you allow anyone to comment. After all, you don’t want to prevent that long lost cousin who finds your family history blog in a search to not be able to contact you.
For Comment Form Placement that’s just a personal preference, but I find the pop up window is easy for readers to use.
Another important feature among these settings is the Comment message. And then next you’ll find Comment Moderation. I would recommend that you always moderate your comments, at least to start. This means that when a reader leaves a comment you will have the opportunity to read it and approve it to be published in the Comments section of that blog posting. That way you can eliminate offensive comments. Honestly, I’ve never received anything objectionable, but occasionally I do get people who are fishing for business and simply post “I like your blog” so that they can then tell about their company and give their website address. There’s no harm in setting it to Always and you can change it later if you want.
Then at the bottom of the Comments Setting I like to type in my email address so that I’ll be notified by email if someone leaves a comment that needs to be moderated. And you moderate and approve comments in your Blogger dashboard.
When you’re done just click the orange SAVE SETTINGS button. And again, you can change these settings any time you want. So how do you moderate reader comments? Well, just click on the Posting Tab, and there will be three options:
New post
Edit Posts
Moderate Comments – just click that link. And if you have comments that need to reviewed and approved or deleted you can do it there.
Let readers subscribe to your blog
And finally, let’s talk about how your readers can subscribe to your blog. That’s the other really cool thing about blogging. Each of your new blog articles can be automatically sent to your readers who subscribe. It’s just like subscribing to a magazine. We subscribe to a magazine so we don’t have to go to the store every day to check to see if a new issue has arrived. Subscribing to a blog is the same idea but of course it’s free. And like magazines being delivered to your mailbox, blog posts can be delivered to your readers blog Reader, or email box.
Your readers subscribe to your blog through your RSS feed. RSS stands for Really Simple Syndication which just means an easy way to send out your posts. But you don’t have to know anything about RSS feeds. Blogger does it all for you and I’m really surprised how many bloggers don’t bother to make it easy for their readers to subscribe. Not everyone who wants to subscribe to your blog will quite know how to do it, or be an experienced blog subscriber. You will want to make it as easy as possible for them to get started. Here’s an easy way to do it.
Go to http://www.google.com/webmasters/add.html. Here you can add an “Add to Google” button to your blog. That way your readers can easily add your blog to their iGoogle homepage or to Google Reader, a tool they can use to receive and read blogs.
For Choose your content type select RSS.
Under Promoting select one blog.
Select the style of button you want to put on your blog
Type your blog address into the box, which needs to be your rss feed. In my case, it’s http://blogyourfamilyhistory.blogspot.com/feeds/posts/default?alt=rss. You substitute your blog name in where mine is currently (your blog name in that link instead of blogyourfamilyhistory).
Click the Generate HTML button. The html code you need to add your button will automatically appear in the box, and it’s already highlighted for you so all you need to do is Control C on your keyboard to copy the code to your computer’s clipboard, and then head back to your Blog dashboard.
Click Layout.
Click Add a Gadget.
Click the HTML / Java Gadget. A window will pop up where you can type in a title such as “Subscribe to this blog.”
In the big box press Control V to paste the HTML code that you copied into the box.
Click the SAVE button.
Back on your Layout page you’ll see at the top that you the “page element has been added” and now the top gadget is “Subscribe to this blog”
Want to see what it looks like? Just click the blue PREVIEW button at the top and it your blog will open up in a new window and there you will see the “Add to Google” button. Now EVERYONE can subscribe and follow your blog quickly and easily. Just close that window, and click the orange SAVE button on your layout page. Now click View Blog and try it out for yourself.
Note: I talk here about iGoogle, which is no longer available.
Add the blog to Google Reader to receive each new blog post when it’s published, and have a link to click through directly to the articles and the blog. It’s very convenient and keeps your blog on the minds and lists of your readers. Now you’re all set to go. You can post your articles, which your readers can follow. As you have more time you can fine tune the settings and layout of your blog. Have fun! Best wishes for connecting with other researchers around the world.
Blogging Tip:
In response to one of our recent tips, a reader named Sarah pointed out that there are services now to “slurp up” blogs and publish them into books. We’ll tell you about one service, but encourage you to shop around. At Sarah’s recommendation, we looked into Blurb.com. According to Blurb’s Web site, this online program works with several blogging platforms including Blogger, LiveJournal, TypePad and WordPress.com.
You can customize and edit your book in real time. The automatic slurp action imports and maps blog text, images and comments and then links it into professionally designed page layouts. What an exciting way to preserve your family history. What a great Christmas gift or Mother’s Day gift.
Once you are ready to publish your book, you can control the price by buying a hardcover, dust jacket, soft cover and other designs. These books can be up to 440 pages and as few as 40. Have a blog book within 10 days of ordering. Now, as you can imagine, this is a little pricey but still very, very reasonable. Prices start at just $12.95 for a 40-page softcover and go up from there. You get bookmaking software free!
Genealogy Gems Podcast Episode 219 In this episode, Lisa shares the stories of Julianne Mangin, who has explored the tragic and twisted stories of her ancestors, Graziella and Philippe Metthe. These stories caught Lisa’s eye: “The tragic tale with...


 MAILBOX: YOUTUBE DISCOVERY FOLLOW-UP
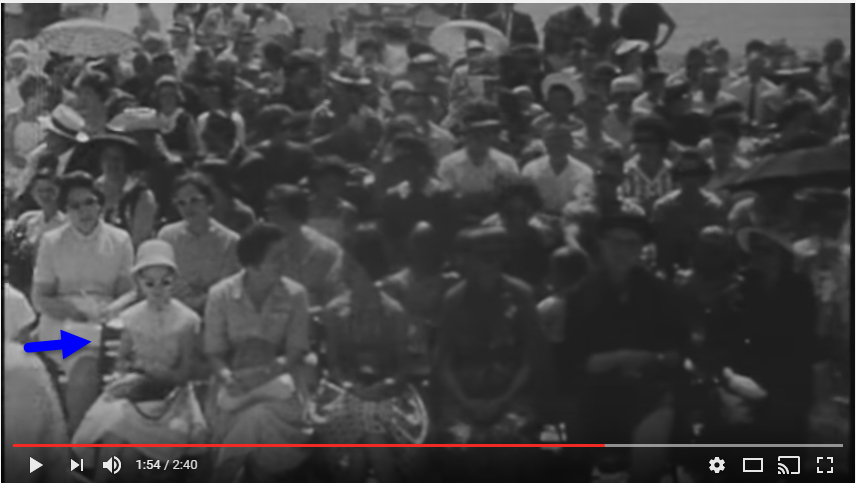


 I was talking with a fellow mom the other day about all the demands that are placed on kids’ time today. They have school and homework, many have after school sports and clubs, religious meetings, some have jobs or at least chores at home, not to mention all the time required to text, check social media, and hang out with friends. As parents and grandparents, we want our children to spend time on things that matter, things that will prepare them for their future lives and mold them into their future selves.