PERSI Adds Thousands of Articles: New Genealogy Records Online
New genealogy records online recently include thousands of articles and images in PERSI, the Periodical Source Index. Also: new and updated Australian vital and parish records, German civil registers, an enormous Japanese newspaper archive, and a variety of newspaper and other resources for US states: AZ, AR, IA, KS, MD, NJ, PA, & TX.
PERSI Update: Thousands of new genealogy articles and images
Findmypast.com updated the Periodical Source Index (PERSI) this week, adding 14,865 new articles, and uploaded 13,039 new images to seven different publications. PERSI is one of those vastly under-utilized genealogy gems: a master subject index of every known genealogical and historical magazine, journal or newsletter ever published! Click here to explore PERSI.
The seven publications to which they’ve added images are as follows:
- North Carolina Historical Commission Biennial Report, 1907-1924, 1944-1962
- Northern Genealogist, 1895-1903
- Old Times-North Yarmouth Maine, 1877-1884
- Olde Ulster, 1905-1914
- Ossory Archaeological Society Transactions, 1879-1886
- Palimpsest, 1920-1923
- Vineland Historical Magazine, 1916-1921
Click here to read an article about using PERSI for genealogy research.
More New Genealogy Records Online Around the World
Australia
Parish registers in Sydney. A new Ancestry.com database has been published: Sydney, Australia, Anglican Parish Registers, 1818-2011. “This database contains baptism, burial, confirmation, marriage, and composite registers from the Anglican Church Diocese of Sydney,” says the collection description. Baptismal records may include name, birth date, gender, name and occupation of mother and father, address, and date and parish of baptism. Confirmation records may include name, age, birth date, address, and the date and parish of confirmation. Marriage records may include the names of bride and groom as well as their age at marriage, parents’ names and the date and parish of the event. Burial records may include the name, gender, address, death date, and date and parish of burial.
Victoria BMD indexes. MyHeritage.com now hosts the following vital records indexes for Victoria, Australia: births (1837-1920), marriages (1837-1942), and deaths (1836-1985). These new databases supplement MyHeritage’s other Victoria collections, including annual and police gazettes. (Note: comparable collections of Victoria vital records are also available to search for free at the Victoria state government website.)
Germany
Just over 858,000 records appear in Ancestry.com’s new database, Halle (Saale), Germany, Deaths, 1874-1957. “This collection contains death records from Halle (Saale) covering the years 1874 up to and including 1957,” states the collection description. “Halle, also known as “Halle on the Saale,” was already a major city by 1890. These records come from the local registry offices, which began keeping vital records in the former Prussian provinces in October 1874. “The collected records are arranged chronologically and usually in bound yearbook form, which are collectively referred to as ‘civil registers.’ For most of the communities included in the collection, corresponding alphabetical directories of names were also created. While churches continued to keep traditional records, the State also mandated that the personal or marital status of the entire population be recorded. (Note: These records are in German. For best results, you should search using German words and location spellings.)”
Japan
A large Japanese newspaper archive has been made available online, as reported by The Japan News. The report states: “The Yomiuri Shimbun has launched a new online archive called Yomiuri Kiji-Kensaku (Yomiuri article search), enabling people to access more than 13 million articles dating back to the newspaper’s first issue in 1874. The archive also includes articles from The Japan News (previously The Daily Yomiuri) dating back to 1989. This content will be useful for people seeking English-language information on Japan…Using the service requires registration. There is a minimum monthly charge of ¥300 plus tax, with any other charges based on how much content is accessed.” Tip: read the use instructions at the article above, before clicking through in the link given in that article.
New Genealogy Records Online for the United States: By State
Arizona. Newspapers.com has added the Arizona Daily Star, with issues from 1879 to 2017. The Arizona Daily Star is a daily morning paper that began publishing in Tucson on January 12, 1879, more than 30 years before Arizona became a state. The Daily Star’s first editor was L.C. Hughes, who would later go on to become governor of the Arizona Territory.
Arkansas. The University of Arkansas Libraries has digitized over 34,000 pages of content for its latest digital collection, the Arkansas Extension Circulars. A recent news article reports that: “The Arkansas Agricultural Extension Service began publishing the Arkansas Extension Circulars in the 1880s. These popular publications covered myriad agriculture-related topics: sewing, gardening and caring for livestock among them. Now, users worldwide can access these guides online.” These practical use articles give insight into the lives of rural and farming families in Arkansas, and feature local clubs and community efforts.
Iowa. The Cedar Rapids Public Library has partnered with The Gazette to make millions of pages of the newspaper available online. The Gazette dates back to 1883, and the new database is keyword searchable. A recent article reports that 2 million pages are currently available online in this searchable archive, with plans to digitize another 1 million pages over the next 18 months.
Kansas. From a recent article: “Complete issues of Fort Hays State University’s Reveille yearbooks – from the first in 1914 to the last in 2003 – are now online, freely available to the public in clean, crisp, fast-loading and searchable digital versions in Forsyth Library’s FHSU Scholars Repository.” Click here to go directly to the yearbook archive and start exploring.
Maryland. New at Ancestry.com: Maryland, Catholic Families, 1753-1851 (a small collection of 13.5k records, but an important point of origin for many US families). “Judging from the 12,000-name index at the back of the volume, for sheer coverage this must be the starting point for Western Maryland Catholic genealogy,” states the description for this collection of birth, baptismal, marriage, and death records for the parishes of St. Ignatius in Mt. Savage, and St. Mary’s in Cumberland, Maryland. Find a brief history of Catholicism in western Maryland with lists of priests and a summary of congregational growth. Then find lists of marriages, baptisms, deaths, and burials, and even lists of those “who appeared at Easter Confession, confirmation, communion, or who pledged financial support for the parish priest.”
New Jersey. Findmypast.com subscribers may now access small but historically and genealogically important collections of baptismal records (1746-1795) and additional church records (1747-1794) for Hannover, Morris County, New Jersey. States the first collection description, “Despite being small in population, the township is rich in history. It was the first settlement established in northwest New Jersey, dating back to 1685, and is situated by the Whippany River.” The second group of records “pertains to an active time in Hanover, with the resurgence of religious revivals kicking off around 1740. The most populous denominations in the latter half of the 1700s were Presbyterian, Society of Friends (Quaker), Dutch Reformed, Baptist, and Episcopal.”
Pennsylvania. The Carlisle Indian Industrial School, located in Carlisle, PA, was a federally-funded boarding school for Native American children from 1879 through 1918. The Carlisle Indian School Digital Resource Center is a project that is building an online searchable database of resources to preserve the history of the school and the students who attended there.
They recently announced a new resource titled Cemetery Information. According to the site, this collection provides “easy access to a wide range of primary source documents about the cemetery and the Carlisle Indian School students interred there.” Available materials include an individual page for every person interred there with their basic information, downloadable primary source materials about their death, an interactive aerial map of the cemetery, and more.
Texas. The Texas State Library and Archives Commission has digitized a series of collections featuring archival holdings from the First World War through the Texas Digital Archive. These collections are:
- The Frank S. Tillman Collection: “The bulk of the collection focuses on the Thirty-Sixth Division and also features items from the Ninetieth Division, the Adjutant General of Texas, and other Texas soldiers.”
- General John A. Hulen Papers:”Highlights include correspondence, photographs, and scrapbooks, dating 1887-1960.”
- 36th Division Association Papers: “The papers include correspondence, reports, military records, and scrapbooks, dating 1857-1954. Records relate to Texans’ experience during World War I, railroads in Texas, and the San Jacinto Monument.”
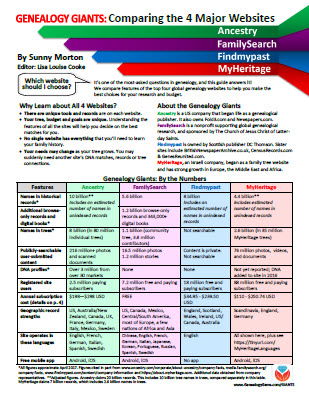 What genealogy websites are you using? Which additional ones should you also be using?
Learn more about the giant genealogy websites mentioned in this post–and how they stack up to the other big sites–in our unique, must-have quick reference guide, Genealogy Giants, Comparing the 4 Major Websites, by Genealogy Gems editor Sunny Morton. You’ll learn how knowing the relative strengths and weaknesses of Ancestry.com, FamilySearch.org, Findmypast.com and MyHeritage.com can help your research. There’s more than one site out there–and you should be using as many of them as possible. The guide does share information about how to access library editions of these websites for free. This inexpensive guide is worth every penny–and may very well help you save money.
Disclosure: This post contains affiliate links and Genealogy Gems will be compensated if you make a purchase after clicking on these links (at no additional cost to you). Thank you for supporting Genealogy Gems!
Featured Success Story From our Reader Celebrating our 200th Episode
The Genealogy Gems Podcast recently celebrated our 200th episode and 10th anniversary! Can you believe it? We couldn’t have made it without you, our Gems listeners and readers…thank you! We asked you to share with us how Genealogy Gems has helped you along...Genealogy Gems Podcast Episode 244 – Ancestry Search Tips
Podcast host: Lisa Louise Cooke
August 2020
Everyone is spending a lot more time at home and online. That means it’s the perfect time to dig into Ancestry.com and talk about strategies that you can use to get the most out of it.
Today’s show comes from my Elevenses with Lisa YouTube Live show. Many podcast listeners have told me they hadn’t really thought about sitting down to watch YouTube videos. And my video viewers say the same thing about listening to audio podcasts. However, when they venture out, they find they really appreciate what each has to offer.
Podcasts let you exercise, work around the house and generally be pretty active even while you’re listening and learning. The live YouTube show is a chance to take a mid-week break, enjoy a cup of tea, watch the show and even chat with other genealogists in the show Chat. The video replays are great in the evening when there’s nothing to watch on TV.
They work together. You can watch the video first and enjoy the show’s community. Then you can listen again later to pick up what you may have missed or sit down to your computer to give the techniques a try.
My goal is that you’re going to learn something new that’s going to help you achieve greater success in your genealogy! Click the player below to listen to the podcast:
Ancestry Search Strategies and Tips
Watch the video and read the full show notes here.
Genealogy Gems Premium Members can download the show notes PDF from the Resources section on that page.
Become a Genealogy Gems Premium eLearning Member
Premium Members have exclusive access to video classes and downloadable handouts, the Genealogy Gems Premium Podcast. and Elevenses with Lisa downloadable show notes PDF. Become a member here.

Profile America: On a Roll – The History of Toilet Paper
Sunday, August 23rd.
Often unmentionable and little regarded, a 130 year old American invention enjoyed—if that’s the word—considerable attention earlier this year.
In 1890, toilet paper on a dispensing roll was patented by the founders of today’s Scott Brand of paper products.
Toilet paper itself dates back about 1,500 years to China, but didn’t develop until the mid-19th Century. Some perforated and medicated versions were available in America before the Scott product, but weren’t successful.
In spite of demand-driven shortages, America is on a roll when it comes to stocking this species of sanitary paper.
Nationwide, there are 132 establishments producing sanitary paper products. These operations employ over 17,000 people in the $13-billion enterprise.
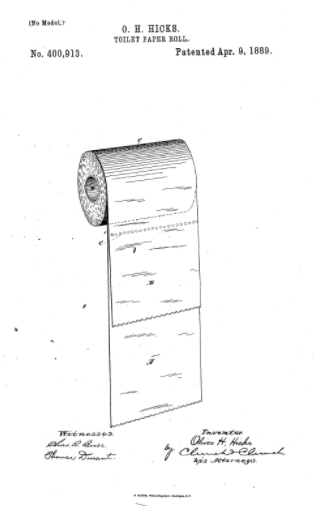
Toilet Paper Patent Application from 1889
Sources:
- Scott Paper patent and product, accessed 4/2/2020
- Scott Brand, accessed 4/2/2020
- History, accessed 4/2/2020
Get the Genealogy Gems Podcast App
Get the right app for your phone or tablet here.
Our Genealogy Gems podcast app includes bonus content
Getting Your Family History Digitized
I use Larsen Digital and have been extremely pleased with the service and results. The folks at Larsen Digital have put together special and exclusive discounts for Genealogy Gems listeners and readers. Click here to learn more and receive exclusive discounts and coupon codes.
Stay Up to Date with the Genealogy Gems Newsletter
The Genealogy Gems email newsletter is the best way to stay informed about what’s available with your Premium eLearning Membership. Click here to sign up today.
Get Unlimited Photo Enhancement and Colorization at MyHeritage
Get genealogy records and unlimited Enhanced and Colorized photos as a MyHeritage PremiumPlus or Complete Plan Subscriber. Click here to start a free trial.
Protect Your Genealogy the Way Lisa Does!
Computer cloud back up is an essential part of your genealogy protection strategy. Visit https://www.backblaze.com/Lisa.html
Follow Lisa and Genealogy Gems on Social Media:
- Instagram.com/genealogygemspodcast

- Facebook.com/genealogygems
- Pinterest.com/lisalouisecooke
- YouTube.com/GenealogyGems
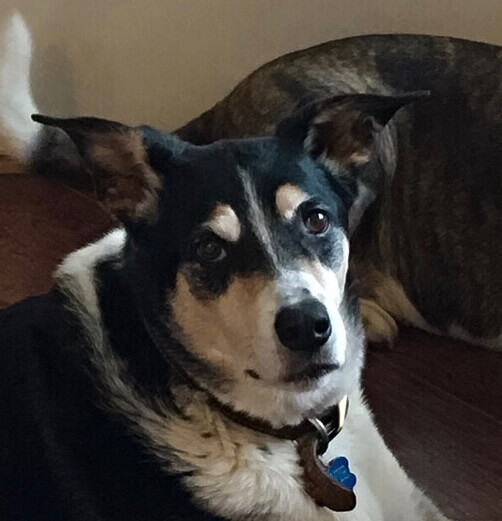
This episode is Dedicated to Howie
We adopted Howie in 2005, and soon after in early 2007 I started this podcast. Howie took his place at my feet, and he’s been there for every recording. He’s been my silent podcasting partner and he will be missed beyond words.
Podcast Resources
Colonial Genealogy: Find Your Early American Ancestors
Early American Ancestors Research
Elevenses with Lisa Episode 33

Lindsay Fulton, VP New England Historic Genealogical Society (NEHGS)
In this episode we head back to 17th century New England with Lindsay Fulton of the New England Historic Genealogical Society and AmericanAncestors.org
Lindsay Fulton is with American Ancestors and New England Historic Genealogical Society where leads the Research and Library Services team as Vice President. She is a frequent contributor to the NEHGS blog and was featured in the Emmy-Winning Program: Finding your Roots: The Seedlings, a web series inspired by the popular PBS series “Finding Your Roots.”
Watch the video and follow along with the show notes below as we cover how to get started researching our early American ancestors. Lindsay will also provide her top genealogical resources.
Getting Started with Colonial-Era Research
During this period of American history, New England includes:
- Connecticut
- Maine
- Massachusetts
- New Hampshire
- Rhode Island
- Vermont
To get started in Colonial-Era genealogical research, Lindsay says the first thing you need to do is put your ancestors into an historical context:
- When did they arrive in New England?
- Where did they migrate to?
Significant dates and events at this time include:
- The Mayflower’s arrival in 1620
- The Great Migration: 1620-1640, with the peak years between 1633 and 1638.
- The Civil War in England, which slowed migration.
Turn to the book The Expansion of New England, The spread of New England Settlement and Institutions to the Mississippi Rover 1620-1865 by L. K. Mathews. Published in 1909 this important book includes 30 to 40 historical maps.
More Resources for 17th Century American Genealogy Research
Book: Genealogists Handbook for New England Research, 5th Edition. Edited by Michael J. Leclerc. This book includes important detailed information on towns, cities, and states. It will help you determine where to look for records during a given timeframe.
Resources at the American Ancestors website
- AmericanAncestors.org > Town Guides (Free)
- AmericanAncestors.org/town-guides/ for New England
Early New England Finding Aids
Finding Aids provide a comprehensive list of all the available records for a person / family.
The first place to look for people settling in New England prior to 1700: New England Marriages Prior to 1700 by Clarence Almon Torrey. This book includes scholarship prior to 1962. Learn more about it here.
The next place to look: Founders of Early American Families by Meredith Colkert. Scholarship goes a little further than 1962 and ventures beyond New England. This book covers 1607-1657.
The next place to look: New Englanders in the 1600s, A Guide to Genealogical Research Published Between 1980 and 2010 by Martin E. Hollick. At the beginning of the book there is a key to all of the original sources. For example, TAG refers to The American Genealogist.
From Lindsay: “The thing about 17th century research, like a said at the beginning, the most studied people on the planet. So, don’t reinvent the wheel, don’t drive yourself crazy trying to find all of this information on your own. You have to stand on the shoulders of those who have come before you. There are all of these people who have done all this research before. Please look at first. Always look at with a little bit of hesitation because there’s always possibilities that mistakes were made. But at least take a peek at what’s already been done first!”
Colonial-Era Study Projects
The first example that Lindsay provided of a study project for early American ancestors is the Great Migration Study Project (searchable online database at AmericanAncestors.org)
- Directed by Robert Charles Anderson, FASG
- Started in 1988
- Genealogical and biographical sketch for immigrants to New England from 1620 to 1640
- Fourteen published volumes
- Newsletter (bound versions available)
- Tours and other educational programs
- Searchable online databases
Published Volumes:
- The Great Migration Directory, Immigrants to New England, 1620-1640
- The Great Migration Begins: Immigrants to New England 1620-1633 (3 vols.)
- The Great Migration: Immigrants to New England 1634-1635 (7 vols.)
- The Pilgrim Migration: Immigrants to Plymouth Colony 1620-1633
- The Winthrop Fleet: Massachusetts Bay Company Immigrants to New England 1629-1630
- The Great Migration Newsletter, vols. 1-20
- The Mayflower Migration: Immigrants to Plymouth, 1620
Those who are included in the study project:
- If person appeared in a record
- Direct or indirect implication of arrival
- Appearance of an immediate family of a person known to have arrived
The second study project example was the Early New England Families Study Project
- Directed by Alicia Crane Williams
- Genealogical and biographical sketch for those who married in New England from 1641 to 1700
- Grouped by year of marriage
- Two published volumes
- Searchable online database
- New sketches posted online
Who is included:
- Using Clarence Almon Torrey’s New England Marriages Prior to 1700 as guide
- Anyone who married in New England in this time period and included in Torrey
Compiled New England Genealogies
There are millions of compiled genealogies available for early American ancestors. Lindsay discussed three publications (available in book form) that are state specific:
- Pioneers of Massachusetts 1620-1650 one of many book by Charles Henry Pope
- Genealogical Notes, or Contributions to the Family History of Some of the First Settlers of Connecticut and Massachusetts, by Nathaniel Goodwin
- Genealogical Dictionary of Maine and New Hampshire by Noyes, Libby, and Davis
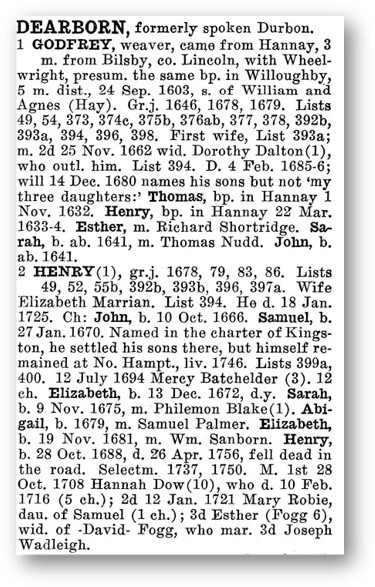
Example from a New England compiled genealogy.
Periodicals
- New England Historical and Genealogical Register (published since 1847)
- New York Biographical & Genealogical Record
- The Mayflower Descendant
- The American Genealogist
- and more!
These can be searched on AmericanAncestors.org: Database Search > Select the Category Journals and Periodicals, and then scroll through all of the available items. They are fully searchable. You will be able to see the actual record. You can download and print the items.
Mayflower Research Resources
The Silver books and the Pink books done by the General Society of Mayflower Descendants. It’s looking at those passengers with known descendants. These are only available currently in book form. If you are interested in applying to the Mayflower Society, they accept these as original records. You can cite the pages. (Learn more about Mayflower related resources at American Ancestors.)
Mayflower Families 5th Gen. Desc.
- Available at AmericanAncestors.org
- Index of all the 5th Generation descendants,
their spouses and children - 31 volumes in total.
- Over 385,000 searchable names
Visit: Database List A – Z at American Ancestors.
If you click Mayflower Families Fifth Generation Descendants, 1700-1880, it will take you to a search page where you can search by names and years, or search by volumes. It will bring up all of the available records.
General Society of Mayflower Descendants (GSMD) Membership Applications, 1620-1920
- New – available soon. Only on AmericanAncestors.org
- Contains all Mayflower Society Applications for applicants born before 1920. Approximately ~30,000 applications
- All data indexed for each generation
- Available to: American Ancestors & NEHGS Members, FamilySearch Affiliate members, and GSMD Members.
New England Genealogy Records
When doing New England genealogy research look for the following records:
- Vital Records
- Church Records
- Cemetery Records
- Probate Records Court Records
- Town Records
- Military Records
- Notarial Records
Usually you’ll be looking at the town level. This is why you must know where your ancestors were living, and what the place was called at that time, and what the borders were.
Be sure to check out 17th-Century New England Research page at the American Ancestors website for more New England tips, tricks and strategies.
Answers to Questions about Early America Genealogy Research
You can schedule a consultation with an expert genealogist on staff at NEHGS.
Length: 30 minutes to 2 hours
Conducted over Zoom or over the phone. A recording is provided.
Contact: research@nehgs.org
Fee: $85 (members) or $105 (non-member)
More on Using the American Ancestors Website
Premium Podcast episode 177 (Genealogy Gems Premium Membership is required.) In this episode we explore the New England Historic Genealogical Society’s American Ancestors website with Claire Vail, Director of Creative and Digital Strategy for the New England Historic Genealogical Society.
Answers to Your Live Chat Questions About Colonial American Genealogy
One of the advantages of tuning into the live broadcast of each Elevenses with Lisa show is participating in the Live Chat and asking your questions.
From Susan W: Is there a source for Rhode Island? (I’m not sure if she was thinking about one particular resource you mentioned or generally. Perhaps she just needs a RI finding aid?)
From Lindsay: Yes! American Ancestors-NEHGS has a fantastic guide to Rhode Island research, which you can access with a free guest membership here.
From Cindy A: What percentage of the items you showed would require a paid membership?
From Lindsay: The majority of the databases shown are included as a benefit of membership with American Ancestors-NEHGS, but if you are interested in Colonial American genealogy, you should consider membership. We have hundreds of databases that will help you to discover more about your 17th and 18th Century ancestry. You can learn more about these databases (and books in the library) with a free guest membership.
From Sue M: What resource was Nathan Snow in. He’s related to my BATES family.
From Lindsay: Nathan Snow was included in the American Ancestors-NEHGS database, Mayflower Families Fifth Generation Descendants, 1700-1880. This database supports the following searchable fields: First and last name, Year, Record type, Location, Family member names: Spouse, Mother and Father (where available), Keyword – for names in the lineage text of direct descendants.
From Kathy M: Excellent. Can you comment on both land inheritance (i.e. did it follow English primogeniture) and on best sources for finding 1600 female ancestors’ family names.
From Lindsay: Alicia Crane Williams wrote a blog post about this entitled, Probate records: Part One, where she states, “for the most part, a testator could leave anything to anyone, unless they were dealing with colonies such as Virginia that followed the laws of primogeniture where all real estate was left to the oldest son. This did not apply in New England, although it was customary to follow the legal model of giving a double share to the oldest son. A legitimate heir who was left out of a will could potentially contest it in court, thus the bequests of one pound or one dollar to cover any claim that someone had been accidentally forgotten.” For more information about land inheritance in New England (and the U.S.), you should examine Wade Hone’s Land & Property Research in the United States. It is an excellent deep-dive into land records. As for female ancestors’ family names in the 1600s, I would recommend examining Torrey’s New England Marriages and Hollick’s New Englanders in the 1600s. Those are the two best places to start your search for the ladies in your family (I covered these in the episode too).
From Louann H: Suggestions for time period 1660-1776?
From Lindsay: Many of the resources discussed during the presentation covered the 17th century, and would be your best bet for resources for 1660-1700. You can learn more about these databases (and books in the library) with a free guest membership. After 1700, there are few compiled resources similar to the Great Migration Study Project; however, you could start with a search of the American Ancestors-NEHGS Library catalog. We have thousands of published genealogies that may cover your family history in the first half of the 18th Century.
From Jane C: This has been wonderful, doing Mayflower research. What are Notarial Records?
From Lindsay: Notarial records are a private agreement written by a notary in the form of a contract. Some of the most common ones are marriage contracts, wills, estate inventories, leases, and sales contracts. While they were not common record keeping practices in New England and New York, notarial records were plentiful in Quebec. You can learn more about them by watching our free webinar called Navigating Notarial Records in Quebec.
News You Can Use: Google Photos Update
Google Photos is currently the home of more than 4 trillion photos and videos of users around the world. According to Google, 29 billion new photos and videos are uploaded every week. They just announced that starting June 1, 20201 “all new photos and videos backed up in High Quality will count toward the free 15 GB of storage that comes with your Google account or any additional storage you may have purchased, the same way other Google services like Google Drive and Gmail already do.”
Watch Elevenses with Lisa episode 23 to learn more about Google Photos.
In that episode we discuss that “High Quality” is the slightly compressed version of images and videos and “Original” quality are full size, uncompressed images and videos. In the past you could upload “High Quality” for free.
All “High Quality” content uploaded before June 1, 2021 is exempt from counting against your storage. On that date they plan to launch a new storage management tool that they say will help you easily identify items you’re currently storing that you may want to remove if they are low quality or otherwise unwanted. This will help you reduce the amount of storage you use.
If you don’t want to pay for additional storage, here are some tips:
- Use Google Photos as a tool for specific projects rather than a complete storage system.
- Turn off auto-sync of your photos from your phone and other devices.
- Carefully select and manually add images and videos.
Resources
Get My Free Genealogy Gems Weekly Email Newsletter
The newsletter is your guide to upcoming shows, articles, videos, podcasts and new Premium content.
Bonus Download exclusively for Premium Members: Download the show notes handout.
Become a Genealogy Gems Premium Member today.
Please leave a comment below:
- Do you have a question?
- Do you have a favorite 17th century resource?
- Do you have New England success story?
Please share in the Comments below.


