by Lisa Cooke | Sep 2, 2013 | 01 What's New
On August 15 I posted a compelling video and article on my Facebook page about the importance of hard word and making your own luck, values I am fortunate that my ancestors passed on to me. The speech came from an unlikely source: a young Hollywood actor. In the video, Ashton Kutcher stands in front of a bunch of teenagers at the Teen Choice Awards talking about the importance of hard work:
“When I was 13, I had my first job with my dad carrying shingles up to the roof, and then I got a job washing dishes at a restaurant, and then I got a job in a grocery store deli, and then I got a job at a factory sweeping Cheerio dust off the ground,” Kutcher said. “And I’ve never had a job in my life that I was better than. I was always just lucky to have a job. And every job I had was a stepping stone to my next job, and I never quit my job until I had my next job. And so opportunities look a lot like work.”
The video went wildly viral (which is how I came across it) and it got me to thinking about my own work ethic. The credit for it sits squarely on my dad’s shoulders, and also my grandparents shoulders, and their grandparents shoulders.
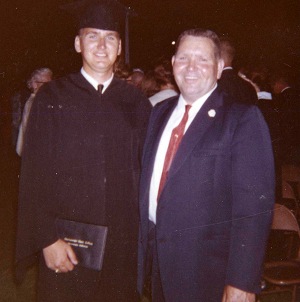
My dad was the first in his family to get a college degree. He went to school and studied all day and worked in the local hospital morgue at night! (image left: Dad and my proud Grandpa at Dad’s Graduation) I remember endless nights as a kid creeping up behind him as he sat in at the makeshift office in my parent’s master bedroom, puffing on a pipe and studying for his CPA. We didn’t have much in common to talk about, but it was what I saw in action that was communicating to me. Dad went on to become a successful businessman in a large company, and later created several vibrant businesses.
I guess it was that non-verbal communication between father and daughter that inspired me as a kid to pull weeds, babysit and yes even shingle the side of the garage to make a few bucks. And I vividly remember taking a temporary job caring for a 100 old year woman for a few weeks one summer. She was testy at first as she felt generally ignored, but warmed up to her inquisitive caregiver until she was soon sharing stories of traveling as a little girl in a covered wagon. She’d found her audience and I was entranced.
At 15 I lied about my age so I could get a job at pizza buy expired medication place washing dishes. Within two days they promoted me to cook, a position a girl had never held in that restaurant.
Later I went on to my teenage dream job – sales clerk at the Mall record store. (Sheer persistence helped me beat out all the other teens for that one!) And then, on to a job at Radio Shack (this time the first female to be hired in the entire state!) as the TRS-80 hit the shelves.
I started my professional career working for free at a travel agency to get a little resume cred as I finished travel agent school, and was the first to land a job a week before graduation. I went on to working in corporate America where I received invaluable career development.
But like my dad, I’m an entrepreneur at heart. I’ve created a couple of businesses and positions for myself over the years, and find myself now with Genealogy Gems living my dream and drawing from all of my past experiences.
There have been many challenges along the way – no one ever said work was easy. And in fact, my mom’s favorite saying that was drilled in to us as kids was “life isn’t fair – get over it!” She was absolutely right, and she removed the obstacle of fretting over fairness from my life, so I could just get on with working hard and creating my own dreams. I was one lucky kid!
Now whenever a challenge arises, my instinct is to say to myself: I can’t wait to find out what future opportunity this dilemma is training me for!” Almost without exception, I can look back over my past work experiences and see how they are helping me today. Some of the very worst have turned out to be blessings.
So what “lucky” opportunities have you had and created? On this Labor Day I hope you’ll join me in the comments and also share what you learned from your previous generations.
The good news: Even if the most recent generations that came before let you down, family history offers you centuries to pull new and positive values from. Your ancestors were survivors and yep, that’s why you’re here! You may have parents or grandparents who went astray, but you have countless ancestors to find, and learn from. And best of all, you get to pick which values you wish to embrace, and which will fall by the wayside.
Let us pass on what our ancestors taught us so our kids and grandkids can enjoy the opportunities, growth, reward and freedom that comes from good old hard work.
Happy Labor Day!
by Lisa Cooke | Dec 2, 2013 | 01 What's New, Conferences
The program for the 2014 National Genealogical Society Conference has been released! The lineup for the Richmond, Virginia event looks fantastic. Here’s the official summary:
“Conference highlights include a choice of more than 175 lectures, given by many nationally known speakers and subject matter experts about a broad array of topics including records for Virginia and its neighboring states; migration into and out of the region; military records; state and federal records; ethnic groups including African Americans, German, Irish, and Ulster Scots; methodology; analysis and problem solving; and the use of technology including genetics, mobile devices, and apps useful in genealogical research.”
I’ll be at NGS 2014 teaching these classes:
- Google Search Strategies for Common Surnames
- Tech Tools that Catapult the Newspaper Research Process into the 20th Century
- Find Living Relatives Like a Private Eye
Looking for my classes? Open the registration brochure (link below) and hit Ctrl+F, then type my last name and hit enter. Hit the up and down arrows to browse the places where my name appears.
Registration opens on December 1, just after Thanksgiving weekend in the U.S.
Why read over the program now? Because like early holiday shoppers, you’ll get the best selection if you’re ready to go when it opens. A number of special events (see the brochure) have limited seating so you’ll want to register as early as possible to ensure your seat. The 16-page downloadable registration brochure addresses logistics as well as the program.
Read more about it on the NGS website, or jump to these helpful URLS:
Guide for 1st-time NGS attendees
Up-to-date hotel info
Conference blog
by Lisa Cooke | Feb 20, 2017 | 01 What's New, DNA, Kids |
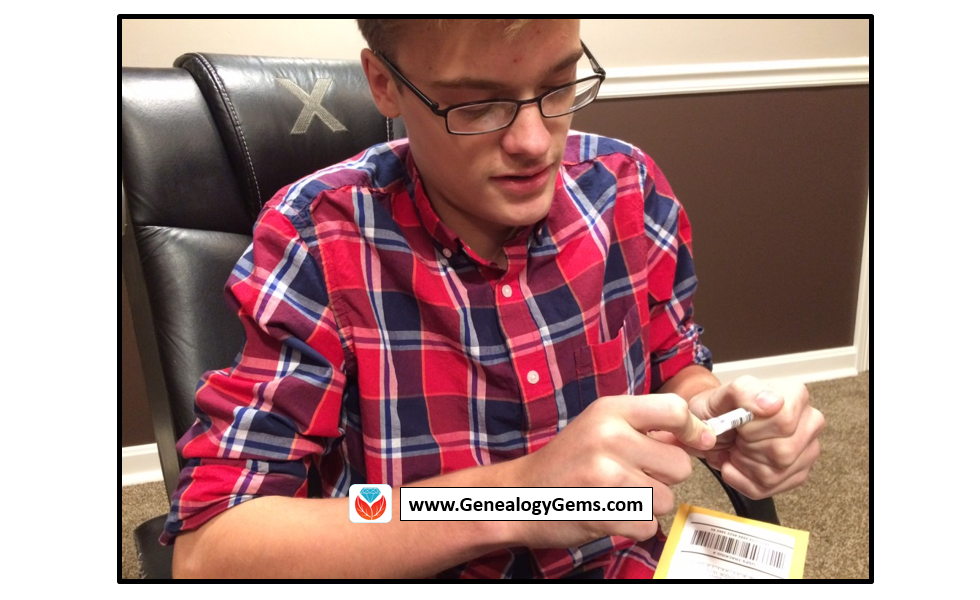
DNA testing for kids is a great way to spark their interest in their heritage, while teaching science, math, geography, and more. Consider these reasons and start with the budget-friendly option of an autosomal test.
According to a 2010 study out of Emory University, if we want to encourage kids toward an activity that will positively impact them, we should steer them toward family history. The researchers reported, “Children who know stories about relatives who came before them show higher levels of emotional well-being.”
Now, I know I don’t need to convince you of this. You are already sold on genealogy. But let’s explore how DNA testing might be able to help you share your love of family history with your children and grandchildren.
Why Try DNA Testing for Kids
Since you know this is me, the genetic genealogist talking, you can probably guess what I’ll suggest for getting kids interested in family history. DNA testing is a great way to personally and physically involve them. There is the tangible process of taking the sample at home, and the marvel at how such a simple act can produce the amazing display of our ethnicity results. Since each of us is unique, it will be fun for them to compare with you and other relatives to see who-got-what-from-who. This will naturally lead to questions about which ancestor provided that bit of Italian or Irish, and wham! You’ll be right there to tell them about how their 5th great-grandfather crossed the ocean with only the clothes on his back, determined to make a new start in a new land.

If there are parts of the ethnicity report you can’t explain, use that as a hook to encourage them to start digging and to find out why you have that smattering of eastern European or Southeast Asian. Taking them for a tour of the DNA match page, you can show them how they share 50% of their DNA with their sister (whether they like it or not!) and how they share 25% with their grandparent!
DNA test results give kids a totally unique look at their personal identity with technology that is cutting edge. Looking at their DNA test results can turn into a math lesson, a science lesson, a geography lesson, a lesson on heredity or biology, or a discussion on identity. DNA is the perfect introduction to the wonders that genealogy can hold, especially for children.
A Warning and Caution
As with all DNA testing pursuits, this one should not be taken lightly, even with all of its benefits.
An important word to parents: Be sure to keep unintentional consequences in the forefront of your mind. This includes the possibility of revealing family secrets. Talk with your spouse and make sure you are both on the same page. In the end, this is your decision.
An important word to grandparents and other relatives: DNA testing is a parent’s decision. Even though you’re passionate about preserving the family’s history and the benefits of including children are numerous, you must obtain parental consent if you are not the parent.
More About Autosomal DNA Testing for Kids
 Click here to learn more about my series of how-to videos (available to Gems fans for a special price) or start your kids’ or grandkids’ DNA journey with two of my genetic genealogy quick guides. The first is a great overview and the second talks about autosomal testing which is a good test for genetic genealogy beginners.
by Lisa Cooke | May 9, 2016 | 01 What's New, Ancestry, DNA
 Double good news: AncestryDNA has made some improvements to the way they calculate your genetic matches, but they haven’t messed with the site format or layout. There is one downside–so keep reading.
Change is afoot at AncestryDNA. Again.
While stability and predictability seem like honorable qualities in a company or product, when it comes to tech tools, in the ears of tech companies, those words sound more like dated and old. Of course, we are used to this by now. I had a client tell me recently that he wanted to be in touch sooner, but his grandson “upgraded” his computer to Windows 10 and then promptly left for college the next day, leaving him fighting with a new interface and operating system.
The good news is, you won’t have this problem with Ancestry’s new update. There aren’t any changes to the interface or the layout of the information. In fact, many of you will not even notice at first that your match list has changed. You’ll just see this notification when you log in:

But in fact, there likely have been some adjustments made to your match results:
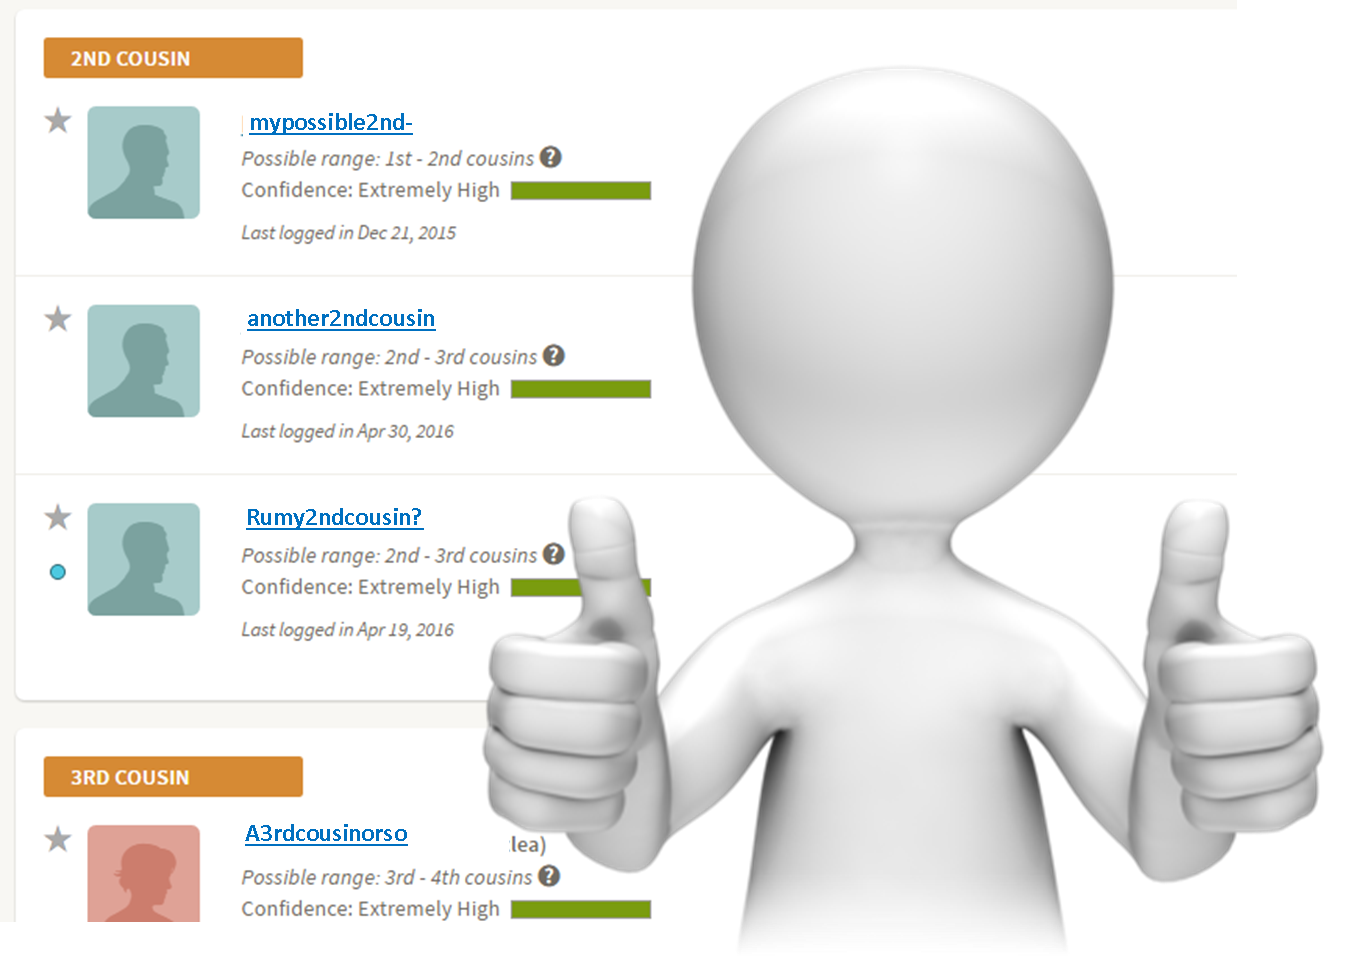
- Some of your third cousins have been demoted to fourth cousins.
- Some of your fourth cousins have been demoted to 5th-8th cousins.
- Some of your Distant Cousins have disappeared off your match list
- You have new cousins on your Distant Cousin match list.
In general, from what Ancestry has showed us, you gain more than you lose.
Changes in the dregs of your match list may not seem like that big of a deal. But Ancestry has made some big changes in the way that they are calculating matches. They are getting better at it. Which means you match list is now more representative of your ancestral connections, even at the very distant level.
There are two big pieces to this matching puzzle that Ancestry has tinkered with in this latest update: phasing and matching.
You will remember our discussion on DNA phasing and how it can impact your matching. Ancestry has developed a robust reference database of phased DNA in order to better phase our samples. Basically, they have looked through their database at parent-child duos and trios and noted that certain strings of DNA values often travel together. It’s like they have noticed that our DNA says “A black cat scared the mouse” instead of “The brown cat ate the mouse” and they can then recognize that phrase in our DNA, which in turn helps our DNA tell the true story of our heritage.
In addition to updating the phasing, Ancestry has revamped their matching method. In the past they viewed our DNA in small windows of information, and then stitched those windows together to try to get a better picture of what our DNA looked like. Now instead they have turned to a point-by-point analysis of our DNA. Again to use a sentence example, with the window analysis we may have the following sentence windows:
ack and J
ill went t
he hill t
etch a pai
l of water.
 Of those windows, you may share the “etch a pai” with another individual in the database, earning that cousin a spot on your match page. However, the truth is, that bit could say “sketch a painting” or “stretch a painful leg” or “fetch a pail.” With Ancestry’s new method, they are able to see farther on either side of the matching segment, making this clearly “fetch a pail.” That means better matching, which means more confidence in your cousin matches.
The downside to this update is going to come in the reorganization of some of your relationships. Ancestry has tightened their genetic definition of your third and fourth cousins. Basically, that means that some of your true 3rd cousins are going to show up as 4th cousins, and some of your true 4th cousins are going to be shifted down into the abyss of 5th-8th cousins.
This brings us to the downside of this AncestryDNA update: changes to the Shared Matches tool. The shared matches tool allows you to gather matches in the database that are related to you and one other person, provided you are all related at the 4th cousin level or higher. This tightening of the belt on 4th cousins means that some of them are going to drop through the cracks of that tool, really limiting its ability. Grr. Hopefully, Ancestry will fix that, and expand this tool to include all of your matches. They have their fairly good reasons for this, but still….
So, as the winds of change blow yet another iteration of the AncestryDNA match page, I think we can see this as an overall win for doing genealogy with our genetics at Ancestry.
More AncestryDNA Gems

Disclosure: This article contains affiliate links and Genealogy Gems will be compensated if you make a purchase after clicking on these links (at no additional cost to you). Thank you for supporting Genealogy Gems!
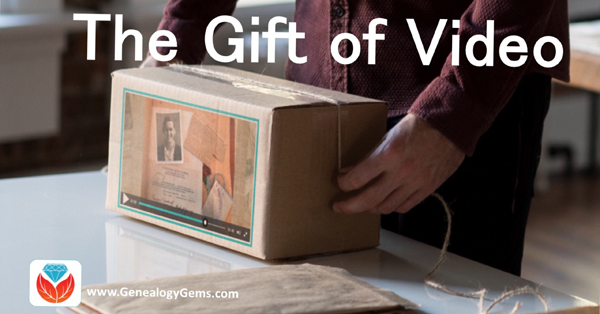
by Lisa Cooke | Dec 13, 2016 | 01 What's New, Holidays, Video |
Are you having a hard time coming up with the perfect gift for someone special on your list? The gift of video gives all year round, and doesn’t require you to buy the correct size. Make your video about family history, or the memories of the recipient, and get ready for hugs and smiles of appreciation for your thoughtfulness.
Do you remember the first Christmas that you realized it was better to give than to receive? It’s an amazing feeling when your heart swells at the thought of snagging the perfect present for the people you love the most. But if you’re like me, there are always one or two relatives who present daunting challenges. Perhaps it’s the elder members of your tribe who seem to want for nothing; or a Aunt who quietly returns everything.
My challenge this year is my Dad. He seems to want for nothing, and having an Amazon Wish List isn’t even on his radar. Last year Dad passed his high school scrapbook on to me. It’s brimming with some of his fondest memories: his Boy Scout membership card, newspaper clippings of his football prowess, and the cardboard glasses he wore to his very first 3D movie. I’m pretty sure his heart was swelling when he handed this treasure chest of beloved memories to his daughter, the family historian.
And that’s when I was struck with an inspiration: give it back to him in the form of a video.
Video: Gift Perfection
Here’s why video makes a perfect gift:
- It doesn’t take up precious space on the shelf
- It can be enjoyed from any computing or mobile device again and again
- It can be shared easily with others
If you have been in search of the perfect holiday gift, follow along with me, and give the gift of video.
Creating a Video Gift
If you’re short on time, consider making a video of an old family scrapbook. All you will need is a smartphone and 30-60 minutes. Pull a scrapbook off the shelf, and dust it off because it’s about to get a new life!
Step 1 – Photograph the album
You could use a flatbed scanner to scan each page and the individual items you want to highlight. But you can save a ton of time by putting your smartphone or tablet to use. For me, this was the ideal solution also because so many of the items in the scrapbook had become loose, and I wanted to be able to show the pages as they were originally laid out. By setting the book on a table I could just snap photos rather than turning it upside down on the scanner glass. And don’t worry about snapping the perfect pics because we’ll get them all snazzy in step 3.
Save the images to a free cloud service like Dropbox so that you can easily retrieve them on your home computer.
Step 2 – Head to Animoto.com
(Full disclosure: This post contains affiliate links and I will be compensated if you make a purchase after clicking on my links. I appreciate you using these links because that compensation helps make the Genealogy Gems blog possible. Thank you!)
Although Animoto does have an mobile app, I like using the web version on my computer which provides the advantage of a bigger screen. Click here to go to Animoto, and sign in to your account. Then, just click the Create button to start a new video project.
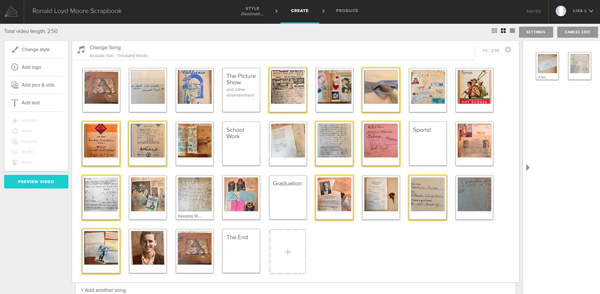
Choose a Video Style, which will include a music soundtrack. If the music isn’t quite what you had in mind, click Change Song and pick from a robust list of tunes. Animoto’s secret sauce optimizes and paces your slides to jive with the music. If the music is faster, the slides are faster, and if it’s slower, yep, the slides are slower. In the end though, you always have the final choice in the pacing of your slides and your entire video. Need a little extra time? Then just add a second music sound track.
Step 3 – Add Your Photos
Now it’s time to add your photos. Click Add Image, select Dropbox, and navigate your way to the folder where you saved your photos. Click the first one in the list, and then holding down the Shift key on your keyboard, click the last photo in the list, and click the Choose button. There you go: you’ve added all your images in one fell swoop! Imagine the time you saved over adding one item at a time.
I snapped all the full page photos first, and then I went back and snapped some of particular items I wanted to highlight with closeup images. That meant that when I added my photos they weren’t in exactly the right order. Thankfully, all I had to do was drag and drop them in the desired order. Easy peasy!
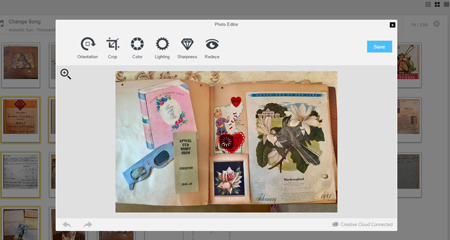
Edit your photos within Animoto.
Another reason I adore using Animoto is that I can do all my editing right there in the dashboard. With a few clicks you can apply a quick crop, slight rotation, and image enhancement with a great result. (Image right)
You even have the option to add video clips with Animoto. So if I had a fancy to add my original video of turning the pages of the scrapbook (above) I would just drag and drop it onto the timeline. And it is that ability to drag images and video from your hard drive straight into Animoto that makes it so quick and easy to use.
Step 4 – Add Title Slides
Although my Dad’s scrapbook really speaks for itself, I decided to add a few title cards to help guide the viewer like:
- The Picture Show
- School Work
- Sports
- Graduation
And title cards are great for “The End” and any other message or credits you want to add.
If you want to add text within your project, click to select the item that your text will follow, then click Add Text from the menu, and it will appear immediately after the previous item. To add text at the end, just click the plus sign in the last box and again type your text. And remember, nothing is set in stone. If you change your mind you can drag the text to a new location, edit it, or delete it all together.
Step 5 – Preview & Publish Your Video
At any time during the process you can click the Preview Video button to see your work. If you like what you see, then click the Produce button in the Preview window to create the final product. And speaking of final products, here’s mine:
Learn More
Are you ready to start creating memorable videos for the loved ones on your list? Click here to learn even more and give Animoto a whirl. (And just think: no wrapping required. You’re welcome!)