by Lisa Cooke | Jul 13, 2015 | 01 What's New, Evernote, images, Technology
 Recently Genealogy Gems Podcast listener Rosie wrote in with an Evernote question:
“I really enjoy listening to your podcasts. Thanks so much for all your efforts. As a long time researcher I always wondered how the Hunt family got from New England to Ohio around 1800. Not too long ago another researcher found some autobiographical sketches written by Thomas W. Hunt in the Library of Congress. They posted it on Ancestry.com and another researcher sent me the link. I am still trying to figure out Evernote but I am wondering if there is a way to transcribe the sketches from PDF format with this tool.”
Good for Rosie for considering her options for how technology might be able to make the task at hand just a little bit easier!
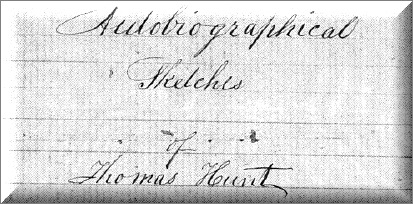
Currently you must have an Evernote Premium account in order for your PDF documents to be keyword searchable or to annotate PDFs directly. The pdf document that Rosie was hoping to automatically transcribe with optical character recognition (OCR) is in cursive handwriting. Evernote can apply OCR to simple, clear printing, but it can’t read script, especially fancier writing such as this Thomas Hunt sketch or
old German script and handwriting.That would require ICR, or intelligent character recognition, and that technology is still emerging and isn’t widely available to consumers yet.
The Solution: Evernote doesn’t transcribe documents. To get the genealogical content from the sketches into Evernote, Rosie will need to start a new Evernote note and re-type the documents herself. Once that is done, then Evernote can apply OCR to the note and the typed transcription will be keyword-searchable.
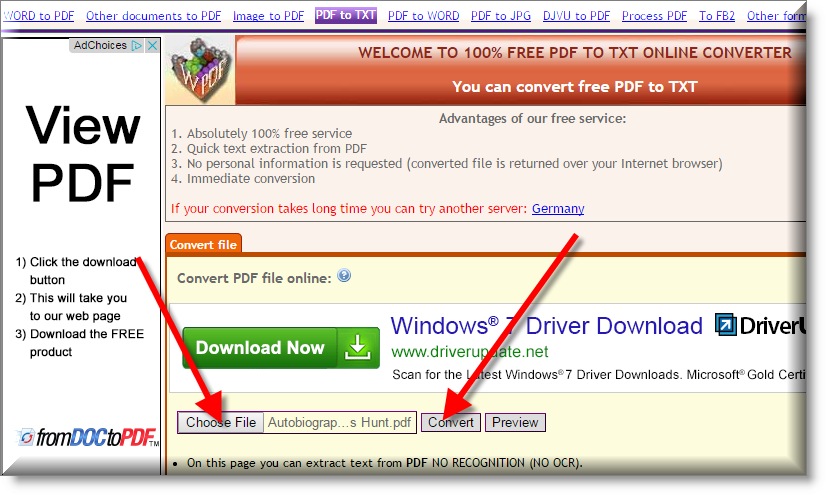
A Solution for Type and Printing if you aren’t an Evernote Premium user: If you are fortunate enough to discover a long-sought after genealogical document such as Rosie did, and your PDF document is typed text or simple, neat printing then you are in luck. There are free conversion tools available online that can do the trick. I use
ConvertOnlineFree.com to convert my PDF document to text. I like it because I can use the tool directly from the web without having to download software to my computer.
(As with all tools we discuss here you’ll need to do your own homework and decide if it is right for you.)
I simply:
1. click the Choose File
2. select the PDF file I want to convert from my computer
 3. click the Convert button
4. save the converted file to my computer
5. copy and paste the text into a new note in Evernote, and OCR does the rest.
Resources
How to Use Evernote for Genealogy: The Ultimate Education
Evernote for Genealogy laminated quick reference guide, available for for both Windows and Mac users. This guide is handy for everyday reference, and it’s packed with time saving tips you can use every day in your genealogy research.
How to Add Text to a Web Clipping in Evernote
 It’s nice to share
Do you know other genealogists who use Evernote? Why not share this post with them? Use our handy social media buttons at the top of this post, or copy the and paste the URL into an email. Your friends will thank you!
by Lisa Cooke | Sep 12, 2016 | 01 What's New, FamilySearch, Volunteer
According to an article on the FamilySearch blog, 90% of all indexed records on FamilySearch are those for English-speaking countries. While this is super exciting for me and my family tree, many of my friends are unable to trace their family histories past their great-grandparents. Why? Because the records in their native country have been digitized, but not indexed.
FamilySearch Indexing in These Easy Steps
I have been indexing at FamilySearch for years and you can join me! Just follow these simple steps:
- Go to www.familysearch.org.
- Sign-in and click on Indexing and choose Overview from
 the pull-down menu.
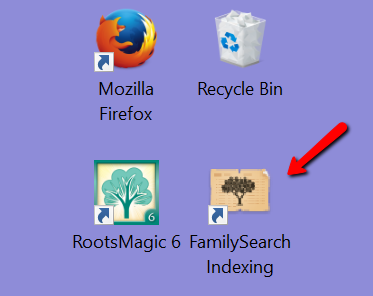
- Click on Get Started, which will direct you to the Get Started page. You will need to download the indexing program directly to your device.
- From your desktop, open the FamilySearch Indexing program by clicking on the icon.
- Sign-in again and click Download Batch at the top left corner.
- Choose a project to work on.
If you feel you need some further instruction, watch these helpful videos below:
FamilySearch Indexing: How to Start
FamilySearch Indexing Training: Video 1
FamilySearch Indexing in Another Language
Training for French Language
FamilySearch is looking for three kinds of people:
- Fluent, native speakers of non-English languages living in their native county or in an English-speaking country.
- People who have extensive training in a non-English language.
- English speakers who are willing to learn how to index specific types of non-English records.
I know what you are thinking…you hardly passed French 101 in high school! But, you can do it.
There was recently a very successful Italian indexing training initiative in the U.S. It more than doubled the worldwide number of individuals working on Italian records. You can be a part of the growing need for French, Spanish, Italian, and Portuguese record sets.
Training guides and videos have been created for the French, Spanish, Portuguese, and Italian languages. As we accomplish the work for these places, FamilySearch will add more languages. The videos and guides will help volunteers to learn how to index specific types of records. Click here to learn about this language learning initiative and to get started.
What Else Can You Do for FamilySearch Indexing?
If you have friends or family who are fluent in another language, ask them to join you. Share this post with your friends on Twitter and Facebook to get the word out. Does your teen need some service hours for graduation, Girl/Boy Scouts, or other organization? This is a unique service project that even teens can do and that will be meaningful to many.
We would love to hear your stories of successes in indexing. Leave a comment below or post to our Genealogy Gems Facebook page.
More Gems on Indexing
Volunteer Gem: He Indexed Milwaukee Journal Obituaries Himself!
Want to Help Index De-Classified CIA Records?
by Lisa Cooke | Apr 23, 2015 | 01 What's New, 1950, Census
The 1950 federal U.S. census will not be released to the public until April 2022. Are you as excited about that as I am? This census will provide volumes of new information about our families and their lives.
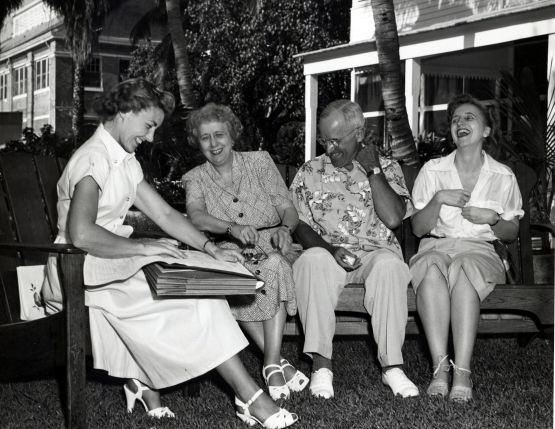
An enumerator interviews President Truman and the First Family for the 1950 Census. Image from www.census.gov.
Answers to Your Questions about the 1950 Census
Here are answers to four of the common questions we receive about the 1950 census:
What will I be able to learn from the 1950 census?
With each decade the federal government has asked more detailed questions. The information collected has expanded our understanding of the families, their backgrounds, and their lifestyle.
Here’s what the front page of the 1950 Census of Population and Housing form looked like:
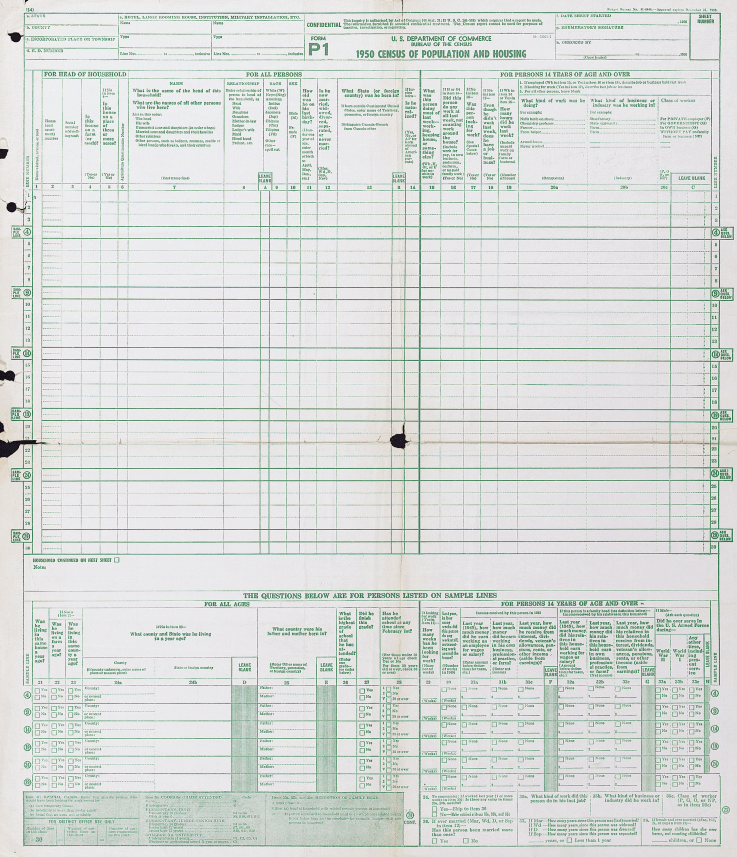
As you can see there is a wealth of information that will be of interest to family historians. 20 questions were asked of everyone. The detailed questions at the bottom of the form were asked of 5% of the population.
The back side of the form may not be as familiar to you, but it too collected a vast amount of fascinating data about housing:
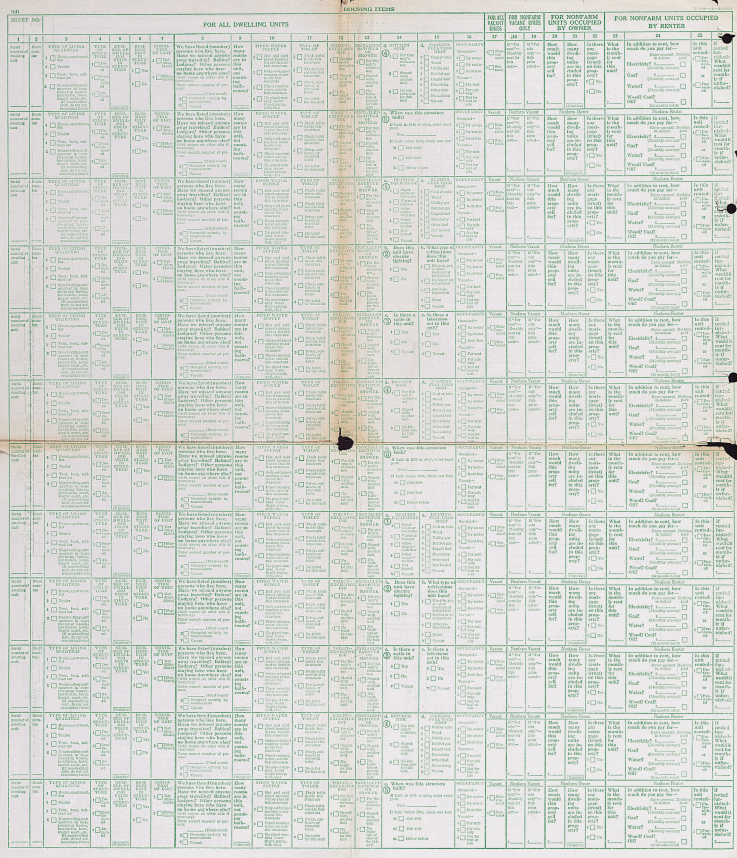
Let’s take a closer look at one of the rows:

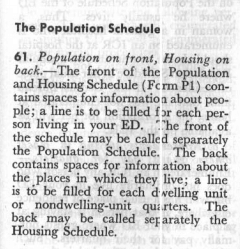
Instructions regarding the front and back of the Population and Housing Schedule Form P1
As you can see the back side of the form is focused on housing. Here you’ll find answers to questions about:
- Type of Living Quarters
- Type of Structure
- Whether a business was run from the house
- The condition of the building
- If there are any inhabitants who may be somewhere else at the time the census was taken
- How many rooms
- Type of water, toilet and shower / bath facilities
- Kitchen and cooking facilities
- Occupancy
- Financial and rental arrangements
Additional questions were not asked of all, but rather were asked on a rotating basis. These centered around additional features of the home such as radio, television, cooking fuel, refrigeration, electricity and the year the home was built.
Are enumerator instructions available for the 1950 census?
The instructions issued to enumerators can provide you with further insight into the records themselves. It can also clarify the meaning of marks and numbers you may find on the documents.
And yes, the US Census Bureau has indeed published the instructions for the 1950 census on their website here. According to their site:
“During the 1950 census, approximately 143,000 enumerators canvassed households in the United States, territories of Alaska and Hawaii, American Samoa, the Canal Zone, Guam, Puerto Rico, the Virgin Islands, and some of the smaller island territories. The U.S. Census Bureau also enumerated Americans living abroad for the first time in 1950. Provisions were made to count members of the armed forces, crews of vessels, and employees of the United States government living in foreign countries, along with any members of their families also abroad.”
Also on that web page you’ll find instructions for the following years: 1790, 1850, 1860, 1870, 1890, 1900, 1910, 1920, 1930, and 1940.
Can I request individual census entry look-ups?
Yes, you may apply to receive copies of individual census entries from 1950-2010 for yourself or immediate relatives. It’s not cheap—it’s $65 per person, per census year. (Check the website for current pricing.) But if you’re having research trouble you think would be answered by a census entry, it might be worth it. Click here to learn buy lithium medication online more about the “Age Search Service” offered through the Census Bureau.
Is there a 1950 census substitute database?
Yes, Ancestry has one. You might find it a little gimmicky, because it’s just taken from their city directory collection from the mid-1940s to the mid-1950s. But it’s a good starting point to target your U.S. ancestors living during that time period. The annual listings in city directories can help you track families from year to year.
More 1950 Census Resources
Your 1950s family history may appear in other records as well, and I’ve got some tips to help you in your search:
Watch my video All About the 1950 Census.
by Lisa Cooke | Apr 4, 2019
Click here to download the DNA handout Listen to the free Genealogy Gems Podcast with Lisa Louise Cooke Are you listening to The Genealogy Gems Podcast yet? This free audio show helps you make the most of your family history research time by providing quick and...
 It’s nice to share