Have you found all the school records there are to be had for your ancestors? Most of us haven’t, and the chances are very good that there are still some gems out there waiting to be found. Here are ten solid strategies that will help you track them down for your genealogy research.
Watch episode 82 below.
Because the movement for compulsory public education didn’t begin until the 1920s, many people assume that there few records to be had for genealogical purposes prior to that time. The reality couldn’t be further from the truth. Many children attended school much earlier.
In fact, it may be surprising to learn that the first public school in what is now the United States opened in the 17th century. On April 23, 1635, the first public school was established in Boston, Massachusetts.
Illustration of the Boston Latin School by Ebenezer Thayer, courtesy of Wikimedia
It was a boys-only public secondary school called the Boston Latin School, and it was led by schoolmaster Philemon Pormont, a Puritan settler. The school was strictly for college preparation, and produced well-known graduates including John Hancock and Samuel Adams. It’s most famous dropout? Benjamin Franklin! The school is still in operation today, though in a different location.
Thousands of schools serving millions of students have been established in the U.S. since the inception of the Boston Latin School. (According to 2015-16 data from the National Center for Education Statistics (NCES) there are 132,853 K-12 schools in the U.S.) This means that the chances of there being school records for your ancestors is great indeed!
10 Solid Strategies for Finding School Records for Genealogy
Here are 10 proven ways to find your ancestors’ awkward yearbook photos, sports triumphs, and much, much more.
1. Establish a Timeline of your Ancestor’s Education
Check your genealogy software database to figure out when your ancestor would have attended high school or college. Keep in mind, as recently as the 1960s, children did not go to Kindergarten but may have started school at about 6 years old and beginning in First Grade.
To keep my search organized, I decided to create a simple worksheet form in a Word document. It allows me to identify the right time frames, locations, and other pertinent information for my search, and record my progress along the way.
2. Consult Family Papers and Books for School Records
Go through old family papers and books looking for things like:
school photos
senior calling cards,
high school autograph books,
journals and diaries,
fraternity or sorority memorabilia,
yearbooks and more.
When I dug through boxes and my grandmother’s cedar chest I found several records like…
a Report Card:
My grandmother’s brother’s 6th grade report card found among family papers.
Grandma’s class picture from the 7th grade in 1925, Chowchilla, California. She is in the back row on the far right, and her brother is the boy in the center of the back row:
Grandma (back row, far right) with her 7th grade class.
And Grandma’s senior portrait, 1930:
Grandma’s senior portrait from 1930
3. Google for Academic Family History
From the professional website of the state archives to the family history site cobbled together by a cousin you’ve never met, the potential for finding school records on the vast expanse of the internet is limitless! Google is the tool to help you locate websites that include school-related records with lightning speed.
Since I’m not sure which school my grandmother attended, I started off my search for my grandmother’s school with a simple query for the history of schools in the county where she lived as a child:
Google search for the history of school’s in the county
I was pleasantly surprised at the first search result. It’s a newspaper article from the Madera Tribune literally outlining the history of how the schools evolved in the county! It details such things as the driving forces behind where schools were located, when they were founded, and which ones at the time of the article were no longer in existence.
History of Madera Schools Outlined in the Madera Tribune, September 1955.
Next, I focused my attention on the grade school listed on Grandma’s brother’s 6th grade report card that I discovered during my search of family papers. I Googled the name of the school, county and state.
A search like this can literally deliver millions of results. In fact, this specific search brings up over 1 million search results.
You can typically reduce the unwanted search results by 90% by using search operators. These symbols and words give Google further instructions on what you want done with the words you are searching.
While I cover a large number of operators in my book The Genealogist’s Google Toolbox, I’m going to use just one of the most popular to dramatically improve my search for the Sharon school.
In the example below I put quotation marks around the name of the school. Doing this explains to Google that I want this phrase to appear exactly as I typed it in every single search result. You’ve probably noticed that when you search a phrase by itself, you’ll receive results that include only one of the words, or the words spelled differently, or in a different order. The quotation marks search operator prevents this from happening. It mandates that the phrase appear on every result exactly as you typed it.
Using Search Operators to Google the Grade School
Notice that I didn’t put quotation marks around the county name or the state. I recommend using search operators sparingly, at least in your initial search, to ensure that you don’t miss out on good results. If I were to put quotations marks around “Madera county” I would not receive any web pages that do mention Sharon School but just don’t happen to mention Madera County as a phrase.
Notice also that this search resulted in just over 11,000 results, a small fraction of what I would have received had I not used the quotation marks! Even more important is that the results on the first few pages of are all very good matches.
I could try a few more variations such as adding words like history, genealogy or records.
My googling led me to the Internet Archive where I found old silent color movies shot in the 1940s. There were several films and one featured the local school in the area where my relatives lived. Many, many people were filmed! Could one of those faces be one of my relatives?! Learn more about finding genealogical information includes school records by watching and reading 10 Awesome Genealogy Finds at the Internet Archive.
Click image to watch episode 43.
4. Search Newspapers
Historic newspaper are also a wonderful source of honor rolls, school sporting events and anything else having to do with school life.
While there are certainly more historic newspapers online than ever before, it’s still a fraction of what is available.
A visit to the Chronicling America website can help. At the home page click the U.S. Newspaper Directory button:
Click the U.S. Newspaper Directory button at Chronicling America
On the Directory search page, enter the state, county and town:
Search the U.S. Newspaper Director for the school location.
On the results page, click the “View complete holding information” link:
Click “View the holdings”
Now you can view all of the known available locations for this item:
The item I searched for has three known locations.
In my case, the Chowchilla newspaper of the early 20th century has not been digitized and is not available online. However, the California State Archives in Sacramento has an extensive collection of microfilm. I was able to make the trip in person, and was certainly glad I did! They not only had the newspaper I needed but also countless other resources that were helpful for my genealogical research.
My Grandma listed by name in the newspaper for making the Freshman high school honor roll.
Here are additional resources to help you find newspapers for your school records research:
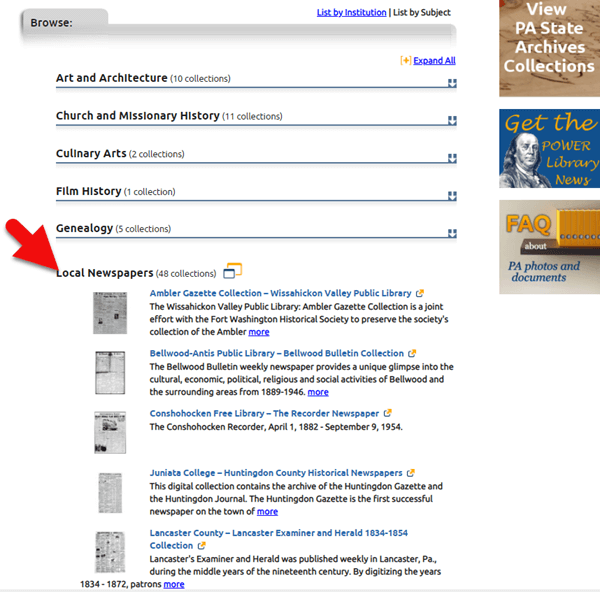
Local newspapers can also be found by searching for the public library website in the town where your ancestor attended school. Check the library’s online card catalog or contact them directly to see what newspapers they have and whether any can be loaned (on microfilm) through inter-library loan.
Click here to search Genealogy Bank – (This page includes a 7 day free trial option.) This popular subscription website has over 11,000 newspaper, 95% of which Genealogy Bank says are exclusive to their website.
5. Consult U.S. State Archives and Libraries
The public libraries and state archives across the country are a treasure trove of genealogical resources, and that includes school-related records.
While it’s easy to stop by your local library for a search, it may not be as easy to make your way to the public library in the town where your ancestors lived. Turn to the internet to do your homework regarding the repositories, their holdings, and the most convenient and economical way for you to access them.
Start by conducting a search. Once you find an item of interest, enter your zip code under the “Find a Copy in the Library” section to identify where it’s available.
Enter your zip code to determine your proximity to the libraries and archives.
As you can see, the name of the libraries are hyperlinked so that you can click through to the item on their website. This makes requesting a look-up or photo copy very easy.
I can’t stress the value of State Libraries enough. Gere are three more excellent resources:
Click here to read Archivist Melissa Barker’s article called Using Vertical Files in Archives.
6. Contact State Historical and Genealogical Societies
In addition to newspapers, state historical and genealogical societies might have old yearbooks, school photograph collections or other records. For example, the Ohio Genealogical Society library has a large collection of Ohio school yearbooks.
Local historical and genealogical societies may also have school memorabilia in their small or archived collections.
To find contact information for a local historical or genealogical society, Google the name of the county and state and add the words genealogy, history and / or society at the end. For example: Darke County Ohio genealogy society.
7. Search for Online Yearbooks
One of the most exciting genealogical record collections to have come out in recent times is Ancestry.com’s U.S. School Yearbooks 1900-1999 collection. It is an indexed collection of middle school, junior high, high school, and college yearbooks from across the United States.
In June of 2019 Ancestry replaced old records with new updated records for most of the yearbooks found on the site. They also added new records from 150,000 yearbooks that previously only had images available. Later in August of 2019 they improved the collection even further by adding a staggering 3.8 million new records. This update also included 30,000 new image-only books.
Ancestry also has an extensive indexed collection of middle school, junior high, high school, and college yearbooks for Canada. Click here to search the Canadian collection.
MyHeritage has an international collection of yearbooks. In the menu under Research go to the Collection Catalog and search for Schools & Universities.
Additional websites featuring yearbooks include:
Old-Yearbooks.com – According to the website, “Old-Yearbooks.com is a free genealogy site, displaying old yearbooks, class rosters, alumni lists, school photos and related school items. All materials on this site are the property of the submitter. You may not use the images, text or materials elsewhere, whether in print or electronically, without written permission from the submitter or this site.”
Classmates.com – “Register for free to browse hundreds of thousands of yearbooks! You’ll find classic photos of friends, family, and even your favorite celebrities. Viewing the books is always free, and you can purchase a high-quality reprint.”
E-Yearbook.com – Their goal is to digitize all old high school, college & military yearbooks. The site has millions of yearbook pictures digitized, they say they are adding thousands of new pictures every week. “From our estimates, we offer the largest collection of old high school, college and military yearbooks on the Internet today.”
8. Check Township Archives
You might be thinking you didn’t read that right, but you did. Townships are small areas within the county. These small townships may have their own archives or one room museums. They are often the holders of some pretty one-of-a-kind finds.
The best way to determine what the township may have is to contact the township trustees. Google your township name, the county name, state name, and add the word trustee. You will likely need to give one of the trustees’ a phone call to ask what resources might be available.
The auction website ebay is the perfect place to look for school record and memorabilia, particularly hard-to-find yearbooks.
Conduct a search on the school or town you are looking for to see if anyone is selling a yearbook that you want. (You’ll need a free ebay account to do this.) Also, search for old photographs or postcards of the school building that you can add to your family history.
Initial search for school items at ebay
When I searched for Chowchilla California School, several auctions for school-related items from Grandma’s high school came up. Unfortunately, these are auctions for yearbooks after she had already graduated. But no worries! This search is only for today. Tomorrow someone could put up an auction for exactly what I want. There’s only one problem: no one has enough time to search every single day!
A way to save time and ensure that you don’t miss new auction items is to save your search.
Click the Save this search button toward the top of the page:
Click the Save button to save the search you just ran.
By doing this, you will be sent an email any time a new auction comes up that meets your search criteria. You can learn more about setting up ebay saved searches for family history by listening to Genealogy Gems Podcastepisode #140.
Here’s another one of my favorite strategies: After you run your initial search, check the box on the results page to include completed listings.
Click the Completed search box in the left hand column
In the revised “Completed” search results you may see some items that are of interest. If the item has a green price, it means the item was sold. If the price is black, it did not sell.
Each item will also have a link that says View Similar Active Items. Click that to see a list of items currently for sale that are very similar to one that you wanted.
You can also contact the seller of any item to inquire about the unsold item or to ask whether they have related items.
Bought on ebay: A yearbook from the school where my husband’s grandfather was a music teacher
I bought the yearbook above on ebay several years ago. It includes several photographs of my husband’s grandfather who was a music teacher at the high school back in the 1940s.
10. Call the School
If the school is still in operation, try calling the main office of the administration office. They may have old yearbooks and scrapbooks in their library or on display. If they don’t, they may very well be able to tell you where they can be found.
You can obtain contact information by Googling the name of the school and the location.
Good times to try calling a school are mid-morning after kids are settled into class, or between 3 and 4:00 pm local time, when many of the kids have gone home but the school office is still open.
Tell Us About the School Records You Find
Using these strategies you are bound to find more school records for your genealogical search. Please leave a comment below and share what you found, where you found it, and which strategy you used. It will inspire us all to keep looking! And if you have a favorite strategy that we didn’t mention here, please do share that too.
Welcome to this step-by-step series for beginning genealogists—and more experienced ones who want to brush up or learn something new. I first ran this series in 2008-09. So many people have asked about it, I’m bringing it back in weekly segments.
Episode 40: How to Start a Genealogy Blog, Part III: Step by Step
In the last two episodes you’ve been hearing from experienced genealogy bloggers about family history blogging. I hope it piqued your interest and got you thinking about the possibility of doing it yourself. As we’ve discussed, it’s a great way to share your experiences with other researchers and potentially connect with long lost relatives.
Well in today’s episode I’m going to walk you through setting up your own family history blog step-by-step. By the end of this episode you could have your own family history blog up and running and sharing your enthusiasm about genealogy with the world. How does that sound? Are you willing to give it a try? And even if you’re not looking to start blogging today, listen in and plant the seeds for the future.
From the Mailbox:
A long-time listener wrote in this last week about the recent blogging episodes:
“The Transcript software mentioned by Denise Levenick looks great – I downloaded and installed it this morning. I am giving a brief software demonstration at the Greater Portland Chapter of the Maine Genealogical Society’s 30th Anniversary Celebration tomorrow and I am going to let people know about this product.
Episode 38 and Episode 39 have really got me thinking about starting my own blog. It won’t be easy with my 50 hours plus a week civil engineering job, but your podcasts have motivated me. Thank you!” -Will Haskell, Listener to All Your Podcasts
Transcript software is really cool: download the most recent version for free here. And that’s just one example of the kind of great tech tips that Denise Levenick blogs about at The Family Curator Blog!
Follow-up: when republishing this episode, we were curious about whether Will ever started a blog. He did! It’s very cool! Find Will’s Genealogy Blog at http://wchgenealogyblog.blogspot.com/.
Also, listener Anne-Marie had some questions about how to make progress with her Maw-gee research, specifically how to track down their immigration records. She wrote in again to say that she’s going to follow up on our suggestions and let us know what she finds. But she also had some comments about my interview with genealogy blogger the Footnote Maven (Episode 38):
“I have begun listening to Family History and Genealogy Gem podcasts from the beginning again. When I listened the first time I was so novice that I did not always understand what I was hearing. It’s great to have this audio reference guide.”
How to Start a Genealogy Blog: Step by Step
Now before we get started on created your blog let me just say that there are probably countless websites for setting up blogs and certainly countless ways to go about it. My goal in the approach that I’m going to take is to get you up and running in a short period of time for free. This is a great way to get your feet wet, see if it’s for you, and if you decide to get more elaborate with it later you can always do that.
1. Decide what the purpose of your blog is.
When it comes to a genealogy themed blog there are still lots of options – so here are some ideas:
A Research Log
A Surname Focus
Family Traditions, Family Recipes, Photos
Genealogy News
Focus on a certain record type
Provide beginner education
Interviews with relatives
History of an ancestor’s home or community
Have a general all purpose blog
Follow a pattern for each day
And remember the Footnote Maven’s good advice – You can’t be an expert in everything, so don’t even try. To me a good way to stay out of that trap is to stay narrowly focused. If you find yourself having to be an expert in everything you’re blog theme is probably too broad. And of course, be yourself. Do what you do best!
2. Use Blogger (http://www.blogger.com) to create your blog. It’s free, and easy to use.
Blogger is owned by Google so if you already have a Google account than you’re one step ahead of the game. If not that’s the first thing you’ll need to do. Then click “Create Your Blog Now.”
Note: As on any website, the organization and features of Blogger change over time. The following description was current at the time of publication. Use this following descriptions and concepts to guide you through the current version of Blogger.
Name your blog.Of course, the name should reflect what your blog is about, but it’s also good to think of one that is catchy, and one that you can get the URL address for. The URL name you pick has to be something that isn’t already being used, so it might take a few tries.
How to Name Your Blog:
Type in the Title Field
Type the URL you want in the “Blog Address URL” field
click the Check Availability link to see if it is available
Type in the word verification code
Click the CONTINUE button.
3. Select a Design Template:
Scroll through the design templates and pick one you like
Click the select button
Click the CONTINUE button
You’ll get a page that says Your Blog has been created!
Click the orange arrow that says START BLOGGING.
There are a couple of more things we’ll want to do with our blog before we get to the business of actually posting blog articles. First let’s just get familiar with the blog dashboard. This is sort of the “behind the scenes,” an area your readers will never see, but where you will actually do your blogging.
There are 4 tabs along the top: Posting, Settings, Layout and Monetize.
Blog Tune Up: From the Posting Tab….Click the SETTINGS tab. Type up a short description of the blog.
Vocab Word: KEYWORDS
Keywords label your blog so that when readers go searching for a blog to read they will find it. So some good keywords for this new blog that I’m creating would be
Genealogy
Family history
Family tree
Blog
How to
Keywords can be single words or a short keyword phrase such as “family history” which readers will very likely be searching for. Blogger allows you 500 characters.
The rest of your options on this Basic Settings page are mostly about how your content will be labeled and found on the internet. You can take a look through the options but in most cases you will want to leave them on their default settings. When you’re done just click the SAVE SETTINGS button at the bottom of the page. And for right now you can leave all of the other types of settings as is as well. There are about 9 different categories within the Settings Tab that you can tweak, but the default settings on these are just fine for now.
4. Add at least one gadget. Click the LAYOUT tab. I love working with this area because this is where you get to customize the layout and the types of gizmos and gadgets that are on your blog. We don’t want to overdo it but there are some really good ones you’re not going to want to miss.
Blogger will automatically add a couple of gadgets to the sidebar of your blog. They are:
Followers – people who use blogger who subscribe to your blog’s RSS feed.
Blog Archive – This gadget automatically archives your older blog posts.
About Me – This is just a place where you can tell your readers a little more about yourself and include your email address if you wish.
To see what other types of gadgets you can add just click the Add A Gadget link in top side box. That will bring up a window with lots of choices for you:
Search Box
Text
Photos
Slide show
Video Bar
Polls
Lists
RSS feed
Subscription Links
HTML / Javascript
Each one of these is very easy to use and pretty self-explanatory. But I recommend not overloading your blog. Only include, at least to start, the items you really think your readers would get some value from. Otherwise it can just be annoying distraction that gives readers a reason to leave your blog.
How to Add a Picture Gadget to Your Blog:
Cick the plus sign on the right hand side of the page for the PICTURE gadget.
This will bring up a page call CONFIGURE IMAGE.
Give the image a title
Type a Caption
Link to an image on the web OR upload from your computer hard drive.
(To upload from your computer make sure the “From your computer” button is selected and then just click the BROWSE button. Navigate your way to the location of the photo on your computer’s hard drive and select it.) Once the image appears that means it has been successfully uploaded to Blogger.
(If you want to link this image to another website, then you will want to type in the address in the LINK field.)
Click the orange SAVE button and we’re done.
Now you will be back at your dashboard in the Layout mode. You will see that the top box on the side is now labeled as the title you gave your image.
Click the blue PREVIEW button at the top and a preview window will open showing how your blog currently looks and it will include the image you just uploaded.
5. Rearrange Your Gadgets on Your Blog. Hover your mouse over the gadget and your cursor will turn into a cross with arrows. Click and grab the gadget and drag it where you want it and drop it in place. Click the PREVIEW button to see how that looks.
Genealogy Blogging Summary
We’ve made a lot of progress on our blog in a very short amount of time. Take some time this week to take the steps we took in this episode:
Decide on the theme or focus on of your blog
Get a Google Account and create your Blogger blog account with your chosen name and secure the URL address to go with it.
Pick your design template
Add at least one gadget from the choices provided
And move the gadgets you have so far around until they are in the order you want.
Next week we will finish up this family history blogging lesson with adding a few more gadgets and details, doing a bit of pre-planning for our blog posts, publishing your first article, and then talking about how your readers will subscribe to your blog.
Finally, here’s a link to genealogy expert (and blogging guru) Amy Coffin’s blog post, “Another Jones Surprise or Why Genealogists Should Blog.” Next week’s episode will include handouts on Amy’s great ideas for up to a year’s worth of genealogy blog posts by societies or individuals—you won’t want to miss that!
Wow! We can’t thank you enough for your overwhelming support of The Genealogy Gems Podcast, website, blog, and our YouTube Channel. Family Tree Magazine listed Genealogy Gems among their 101 best genealogy websites for 2016!
Genealogy Gems Named One of the Best for 2016
Family Tree magazine writer David A. Fryxell wrote the post last week listing the 101 Best Websites for 2016. He said they were searching for “new frontiers in online genealogy [and] sites not afraid to innovate at warp speed.” As you know, we really enjoy sharing new and innovative ways to use technology around here and we are delighted they noticed!
As if we weren’t elated enough, The Genealogy Gems Podcast hit 2 million downloads earlier this month! We could never have accomplished this goal without your enthusiasm and support. Thank you for listening, for sharing, and for keeping us engaged in bringing you the best in genealogy and family history research tools.
If you enjoy our free podcast, you’re going to love the Premium Episodes. Click here to peruse our vast archive, rich with family history innovation and inspiration. Premium episodes go more in depth and are commercial free!
Also included in Premium Membership is over thirty of Lisa’s most popular genealogy classes on video, complete with downloadable handouts.
What’s New for Genealogy Gems
No time to sit on our laurels because we have loads of gems in the works for the coming year. Would you like to feel more focused and organized? You’ll be hearing detailed strategies for streamlining your family history efforts and reducing overload and disorganization.
Have you seen Lisa’s Tech Tips video series? She launched it this summer to rave reviews and she’s got more incredible strategies on the way to help you save time and get better research results.
The Genealogy Gems Podcast Episode #211 with Lisa Louise Cooke
Photo Credit: Beth Forester
In this episode, host and producer Lisa Louise Cooke talks with Barry Moreno, Historian at Ellis Island. Hear about the life cycle of this busy U.S. immigration station (1892-1954) and Barry’s research into thousands of Ellis Island employees who worked there.
More Episode Highlights
Archive Lady Melissa Barker tells us about the National Archives Citizen Archivist program and Lisa profiles a volunteer effort coordinated by the British Library to geo-tag thousands of old maps that are already online.
A giant genealogy lost-and-found! Two listeners write in about rescuing old artifacts and returning them to those who might be interested.
Military Minutes contributor Michael Strauss talks about Official Military Personnel Files for 20th-century US servicemen and women?files that were unfortunately partially destroyed. Hear what he learned about his grandfather.
The Genealogist’s Google Toolbox, by Lisa Louise Cooke. This book has 7 full chapters on Google Earth! Available in print.
Google Earth for Genealogy Video Training by Lisa Louise Cooke. Available now as a digital download.
Available in the Genealogy Gems Store
New Video for Premium Members
“Share Your Life Stories More Meaningfully” Premium Video
Every life is fascinating when it’s well shared! Learn from the author of Story of My Life: A Workbook for Preserving Your Legacy what stories you have that are worth telling–and several inspiring reasons to write them. Review different kinds of memories, why some memories are more vivid that others, and how to flesh them out. Learn tips for researching gaps in your memories, how to turn a memory into a good story, what to leave out and several ways to share your stories.
Genealogy Gems App Bonus Content
If you’re listening through the Genealogy Gems app, your bonus content for this episode is a preview of the new Premium video class, “Share Your Own Life Stories More Meaningfully” by Contributing Editor Sunny Morton. TheGenealogy Gems app is FREE in Google Play and is only $2.99 for Windows, iPhone and iPad users
Mailbox: Roland’s Heirloom Rescue
Mailbox: New Listener Photo Rescue Project
What can you do with a collection of unidentified photos?
Return them to a loving home. In this case, it was a local historical society. Linda wisely kept the collection together because often there’s power in what some of the photos may tell you about others.
Get them digitized and online so those who want them can find them. The historical society put images on Find A Grave memorials and Iowa GenWeb. They even plan to display them for locals to look at personally and try to identify!
Historical and genealogical societies can also share mystery photos on their websites (or their local library’s website if they don’t have their own) or on their blogs, Facebook pages or even in their regular newsletters. These are great conversation pieces, especially when you can later report that you have solved the mystery! (Click here for more tips aimed at supporting genealogy societies.)
Lisa Louise Cooke uses and recommendsRootsMagic family history software. From within RootsMagic, you can search historical records on FamilySearch.org, Findmypast.com and MyHeritage.com. RootsMagic is now fully integrated with Ancestry.com: you can sync your RootsMagic trees with your Ancestry.com trees and search records on the site.
Keep your family history research, photos, tree software files, videos and all other computer files safely backed up with Backblaze, the official cloud-based computer backup system for Lisa Louise Cooke’s Genealogy Gems. Learn more at https://www.backblaze.com/Lisa.
MILITARY MINUTES: OFFICIAL MILITARY PERSONNEL FILES
The military service files for your ancestors who served during the twentieth century or later are located at the National Personnel Record Center in St. Louis, MO as part of the National Archives. The files are called the Official Military Personnel Files (OMPF) and are available for each of the military branches; namely; Army, Navy, Air Force, Marines, and Coast Guard.
Researchers should be keenly aware of the devastating fire that occurred on July 12, 1973 at the research facility that destroyed or damaged between 16-18 million service files from the United States Army and the Air Force. Remember that the Air Force wasn’t officially organized until September 14, 1947. Before this date Air Force records were part of the United States Army Air Corps, then part of the U.S. Army.
National Archives at St. Louis. Overview of the holdings, media articles and PowerPoint presentations (download as PDFs)
Start creating fabulous, irresistible videos about your family history with Animoto.com. You don’t need special video-editing skills: just drag and drop your photos and videos, pick a layout and music, add a little text and voila! You’ve got an awesome video! Try this out for yourself at Animoto.com.
Watch the video below for an example of a family history video made with Animoto:
Barry Moreno is a leading authority on the history of Ellis Island, the famous receiving station for millions of immigrants to the United States from 1892-1954. He has worked in the Museum Services Division at Ellis Island for more than a decade. He is the author of several books, including Children of Ellis Island, Ellis Island’s Famous Immigrants (including Bob Hope, Bela Lugosi, and Max Factor) and Encyclopedia of Ellis Island(which includes information on displaced persons).
Ellis Island: Historical highlights
Prior to 1890, immigration was handled by the states (primarily New York, as most passed through the Port of New York).
1920-1921: New regulations cut down immigration dramatically. Each country had quotas that could not be exceeded. New regulations were passed requiring immigrants to
have a passport from their home country
have medical examinations
pay a tax to the American Consulate in their home country.
During the last 30 years, Ellis Island mostly handled immigrants who were “in trouble.”
Starting in the 1930s some immigrants arrived by air (Colonial Airways from Canada). After WWII, Air France started service, and German and Italian airlines came in the 1950s.
Ellis Island was closed in 1954 by President Eisenhower. Immigrants who were still detained when it closed were sent to jails.
After 1954, Ellis Island was still used by the Coast Guard for training and by the Public Health Services department.
Barry’s research on workers at Ellis Island:
Most employees were men. Interestingly, blue collar men tended to die before age 60, and better educated ones lived much longer.
Female employees were typically widows, unmarried or had husbands who did not support them. “Char woman” was a common role held by Irish, Swedish and German women. Char means “chores” (cleaning women). They worked often for about $400/ year with no pension, and lived to old ages.
A nursery was opened at Ellis Island; many Christian missionaries worked there. Ludmila Foxlee (1885-1971) was one of them, a social worker with the YWCA. Click here to read more immigrant aid workers at Ellis Island.
Three more great resources for discovering the stories of your immigrant ancestors:
If your search at the Ellis Island website doesn’t retrieve your ancestors, head on over to Stephen P. Morse’s One Step Pages. There you will find dozens of links to search resources, including the Ellis Island Gold Form for arrivals between 1892 and 1924. Even the folks at Ellis Island refer researchers to Morse’s site. Listen to Lisa’s interview with Stephen Morse in Genealogy Gems Podcast episode #153.
In Lias’s free Family History: Genealogy Made Easy Podcast (episodes 29-31), genealogist Steve Danko covers immigration and naturalization records in depth and even offers up some little-known tips about deciphering some of the cryptic notes researchers often find on passenger lists.
PRODUCTION CREDITS
Lisa Louise Cooke, Host and Producer
Sunny Morton, Editor
Diahan Southard, Contributor: Your DNA Guide
Michael Strauss, Contributor: Military Minutes
Hannah Fullerton, Production Assistant
Lacey Cooke, Service Manager
Disclosure: This page contains affiliate links and Genealogy Gems will be compensated if you make a purchase after clicking on these links (at no additional cost to you). Thank you for supporting this free podcast and blog!