Episode 206 – Publishing Family History Books
Genealogy Gems Podcast Episode 206
with Lisa Louise Cooke
In this Blast from the Past episode:
- Lisa reprises a favorite research detour into vehicle forensics to identify an old family car and shares tips for creating short family history books like those she given as holiday gifts to loved ones.
- Hear letters from listeners on a special adoption discovery and a 1940 census mystery that now makes more sense.
- Your DNA Guide Diahan Southard weighs in with 4 reasons to take a DNA test if you haven’t taken the plunge yet.
- Genealogy Gems Editor Sunny Morton spotlights the current Genealogy Gems Book Club title, Murder in Matera.
- The vehicle forensics and family book segments originally appeared in Genealogy Gems Podcast episodes 18 and 13, respectively, and are being republished here for web audiences.
MAILBOX: RICHARD ON THE 1940 CENSUS

1940 census tip: Listen in Genealogy Gems Episode 201 or read it on the Genealogy Gems blog.
Evidentia software helps genealogists organize and analyze their research discoveries. Free 14-day trial available.
MAILBOX: ADOPTEE DISCOVERY

Tips for using DNA to solve adoption mysteries, taken from a conversation between genetic genealogy experts Your DNA Guide Diahan Southard and CeCe Moore from DNA Detectives.
Join our conversations on the Genealogy Gems Facebook page.
BONUS CONTENT for Genealogy Gems App

If you’re listening through the Genealogy Gems app, your bonus content for this episode is an audio excursion with Lisa on an old railroad track up to a silver mine in the Colorado Rockies, an excursion she originally shared in Episode 18 of the Genealogy Gems Podcast, not now available online, and is being republished here exclusively for your enjoyment. The Genealogy Gems app is FREE in Google Play and is only $2.99 for Windows, iPhone and iPad users
GEM: MAKING FAMILY HISTORY BOOKS

Genealogy Gems Podcast episode 2 with a segment on transcribing diaries was republished as Genealogy Gems episode 134.

Qualities of a successful short family history book, from Lisa Louise Cooke
- The book conveys an overall theme.

Start by reviewing all the available material you have. That will give you a good sense of what the time period was like for your ancestor. You’ll also start to understand their goals, experiences, and emotions. Ultimately a theme should begin to surface.
In the case of A Nurse In Training, I wanted to communicate my grandmother as a young woman taking on a new adventure away from home that ultimately led to this warm, caring woman’s successful career as a nurse. I also tucked a bonus subplot in there of how she just happened to meet her husband at the same time!
You don’t need every scrap of research and every photo to get this theme across. It’s your job to be a sharp editor and to pick out the critical pieces. You want the words and photographs that clearly communicate your theme to the reader.
#2. The book can be read in one sitting.
Like it or not, if it takes too long read, they probably won’t. Strive to create a book that doesn’t look intimidating. I create books that are ten to twenty double-sided pages. People will be willing to pick up a thinner book off the coffee table. If it’s well done they’ll find that all of a sudden they’ve finished the entire book without wanting to put it down. The final goal is that they will walk away with a real sense of having gotten to know that ancestor.
#3. It contains the best of the best of what you have.
This goes back to conveying the theme and being a strict editor. My grandma had many funny stories, but there just wasn’t room for all of them. I picked the best of the best. Anyone who reads the book should hopefully come away with the fact that she had a sense of humor and could laugh at herself. So keep the content of your book focused, full of graphics and photos, and including the best of the best. If you can capture their interest in the first three pages, you’ll have them for the entire book.
#4. There are lots of photos and graphics.

A picture is definitely worth a thousand words. Since the number of words in this size book will be limited, photographs will be your best friend. If you’re lacking in family photos, many of my previous podcasts will give you countless ideas for locating associated photos. In A Nurse In Training, I included scanned images of skating rink tickets, programs and announcements from my grandma’s scrapbook, and journal pages in my grandmother’s own hand. These types of items really add texture and interest to your book, as well as help the reader to see that you’ve really done your homework.
#5. Keep it in chronological order.
This may seem obvious, but it’s easy to get sidetracked and start going back and forth in time. Believe me, for the reader’s sake keep things in chronological order. You as the researcher know this information backward and forwards, but this is probably your reader’s first exposure to it. Be gentle with them and keep it straight forward and simple. Your reader will thank you.
#6. You choose only high-quality images and printing.
High-quality glossy pages, good image quality and a hardcover binding all shout to the reader “I’m worth your time, read me!” For example, I found a drawing of Dameron Hospital where my grandmother worked, but it was a low-quality image and didn’t translate well in the book. As much as I wanted to include it, I ended up leaving it out. I’m glad I did; it wasn’t critical to the book and there were other ways to communicate the hospital to the reader.
![]()
Start creating fabulous, irresistible videos about your family history with Animoto.com. You don’t need special video-editing skills: just drag and drop your photos and videos, pick a layout and music, add a little text and voila! You’ve got an awesome video! Try this out for yourself at Animoto.

MyHeritage is the place to make connections with relatives overseas, particularly with those who may still live in your ancestral homeland. Click here to see what MyHeritage can do for you: it’s free to get started.
4 REASONS TO RSVP YOUR DNA INVITATION
with Diahan Southard, Your DNA Guide
I used to think that economics was just a series of numbers and calculations that helped to gauge the future growth of companies and countries. In a word: boring. But that was before I discovered that you can study the economics of people and essentially use math to describe human behavior, and therefore in some ways make that behavior more predictable.
This is of course especially intriguing to my current situation as the parent of a teenager, a pre-teen, and a daughter. Teenagers especially are always talking about the things that “everyone else has,” a phenomenon that Malcom Gladwell, one of these interesting people-economists, describes as the “tipping point.” He says that the tipping point is “the moment of critical mass, the threshold, the boiling point.” For my kids it’s everything from the point at which a party becomes fun to doing everything that is humanly possible to procure a fidget-spinner (if you don’t know what that is, ask the nearest 11 year old).
In DNA testing in the United States, that tipping point is now. We have reached the point where most genealogists at least have the passing notion that genetics can be useful in genealogy. Most genealogists (I would guess 85%) who attend the lectures I give have already had at least one DNA test completed. Let’s stop for just one minute and recognize how incredible that is! Not too long ago I was still trying to convince people that this was a good idea and that you didn’t have to dig up your ancestors to do it! But now we have scores of genealogists who have not only tested themselves, but have convinced half their family to test as well!

This got me thinking though, who are those people who haven’t tested? And why not? One category of people sans DNA test are those who have full pedigree charts. I have heard many of them say that they don’t see the need to do DNA testing since they have most of their lines “way back.” To those with the blessing of ancestors who kept better records than mine, I am offering four reasons why you should RSVP to your invitation to DNA test.
- Record. First and foremost, your DNA is a record. Just as you have obtained birth certificates and marriage licenses for your ancestors, your DNA is a unique record. It does represent you and your family in a way that no other record can. It is a document of your genetic history, and should be preserved. Further, while you may doubt the ability of your DNA to shed light on your current genealogy, don’t underestimate the contribution it might make in the future.
- Second Cousins. And third cousins, and fourth cousins, etc. Having your DNA tested means you can see a biological connection between you and other relatives that have had tested. For many, the idea of meeting or forming relationships with distant cousins is not appealing. But even if you have no intention of attending DNA family reunions or even in corresponding with these relatives, there is something reassuring about seeing them there on your match list. There is a certain thrill that comes with recognizing the connection between you and someone else. A connection that may not add any new names to your tree, but it helps you feel a deeper connection to your ancestor, and a greater appreciation for your biology.
- Verify. Which brings me to the next point. Seeing these cousins on your list can actually help verify the genealogy you have already collected and documented. It helps to reassure you that you have made the right steps along the way, and may help you gain additional resources about your relative through their descendants that you find on your match list. Resources that can help turn that ancestor from a name on a chart, to a story and a life worth preserving.
- Philanthropy. The last reason to go ahead and have your DNA tested is to help others. If you have been lucky enough to fill in most of the blanks on your tree, you can help others do the same by simply having your DNA tested. Your DNA provides a link to your tree that might be just what someone needs to overcome a brick wall in their family history.
So, if you have been hanging out on the outskirts of DNA testing because you feel like your tree is full enough without it, remember to RSVP to your invitation to be DNA tested, and join the party!
GENEALOGY GEMS BOOK CLUB: A FAMILY HISTORY MURDER MYSTERY!
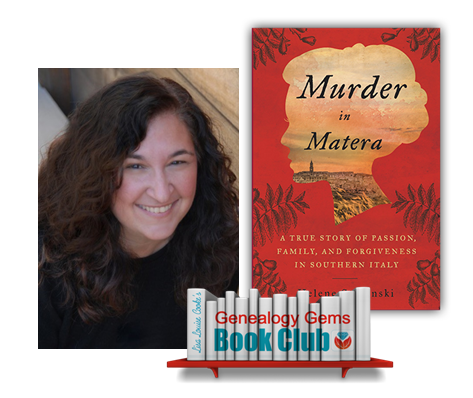
Murder in Matera: A True Story of Passion, Family, and Forgiveness in Southern Italy by journalist Helene Stapinski. A story of poverty and power, love, tragic decisions, and a courageous and desperate woman’s leap for a new life across the ocean.
Murder in Matera continues to unravel a past Helene explored in her fantastic first family history memoir, Five-Finger Discount: A Crooked Family History. Find a whole list of fabulous family history-inspired reading at the Genealogy Gems Book Club!
Genealogy Software
Lisa Louise Cooke uses and recommends RootsMagic family history software. From within RootsMagic, you can search historical records on FamilySearch.org, Findmypast.com and MyHeritage.com. RootsMagic is now fully integrated with Ancestry.com, too: you can sync your RootsMagic trees with your Ancestry.com trees and search records on the site.
![]()
Visit http://www.backblaze.com/lisa
Keep your family history research, photos, tree software files, videos and all other computer files safely backed up with Backblaze, the official cloud-based computer backup system for Lisa Louise Cooke’s Genealogy Gems. Learn more at http://www.backblaze.com/lisa.
GEM: VEHICULAR FORENSICS: Updated links, tips and resources
Here’s the original photo of my grandma next to her father’s car:

The original zoomed in image of the license plate:

The license plate with the “alternative light source” applied:

Since I first published this episode, iGoogle has gone away.
Websites for identifying old cars:
Hubcap Café.com: Collector Car Resources
Flickr group called Vintage Car Identification
From ItStillRuns.com: “Veteran cars were manufactured before 1903, vintage cars were made between 1903 and 1933, and classic cars are considered to be vehicles manufactured from 1933 until fifteen years ago.”
Learn more about ArchiveGrid in Premium Podcast episode 149 (Genealogy Gems Premium subscription required) and in this blog post: How to find original manuscripts and documents using ArchiveGrid.
The Genealogist’s Google Toolbox by Lisa Louise Cooke for Google searches and even YouTube:

Available in the Genealogy Gems Store
“Take a ride in a 1928 Willys Knight made in, owned in and driven in Toledo, Ohio”
Forensic Files channel on YouTube
More updated resources:
“The Colorful History of California License Plates” in LA Magazine
- WorldLicensePlates,com
- California DMV license plate introduction
- California State Archives
- Willys Overland Knight Registry website and Facebook page
- Inflation Calculator
TIP: Remember that you may be able to make great discoveries IN old photos with your photo editing software (even just with whatever free software is on your computer):
1. Open up the photo editing software
2. Open the photograph in question in the program
3. Use the trim feature to zoom in on the license plate?or whatever feature you want to focus on
4. Zoom in to make it easier to see
5. Try using both the Brightness and Contrast feature of your program in combination until you achieve a favorable result
6. Apply Auto Sharpen for further detail
Savvy tips to help identify old photos
Photo editing apps and software for family history
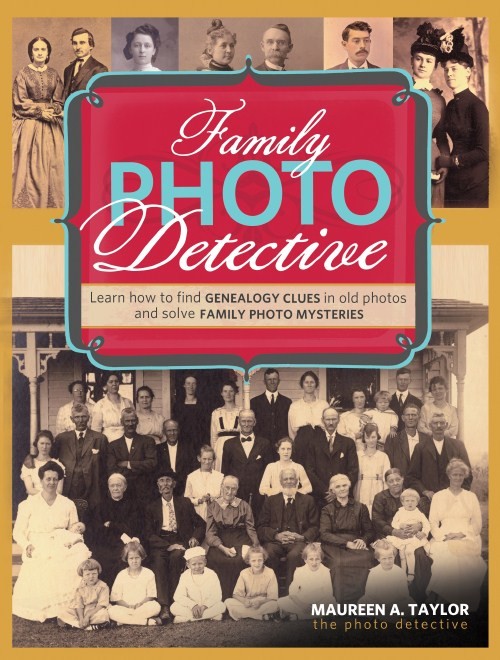
The Photo Detective by Maureen Taylor is your ultimate guide to identifying old objects in pictures to help you learn more about your family history.
PROFILE AMERICA: FIRST TRAFFIC LIGHT
PRODUCTION CREDITS
Lisa Louise Cooke, Host and Producer
Sunny Morton, Editor
Diahan Southard, Your DNA Guide, Content Contributor
Hannah Fullerton, Production Assistant
Lacey Cooke, Service Manager
Resources
PERSI Adds Thousands of Articles: New Genealogy Records Online
New genealogy records online recently include thousands of articles and images in PERSI, the Periodical Source Index. Also: new and updated Australian vital and parish records, German civil registers, an enormous Japanese newspaper archive, and a variety of newspaper and other resources for US states: AZ, AR, IA, KS, MD, NJ, PA, & TX.
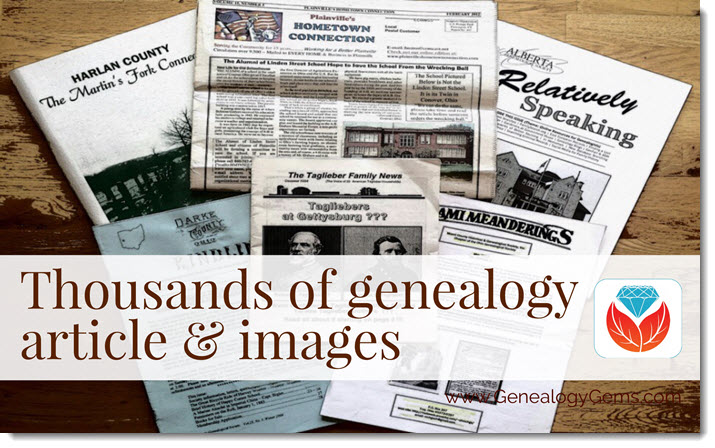
PERSI Update: Thousands of new genealogy articles and images
Findmypast.com updated the Periodical Source Index (PERSI) this week, adding 14,865 new articles, and uploaded 13,039 new images to seven different publications. PERSI is one of those vastly under-utilized genealogy gems: a master subject index of every known genealogical and historical magazine, journal or newsletter ever published! Click here to explore PERSI.
The seven publications to which they’ve added images are as follows:
- North Carolina Historical Commission Biennial Report, 1907-1924, 1944-1962
- Northern Genealogist, 1895-1903
- Old Times-North Yarmouth Maine, 1877-1884
- Olde Ulster, 1905-1914
- Ossory Archaeological Society Transactions, 1879-1886
- Palimpsest, 1920-1923
- Vineland Historical Magazine, 1916-1921
Click here to read an article about using PERSI for genealogy research.
More New Genealogy Records Online Around the World
Australia
Parish registers in Sydney. A new Ancestry.com database has been published: Sydney, Australia, Anglican Parish Registers, 1818-2011. “This database contains baptism, burial, confirmation, marriage, and composite registers from the Anglican Church Diocese of Sydney,” says the collection description. Baptismal records may include name, birth date, gender, name and occupation of mother and father, address, and date and parish of baptism. Confirmation records may include name, age, birth date, address, and the date and parish of confirmation. Marriage records may include the names of bride and groom as well as their age at marriage, parents’ names and the date and parish of the event. Burial records may include the name, gender, address, death date, and date and parish of burial.
Victoria BMD indexes. MyHeritage.com now hosts the following vital records indexes for Victoria, Australia: births (1837-1920), marriages (1837-1942), and deaths (1836-1985). These new databases supplement MyHeritage’s other Victoria collections, including annual and police gazettes. (Note: comparable collections of Victoria vital records are also available to search for free at the Victoria state government website.)
Germany
Just over 858,000 records appear in Ancestry.com’s new database, Halle (Saale), Germany, Deaths, 1874-1957. “This collection contains death records from Halle (Saale) covering the years 1874 up to and including 1957,” states the collection description. “Halle, also known as “Halle on the Saale,” was already a major city by 1890. These records come from the local registry offices, which began keeping vital records in the former Prussian provinces in October 1874. “The collected records are arranged chronologically and usually in bound yearbook form, which are collectively referred to as ‘civil registers.’ For most of the communities included in the collection, corresponding alphabetical directories of names were also created. While churches continued to keep traditional records, the State also mandated that the personal or marital status of the entire population be recorded. (Note: These records are in German. For best results, you should search using German words and location spellings.)”
Japan
A large Japanese newspaper archive has been made available online, as reported by The Japan News. The report states: “The Yomiuri Shimbun has launched a new online archive called Yomiuri Kiji-Kensaku (Yomiuri article search), enabling people to access more than 13 million articles dating back to the newspaper’s first issue in 1874. The archive also includes articles from The Japan News (previously The Daily Yomiuri) dating back to 1989. This content will be useful for people seeking English-language information on Japan…Using the service requires registration. There is a minimum monthly charge of ¥300 plus tax, with any other charges based on how much content is accessed.” Tip: read the use instructions at the article above, before clicking through in the link given in that article.
New Genealogy Records Online for the United States: By State
Arizona. Newspapers.com has added the Arizona Daily Star, with issues from 1879 to 2017. The Arizona Daily Star is a daily morning paper that began publishing in Tucson on January 12, 1879, more than 30 years before Arizona became a state. The Daily Star’s first editor was L.C. Hughes, who would later go on to become governor of the Arizona Territory.
Arkansas. The University of Arkansas Libraries has digitized over 34,000 pages of content for its latest digital collection, the Arkansas Extension Circulars. A recent news article reports that: “The Arkansas Agricultural Extension Service began publishing the Arkansas Extension Circulars in the 1880s. These popular publications covered myriad agriculture-related topics: sewing, gardening and caring for livestock among them. Now, users worldwide can access these guides online.” These practical use articles give insight into the lives of rural and farming families in Arkansas, and feature local clubs and community efforts.
Iowa. The Cedar Rapids Public Library has partnered with The Gazette to make millions of pages of the newspaper available online. The Gazette dates back to 1883, and the new database is keyword searchable. A recent article reports that 2 million pages are currently available online in this searchable archive, with plans to digitize another 1 million pages over the next 18 months.
Kansas. From a recent article: “Complete issues of Fort Hays State University’s Reveille yearbooks – from the first in 1914 to the last in 2003 – are now online, freely available to the public in clean, crisp, fast-loading and searchable digital versions in Forsyth Library’s FHSU Scholars Repository.” Click here to go directly to the yearbook archive and start exploring.
Maryland. New at Ancestry.com: Maryland, Catholic Families, 1753-1851 (a small collection of 13.5k records, but an important point of origin for many US families). “Judging from the 12,000-name index at the back of the volume, for sheer coverage this must be the starting point for Western Maryland Catholic genealogy,” states the description for this collection of birth, baptismal, marriage, and death records for the parishes of St. Ignatius in Mt. Savage, and St. Mary’s in Cumberland, Maryland. Find a brief history of Catholicism in western Maryland with lists of priests and a summary of congregational growth. Then find lists of marriages, baptisms, deaths, and burials, and even lists of those “who appeared at Easter Confession, confirmation, communion, or who pledged financial support for the parish priest.”
New Jersey. Findmypast.com subscribers may now access small but historically and genealogically important collections of baptismal records (1746-1795) and additional church records (1747-1794) for Hannover, Morris County, New Jersey. States the first collection description, “Despite being small in population, the township is rich in history. It was the first settlement established in northwest New Jersey, dating back to 1685, and is situated by the Whippany River.” The second group of records “pertains to an active time in Hanover, with the resurgence of religious revivals kicking off around 1740. The most populous denominations in the latter half of the 1700s were Presbyterian, Society of Friends (Quaker), Dutch Reformed, Baptist, and Episcopal.”
Pennsylvania. The Carlisle Indian Industrial School, located in Carlisle, PA, was a federally-funded boarding school for Native American children from 1879 through 1918. The Carlisle Indian School Digital Resource Center is a project that is building an online searchable database of resources to preserve the history of the school and the students who attended there.
They recently announced a new resource titled Cemetery Information. According to the site, this collection provides “easy access to a wide range of primary source documents about the cemetery and the Carlisle Indian School students interred there.” Available materials include an individual page for every person interred there with their basic information, downloadable primary source materials about their death, an interactive aerial map of the cemetery, and more.
Texas. The Texas State Library and Archives Commission has digitized a series of collections featuring archival holdings from the First World War through the Texas Digital Archive. These collections are:
- The Frank S. Tillman Collection: “The bulk of the collection focuses on the Thirty-Sixth Division and also features items from the Ninetieth Division, the Adjutant General of Texas, and other Texas soldiers.”
- General John A. Hulen Papers:”Highlights include correspondence, photographs, and scrapbooks, dating 1887-1960.”
- 36th Division Association Papers: “The papers include correspondence, reports, military records, and scrapbooks, dating 1857-1954. Records relate to Texans’ experience during World War I, railroads in Texas, and the San Jacinto Monument.”
 What genealogy websites are you using? Which additional ones should you also be using?
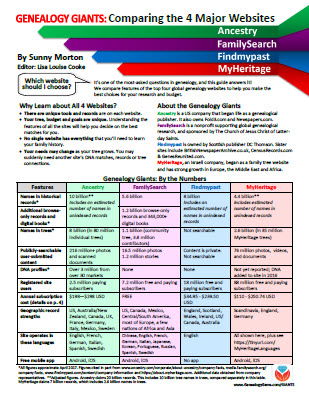
Learn more about the giant genealogy websites mentioned in this post–and how they stack up to the other big sites–in our unique, must-have quick reference guide, Genealogy Giants, Comparing the 4 Major Websites, by Genealogy Gems editor Sunny Morton. You’ll learn how knowing the relative strengths and weaknesses of Ancestry.com, FamilySearch.org, Findmypast.com and MyHeritage.com can help your research. There’s more than one site out there–and you should be using as many of them as possible. The guide does share information about how to access library editions of these websites for free. This inexpensive guide is worth every penny–and may very well help you save money.
Disclosure: This post contains affiliate links and Genealogy Gems will be compensated if you make a purchase after clicking on these links (at no additional cost to you). Thank you for supporting Genealogy Gems!
Family History Episode 42: How to Start a Genealogy Blog, Part 5
Family History: Genealogy Made Easy Podcast
with Lisa Louise Cooke
Republished August 26, 2014

Free podcast – available in all major podcast apps.
https://lisalouisecooke.com/familyhistorypodcast/audio/fh42.mp3
Download the Show Notes for this Episode
Welcome to this step-by-step series for beginning genealogists—and more experienced ones who want to brush up or learn something new. I first ran this series in 2008-09. So many people have asked about it, I’m bringing it back in weekly segments.
In today’s episode we finish a multi-part, step-by-step series on setting up your own family history blog. In episode 40 you decided what the purpose of your blog is, and we got you started with the free Blogger web site and picked out your blog name and set up the web address for it, and got the basic framework started. In episode 41 two seasoned bloggers inspired us with their posts.
In this episode I talk about adding a few more gadgets and details, doing a bit of pre-planning for your blog posts, publishing your first article, and then talking about how your readers will subscribe to your blog. You’ll also get great tips on how to create genealogy content that others looking for the same ancestors can find easily online.
Episode 42: How to Start a Genealogy Blog, Part 5
OK, let’s head back to the new blog we created in Episode 40. I named mine Blog Your Family History. (This is just a sample blog: my current blog is part of the Genealogy Gems website.) Please note: blogging platforms change over time. The features and layouts I mention have been updated. Just watch for similar features in newer versions of the blog platform.
So far I have the basic layout set up and I added the vintage photograph of the three ladies sharing some written correspondence. If you’re not signed in to your Google account, you’ll notice a link in the upper right corner of your blog page that says “sign in.” You’ll need to click that and enter your user name and password to get access to your blog dashboard – the area where you customize your blog and write your blog posts.
When you sign in you’ll be taken to the dashboard area for your blog. In my case I have a couple of blogs, so they’ll all be listed here in the dashboard. To get back to your blog just click the View Blog link for the blog you want to view. You’ll notice that when you get there the link in the upper right corner now says “sign out” so you know right now you’re signed in. To get back to the dashboard where we can continue customizing the blog, just click the Customize link in the upper right hand corner of the blog. So far we have a couple of “gadgets” or sections of our blog:
- the title area at the top;
- the blog posts box. In the case of the blog I’m creating here the gadgets run along the right hand side of the blog page.
- About Me
- the gadget with the photo I added
- A followers gadget showing other blogger readers
- the blog archive gadget – this is where readers can access blog posts that are over a month old.
So let’s add another gadget by clicking the Add Gadget link in the top gadget box and a window will pop up showing us out options. I’d like to add a search box so that my readers can easily find articles with keywords they are interested in. So just click the plus sign to add the Search gadget and a Configure Search Box window pops up so I can fine tune this gadget the way I want it. So I’ll keep the title as “Search this blog” since that’s pretty straightforward, and I’m going to just have it search this blog so I will keep that check box checked. And click the SAVE button and now I have a Search box on my blog.
So as you can see adding various gadgets to your blog is easy and you can customize them to appear the way you want. And remember you can rearrange them on your dashboard by just clicking and dragging them into the position you want. Once you get the elements of your blog the way you like them – at least for now, and you can certainly make changes any time you want – then it’s time to start blogging.
What to blog about?
Hopefully you’ve decided what you want to blog about – perhaps a specific line of your family, or maybe you’re going to just sort of journal what you work on each day. No matter what approach you take, there are a few things to keep in mind. First, each time you write an article and publish it to your blog page it’s called a “post.” Post is sort of interchangeable with article, and posting is another word for publishing – basically you’ve made the article available on the web.
When you do post an article you will want people—particularly other researchers—to be able to find it. You’ll have better success attracting readers who are researching the same families if you sort of put yourself in their shoes. Ask yourself, what will they be searching on? When someone goes to Google and starts looking for blogs about their family trees, they are using keywords to do that search.
So while you may have some very creative ideas for blog post titles, if you don’t include some of those important keywords (or at a minimum the surnames) they may never find you. And of course sprinkling keywords into your post will also increase its chances of being found. And when we talk about keywords, we’re also talking about key phrases, such as family history, or family tree. Other good keywords are genealogy, birth, death, research, location names, etc. Just the kinds of things you would search on if you were looking for people writing about your ancestors. Remember too that an ancestor’s name is also a keyword phrase.
It’s a good idea to mix it up because you never know how someone else will be searching. For example, I research my husband’s great great grandfather Senator C J Larson of Winthrop MN. So if I’m writing about him, I will use several variations of his name:
- C J Larson
- Carl Johan Larson
- Charles Larson
- Charles J Larson
- Senator C J Larson
And of course when I use these names in combination with Winthrop, Sibley County, Minnesota, I’m bound to be found by someone also researching him and his family.
Publish your first post
OK, well let’s get right to how to publish your first blog post. At your blog Dashboard (if you’re not there just click the link in the upper right corner that says Dashboard) and click NEW POST. This is like getting a new piece of paper. You’re new post is under the Posting tab and there’s a box where you can write your text and there are some formatting buttons along the top.
My advice is to bite off small chunks. People tend to read something that looks more like a magazine article rather than a novel. And it’s easier to focus in on one topic at a time. So you may want to make your first post a welcome message and explain to your readers what they’ll will be seeing in the future on your blog. I know, you don’t have any readers yet, but since all of your posts are archived, this post will be read tomorrow and two years from now. New readers can find you at any time, and they may very likely take a look at your first post.
The first thing to do is write your post title. I used to wait to title my posts until after I wrote them because writing them often brought to mind the perfect title. But the problem with that is that so often I would forget to go back and type a title in and I would end up publishing without the title. While you can go back and add the title later, it may show up in your readers RSS feeds including those who subscribe to your blog by email. So I find that it works best if I give it the best working title I can come up with, then I write the post, and then I can go back and change it if I want, but if I forget it will at least have a basic title.
Also, remember that your readers probably have many blogs they read – but they probably don’t READ them all, the probably scan the titles and click through to read the ones that sound interesting. So your title has an important job to do. Like the blog text it should contain keywords that will help the post show up in search results, AND it needs to catch your readers’ attention.
When I first started blogging I was always trying to come up with title that as clearly as possible explained what the post was about. But over time I realized that we don’t have to explain it all in the title. In fact, being a bit mysterious or intriguing with the title can entice the reader to click through and read. They’ll find out soon enough all the details of your posting, but your title sets the tone, and catches their curiosity. Of course I don’t advocate bait and switch – but have fun with your titles and use it to your best advantage. And now FINALLY it’s time to actually write your blog post! Of course you can unleash your creativity here, but I do have a few suggestions:
- Keep your paragraphs shorter rather than longer – it just makes them easier and quicker to read
- Incorporate those keywords and phrases
- A picture says a thousand words – add images whenever possible and I’ll show you how in just a moment
- Write in your natural voice. Typically blogs aren’t formal, and you will have an easier time writing if you write more like you speak. And that will come across as more genuine to your readers.
- Don’t bite off more than you can chew. If you have a lot to say on a particular topic, consider publishing your thoughts in a series of blog posts rather than one really long one. And I find that readers really like following a series.
Once you’ve got it written up, it’s time to a bit of formatting. In Blogger there are a few different fonts you can choose from. Just like in Microsoft word, you highlight the text you want to format and then select from the drop down menu which font, and font size you want. The default font and size might be just fine, but it’s nice to know you do have some flexibility. You can also bold and italicize text by highlighting the text and clicking either button. And like Word you can use Control-B on your computer keyboard for bold and Control I for italicize. You can also put your text in a different color. Again just highlight the text to be changed and click on the capital T button with the color boxes and click on the color you want.
Now a word about formatting. Remember when we discussed that it was a good idea to avoid blog template designs that had dark backgrounds with light type because they are hard on the eyes and difficult to read? Well, over doing text formatting is much the same. It can get hard on the eyes. It’s like the rule of thumb that says you don’t type in capital letters because it looks like you’re screaming at the reader.
Well, overdoing the formatting with a ton of bold and italics and colors just ends up looking chaotic and nothing really ends up standing out. So keep in mind that less is more and use it sparingly so that only the most important things stand out. And just like in Word you can select whether your text is left right or centered justified, or fully justified. And you can create numbered and bulleted lists simply by highlight the text and clicking one of those buttons. And you can also use the Block Quote feature to set text apart as a quotation by indenting it from both sides.
With all of these formatting features you will probably want to see what it will look like to your readers. And that will be different to a certain extent than how it looks here in the post editor. To see it as it will look when posted, click the Preview link in the upper right corner of the text box. When you’re in preview mode the link will then say Hide Preview and to go back to editing or what they call Compose mode just click that Hide Preview link.
Next is the Spell check button, which is something you’ll want to use every time you post. Thankfully if you make a spelling error you can fix it after it’s posted, but it’s so much easier just to run the spell check before you do. There are a couple of more things you can add to this text post to spice it up.
The next button is the Add Image button and it does just that, adds your images and photos. When you click the button an Upload Images window pops up where you can browse your computer hard drive and locate the image you want to add, or if you have a website you can type in the URL address for an image you already have hosted on your website and it will use that image. Keep in mind that Blogger has an 8 MB image size limit, so you might have to reduce some of your photos and save them as smaller files to be uploaded to Blogger. This is often the case when you’ve scanned old family photos at high resolutions that create quite large files.
Once you’ve told Blogger which image to use, you can also choose how you want it to appear on the page on the left, in the center or on the right with the text around it, or you can just leave it as None. And you can also choose whether it is Small, Medium or Large. When you’re ready to go just click the orange Upload Image button and in a few moments it will be processed and you can just click the Done button, the window will close, and your image will now be in your blog post. Again, if you want to see for sure how it will look to your readers just click the Preview link.
You can even upload a video to your blog post. It works much the same way. Click the video upload button. A window pops up and you click the Browse button to locate the video on your hard drive. Blogger will accept AVI, MPEG, QuickTime, Real, and Windows Media video files up to 100 MB in size which is typically about 10 minutes at most. They also have rules about the kind of videos you can upload and require you to click the check box to agree to their terms of service, and then you just click the orange Upload Video button.
Videos take a few minutes to upload, so at first you’ll see the Blogger Uploading Video screen on the video player. You’ll see down at the bottom that it is processing. Once your video appears on the screen then you’re ready to go. If you don’t want to wait while it finishes processing you can click the SAVE button on your post and check back later to make sure it’s complete before Publishing.
And finally, if you decide you want to remove the formatting from you text you can do so with the last button which looks like an eraser. It’s called Remove Formatting from Selection. So in the case of the text that I set apart as a quote, if I want to change it back to regular text, I just highlight the text with my mouse and click the Eraser button and it will go back to normal. If you happen to know HTML you can click the HTML tab and work with your blog post code to further customize it. When you’re done just click the Compose tab to go back to regular editing mode.
Once you have everything formatted, you’ve spell checked and you’ve reconfirmed your title, your ready to send it out to the world! Just click the orange Publish Now button and it will immediately be live on your blog. The next window will say Your blog post published successfully! And you can just click the View Blog link to open a new window and see your published post.
Edit your previous posts
Now if you’re like me then occasionally you’re going to want to go back and edit one of your blog postings. And thankfully that’s very easy to do. Just head back to your Blogger Dashboard and next to the blue New Post button which you would click to create another post, you’ll find the Edit posts link. Just click that and you will see the articles you’ve posted with the most recent one at the top. If you wanted to delete the post all together you just go to the right hand side and click the Delete link for that particular post. To edit the post click the Edit link on the far left side of the post title. This takes you write back into Compose mode and you can make any changes you want. When you’re done, just click the Publish button.
Schedule posts to publish in the future
Do you want to write several posts at once, and have them automatically publish one at a time—once a day, once a week, etc? There’s an easy way to set up your posts to publish in the future. At the bottom of the Text box you’ll see a link called Post Options, just click that. This will expand the box and give you some options. Here you can enter the date and the time that you want the post to go live online. Once you’ve typed that in then just click the Publish button. It won’t be live right now, but will be published at the date and time you specified.
When I first started using this feature I kept clicking SAVE and then wondering why my posts didn’t publish at the right time. But you have to click the Publish button even though you’re not publishing at that very moment. It’s a neat feature, and works great when you’re going to be away but want articles to be published each day. Or like when we talked about breaking up a long article into a series of short articles, you could create them all and then set them to publish once a day or whatever time frame you preferred.
Now you probably noticed that you could also check a box in the Post Options for allowing your readers to post comments. But the best place to set that up is under the Settings Tab. So go to your dashboard, and click Settings. This will take you to the Settings tab which offers a lot of options. Click on the Comments menu link and here’s where you can make your selections as to how you would like your readers to be able to interact with you and your blog. Instant communication and connection with your readers is one of the really unique aspects of blogging, and you’ll find that most folks who read genealogy blogs are interested in a civil conversation. So let’s go through the options here.
- Show: I usually have this set to show comments. But you can hide them if you want.
- Under Who Can Comment? I would recommend that you allow anyone to comment. After all, you don’t want to prevent that long lost cousin who finds your family history blog in a search to not be able to contact you.
- For Comment Form Placement that’s just a personal preference, but I find the pop up window is easy for readers to use.
- Another important feature among these settings is the Comment message. And then next you’ll find Comment Moderation. I would recommend that you always moderate your comments, at least to start. This means that when a reader leaves a comment you will have the opportunity to read it and approve it to be published in the Comments section of that blog posting. That way you can eliminate offensive comments. Honestly, I’ve never received anything objectionable, but occasionally I do get people who are fishing for business and simply post “I like your blog” so that they can then tell about their company and give their website address. There’s no harm in setting it to Always and you can change it later if you want.
- Then at the bottom of the Comments Setting I like to type in my email address so that I’ll be notified by email if someone leaves a comment that needs to be moderated. And you moderate and approve comments in your Blogger dashboard.
When you’re done just click the orange SAVE SETTINGS button. And again, you can change these settings any time you want. So how do you moderate reader comments? Well, just click on the Posting Tab, and there will be three options:
- New post
- Edit Posts
- Moderate Comments – just click that link. And if you have comments that need to reviewed and approved or deleted you can do it there.
Let readers subscribe to your blog
And finally, let’s talk about how your readers can subscribe to your blog. That’s the other really cool thing about blogging. Each of your new blog articles can be automatically sent to your readers who subscribe. It’s just like subscribing to a magazine. We subscribe to a magazine so we don’t have to go to the store every day to check to see if a new issue has arrived. Subscribing to a blog is the same idea but of course it’s free. And like magazines being delivered to your mailbox, blog posts can be delivered to your readers blog Reader, or email box.
Your readers subscribe to your blog through your RSS feed. RSS stands for Really Simple Syndication which just means an easy way to send out your posts. But you don’t have to know anything about RSS feeds. Blogger does it all for you and I’m really surprised how many bloggers don’t bother to make it easy for their readers to subscribe. Not everyone who wants to subscribe to your blog will quite know how to do it, or be an experienced blog subscriber. You will want to make it as easy as possible for them to get started. Here’s an easy way to do it.
- Go to http://www.google.com/webmasters/add.html. Here you can add an “Add to Google” button to your blog. That way your readers can easily add your blog to their iGoogle homepage or to Google Reader, a tool they can use to receive and read blogs.
- For Choose your content type select RSS.
- Under Promoting select one blog.
- Select the style of button you want to put on your blog
- Type your blog address into the box, which needs to be your rss feed. In my case, it’s http://blogyourfamilyhistory.blogspot.com/feeds/posts/default?alt=rss. You substitute your blog name in where mine is currently (your blog name in that link instead of blogyourfamilyhistory).
- Click the Generate HTML button. The html code you need to add your button will automatically appear in the box, and it’s already highlighted for you so all you need to do is Control C on your keyboard to copy the code to your computer’s clipboard, and then head back to your Blog dashboard.
- Click Layout.
- Click Add a Gadget.
- Click the HTML / Java Gadget. A window will pop up where you can type in a title such as “Subscribe to this blog.”
- In the big box press Control V to paste the HTML code that you copied into the box.
- Click the SAVE button.
- Back on your Layout page you’ll see at the top that you the “page element has been added” and now the top gadget is “Subscribe to this blog”
Want to see what it looks like? Just click the blue PREVIEW button at the top and it your blog will open up in a new window and there you will see the “Add to Google” button. Now EVERYONE can subscribe and follow your blog quickly and easily. Just close that window, and click the orange SAVE button on your layout page. Now click View Blog and try it out for yourself.
Note: I talk here about iGoogle, which is no longer available.
Add the blog to Google Reader to receive each new blog post when it’s published, and have a link to click through directly to the articles and the blog. It’s very convenient and keeps your blog on the minds and lists of your readers. Now you’re all set to go. You can post your articles, which your readers can follow. As you have more time you can fine tune the settings and layout of your blog. Have fun! Best wishes for connecting with other researchers around the world.
Blogging Tip:
In response to one of our recent tips, a reader named Sarah pointed out that there are services now to “slurp up” blogs and publish them into books. We’ll tell you about one service, but encourage you to shop around. At Sarah’s recommendation, we looked into Blurb.com. According to Blurb’s Web site, this online program works with several blogging platforms including Blogger, LiveJournal, TypePad and WordPress.com.
You can customize and edit your book in real time. The automatic slurp action imports and maps blog text, images and comments and then links it into professionally designed page layouts. What an exciting way to preserve your family history. What a great Christmas gift or Mother’s Day gift.
Once you are ready to publish your book, you can control the price by buying a hardcover, dust jacket, soft cover and other designs. These books can be up to 440 pages and as few as 40. Have a blog book within 10 days of ordering. Now, as you can imagine, this is a little pricey but still very, very reasonable. Prices start at just $12.95 for a 40-page softcover and go up from there. You get bookmaking software free!