When it comes to chocolate my general rule of thumb is that more is usually better! The same is true with DNA testing. With this big DNA test upgrade sale, now is the perfect time to get MORE! I love being Your DNA Guide here at Genealogy Gems, and today I’ll walk you through how to get the best deal and the right tests. Take my hand, and let’s get upgrading!
This month, Family Tree DNA is running this Family Tree DNA’s Friends & Family sale, which means that all of the kits and upgrades are on sale! This sale is the perfect time to upgrade your DNA tests. (By clicking our link above you are supporting the free Genealogy Gems Podcast. It doesn’t cost you anything extra, and we will receive compensation from the affiliate link. Thank you!)
Once in your account, click the Upgrade button. In very basic terms, to Upgrade means that they are going to go back to your DNA sample that they have on file, and do more testing.
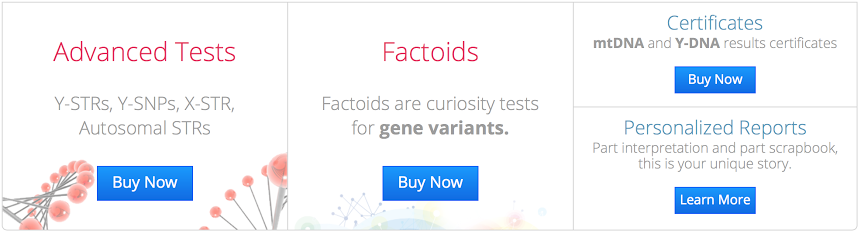
Depending on the tests you have already had completed at Family Tree DNA, you will see several different options in the Upgrade menu. Most of you will see this box, listing the option to do more advanced testing, find gene variants, or order certificates.
If you’re testing for general genealogy purposes, you can most likely ignore all of those options. The advanced testing is aptly named as it is only for very specific, very, advanced problems. The gene variant report can be interesting, but you can get a similar report for only $5 from Promethease.com. As for the certificates, that is up to you. It is a printed report of your DNA values for either your YDNA or your mtDNA test. These are nice to give to relatives that have tested for you that might want something tangible to hold as evidence of their participation in your genetic genealogy efforts.
The last option in this box is to have a personalized report written. This will be several pages of information about the DNA testing you have had completed, but don’t expect them to find your ancestors or do much interpretation of the results.
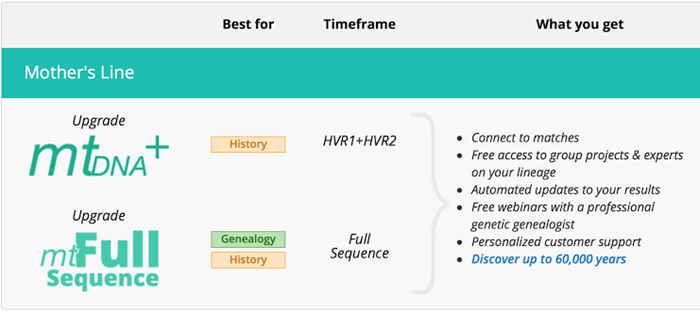
Beyond those options, if you have not had mitochondrial DNA testing completed, or if you have only had the lower mtDNAPlus test completed, you will see options to evaluate your mtDNA. If you are going to try to do family history with your mtDNA test, you need to have the Full Sequence test completed. For the most part, using mtDNA in your family history won’t get you very far, but it is a good record of your direct maternal line.
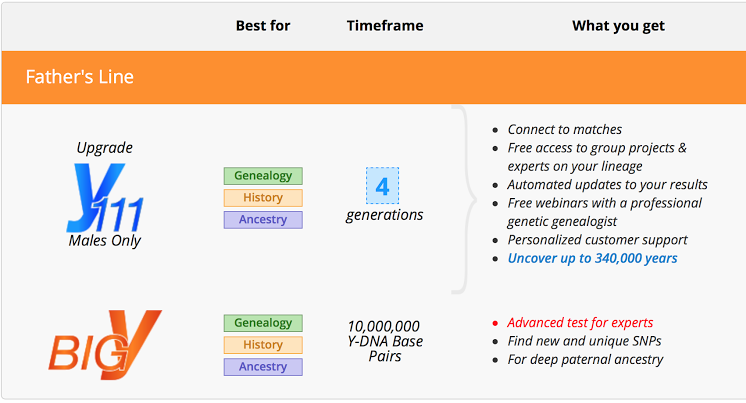
If you are a man with the YDNA test, you will also see options to upgrade your YDNA test to a higher number of markers. You will want to upgrade from 37 to 67 or 111 if you have other matches on your match page who have also tested at those higher levels and you would like to get a better comparison. You can check to see if they have tested at a higher level by looking at your match page under their name. In general, the 67 marker test will help you better decide if you are or are not related to someone, while the 111 marker test will help you better determine how you are related to known connections on your match list.
If you have not yet taken the Family Finder test at Family Tree DNA, that option will present itself as well. If the person tested is still available for testing, you should actually start their autosomal DNA testing experience with AncestryDNA, then transfer for free into their FTDNA account. If your family member is deceased, then you can get permission from their closest living relative, or whoever is administrating their account, to have them tested on the Family Finder test at Family Tree DNA.
So remember my general rule of thumb when it comes to chocolate and DNA testing, more is usually better. Click here to shop the Family Tree DNA Friends & Family!
You will find the complete show notes for the topic discussed in this episode at the Elevenses with Lisa show notes page here.
Google Books is a free online catalog of over 25 million books, 10 million of which are digitized and searchable. While you would expect to find books at Google Books, you may be surprised to discover there it also includes many other types of published materials. In this episode I’ll explain how to find 10 of my favorite surprising items at Google Books.
Click below to listen:
Learn More About Google Books for Genealogy
My book includes everything you need to know about improving your Google searches in Google Books:
Genealogy Gems Premium Members Exclusive Download:
This audio from this episode comes from Elevenses with Lisa episode 30. Log into your membership and then click here to download the handy PDF show notes that compliment this podcast episode.
Don’t miss the Bonus audio for this episode. In the app, tap the gift box icon just under the media player. Get the app here.
Get the Free Genealogy Gems Newsletter
The Genealogy Gems email newsletter is the best way to stay informed about what’s available with your Premium eLearning Membership. Sign up today here.
Get Unlimited Photo Enhancement and Colorization at MyHeritage
Get genealogy records and unlimited Enhanced and Colorized photos as a MyHeritage PremiumPlus or Complete Plan Subscriber. Click here to start a free trial.
Are you having a hard time coming up with the perfect gift for someone special on your list? The gift of video gives all year round, and doesn’t require you to buy the correct size. Make your video about family history, or the memories of the recipient, and get ready for hugs and smiles of appreciation for your thoughtfulness.
Do you remember the first Christmas that you realized it was better to give than to receive? It’s an amazing feeling when your heart swells at the thought of snagging the perfect present for the people you love the most. But if you’re like me, there are always one or two relatives who present daunting challenges. Perhaps it’s the elder members of your tribe who seem to want for nothing; or a Aunt who quietly returns everything.
My challenge this year is my Dad. He seems to want for nothing, and having an Amazon Wish List isn’t even on his radar. Last year Dad passed his high school scrapbook on to me. It’s brimming with some of his fondest memories: his Boy Scout membership card, newspaper clippings of his football prowess, and the cardboard glasses he wore to his very first 3D movie. I’m pretty sure his heart was swelling when he handed this treasure chest of beloved memories to his daughter, the family historian.
And that’s when I was struck with an inspiration: give it back to him in the form of a video.
Video: Gift Perfection
Here’s why video makes a perfect gift:
It doesn’t take up precious space on the shelf
It can be enjoyed from any computing or mobile device again and again
It can be shared easily with others
If you have been in search of the perfect holiday gift, follow along with me, and give the gift of video.
Creating a Video Gift
If you’re short on time, consider making a video of an old family scrapbook. All you will need is a smartphone and 30-60 minutes. Pull a scrapbook off the shelf, and dust it off because it’s about to get a new life!
Step 1 – Photograph the album
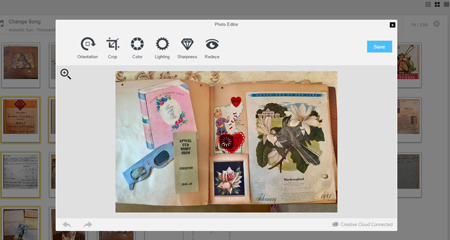
You could use a flatbed scanner to scan each page and the individual items you want to highlight. But you can save a ton of time by putting your smartphone or tablet to use. For me, this was the ideal solution also because so many of the items in the scrapbook had become loose, and I wanted to be able to show the pages as they were originally laid out. By setting the book on a table I could just snap photos rather than turning it upside down on the scanner glass. And don’t worry about snapping the perfect pics because we’ll get them all snazzy in step 3.
Save the images to a free cloud service like Dropbox so that you can easily retrieve them on your home computer.
Step 2 – Head to Animoto.com
(Full disclosure: This post contains affiliate links and I will be compensated if you make a purchase after clicking on my links. I appreciate you using these links because that compensation helps make the Genealogy Gems blog possible. Thank you!)
Although Animoto does have an mobile app, I like using the web version on my computer which provides the advantage of a bigger screen. Click here to go to Animoto, and sign in to your account. Then, just click the Create button to start a new video project.
Choose a Video Style, which will include a music soundtrack. If the music isn’t quite what you had in mind, click Change Song and pick from a robust list of tunes. Animoto’s secret sauce optimizes and paces your slides to jive with the music. If the music is faster, the slides are faster, and if it’s slower, yep, the slides are slower. In the end though, you always have the final choice in the pacing of your slides and your entire video. Need a little extra time? Then just add a second music sound track.
Step 3 – Add Your Photos
Now it’s time to add your photos. Click Add Image, select Dropbox, and navigate your way to the folder where you saved your photos. Click the first one in the list, and then holding down the Shift key on your keyboard, click the last photo in the list, and click the Choose button. There you go: you’ve added all your images in one fell swoop! Imagine the time you saved over adding one item at a time.
I snapped all the full page photos first, and then I went back and snapped some of particular items I wanted to highlight with closeup images. That meant that when I added my photos they weren’t in exactly the right order. Thankfully, all I had to do was drag and drop them in the desired order. Easy peasy!
Edit your photos within Animoto.
Another reason I adore using Animoto is that I can do all my editing right there in the dashboard. With a few clicks you can apply a quick crop, slight rotation, and image enhancement with a great result. (Image right)
You even have the option to add video clips with Animoto. So if I had a fancy to add my original video of turning the pages of the scrapbook (above) I would just drag and drop it onto the timeline. And it is that ability to drag images and video from your hard drive straight into Animoto that makes it so quick and easy to use.
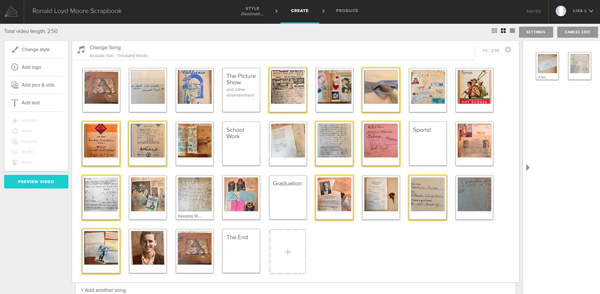
Step 4 – Add Title Slides
Although my Dad’s scrapbook really speaks for itself, I decided to add a few title cards to help guide the viewer like:
The Picture Show
School Work
Sports
Graduation
And title cards are great for “The End” and any other message or credits you want to add.
If you want to add text within your project, click to select the item that your text will follow, then click Add Text from the menu, and it will appear immediately after the previous item. To add text at the end, just click the plus sign in the last box and again type your text. And remember, nothing is set in stone. If you change your mind you can drag the text to a new location, edit it, or delete it all together.
Step 5 – Preview & Publish Your Video
At any time during the process you can click the Preview Video button to see your work. If you like what you see, then click the Produce button in the Preview window to create the final product. And speaking of final products, here’s mine:
Learn More
Are you ready to start creating memorable videos for the loved ones on your list? Click here to learn even more and give Animoto a whirl. (And just think: no wrapping required. You’re welcome!)
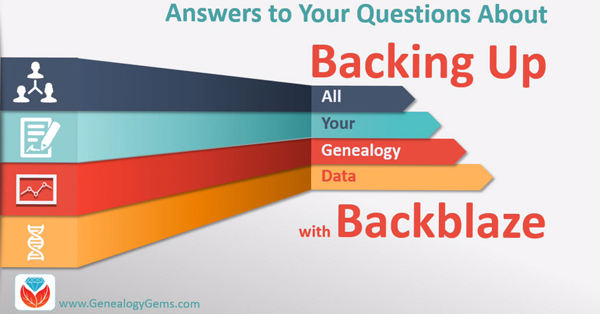
Backing up your genealogy with Backblaze is a critical move if you want to protect your family history. Let us answer your questions and share with you how the cloud backup service Backblaze can be the answer to effectively backing up and protecting all your genealogy data.
Recently, we received some great questions concerning the cloud-based computer backup service, Backblaze, one of our trusted sponsors of The Genealogy Gems Podcast. The answers to these questions will give you with the confidence to put a reliable cloud backup plan in place so that your family history remains safe and secure.
What is Backblaze?
Backblaze is an online back-up tool that stores copies of your computer files, and allows you to restore them in case your computer is lost, stolen, or destroyed. It offers unlimited storage and supports every type of file, including large video files and genealogy tree files.
Once installed, Backblaze works 24/7 through your internet connection to save every change you make. Backblaze also keeps your files safe offsite (at their data centers) with 24-hour staff, biometric security, and redundant power.
Unlike Evernote or Dropbox which are designed to allow you to work with your files across multiple devices, Backblaze is “set it and forget it” protection should the worst happen.
While you can sign-in and access your files from multiple devices, it’s primary purpose is to provide a back-up plan so you can restore your data if something happens to your computer. While external hard drives are great for when your computer crashes, they can’t help you if they are destroyed in a fire or flood along with your computer because they were both in the same location. Off-site backup and multiple copies (redundancy) are key when it comes to protecting your precious genealogy research.
Answers to Your Questions about Using Backblaze for Cloud Storage
Q: I am excited to begin using Backblaze for the first time! However, I am a bit uncertain of how to actually begin. Can you walk me through it?
A: Lots of our readers are a little uncertain when it comes to using something new. We have created a blog post titled “How to Download Backblaze in 4 Easy Steps” that will walk you through it!
Q: I have a number of computers at home and I also have a network drive. What does Backblaze cover? Will it back up everything?
A: No, and here are the details. You can have multiple computers backed up on your account, but each computer will require its own subscription (about $6/month). Backblaze can back up all file types and storage is unlimited, so large files from your hard drive are not a problem. It also backs up every time you make a change to a file and your backup will always have the most current version. You can view and restore your backed up files at any time via download, USB flash drive (mailed to you,) or USB hard drive (mailed to you.) Backblaze does not however support the backup of network drives.
Q: Does Backblaze also save earlier versions of my files like Dropbox does?
A: Yes. You can locate earlier versions of files or even files that have since been deleted. To learn how to do this, follow the step-by-step directions in this article from Backblaze.
Q: I live in a fairly remote location, and have a limited Internet data plan. Will Backblaze use a lot of data?
A: Backblaze, as with any Cloud backup service, does require a strong internet connection and could take days or weeks to completely back up your entire computer. This will depend quite a bit on how much data you have on your computer. If you have a limited data plan or slow internet, you could experience delays or what appears to be high data usage while the initial backup is occurring. Here is a link to a helpful page on the Backblaze website called “Bandwidth Speed Test to Backblaze”where you can test your internet speed. Backblaze is designed not to “throttle” or slow down the flow of uploads. It strives to use your full internet bandwidth. However, you do have the option to set it to slow down the backups. The “Bandwidth Speed Test to Backblaze” page provides instructions on how to throttle your download speed so that it doesn’t use up as much bandwidth. While this will cause your initial backup to take longer, it can clear help ease up on the data usage and allow for your other internet activity. You can also pause backups, or set them to start manually or at scheduled intervals. Once your initial backup is complete, the data usage should slow down.
Q: Because Backblaze backs up my computer automatically and instantly, what happens if I get a virus. Will that also be transferred to Backblaze?
A: From Backblaze blog
“Since Backblaze is…continuously running online backup solution and is not locally connected to your machine, all of your backed up files would be available for restore with minimal or no data loss (depending on the last backup time before the machine was infected).”
A Note from Lisa About Backblaze and Genealogy
“You’ve heard me talk about Backblaze on the podcast, and why it’s my first choice when it comes to backing up my precious genealogy research and personal files. I met their CEO Gleb Budman at Rootstech and after lots of research, I decided that Backblaze was the best cloud backup service out there! Maybe you’re still on the fence about it or maybe you’ve been putting it off, unsure of how complicated it is to set up or if it’s really worth the cost. So I got in touch with our friends over at Backblaze and we’ve set up a special offer for those of you have not yet begun protecting your data.”
Your DNA test results come with raw DNA data. This raw data is the next piece in your DNA puzzle. Your DNA Guide, Diahan Southard, shares some interesting facts about raw DNA data and its use. Dig in and learn why!
What is Raw DNA Data?
Raw DNA data is the actual output file created by the DNA testing company. You can access your raw data at each testing company, and I strongly encourage that you do. You will need to download and save your raw data results to your computer. For instructions on how to do this, head on over to this page on my Your DNA Guide website.
This file contains your little DNA values at over 700,000 locations tested by your testing company. Any company with the right set-up and analysis tools can help you find matches with other people, and make additional genealogical discoveries. They may also be able to tell you if you like cilantro and are likely to have high blood sugar!
Raw DNA Data Research Projects and Destinations
Raw DNA data has to have a place to go. There are several research projects underway that utilize your data from any of the big four testing companies (Family Tree DNA, 23andMe, MyHeritage DNA, and AncestryDNA) for various genealogical or genetic purposes.
Home page of the DNA Land website
Let’s look at four examples of places you might upload your raw DNA data.
1. Family Tree DNA. If you have tested at 23andMe or AncestryDNA, you can transfer your raw data file to Family Tree DNA for free! You can access all of your matches and use the matching tools. For an additional $19, you can get access to the ethnicity features and other tools.
2. DNA Land. The not-for-profit DNA Land has over 26,000 individuals who have voluntarily uploaded their autosomal DNA test results into their website to be used for research purposes. Their self-stated goal is to “make genetic discoveries for the benefit of humanity.”
3. MyHeritage. MyHeritage also accepts your raw DNA data for incorporation into their genealogical database. You can upload your results for free and receive access to matches along with the ability to contact them. For a one-time fee of $29, you can unlock access to all of MyHeritage DNA’s features and tools as well. Learn more and upload your data here.
4. Geni.com. Geni.com (a family tree collaboration tool) jumped on the DNA bandwagon and announced they too would be integrating DNA into their family tree tool. Utilizing a partnership with Family Tree DNA, Geni.com is utilizing all three kinds of DNA (autosomal, YDNA, and mDNA) in their offering. The interface looks much like what you would see at your testing company: a list of matches with some family tree information.
The biggest takeaway from the recent influx of destinations for your raw DNA data shows us that the integration of DNA into genealogy is in full swing. I estimate every genealogy company and every major genealogy software will offer some kind of DNA integration within the next five years. DNA has certainly earned a permanent spot as a genealogical record type!
A Word of Caution
With all of these options available, and surely more to come, you will want to be careful about who you are giving your raw data to. Make sure you are comfortable with the company and its goals. Be sure you understand what role your DNA will be playing in their research, as well. These are exciting times in the world of genealogy.
Take the Next Steps in Your DNA Journey
Wherever you are in your DNA journey, we can help!
For the most help in understanding DNA for family history, take a look at the ten different DNA guides in both print and digital form from Your DNA Guide, Diahan Southard.
 This month, Family Tree DNA is running this Family Tree DNA’s Friends & Family sale, which means that all of the kits and upgrades are on sale! This sale is the perfect time to upgrade your DNA tests. (By clicking our link above you are supporting the free Genealogy Gems Podcast. It doesn’t cost you anything extra, and we will receive compensation from the affiliate link. Thank you!)
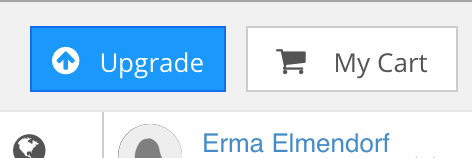


 “You’ve heard me talk about Backblaze on the
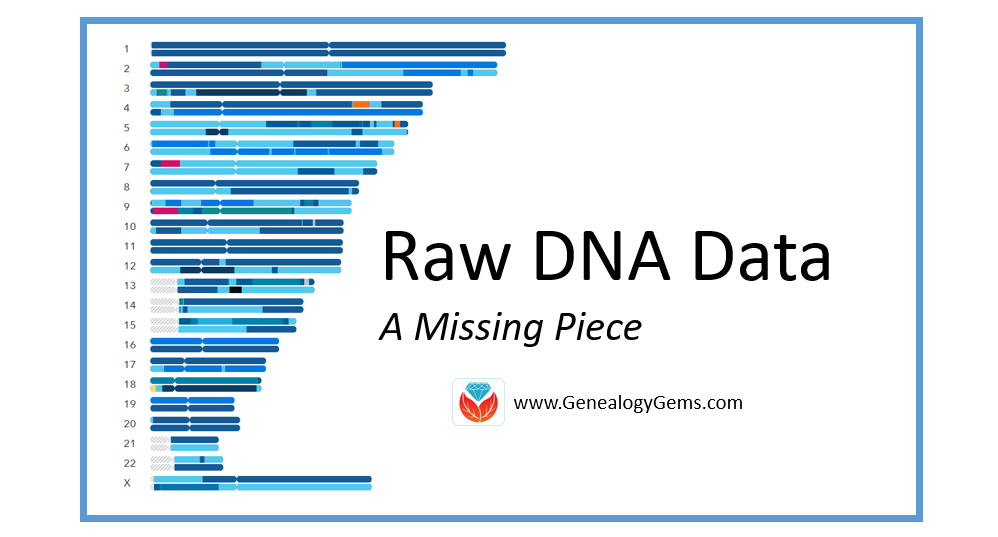
 Wherever you are in your DNA journey, we can help!