Best Ways to Search for Photos with Google Images
Google offers a variety of ways to help you find and search for images. In fact, there are so many different ways it can get a little confusing. In this video and article I’m going to show you how to find images and photographs that apply to your family history. Who knows, we may even find an ancestor’s photo. I’m also going to show you how you can use Google Images to even help identify some of the images and photos you have in your family scrapbooks. These are my best image search strategies and they come my book The Genealogist’s Google Toolbox.

Available in the Genealogy Gems Store
Elevenses with Lisa Episode 49 Show Notes
Follow along in the show notes below. The step-by-step instructions are available in an ad-free show notes cheat sheet which is downloadable in the Resources section at the end of these show notes. (Premium Membership required.)
How to Find Photos and Images with Google Images
When it comes to searching for images, part of the confusion comes from the fact that the search experience on desktop and mobile are a bit different. So, let’s start with running a basic image search on computer desktop. There are actually two ways to do that.
#1 Google search for images at Google.com on desktop:
- Go to Google.com
- Run a search
- Click Image results
#2 Search for images at Google Images on desktop:
- Go to https://images.google.com or go to Google.com and click Images in the top right corner (Image 1)
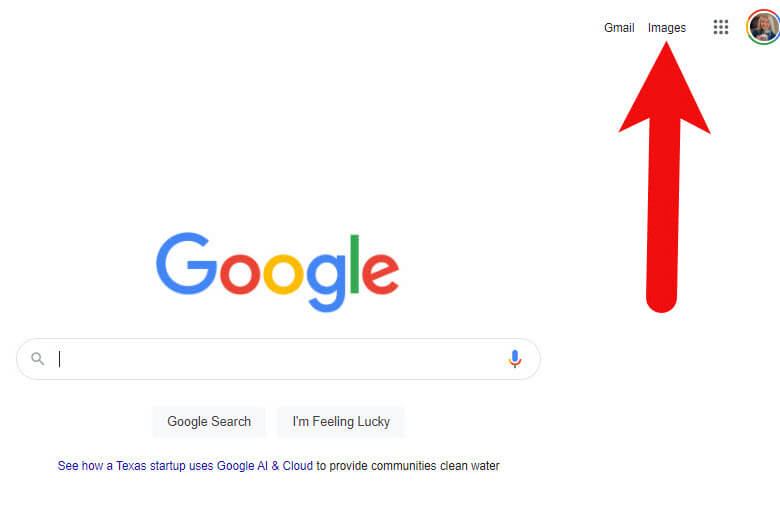
Image 1: How to get to Google Images from Google.com
- Run a text search: Example: John Herring
- Images results will be presented
If I’m in a hurry, I’ll usually just search from Google.com because I’m probably over there anyway. But if I really want to find the best image, or I expect to do some digging, I go directly to Google Images.
How to Get the Best Google Images Results
Searching for a name is fine, but chances are there are and have been many people with that name. You’ll need to narrow things down and provide Google with more specific information about what you want.
There are a several excellent ways to refine and dramatically improve your results. The best place to start is by using a few powerful search operators.
The first search operator is quotation marks. By putting quotation marks around a word or a phrase you are telling Google that it must:
- Be included in each search result,
- Be spelled the way you spelled it,
- And in the case of a phrase, the words must appear in the order you typed them.
You can also use an asterisk to hold the spot for a middle initial or middle name. This is important because without it, Google may pass over these since the name was presented in quotation marks which means its to be searched exactly as typed.
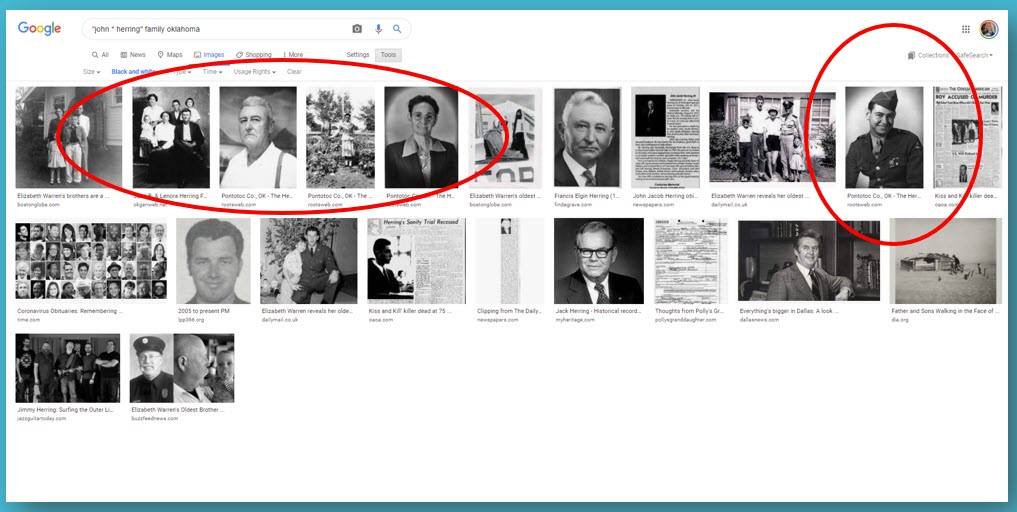
Notice in the following screen shot how this refined search appears. The search operators have made quite an improvement in the image results. I’ve located four photos of my great grandfather! (Image 2)

(Image 2) Google Images found photos of my great grandfather
Google might restrict how many images it shows you. Click See more anyway at the bottom of the screen to reveal all the results. (Image 3)
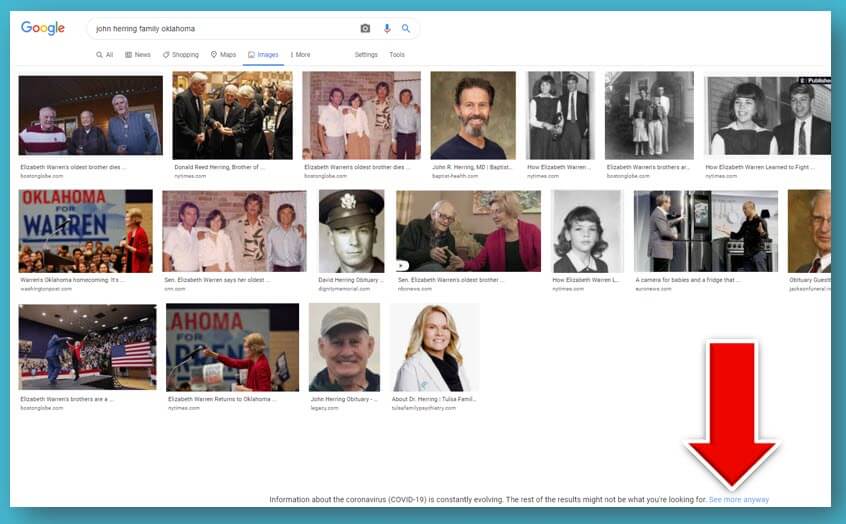
(Image 3) Click to see more image results
You may need to scroll down to see even more results. Click an image to preview it. (Image 4)
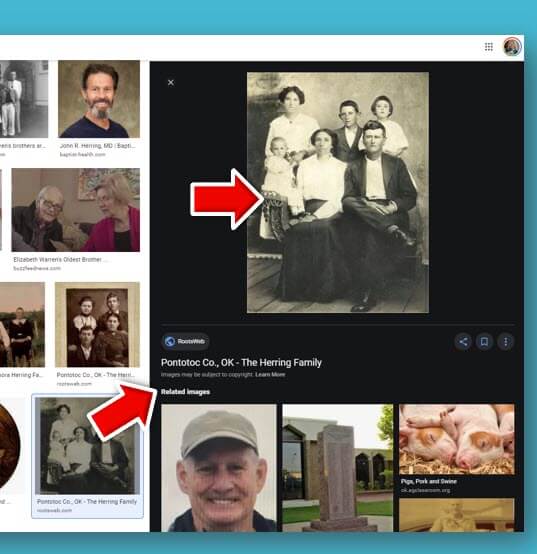
(Image 4) Click to preview Google Image results
Click the enlarged preview image again to visit the website where it is hosted. I’ve got my fingers crossed that since this website is hosting a photograph of my ancestors, it just might have more. And indeed, it does – genealogy happy dance! (Image 5)
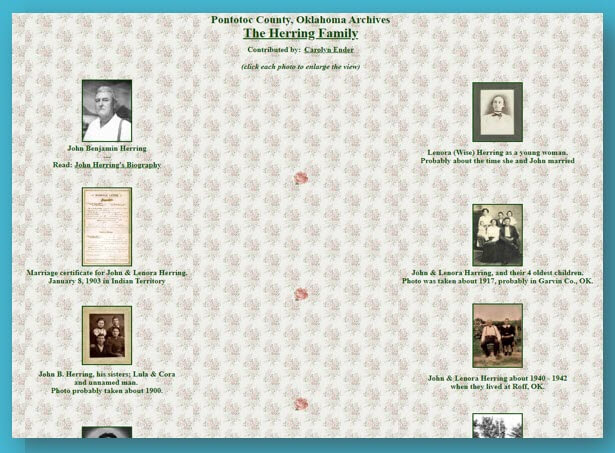
(Image 5) Old family photos found on this web page
How to Narrow Down an Image Search to Old Photos
One of the ways you can zero in on old photos is by filtering down to only Black and White images. This makes sense because most of our older family photos are black and white.
On the Google Images search results page click the Tools button. This will cause a secondary menu to drop down. Click the Any Color menu and select Black and White. (Image 6)
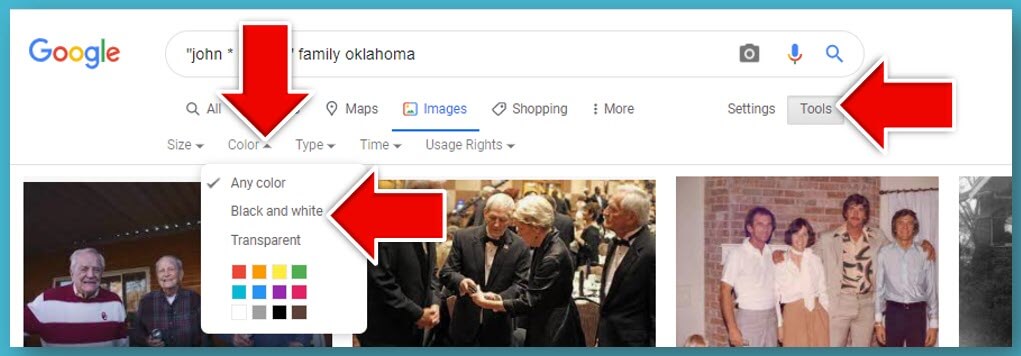
(Image 6) How to filter Google Image results
Now all of your image results will be black and white. It’s easy to tell that most of these are older photos. (Image 7)
(Image 7) Filtered image results
Permission to Use Images Found with Google Images
If you want to use any of the photos you find, you’ll need to ensure that you have permission to do so. Start with the FAQ at Google Search Help. This page will help guide you through issues like Fair Use and how usage rights work. In the end, the best thing to do when in doubt is to contact the person who posted the photo and explore any requirements they may have regarding use of the image.
How to Use Google Images to Identify Images and Photos
Do you have unidentified photographs, old postcards or other images in your family scrapbooks or photo albums? Google Images just might be able to help!
Start by first digitizing the image (I use a flatbed scanner) and saving it to your computer hard drive. Then head to Google Images on your computer and click the camera icon in the search field. This will give you two options:
- Paste URL (we’ll get to that in just a bit)
- Upload an image (this is the one you want – click it)
Click Choose File and grab the photo you saved to your computer. Google Images will search the Web for that image. It may find an exact copy, or it may deliver visually similar images.
Notice on the Google Images search results page that Google has added keywords to the search field at the top of the page. You’ll also see a tiny version of the image you searched. The keywords may be rather generic such as gentleman, family, etc. Try replacing these words with more specific words about the photos and what you are looking for. For example, you could replace the word gentleman with your ancestor’s name in quotation marks, or replace the word family with the family surname and the town where they lived. Experiment and try different variations to see what provides the best results.
How to Upload an Image to Google Image Search (Reverse Search):
- Digitize the image and save it to your computer.
- On your computer, go to https://images.google.com or google Google Images.
- Click the camera icon in the search field.
- Navigate to and select the digitized photo you saved to your computer.
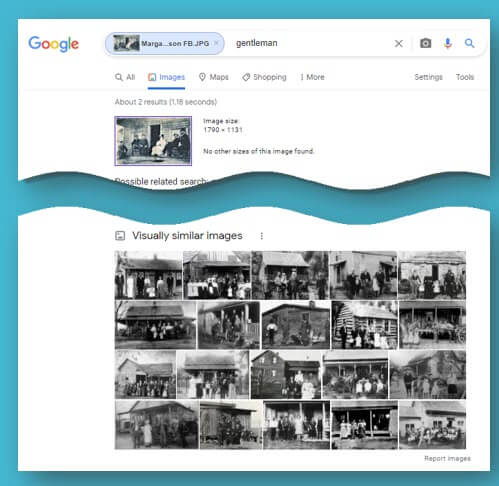
- Google will attempt to find that exact image. If not the closest visually. You will see words in the search field along with your photo. These words describe what Google AI noted about the photo. For example, when I upload a photo of Margaret Scully sitting in her rocking chair, Google note “sitting” and delivered old photo of people sitting. When I upload a photo of the John Herring family Google notes “family” and provides old photos of family groups. Neither Margaret nor the Herrings are well-known, so this isn’t a surprise. If I upload a postcard from an ancestor’s scrapbook of a well-known or famous location, Google will likely find additional copies on the web and provide background information on the location and a website address for it if there is one.
- You can revise this search by replacing the words that Google noted (i.e. family) with the person’s name of the surname. In the case of the John Herring group photo, I replaced family with Herring and then John Herring.
Remember the option to Paste URL? Use this when you find a photo on a website, (or if you have posted a photo on your own website or blog) and you want to find more like it. Right-click (PC – or Control Click on a Mac) on the image and Copy Image Address. Next, head back to Google Images, click the camera icon and paste the URL. Google will use that image to run your image search.
How to Search an Online Photo with Google Images (Reverse Search):
- Right-click on a PC (Control Click on a Mac) on the image on the web page.
- In the pop-up menu select Copy Image Address.
- Go to Google Images.
- Click the camera icon in the search field.
- Paste the image URL that you copied to your computer clipboard (on a PC use Control V on your keyboard.)
- Click the Search by Image button to run your search.
Searching with your own image or an image you find online can help you discover many more website that have the visual content you need. In this episode I searched using an Elevenses with Lisa viewer’s old photo and revised the search with the name of the town. This resulted in a wonderful assortment of websites to look at that also hosted photos from the same town and timeframe.
The initial Google Image results added the keyword gentleman to the search field. But you can see by the visually similar images it found that it was able to target photos that included more similarities than just gentleman. These photos also matched in other important ways (Image 8):
- House
- Porch
- Multiple People
- White dress
- Old photo
(Image 8)
Who might have photos online of your family? Here’s just a short list of possibilities:
- Archives
- Libraries
- Historical Societies
- Newspapers
- Genealogy Websites
- Cousins
- Social Media
How to Use Google Image Search on Mobile
The Google Images camera icon allows you to conduct reverse image searches. However, whether you use a browser app like Safari or Chrome to go to Google Images or you use the Google search app, you won’t find the Google Images camera icon in the search field. Google Images is different on mobile than it is on computer desktop. The main difference is that there is no camera icon for uploading images to search. However, there’s a little secret for getting around that problem.
On an iPhone / iPad you can switch your settings for the Safari app so that it behaves more like a desktop computer. And for our purposes, that means getting the camera icon in Google Images.
How to Search Your Own Image Using Google Images on an iPhone or iPad
- Open the Settings app
- Scroll down and tap the Safari app
- Scroll down and tap Request Desktop Website
- Tap the slide to activate All Websites
- Close the Settings app
- Open Safari
- Go to Google.com – if you’re signed into your account you can tap the apps icon (9 dots) and open Images or just google Google Images
- Now you have the camera icon in your search bar ready to reverse search images!
How to Reverse Search a Web Image on an iPhone or iPad (Reverse Search Images)
- When you find a photograph on a website in Safari, press and hold the image
- Tap Copy
- Go to Google Images (after changing your settings to Desktop Website)
- Tap the camera icon
- In the Paste URL field press and hold and tap Paste
- The web image URL will appear in the search field.
- Tap the Search by Image button to run your search.
How to Reverse Search an Image on Android:
- Open the Chrome browser app.
- Go to google.com.
- Tap the three dots at the top right to open the menu.
- Tap to check the box for Desktop Site.
- The Google Images page will refresh and you will now have the camera icon ready to run reverse image searches.
How to Reverse Search a Web Image on Android (Reverse Search Images)
- In the Chrome browser, go to the web page hosting the image.
- Tap and hold on the image until the menu pops up.
- Tap on Search Google For This Image.
- You’ll be taken to Google Image results for that image.
Resources
- Watch past free episodes of Elevenses with Lisa
- Get your official Elevenses with Lisa mug
- Subscribe for free to our Genealogy Gems YouTube channel so you’ll never miss another episode.
- Subscribe to my free email newsletter to get notifications.
- Bonus Download exclusively for Premium Members: Download the show notes handout. (Not a Premium Member? Become a Genealogy Gems Premium Member today.)