Show Notes: If you’ve created a MyMap in Google Maps, there’s a lot more that you can do with it if you import it into Google Earth. However, exporting it out of MyMaps as a KMZ that can be used in Google Earth isn’t really obvious. The good news is that it’s not hard to do. I’ll explain how and I’ll also show you how to import the KMZ file into Google Earth.
If you have several items in your MyMaps project, make sure that each item that you want to be included in the file that you’re exporting has a checkmark next to it. Whatever is checked is activated on the map display and will be included in your exported file.
Next, in the upper left corner of Google MyMaps, you’ll see three vertically stacked dots. When we click that, you’ll get a menu that includes Download KML. KML and KMZ are file extensions that are supported by Google Earth.
You’ll also see View Map in Google Earth in this menu. If you click that the MyMaps project will open in a new web browser tab in the web version of Google Earth. You don’t want that because the web version does not have all the features that are available in the free downloadable software version of Google Earth.
Click to select Download KML. KML stands for Keyhole Markup Language. This is a geographic file. The difference between KML and KMZ is that KML is typically a single item while a KMZ is a zipped file potentially containing several items. Each placemark and data item added to your project is a single item. When you have several like in our example project, you will want to export it as a KMZ. So even though the menu says Download KML, go ahead and click it.
When you click it you’ll get a pop-up menu with two options:
Keep data up to date with network link KML (only usable online).
This will include all your data. If any of that data is coming from another source on the cloud and that source updates, your data will update in Google Earth.
Export as KML instead of KMZ. Does not support all icons. This can zip your project as a .KMZ but it might not transfer all your icons, particularly those that might be coming from another source on the cloud.
In many cases, either of these would be fine. But when in doubt, I select Keep data up to date with network link KML so that all my project data will remain current.
After you make your selection, your file will be exported to your hard drive. You can select the destination where you want it saved. It will be a KMZ file because there are multiple items that have been zipped into one package.
How to Open an Exported MyMaps KMZ File
On a PC you will see the downloaded KMZ file in the bar at the bottom of your screen. If you click the up arrow you can open the location on your hard drive where the file was saved. You can also click Open. That opens the KMZ in a program that can read it like Google Earth if it’s already installed on your computer. The easiest way to open the file is to simply double-click it. Your computer will automatically detect that you are opening a KMZ file and it will automatically launch your Google Earth software, and open and display the file in it. It may take a few extra moments to load and run because it’s trying to do two things at once, and Google Earth is a pretty robust program.
There are three panels in Google Earth:
Search (where you enter names, addresses and more to fly to locations in Google Earth),
Places (your Google Earth files and folders These are private and are not published by Google.)
and Layers (data that can be streamed from cloud sources.)
Your project file will be in the Temporary Folder of the Places Panel. Google places opened files in the Temporary folder because it doesn’t know whether you just want to look at it one time, or you want to keep it. When you want to keep a file, you will need to drag and drop it onto MyPlaces at the top of the Places panel, or into a folder you have created.
Also, Google Earth doesn’t autosave. So it’s important to save your work before you close the program. Otherwise, your file will be lost. To save your file, in the menu at the top of the screen select File > Save > Save MyPlaces.
How to Display a MyMaps File in Google Earth
There is a small arrow next to your project file in the Places panel that indicates it is a nested project folder. Click the arrow to display the contents of this zipped container. Inside is the actual MyMaps project folder or the project. Continue to click arrows to reveal the nested content. Now that you can see the individual items, you can now work with them.
To display the entire project on the screen, double-click the main project file (not one of the nested items). Click only to highlight it. Don’t click the linked title because that will only display the descriptive text you included in your original MyMaps project.
Everything that you saw in MyMaps is now in Google Earth. You can check and uncheck items within the project in the Places panel depending on what you want to be displayed on the screen.
How to Add Content to a MyMaps File in Google Earth
You can easily add additional content to your project. Click to select the project, then add content such as a Placemark. If you selected the Keep data up to date with network link KML option when you exported your file, you won’t be able to add items to the existing folders that came over from MyMaps. However, you can add individual items or new folders by selecting the top-level project.
The beauty of working with the project file in Google Earth is that you can now add content from the Layers panel, some of which was not available to you in MyMaps. You can also add additional items from the Toolbar at the top of the Google Earth screen.
Learn More about Google Earth for Genealogy
Get the book:
The Genealogist’s Google Toolbox, 3rd edition by Lisa Louise Cooke. This book includes 7 full chapters on Google Earth for genealogy.
More Videos and Show Notes Articles on Using Google Earth for Genealogy:
Visit the Maps & Geography category on the Video & Show Notes page on the Genealogy Gems website.
This blast from the past episode comes from the digitally remastered Genealogy Gems Podcast episodes 11 and 12 (originally recorded in 2007). They are now interwoven with fresh narration and updated show notes. Topics include: Google Images; Top 10 Tips for finding Graduation Gems in your family history; Display your family history with an easy to create Decoupage plate.
Did you know you can use Google to help identify images, to find more images like them online, and even to track down images that have been moved to a different place online? Find these great Google tech tips in this episode, along with 10 tech-savvy tricks for finding an ancestor’s school records. You will also hear how to create a family history photo decoupage plate: a perfect craft to give as a gift or create with children.
This “blast from the past” episode comes from the digitally remastered Genealogy Gems Podcast episodes 11 and 12 (originally recorded in 2007). They are now interwoven with fresh narration; below you’ll find all-new show notes.
Google Image searches: Updated tips
Click here to watch a short new tutorial video on using Google Images to find images for your genealogy research.
Conduct an initial search using the search terms you want. The Image category (along with other categories) will appear on the screen along with your search results. For images of people: enter name as search term in quotes: “Mark Twain.” If you have an unusual name or if you have extra time to scroll through results, enter the name without quotation marks. Other search terms to try: ancestral place names, tombstone, name of a building (school, church, etc.), the make and model of Grandpa’s car, etc.
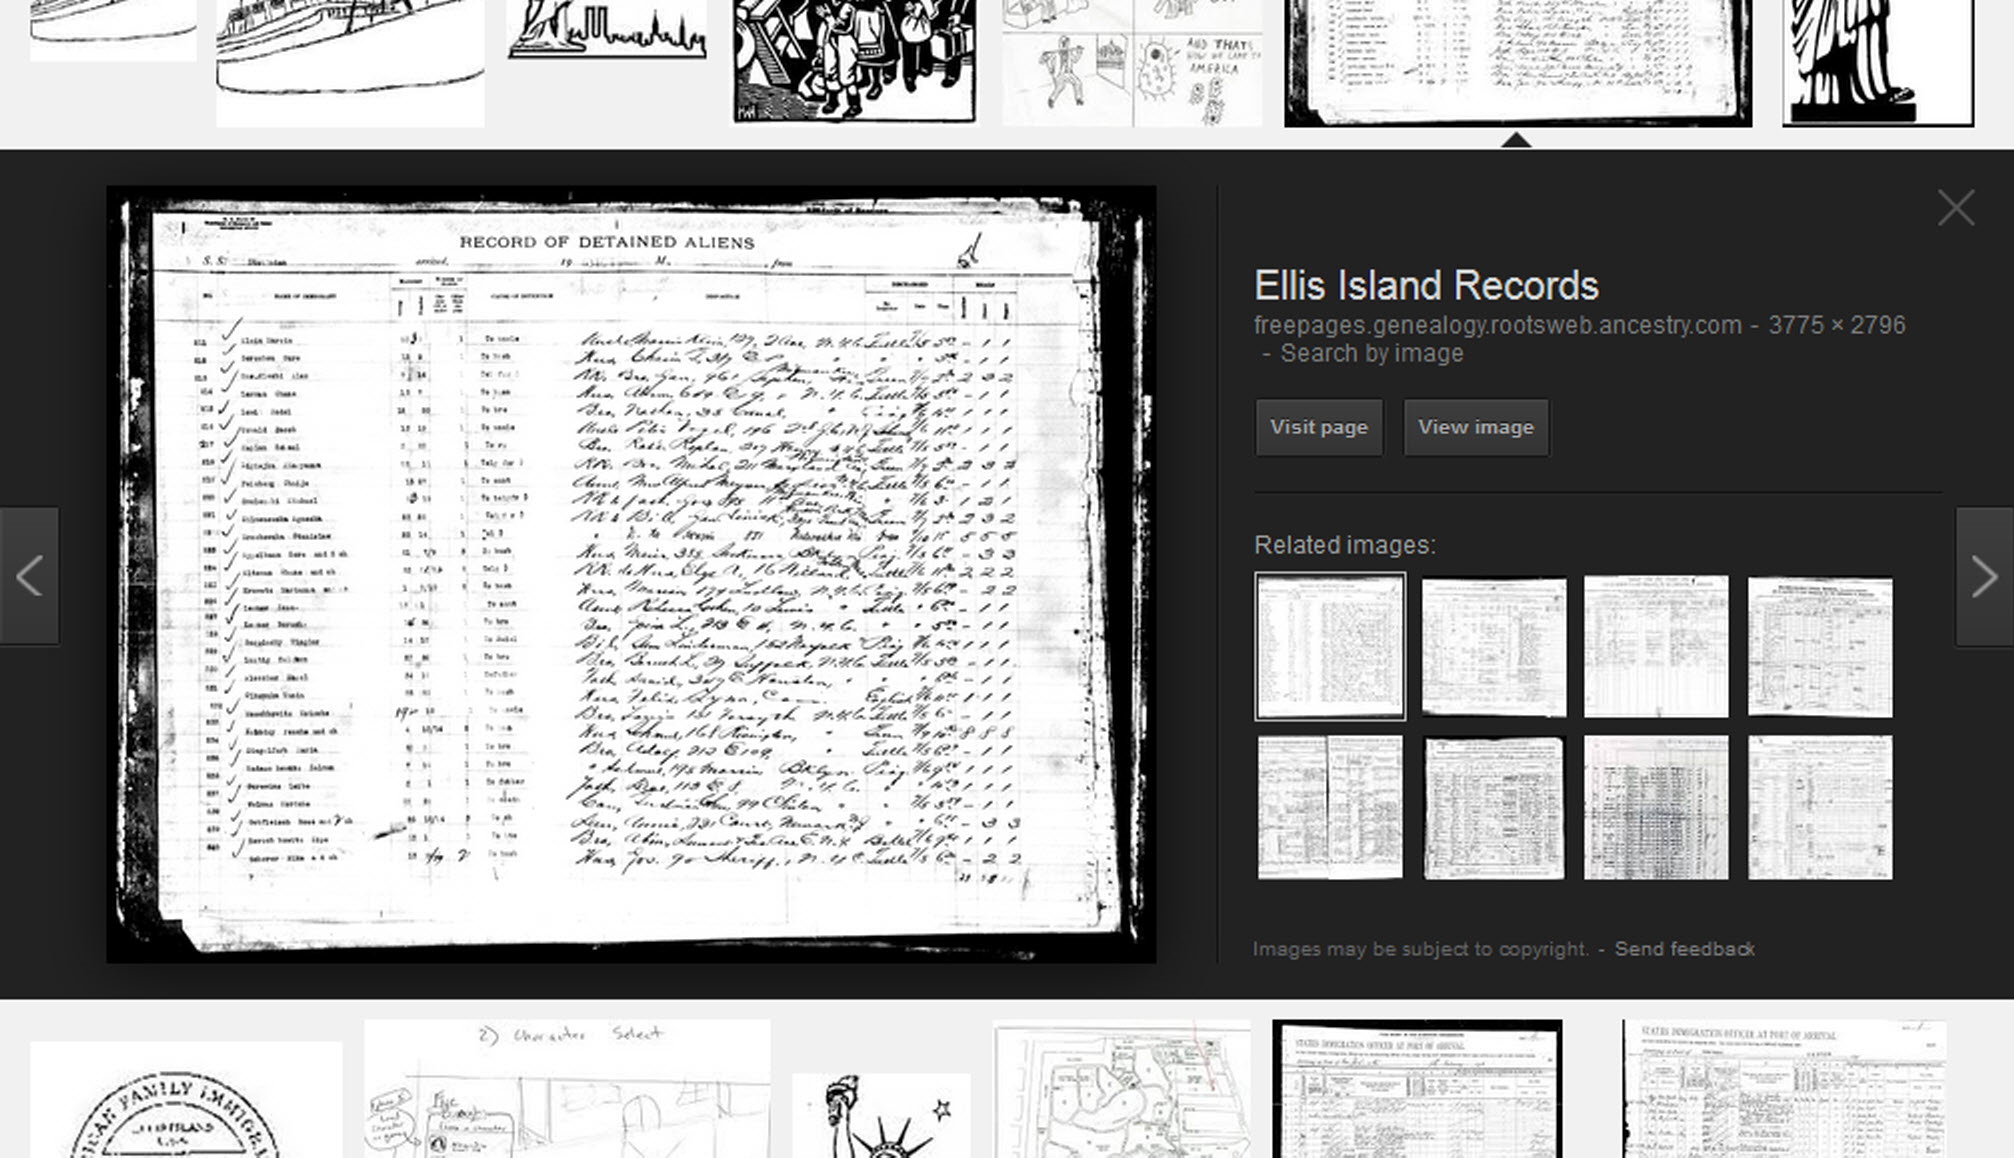
Click on one of the image thumbnails to get to a highlight page (shown here) where you can visit the full webpage or view the image. If you click View images, you’ll get the web address.
To retrieve images that no longer appear at the expected URL: Click on View image to get the image URL. Copy the image’s URL (Ctrl+C in Windows) and paste it (Ctrl+V) into your web browser to go to that image’s page. When you click through, you’re back in Web view. The first few search results should be from the website with the image you want. Click on a link that says “cache.” A cached version is an older version of the website (hopefully a version dated before the image was moved or removed). Browse that version of the site to find the image.
NEW Tip: Use Google Chrome to identify an image and find additional images showing the same subject, such as a place, person or subject.
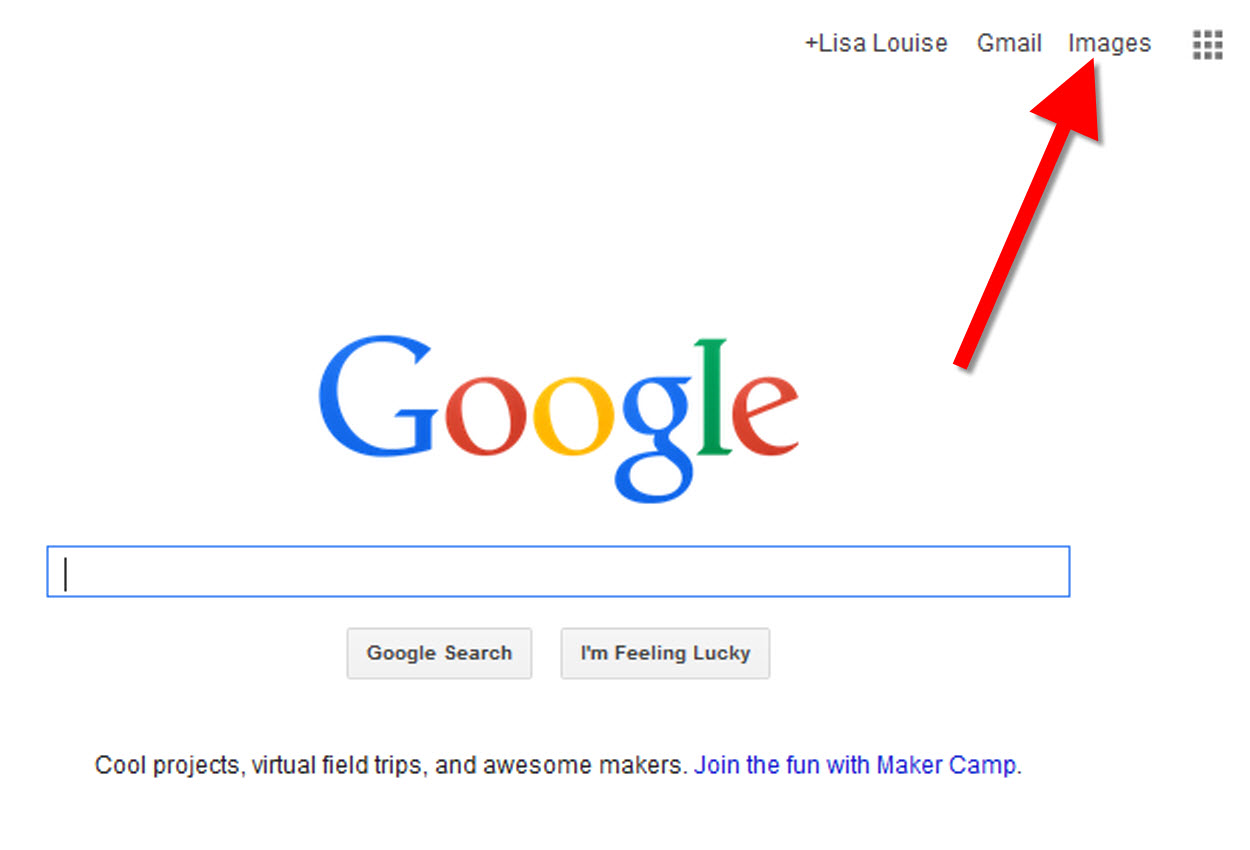
From the Google home page, click Images.
In the Google search box, you’ll see a little camera icon. Click on it.
If you have an image from a website, insert the URL for that image. If you have an image on your computer, click Upload an image. Choose the file you want.
Google will identify the image as best it can, whether a location, person, or object, and it will show you image search results that seem comparable.
Click hereto watch a free video tutorial on this topic.
GEM: Decoupage a Family Photo Plate
Supply List:
Clear glass plate with a smooth finish (available at
kitchen outlet and craft stores)
Sponge craft brush
Decoupage glue
Fine paper-cutting scissors (Cuticle scissors work well)
Small bottle of acrylic craft paint in a color you would like for the back
A flat paintbrush
Painter’s tape
Brush-on clear acrylic varnish for a glossy finish on the back of the plate
A selection of photos (including other images that complement the photos)
Assembling your plate:
Lay out your design to fit the plate
Add words if desired. You can draw directly on the copy or print it out and cut it to fit.
Put an even coat of glue on the front of each photo. Don’t worry about brush strokes, but be careful not to go over it too many times which could cause the ink to run.
Apply the photos to the back of the plate, working in reverse order (the first images placed on the plate will be in the foreground of the design). Glue the edges firmly. Turn the plate over to check the placement of images. Smooth using craft brush.
Brush glue over the back of each photo.
Turn the plate around so you can see the image from the front and work out the air bubbles.
Continue to place the images until the entire plate is covered. Let it dry 24 hours.
Use painters’ tape to tape off the edges before you apply the acrylic paint to the back of the plate. Paint the back and let dry. Apply a second coat. Let dry.
Apply an acrylic varnish for a glossy finish on the back. Let dry.
Lisa Louise Cooke uses and recommends RootsMagic family history software. From within RootsMagic, you can search historical records on FamilySearch.org, Findmypast.com and MyHeritage.com. And it is in the works for RootsMagic to be fully integrated with Ancestry.com, too: you’ll be able to sync your RootsMagic trees with your Ancestry.com trees and search records on the site.
Keep your family history research, photos, tree software files, videos and all other computer files safely backed up with Backblaze.com/Lisa, the official cloud-based computer backup system for Lisa Louise Cooke’s Genealogy Gems.
GENEALOGY GEMS BOOK CLUB
Our current book is Everyone Brave is Forgiven by Chris Cleave. Follow the story of Mary North, a wealthy young Londoner who signs up for the war effort when the Great War reaches England. Originally assigned as a schoolteacher, she turns to other tasks after her students evacuate to the countryside, but not before beginning a relationship that leads to a love triangle and long-distance war-time romance. As her love interest dodges air raids on Malta, she dodges danger in London driving ambulances during air raids in the Blitz.
This story is intense, eye-opening and full of insights into the human experience of living and loving in a war zone and afterward. Everyone Brave is Forgiven is inspired by love letters exchanged between the author’s grandparents during World War II.
Click here for more Genealogy Gems Book Club titles
GEM: Top 10 Tips for finding Graduation Gems in your family history
Establish a timeline. Check your genealogy database to figure out when your ancestor would have attended high school or college.
Consult family papers and books. Go through old family papers & books looking for senior calling cards, high school autograph books, journals and diaries, senior portraits, fraternity or sorority memorabilia and yearbooks.
Search newspapers. Look for school announcements, honor rolls, sports coverage, end-of-year activities and related articles. Updated tips and online resources:
Ancestry.com has moved the bulk of its historical newspaper collection to its sister subscription website, Newpapers.com.
Search your browser for the public library website in the town where your ancestor attended school. Check the online card catalogue, look for a local history or genealogy webpage, or contact them to see what newspapers they have, and whether any can be loaned (on microfilm) through interlibrary loan.
Search the Library of Congress’ newspaper website, Chronicling America, for digitized newspaper content relating your ancestor’s school years. Also, search its U.S. Newspaper Directory since 1690 for the names and library holdings of local newspapers.
Contact local historical and genealogical societies for newspaper holdings.
Consult the websites of U.S. state archives and libraries: click here to find a directory of state libraries
State historical and genealogical societies. In addition to newspapers, state historical and genealogical societies might have old yearbooks or school photograph collections. For example, the Ohio Genealogical Society library has a large (and growing) collection of Ohio school yearbooks. Local historical and genealogical societies may also have school memorabilia collections.
RootsWeb, now at http://www.rootsweb.ancestry.com. Check the message board for the county and state you’re looking for. Post a message asking if anyone has access to yearbooks or other school info.
TIP: Use Google site search operator to find mentions of yearbooks on the county page you’re looking at. Add site: to the front of the Rootsweb page for the locale, then the word yearbook after it. For example:
Yearbookgenealogy.com and the National Yearbook Project, mentioned in the show, no longer exist as such
US GenWeb at www.usgenweb.org. Search on the county website where the school was located. Is there anyone willing to do a lookup? Is there a place to post which yearbooks you’re looking for?
Call the school, if it’s still open. If they don’t have old yearbooks, they may be able to put you in touch with a local librarian or historian who does.
TIP: Go to www.whowhere.com and type the school name in “Business Name.” Call around 4:00 pm local time, when the kids are gone but the school office is still open.
ebay: Do a search on the school or town you’re looking for to see if anyone out there is selling a yearbook that you need. Also search for old photographs or postcards of the school. Here’s my extra trick: From the results page, check the box to include completed listings and email potential sellers to inquire about the books you are looking for.
TIP: Don’t be afraid to ask ? ebay sellers want to sell! And if all else fails, set up an ebay Favorite Search to keep a look out for you. Go to and check out Episode #3 for instructions on how to do this.
MyHeritage.com is the place to make connections with relatives overseas, particularly with those who may still live in your ancestral homeland. Click here to see what MyHeritage can do for you: it’s free to get started.
FREE NEWSLETTER:
Subscribe to the Genealogy Gems newsletter to receive a free weekly e-mail newsletter, with tips, inspiration and money-saving deals.
Disclosure: This article contains affiliate links and Genealogy Gems will be compensated if you make a purchase after clicking on these links (at no additional cost to you). Thank you for supporting Genealogy Gems!
The National Archives is marking the World War I Centennial with a new app, as well as programs and exhibits. Here’s the scoop from their press release:
The United States declared war on April 6, 1917
Washington, DC – The National Archives marks today’s World War I Centennial with a new mobile app, special programs, featured document displays, traveling exhibits, and a special new webpage highlighting all related resources on National Archives News.
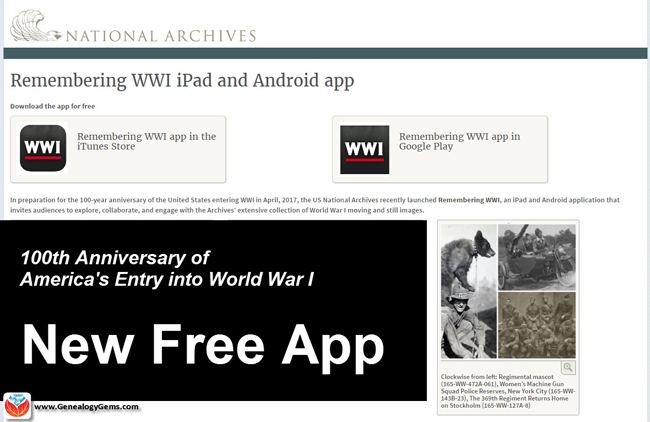
Remembering WWI App
Today, the National Archives launches the Remembering WWI interactive app, now available free of charge through iTunes(iPad only) and Google Play. The app commemorates the 100-year anniversary, in April 2017, of the U.S. entry into World War I.
The app provides an unprecedented collection of WWI content digitized and preserved as part of the larger Wartime Films Project – much of it never-before-seen by the public – including photos and film shot by the U.S. Signal Corps from 1914 –1920.
National Archives’ partners for the design and testing of the app included: Historypin, Library of Congress, Smithsonian’s Museum of American History, WWI Centennial Commission, WWI Museum, and, American Association of State and Local History. This project is made possible in part by an anonymous donor and the National Archives Foundation.
Saving World War I and II Media through Digitization and Crowdsourcing
Thanks to a generous donation from an anonymous donor, the National Archives embarked on a three-year project to digitize and create public engagement with World War I and II motion pictures and photographs. The project’s original goal was to digitize 70 films and 75,000 photos, and foster engagement on the new digital platform, but by the end of the project, the National Archives had digitized 164 films (337 reels) for more than 65 hours’ worth of content, in addition to more than 100,000 photographs. This is the first time that many of these photos and films will be viewed by the public. All scans are available through the National Archives Catalog or on our YouTube page.
Special WWI-related Exhibits
Featured Document Display: Making the World Safe for Democracy: U.S. Enters WWI East Rotunda Gallery, National Archives Museum, through May 3, 2017
To commemorate this centennial, the National Archives presents a special display of the Joint Resolution declaring war against the Imperial German Government, April 6, 1917. President Woodrow Wilson signed this declaration of war on April 6, 1917, ending America’s neutral stance on the World War conflict and formally declaring war against Germany. The National Archives Museum’s “Featured Document” exhibit is made possible in part by the National Archives Foundation through the generous support of Ford Motor Company Fund.
Traveling Exhibit: Over Here: Americans at Home in World War I
Over Here: Americans at Home in World War I draws on the unparalleled holdings of the National Archives to capture the patriotic fervor of draft registration, the emotional good-byes of men leaving for training camps, the “hoopla” of Liberty Loan drives, the craze for volunteerism, and the violence of vigilantism. The exhibit is divided into three themes: Mobilizing the Nation, Stirring Patriotic Passions, and Policing Enemies at Home. Over Here is organized by the National Archives, and traveled by the National Archives Traveling Exhibits Service (NATES).
Traveling Exhibit: Over There: Americans Abroad in World War I
After the United States entered World War I, 1917, millions of American men joined or were drafted into the armed services. Some 2 million served in Europe with the American Expeditionary Forces. Over There: Americans Abroad in World War I showcases World War I overseas military photography from the immense photographic holdings of the National Archives. The exhibition includes photographs from the fronts, behind the lines, and the consequences of the war and how it was remembered. Over There is organized by the National Archives, and traveled by the National Archives Traveling Exhibits Service (NATES).
World War I Social Media Day Events in DC, nationwide, and online!
Tuesday, April 11, 2017 Join the National Archives to participate in World War I Social Media Day, hosted by the Smithsonian’s National Museum of American History. Museums, archives, and other educational institutions around the world will share a day of social media activity focused on #WorldWar1 history.
Facebook: World War I in Photos: A Peek inside the Special Media Research Room 10:30 a.m.—Military historian and archivist Mitchell Yockelson showcases his favorite photographs from the war and answers your questions. National Archives on Facebook
Facebook Live with the National Archives at NYC: Online resources for WWI Military Records 2 p.m.—Tune in to Facebook Live for a recap of our Finding Family Genealogy Series, which will be discussing online resources for veterans and military records related to World War I. National Archives at New York City on Facebook
Twitter: Q&A: U.S. Presidents who served during World War I 11 a.m.—Join archivists from the Presidential Libraries to learn how Presidents Hoover, Franklin D. Roosevelt, Truman, and Eisenhower served during the war.
Presidential Libraries: @OurPresidents, @HooverPresLib, @FDRLibrary, @TrumanLibrary, @IkeLibrary
Digital Catalog: Tagging mission: World War I posters All day—Become a citizen archivist and join us to help “tag” World War I posters. By adding keywords of details and features found on the poster in our catalog, you can help make them more accessible to researchers, students, and the public. Educators and classroom teachers, this is a great way to get students involved in doing American history! New to tagging? Get started!
Transcription mission: Fire and Orientation notes by Harry S. Truman All day—Calling all military history buffs! Help us to transcribe Harry S. Truman’s handwritten notes that he took during his training to learn to fire the French 75 millimeter guns that his artillery unit used while in France. Learn about the future President’s experience during the war. Get started!
The National Archives Museum is located on the National Mall on Constitution Ave. at 9th Street, NW. Hours are 10 a.m. to 5:30 p.m. daily, except Thanksgiving and Christmas.
Google your family history with Genealogy Gems! Google has a great collection of free online search tools–all powered by the same Google search engine–that can help you discover your family history. In this new Genealogy Gems Premium eLearning video,...
Original air date: 10/8/20 Join me for Elevenses with Lisa, the online video series where we take a break, visit and learn about genealogy and family history.
In this episode we’re going to take many of the things we’ve learned in past episode of Elevenses with Lisa and apply them to one of your genealogical problems. My goal isn’t to find the answer myself, but rather to provide a toolbox of strategies that you can use to experience the joy of the discovery yourself when researching a home or location, as well as in a wide variety of other genealogical situations! Keep reading for notes that accompany this episode.
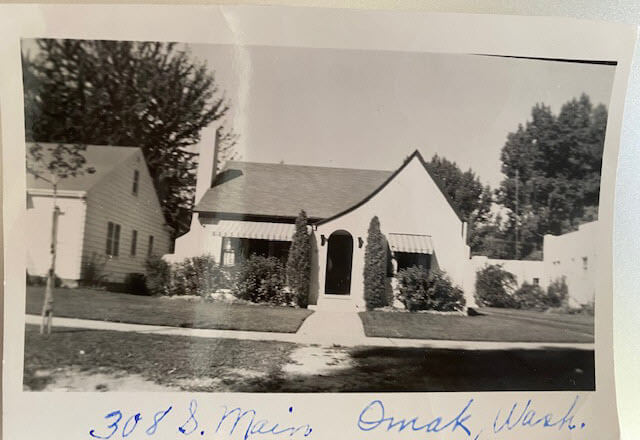
Cynthia Owens is a regular viewer and participant in the Live chat each week during Elevenses with Lisa. She emailed this photo and wrote “This picture was with my mother’s belongings…photo of a house in Omak, Okanogan, Washington with only an address written on it. 308 S. Main, Omak, WA. I have hundreds of photo’s (B & W) that have no information on them and a lot of people who I don’t know. I have a gold mine and no idea how to mine it.”
The house photo in Cynthia’s family collection.
Cynthia said that so far she has found the names of the last two owners in county records and some directories. She also determined that the house was built in 1928. She writes, “I have a lot of family on both sides of my parents who could have owned it.”
Formulate Your Research Question
The research question in this case boils down to: Who owned the home at 308 S. Main, Omak, WA in the 1930s?
Compile Known Family Names
We start by compiling a list of family surnames that we will be on the lookout for. These are families who are known to have lived in Washington state during that time frame.
Cynthia’s mother’s family names:
Woodhead
Patience
Cynthia’s father’s family names:
Tucker
Stubbs
Tonks
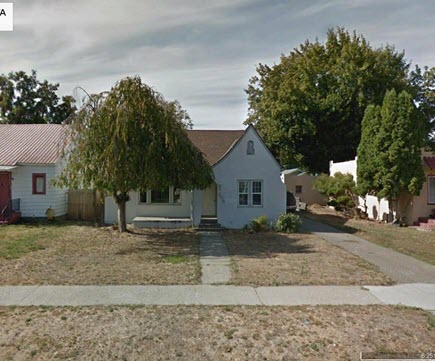
Answer the Question Does the house still exist today?
To answer this question, we turn to the free Google Earth Pro software. By simply searching the for the address and using Street View we are able to determine that yes, it is. Google Earth also allows us to obtain a high-quality image.
The house in Google Earth’s Street View today.
Google for Land Records
I conducted a simple Google search: Okanogan County Land Records
The results:
The Central Regional Branch of the Washington State Archives
“The Central Regional Branch provides archival and records management services to local government agencies throughout Benton, Chelan, Douglas, Franklin, Grant, Kittitas, Klickitat, Okanogan, and Yakima counties.”
Special Guest: Kathy Nielsen, Librarian Kathy Nielsen is a reference librarian and an educator. She has a masters degree in History and in Library Science. Kathy is currently a popular genealogy speaker on California’s Monterey Peninsula. She incorporates her skills as an historian, a storyteller and a librarian in her search for her family’s history. Kathy Nielsen stopped by to offer suggestions on obtaining land records. Watch Elevenses with Lisa episode 20 on House History featuring Kathy Nielsen.
The FamilySearch Wiki
Visit the free FamilySearch Wiki here. Search for the county in the wiki and then click on Land Records.
County Auditors Department
Where land records are located.
You can do a title search.
The records may not be online.
Email or call and inquire what the options are to access the records or have a search done.
Access varies by county.
Follow the chain of ownership back in time:
Grantee = the person who bought the property
Grantor = the person who sold the property.
Real Estate Websites
Trulia.com
Zillow.com
These sites don’t provide owner names but do show you recent transactions.
Result: The house was sold in 1997. It went on the market briefly in 2013.
Assessor’s Office (Tax Records)
These are typically only available to the current owner.
More Places to Look for Real Estate Related Information
City Directories
City directories are usually published yearly. Look also for Reverse Directories that allow you to look up the address in order to find who lived there. Kathy suggests contacting the local public library staff to inquire about City Directories and other records. Many libraries are currently staffing online reference chat.
State Libraries
Kathy recommends expanding out from the local area library to nearby communities, and the state. The Washington State Library is also currently answering questions. They have a genealogy department and city directories.
WorldCat.org
WorldCat is the world’s largest network of library content and services. The online catalog that itemizes the collections of 17,900 libraries in 123 countries and territories.
National Register of Historic Places
According to the website: “The National Register of Historic Places is the official list of the Nation’s historic places worthy of preservation. Authorized by the National Historic Preservation Act of 1966, the National Park Service’s National Register of Historic Places is part of a national program to coordinate and support public and private efforts to identify, evaluate, and protect America’s historic and archeological resource.” Click here to learn more about and search their digital database.
Department of Archaeology and Historic Preservation (Washington State)
From the website: “On this site you will find information on historic buildings, the archaeology of Washington State, how to navigate our regulatory processes and how to nominate properties to the State and National Register of Historic Places.”
Neighbors
Contacting and talking to neighbors is often one of the quickest and easiest ways to gain information. The 411.com website offers a free reverse address lookup. The results will give you the name of the current owner and residents, and even plot nearby neighbors (with names) on a map.
Researching the Home from Home
If you’re unable to research in person, make significant headway with these online resources.
Historical Societies
Google to find the official website of the historical society located in the area where the house is located. These sites may include searchable databases and information on how to contact them for resources and lookups.
Result: The Okanogan County Historical Society features a searchable database.
Facebook
Search Facebook for the name of the county historical society in the area where the house is located. Facebook pages often include more up to date information than the official website.
Old Maps
Depending on the town and area, you may be able to find an old map from the approximate time frame that includes details on homes. Two excellent free resources are:
Davidrumsey.com
Historical maps in the Layers panel of Google Earth Pro
Search at Genealogy Records Websites
Searching for various combinations of the address, town and surnames from the family tree may lead you to an answer. Here are a few examples of searches run at Ancestry.com and FamilySearch. (Your results may vary depending on the date you are searching):
Keyword: (address) 308 Main St, Omak (exact)
Results: 25 (These were not all exact)
Residence: (town) Omak (exact) and Keyword: (address) 308 Main St. (exact)
Results: 5
Search each surname in Okanogan County at Ancestry.
Results for Cynthia’s mother’s family names:
Woodhead (Paul Woodhead married in Okanogan in 1941)
Patience (No results)
Cynthia’s father’s family names:
Stubbs (results from the 1970s)
Tonks (None)
Tucker (8 results)
FamilySearch.org
Run the same at the free FamilySearch.org genealogy website. Search each surname with Omak (exact) & 1920-1940 (restricted to) U.S. On the day I searched, the only surname from the list with results was Tucker. Cynthia’s next step would be to compare the results to her known family tree.
Search the Census Specifically
You can search the census by using the search fields and using variations of names, town, county and specific address. If you don’t find the specific address that way, brown the records of the town, looking for addresses written in the left margin. At Ancestry, look for the link to a map of the location found in a census.
Results: 1930 Census: 104 West First St., Omak (Jess Tucker)
Use Google Earth to determine if the addresses found are the same today. Plot each finding on the map using placemarks.
Result: 1930 Census Address: 104 West First Street, Omak = not there today
A search in the 1940 for Jess Tucker found him still living with his mother. She was recorded as “Frances Write” living at 504 Main St., Omak, close to the house in question. When searching the census be sure to look at the pages on either side of the results page. In this case Jess is found on the next page living at “no number” as a renter at his mother’s home.
1940 Census Enumeration District Maps
Ancestry has a collection of 1940 Enumeration District Maps from the National Archives (where they can also be found here along with additional helpful search strategies.) Enumeration districts are geographic areas that were designed to allow an enumerator (the census taker) to visit every house in the district within a two-week time period. A month was allowed in more wide-spread rural areas. These maps vary in the amount of detail provided. They may or may not indicate house numbers.
Go the Ancestry Card Catalog and search for the 1940 Census Enumeration District Maps collection. In the search fields for this collection, enter the enumeration district number which can be found in the upper corner of the 1940 census page.
State Census
State Censuses were often conducted every ten years in years ending with “5” which makes them a great supplement to the U.S. Federal Census. They also sometimes include information not gathered at the federal level. Therefore, an important question to ask is “was a State Census taken in this approximate time period?”
Here’s a State Census list from the National Archives.
Results for Washington state: No state census taken after 1898.
Card Catalog Include Useful Unique Sources
Not all useful records will surface with a straight-forward search. Dig into the Card Catalog of your favorite genealogy records website to find unique and useful collections that may include addresses.
Example: Search the Ancestry card catalog for Okanogan County, WA Found: Washington, Postmaster Indexes, Prior to 1965 Strategy: Browse the alphabetically organized Okanogan cards for each family name.
Another unique record type that often includes address are Draft Cards. Search by location then surname. Also try Keyword searches. Not all cards include complete addresses but many do.
The Future is Bright
Here’s a summary of the wide variety of genealogical research strategies we’ve covered in this episode:
I really want to hear from you. Did you enjoy this episode? Do you have a question? Please leave a comment on the video page at YouTube or call and leave a voice mail at (925) 272-4021 and I just may answer it on the show!
If you enjoyed this show and learned something new, will you please share it with your friends? Thank you for your support!


 The United States declared war on April 6, 1917
 Today, the National Archives launches the
 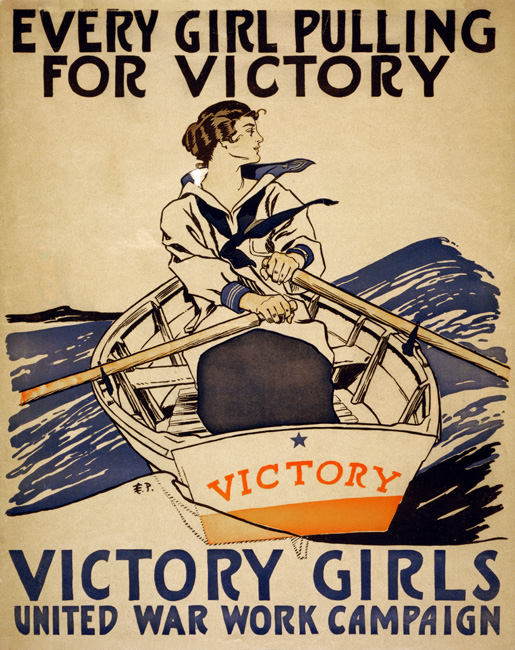 Digital Catalog: Tagging mission: World War I posters