The Genealogy Gems Podcast Episodes
2009 Season Four
Scroll to the bottom of each Podcast Show Notes Page and click the episode mp3 file to download the episode for listening. It will take a minute or two for the episode to download, and it will open in your computer’s audio program (for example: Quicktime or Windows Media Player.)
Episode 61Listen & Show Notes
A sneak peek at the new website GenSeek with Steve Nickle, President of Familylink.com. And Part 2 of Lisa’s interview with Darby Hinton where they discuss the Hinton Family History.
Episode 62Listen & Show Notes
Go Genealogical Channel Surfing: Part 3 of Lisa’s interview with Darby Hinton about his new TV pilot Hintons Living History. Hang Ten with Ken Marks, executive producer of the new TV series Legend Seekers.
Episode 63Listen & Show Notes
Lisa conducts an exclusive interview with Dr. Tukufu Zuberi, star of the hit TV series The History Detectives.
Episode 64Listen & Show Notes
New Online Newspaper Databases, An answer to a listener’s Family Tree Maker software question, A Gem of an Idea: Online Downloadable Source Citations, Interview with Maureen Taylor, and the History of Casey Jones
Episode 65Listen & Show Notes
Interview with George Morgan, Mother’s Day, Odometer History
Episode 66Listen & Show Notes
An Important Anniversary: D-Day, Upcoming Genealogy Conferences, Genealogy Records Update, Interview with Kathy Meade of Genline.com about new features at the Swedish records website, and Paper of Record at the Google News Archive.
Episode 67Listen & Show Notes
Jamboree Highlights, News, Interview with Genealogy Blogger Randy Seaver of the Genea-Musings blog
Episode 68Listen & Show Notes
GenealogyWise, Lisa on the Genealogy Guys Pocast, Paper of Record Update, Interview with Genealogy Blogger Thomas MacEntee, 40th Anniversary of Apollo 11, A Special Collection at the DAR Library, Lisa to Teach Family Tree Magazine Webinar
Episode 69 Listen & Show Notes
The First U.S. Census, Interview with author and genealogist Tony Burroughs, “My Mother Was a Quilter” by Lee Drew,
Episode 70Listen & Show Notes
Resources for understanding the U.S. Federal Census, Member Connect Tour with David Graham from Ancestry.
Episode 71 Listen & Show Notes
The new Genealogy Gem rhinestone pin, The Mailbox, Member Connect with Ancestry, Part 2, Family History Thoughts with Lee Drew “Choices & Consequences,”
Episode 72Listen & Show Notes
Civil War Records, The Mailbox, Probate Records with Jana Broglin, Sorting Your Bookmarks Alphabetically in Safari,
Episode 73Listen & Show Notes
It’s All About You and Genealogy! New Digitized Newspapers, Premium Episodes.
Episode 73 Video Cast Show Notes
Genealogy News Segment
Episode 74 Listen & Show Notes
An Amazing Story Featuring the DeadFred Web Site (Interview with Joe Bott)
Episode 75Listen & Show Notes
The New Free Genealogy Gems Toolbar, The Mailbox, Interview with David Rencher, Head Genealogist at FamilySearch About the Digitization of Records and the Future of FamilySearch.
Episode 76Listen & Show Notes
News, Mailbox, The 1810 Census, Part 2 of Lisa’s Interview with David Rencher Head Genealogist at FamilySearch.org, the Free Genealogy Gems Toolbar.
Episode 77Listen & Show Notes
News, Mailbox, Interview with Maureen Taylor “The Photo Detective” about ancestral hairstyles, Family Storytelling During the Holidays.
Episode 78Listen & Show Notes
News, Mailbox, the New Genealogy Gems Podcast App for iPhone and iTouch, Adoption research, 45 History, and a video of Mona Golabek and the inspiring story of her family.
Episode 79Listen & Show Notes
This episode is a broadcast of the LIVE Genealogy Gems Podcast presented at the Family History Expo in Mesa, Arizona on January 22, 2010 featuring guests Gena Philibert Ortega, Thomas MacEntee, Bruce Buzbee and Anastasia Tyler.
Episode 80Listen & Show Notes
Lisa’s special guest is Irene Johnson (you know her from the PBS TV series Ancestors). She worked at the Family History Library in Salt Lake City for 15 years and gives us her best tips and tricks.
Family History: Genealogy Made Easy Podcast with Lisa Louise Cooke Republished June 18, 2014
Listen to the Family History: Genealogy Made Easy podcast by Lisa Louise Cooke. It’s a great series for learning the research ropes and well as refreshing your skills.
Welcome to this step-by-step series for beginning genealogists—and more experienced ones who want to brush up or learn something new. I first ran this series in 2008-09. So many people have asked about it, I’m bringing it back in weekly segments.
Episode 36: Your Genealogy Questions Answered, Part 1
Today’s show is all about YOU! This episode is made up completely of your emailed questions, comments and stories. I couldn’t do this podcast without you, and I definitely want it to be a two way conversation. Joining me on today’s episode to read your emails is my daughter, Lacey Cooke.
Question: When do I use the GPS (genealogical proof standard) method? How do I know whether what I’ve found meets the genealogy research standard? Do I need a research report for every ancestor? When do I use the research worksheet? – Jenna in Kansas City
Answer: First, put priority on your direct ancestors. I write up research reports on each direct ancestor, but only after I’ve done the bulk of the research on them. Use the research worksheet when you have conflicting or unclear information that needs to be worked over a little more thoroughly. Learn more about navigating your research with the genealogical proof standard in the Family History Made Easy Podcast, Episode 20 andEpisode 23.
Question: I need help finding a newspaper article on the killing of my great-great grandfather Thomas Leonard Frazier that originally appeared in The Deseret News in Salt Lake City, Utah. I didn’t cite the source when I first found it! – Kent Frazier
Answer: I found the article you’re looking for at GenealogyBank.com. Online newspapers are scattered all over the internet. I started at GenealogyBank because they have a lot and I have a subscription. If you have trouble finding newspaper article, review the episodes below. You may also want to try regional and state archives, public libraries, genealogical and historical societies and large genealogy or university libraries.
Comment: I just listened to Family History Podcast Episode 33 about hard buy medicine online gurgaon drive file organization, including organizing photos files, and I just listened to Genealogy Gems Podcast Episode 18 (not currently available online) on how to identify old photos by the cars that appear in them. My sister recently sent me a batch of old family photos, including one with the van in which I learned to drive. I decided to organize them according to your suggestions and it’s worked really well. I have one more suggestion: add a caption to each photo’s metadata. It’s like writing about the photo on the back of it.
To add a caption in Windows, right-click on the file, then click Properties. On a Mac, click on the File icon and then in the Finder menu, click on Get Info. I’m using Windows Vista, so this comes up with a window that has three tabs on it: General, Security and Details. Go to the Details tab and click to the right of the fields that are listed there to enable editing. On my computer, there are fields for Title, Subject, Tags and Comments as well as Authors, Date Taken and Date Acquired. There are a number of other fields that can be edited on this screen that have to do with the photographic equipment that was used, so scanned photos from your grandparents’ Kodak Brownie cameras can be updated too. The fields that I fill in are Subject, Tags and where known, the Authors and Date Taken. The Tags field can be very useful for the computer’s search function. If these fields are not available from the operating system itself, most modern photo editing software has functionality that will let you edit these same fields from within the photo software [for example, in Adobe Photoshop, this is under File -> File Info]. –Sean Lamb
In Genealogy Gems Premium Podcast Episode 25, I interviewed Ken Watson who talked about tagging photos with actual GPS (global positioning) coordinates in meta-tags.
Russ provides this link to his blog post about applying my hard drive organization strategies and incorporating Family Tree Maker software. For hard drive organization, see Family History Podcast Episode 32 and Episode 33.
Question: I’ve been doing genealogy for a couple of years on and off. I found your two podcasts and I’m almost caught up on Family History Made Easy. (Next will be the “Genealogy Gems” podcast!) Is there a “best practice” for which name should be used for a woman’s record? Maiden or married? Also, will you recap what a primary source is? –Bob Callahan
Answer: When I started the podcast, I wondered whether having two podcasts was overkill. I’m getting great feedback telling me that’s not the case! A primary source contains genealogical data collected at the time of the event reported by someone of authority and/or who was at the event and has first-hand knowledge. You may have several primary sources for each fact, like a family Bible and a government or church record for a birth or death. (A secondary source for that might be a birth announcement in a newspaper. The reporter obviously wasn’t there and doesn’t have firsthand knowledge of the event. If that’s all you have, dig a little deeper.)
As for your question about women’s names, a woman is listed in on a family tree with the name she was born with: her maiden name. She will be connected to any spouses later in life, and you can get her married name from there. They may appear in records with any of their surnames. A death record on Ancestry.com may have her listed by her married name, but in your family tree you should have her by her maiden name.
Comment: Let me first say that I am a new listener and have been on a Genealogy Gems and Family History Made Easy Podcast marathon! For the past month, I have listened to almost all of your podcasts and have gleaned quite a bit of information…to the point that it has almost overloaded my brain. But that is a good thing because I have a lot of new ideas for expanding the tree that my grandmother started forty plus years ago…
I just listened /watched the Premium Members Video for organizing your hard drive (available only to Premium Members). I have one more suggestion. It’s on how to copy multiple folders with the same name into your surname folders.
When setting up the surname folders and the sub-folders that go inside each, you set up one set of folders inside of one of the surname folders that are brand new with no documents inside of them. Then highlight each of them by first clicking on the first folder inside the surname folder, press and hold the shift key and click on the last folder and then right click on one of the highlighted folders and click copy from the drop down list. Then click and open the next surname folder, right click inside the folder and then click on paste from the drop down folder. –Eric Gomes
This is a GREAT suggestion! I constantly move multiple files at a time, but completely forgot that this can be done with file folders.
Question: Do you have any suggestions on what to look at when checking out and deciding on a society to join? –Eric Gomes
Answer: It depends on what your goals are. If your goals are camaraderie, education, involvement and community service, involve yourself with a local society. Go visit! See how welcoming they are, what kinds of programs they offer and whether they meet your needs. Don’t be shy about meeting the president and asking for a recent copy of their newsletter. Test drive it to see what’s a good fit for you.
If you’re trying to learn about where your ancestor lived, look for a society closest to that area. Look for societies near and far at the Federation of Genealogical Societies website on the Find a Society page. Or Google the name of the city and/or county/province and the keywords “genealogy society” to find what you’re looking for. Coming up dry? Contact a reference or local history/genealogy librarian at a local library or someone at a local historical society to ask for a recommendation.
“In my grandmother’s final days battling brain cancer, she became unable to speak and she filled dozens of index cards with random letters of the alphabet. I’m beginning to think that they are the first letters in the words of song lyrics, and would love to know what song this was. This is a crazy long shot, but I’ve seen Mefites [other site users] pull off some pretty impressive code-breaking before!” Then she posted the “code” from one of the cards.
Within 15 minutes someone solved part of the puzzle: a section of the code was the first letters of the prayer from the New Testament, “Our Father who art in heaven, hallowed be thy name….”
Have YOU ever been faced with indecipherable notes left behind by a family member? What family history mystery do you wish an online community could help you solve? Share this on the Genealogy Gems Facebook page and leave your answers.
Do you have a family reunion, wedding or another special family gathering coming up soon? I’ve been busy helping plan my youngest daughter’s wedding, and we are looking for ways to capture memories from our loved ones while they are all together.
Hannah and I aren’t the only ones looking to make the most of this exciting event. Genealogy Gems podcast listener Kirsty recently asked me how she could incorporate family history gathering at her upcoming wedding (Congratulations, Kirsty!) and here’s what I told her:
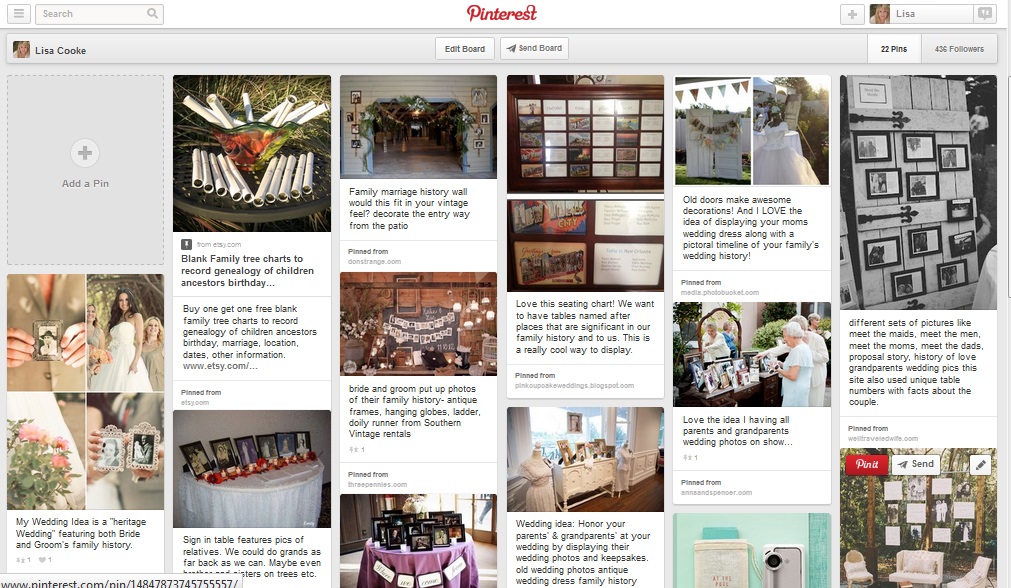
My Board: Incorporating Family History into Your Wedding
2. If you have your guests seated at tables, that’s a great opportunity to provide an icebreaker that can double as a family history gathering opportunity. You could have a form at each place setting for them to fill out. If you are having a videographer, you could have a short list of questions at each table, and when he comes to their table he records them answering the questions. (What’s your earliest childhood memory? Who’s the earliest ancestor you have a photograph of? What are three things you remember about great-grandmother? etc) Can you imagine howthis Martha Stewart placecard on Pinterest (which I found by searching “family reunion history” at Pinterest) might be adapted this way?
3. If you they won’t be at tables, you could have a family history table (next to another table they are likely to visit such as guest book table) and have your activity there. Let them know that this is their gift to you. You could even have some sort of treat or little sticker they can wear that says “I shared the family history, have you?” (In the U.S. when you vote they often give you a little lapel sticker that says “I voted.”) Or you could create the “Sweet Memories Candy Bars” that feature family history that I write about in my book Genealogy Gems: Ultimate Research Strategies.
I hope these ideas help inspire Kirsty and anyone who wants to gather their loved ones’ memories at their next family event!
Have you already searched for your relatives’ names at Chronicling America, the the Library of Congress’ web collection of digitized American newspapers? Well, search again!
Recently the the Library of Congress added more than 600,000 historic newspaper pages to its enormous collection. According to a press release, these pages include “first-time contributions from Iowa, Michigan, and West Virginia. Other new additions include content from Hawaii, Indiana, Illinois, Kansas, Kentucky, Louisiana, Minnesota, Montana, North Dakota, Oklahoma, Oregon, South Carolina, Tennessee, and Texas.” The site now has over 6.6 million searchable newspaper pages from over 1100 newspaper titles, published in 30 states and Washington, D.C. between 1836 and 1922.
What are the chances your family will appear on one of those pages? Pretty good, actually. Here’s a list of the kinds of articles they may show up in from my book How to Find Your Family History in Newspapers:
Advertising: classifieds, companies your ancestor worked for or owned, grocery or dry goods stores ads (for historical context), runaway slaves search and reward, ship departures.
Births & deaths: birth announcements, card of thanks printed by the family, obituary and death notices, “Community Pioneer” article upon passing, funeral notice, reporting of the event that lead to the death, or the funeral.
Legal notices and public announcements: auctions, bankruptcies, city council meetings, divorce filings, estate sales, executions and punishments, lawsuits, marriage licenses, probate notices tax seizures, sheriff’s sale lists.
Lists: disaster victims, hotel registrations, juror’s and judicial reporting, letters left in the post office, military lists, newly naturalized citizens, passenger lists (immigrants and travelers), unclaimed mail notices.
News articles: accidents, fires, etc. featuring your ancestor; front page (for the big picture); industry news (related to occupations); natural disasters in the area; shipping news; social history articles.
Community and social events like school graduations, honor rolls, sporting and theater events; social news like anniversaries, church events, clubs, engagements, family reunions, visiting relatives, parties, travel, gossip columns, illnesses, weddings and marriage announcements.
Learn more about researching family history with my book, available in both print and e-book format. And don’t forget to keep checking Chronicling America for stories and clues about your ancestors’ lives.