Find Family Recipes in Old Newspapers
Show Notes: Learn how to find old family recipes in newspapers. Lisa Louise Cooke and her guest Jenny Ashcraft of Newspapers.com show you how to find old recipes and discover what newspapers can tell you about the food your ancestors cooked and ate. Genealogy & family history has never tasted so good!
Watch the Video:
Show Notes
Get 20% off Newspapers.com. Click here and use coupon code genealogygems
Do you have a family recipe that has been passed down for generations? Or maybe you wish you could find a family recipe that has been lost?
Jenny Ashcraft of Newspapers.com is back and we’re talking about food and family history. How to find long-lost family recipes in Newspapers, how history has impacted the food your family ate and the recipes they used, and food trends over the decades.
You’ll learn some of our favorite search strategies, and who knows, you just might discover a recipe from your family in the papers!
Food really evokes powerful memories, brings people together, and strengthens family history ties among both the living and the dead.
Families have gathered around the table forever, and family recipes evoke powerful memories. Have you ever smelled something baking or had a little taste of something, and the memories just flood back? Food is usually a part of family gatherings, and it’s a way to strengthen traditions and express love.
Why did newspapers publish recipes?
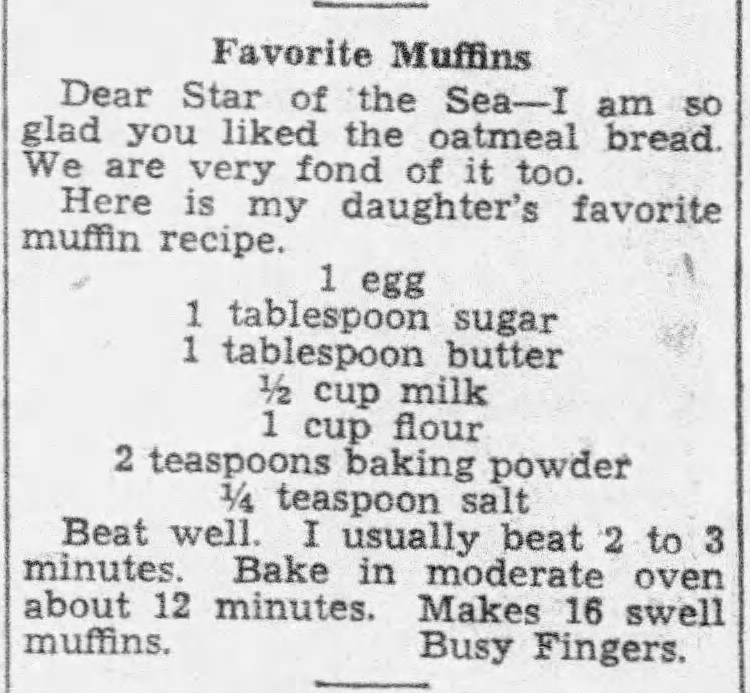
In the days before the internet, newspapers were a popular way for home cooks to share recipes. Most home cooks had a repertoire of recipes they cooked often. Newspaper recipes were a way to try something new. Recipe exchanges in the newspapers were popular, with cooks both asking for recipes and sharing one of their favorites.
Courtesy of Newspapers.com
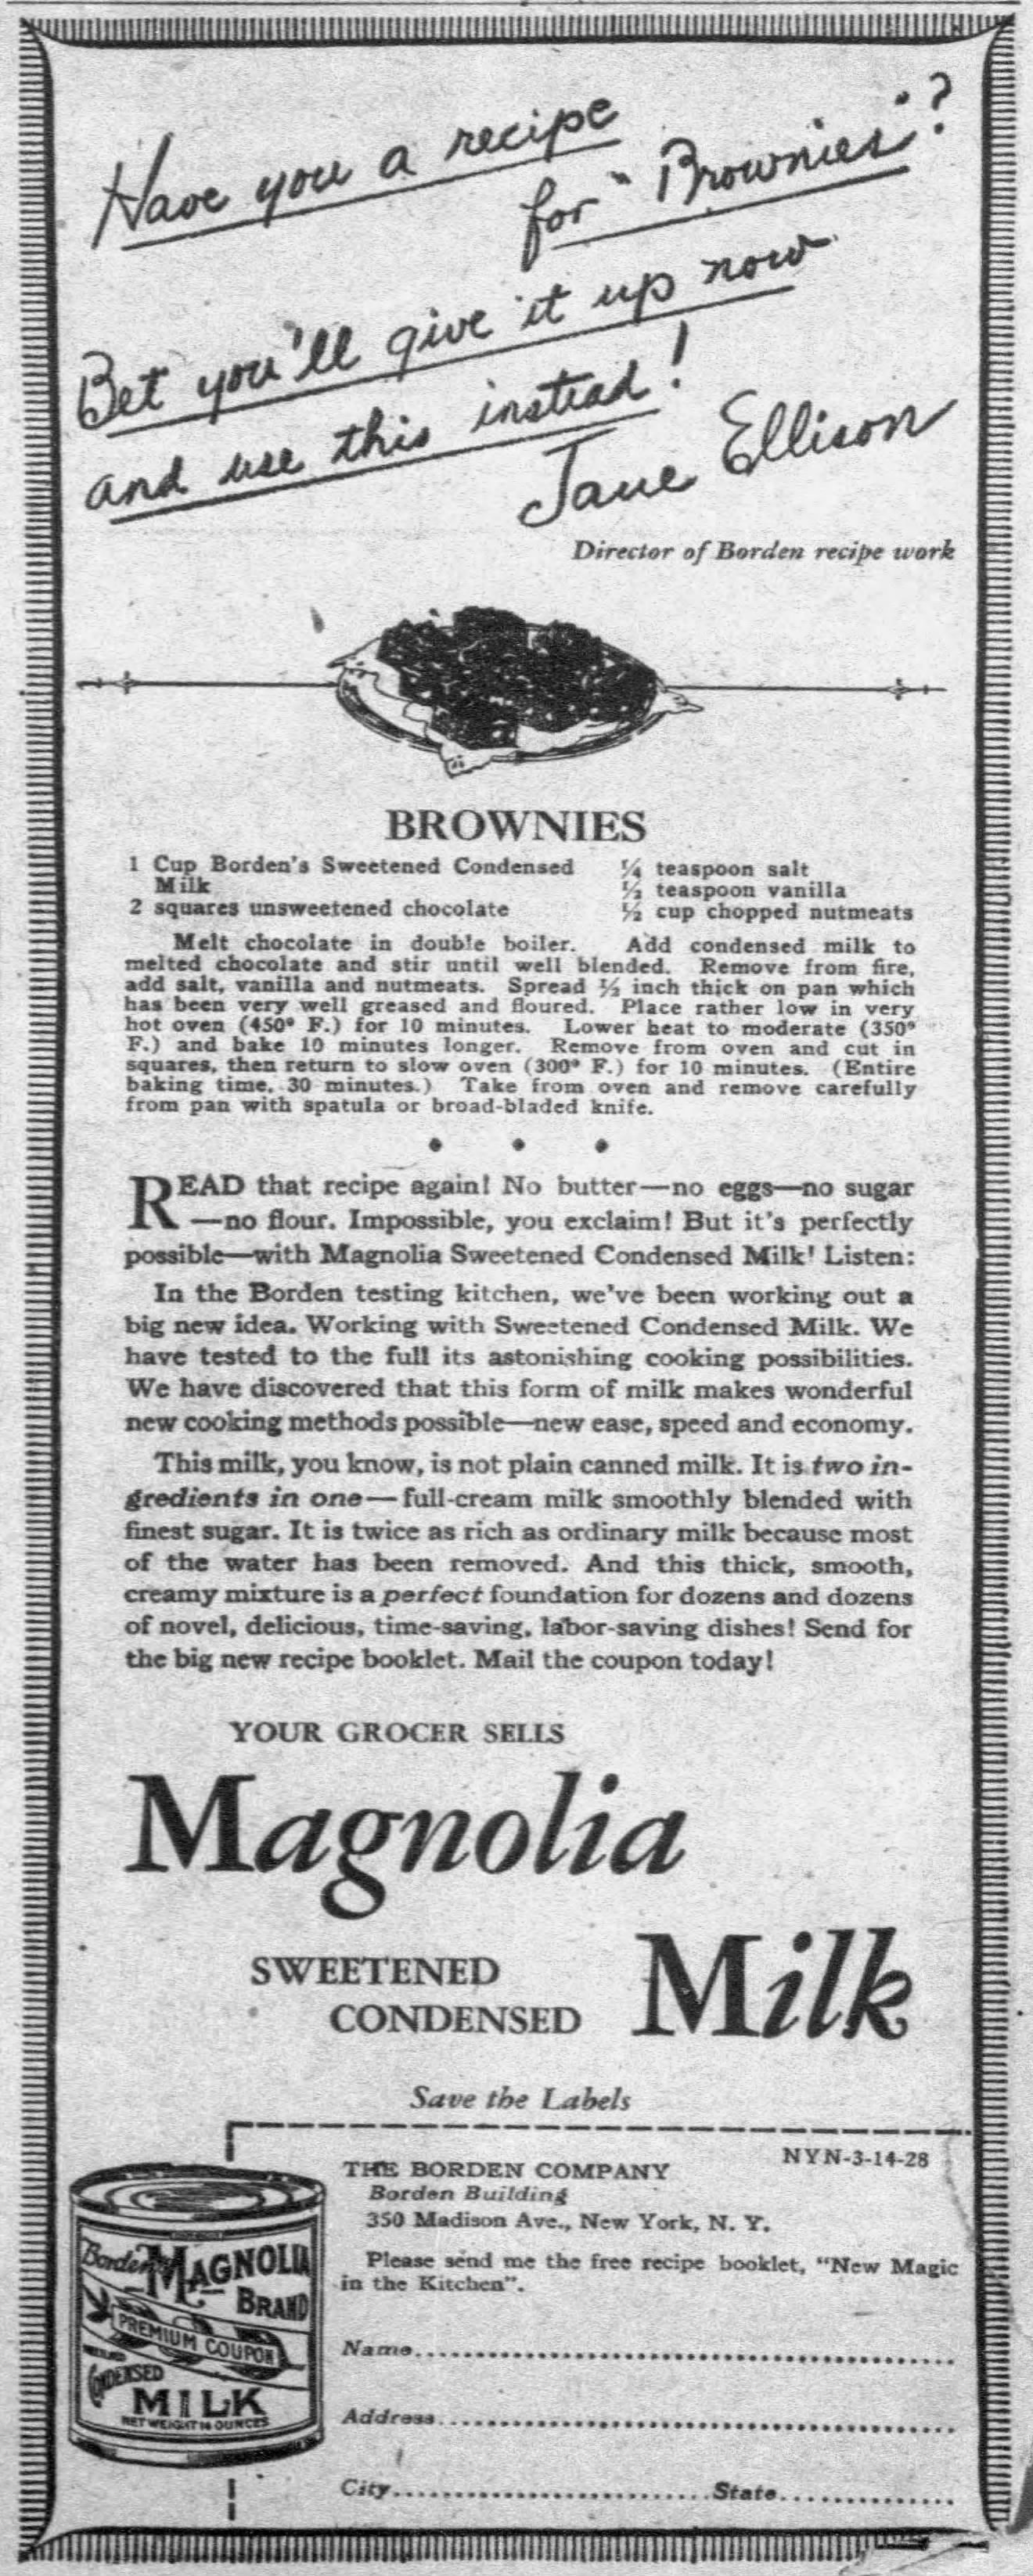
Sometimes newspapers called for readers to submit recipes, and they would choose a few to publish. Other times the paper published the recipes of contest winners. Papers also published brand recipes like this 1928 recipe for brownies using Borden Magnolia Sweetened and Condensed milk. https://www.newspapers.com/clip/106800978/borden-sweet-and-condensed-milk-brownie/. Many newspapers also had official food columns. Just the other day, I went to my cookbook to find a recipe and noticed that I still have all kinds of newspaper clippings in my own recipe collection.
Courtesy of Newspapers.com
How to Find Family Recipes in Newspapers
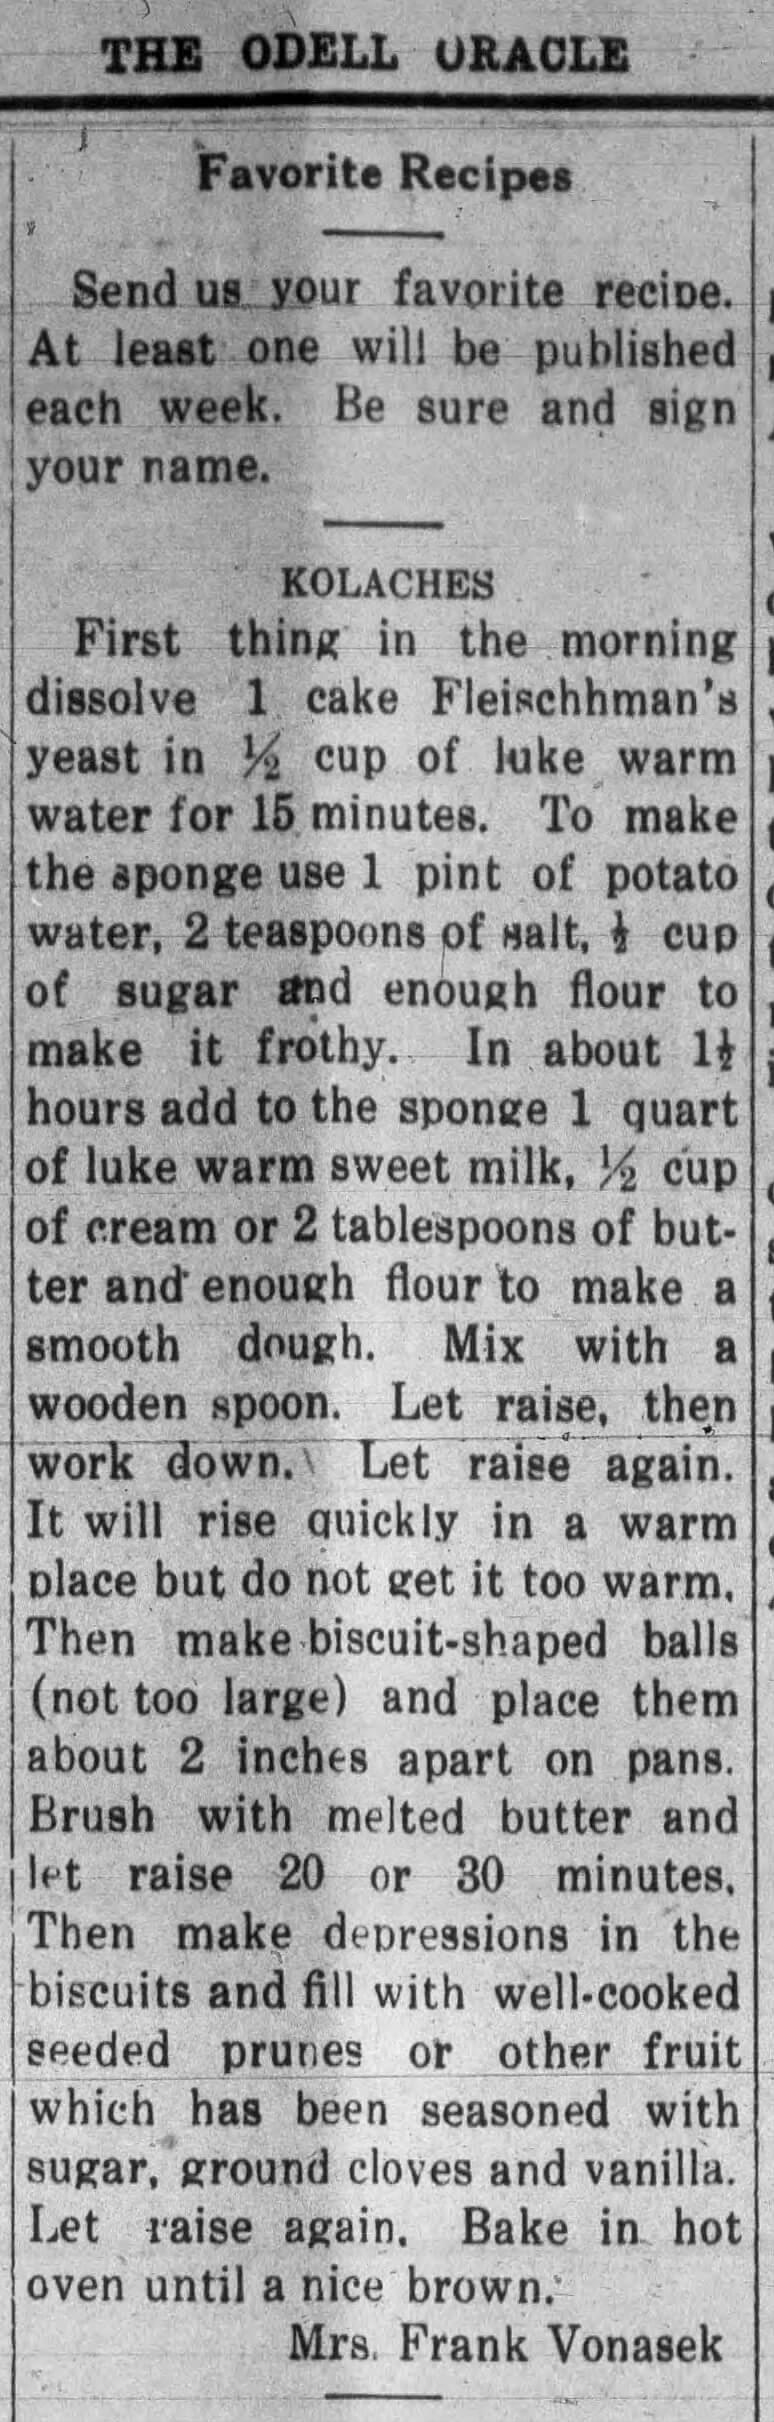
Finding a recipe from one of your ancestors is so exciting! Let me share an example of how one of our customers discovered his grandmother’s recipe for kolaches.
In July, we published a Newspapers.com blog about finding your ancestors in the newspaper Society Pages. Maurice, one of our readers, commented that he searched the society pages to see if his grandmother was mentioned. Initially, he didn’t have success. However, as he continued to search, he found his grandmother listed under her husband’s name, Mrs. Frank Vonasek. This was 1932, and it was common for women to appear in the paper using their husbands’ names.
Maurice found his grandmother in several articles. In one, she shared her recipe for kolaches. Maurice said it was such a thrill to find this family recipe and just about brought tears to his eyes. Notice how this recipe says cook in a hot oven (usually 375-400) In 1932, some cooks were still using ovens heated with wood or coal. Ovens with temperature settings were invented around 1915, but not everyone had one. Without the ability to set your oven to a designated temperature, cooks became very adept at determining if the oven had reached the desired temperature.
Courtesy of Newspapers.com
It was a thrill for Maurice to find his grandma’s recipe, but what if you can’t find your ancestor’s recipe? Chances are, you will find one very similar. Let me share a personal example.
My family loves fresh English peas that come on every spring. We go to the fruit stand or farmer’s market and buy a bag. We just shell them and pop them in our mouths. Every year, my husband talks about the new potatoes and peas in a white sauce that his grandmother used to make.
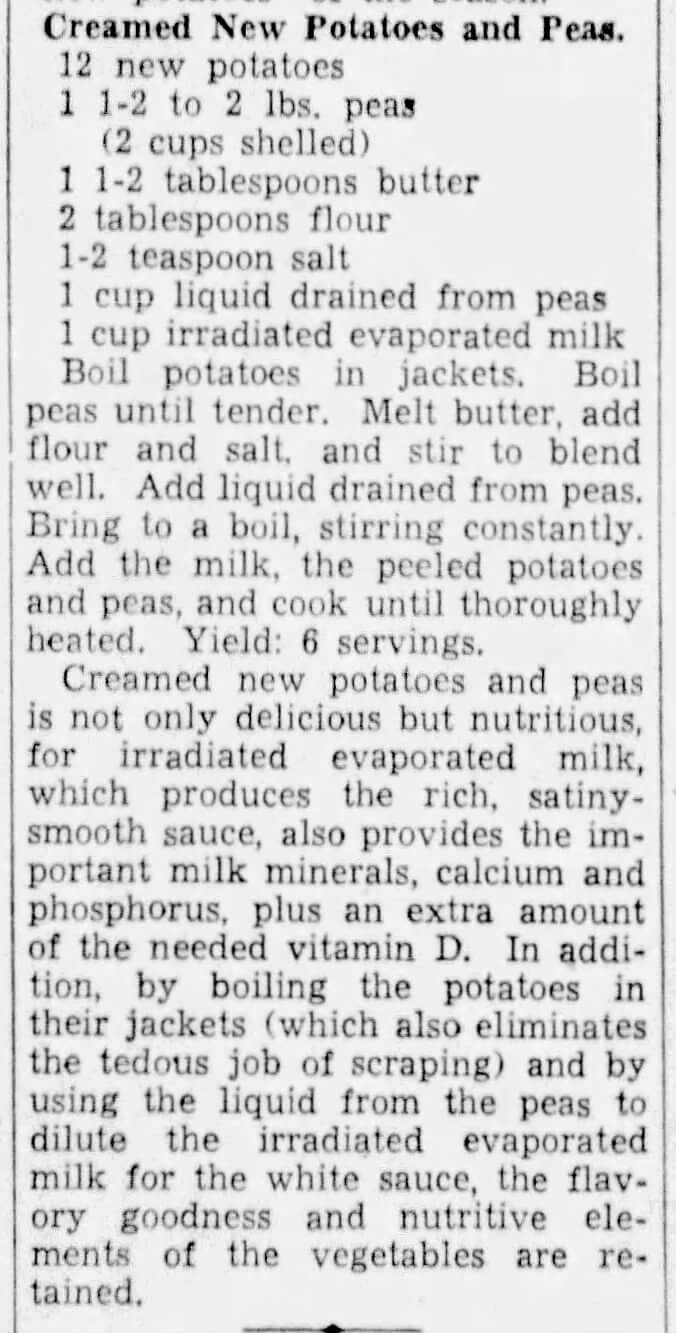
I decided to search for this recipe on Newspapers.com. I began by searching “new potatoes and peas” in the search box. I started finding some recipes, but none that were similar. Then I added the term, “white sauce”. Again, I wasn’t finding much. I wondered if the white sauce was a cream sauce, so I searched, “New potatoes, peas, and cream”. When I entered those terms, I saw a few recipes that said, “Creamed New Potatoes.” As I looked over the ingredients, I realized I was getting warmer. So, then I started searching for “Creamed New Potatoes and Peas,” and I found tons of recipes.
Courtesy of Newspapers.com
It’s not uncommon to find ingredients that are now unusual in historic recipes. For example, in my recipe for Creamed New Potatoes and Peas, one of the ingredients is irradiated evaporated milk. I didn’t know what that was, but after a few moments of searching, I learned that irradiated milk simply meant that the milk was treated with ultraviolet light to get rid of any bacteria.
Learn about history from the food your ancestors cooked
Another thing that impacted the way your ancestors cooked and ate was history. What was happening in the world around them, and how did it impact what they cooked?
Great Depression recipes and food.
One example of this was the Great Depression. How did the Depression impact your family? Was the father out of work? Could they afford to buy food? Where were they living?
Your family’s experience could be dramatically different if they lived in California, where they could grow food in a home garden, or if they lived in the Midwest and were impacted by the Dust Bowl. Growing food was a huge challenge for those people. Residents not only had great difficulty growing food, but they contended with swarms of grasshoppers that destroyed crops.
When you search for recipes during the Depression, you’ll see recipes that used cheaper food and recipes that utilized leftovers, so nothing went to waste.
One example of this is a gelatin loaf. These loaves were used during the Great Depression as a great way to use anything leftover.
For most of us, that is not very appealing. Our Newspapers.com social media team has a lot of fun trying and sharing historic recipes on our social channels. If you are not following us, check us out on Facebook, Instagram, Twitter, and TikTok.
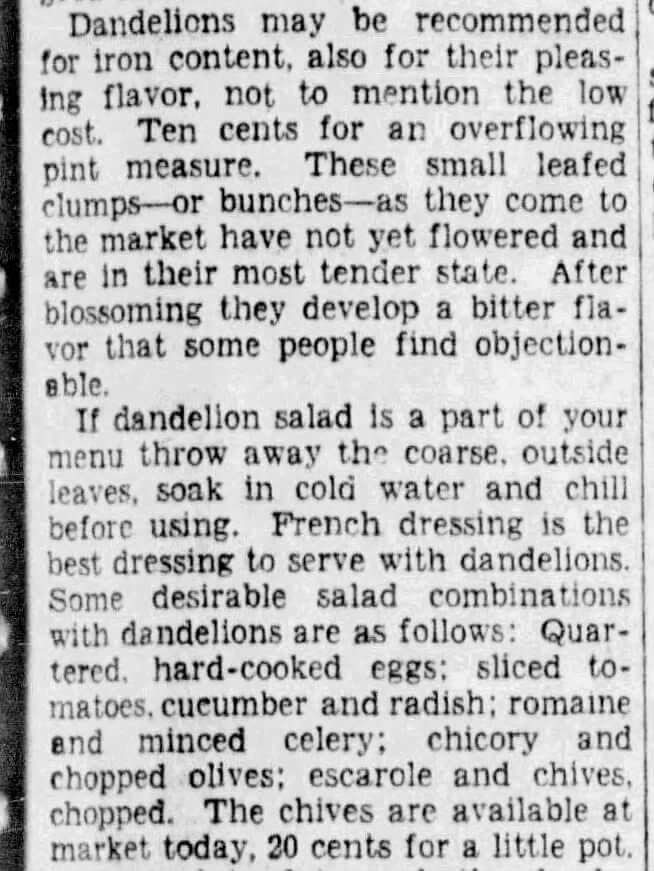
Dandelion greens were another way to get some nutrition. People could go outside and pick dandelions or buy them at the market for a low price. This clipping from 1930 tells readers how to soak the dandelion greens and then the best type of salad dressing to use over them.
Courtesy of Newspapers.com
What are some other examples of the times impacting food?
Another example of how history impacted the way our ancestors cooked was World War II. Food availability during WWII was different. The world was at war, so some items were hard to get – just like today’s supply chain issues. Foods like sugar, coffee, canned foods, meats, cheese, butter, and oil were rationed. To purchase these items, families presented the grocer with the correct stamps from their government-issued ration books and the money to buy these items.
Courtesy of Newspapers.com
Newspapers became a valuable source for home cooks to share ideas and recipes to navigate rationing. Home cooks had to get creative. For example, In WWII a chocolate chip cookie recipe caleld for using honey instead of the hard-to-obtain sugar.
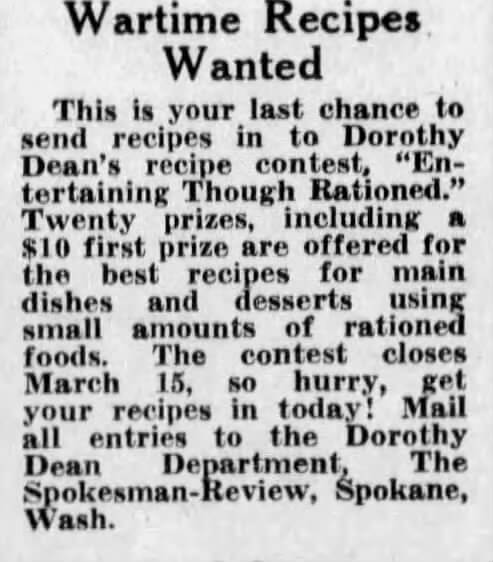
Newspapers sponsored contests and awarded cash prizes for the best wartime recipes using small amounts of rationed food items or substitutes for rationed foods.
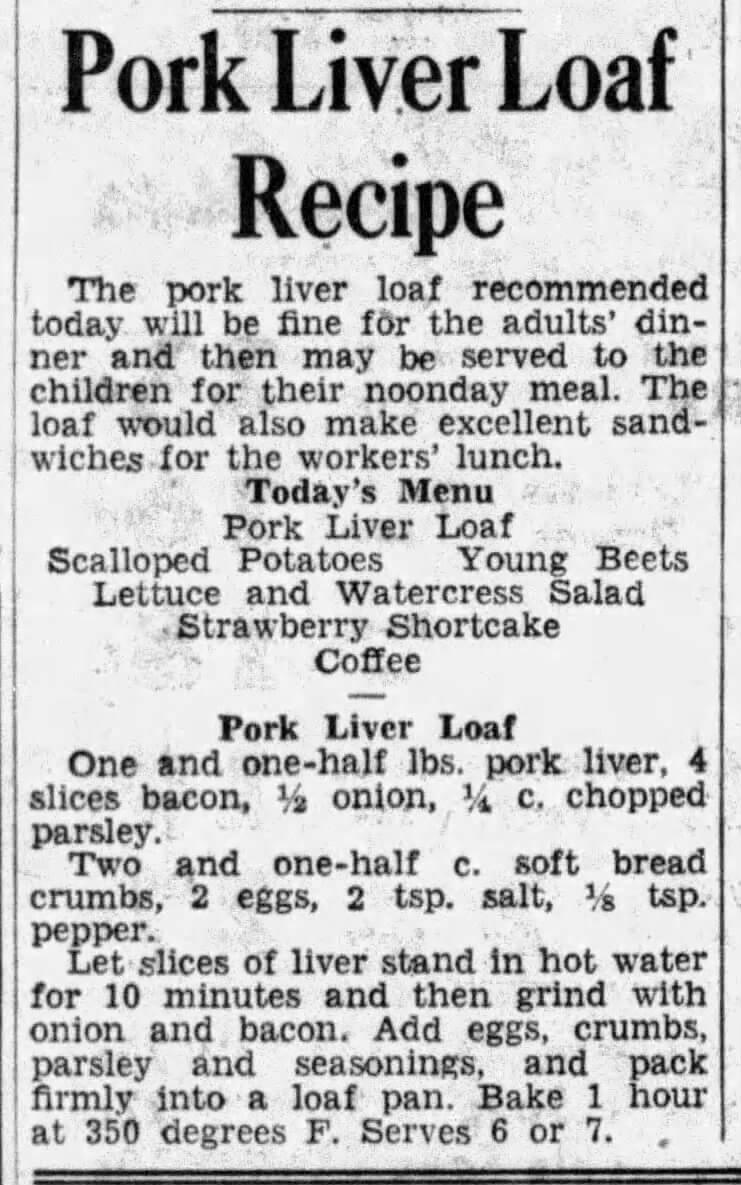
Another example of how rationing impacted cooking during WWII was cooking with meat. Nicer cuts of meats required a higher number of ration points, but organ meats like kidneys, liver, and heart had relatively low point values. So, we start to see a lot of recipes using these low point value meats. Maybe this is why your grandparents ate liver and onions.
Courtesy of Newspapers.com
Fresh fruit and veggies were not rationed, but canned, bottled, and frozen food was. WWII recipes focused on high nutritional value to make sure people were still getting vitamins, minerals, protein, and energy even though their diets may have changed due to rationing.
1950s and 1960s Recipes and Food Trends
There have always been food fads and trends, and as we move out of the WWII era, we see evidence of this.
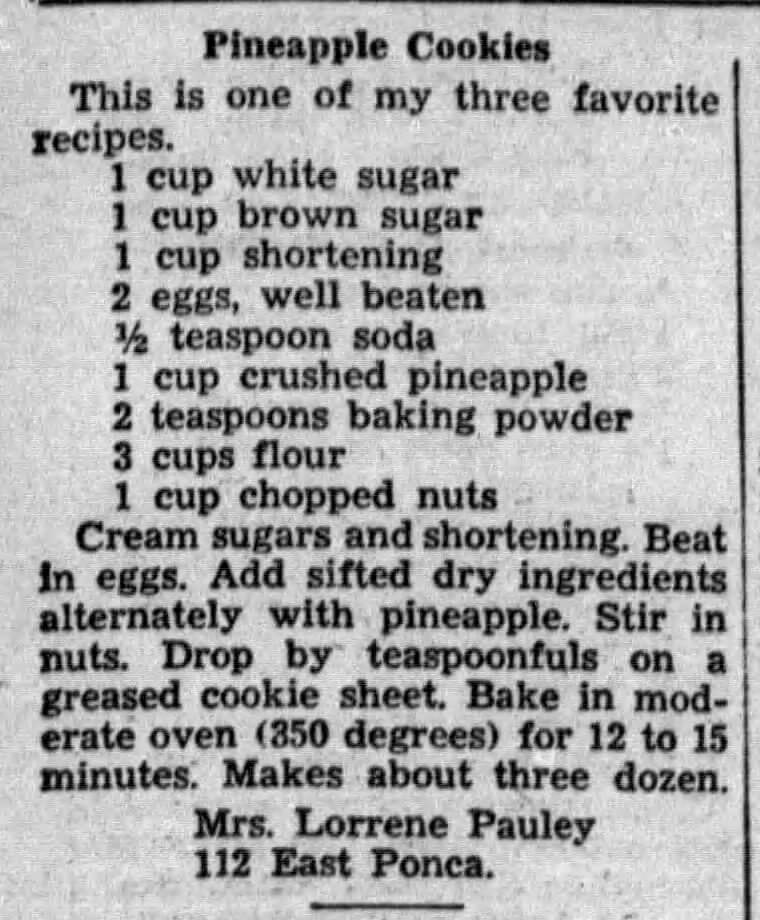
For example, in the 1950s, we see lots of recipes with canned pineapple. During the 1950s and the 1960s, many Americans loved anything tropical, and canned pineapple represented the islands. Here’s a reader-submitted recipe for pineapple cookies in 1954:
Courtesy of Newspapers.com
Bourbon balls were also very popular in the 1950s. Apparently, they are still popular today because this is one of our viewers’ favorite recipe posts.
Pimientos were big in the 1960s, and you’ll see that manifest in recipes:
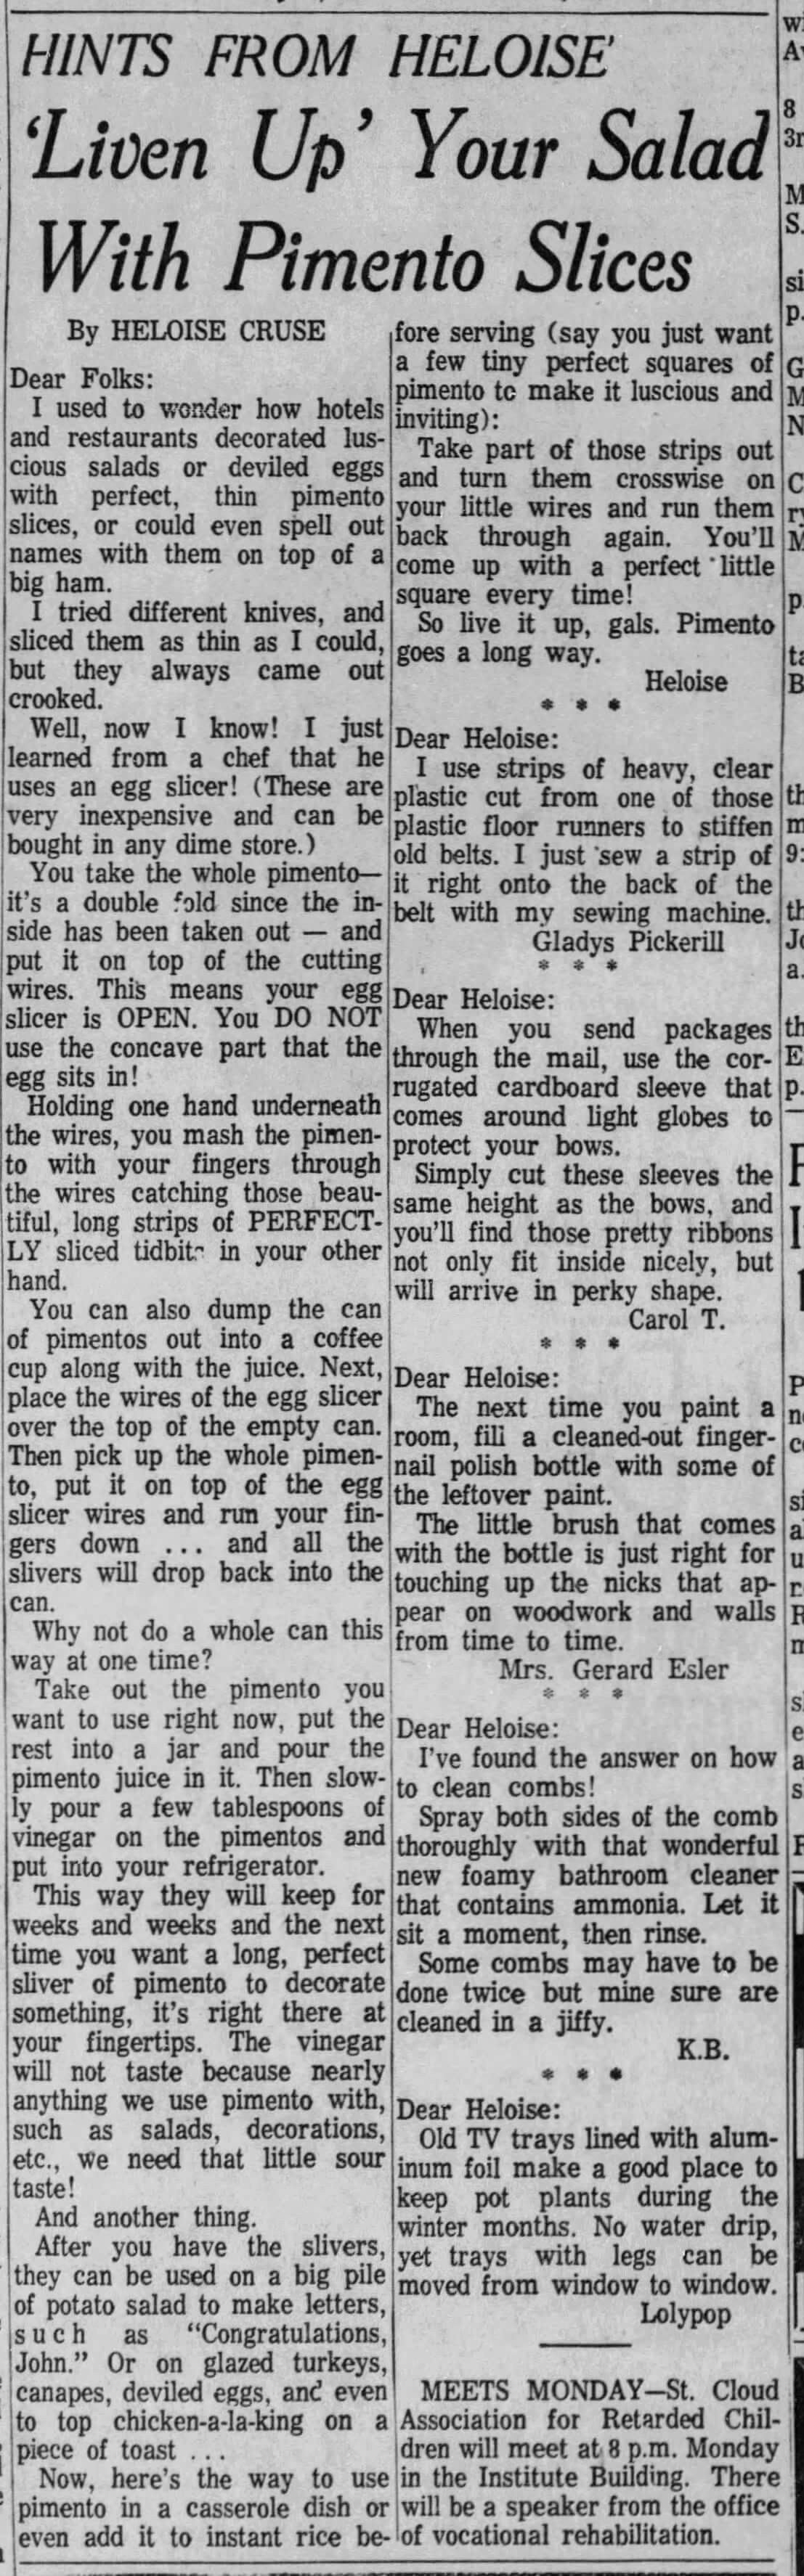
Courtesy of Newspapers.com
The 1980s brought an excess of cheese. Starting in WWII, processed cheese was a commodity that was controlled on a federal level. The cheese was stockpiled in warehouses around the country, and by the early 1980s, there were more than 2 lbs. of cheese stored for every person living in the United States.
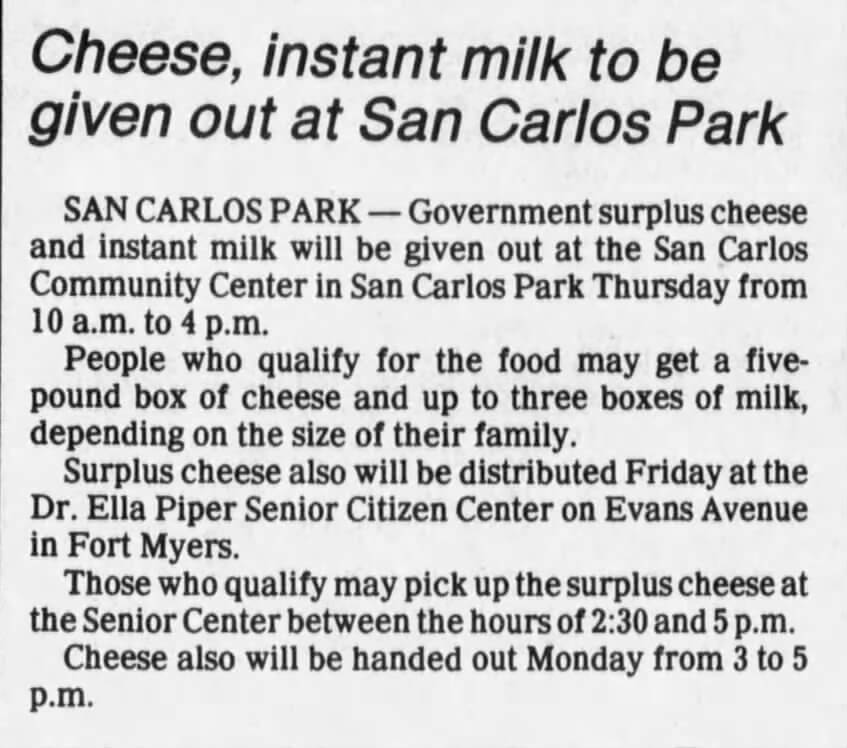
Courtesy of Newspapers.com
In 1981, President Ronald Reagan signed the Agricultural and Food Act and began distributing all the stockpiled cheese. As a result, in the 1980s, we start to see a plethora of recipes to use all of that processed cheese.

Courtesy of Newspapers.com
How recipes changed over the years
Once you find your ancestor’s recipe in the paper or just one you think looks interesting, it’s important to know that there may be differences in historic recipes and recipes today.
Some ingredients or brands are no longer available. Here is a 1918 ad for a product called Egg-O. It was a common ingredient and an egg substitute.
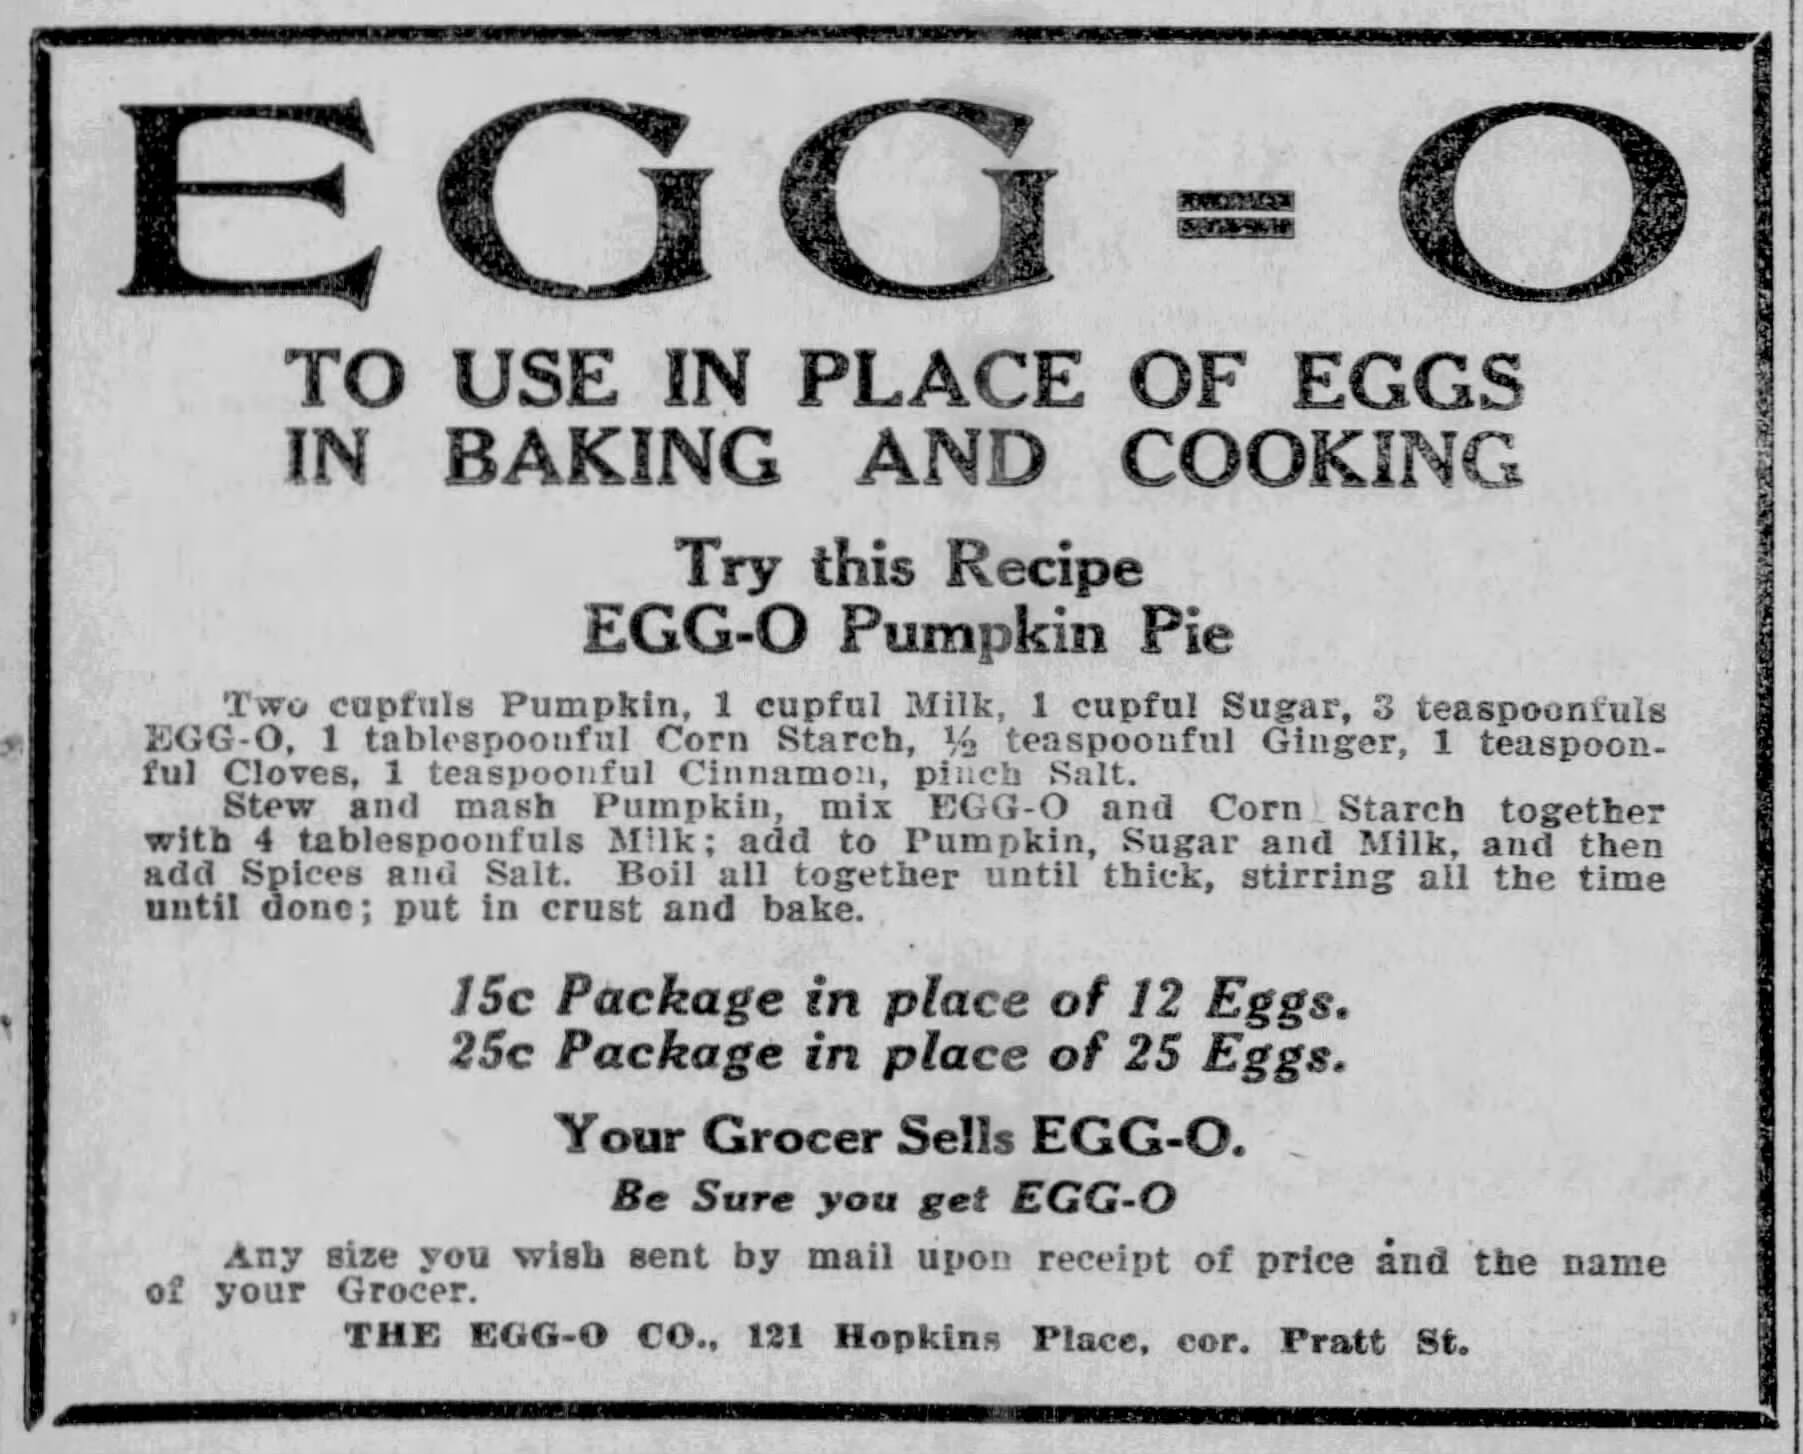
Courtesy of Newspapers.com
Package sizes are different. An example of this is bakers’ chocolate.
The way recipes were written can be different. Some old-time recipes used hyphens instead of slashes for fractions. So, it may look like 2-3 cups of sugar, but it is really 2/3 cup of sugar.
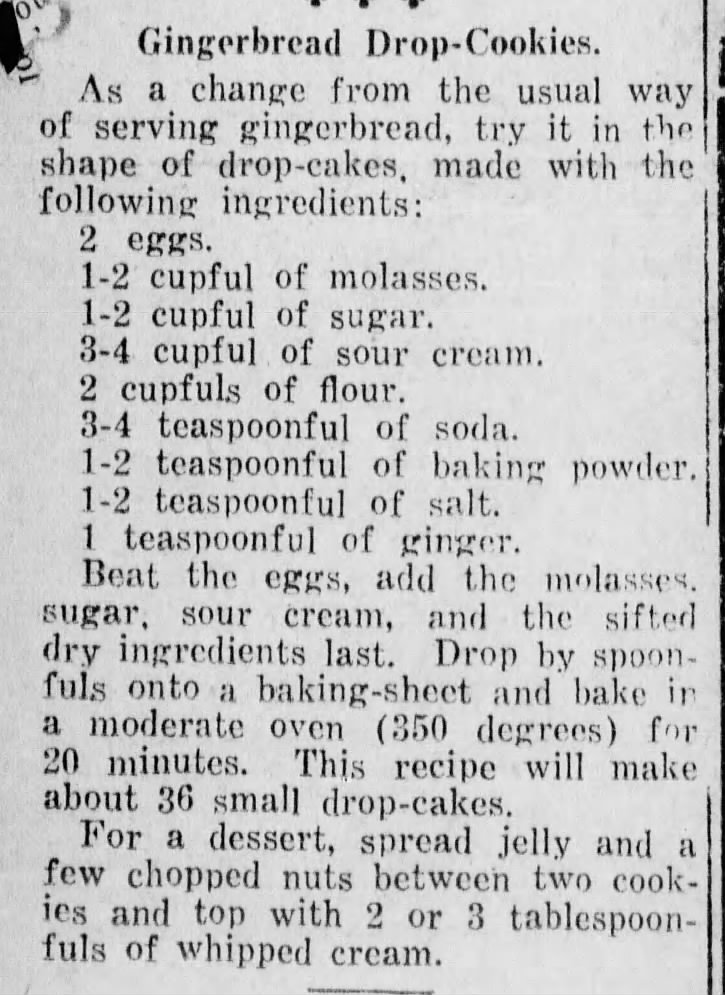
Courtesy of Newspapers.com. Dashes mean the same as a slash. They are fractions.
Recipes also might taste different today. If you have your grandmother’s banana bread recipe, it was likely made using a different variety of bananas called Gros Michel. In the 1950s, a disease destroyed wiped out the banana crop, and farmers started growing a variety of bananas called Cavendish. Apparently, the Gross Michel bananas were better, so your banana bread will never taste quite the same.
Many old recipes called for sour milk. Before milk was pasteurized, it soured very quickly. When you combined the sour milk with baking soda, it created a chemical reaction that was just like using baking powder. The reaction also removed the sour taste from the milk. My sugar cookie recipe calls for sour milk, and I add a bit of lemon juice or vinegar to the regular milk.

Uses for Sour Milk in cooking. Courtesy of Newspapers.com
Exact measurements may not be used in older recipes. Standardized measurements didn’t come out until the Victorian era and even then they took a while to catch on, so up until the 1940s or so, it’s not uncommon to see a recipe that calls for terms like a teacup of sugar, butter the size of an egg, or a gill of milk (which was about 4 oz).

Courtesy of Newspapers.com
Recipes were often in the paper in paragraph format, not the column format we are used to today.
Start finding recipes in old newspapers
Take the opportunity to ask your parents and grandparents about the types of foods they prepared and ate. Start a family conversation. We can learn so much from these oral histories.
If you’ve been lamenting that long-lost family recipe, you’ll probably find it on Newspapers.com. We have nearly 775 million pages of newspapers dating back to the 1690s. You can search papers from every state and international papers from the UK, Canada, Australia, Ireland, and Panama.
Get 20% off Newspapers.com. Click here and use coupon code genealogygems

Resources
Downloadable ad-free Show Notes handout for Premium Members.
Find Your Family History at ScotlandsPeople: New Look and Free Content
ScotlandsPeople has a new look and more free features. Here’s what the makeover involves, and how customers of the former host Findmypast.com are affected.
 Recently, ScotlandsPeople gained a new site host, after finishing its previous contract with Findmypast.com. ScotlandsPeople is the official Scottish government website for searching government records and archives.
Hundreds of thousands of people use it each year to research their family histories and access documents such as censuses, statutory and parish vital records, valuation rolls, wills and other critical historical records.
New on ScotlandsPeople
ScotlandsPeople has undergone its most extensive overhaul since 2010. It recently relaunched with several new features, including free content and services. Here’s a summary list taken from an article on the site:
- You can now search indexes to records, including statutory records of births, deaths and marriages, free of charge for the first time. (You will be charged when you view or download a record image.)
- The improved site design allows you access across digital devices.
- An enhanced search function makes it easier to locate and view records.
- New features include a quick search for people (across all records indexed by name) or the advanced search for specific types of records.

- You can now link to the Register of Corrected Entries from the relevant entry in a statutory register free of charge.
- Transcriptions of the 1881 census can now be read without charge.
- Indexes to births, marriages and death for 2015 and early 2016 have been added.
- You can now search coats of arms up to 1916.
- There are now more than 150,000 baptism entries from Scottish Presbyterian churches other than the Old Parish Registers of the Church of Scotland. More will be added in the near future, including marriages and burials.
- Over the next few months, more records will be added from the National Records of Scotland, including records of kirk sessions and other church courts.
Effect on Findmypast.com users
So, how did this transition affect Findmypast.com subscribers? Did they lose any access to Scottish records? No, says company rep Jim Shaughnessy: “Nothing is changing from a Findmypast perspective. Because of how Scottish records work, we didn’t have a reciprocal arrangement with ScotlandsPeople; our users didn’t get access to their records. We’ll continue to have the extensive Scottish records we already have, our users aren’t going to lose anything at all.”
 Findmypast.com has Scotland’s census for 1841-1901, indexes to births, baptisms and marriages back to the 1560s, and some other collections. Click here to search Scottish records on Findmypast.com.
Genealogy Gems Podcast Episode 233
Genealogy Gems Podcast Episode 233
with Lisa Louise Cooke
September 2019
Listen now, click player below:
;
Please take our quick podcast survey which will take less than 1 minute. Thank you!
In this Episode
Today we’re going to take a look at what so many records and record collections have in common: they are often Lists. Now that may sound pretty straight forward, but there’s a lot more to Lists than meet the eye.
A list of names, places or other information has a lot to tell us and can be used in unique ways. Professional genealogist Cari Taplin joins me in this episode for a conversation about what is so lovely about lists.
My Summer Vacation
If you’ve been following me on Instagram – you can find me here on Instagram or by searching for genealogy gems podcast in the free Instagram app – then you know that I’ve spent a bit of my time this summer getting a taste of some of the work many of my ancestors did and probably that many of your ancestors did: farming.
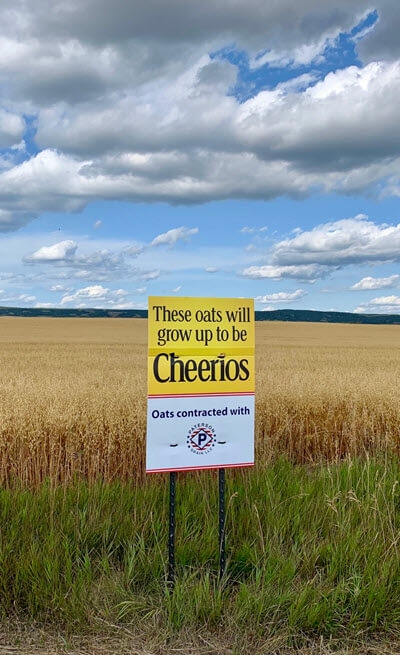
Bill and I have a close friend who owns his grandfather’s 1904 homestead in North Dakota. A few years back Bill went up there to help them open it back up and get things up and running. This year we helped them harvest their crop of oats. (They even have a sign in the field that says, “These oats will grow up to be Cheerios”)
Of course, we used equipment that our ancestors may not have had. I learned to drive the combine, and I turned the field with the tractor. But in many ways, things haven’t changed all that much.
One of the things that really struck me was how the farming community out there pulls together.
Now to put this in perspective: the 240-acre homestead is about two miles down a dirt road from Canada. The house has fallen into disrepair over the decades, so our friend bought an old farmhouse in the nearby town where he grew up. That town has a population of just over 50 people!
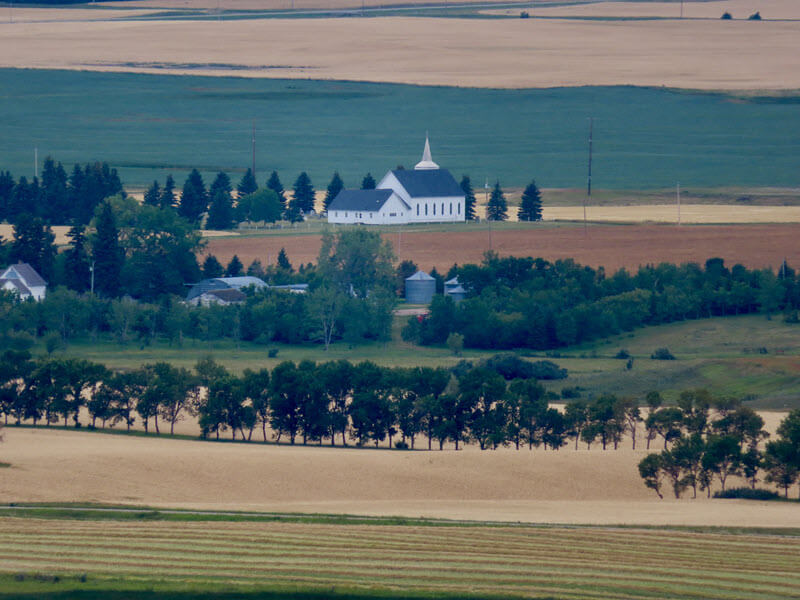
North Dakota farmland. Photo Credit: Lisa Louise Cooke, Genealogy Gems
So, we’re talking about a pretty remote location, and folks are scattered on various farms miles apart. But when a tractor was in need of repair, within the hour a neighbor would be pulling up ready to crawl under it alongside our friend to work on it till it was fixed. When a piece of equipment was needed that he didn’t have, it would soon be rolling down the road from a neighboring farm to pitch in.
Everyone had one eye on the sky at all times to watch the ever-changing weather, and there was such a commitment by all to make sure no neighbor was left with unharvested crops before a storm hit.
So even though the combines of today are motorized massive machines with air conditioning and stereos, the work ethic, the commitment and the community was unchanged from when his granddad first filed his homestead claim. Bill and I felt really blessed to be a part of it.
Think of us next time you eat your cheerios.
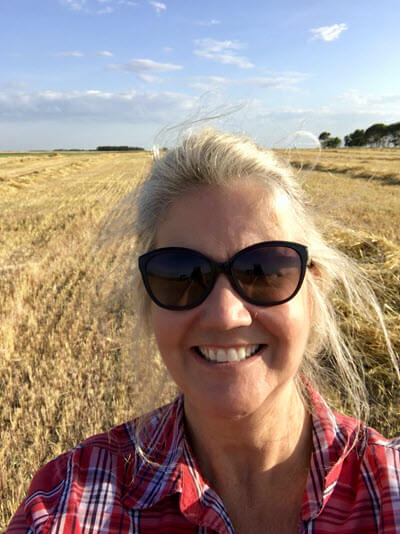
Farm selfie
MyHeritage.com is the place to make connections with relatives overseas, particularly with those who may still live in your ancestral homeland. Click the logo above to get started.
GEM: Interview with Cari Taplin
If you’ve been doing genealogy for any length of time, then you have probably encountered a list. They come in all shapes and sizes, and at first glance they may seem very straight forward.
Cari Taplin, a certified genealogist out of Pflugerville, Texas, says it’s worth taking the time to really examine lists carefully because there may be more there than meets the eye.

Cari currently serves on the boards of the Association for Professional Genealogists and is the Vice President of Membership for the Federation of Genealogical Societies. As the owner of GenealogyPANTS, she provides speaking, research, and consultation services, focusing on midwestern and Great Lakes states and methodology.
Types of Lists
Nearly every time we sit down to do genealogy research we run into a list. There are loads of them out there. Here’s just a starter list of the lists you might run into:
- indexes of any kind
- city directories
- tax lists
- petitions
- censuses
- church membership
- members of a club or society
- fraternal organization member lists
- community groups
- committees
- lists in newspapers like hotel registrations, letters at post office
- hospital admittances and discharges
- cemetery books
- event participants
- jurors
- estate sales
- militia rolls
- voter lists
- land lottery winners
- school class lists
- yearbooks
- agricultural lists
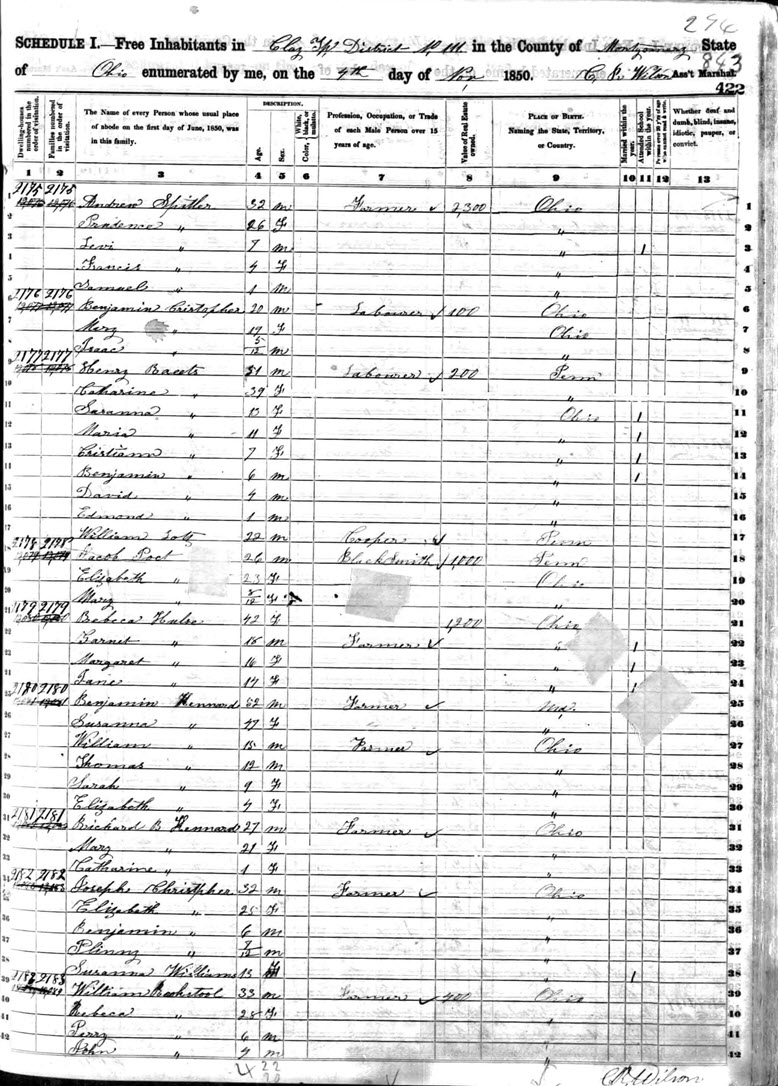
Census records are examples of lists
Significance of List Construction
Of course, not every list is alphabetically organized by any means. We might run into a list of prison inmates listed by number, or burial sites listed by plot or location. The information can be organized in many different ways.
Cari says that the way the list maker decided to organize the list tells us a lot about the information.
For example, a list that is alphabetized might be an indication that it is a recreated list. Other ways that lists may be constructed include chronologically or by location.
Here are follow up tasks you can do:
- Evaluate for potential error
- Locate the original source
List Explanation or Instructions
Understanding the thinking behind how the list was constructed is also important.
The U.S. Federal Census is a great example of a list that has other background documents such as the enumerator instructions. We don’t see these instructional documents unless we go looking for them. The instructions provide background on the creation of the list, and that can help us get more out of it.
Research Tip: Measuring America: The Decennial Censuses From 1790 to 2000. From that page you download the PDF of enumerator instructions.
Here’s an example of how understanding the census enumerator instructions can help you better understand how to interpret it:
In 1900 the census was answered as if it were a particular day. This means that if someone died a few days later, they may still be listed as alive in the 1900 census. If you know that they died that year, you now have more information that it was after the enumeration date.
Genealogy websites like Ancestry, FamilySearch and MyHeritage often provide background on the creation and purpose of their record collections.
Tax List example: there are laws behind them. Look up the statute. Google to find summations of tax laws at the time. Keep in mind that they might be in order of location.
When analyzing a list, ask yourself the following questions:
- What was this list created for?
- Why is it in this order?
- What does that then tell me about these people?
What’s we’re really talking about is educating ourselves
so that we’re not contributing to the errors that get out there.
It’s an investment in accuracy.
Context
It can be tempting to just scan the list, grab your ancestor out of it, and move on. But if we do that, we could be leaving a lot of genealogical gold behind.
“Evidence mining requires attention to detail, including details that might initially seem insignificant.” ––BCG, Genealogy Standards, #40, p. 24
Here are some ideas as to what we should look for:
- Sometimes it’s just a name (example: petition lists)
- There might be columns at the top – pay attention to those details for more understanding
- Other people in the list: the FAN Club (Friends, Associates, Neighbors.) Look for those names in other documents.
Organizing Your Research and the Data Collected from Lists
Cari uses spreadsheets to organize her genealogical research project data.
Come of the benefits of using a spreadsheet are that you can:
- easily sort the data
- easily manipulate the data
- visualize the data in different forms
Free Download: Read How German Address Books at Ancestry.com are Helping Bust Brick Walls and download the free spreadsheet template.
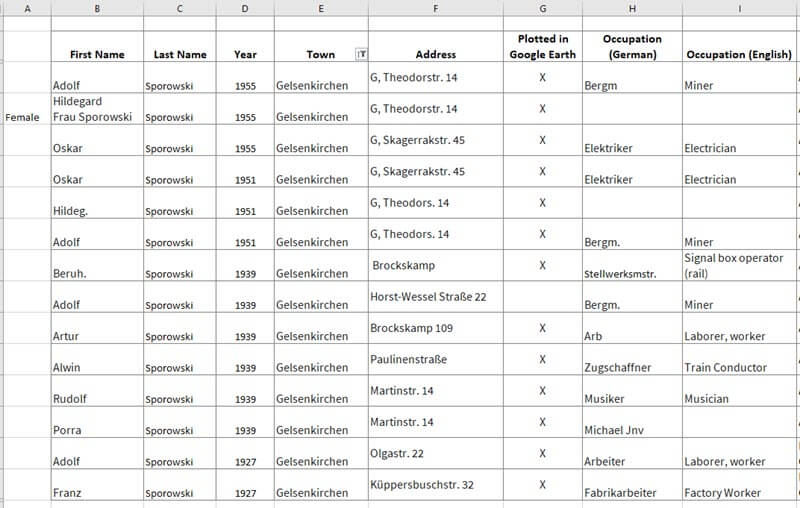
Addresses found in German Address Books marked in the spreadsheet
Explore the Bigger List
Often times you do a search, and you find a single record. But that single record is actually part of a massive internal list, an indexed list from which the search engine is pulling.
An example of this is when you run a search for your ancestor at the Bureau of Land Management website (BLM). After finding your ancestor’s record, you can then run a search by that land description to find other people who owned land and possibly lived nearby.
Watch the FamilySearch video on the batch search technique that Lisa mentioned.
What Constitutes Proof?
“Evidence mining requires attention to detail, including details that might initially seem insignificant.” – BCG, Genealogy Standards, #40, p.24
Review the Genealogical Proof Standard in the show notes for Genealogy Gems Podcast episode 232.
2 men with 1 name
When everyone in the family wants to name their children after Grandpa, you can end up with a lot people in a county with the same name. You need to tease them apart.
Questions to ask:
- Who did they associate with?
- Who were their siblings?
- Where were each of them located?
All of these things can help differentiate them. A spreadsheet is an excellent tool for this.
The Yearbook List Example
Very often the list of names is the full list of students. However, not every student necessarily had their photo taken. Count the names and then count the photos to verify you have the right person. Search the Ancestry Yearbook collection to try and find another photo of the person to compare.
Cari’s Main Message
Don’t skip over a list because it’s lacking some identifying information. You still need to record it. You may come back to it one day!
Visit Cari Online: Genealogy Pants
Profile America: The Gregorian Correction
Wednesday, September 11th. This was a day that didn’t exist in Colonial America in 1752, as the familiar calendar underwent what is called the “Gregorian correction,” switching from the ancient Julian calendar to adjust for errors accumulated over centuries.
After September 2nd, the next day was September 14th. The British parliament’s Calendar Act of 1750 had also changed New Year’s Day from March 25th to January 1st. As a result, the year 1751 had only 282 days. Since then, with leap years built in as in 2020, the calendar has remained constant.
Sources:
Calendars timeline, accessed 6/6/2019
Calendar Act
Calendar riots
Printing services, County Business Patterns, NAICS 32311
Printing employment, Annual Survey of Manufacturers, NAICS 32311
News: Watch Lisa’s new MyHeritage Education Center
Visit the MyHeritage Education Center to watch videos and read article to help you get more out of using MyHeritage. Watch the presentation at the MyHeritage Education Center: How to Find Your Family in Newspapers with SuperSearch
Download the Show Notes PDF in the Genealogy Gems Podcast app.
We Dig These Gems! New Genealogy Records Online
 Here’s our weekly list of new genealogy records online. Do any collections below relate to your family history? Please share with your genealogy buddies or with societies that might be interested!
ITALY CIVIL REGISTRATION. Over a million total indexed Italian civil registrations have been added to FamilySearch for Bario, Caltanissetta, Genova, Mantova, Pesaro e Urbino and Pescara. See and search (for free) all available records here.
MEXICO CHURCH RECORDS. FamilySearch also just updated their Mexican church records by the millions, from Aguascalientes to Zacatecas. The biggest updates are for the Distrito Federal (Mexico City) and Pueblas. Search these here for free.
SOUTH DAKOTA SCHOOL RECORDS. Nearly 3 million indexed names have been added to this free collection at FamilySearch. According to the database description, “School records, including teacher’s term reports, school census and attendance records located at the South Dakota State Historical Society in Pierre. Records are generally arranged by county, year and school district number.” It looks like this is a work-in-progress and more indexed records will be added.
US ALIEN CASE FILES. Nearly half a million In 1940, immigrants in the U.S. who had not naturalized had to register and be finger printed. Case files resulted! Nearly a half million indexed records from all over the U.S. are part of this new FamilySearch collection. (Residents of Guam; Honolulu, Hawaii; Reno, Nevada; and San Francisco, California are not part of this collection.)
US CENSUS RECORDS. Updates, corrections and additions to their U.S. federal census collections have been posted recently by both FamilySearch (1790 and 1800) and Ancestry (1880 and 1920 as well as the 1850-1885 mortality schedules). No additional detail was provided about specific changes to the collections. We blogged a few months ago about why FamilySearch was re-indexing part of the 1910 census; read it here.
 Sign up for our weekly newsletter, and this weekly round-up of major new record collections will be among the “gems” you find in it! With your sign-up, you’ll receive a free e-book on Google search strategies for genealogy. Simply enter your email address in the box in the upper right-hand corner of this page. Thank you for sharing this post with anyone else who will want to know about these records (and this weekly blog post.)