Here at Genealogy Gems we love using Google for genealogy. Today we have another exciting Google resource that can transform how you share your genealogy with your family – because ultimately, genealogy is all about sharing your family’s story!
While the mobile device era has made communication and sharing easy and instant, sometimes it’s hard to really see the ‘big picture’ on our tiny screens. And crowding around the computer monitor isn’t much better. Chromecast by Google is a tool that allows you to stream content from your mobile devices and computers directly onto your TV!
You can share slideshows, photos, videos, and more while everyone is seated comfortably in the living room. If you are looking for an easy and inviting way for your family to enjoy all the hard work you put into constructing the family tree, Chromecast is for you. The Google Chromecast HDMI Streaming Media Player currently sells for $35 and takes a mere 5 to 10 minutes to set up.
Even though I’m Lisa’s daughter, I am not a techie person at all, so if I can do it in just a few minutes without help, you can too!
How to Use Chromecast
After you’ve completed the initial set up, simply open the app you want to stream (YouTube, for example) and tap the Chromecast icon. Streaming is now enabled. (Chromecast primarily works over wifi, but Google recently announced that Ethernet cables are now available as an alternative.)
While streaming, you control the app functions on your mobile device or computer. For example, if you’re streaming a movie from the Netflix app on your iPad, you would play, pause, and make your selections directly on your iPad. If you want to switch back to viewing on your mobile device (or simply stop streaming), tap the Chromecast icon again.
Dozens of photo and video apps are compatible with Chromecast and all are listed on their website. Here are a few that I think genealogists will really enjoy, and they’re all available on both The App Store and Google Play:
When you open the app, you can view all the photos and videos (including TV shows or movies you may have purchased) on your device. You can also create slideshows by picking individual photos or entire albums and adding songs from your music library. Then tap the Chromecast icon to instantly stream to your TV. It has four viewing modes available. Photo streaming has very little lag, but video streaming could take a little longer to load, depending on your wifi speeds. Multiple devices can stream to the same TV, and slideshows can continue to play on the TV while you use your mobile device for other tasks.
Google Slides Free
Google Slides is an ideal tool for Chromecast because it is linked directly to your Google account. I recommend using Google Slides from your laptop or desktop because you can pull pictures from your hard drive (or anywhere – you’re not limited only to the pictures on your mobile device). And personally I find I can work much more efficiently with a full mouse and keyboard for this kind of project. You can create a wonderfully detailed and multi-media slide show or presentation. Then, download the app to your mobile device and your presentations will be accessible there as well. I find streaming from your tablet works a little better than streaming from your computer, but you can still stream from a computer as long as it’s connected to wifi and is close enough to the TV to detect Chromecast.
YouTube Free Chromecast offers you an easy and convenient way to watch videos from our Genealogy Gems YouTube channel and other favorites on your TV! Open the YouTube app and tap the Chromecast icon. Browse videos as usual. When you select one to watch, it will stream to your TV with no loss of video or audio quality. You can also create a TV queue, specifically for videos you want to watch on the big screen. Tap on a video and a pop-up will ask to either play it or add it to your TV queue. The best part? YouTube will continue to play your video on your TV even if you minimize the app on your device to do other tasks. Before you finish your viewing session, be sure to tap the Subscribe button at the Genealogy Gems YouTube channel so you’ll have easy access to all current and new videos.
Desktop Streaming
Streaming from your desktop browser is another great feature. Anything you are viewing on your browser (videos, audio, website content, etc.) can be projected to your TV. You will need the current version of the Chrome web browser, as well as the Chromecast extension installed. In my personal experience I found streaming video from my browser to be a bit slow and choppy, but results may vary based on browser settings and wifi speeds. It’s worth a try, and I wouldn’t be surprised if this technology continues to evolve and improve.
TIP:How to Update Chrome
Normally, Chrome updates automatically in the background when you open and close your browser. But here’s how to check if you have the most current version of Chrome:
Open Google Chrome.
In the top right, click the Chrome menu
Click About Google Chrome.
The current version number is the series of numbers beneath the “Google Chrome” heading. Chrome will check for updates when you’re on this page.
Click Relaunch to apply any available update.
Another cool thing about Chromecast:
Once you have Chromecast set up, your devices will detect any Chromecast that is nearby, whether it’s yours or someone else’s. So if you’re at a family member’s home and they have Chromecast, you can stream from your device to their TV as well! Can you say “time to share the latest version of the family tree?”
Again, as a non-techie I found Chromecast to be very user-friendly, and a huge value for the price. There are loads of fun apps to explore (music, podcasts, interactive games, and even a karaoke app!). Happy streaming!
P.S. If you decide to purchase Chromecast, will you please use this link? Purchasing through our site supports the free Genealogy Gems podcast and all the free content on our website.
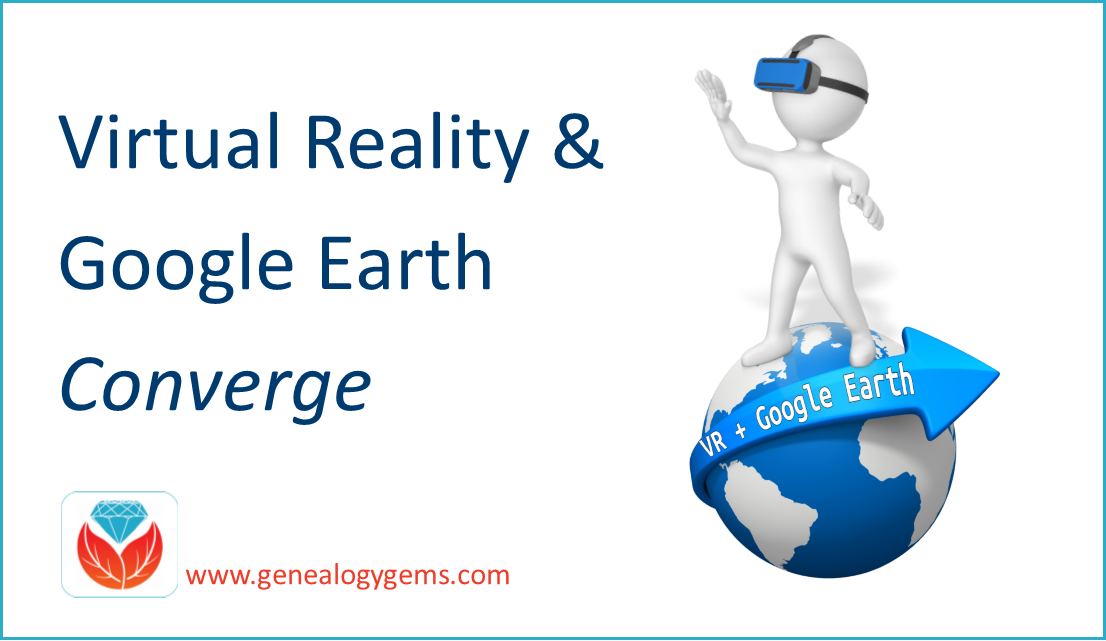
Google has announced that it is bringing Google Earth to the HTC Vive virtual reality (VR) headset. Here’s what that could mean for family historians.
Google Earth VR (virtual reality), which is available through Steam, allows users to visit various landmarks around the world, providing a 360-degree, immersive view. According to Google, “you can fly over a city, stand at the edge of a mountain, and even soar into space.”If you’ve read my book The Genealogist’s Google Toolbox, then you already know the potential genealogical goodness that Google Earth can bring to your family history. (If you haven’t, visit my Google Earth for Genealogy page to see what I’m referring to and you’ll quickly embrace the idea.)
And, if you’ve had the opportunity to sit in on my presentation The Future of Technology and Genealogy at a conference or seminar, then you’ve followed along as I explored the potential application of VR to genealogy. It’s a match made in heaven. VR does not only allow us a deeper exploration of our ancestral homelands, but could potentially intertwine with historical imagery.
According to Polygon.com, right now “the app is only available to use through the Vive. Google has not said if it plans to make the program accessible through its new, lower-end VR headset, the Daydream. The company recently released its ultra-powerful, VR-capable phone, the Pixel, so there’s a good chance that Google will eventually bring the app to specific phones.”
Since Microsoft announced in October it was working on a program called HoloTour (which allows headset wearers to visit different cities around the world through VR), the competition should encourage expansion beyond just global landmarks. But, it’s a start!
Watch this video to see it in action.
Learn More About Virtual Reality and Genealogy Tech
10 Genealogy Tech Tools You Can’t Live Without is an hour long video lecture and it’s available in our Premium Member features! Click the title to pop on over, or if you are not a Premium Member yet, become a member today.
Did you have the View Master toy as a kid? Well, see how virtual reality is changing your favorite old play thing into something magnificent by reading, View Master Toys are Going Virtual Reality.
Have you thought about using Google Photos but just weren’t sure how it worked or where to start? This episode will answer your questions and give you the confidence to use it effectively. In this audio introductory tour to Google Photos we will answer the questions:
What is Google Photos? Is Google Photos private?
What features do I get with Google Photos?
How does Google Photos storage work? (Is Google Photos free?)
How do I start using Google Photos?
How do I upload my photos and videos?
How to search and retrieve photos and videos in Google Photos How would Google Photos benefit genealogists, archivists and others?
This audio comes from my YouTube video series Elevenses with Lisaepisode 23.
Listen to the Podcast Episode
To Listen click the media player below (AUDIO ONLY):
Watch the Original Video:
Genealogy Gems Premium Members Exclusive Download:
Don’t miss the Bonus audio for this episode. In the app, tap the gift box icon just under the media player. Get the app here.
Get the Free Genealogy Gems Newsletter
The Genealogy Gems email newsletter is the best way to stay informed about what’s available with your Premium eLearning Membership. Sign up today here.
MyHeritage is the place to make connections with relatives overseas, particularly with those who may still live in your ancestral homeland. Visit www.MyHeritage.com
Have you ever wondered how the Internet works? I mean, how data from your computer actually makes to another computer somewhere else around the world? I found a very cool video that really manages to explain a very complex process that happens in a matter of seconds in a way that actually makes a lot of sense. And yet while it made sense, after I watched it it was almost harder to believe that it really works at all because it’s so amazing. Even if you are typically a person who doesn’t bother to click on videos, you have got to check out How Does the Internet Work in the newest of an edition of the free Genealogy Gems Podcast email newsletter.
While the world’s largest online family history resource, Ancestry.com, awaits a possible buyout, they are keeping busy buying other companies. Reuters reported that Permira Advisers LLP has emerged as the front-runner to take Ancestry private in a deal that could exceed $1.5 billion. (Read more about the possible acquisition at PEHUB)
Ancestry also released the following press release about the company’s latest acquisition, San Francisco based 1000Memories. You can learn more about 1000 Memories by listening to my interview with Michael Katchen, Director of Business Development at 1000Memories in Genealogy Gems Podcast Episode 119.
Old maps can tell us a lot more than just where our ancestors lived: They put events into geographic context, reveal surprising genealogical clues, and can be incorporated into Google Earth for analysis and storytelling.
In the newest episode (#92) of the Genealogy Gems Premium Podcast I’ll tell you about a terrific example of a website that has set the goal of have every image they possess (allowable by copyright) digitized and on their website by early 2013
I’m also going to tell you about something pretty shocking that happened to me recently while speaking at an international genealogy conference. I was really taken by surprise, and received some unexpected questions. I will share those with you as well as some solid answers.
It’s another packed episode. If you are a member sign in now to start listening. Become a Member today.
MAILBOX
Stephanie also wrote in with an opinion about Ancestry Trees
“So here are my “2 bits”. I am new to all this and honestly never considered my public tree as published. I have used the Ancestry tree as a if were my workbook, just as if it were a software package like Roots Magic. Because I consider it a workbook I add names as I find them and work the family as a group to document the information AFTER I add them. It simply never occurred to me that others would see this as complete, documented information. I have kept my tree open since I want to be open to contacts. When I see hints from other trees I simply avoid the un-sourced ones. The Ancestry hints have moved me along much faster than I ever could have before. I truly hope others who get angry could see my point of view. Thank you so much for teaching us, you have made this journey so much more enjoyable and effective!!!”
From Loretta: Ancestry Trees
“I’ve had a little different reaction towards the “polluted” online trees… sarcasm. At the beginning of the year I started a blog, Barking Up The Wrong Tree. I post on Tuesdays and Fridays. Both days could be considered tips for beginners but Tuesdays are examples of what NOT to do. All the examples are actual online trees and because of the propensity of newbies to mindlessly copy other trees most examples are not just on ONE tree. It makes for a lot of head meets desk moments but I’m enjoying it. Hope you and some of your listeners will too.”
Ricky in Birmingham, Alabama asks about citing sources and paper and file organization
GEM: New Family History Bloggers
Family History blogging is hotter than ever and the ideal way to get your research out on the web where others working on the same family lines can find you through Google searches! Many of you have been taking advantage of free blogging services like Blogger at Mom Cooke’s nagging here on the podcast, and reaping some rewards. So let me highlight a few listeners who have turned in their “Round To It” for a “Gitter Done!”
First up is David Lynch who started a blog on his St. Croix research
“I recently started in my genealogy and find your show both entertaining and helpful. My 200 Years in Paradise
The reason I’m writing is that sometimes we forget that the world wasn’t homogeneous throughout the 1800s. Right now, I’m writing a series on illegitimate births on the island of St. Croix from 1841-1934. From my research, it seems that over 77% of the children born were to unmarried households. Typically they formed stable family units, but just didn’t marry. In fact, in my personal family history, I have a set of ancestors who had 16 children and got married after their 12th child was born. In the US at the same time, only about 4% of the children were illegitimate.”
Jennifer shares her blog
“Just wanted you to know that I’ve started my own blog, based largely on the encouragement in your podcasts. What appealed to me was that it’s a medium where I can share information, but not in a way that’s an online family tree. This will prevent readers from copying and pasting family tree branches, without slowing down to learn some context. It also allows me a forum to correct some gigantic errors floating around out there about my ancestors. I finally woke up to the fact that I’ve moved to the head of the line in the experience department. I’ve placed a lot of tags on the entries, so the information is easily located in Google.” http://jenongen.blogspot.com/
Sonja Hunter wrote in to share her blogging success
First, I would like to thank you for putting together your podcasts!…I only became a listener about a year ago, but have been working my way through old Genealogy Gems podcasts as well as the Genealogy Made Easy podcasts, mostly while gardening.
I also wanted to let you know you inspired me to start blogging. I rang in the New Year by starting a blog about doing genealogy in my hometown of Kalamazoo, Michigan. One primary goal is to highlight helpful area resources. I imagine this will be most helpful to those new to conducting family history research in the area.
In addition, I am trying to include Kalamazoo area or Michigan history items that I think are interesting. One example is an article I found in the local paper describing what Kalamazooans from 1884 imagined life would be like in 1984. I’ve also written about poisonous cheese in the 1880s, diphtheria and the case of my gg-grandfather’s brother-in-law who may or may not have committed suicide by slitting his throat. I consulted Paula Sassi for that case and plan to blog about her handwriting analysis in the future.
Thank you for inspiring me to embark on this project! I’m learning a lot. And keep up the good and valuable work you do on your podcasts!
From John in Maryland:
“I want to thank you again for everything you do to inspire people to be enthusiastic about their family history. I learn so many “Gems” within all of your resources and put many of them to practice. You are the family history “Go-To” person in my book. I recently started a blog for the primary reason of documenting my findings so that I wouldn’t forget what I’ve been discovering. The blog also appears to be a good way to share my success stories with others that may be interested. I credit you for introducing the idea of using a blog in Family History: Genealogy Made Easy podcast. When I first listened to the podcasts about blogs, I didn’t think it was something that was applicable to me, as I felt I had no new information to share with others since many experts like yourself already handle this. However, I’m giving it a try and enjoy it so far. I really like how I’m able to place images within the text to help convey my information.” http://recordetective.blogspot.com/
And finally Shannon Bennett has really made a blogging splash. She writes:
“I have been hemming and hawing on writing to you and finally took the plunge to do it. Last spring a friend of mine told me about your podcasts (yes all of them) since I had just started into family research. She thought I would like it, and boy was she right! I have taken you on my iPod to drop my kids off to school and pick them up again, cleaned house, grocery shopping as well as everywhere in between. The wealth of information I have gathered from your podcasts have been very helpful, and I have loved all the interviews and tid-bits that have come along the way as well. There is no way that I could just pick one out of so many to be my all-time favorite. Maybe a top 10 list would cover it.
However, I do have to blame you for the latest adventure in my life, which is why I am writing. Listening to you tell us, in almost every episode, about the importance of having a family blog finally sank in. The first couple of times I heard you say it I thought to myself “there’s no way I would/could ever do such a thing, I barely have time to keep up with my Live Journal account.” A few weeks went by and the thoughts began to change to “hmmm…maybe I could do this.” Then after 4 months of thinking about it I started to do some research into how to run a successful blog.”
Shannon took the plunge and applied to Family Tree University to write for their Family Firsts Blog. “I come to find out that they are looking for their second blogger. I sat…I thought…I clicked the application button. Yes, on a whim I entered because I thought I had nothing to lose. You see I never win these types of things.
A month goes by, and I have given into the feeling that well it was a good try but of course I didn’t get it.…then later on that week I find out I won it!
So thank you, I never would have entered let alone thought about creating my own blog less than a year into my family research, without you and your wonderful podcasts.”
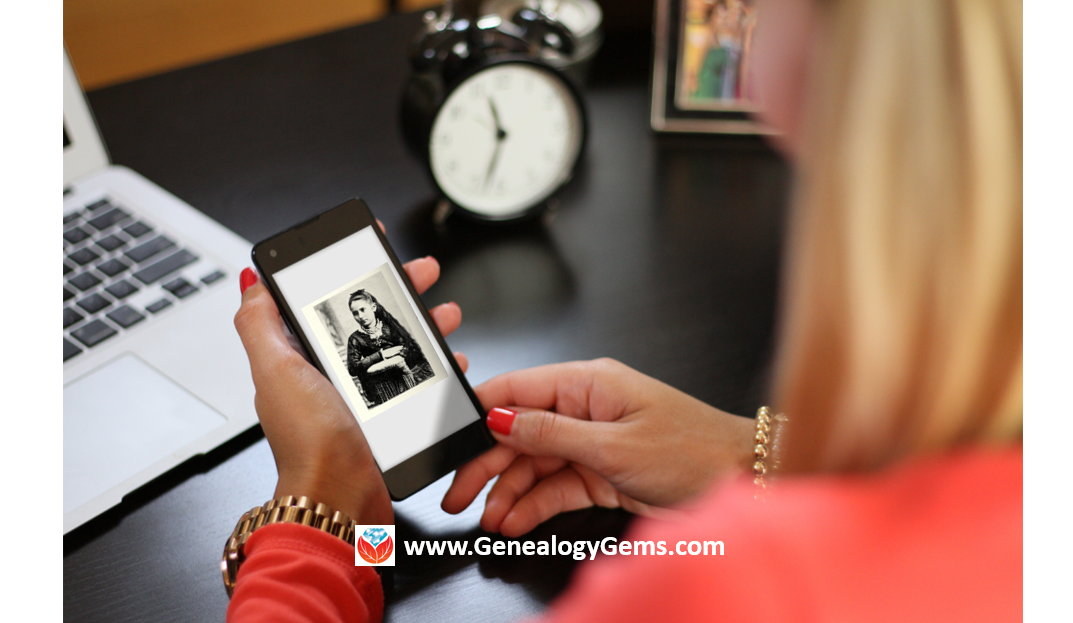
Using your mobile device for genealogy is a great idea, but with that convenience takes some additional know-how. Back-up your mobile device images in a few simple steps and you’ll never say, “I lost my photos on my phone!”
“I lost my photos on my phone!!”
This is NOT what you want to hear from a dear friend who is also a genealogist. So my heart sank when Genealogy Gems Contributor Amie Tennant’s email dropped into my inbox.
Amie wrote:
“I spent 6 hours researching at a cemetery and archives in a far away location. You won’t believe this, but when I got home I realized my smartphone wasn’t working. I had taken all the tombstone images with it, all the document copies were made with it, all my notes were on it. And I hadn’t even had time to back it up.”
That’s the problem, unless you back up as you go, you can’t be sure that just an hour later it won’t all be gone. These days you’re more likely to snap photos of records with your phone than a camera. But with that convenience comes the need for a new game plan to keep those precious images safe.
Back-up Your Mobile Device Images: The Plan
I put together an immediate email to Amie with a restoration and preservation game plan. If, like Amie, you are using your smartphone and mobile devices more and more, you’ll want to put this plan into place too.
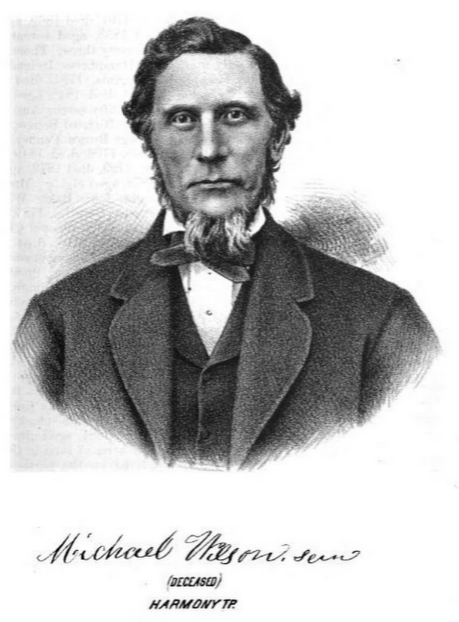
First, I advised Amie to visit her phone store (for example, The Apple Store if you have an iPhone) and see if they could retrieve the lost photos and data. You never know unless you ask!
Image of Amie’s 4th great-grandfather she was able to retrieve.
Next, it’s important to consider automatic back-up options. Automatic back-ups are great, which is why I love BackBlaze. But BackBlaze is back up for your computer. The BackBlaze app on your phone only gives you access to those computer files, and doesn’t back up your phone.
One option is to back-up manually as you go. In other words, as soon as you snap that image of a record, save it to a Cloud storage service such as Google Drive or Dropbox. You could even activate Cloud back-up so that it happens automatically, though with the size of image files, you would likely need a paid subscription service to allow for adequate storage space. However, if you are going to continue to use your phone as a genealogy tool, it may be well worth the investment. Let’s look more closely at these two options:
Free Manual Option: If cost is an issue, you can save your photos to a free Dropbox account at the time you take the photo, and then move to more permanent storage on your computer at a later time.
1. Take the photograph
2. Tap the photo in my iPhone’s Photos app
3. Tap Edit and do a quick edit to clean it up (improve contrast, rotate so that it is right side up, crop to get as close-up as possible)
4. Tap Done to close the editor
5. Tap the Share icon and tap Save to Dropbox
6. Select the folder in Dropbox where I want to save the image and tap Save
However, it would definitely be faster and simpler to have your phone automatically backing up to the Cloud.
Low Cost Automatic Option: If your phone is going to be one of your genealogy tools, then automatic cloud back-up may be worth the low cost of around a dollar a month.
Personally, I am not a fan of iCloud even though I have an iPhone. I just don’t find it very user friendly to work with. Setting up your photos and videos to automatically back up to your Google Photos library via Google Drive is another option. Again, since photos and videos do take up a lot of space you’ll likely need to invest in a low cost monthly storage plan. Click here to learn more, or Google search Google Drive Plan Cost (or substitue the name of the service you are considering)for current plans.
Bottom line: There are several Cloud services available for our smartphones and mobile devices, so there’s sure to be one that’s right for you. Where ever your images find their final resting place, make sure it has Cloud back-up.
Amie’s Response to the Plan
I quickly sent the plan to Amie. She responded by saying:
“Thank you, Lisa! It was devastating. You were right, a nice man at the phone store was able to restore them! But, I don’t ever want to have this happen again. When I set up my new phone, a Samsung Android, I noticed a setting that said something like “automatic save to Google drive” and it would sync your images. So I clicked it “on” but now I can’t find where I did that! Any ideas?”
Troubleshooting Backing-up Your Mobile Device
When people shoot me a question, my usual response is “Just Google it!” I Googled Automatic backup of android phone and got several great hits on the results list.
One article on Android Fact.com was particularly helpful. (Read the full article here.) Remember, it can get pretty expensive to be instantly uploading images with your cell phone carrier. I suggest clicking Wi-Fi Only to ensure that uploading only takes place when you are connected to Wi-Fi.
I regularly emphasize backing up important documents that live on your computer. But let’s face it: If you have a smartphone, it would be oh, so sad to have to say “I lost my photos on my phone!” So don’t wait—back up your smartphone or mobile device today.
Smartphones and other mobile devices offer a plethora of editing tools. It is well worth the investment of a few extra seconds to clean up and maximize images as you go. This is particularly true of records that need to be clear for future reference or printing.
Try applying a filter to your images for maximum readability. I like the Noir filter in my iPhone’s Photos app editor.
 Here at Genealogy Gems we love using Google for genealogy. Today we have another exciting Google resource that can transform how you share your genealogy with your family – because ultimately, genealogy is all about sharing your family’s story!
 Photo Cast for Chromecast
 When you open the app, you can view all the photos and videos (including TV shows or movies you may have purchased) on your device. You can also create slideshows by picking individual photos or entire albums and adding songs from your music library. Then tap the Chromecast icon to instantly stream to your TV. It has four viewing modes available. Photo streaming has very little lag, but video streaming could take a little longer to load, depending on your wifi speeds. Multiple devices can stream to the same TV, and slideshows can continue to play on the TV while you use your mobile device for other tasks.
 Google Slides
 Chromecast offers you an easy and convenient way to watch videos from our Genealogy Gems YouTube channel and other favorites on your TV! Open the YouTube app and tap the Chromecast icon. Browse videos as usual. When you select one to watch, it will stream to your TV with no loss of video or audio quality. You can also create a TV queue, specifically for videos you want to watch on the big screen. Tap on a video and a pop-up will ask to either play it or add it to your TV queue. The best part? YouTube will continue to play your video on your TV even if you minimize the app on your device to do other tasks. Before you finish your viewing session, be sure to tap the Subscribe button at the Genealogy Gems YouTube channel so you’ll have easy access to all current and new videos.
 P.S. If you decide to purchase Chromecast, will you please use this link? Purchasing through our site supports the free Genealogy Gems podcast and all the free content on our website.