Like anyone else who sells a popular product, Ancestry.com is always tweaking little things to improve the user’s experience. They’ve been working on some updates, some of which you may have noticed on the site over the summer and some of which are rolling out gradually over the next couple of weeks:
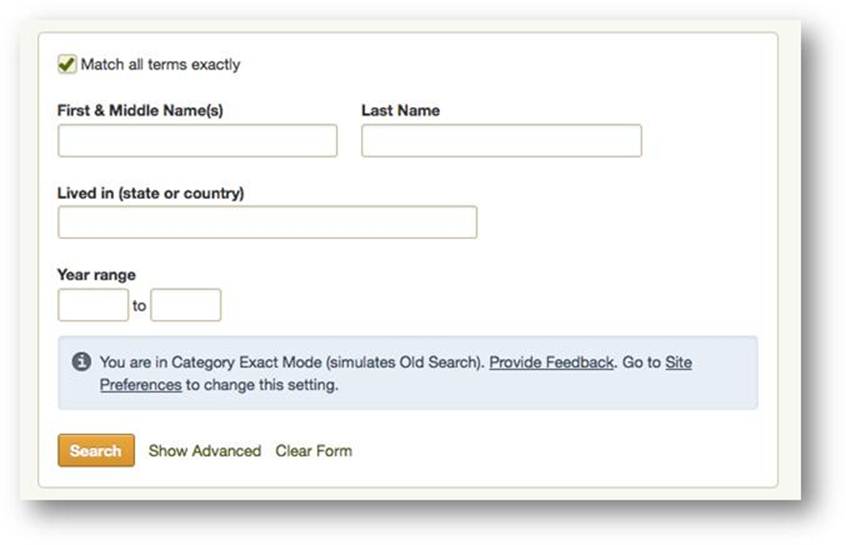
1. A simple search form with the check-box option to match all terms exactly.
2. Search results shown grouped by category. This is great–no more scrolling through lots of results when you’re looking for specific kinds of records. This sort feature also reminds us to check categories we may be overlooking, like city directories and local histories. These first two-features are opt-in: learn how to do it here and see what it looks like below:
3. A summary box at the top of search results showing what you’ve already attached to your ancestor. The list is sorted alpha-numerically so you can see easily which records have been found and where there might be gaps (see what it looks like below). You can collapse this list if you want to give you more room to see the search results.
4. A filter that removes search results similar to types you already found for that ancestor. For example, if you already have a death record for someone, the filter will remove other death records. “Smart filtering” is an optional feature, so you can still choose to see the full list. Read more about it here and see it here:
Ancestry says they will provide plenty of feedback opportunities for these new features. Don’t be shy: tell them what you like (and what you don’t) and why!
Recharge your genealogy research at the Fort Worth Genealogical Society End of Summer Seminar this Saturday, September 9, 2017. Genealogy and technology expert Lisa Louise Cooke will help you to discover, organize and share your family history more effectively.
To celebrate their 60th anniversary, the Society has invited internationally-renowned genealogy and technology expert Lisa Louise Cooke for a full day of genealogy fun and inspiration. She’ll be presenting four sessions packed with simple yet powerful strategies, how-to’s and examples that will help you discover your family history more effectively online, organize what you learn, and share it with attention-getting style.
THIS SATURDAY: Fort Worth Genealogical Society Seminar Details
Here’s what’s happening:
What: 2017 End of Summer Seminar Where: Trimble Tech High School, 1003 W. Cannon Street, Fort Worth, TX When: Saturday, September 9, 2017, 8:45 am – 4:30 pm (doors open at 8:15 am for registration) Hosted by: Fort Worth Genealogical Society
Lisa will be teaching some of her most empowering classes–the ones that give attendees immediate action items to help them take the next steps in their own genealogy research. Three of the four classes are entirely new in 2017. Here they are:
1. Google Books: The Tool You Should Use Every Day! Over 25 million digitized and searchable free books are at your fingertips with Google Books. Learn how to make the most of this goldmine chock full of historical data. (This was a BIG hit at Rootstech,)
2. Create a Free Google Earth Map Collection for Your Research. Learn how to find free digital maps for your ancestral locations, add them as permanent overlays to Google Earth, and then organize them into your personal map reference collection. You’ll learn best practices for keeping them organized and enriching your research.
3. Making Evernote Effortless. Learn the best strategies for making Evernote a breeze to use for your genealogy research. Shave time off your note-taking with quick keys, shortcuts, saved searches, search operators, Reminders, note sharing, source citation, and building Evernote into any browser you use (including mobile devices). (Evernote is one of the world’s top free organization tech tools:click hereto learn more about it.)
4. 7 Awesome Apps that Eliminate Eye-Rolling! Eliminate your relative’s bored eye-rolling and captivate them with compelling stories and imagery! We’ll cover seven easy-to-use and free mobile apps that will help you tell your family history stories in a riveting way.
More Learning Opportunities with Lisa Louise Cooke
If you can’t make it this weekend, you can still get the benefit of Lisa’s expertise and inspiring teaching style.
First, head to her Seminar schedule to see if she’ll be headed to a town near you!
Then, check out her books and quick guides. They are packed with her signature approach to technology: she shares creative ideas and simple, step-by-step instructions for using powerful, mainstream and mostly free technologies for family history.
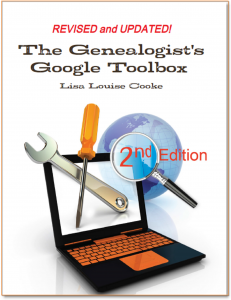
The Genealogist’s Google Toolbox (2nd edition) is a must-have for all family history researchers who work online (and that’s just about everyone). Find detailed instructions and explanations for making your Google searches more effective, along with entire chapters on using Google Earth, Google Books, Google Scholar, Google Alerts and even YouTube for genealogy.
The Evernote for Genealogists quick reference guide (available for Windows and Mac users) is a handy cheat sheet you’ll want to keep close at hand. It takes you from the “getting started” level quickly into navigating Evernote to maximize and organize your research note-taking.
Mobile Genealogy: How to Use Your Tablet and Smartphone for Family History Researchwill help you put your iPad, tablet and/or smartphone to work for your genealogy research. This expanded second edition of her original, groundbreaking book on mobile genealogy goes into greater depth with more apps and is loaded with tips and tricks that make your mobile device a genealogy powerhouse.
Show Notes: Are you trying to work on a genealogy brick wall, and you think the records you need might be at the National Archives? In this video, I’m going to show you a new way that you can get answers and hopefully get the records quickly.
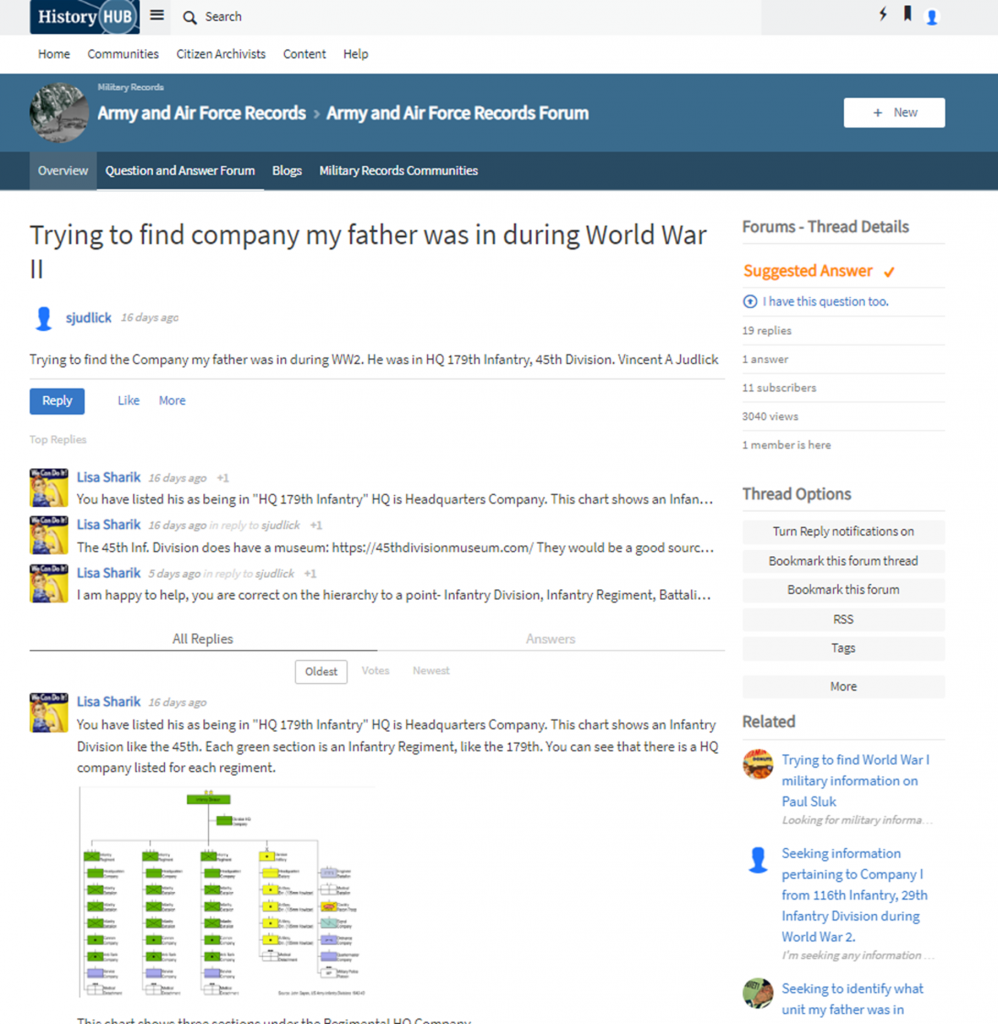
The National Archives is a great place to do that, but as I’ve mentioned before in this video, their website can be a bit daunting. However, I’ve got some good news. They have updated the website, and tucked away in that update is a special area where you can ask questions and get answers from many different sources including the staff at the National Archives.
It’s called History Hub. This updated platform is a place where the staff will actually answer your questions. You’ll also get responses from other archivists, librarians, museum curators, genealogists, and history enthusiasts. We all have areas of expertise and a wide array of experience, and the new History Hub makes it easier to help each other.
Before you can ask a question or help answer a question, you’ll need to register for a free History Hub account. To do so, click the Create your History Hub account now link on the home page. Type in the account name you want, enter your email address and a password and click the box to agree to the terms of service.
If you are a returning History Hub user, you will need to reset your password and re-accept the community Terms of Use when you first log in.
Be aware that accounts that have not been used for over 1 year are automatically deactivated. So, you can email them at historyhub@nara.gov and they will reactivate your account.
Searching History Hub
Searching for answers at the History Hub is pretty simple and easy to do. You can enter your question in the “Ask” field on the History Hub homepage, or within a specific community. And we’ll talk about communities in just a second.
Let’s first ask a question. There’s a very good chance that someone else has already asked a very similar question to the one you have and there may already be a lot of contributions that will have the information you need.
Go to History.gov and type your question or some keywords into the Ask box. Don’t click the Ask button just yet. Give it a second to show you any potential answers that are already on History Hub. They will appear as a list below the Ask box.
Again, those answers will build up over time, so if when you ask your question you don’t see a similar answer, that’s OK. Go ahead and click the Ask button now and you’ll be taken to a page called Ask a Question in Researchers Help where you can write up your question. Include any relevant information you already know, such as names, dates, and places, and also mention specifically where you’ve already looked. That’s going to help them help you.
You can also add Tags to your question so that if someone searches for a tag, your request will also pop up. And be sure to check the box at the bottom so that you’ll be notified when someone replies to your post.
There are a couple of things to understand and keep in mind. First, all questions are public. So don’t post your phone number or other personal information about you or other living people.
Second, all questions are reviewed and moderated to make sure they comply with History Hub’s Terms and Conditions which again you can read when you sign up for your account. They only moderate and answer questions on weekdays during regular business hours, so patience is a virtue here.
In addition to the Ask a Question box, you’ll find a search bar at the top of the page. This search field searches the entire History Hub website. It’s very similar to the Ask a Question search bar in that once you enter your search terms, you’ll want to wait and let it populate possible answers that are already on the website. It will show you Forums, blogs and communities where your terms are being discussed.
You’ll also find a link to Advanced Search in the bottom right corner of that prepopulated list. This gives you a place to filter down in several creative ways which is very handy if you’re looking for information on a pretty broad topic or one that has had a lot of activity on History Hub.
History Hub search example
They even give you an RSS feed for your specific query. So, if you use an RSS reader to follow blogs and podcasts, you could add this link to it to sort of bookmark this search and keep up to date on the activity on this topic. If you don’t use a Feed Reader currently, but that sounds interesting to you, check out a feed reader like https://feedburner.google.com/ or just google Feed Reader.
Browsing History Hub
Even if you don’t have a specific question, History Hub is worth browsing. There are a couple of ways to do that.
Top Questions where you can look through the most popular questions and topics. This also includes threads from related forums. Use the filters underneath the title of this section to focus even more.
Activity Stream which features the most recent conversations.
Explore Communities. History Hub currently hosts 19 communities, including “Researchers Help,” Military Records, Genealogy, and more. To see them all, click on Communities at the top of any page on the History Hub website.
At History Hub you can not only ask questions, you can also answer them. Since all of us have expertise in our own areas of genealogy, History Hub encourages everyone to share their knowledge and experience with other users who are new to archival and genealogical research. So, you can help out a fellow genealogist by clicking Reply at the bottom of their post and sharing what you know about the topic.
Notifications, Updates, and Subscriptions
As I mentioned before, this site is building up content over time. So, you’re probably going to want to follow topics, and History Hub offers a couple of ways to do that.
Forum Updates & Notifications
If you’re interested in following a particular topic, such as Census Records, or Army and Air Force Records, you can get updates by email and on the platform for all new questions and answers in that specific forum. To do that, click on any community’s Question and Answer Forum tab, then click the Turn Forum notifications on link in the sidebar of that Forum’s homepage.
Subscribe to Community Updates
You can also receive daily or weekly email updates within a specific community, including new blog posts and questions. To do that on any Community Overview page, click “Email digest options” in the right column sidebar.
Getting Help with History Hub
History Hub Help Files: Getting Started. Again, this website is newly revamped, so they are still working out the bugs. You can report any problems or ask questions in theTechnical Help and Support Forum.
These free online historical maps may help you learn more about your ancestors’ daily lives and flesh out your family history. Find maps for Victorian and Edwardian England and Wales; indigenous people of Canada and the U.S.; European synagogues; the Soviet military...
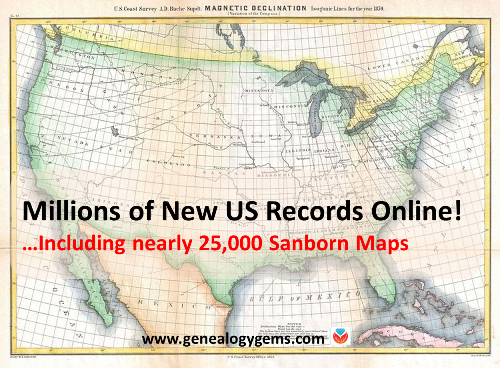
Thousands of Sanborn Fire Insurance maps and a national Civil War burial database are among new genealogy records online. Also: newspapers in Florida, Hawaii, Illinois, Louisiana, and Pennsylvania; vital records for Idaho, Utah, and Washington; Catholic parish records for the Archdiocese of Boston; Maine cemetery plans; New Hampshire Civil War records and New York passenger arrivals.
Breaking news! The Library of Congress has put online nearly 25,000 additional Sanborn Fire Insurance Maps–and more are coming! Over the next three years, more will be added monthly until all 50 states are covered from the 1880s through the 1960s.
Sanborn maps show detailed information about neighborhoods, buildings, roads and more for thousands of towns in the U.S. and beyond. A sizable collection of pre-1900 Sanborn maps are already online at the Library of Congress (use the above link). Watch the short video below to learn more about them. The full-length class is available to Genealogy Gems Premium Members.
Civil War burials. Ancestry.com’s new database, U.S., Civil War Roll of Honor, 1861-1865, lists over 203,000 deceased Civil War soldiers interred in U.S. cemeteries. “Records in this database are organized first by volume and then by burial place,” says the collection description. Entries “may contain the name of soldier, age, death date, burial place, cemetery, rank and regiment.”
Newspapers. We’ve noticed the following new digital newspaper content online recently:
Florida, Illinois, Pennsylvania: Newspapers.com recently added or updated newspaper content for the following newspapers (with coverage shown): Chicago Tribune (1849-2016), Fort Lauderdale News (1911-1991), South Florida Sun Sentinel (1981-2017) and the Morning Call [Allentown, PA] (1895-2017). (With a Newspapers.com Basic subscription, you can see issues through 1922; a Publisher Extra subscription is required to access issues from 1923 onward.)
Hawaii: Newspaper content has been recently added to the Papakilo Database, an online archive of The Office of Hawaiian Affairs. The collection currently contains nearly 12,000 issues from 48 different publications, with a total of 379,918 articles. Coverage spans from 1834 to 1980.
Louisiana: A New Orleans feminist newspaper is now available online at Tulane University’s digital library. An online description says: “Distaff was the first and only feminist newspaper published in New Orleans….Distaff served as a forum for women’s voices in politics, activism, and the arts….A preview issue was published in 1973 and the newspaper continued to be published until 1982. There was a hiatus in publication from 1976-1978.”
Maine cemetery plans. “Many Maine cemeteries have plans originally created courtesy of the Works Progress Administration, which reside at the Maine State Archives,” states a recent post at Emily’s Genealogy Blog at the Bangor Daily News website. The post advises us that all of them–nearly 550–are now viewable online at DigitalMaine.com (search for WPA cemetery plans). “These plans are great for locating veterans; some graves are coded by the war of service,” advises the post. “With such an item in hand one could also visit the appropriate town clerk and locate a civilian’s burial as well, I should think.” Thanks for that tip, Emily!
Massachusetts Catholic church records. The New England Historic Genealogical Society (AmericanAncestors.org) has added 13 new volumes to its browse-only collection, Massachusetts Roman Catholic Archdiocese of Boston Records, 1789-1900. “This addition, drawn from the collections of St. James the Greater in modern-day Chinatown, includes the largest volume we’ve scanned yet–1,035 pages,” says an NEHGS announcement. The collection description states that an index is being created and will be available to site members in the future.
New Hampshire Civil War records. The free site FamilySearch.org has added about 25,000 indexed names to its collection of New Hampshire, Civil War Service and Pension Records, 1861-1866. The collection contains an “index and images of Civil War enlistment papers, muster in and out rolls of New Hampshire Regiments and pension records acquired from the New Hampshire state archives.”
New York passenger lists. FamilySearch.org has added nearly 1.2 million indexed names to the database, New York Book Indexes to Passenger Lists, 1906-1942. According to the collection description, names are taken from “books of indexes to passenger manifests for the port of New York. The indexes are grouped by shipping line and arranged chronologically by date of arrival.”
Utah birth certificates. Nearly 33,000 names have been added to an existing FamilySearch database, Utah, Birth Certificates, 1903-1914. “This collection consists of an index and images to birth certificates acquired from the Utah State Archives,” says the site. “The records are arranged by year, county, and month within a numerical arrangement by box and folder number. Many of these volumes have indexes at the beginning or end.”
Sanborn maps are a rich resource for genealogy–but they’re just one kind of map that can lead to genealogical gems! Lisa Louise Cooke teaches tons of strategies for using maps to chart your family history in her Genealogy Gems Premium video series. Discover these for yourself with a Genealogy Gems Premium website membership.
Thanks for sharing this great news on Sanborn maps and more with your genealogy friends!
Disclosure: This article contains affiliate links and Genealogy Gems will be compensated if you make a purchase after clicking on these links (at no additional cost to you). Thank you for supporting Genealogy Gems!
 3. A summary box at the top of search results showing what you’ve already attached to your ancestor. The list is sorted alpha-numerically so you can see easily which records have been found and where there might be gaps (see what it looks like below). You can collapse this list if you want to give you more room to see the search results.
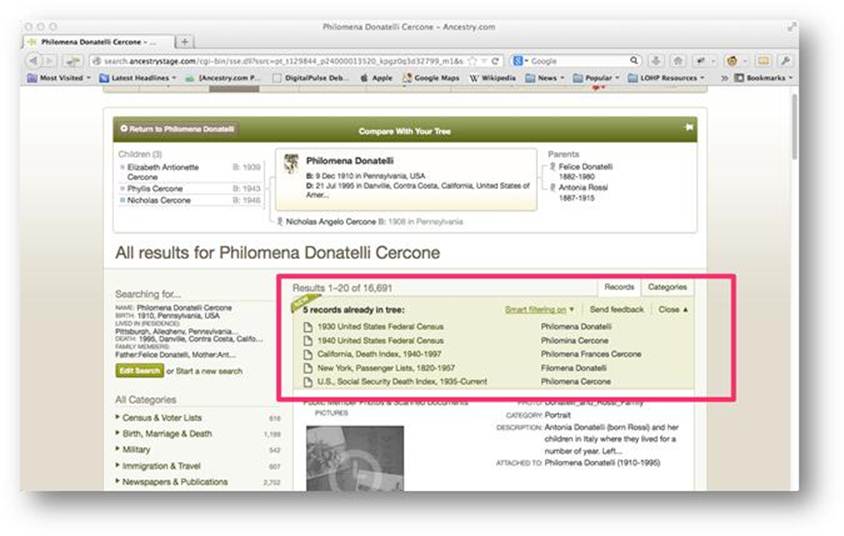
 Ancestry says they will provide plenty of feedback opportunities for these new features. Don’t be shy: tell them what you like (and what you don’t) and why!
 Sanborn maps are a rich resource for genealogy–but they’re just one kind of map that can lead to genealogical gems! Lisa Louise Cooke teaches tons of strategies for using maps to chart your family history in her Genealogy Gems Premium video series. Discover these for yourself with a