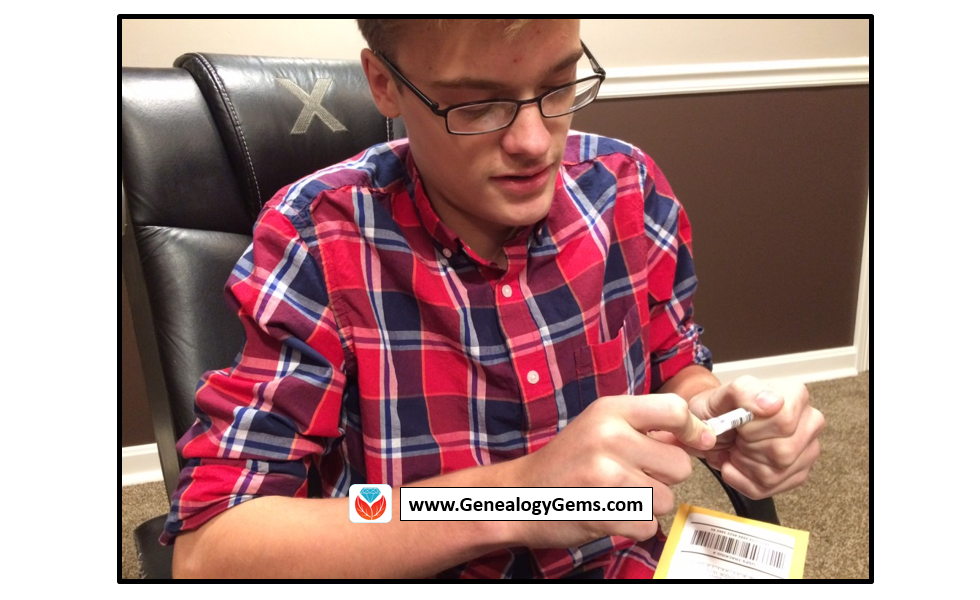
DNA testing for kids is a great way to spark their interest in their heritage, while teaching science, math, geography, and more. Consider these reasons and start with the budget-friendly option of an autosomal test.
According to a 2010 study out of Emory University, if we want to encourage kids toward an activity that will positively impact them, we should steer them toward family history. The researchers reported, “Children who know stories about relatives who came before them show higher levels of emotional well-being.”
Now, I know I don’t need to convince you of this. You are already sold on genealogy. But let’s explore how DNA testing might be able to help you share your love of family history with your children and grandchildren.
Why Try DNA Testing for Kids
Since you know this is me, the genetic genealogist talking, you can probably guess what I’ll suggest for getting kids interested in family history. DNA testing is a great way to personally and physically involve them. There is the tangible process of taking the sample at home, and the marvel at how such a simple act can produce the amazing display of our ethnicity results. Since each of us is unique, it will be fun for them to compare with you and other relatives to see who-got-what-from-who. This will naturally lead to questions about which ancestor provided that bit of Italian or Irish, and wham! You’ll be right there to tell them about how their 5th great-grandfather crossed the ocean with only the clothes on his back, determined to make a new start in a new land.
If there are parts of the ethnicity report you can’t explain, use that as a hook to encourage them to start digging and to find out why you have that smattering of eastern European or Southeast Asian. Taking them for a tour of the DNA match page, you can show them how they share 50% of their DNA with their sister (whether they like it or not!) and how they share 25% with their grandparent!
DNA test results give kids a totally unique look at their personal identity with technology that is cutting edge. Looking at their DNA test results can turn into a math lesson, a science lesson, a geography lesson, a lesson on heredity or biology, or a discussion on identity. DNA is the perfect introduction to the wonders that genealogy can hold, especially for children.
A Warning and Caution
As with all DNA testing pursuits, this one should not be taken lightly, even with all of its benefits.
An important word to parents: Be sure to keep unintentional consequences in the forefront of your mind. This includes the possibility of revealing family secrets. Talk with your spouse and make sure you are both on the same page. In the end, this is your decision.
An important word to grandparents and other relatives: DNA testing is a parent’s decision. Even though you’re passionate about preserving the family’s history and the benefits of including children are numerous, you must obtain parental consent if you are not the parent.
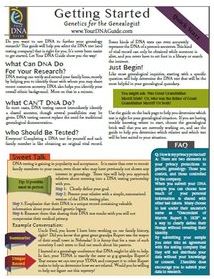
More About Autosomal DNA Testing for Kids
Click here to learn more about my series of how-to videos (available to Gems fans for a special price) or start your kids’ or grandkids’ DNA journey with two of my genetic genealogy quick guides. The first is a great overview and the second talks about autosomal testing which is a good test for genetic genealogy beginners.
Are you looking for a fun, easy and downright delicious way to share some family history this Christmas? What better way to entice your family to have an interest in the family tree than wrapping that history around a luscious chocolate bar?
DIY: Stuff Their Heritage in Their Stocking
I firmly believe that family history should not sit on a shelf, but should be seen, touched, felt and even tasted!
Sometimes when a passionate genealogist shares the family history discoveries they have made, their relatives are less than enthusiastic to hear about it. (Sound familiar? I know I’ve experience this phenomenon.) This lack of interest may be more about the delivery of the information rather than the information itself. The trick is to serve up the family tree in an appealing and fun way.
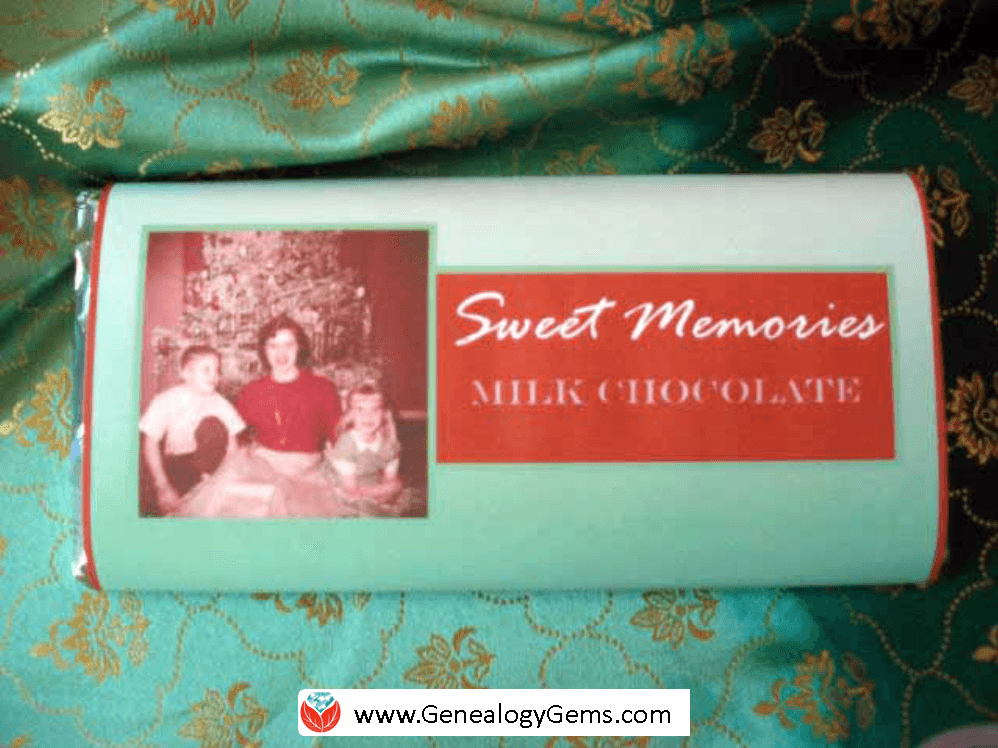
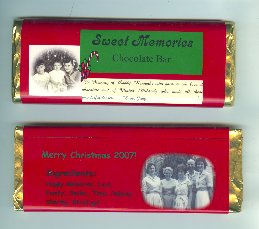
That’s why a few years ago I designed these customized candy bars which I call Sweet Memories. They’re basically your favorite chocolate bar wrapped in a custom label with your own sweet family history memory on it. What could be better than that?!
Here’s the first Sweet Memories stocking stuffer candy bar I made for Christmas.
They are really simple to make. The candy bars themselves are store bought. All you need is a computer, printer and some paper and you can whip some up in an hour or so.
What I especially love about these customized delectable delights is the conversation they stimulate. I loved seeing the surprises on the faces of my family, and then the reminiscing that soon followed. They loved seeing the old photos and the clever list of “ingredients” that provided insight into the character of their ancestors.
Don’t feel like you have to do exactly what I did on mine. Instead of a list of ingredients you could include a short funny story, favorite family quotes, or little-known fun facts about the ancestors in the photo. Use your imagination and have fun!
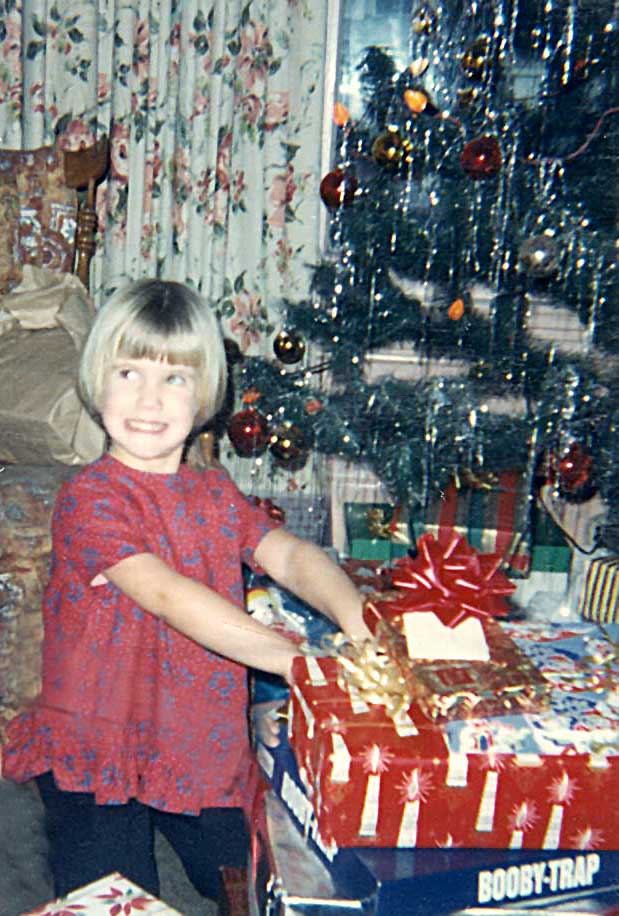
Me having fun at Christmas in 1966. Did you have the Booby-Trap game too? (Leave a comment)
Keep reading because after the step-by-step instructions below, I’ll share some more design ideas.
How to Make “Sweet Memories” DIY Stocking Stuffer Candy Bars
Here’s how to make your own custom labels and turn plain chocolate bars into wonderful holiday gifts for your loved ones.
Start by gathering up the following supplies:
A 3.67 oz approximately sized Chocolate Bar wrapped in foil with a paper wrapper. (Dove and Cadbury are some of my favorites. Hmmmm!)
Bright white printer paper
Computer and printer
A software publishing program that you can create your label in, like Microsoft Publisher. (Or try using a word processing programming using the text box feature.)
Scanned family photos, especially old holiday photos
These instructions are for creating the labels in Microsoft Publisher, but you could also do it in PowerPoint or any other design type software or app.
1. Create a Rectangle
On the blank page, create a 7 ¾” high and 5 ¾” wide rectangle using the Shape tool. This just gives you a nice outline to work in.
2. Add a Background
An easy way to add an interesting background is to scan a piece of scrapbook paper that you like. The scrapbook paper could be textured or have a repeating design. But you could also choose a favorite digital image.
Use the INSERT IMAGE function to get the image onto your page. Next, resize it to fit just over the rectangle that you created.
Another other option for the background is to select the rectangle and use the FORMAT FILL COLOR function to color the box with the color of your choice. I used green and then chose a gradient that went from light to dark for added interest.
3. Add an Old Photo(s)
You can add any digitized photo that you like. Dig through your old family photo albums to find Christmas photos from the past, or simply feature an ancestor or family. You can use the same photo for all your stocking stuffers, or surprise each member of your family with a candy bar featuring a different ancestor.
Use INSERT IMAGE to add your photos and resize them to fit.
For the front side image, I measured down approximately two inches from the top of the label, and that is where the top of the photo was placed. I set it ¼” from the left edge. Both photos are about 2” x 2”.
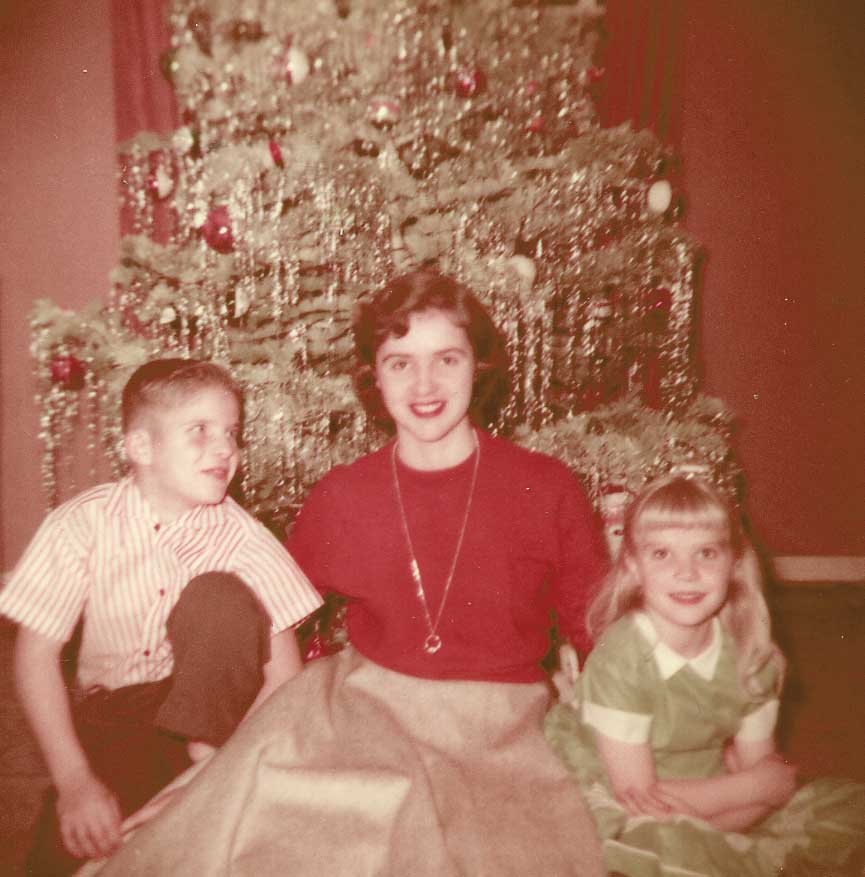
My uncle, mom and aunt in 1956. I used this photo for the front side of my stocking stuffer candy bar label.
4. Adding Photos to the Back of the Label
The backside photo begins 5” from the top of the label and is set ¼” from the left edge.
You may also want to include a small text box that states the date and location of the photos and the names of the people.
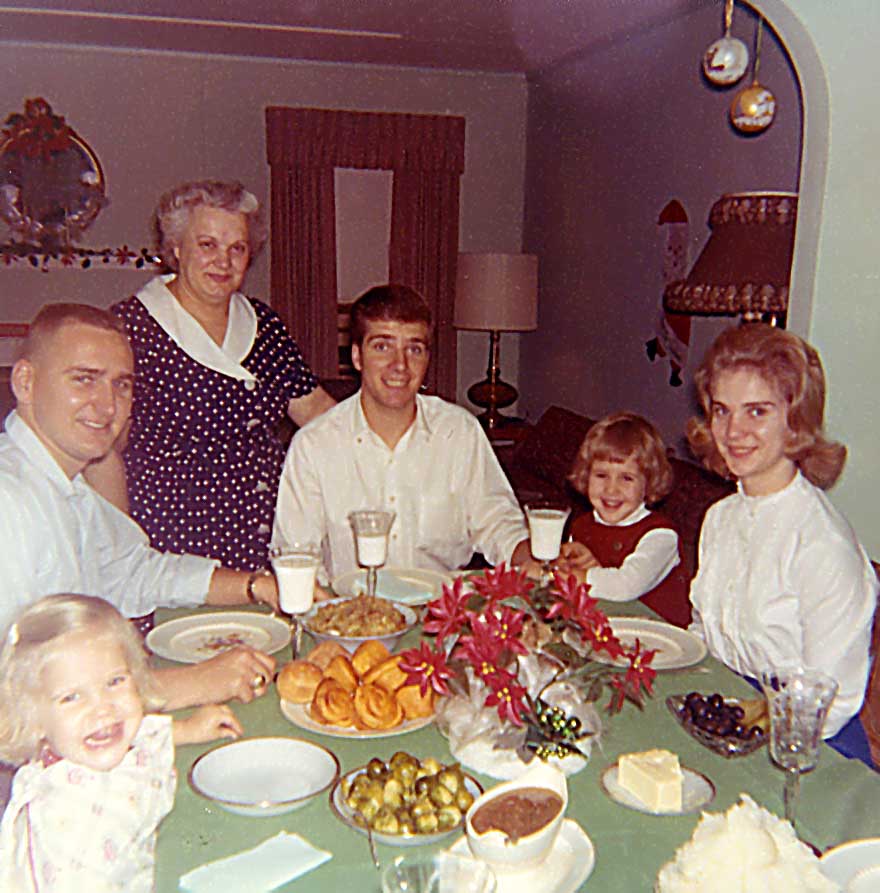
Christmas Dinner at Grandma’s House (I’m in the bottom left corner, mouth wide open as usual.) I featured this photo on the backside of my label.
5. Add Descriptive Text
The last step is to insert the text boxes.
Both the “Sweet Memories” text box and the “Ingredients” text box that I included are about 3” wide and 1 1/4” high. You can format them with the borders and colors that you want.
In my example, you’ll see that I took the color cues from the colors in the photos – the crimson red and soft green. Many apps have a color picker feature that will allow you to get an exact match.
6. Add the Ingredients List
Every food item has an ingredients label on it, and this bar is no exception. I had some fun with the ingredients list and played up the family theme. I thought about my memories of my Grandmother and the values and elements she poured into each holiday. So my ingredients list reads:
Love,
Family,
Attention,
Politeness,
Grandma’s Cooking,
Smiles,
Caring
and Time.
Feel free to reflect your own family values in the list.
7. Print Your Label
Once you’ve got everything laid out on the screen the way you want it, it’s time to print.
From the menu, click FILE then PRINT and then click the PROPERTIES button. From this window be sure to select “high resolution paper” or “high brightness” as the media type, and select HIGH for the print quality to make sure you get the best, most professional looking label.
Print the label, then carefully cut it out.
8. Fold the Label to Fit
Follow the folding guidelines shown above, but keep in mind that your candy bar is going to dictate your actual fold lines.
The first fold line for my standard size Cadbury chocolate bar (which you can buy in bulk here) was 1 ½” from the top of the label and the second fold line is 4 ¼” from the top of the label.
(Disclosure: Genealogy Gems is a participant in the Amazon Services LLC Associates Program, an affiliate advertising program designed to provide a means for sites to earn advertising fees by advertising and linking to Amazon.com. Thank you for supporting articles like these by using our links.)
9. Tape the Label Closed
Remove the original wrapper of the chocolate bar, being sure to keep the foil wrapper in place and undisturbed. Use a small piece of double sided tape to stick the label to itself on the backside snugly.
And there you have it, your own custom family history themed chocolate bar! It’s ready to tuck into a Christmas stocking, use at your next family reunion, or at any other time you want to tickle someone’s sweet tooth and share memories.
More DIY Stocking Stuffer Design ideas
I promised you more examples of these Sweet Memories candy bars. Here are some from my Genealogy Gems Podcast listeners.
I love the vignette styling Judy gave her family history photos.
Genealogy Gems Podcast listener Judy shared her version of the Sweet Memories stocking stuffer candy bar.
And this listener took this DIY idea and used it to create candy bar treats for her family reunion. What makes these SO unique is that she used a family heirloom crocheted blanket for her background image. (How clever is that?!) She spread the blanket over the bed of a scanner to make a digital image of that she could use on the label.
Get more DIY project here at Genealogy Gems. You’ll also find great heritage crafting ideas–including photo displays and heritage quilts–on my Pinterest boards. If you enjoyed this idea I’ll hope you’ll share via Pinterest or Facebook. Did you like this idea and do you have other suggestions for a new spin on it or a favorite DIY family history project? I’d love to hear it so please leave a comment below.
Guess what? The Genealogical Society of Pennsylvania has also been covering Orphan Train as a book club selection!
Their format’s a little different than ours: they have weekly blog posts on the book and members are invited to get together over coffee and chat about it. The blog posts are part plot summary, part personal response, and even part genealogy and history instruction! Check out these posts:
Do you have ancestors who lived in the “Windy City” of Chicago, Illinois (USA)? You should check out Chicago in Maps, a web portal to historic, current and thematic maps.
As the News-Gazette reports, “There are direct links to over three dozen historic maps of Chicago, from 1834 to 1921. The thematic maps include Chicago railroad maps, transit maps and geological maps.”
Of course, there are current maps, too, including a Chicago street guide for 2014. There’s a fascinating set of maps showing the effects of landfill projects. The Sources and Links page directs users to helpful guides to street name changes and house numbers. You’ll find links to surveyors’ maps, too.
From the home page, you can also click to a sister site on Chicago streetcars that includes a 1937 map of streetcar lines. (There’s a second sister site on Chicago bridges.)
Genealogy Gems Premium members can learn more about using maps for family history research in my online video class,5 Ways to Enhance Your Genealogy Research with Old Maps. To learn more about the benefits of Premium membership (including a year’s full access to over 2 dozen full-length video classes), click here.
Do you have Italian ancestors? Did you recently discover Italian heritage in your DNA ethnicity results? Don’t miss this exclusive interview with Mary Tedesco of Genealogy Roadshow! She’s here to talk about her top tips for Italian genealogy research, as well as share a bit about working on the hit PBS series.
Mary recently published Tracing Your Italian Ancestors, an 84-page guide to researching. There’s a section on using U.S. records to learn essentials about your family, and then a section on researching in Italian records. In this interview, she talks about traveling to Italy to research for others and the importance of using Italian church records in local parish churches or diocesan archives.
Learn more about Mary at her website, Origins Italy, or visit the Genealogy Roadshow website to learn about her involvement on that show. Also, Mary joined us as a guest on the FREE Genealogy Gems podcast, episode 175. Click here to listen!
If you watch genealogy TV shows like Genealogy Roadshow or Who Do You Think You Are? or Finding Your Roots with Henry Louis Gates, Jr, go to our home page and search on the category “Genealogy TV.” See what we’ve blogged about!

 Click here to learn more about my series of how-to videos (available to Gems fans for a special price) or start your kids’ or grandkids’ DNA journey with two of my genetic genealogy quick guides. The first is a great overview and the second talks about autosomal testing which is a good test for genetic genealogy beginners.
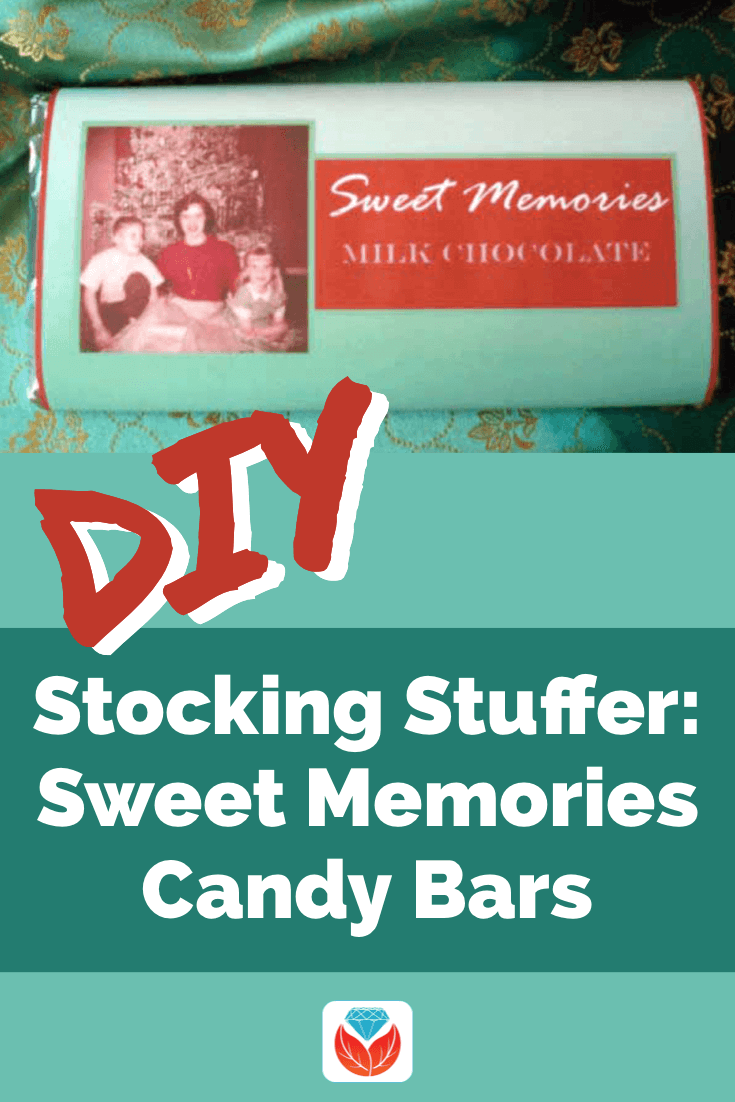


 Guess what? The Genealogical Society of Pennsylvania has also been covering Orphan Train as a book club selection!