A ton of genealogy and family history research can be done for free. In this episode I’ll share 15 fabulous free websites and what I love about them. These are essential for everyone serious about saving money while climbing their family tree.
(Get your ad-free Show Notes Cheat Sheet at the bottom of this page in the Resources section.)
LISA’S SHOW NOTES: Get your ad-free downloadable handout in the Resources section at the bottom of this page.
Tip: Use the Tools button on the results page to reveal the filter menu. Filter your results down to just full digitized and searchable books by selecting Full View.
Snagit Clipping Tool: Here’s our link for purchasing your copy of Snagit (screen clipping tool) Thank you for using our link. Use coupon code GENEALOGY15to get 15% off. (We will be compensated at no additional cost to you, which makes the free Elevenses with Lisa show and notes possible.)
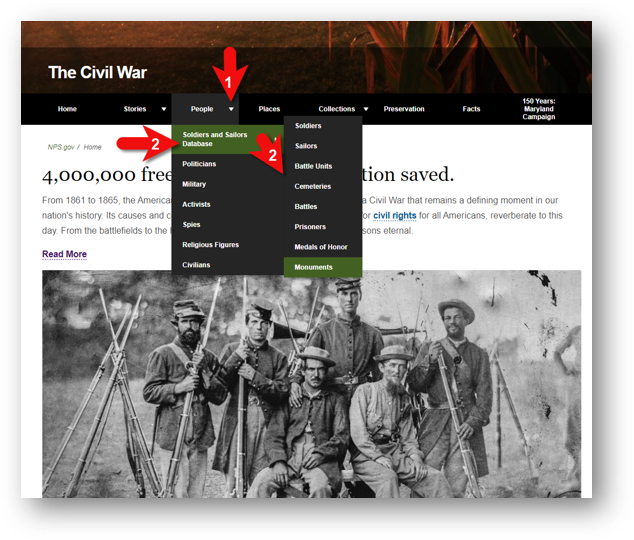
“Cooperative effort between the National Park Service and several public and private partners whose goal is to increase Americans’ understanding of this decisive era in American history by making information about it widely accessible.
11. Soldiers and Sailors Database
Features:
Men who served in the Union and Confederate armies during the Civil War.
Histories of Union and Confederate regiments.
Links to descriptions of significant battles.
Selected lists of prisoner-of-war records and cemetery records.
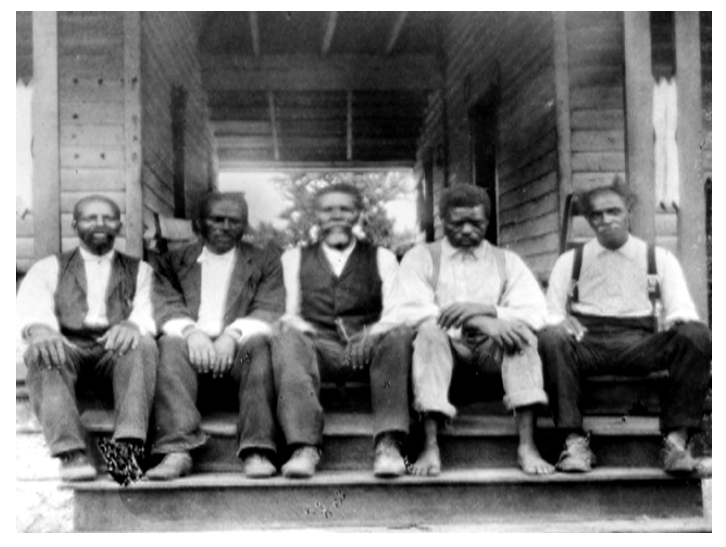
Social history plays a significant role in successful genealogical research. The events of a particular time-frame shed new light on the lives of our ancestors and ultimately lead us to new finds. In this post, Gems Reader Trisha asks questions regarding her family’s ties to the Colored Farmers’ Alliance.
“The Colored Farmers’ Alliance.” NBC News. NBCUniversal Media. 29 July 2007. NBC Learn. Web. 22 January 2015.
Did a Member of the Family Belong to the Colored Farmers’ Alliance?
Our Genealogy Gems Editor, Sunny Morton, received the following email recently from Trisha:
I am researching my great-grandparents in Northeast Arkansas. The census records I have found so far list that my great-grandfather was a famer. So, I started looking up farming associations hoping that maybe he was a member and I could find out more information about him and possibly any relatives that lived nearby. I came across the Colored Farmers’ Alliance that was in existence from 1886- 1891 in the southern states, but I have only been able to find out basic general public information about this agency. Do you know if, or how, I can find an Arkansas member list or something similar? Any help or advice you can give me would be greatly appreciated.
The History of the Colored Farmers’ Alliance
The Colored Farmers’ Alliance was formed in 1886 in the state of Texas. A group of southern African-American farmers had been barred membership to the other Farmers’ Alliances and hoped by creating this group, they would be able to cooperatively solve the common problems of its members. The group also encouraged African-American farmers to become economically independent by purchasing homes and eliminating debt. [“Colored Farmers’ Alliance,” The Gilder Lehrman Institute of American History (https://www.gilderlehrman.org/history-by-era/populism-and-agrarian-discontent/timeline-terms/colore : accessed 28 Oct 2016).]
The organization took off and spread across the Southern United States. It’s peak membership was up to 1.2 million in 1891. However, the organization did not survive long. In 1891, the Colored Farmers’ Alliance called a general strike of African-American cotton-pickers and demanded a wage increase from 50 cents to $1 per hundred pounds of cotton. The strike failed and the group dissolved. [“Colored Farmers’ National Alliance and Cooperative Union,” Wikipedia (https://en.wikipedia.org/wiki/Colored_Farmers%27_National_Alliance_and_Cooperative_Union : accessed 28 Oct 2016).]
Pulling Together Some Answers
We pulled the whole team together for this one, and Sunny reached out to me regarding Trisha’s questions. In our initial research, we didn’t come across any references online to membership lists for any branch of the Colored Farmers’ Alliance, including Arkansas where Trisha’s ancestors lived. We did however find an article titled Preliminary research for writing a history of the Colored Farmers Alliance in the Populist movement: 1886-1896by Omar Ali, written May 11, 1998, which states:
“Little detail is known about individual members of the Colored Farmers Alliance, including its leadership.”
That may not be surprising considering that the organization was attempting to improve member’s situations and fight for better pay. It’s possible that members may not have wished to be named due to concerns about repercussions. It would be important to learn more about the organization and the political and historical environment in which it operated in order to determine the probability of membership rolls existing or surviving.
While not everything is online (by any stretch of the imagination,) the web is the best place to do further homework to track down offline resources. Trisha could start by contacting the Arkansas State Library, and then exploring these search results from WorldCat.org which include a variety of works on the subject. It would also be very worthwhile to spend some time digging into the wide range of online resources such as Google buy syphilis medication Books and the Library of Congress’ Chronicling America digital newspaper collection. Let’s do that now!
Google Books
A search of colored farmers alliance delivers several results on the topic. Use search operators to help Google deliver even better results, by putting quotation marks around the search phrase “colored farmers alliance.” This instructs Google to return only web pages that contain that exact phrase. You’ll find more Google search strategies in my book The Genealogist’s Google Toolbox, which also includes an entire chapter on using Google Books for genealogy.
Here’s an example of one book I found called The Agrarian Crusade: A Chronicle of the Farmer in Politics by Solon J. Buck (1920).
While I didn’t discover any references to actual member names beyond some of the leaders, Google Books certainly offers more depth and history on the Alliance.
Digitized Newspapers
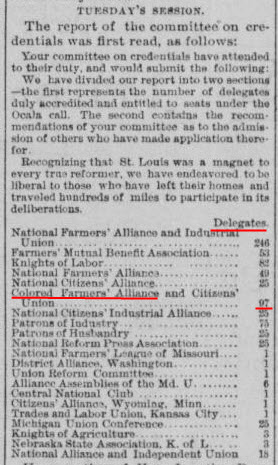
Indian chieftain., March 03, 1892, Image 1 at the Library of Congress’ Chronicling America. (The Indian Chieftan was published in Vinita, Indian Territory [Okla.]) 1882-1902
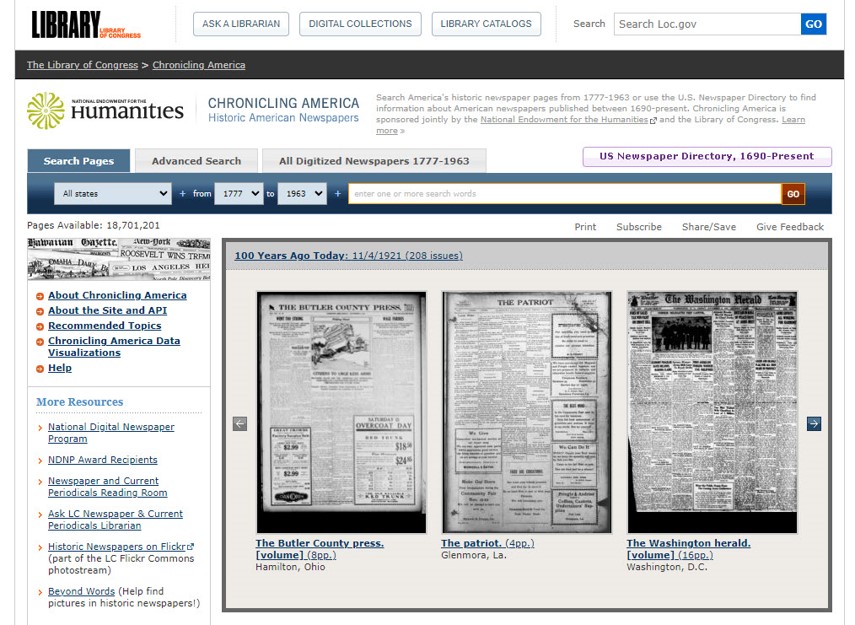
While only a small fraction of newspapers published throughout history are digitized and online, what can be found offers a wealth of information. The Library of Congress’ Chronicling America offers an excellent cache of searchable newspapers for free. Subscription websites such as Ancestry’s Newspapers.com and Newsbank’s GenealogyBank offer real value if the newspaper you seek is held within their collections.
Since Chronicling America is free, that’s a good place to start. At the main search page, click the Advanced Search tab. On that page, you will have the option to search by state, publication, and dates. Under “Enter Search” fields, there are three options. Type the phrase colored farmers alliance into the “with the phrase” field. That will narrow the search results down to newpaper pages that include the entire phrase and will eliminate pages that have some or all of the words independent of each other. A search of all states for that phrase delivers over 325 digitized newspaper pages featuring articles that include that phrase.
At Newspapers.com, I found dozens of references as well, many from Arkansas newspapers. I also noticed that several individuals wrote and signed letters to the editor on the subject.
For more help on researching newspapers for genealogy, listen to my two part podcast series titled “Find Your Family History in Newspapers, Part 1 and Part 2.”
members named
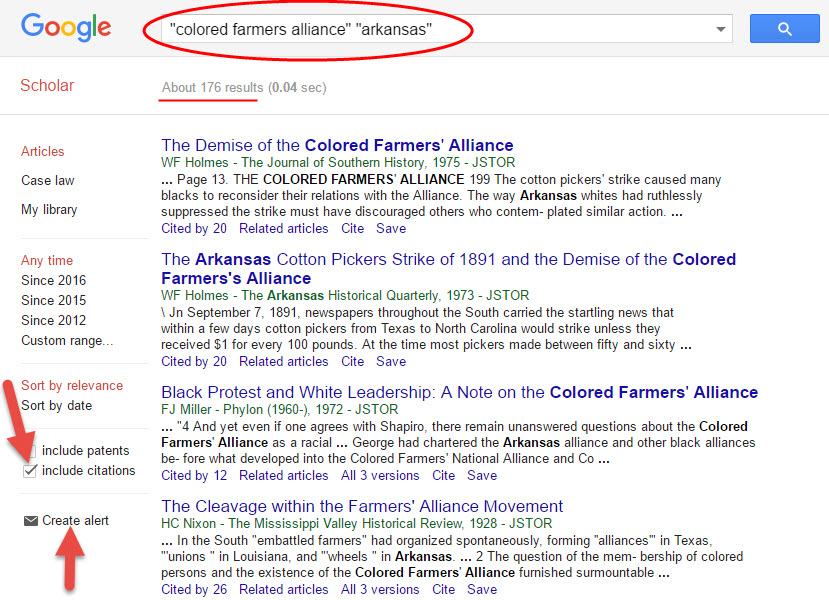
Google Scholar
Google Scholar offers not only well-researched works on a given subject, but also the ability to request only results with source citations. These citations not only help you weigh the accuracy and value of the paper, but provide intriguing new leads for research materials.
Using the same search operators as I did in Google Books, I retrieved over 175 results. To filter these results to only those with source citations, click the “include citations” box on the search page at the bottom, left side.
The savvy genealogist will also want to experiment with variations on the query by adding words and phrases such as members included, members list, list of members, and so on.
YouTube
Since I devoted another chapter of my book to using another free Google tool, YouTube, I would be remiss if I didn’t run a quick search at the video giant website. Here is a link to the video I found online.
It’s amazing what the family historian can discover from the comfort of their own computer. With so many valuable resources discovered through an online search, a well-prepared trip to the library or archive will prove even more fruitful.
Jesus EXPERIENCE CHURCH IN A WHOLE NEW WAY Plan a Visit Next Service In Day(s) : Hour(s) : Minute(s) : Second(s) Watch Messages Plan a Visit Give Online Josefin is a church that believes in Jesus. A church that loves God and people. Welcome home. Meet the Pastors...
The Genealogy Gems Podcast is the leading genealogy and family history show. Launched in 2007, the show is hosted by genealogy author, keynote presenter, and video producer Lisa Louise Cooke. The podcast features genealogy news, interviews, stories and how-to instruction. It can be found in all major podcasting directories, or download the exclusive Genealogy Gems Podcast app to listen to all the episodes and receive bonus content.
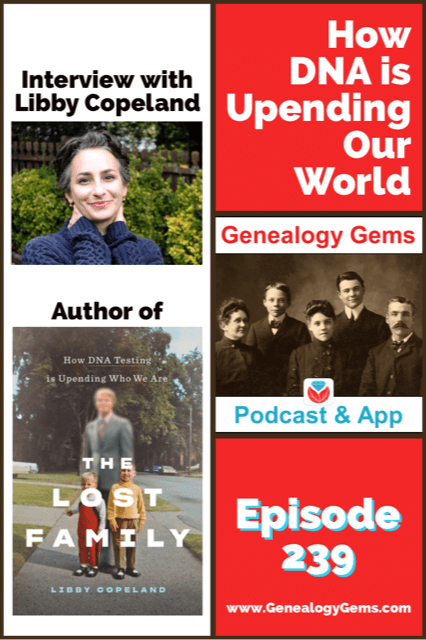
In this episode we’re going to delve into how DNA testing has changed our world with award-winning journalist Libby Copeland, author of the new book The Lost Family: How DNA Testing is Upending Who We Are.
Lisa Louise Cooke presenting her new class “3 Cool Cases Solved: How to Identify Your Photos” at RootsTech 2020. Video coming soon to Genealogy Gems Premium Membership!
Genealogy Gems Mailbox
Jenn shares her journey into genealogy and her brand new family history blog.
Jenn writes:
You even inspired me to start my own blog! This is something I thought I would never do, but with your helpful tutorials and encouragement I got started last month and I already have 7 posts!
My question is about getting my blog to show up in Google Search. I am using Blogspot. I have used Google’s Search Console to request indexing for my url’s (they are all indexed). I have included labels and pictures. I use the key words often that I think folks will search for. I’m not sure what I’m doing wrong. Can you help me?
I have tried the following searches in Google to no avail:
Jenn has crafted some great Google search queries to see if her blog will come up in the search results. However, the query does need a few adjustments.
Numrange Search: 1788…1856
Use two periods – not three.
Synonym Search: The tilde (~genealogy)
This search is no longer supported by Google, and in reality really isn’t necessary due to the updates and improvements it has made to its search algorithm.
Simply include the word genealogy at the end of your query and it should provide search results for words like ancestry, familytree, and family history.
It can take Google up to around a month to index your site so that it will appear in search results. Give it a little more time. In the meantime, I would recommend setting up Google Analytics and Google Console for additional traffic data.
Run this search to verify your family history blog has been indexed:
This blog post by Neil Patel is a great source of additional information about how to get your site found and showing up in search results.
Lisa’s Recommended Strategy:
Be Patient
Keep Consistently Blogging
Use free tools like Google Analytics and Google Console.
Genealogy Gems Book Club: Libby Copeland, author of The Lost Family
From the book: “In The Lost Family, journalist Libby Copeland investigates what happens when we embark on a vast social experiment with little understanding of the ramifications. Copeland explores the culture of genealogy buffs, the science of DNA, and the business of companies like Ancestry and 23andMe, and delves into the many lives that have been irrevocably changed by home DNA tests.”
You’re listening to episode 239.
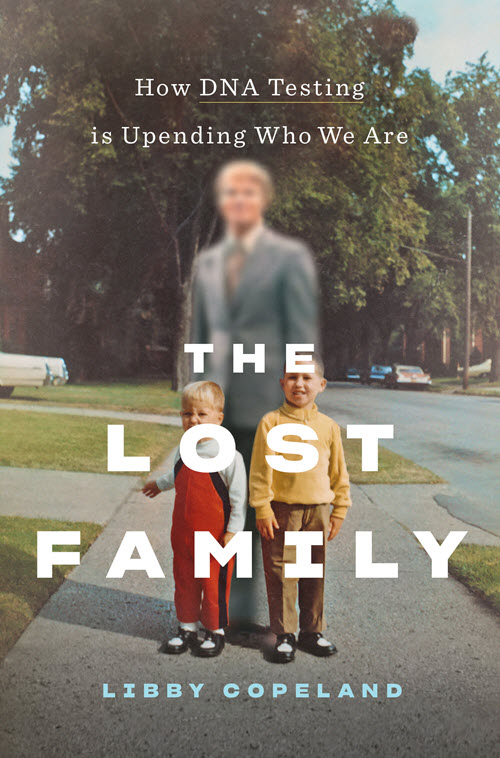
Get your copy of the book here. Thank you for using our affiliate link. We will be compensated at no additional cost to you, and that makes it possible for us to be bring more interviews to the free Genealogy Gems Podcast.
Click image to order “The Lost Family”
Libby Copeland is an award-winning journalist who has written for the Washington Post, New York magazine, the New York Times, the Atlantic, and many other publications. Copeland was a reporter and editor at the Post for eleven years, has been a media fellow and guest lecturer, and has made numerous appearances on television and radio.
Libby Copeland author of The Lost Family
Quotes from Libby Copeland:
‘I think that America in many ways because of commercial genetic testing is becoming a nation of seekers, and we’re all sort of seeking out our origins.”
“It’s hard to tell your story when you don’t have a beginning.”
“So, we’re sort of operating in the dark in a way. It’s like we have a flashlight and it only illuminates what’s directly in front of us.”
“We have all this information that’s available with the intention for it to be used for one thing, and we cannot anticipate the ways in which it might be used in coming years.”
“So, DNA is…really causing in many ways, the past to collide with the present. And that’s what I find so fascinating.”
Quotes from Lisa Louise Cooke:
“When you say, ‘what’s coming in the future?’ and he (Yaniv Erlich) says ‘oh, I don’t have a crystal ball, but you don’t need one because you look to the past.’ This is what we as genealogists do all the time!”
Get your copy of the book here. Thank you for using our link and supporting author interviews and the free Genealogy Gems Podcast.
The Genealogist’s Google Toolbox , 3rd Edition
By Lisa Louise Cooke
Fully Updated and Revised!
Brand New Chapters
Featuring Lisa Louise Cooke’s Google Search Methodology for 2020
A lot has changed and it’s time to update your search strategy for genealogy!
Click to order your copy of “The Genealogist’s Google Toolbox, Third edition” by Lisa Louise Cooke
Discover the answers to your family history mysteries using the newest cutting-edge Google search strategies. A comprehensive resource for the best Google tools, this easy-to-follow book provides the how-to information you need in plain English.
This book features:
Step-by-step clear instructions
quick reference pages.
Strategies for searching faster and achieving better results.
How to use exciting new tools like Google Photos and Google Earth.