by Diahan Southard | Jul 16, 2014 | 01 What's New, Digital Archives, German, History, Newspaper
 Do you have German roots in the U.S.? Have you ever looked for them in newspapers?
The folks who run Chronicling America, the most comprehensive free collection of digitized U.S. newspapers, have published a new article on historical German newspapers. Here’s an excerpt:
“For decades, Germans were the largest non-English-speaking immigrant group in America. Between 1820 and 1924, over 5.5 million German immigrants arrived in the United States, many of them middle class, urban, and working in the skilled trades, and others establishing farming communities in the West. Their numbers and dedication to maintaining their language and culture made Germans the most influential force in the American foreign-language press in the 1880s – the 800 German-language newspapers accounted for about 4/5 of non-English publications, and by 1890, more than 1,000 German newspapers were being published in the United States.” (Click here to read the whole article, which includes fascinating facts about how they retooled OCR technology to read Fraktur.)
Chronicling America currently includes 23 German-language titles from 9 states. You can search German newspapers in America (or other foreign languages) by going to the Advanced Search page. Under Language, select German (or another language):

Are you interested in learning more about newspaper research, online or offline? Read Lisa’s How to Find Your Family History in Newspapers, available as an e-book or in print. Or ask for it at your local library (if they don’t have it, they may be willing to purchase it–librarians are always looking for new titles their patrons want).
by Lisa Cooke | Sep 13, 2015 | 01 What's New, Apps, Dropbox, images
Now you can save the links to your favorite websites in Dropbox. It’s another great way to use Dropbox for genealogy! Here’s how….

Big news: Dropbox recently announced that you can now save web page URLs to Dropbox on the web or on your PC. It’s as simple as drag and drop!
Here’s a link to a quick-read article all about it, and it includes a super short video showing you the feature in action:
Think how handy this would be for tracking genealogy website sources! Those bookmarks we create in our web browsers can get pretty cluttered. A Dropbox folder dedicated just to your genealogy would be a great place to store URLS for those websites you find yourself consulting a lot: a Rootsweb site, the Genealogy Gems blog, JewishGen, and even specific pages within those sites for articles you love.
If you’re a Dropbox user, why not try saving this article URL to your Dropbox? The article we link to above has a video in which they show the drag-and-drop in a web browser, but it works just as well when you click on the URL and drag it onto the Windows Explorer icon on your computer’s task bar. When Windows Explorer pops open, just “drop” onto the Dropbox folder! And if you’re on a Mac, try the equivalent.
I use Dropbox every day. Below I have some great resources for you including an article on the types of items a genealogist could use Dropbox to save and share with other researchers.
Resources
Tips for Collaborative Genealogy: Dropbox for Genealogists
Genealogists’ Guide to Dropbox, a video presentation available to Genealogy Gems Premium members
Dropbox v Backblaze: Does Cloud Storage for Genealogy Replace Computer Backup?
by Lisa Cooke | Aug 27, 2015 | 01 What's New, Digital Archives, Evernote, images, Mobile, Organization, Photographs, Technology
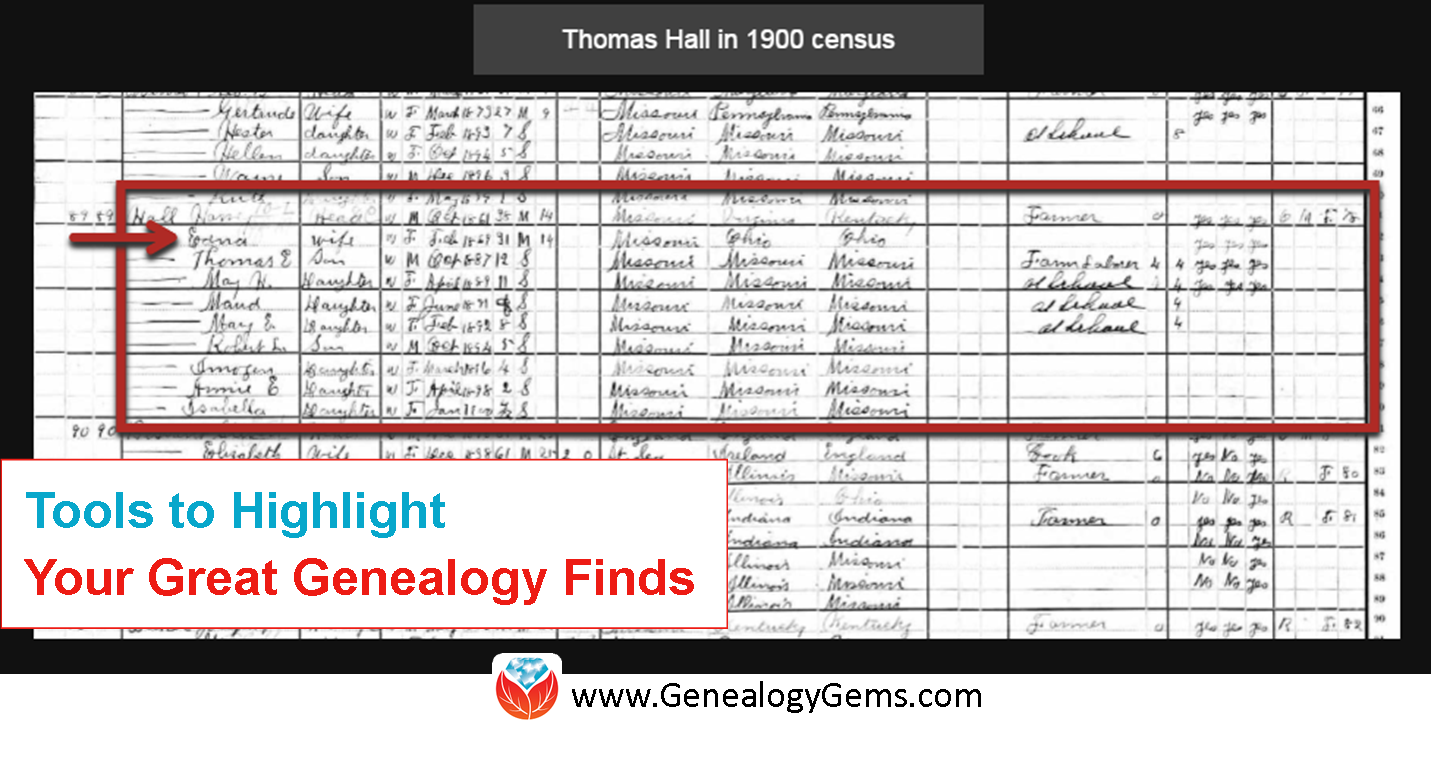
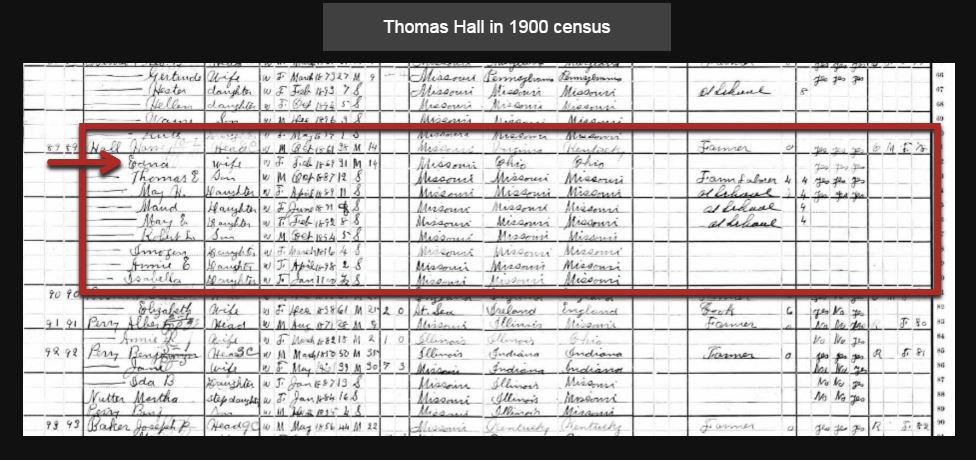
Snagit and Skitch can help you highlight screenshots and other digital images you capture for genealogy. Here’s how!

 Recently Diane from Alberta, CA sent in this question:
“I am trying to find how to highlight a portion of a document such as a birth certificate. The document has three people listed for the county and prior to adding it to my tree on Ancestry, I would like to highlight my ancestor so he will stand out. Can you offer any suggestions. I tried Evernote without success, also my family tree program. What am I missing?”
I suggested Diane use Snagit 2019, compatible with Windows and Mac software to highlight her documents. In fact, I use it constantly for a variety of genealogical projects. The full-blown software has loads of cool features!
You can also download the free Snagit Chrome extension here. After you install Snagit, you’ll see it show up on your browser page. Here’s what it looks like on Google Chrome (the blue “s” button):

 When you see something on your screen you want to capture, just click on the blue “S” icon. You’ll be asked at the outset to give Snagit access to various cloud storage options so it can store the image for you. Once you allow it access, then you’ll be able to name your file and add your own shapes, arrows and text. Use these to call attention to part of a record; annotate what you learned from it or even mark your ancestor’s face in a group photo.
As far as doing something similar in Evernote: Evernote only allows you to highlight typed text, not portions of an image. However, you can download Skitch and drag and drop the document from Evernote into Skitch. Then you can highlight an image to your hearts content. When you’re done you can Save to Evernote in the menu (SKITCH > SAVE TO EVERNOTE).
 Thanks to Diane for a great question! I hope you’ll all share this post: Snagit is free and makes it so easy to take notes on your digital images, for your own use or to share with others!
Resources
How to Add Text to a Web Clipping in Evernote
Should Evernote Be My Digital Archive?
Annotating and Transcribing Documents in Evernote (What Evernote Can and Can’t Do for Family History)
by Diahan Southard | Jul 1, 2014 | 01 What's New, Trees

Easy or complicated genealogy for the folks on this remote island? Tristan da Cunha, Wikipedia image.
Small, isolated populations should mean it’s easy to do their genealogy, right? Well, I wonder.
I came across this Wikipedia article on Tristan da Cunha, described as “the most remote inhabited island in the world, lying 1,750 miles from the nearest landfall in South Africa, and 2,088 miles from South America. Its current population of 264 is thought to have descended from 15 ancestors, 8 males and 7 females, who arrived on the island at various times between 1816 and 1908. The male founders originated from Scotland, England, the Netherlands, United States and Italy and the island’s 80 families share just eight surnames: Glass, Green, Hagan, Lavarello, Patterson, Repetto, Rogers, and Swain.”
Of course, success in doing family history on this island depends a lot on how strong their record-keeping and preservation has been. (Consider what one natural disaster could do to written history) Barriers to migration should certainly mean it’s easy to find ancestors. But what does that family tree look like? How many people will show up in multiple places on the tree?
Have you ever done genealogy research on an isolated or insular group? What are the challenges? What’s easier? Feel free to share on the Genealogy Gems Facebook page. Feel free to share your tales of complicated genealogy!
 Do you have German roots in the U.S.? Have you ever looked for them in newspapers?