by Lisa Cooke | Jan 14, 2014 | 01 What's New, Family History Podcast, Inspiration, Interviewing
 Originally published 2009
Republished January 14, 2014
https://lisalouisecooke.com/familyhistorypodcast/audio/fh14.mp3
Download the Show Notes for this Episode
Welcome to this step-by-step series for beginning genealogists—and more experienced ones who want to brush up or learn something new. I first ran this series in 2008-09. So many people have asked about it, I’m bringing it back in weekly segments.
Episode 14: How to Contact Long Lost Relatives
Connecting with someone who knows about our ancestors can really boost our research results—and even create new relationships among living kin. But it’s not always easy to send that first email or make that first call.
In today’s episode we talk about the skill of “genealogical cold calling.” We’ll chat with my cousin, Carolyn Ender, who has conducted hundreds of telephone interviews. She has a knack for quickly connecting with folks she doesn’t know over the telephone in ways that put them at ease and bring to light the information that she’s looking for.
But first, we do some follow up with an email from a listener about family trees. Then, I share a little story that puts into practice what we’ve learned so far in this podcast series.
Links
Anywho
Google
Whitepages
Whowhere
by Lisa Cooke | Sep 22, 2017 | 01 What's New, British, Military, Records & databases, Scottish Genealogy
Denmark Census Records are new at FamilySearch this week. Other new and updated genealogy records include new vital records for England, Catholic Parish records for Scotland, and various unique collections like WWII records for New Zealand, French Polynesian vital records, and military records and more for the United States.

Denmark Census Records
FamilySearch.org now has Denmark Census collections for the following years: 1860, 1870, 1880, 1890, 1901, & 1906. These indexes (provided by MyHeritage) are totally free to explore at FamilySearch, and the images were provided previously from the National Archives of Denmark.
England Wills & Probate
New at Findmypast is an index of over 229,000 Lancashire Wills & Probate 1457-1858 records. This index of more than 229,000 records will give you details about the type of material available, the probate year, and your ancestor’s occupation and residence.
Also new from Findmypast this week are large records for Herefordshire. You can search indexes for Baptisms starting in the early 1500s, Marriages 1538-1936, Burials spanning four centuries, and Wills 1517-1700.
Scotland: Catholic Parish Records
An extensive collection of browsable Scottish Roman Catholic Parish records is now available at Findmypast. It consists of all eight Scottish dioceses: Aberdeen, Argyll & The Isles, Dunkeld, Galloway, Glasgow, Motherwell, St Andrews & Edinburgh, and Paisley. Records begin as early as 1736 and continue until 1942.
New Zealand WWII Records
The Auckland War Memorial Museum has made over 100,000 WWII records available free online. From a recent press release: “Of the 140,000 New Zealanders dispatched to serve overseas in WWII, 104,000 of them served with the 2NZEF. Auckland Museum is now making these WWII Army personnel records publicly accessible through Online Cenotaph.”
French Polynesia: Vital Records
New this week at FamilySearch: Civil registration of births, marriages, and deaths for French Polynesia, 1843-1999. Original records are located with the Tribunal Civil, Papeete, Tahiti.
United States Military Collections & More
Japanese internment camps. Now available at FamilySearch.org: War Relocation Authority Centers, Final Accountability Rosters, 1942-1946. From the collection description: “Digital images of originals are held by the National Archives at College Park, Maryland. These rosters are alphabetical lists of evacuees housed in relocation centers from 1945-1946. This project was completed in cooperation with Densho: The Japanese American Legacy Project.”
Audio recordings. Check out The Great 78 Project! You can listen to this collection of 78rpm records and cylinder recordings released in the early 20th century. These recordings were contributed to Internet Archive by users through the Open Source Audio collection. The Internet Archive has digitized many.
Montana. A new Birth Index 1870-1986 is available at Ancestry.com. The Death Index 1907-2015 has also been updated. These records come from the State of Montana Department of Public Health and Human Services. Copies of the actual certificates may be ordered from the Office of Vital Statistics.
Virginia. Also new at Ancestry.com are Virginia Vital Records, 1660-1923. Indexed information may include primary names and names of family members, as well as birth, marriage, death, and burial information. This collection was indexed by Ancestry World Archives Project contributors.
North Carolina. From the State Archives of North Carolina: New Veterans Oral History Collection Online. “The interviews, conducted since 2015 as audio interviews, are part of the Military Collection’s North Carolina Veterans Oral History Program, whose goal is to capture and provide access to the memories and experiences of the military servicemen and servicewomen from North Carolina, preserving them for the future scholarship.”

Be sure to share this post with your genealogy friends and groups so they can explore these wonderful new collections!
Disclosure: This post contains affiliate links and Genealogy Gems will be compensated if you make a purchase after clicking on these links (at no additional cost to you). Thank you for supporting Genealogy Gems!
by Lisa Cooke | Dec 16, 2016 | 01 What's New, Records & databases
It’s snowing like crazy in some parts of the U.S. this week and it’s blown up a blizzard of great new and updated genealogical record collections! Take a look at this week’s round-up for Bishop’s Transcripts in England, Veteran Memorials in New Zealand, and records for Peru, United States, and Canada.

England – Devon – Bishop’s Transcripts
England, Devon Bishop’s Transcripts, 1558-1887 is a collection found at FamilySearch. Though a rather small collection, these Bishop’s transcripts contain an index from the county of Devon and cover the years of 1558-1887. Availability of records will vary by year and locality.
Starting in 1598, parish priests were to make a copy of their parish register and send it to the archdeacon or bishop each year. Many priests stopped producing bishop’s transcripts with the beginning of civil registration in 1837, but they did not fully disappear until after 1870.
As bishop’s transcripts generally contain more or less the same information as parish registers, they are particularly valuable when parish records have been damaged, destroyed, or lost. However, because bishop’s transcripts are copies of the original records, they are more likely to contain errors than parish registers might be.
This collection refers to baptism, marriage, and burial records. Baptism record entries are the most common in the index, followed by burial records, with marriage records being the smallest portion.
England – Worcestershire – Probate Records
The Worcestershire Probate Index 1660-1858 at Findmypast contains over 51,000 records taken from four types of probate documents. Each record includes a transcript only, however the transcript may include some or all of the following information:
- First and last name(s)
- Sex
- Date
- Occupation
- Place
- County
- Country
- Document type
England – Buckinghamshire – Marriages
The Findmypast collection titled Buckinghamshire Marriages contains over 49,000 records. The collection consists of transcripts covering 26 parishes within the English county of Buckinghamshire. These transcripts will cover the years between 1538 and 1838. Here is the list of parishes and years covered within this collection:
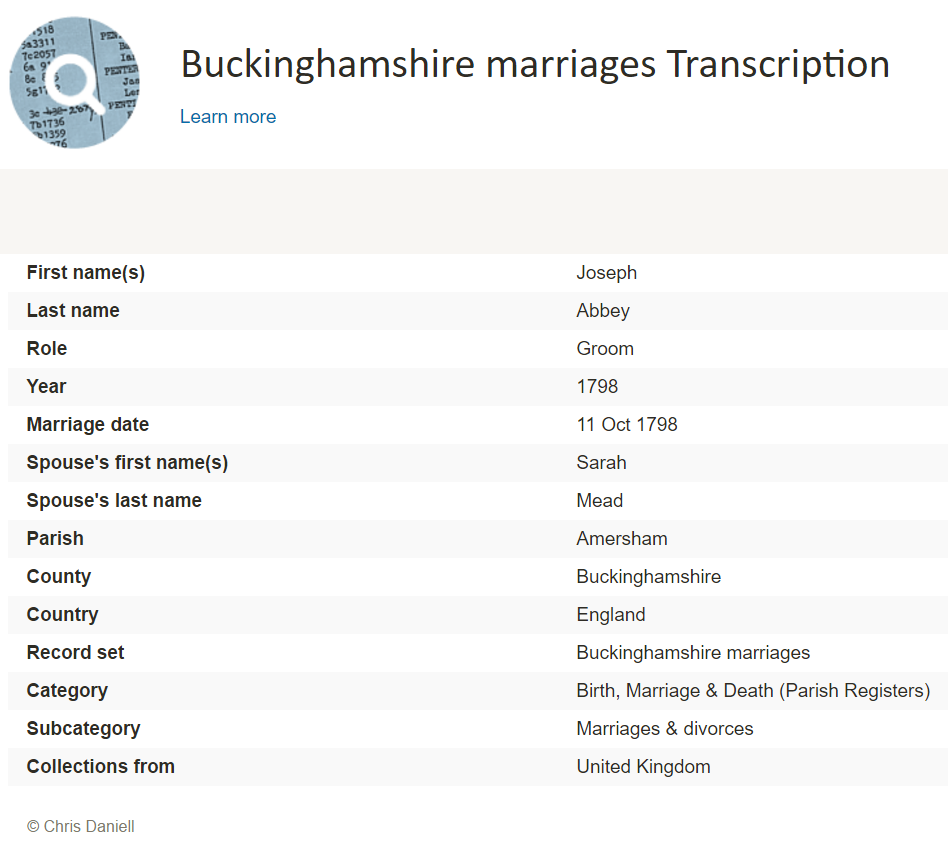
- Amersham 1561-1812
- Aston Clinton 1560-1812
- Bradenham 1627-1810
- Chalfont St Giles 1584-1812
- Chalfont St Peter 1538-1812
- Cheddington 1552-1812
- Chenies 1593-1836
- Chesham 1637-1838
- Cholesbury 1576-1810
- Edlesborough 1568-1812
- Fingest 1607-1812
- Hawridge 1600-1812
- Hedgerley 1540-1811
- High Wycombe 1600-1812
- Hormead 1575-1813
- Instone 1665-1812
- Iver 1605-1812
- Ivinghoe 1559-1812
- Masworth 1591-1812
- Mentmore 1575-1812
- Pitstone 1576-1812
- Slapton 1653-1812
- Soulbury 1575-1812
- Stoke Poges 1563-1812
- Turville 1582-1812
- Wendover 1576-1812
New Zealand – Church Records, Veteran Memorials, and Civil Service Examinations
Three new databases for New Zealand are available at Findmypast. The first, New Zealand Officiating Ministers 1882 is an index containing over 600 records and covering 13 religious denominations. Each record includes a transcript that will reveal the officiator’s official title and the church they served.
The second collection titled, New Zealand Waikaraka Cemetery Memorial 1902-1940 will help you find out if you have military ancestors who were memorialized as veterans who fought for the Empire and died at the Auckland Veterans’ Home between 1902 and 1940. Each record includes a transcript that will list their birth year, death year, age at death and force or regiment.
Lastly, the final collection at Findmypast is the New Zealand Civil Service Examinations 1906-1907. More than 700 records are available to explore and uncover the details of those who sat for the annual examinations for admission to, or promotion in, the Civil Service in mid-December 1906 and mid-January 1907. This collection is of transcripts only, but may contain the following information:
- First and last name(s)
- Examination location
- Notes
Peru – Puno – Civil Registration
Also at FamilySearch this week, Peru, Puno, Civil Registration, 1890-2005 has been updated. This collection includes births, marriages, deaths, and indexes. Some of these records have been indexed and are available for search. It should be noted that these records are written in Spanish.
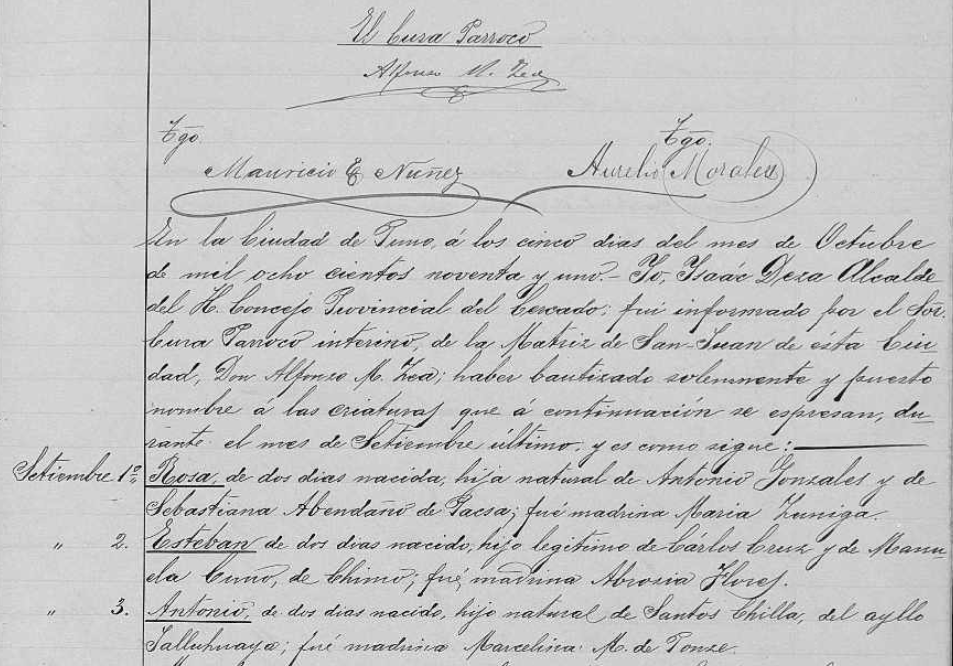
Civil registration record for a birth in Peru via FamilySearch.org.
Within these records you may find any of the following helpful information:
Birth records:
- Date and place of registration
- Name and gender of child
- Date, time, and place of birth
- Legitimacy
- Religious affiliation
- Parents’ names, ages, origin, and residence
- Presenter’s name, age, civil status, occupation, origin, and residence
- Witnesses’ name, age, civil status, and residence
- Sometimes, grandparents’ names
Marriage records may include the following:
- Date and place of registration
- Names of the bride and groom
- Date and place of marriage
- Groom’s age, civil status, nationality, race and occupation
- Names of groom’s parents, origin, and residence
- Bride’s age, civil status, nationality, race, and occupation
- Names of bride’s parents, origin, and residence
- Bride and groom’s religious affiliation
- Names, residence, and ages of witnesses
Death records may include:
- Time, date, and place of registration
- Name, gender, and age of the deceased
- Cause of death
- Date, place, and time of death
- Civil status, and occupation of deceased
- Nationality, origin, and residence of deceased
- Parents’ names of deceased if a minor
- Presenter’s name, age , and occupation
- Presenter’s origin, nationality, and residence
- Names of witnesses
United States – California – Cemetery Transcriptions
California Cemetery Transcriptions, 1850-1960 is a small collection at FamilySearch, but keep an eye on it as it will likely be added too. The collection consists of abstracts from cemeteries for 1850-1960 in the following counties:
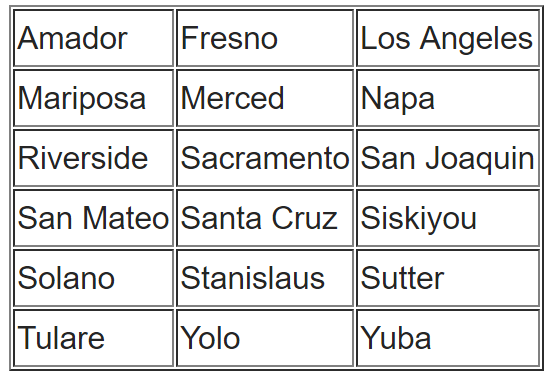
You can do a search for your targeted ancestor, or you can browse through the collection. To browse through any of the FamilySearch collections, you can read our article here and follow the step-by-step instructions.
Cemetery abstracts are actually quite useful to genealogists, especially if there has been a loss of death records in the targeted area.
Cemetery abstracts may contain the following information:
- Name of Cemetery
- Location (Town, County, State)
- Full name of deceased
- Lot number
- Age
- Date of Death
- Place of Death
- Names of Parents, Husband or Wife
- Other Important Facts
- Place of Birth
- Date of Birth
WWII Veterans – Interviews
We have found a free collection of oral histories and interviews of WWII veterans from around the world.
Chronicles of Courage: Stories of Wartime and Innovation is an online video archive of in-depth interviews put together by the Flying Heritage Collection. The project, which took 15 years to complete, went live Wednesday on the 75th anniversary of Pearl Harbor. All 335 video interviews — some of which are two hours long — will be available on the Flying Heritage Collection’s website at
www.flyingheritage.com/chronicles.
Another free collection includes eyewitness accounts by U.S. military personnel and family members in Pearl Harbor at the time of Japan’s 1941 attack. You can now access this site online. The Pearl Harbor Archive (
http://1941.mapping.jp/), also carries photos of U.S. warships ablaze and sinking. The interactive website material was gathered by Katrina Luksovsky, 49, an American living on Ford Island in the center of the harbor. The website was created by Hidenori Watanabe, 42, an associate professor of network design at Tokyo Metropolitan University.
The website works similar to Google Earth and is really quite remarkable. If you are a WWII buff, this is right up your alley!
Canada
The Canadian Museum of History and
Library and Archives Canada collaborate on new exhibition gallery. This gallery is named
Treasures from LAC and will showcase some of Canada’s most historically significant documents, making them more accessible to Canadians and enhancing public understanding of Canada’s history and heritage. Many of the documents showcased in the gallery will be referenced in the Canadian History Hall, a new permanent exhibition opening July 1, 2017 at the Canadian Museum of History. The LAC documents will complement the Hall and add greatly to the visitor experience.
Hire a Professional at LegacyTree
If you don’t have time to scour these records yourself, why not hire a profession
al? The team of expert
genealogists at
Legacy Tree Genealogists can help bust through your brick walls! They do the research and you enjoy the discoveries!
by Lisa Cooke | Dec 21, 2016 | 01 What's New, DNA, MyHeritage |
MyHeritage DNA is new on the scene of genetic genealogy. With the recent launch of their DNA Matching, I decided to give it a test drive for you. I have now uploaded my test results from another company. Follow along as I share what I like about the MyHeritage DNA site…maybe it is just what you’ve been looking for!
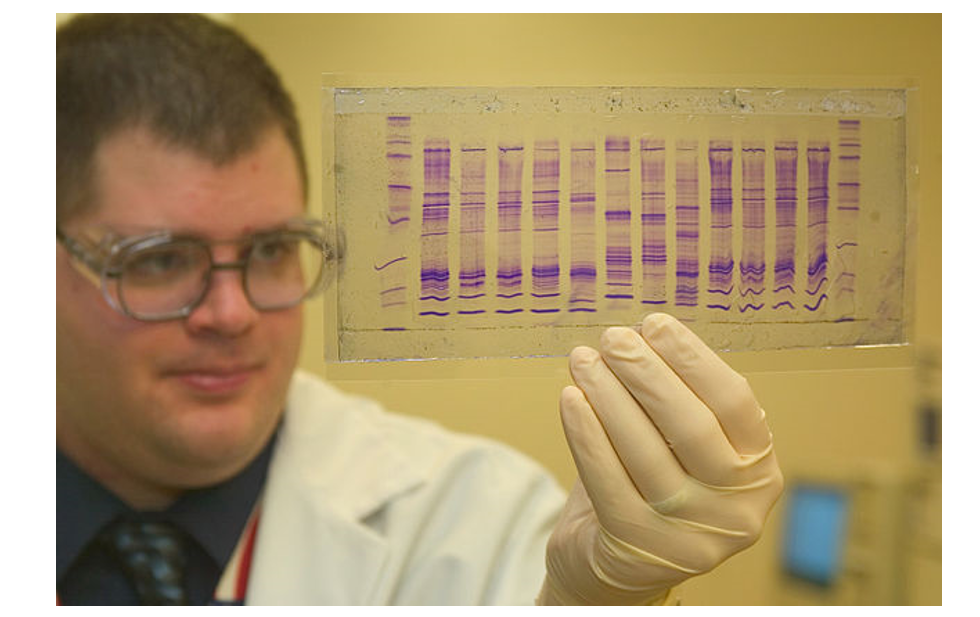
By James Tourtellotte, photo editor of CBP Today[1] [Public domain], via Wikimedia Commons.
In September, MyHeritage began to provide matching results for individuals who had uploaded their test results from another company to their site. As of today, uploading your DNA test results to MyHeritage DNA is still free, so if you have been thinking about it, you may want to take advantage sooner rather than later. As expected, the matches are only as good as the depth of the database, and it is early in the game. Their DNA database is small, but even now we can get an idea of what to expect from MyHeritage as they take their first steps into genetic genealogy.
One of the most exciting elements of their November 7, 2016 announcement is their development of a Founder Population project where they have hand-picked individuals to represent their reference population for calculating ethnicity. They plan to launch with 25 population groups, but will likely increase to 100 in a fairly short amount of time. This is a far more advanced ethnicity report than is currently offered anywhere else.
Transferring Your DNA Results to MyHeritage DNA
After you have figured out how to download your raw data from your testing company (see my instructions here: http://www.yourdnaguide.com/transferring), and add it to MyHeritage (you have to add a family tree to MyHeritage to do this), you will need to wait the requisite time to process. Then, you will receive an email notice that you have new DNA matches:
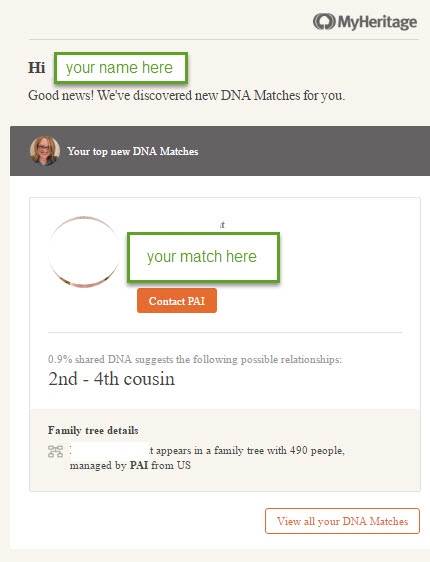
Email notice from MyHeritage regarding DNA matches.
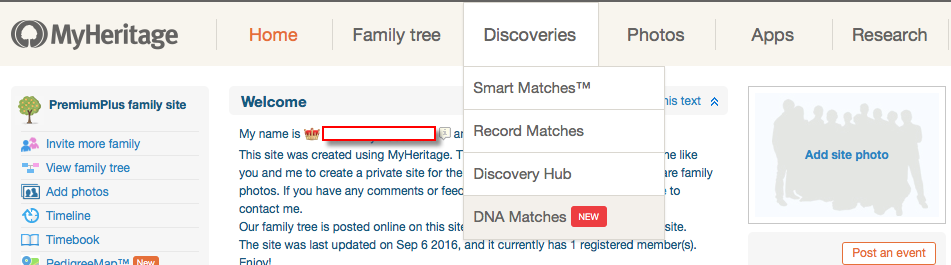
You can access DNA matches when you log on to the site: under Discoveries, click DNA Matches (as shown below).
My Favorite Features of MyHeritage DNA
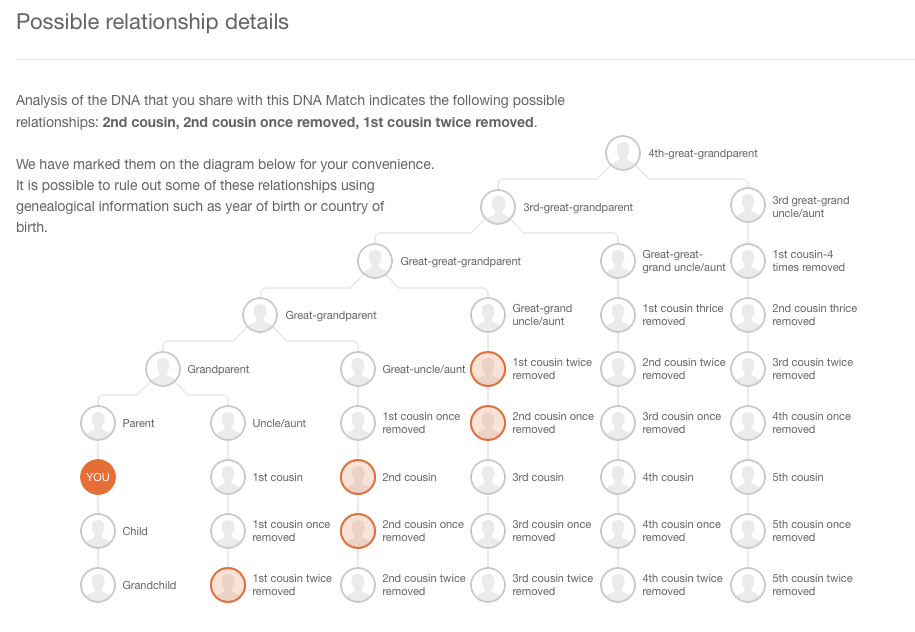
As for my favorite features, I like how they list all the possible relationships that make sense between you and your match, taking into account multiple factors like your age, gender, and your genetics instead of a simple, generic range like 2nd-4th buy chlamydia medication uk cousins. The accompanying chart, which visually shows you all possible relationships, is also very helpful. You can access the chart by clicking on the little question mark icon next to the relationship suggestions.
I like that these suggestions remind us that our genetic relationships have different genealogical interpretations. Meaning that genetically, a 2nd-cousin-once-removed, a first-cousin-twice-removed, and a second-cousin, all fall within a similar genetic range and it is impossible to determine your exact relationship based on the genetics alone.
I also like how MyHeritage offers all three genetic descriptors of your relationship:
- total amount of shared DNA
- how many segments are shared
- the size of the longest piece of shared DNA.
While this is more of an intermediate to advanced piece to your results, it can be important as your relationship analysis becomes more involved.
Addressing a Concern of Genetic Genealogists
MyHeritage makes a unique claim in their press release about their matching feature addressing a main concern genetic genealogists have: the lack of pedigree information provided by their matches. MyHeritage claims that 95% of their DNA samples have pedigrees attached. That is remarkable! However, from my own quick calculation of my matches, the number with pedigrees is more like 60%.
They also indicated that they will soon be doing a bit of pedigree-analysis for you by providing a list of shared surnames and locations between you and your match. This will be based on the pedigrees you have both submitted and will certainly be a welcome addition.
 According to their November 9th Q and A, MyHeritage hasn’t decided yet if the ethnicity features will be available to those who only transfer, and they hint at many more features they have in the works that may only be offered to those who purchase their test.
In short, the MyHeritage DNA site is currently functioning much like the top three genetic genealogy sites (Ancestry, Family Tree DNA, and 23andMe) and like the free tool Gedmatch: it offers a meeting place for those who have been tested at one company to meet those who have tested at another.
by Lisa Cooke | Jan 4, 2017 | 01 What's New, Conferences
Follow me, Lisa Louise Cooke, in 2017 as I share Google research techniques, newspaper research for genealogy, finding living relatives, and much more. I’ll be in Florida in February – here’s the scoop!
The Annual Pinellas Genealogy Society Seminar, co-sponsored by the Largo Public Library, is scheduled for 25 February 2017 at the Largo Public Library from 8 am to 4 pm. The library is located at 120 Central Park Drive, Largo, FL.
 I will be the featured speaker, in addition to three great breakout speakers. My four presentations are:
1. Google Tools and Procedures for Solving Family History Mysteries
2. Getting the Scoop on Your Ancestors with Newspapers
3. Nine Strategies for Finding Living Relatives
4. Future Technology and Genealogy – 5 Strategies You Need
The topics of the breakout sessions will be (1) “How Do I Organize My Genealogy Records?” by Debbe Hagner, (2) “What’s New at FamilySearch.org with Focus on ‘Memories’” by Debra Fleming, and (3) “English & Welsh Family History: Useful Online Research Resources” by Liz Pearson.
In addition to the speakers, this event boasts a continental breakfast, box lunch, raffles, door prizes, huge book sale, and plenty of time to network with guest organizations and other researchers. The all-inclusive registration fee is $40 for PGS members and $45 for non-members. After 18 February, the cost is $50, so register early.
What: The Annual Pinellas Genealogy Society Seminar co-sponsored by the Largo Public Library
When: Saturday, 25 February 2017, from 8 am to 4 pm
Where: The Largo Public Library at 120 Central Park Drive, Largo, FL.

A detailed schedule of events and a registration form are found at http://www.flpgs.org/NMbrs/seminar/2017/Sem17.aspx . Questions can be addressed to pgsfla@yahoo.com.
My entire lecture schedule for 2017 can be viewed here. I hope to meet with many of you as you pursue genealogy greatness this new year!
